
Recommended
More Related Content
Similar to PTL User Guide
Similar to PTL User Guide (20)
PTL User Guide
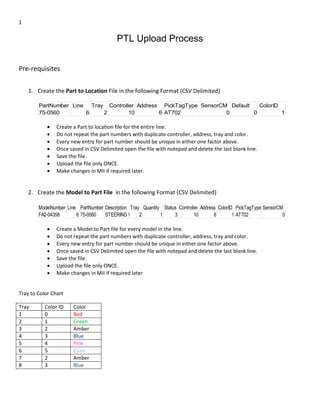
- 1. 1 PTL Upload Process Pre-requisites 1. Create the Part to Location File in the following Format (CSV Delimited) Create a Part to location file for the entire line. Do not repeat the part numbers with duplicate controller, address, tray and color. Every new entry for part number should be unique in either one factor above. Once saved in CSV Delimited open the file with notepad and delete the last blank line. Save the file. Upload the file only ONCE. Make changes in MII if required later. 2. Create the Model to Part File in the following Format (CSV Delimited) Create a Model to Part file for every model in the line. Do not repeat the part numbers with duplicate controller, address, tray and color. Every new entry for part number should be unique in either one factor above. Once saved in CSV Delimited open the file with notepad and delete the last blank line. Save the file. Upload the file only ONCE. Make changes in MII if required later Tray to Color Chart Tray Color ID Color 1 0 Red 2 1 Green 3 2 Amber 4 3 Blue 5 4 Pink 6 5 Cyan 7 2 Amber 8 3 Blue PartNumber Line Tray Controller Address PickTagType SensorCM Default ColorID 75-0560 6 2 10 6 AT702 0 0 1 ModelNumber Line PartNumber Description Tray Quantity Status Controller Address ColorID PickTagType SensorCM FA2-04358 6 75-0560 STEERING WHEEL ASM2 1 3 10 6 1 AT702 0
- 2. 2 Step 1 Log into MII PTL MII Development: http://lynms446d:58100/XMII/CM/ToroPTL/index.irpt?Plant=1006# MII Production: http://lynms446:58500/XMII/Illuminator?service=Personalization
- 3. 3 Step 2 Enter Username and Password same as the Toro Login ID Enter username Enter Password
- 4. 4 Step 3 PTL Homepage appears Select PTL Management Select PTL Management
- 5. 5 Step 4 Select the Line. Select the Line
- 6. 6 Step 5 Select the Model Select the Model
- 7. 7 Step 6 Select File Upload Select File Upload
- 8. 8 Step 7 Upload the Part Location File 1. Save the Part to location file in CSV Delimited format in Excel. 2. Open the excel file in Notepad and delete the last blank line. 3. Then browse for the same Part to Location file. 4. Once file is selected click on Upload Browse for the saved Part to Location File in the computer.
- 9. 9 Step 8 Upload the Model to Part File 1. Save the Model to Part file in CSV Delimited format in Excel. 2. Open the excel file in Notepad and delete the last blank line. 3. Then browse for the same Model to Part file. 4. Once file is selected click on Upload Browse for the saved Model to Part file in the computer
- 10. 10 Step 9 Reconcile the BOM Click here
- 11. 11 Continue step 9 Wait while the BOM is Reconciling
- 12. 12 Continued… Reconcile the BOM to look for new parts and removed parts. BOM will successfully reconcile
- 13. 13 Step 10 View Grid Select View Grid
- 14. 14 Step 11 Check for Removed Parts 1. Find for Removed Parts in PTL Assignment 2. Click on Clear Removed to clear the Removed Parts. Upload process will not progress if removed parts are not cleared It is not always necessary to have removed parts in the list Click here to find Removed Parts Click on Clear Removed to get rid of the Removed Parts.
- 15. 15 Step 11 Check for New Parts 1. Find for New Parts by clicking on New in PTL Assignment 2. Click on Managed Off to clear the New parts. Click on New to find New Parts Click on Managed Off to clear the New Parts
- 16. 16 Step 12 Validate Pick to Light 1. Click on PTL Management 2. Validate PTL This message will be seen after clicking on Validate PTL Click on Validate PTL
- 17. 17 Continued.. Validation will not be successful if the Tray number, Color, Address, Controller or Line slot is empty. Fill in the empty slots with correct quantity and the validation will be successful. How to Edit or Add Line, Tray, Controller, Address & Color ? If during an excel file upload these slots are left empty or the entered wrong they can be edited or added in MII by following these steps: 1. Select the Part Number in PTL Management.
- 18. 18 Continued.. 2. Click on Edit
- 19. 19 Continued.. 3. Select or Change the Line/tray/Controller/Address/Color Click on Update after changing the Line/Tray/Controller/Address/Color
- 20. 20 Step13 Upload Pick to Light This message below will be display after the PTL Upload is Successful Click on Upload PTL
- 21. 21 Continued.. If the entered quantity is not equal to the BOM Quantity the following message will display
- 22. 22 Continued.. How to Change Quantity? Change the Quantity by following the steps below and the PTL Upload will be successful: 1. Select the Part Number.
- 23. 23 Continued.. 2. Click on Edit
- 24. 24 Continued.. 3. Change the Quantity and Click on Update Change the Quantity Click on Update after changing the Quantity
- 25. 25 Continued.. How to SPLIT Parts? In some cases if the same part number is scattered in different locations of the supermarket there is an option called SPLIT in MII. Split parts can be very well expressed in the Model to Part Excel file, where in the different locations can be specified like all other parts. To SPLIT the parts in MII follow the steps below: 1. Select the Part Number
- 26. 26 Continued.. 2. Enter the quantity and select Split Enter the Split Quantity Select Split after selecting the desired quantity
- 27. 27 Continued.. How to ADD PARTS? If part numbers do not exist in the BOM and need to be added in the list follow these steps below: 1. Select Add Part Click here to Add Part
- 28. 28 Continued.. 2. Enter the Part Number 3. Enter Description 4. Enter Quantity and Total Quantity 5. Click Add Part Click on Add Part after entering data Click here
- 29. 29 Continued.. Add Setup for Added Part This allows MII to give options while selecting trays, line, controller, address, color How to Add Setup? 1. Click on PTL Assignment 2. Double click on the Part Number Double Click here Click here
- 30. 30 Continued.. 3. Mini Mart: Select the desired Line 4. Enter the Tray number 5. Enter the Controller number 6. Enter the address 7. Pick Tag: AT702 8. Sensor CM: 0 9. Default: 0 10. Enter the Color 11. Click on Add Setup Click here Click here to Add Setup
- 31. 31 How to Delete a Part Number ? 1. Click on PTL management 2. Select the Part Number Click here
- 32. 32 3. Click on Edit 4. Change the Quantity to 0. 5. Click on Update 6. Click on Update Change the Quantity to 0
- 33. 33 Continued.. How to Add Group or the Model Number? 1. Click on Group Setup Click here for Group Setup
- 34. 34 Continued.. 2. Enter Line Number in Group 3. Enter Model Number 4. Click Add Group Click here Click here to Add Group
- 35. 35 Continued.. How to add Controller? 1. Click on Controller Setup Click on Controller Setup
- 36. 36 Continued.. 2. Select Line in Mini Mart 3. Enter Controller Number 4. Enter Pick Tag (AT702) 5. Enter Sensor CM (0) 6. Enter Color 7. Click Add Controller 8. Click here Click here to Add Controller
- 37. 37 Pick to light Console http://tomms446d:8888/#/home
- 38. 38 1. At a Glance- Shows the status of all the Controllers in the Supermarkets
- 39. 39 2. Special Functions Start Line- Select the line and all controllers in it will start if stopped Stop Line- Select the line and all controllers will stop Trigger Picking Session- Select the Model Number to trigger Picking for the selected controller in a line Simulate- will display the address on the buttons of the selected controller (useful to look up into the inventory list with Address) When the Controllers lag or there is an incomplete pick, it is advised to stop and start the Line If at the first scan lights do not turn up right, it is advised to wait until a 15 minutes cycle, stop and start the Line. If a pick is incomplete and the buttons are not turned off, the system will hang. The lights will turn off after some time and the pick will remain incomplete so it is necessary to complete the pick and scan a new pick later.
- 40. 40 How to add a Button in MII? Even though in theory the part to location file should create the buttons automatically, this feature is currently not available. These are the following steps to ADD BUTTON 1. Click on Administration 2. Select the Controller to add the button in Zones 3. Click on Add Tag Select Controller to add button Click here
- 41. 41 4. Enter Name of the button-TBD 5. Enter the Button Number 6. Enter Model – AT702 7. Enter Description-TBD 8. Select Save Click here Click here to save the added Button