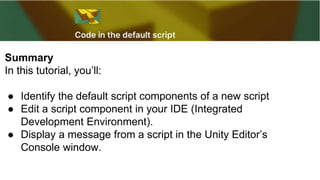
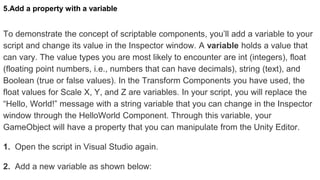
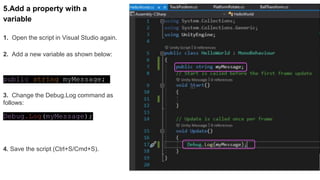
In this tutorial, you will learn the basics of scripting in Unity by:
- Creating a new script component and adding it to a GameObject
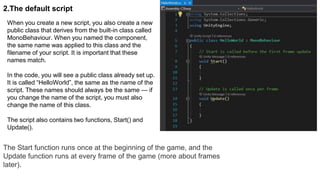
- Exploring the default script structure and functions like Start and Update
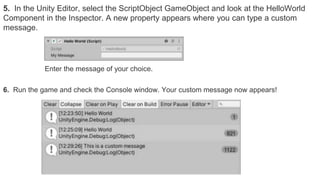
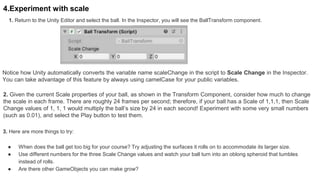
- Adding a variable to the script and editing its value in the Inspector
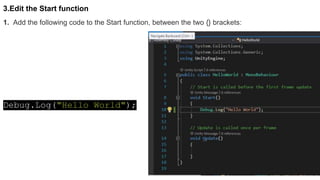
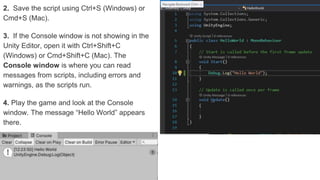
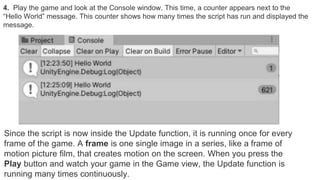
- Using Debug.Log to output messages to the Console
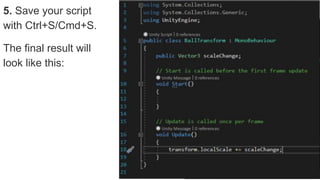
- Changing a property of a GameObject by editing values in the script


![[ICE 2025] Quick Prototyping with Unity & CoPilot.pptx](https://cdn.slidesharecdn.com/ss_thumbnails/ice2025quickprototypingwithunitycopilot-250819033823-549f06c1-thumbnail.jpg?width=640&height=640&fit=bounds)