SlideShare a Scribd company logo
1 of 107
Download to read offline
2009

Cerebral
Development Guide
Using Python and Android Development
Technologies
This guide covers the essential information required to build an Android
application. It will help any developer, amateur, professional, or dabbler who is
interested in developing for Android. Over the course of the book, I cover the
essentials you’ll need to get started with your own innovative application. We
took on this project because, 3 months of working on our android application, it
has become clear that others may need help. With mobile devices becoming
more powerful and essential, quickening the learning pace is necessary to
overcome the stagnation that has plagued the industry. As an industry, we need
to graduate from making cookie-cutter ring tones, wallpaper, and e-mail
applications. I hope that once you’ve read this guide, which you’ll be in a position
to start that killer mobile product you’ve told all your friends you are going to
make.

Nehemiah Tan Yong En, Sim Pei Zhen, Lau Min Qi
Let’s Start Programming
8/14/2009
Table of Contents
Chapter 1: Introduction
1.0 What You Need to Know to Start .............................................................................................................. 6
1.0.1 Python ................................................................................................................................................................. 6
1.0.2 Android ............................................................................................................................................................... 6
1.0.3 Apache HTTP Server ............................................................................................................................................ 7
1.0.4 SQLite .................................................................................................................................................................. 7
1.0.5 MySQL ................................................................................................................................................................. 7

Chapter 2: Configurations
2.0 Downloading of Software for Python, Eclipse Ganymede, Apache, MySQL .................................................. 8
2.0.1 Python ................................................................................................................................................................ 9
2.0.2 Eclipse Download: Eclipse SDK 3.4.2 .................................................................................................................. 10
2.0.3 Android SDK 1.5 R2 ............................................................................................................................................ 11
2.0.4 Apache HTTP Web Server .................................................................................................................................. 12
2.0.5 MySQL ............................................................................................................................................................... 13
2.0.6 Android USB Windows Installation .................................................................................................................... 16
2.0.7 Google Map API Key Generation ....................................................................................................................... 24
2.0.7.1 Know the location for androiddebug.keystore ........................................................................................... 24
2.0.7.2 In Command Prompt ................................................................................................................................... 27
2.0.7.3 Go to http://code.google.com/android/maps-api-signup.html ................................................................... 28
2.0.8 Environmental Settings .................................................................................................................................... 29
2.0.8.1 Android Environmental Settings ................................................................................................................ 29
2.8.2 Python Environmental Settings ..................................................................................................................... 34
2.0.8.3 Apache Environmental Settings .................................................................................................................. 41
2.0.8.4 MySQL Environmental Settings ................................................................................................................. 46

Chapter 3: Create a Sample Application
3.0 Hello, World Application ......................................................................................................................... 57
3.0.1 Create an AVD .................................................................................................................................................... 57
3.0.2 Create a New Android Project ............................................................................................................................58
3.0.3 Construct the UI ................................................................................................................................................. 61
3.0.4 Run the Application ............................................................................................................................................63
3.0.5 Upgrade the UI to an XML Layout ..................................................................................................................... 64
3.0.6 Debug Your Project ........................................................................................................................................... 68
2
Copyrighted © 2009: Cerebral
Team Let’s Start Programming
Chapter 4: Android Must-Knows
4.0 User Interfaces ....................................................................................................................................... 70
4.0.1 User Interface Guidelines ................................................................................................................................... 70
4.0.2 Hello Views ........................................................................................................................................................ 70
4.0.3 User Interface XML and Java Codes.................................................................................................................... 70
4.1 Resources and Assets .............................................................................................................................. 70
4.2 The AndroidManifest.xml File .................................................................................................................. 71
4.3 Intents and Intent Filters ......................................................................................................................... 71
4.4 Data Storage .......................................................................................................................................... 72
4.5 Content Providers ................................................................................................................................... 72
4.6 Security and Permissions ........................................................................................................................ 73
4.7 Graphics ................................................................................................................................................ 73
4.8 Audio and Video ..................................................................................................................................... 73
4.9 Locations and Maps ................................................................................................................................ 74
4.10 App Widgets ......................................................................................................................................... 74

Chapter 5: Planning for Cerebral™
5.0 Conceptualization ................................................................................................................................... 75
5.1 Functionalities ........................................................................................................................................ 75
5.2 Technicalities ......................................................................................................................................... 76
5.3 Functionality Delegation ......................................................................................................................... 76
5.4 Architecture ........................................................................................................................................... 77

Chapter 6: Development for Cerebral™
6.0 Package Explorer.................................................................................................................................... 78
6.0.1 Source Files ........................................................................................................................................................ 78
6.0.2 Generated Java Files .......................................................................................................................................... 79
6.0.3 Android Library .................................................................................................................................................. 79
6.0.4 Assets ................................................................................................................................................................ 79
6.0.5 Resource Files ................................................................................................................................................... 80
6.0.6 Android Manifest .............................................................................................................................................. 80
6.1 User Interfaces .......................................................................................................................................81
6.1.1 Cerebral™ Icon ................................................................................................................................................... 81
6.1.2 Cerebral™ Splash Screen .................................................................................................................................. 82
6.1.3 Cerebral™ Main Page ......................................................................................................................................... 83
3
Copyrighted © 2009: Cerebral
Team Let’s Start Programming
6.1.4 Cerebral™ Main Page (Landscape) .................................................................................................................... 84
6.1.5 Retrieve Food Product Details by Text Input ......................................................................................................85
6.1.6 Retrieve Food Product Details by Barcode Scanning ......................................................................................... 86
6.1.7 Search History ................................................................................................................................................... 88
6.1.8 Alternate Food Product (Text Input).................................................................................................................. 90
6.1.9 Alternate Food Product (Barcode)...................................................................................................................... 91
6.1.10 Android’s Global Positioning System ............................................................................................................... 92
6.1.11 Locate Place by GPS (Text Input) ...................................................................................................................... 93
6.1.12 Locate Place by GPS (Barcode)........................................................................................................................ 94
6.1.13 Cerebral Web™ (Backend) - http://www.cerebralweb.mdesignideas.com/index.php .......................................95
6.1.13.1 Login ..........................................................................................................................................................95
6.1.13.2 Homepage .................................................................................................................................................95
6.13.1.3 Cerebral™ Products .................................................................................................................................. 96

Chapter 7: Internet References
7.0 Informational Foundation...................................................................................................................... 100
7.1 Program Codes ..................................................................................................................................... 100
7.1.0 Python .............................................................................................................................................................. 100
7.1.1 Android ............................................................................................................................................................. 100
7.1.2 Animation......................................................................................................................................................... 100
7.1.3 Intro .................................................................................................................................................................. 100
7.1.4 GPS .................................................................................................................................................................. 101
7.1.5 User Interface ................................................................................................................................................... 102
7.1.6 XML Feeds ........................................................................................................................................................ 102
7.1.7 Barcode ............................................................................................................................................................ 103
7.1.8 Barcode Generators.......................................................................................................................................... 103
7.1.9 Others .............................................................................................................................................................. 103
7.1.10 Google MapKey .............................................................................................................................................. 104
7.1.11 HTC Dream ..................................................................................................................................................... 104
7.1.12 Database SQLite ............................................................................................................................................. 104
7.1.13 Database MYSQL & PHP................................................................................................................................. 104
7.1.14 Anti-Smoking ................................................................................................................................................. 105
7.1.15 WebService ..................................................................................................................................................... 105
7.1.16 Bluetooth........................................................................................................................................................ 105
4
Copyrighted © 2009: Cerebral
Team Let’s Start Programming
7.1.17 Android 1.5 ...................................................................................................................................................... 105
7.1.18 Toast .............................................................................................................................................................. 105
7.1.19 Saving File to SD card ..................................................................................................................................... 105
7.1.20 Android FTP ................................................................................................................................................... 105
7.1.21 Dialogs............................................................................................................................................................ 106
7.1.22 Capture Images to SD Card............................................................................................................................. 106
7.1.23 Passing Data Thru Activities ........................................................................................................................... 106
7.1.24 Splash Page .................................................................................................................................................... 106
7.1.25 Storing & Retrieving Images ........................................................................................................................... 106
7.1.26 Python ............................................................................................................................................................ 106
7.1.27 ModMyGPhone............................................................................................................................................... 106

5
Copyrighted © 2009: Cerebral
Team Let’s Start Programming
Chapter 1: Introduction
Before we start, we will have a brief introduction to the technologies we are using in this guide.

1.0 What You Need to Know to Start
If you have zero knowledge about the Android Platform then this is even more the guide for you. Throughout the
development of our android application, we will be using various technologies and tools.
Below are the technologies used:

1.0.1 Python
Python is a dynamic object-oriented programming language that can be used for many kinds of software
development. It offers strong support for integration with other languages and tools, comes with extensive
standard libraries, and can be learned in a few days. In this case, we are using python with Java coding to interface
with Apache which is a server to retrieve data.
For more information: http://www.python.org/

1.0.2 Android
Android is a software stack for mobile devices that includes an operating system, middleware and key applications.
The Android SDK provides the tools and APIs necessary to begin developing applications on the Android platform
using the Java programming language.
For more information: http://developer.android.com/guide/basics/what-is-android.html

Figure 1: Android Architecture

6
Copyrighted © 2009: Cerebral
Team Let’s Start Programming
1.0.3 Apache HTTP Server
Apache HTTP Server as its name suggest is a server for your android application. The use of the server is to host
the database (MySQL) from which you can retrieve your data from. Your laptop will act as a server when the
Apache console is run.
For more information: http://httpd.apache.org/

1.0.4 SQLite
SQLite is a software library that implements a self-contained, serverless, zero-configuration, transactional SQL
database engine. SQLite is the most widely deployed SQL database engine in the world.
For more information: http://www.sqlite.org/

1.0.5 MySQL
MySQL is a database management system.
A database is a structured collection of data. It may be anything from a simple shopping list to a picture gallery or
the vast amounts of information in a corporate network. To add, access, and process data stored in a computer
database, you need a database management system such as MySQL Server. Since computers are very good at
handling large amounts of data, database management systems play a central role in computing, as standalone
utilities, or as parts of other applications.
For more information: http://dev.mysql.com/doc/refman/5.0/en/what-is-mysql.html

7
Copyrighted © 2009: Cerebral
Team Let’s Start Programming
Chapter 2: Configurations
2.0 Downloading of Software for Python, Eclipse Ganymede, Apache,
MySQL
Go to http://cxa.sit.rp.edu.sg/pages/software.php

8
Copyrighted © 2009: Cerebral
Team Let’s Start Programming
2.0.1 Python

Dialog Box will appear.

Select “Save” to save
the installer.




Select the directory to save
the installer.






9
Copyrighted © 2009: Cerebral
Team Let’s Start Programming
2.0.2 Eclipse Download: Eclipse SDK 3.4.2

Dialog Box will appear.

Select “Save” to save
the installer.

Select the directory to save
the installer.

10
Copyrighted © 2009: Cerebral
Team Let’s Start Programming
2.0.3 Android SDK 1.5 R2

Dialog Box will appear.

Select “Save” to save
the installer.

Select the directory to save
the installer.

11
Copyrighted © 2009: Cerebral
Team Let’s Start Programming
2.0.4 Apache HTTP Web Server
Go to http://httpd.apache.org/download.cgi to download Apache.

Select apache_2.2.13-win32-x86-openssl-0.9.8k.msi

Dialog Box will appear.

Select “Save” to save
the installer.

12
Copyrighted © 2009: Cerebral
Team Let’s Start Programming
2.0.5 MySQL
Go to http://dev.mysql.com/downloads/ to download MySQL

Select MySQL
Community Server &
Click Download.

Click Download.

13
Copyrighted © 2009: Cerebral
Team Let’s Start Programming
Click “Pick a Mirror”.

Click “HTTP”.

14
Copyrighted © 2009: Cerebral
Team Let’s Start Programming
Dialog Box will appear.

Select “Save” to save
the installer or “Open”
to start the installation.

15
Copyrighted © 2009: Cerebral
Team Let’s Start Programming
2.0.6 Android USB Windows Installation
Your android phone needs a USB driver in order for your laptop or PC to connect to it. To download the Android USB
Windows driver, you can search Google for it. Many sites offer the download.
After you have downloaded the driver, connect your Android phone to your laptop or PC. The system will automatically
search for the phone driver. If the search is unsuccessful, you have to manually install it as shown below:

Select the radio button that
says “Install from a list or
specific location (Advanced)”

Select “Next”.

16
Copyrighted © 2009: Cerebral
Team Let’s Start Programming
Check the “include this
location in the search”
checkbox.

Click “Browse” to browse for
the android driver folder.

Navigate and select the
android driver folder.

Click “OK”

17
Copyrighted © 2009: Cerebral
Team Let’s Start Programming
Click “Next”

Wizard searching for
Android driver.

18
Copyrighted © 2009: Cerebral
Team Let’s Start Programming
Installation of Driver.

Installation successful, click
“Finish”.

19
Copyrighted © 2009: Cerebral
Team Let’s Start Programming
Go to Eclipse -> Right click on any
working projects-> Run as-> Select
run configuration.

20
Copyrighted © 2009: Cerebral
Team Let’s Start Programming
Select “Target”

21
Copyrighted © 2009: Cerebral
Team Let’s Start Programming
Leave the default settings and
Select run to proceed.

22
Copyrighted © 2009: Cerebral
Team Let’s Start Programming
If the android driver is successfully
installed, you will see the Phone’s
Serial Number with a green tick
signifying that the phone is online.

Select the phone and
double click on it to run.

23
Copyrighted © 2009: Cerebral
Team Let’s Start Programming
2.0.7 Google Map API Key Generation
To configure Google API key, first you have to:
Run command prompt

2.0.7.1 Know the location for androiddebug.keystore
Go to the default directory where you have stored your .android debug.keystore
Select the address for the directory:

Example: C:Documents and SettingsL306c07.androiddebug.keystore

24
Copyrighted © 2009: Cerebral
Team Let’s Start Programming
This would be the address directory for
your .androiddebug.keystore

Or alternatively you can select window toolbars in Eclipse and select preferences to search for the location for
.androiddebug.keystore

Select “Preferences”

25
Copyrighted © 2009: Cerebral
Team Let’s Start Programming
Select Build

This would be the directory for
your .androiddebug.keystore

26
Copyrighted © 2009: Cerebral
Team Let’s Start Programming
2.0.7.2 In Command Prompt

Navigate the directory to C:Program FilesJavajre6bin

Paste: keytool.exe -list -alias androiddebugkey -keystore "C:Documents and
SettingsL306c07.androiddebug.keystore" -storepass android -keypass android
Change the directory where you store .androiddebug.keystore in this case is "C:Documents and
SettingsL306c07.androiddebug.keystore"
A certificate's MD5 fingerprint will be generated
Example: 44:7A:96:96:53:2E:E8:58:2B:1F:9D:39:31:7E:2A:57

27
Copyrighted © 2009: Cerebral
Team Let’s Start Programming
2.0.7.3 Go to http://code.google.com/android/maps-api-signup.html

Paste the certificate's MD5 fingerprint generated by the command prompt into the” My certificate's MD5
fingerprint:”
Example: 44:7A:96:96:53:2E:E8:58:2B:1F:9D:39:31:7E:2A:57

Select the checkbox.

Click on generate API Key.

Paste Example:
44:7A:96:96:53:2E:E8:58:2B:1F:9D:39:31:7E:2A:57

28
Copyrighted © 2009: Cerebral
Team Let’s Start Programming
2.0.8 Environmental Settings
2.0.8.1 Android Environmental Settings
1. Unzip downloaded ‘android-sdk-windows-1.5_r2’ and ‘eclipse’ files
2. Install the Java Runtime Environment

Click on the ‘Accept’
button to start the
installation.

Installing…

29
Copyrighted © 2009: Cerebral
Team Let’s Start Programming
Click on the ‘Finish’
button to complete
the installation.

3. Click on the ‘eclipse’ folder and run the ‘eclipse.exe’ file

Use the default
workspace and click
the ‘OK’ button.

30
Copyrighted © 2009: Cerebral
Team Let’s Start Programming
Click here to process
to the workbench.

4. To install Android SDK 1.5 R2 in Eclipse

Click on the ‘Window’
button and choose the
‘Preferences’ button.

31
Copyrighted © 2009: Cerebral
Team Let’s Start Programming
Choose the ‘Android’
tab and click on the
‘Browse’ button.

Choose the path for the
‘android-sdk-windows1.5_r2’ folder and click the
‘OK’ button.

32
Copyrighted © 2009: Cerebral
Team Let’s Start Programming
Click the
“Apply” Button

Click the “OK”
Button.

33
Copyrighted © 2009: Cerebral
Team Let’s Start Programming
2.8.2 Python Environmental Settings

Select “Install for all users”

Click “Next”

Select directory to install python.

Click “Next”

34
Copyrighted © 2009: Cerebral
Team Let’s Start Programming
Click “Next”

Installing…

35
Copyrighted © 2009: Cerebral
Team Let’s Start Programming
Click “Finish” to complete installation.

Configuring python settings in eclipse

Go to Eclipse-> window toolbars-> preferences

36
Copyrighted © 2009: Cerebral
Team Let’s Start Programming
Select “New…”

Enter default Interpreter name as
Python, then select “Browse…”

37
Copyrighted © 2009: Cerebral
Team Let’s Start Programming
Select python.exe from
the respective directory.
Click “Open”.

.Click “OK”.

38
Copyrighted © 2009: Cerebral
Team Let’s Start Programming
.Click “OK”.

39
Copyrighted © 2009: Cerebral
Team Let’s Start Programming
Select ok button and
the configuration is
completed.

40
Copyrighted © 2009: Cerebral
Team Let’s Start Programming
2.0.8.3 Apache Environmental Settings

Unzip and install apache_2.2.11-win32-x86-openssl-0.9.8i.zip

Select “Next”

Select “I accept the terms in the license
agreement.

Click “Next”

41
Copyrighted © 2009: Cerebral
Team Let’s Start Programming
Click “Next”

Enter Network Domain: localhost
Server name: nyp.edu.sg
Administrator email address: adminNo@nyp.edu.sg
Select Port 80 radio button.
Select Next button to continue.

42
Copyrighted © 2009: Cerebral
Team Let’s Start Programming
Click “Next”

Click “Next”

43
Copyrighted © 2009: Cerebral
Team Let’s Start Programming
Click “Install”

Installing…

44
Copyrighted © 2009: Cerebral
Team Let’s Start Programming
Select finish to
complete installation

45
Copyrighted © 2009: Cerebral
Team Let’s Start Programming
2.0.8.4 MySQL Environmental Settings
1. Unzip ‘mysql-essential-5.1.37-win32.msi’, ‘mysql-connector-odbc-5.1.5-win32’ and ‘mysql-gui-tools-5.0-r12win32’ files
2. Run the MySQL Server 5.1 installer (mysql-essential-5.1.37-win32.msi)

Click on the ‘Next’
button to continue with
the installation.

Leave the setting to the default
(Typical Setting) and click on the ‘Next’
to continue with installation.

46
Copyrighted © 2009: Cerebral
Team Let’s Start Programming
Click on the ‘Install’ button to
start the installation.

Installing…

47
Copyrighted © 2009: Cerebral
Team Let’s Start Programming
Click on the ‘Next’
button to continue
with the installation.

Click on the ‘Next’
button to continue
with the installation.

48
Copyrighted © 2009: Cerebral
Team Let’s Start Programming
Uncheck “Configure the
MySQL Server now”

Click on the ‘Finish’ button to
complete the installation.

3. Run the MySQL Connector/ODBC 5.1 installer (mysql-connector-odbc-5.1.5-win32) to establish a connection
between the MySQL and ODBC System Data Source.

Click on the ‘Next’
button to continue with
the installation.

49
Copyrighted © 2009: Cerebral
Team Let’s Start Programming
Leave the setting to the default
(Typical Setting) and click on the ‘Next’
to continue with installation.

Click on the ‘Install’ button to start the
installation.

50
Copyrighted © 2009: Cerebral
Team Let’s Start Programming
Installing…

Click on the ‘Finish’ button to
complete the installation.

51
Copyrighted © 2009: Cerebral
Team Let’s Start Programming
4. Run the MySQL Tool for 5.0 installer (mysql-gui-tools-5.0-r12-win32) to manage MySQL databases through the
graphical interface

Click on the ‘Next’
button to continue
with the installation.

Choose the “I accept the
terms in the license
agreement” option.

Click on the ‘Next’ button
to continue with the
installation.

52
Copyrighted © 2009: Cerebral
Team Let’s Start Programming
Click on the ‘Next’ button
to continue with the
installation.

Leave the setting to the default
(Complete Setup) and click on
the ‘Next’ to continue with
installation.

53
Copyrighted © 2009: Cerebral
Team Let’s Start Programming
Click “Install”

Installing…

54
Copyrighted © 2009: Cerebral
Team Let’s Start Programming
Click on the ‘Next’
button to continue with
the installation.

Click on the ‘Next’
button to continue with
the installation.

55
Copyrighted © 2009: Cerebral
Team Let’s Start Programming
Click “Finish” to complete the
installation.

56
Copyrighted © 2009: Cerebral
Team Let’s Start Programming
Chapter 3: Create a Sample
Application
If you proceed to this chapter, we assumed that you have configured the above programs correctly in chapter 2.
We shall now proceed to make your first sample application to get a taste of how android is like.

3.0 Hello, World Application
3.0.1 Create an AVD
In this tutorial, you will run your application in the Android Emulator. Before you can launch the emulator, you must
create an Android Virtual Device (AVD). An AVD defines the system image and device settings used by the emulator.
To create an AVD, use the "android" tool provided in the Android SDK. Open a command prompt or terminal, navigate
to the tools/ directory in the SDK package and execute:
android create avd --target 2 --name my_avd

The tool now asks if you would like to create a custom hardware profile. For the time being, press Return to skip it ("no"
is the default response). That's it. This configures an AVD named "my_avd" that uses the Android 1.5 platform. The
AVD is now ready for use in the emulator.
In the above command, the --target option is required and specifies the deployment target to run on the emulator.
The --name option is also required and defines the name for the new AVD.

Navigate to the directory of your
android SDK.
Type in the required statement
and press “Enter”.

Figure 2: Create Android Virtual Device (AVD)

57
Copyrighted © 2009: Cerebral
Team Let’s Start Programming
To learn more about how to use AVDs and the options available to you, refer to the Android Virtual Devices document.

3.0.2 Create a New Android Project
After you've created an AVD, the next step is to start a new Android project in Eclipse.
1. From Eclipse, select File > New > Project.
If the ADT Plug-in for Eclipse has been successfully installed, the resulting dialog should have a folder labeled "Android"
which should contain "Android Project". (After you create one or more Android projects, an entry for "Android XML
File" will also be available.)
2. Select "Android Project" and click Next.

Figure 3: Create New Android Project

58
Copyrighted © 2009: Cerebral
Team Let’s Start Programming
3. Fill in the project details with the following values:
•

Project name: HelloAndroid

•

Application name: Hello, Android

•

Package name: com.example.helloandroid (or your own private namespace)

•

Create Activity: HelloAndroid

•

Min SDK Version: 2

Click Finish.

Figure 4: Enter data in the relevant fields

59
Copyrighted © 2009: Cerebral
Team Let’s Start Programming
Here is a description of each field:
Project Name
This is the Eclipse Project name — the name of the directory that will contain the project files.
Application Name
This is the human-readable title for your application — the name that will appear on the Android device.
Package Name
This is the package namespace (following the same rules as for packages in the Java programming language) that you
want all your source code to reside under. This also sets the package name under which the stub Activity will be
generated.
Your package name must be unique across all packages installed on the Android system; for this reason, it's very
important to use a standard domain-style package for your applications. The example above uses the "com.example"
namespace, which is a namespace reserved for example documentation — when you develop your own applications,
you should use a namespace that's appropriate to your organization or entity.
Create Activity
This is the name for the class stub that will be generated by the plug-in. This will be a subclass of Android's Activity class.
An Activity is simply a class that can run and do work. It can create a UI if it chooses, but it doesn't need to. As the
checkbox suggests, this is optional, but an Activity is almost always used as the basis for an application.
Min SDK Version
This value specifies the minimum API Level required by your application. If the API Level entered here matches the API
Level provided by one of the available targets, then that Build Target will be automatically selected (in this case,
entering "2" as the API Level will select the Android 1.1 target). With each new version of the Android system image and
Android SDK, there have likely been additions or changes made to the APIs. When this occurs, a new API Level is
assigned to the system image to regulate which applications are allowed to be run. If an application requires an API
Level that is higher than the level supported by the device, then the application will not be installed.
Other fields: The checkbox for "Use default location" allows you to change the location on disk where the project's files
will be generated and stored. "Build Target" is the platform target that your application will be compiled against (this
should be selected automatically, based on your Min SDK Version).
Notice that the "Build Target" you've selected uses the Android 1.1 platform. This means that your application will be
compiled against the Android 1.1 platform library. If you recall, the AVD created above runs on the Android 1.5 platform.
These don't have to match; Android applications are forward-compatible, so an application built against the 1.1
platform library will run normally on the 1.5 platform. The reverse is not true.
Your Android project is now ready. It should be visible in the Package Explorer on the left. Open
the HelloAndroid.java file, located inside HelloAndroid > src > com.example.helloandroid). It should look like this:
package com.example.helloandroid;

60
Copyrighted © 2009: Cerebral
Team Let’s Start Programming
import android.app.Activity;
import android.os.Bundle;

public class HelloAndroid extends Activity {
/** Called when the activity is first created. */
@Override
public void onCreate(Bundle savedInstanceState) {
super.onCreate(savedInstanceState);
setContentView(R.layout.main);
}
}

Notice that the class is based on the Activity class. An Activity is a single application entity that is used to perform
actions. An application may have many separate activities, but the user interacts with them one at a time.
The onCreate() method will be called by the Android system when your Activity starts — it is where you should perform
all initialization and UI setup. An activity is not required to have a user interface, but usually will.
Now let's modify some code!

3.0.3 Construct the UI
Take a look at the revised code below and then make the same changes to your HelloAndroid class. The bold items are
lines that have been added.
package com.android.helloandroid;

import android.app.Activity;
import android.os.Bundle;
import android.widget.TextView;

public class HelloAndroid extends Activity {
/** Called when the activity is first created. */
@Override

61
Copyrighted © 2009: Cerebral
Team Let’s Start Programming
public void onCreate(Bundle savedInstanceState) {
super.onCreate(savedInstanceState);
TextView tv = new TextView(this);
tv.setText("Hello, Android");
setContentView(tv);
}
}

Tip: An easy way to add import packages to your project is to press Ctrl-Shift-O (Cmd-Shift-O, on Mac). This is an
Eclipse shortcut that identifies missing packages based on your code and adds them for you.
An Android user interface is composed of hierarchies of objects called Views. A View is a drawable object used as an
element in your UI layout, such as a button, image, or (in this case) a text label. Each of these objects is a subclass of the
View class and the subclass that handles text is TextView.
In this change, you create a TextView with the class constructor, which accepts an Android Context instance as its
parameter. A Context is a handle to the system; it provides services like resolving resources, obtaining access to
databases and preferences, and so on. The Activity class inherits from Context, and because your HelloAndroid class is
a subclass of Activity, it is also a Context. So, you can pass this as your Context reference to the TextView.
Next, you define the text content with setText(CharSequence) setText().
Finally, you pass the TextView to setContentView() in order to display it as the content for the Activity UI. If your
Activity doesn't call this method, then no UI is present and the system will display a blank screen.
There it is — "Hello, World" in Android! The next step, of course, is to see it running.

62
Copyrighted © 2009: Cerebral
Team Let’s Start Programming
3.0.4 Run the Application
The Eclipse plug-in makes it very easy to run your applications:
1. Select Run > Run.
2. Select "Android Application".
To learn more about creating and editing run configurations in Eclipse, refer to Developing In Eclipse, with ADT.
The Eclipse ADT will automatically create a new run configuration for your project and the Android Emulator will
automatically launch. Once the emulator is booted up, your application will appear after a moment. You should now
see something like this:

The "Hello, Android" you see in the grey bar is actually the application title. The Eclipse plug-in creates this
automatically (the string is defined in theres/values/strings.xml file and referenced by your AndroidManifest.xml file).
The text below the title is the actual text that you have created in the TextView object.
That concludes the basic "Hello World" tutorial, but you should continue reading for some more valuable information
about developing Android applications.

63
Copyrighted © 2009: Cerebral
Team Let’s Start Programming
3.0.5 Upgrade the UI to an XML Layout
The "Hello, World" example you just completed uses what is called a "programmatic" UI layout. This means that you
constructed and built your application's UI directly in source code. If you've done much UI programming, you're
probably familiar with how brittle that approach can sometimes be: small changes in layout can result in big sourcecode headaches. It's also very easy to forget to properly connect Views together, which can result in errors in your
layout and wasted time debugging your code.
That's why Android provides an alternate UI construction model: XML-based layout files. The easiest way to explain this
concept is to show an example. Here's an XML layout file that is identical in behavior to the programmaticallyconstructed example:
<?xml version="1.0" encoding="utf-8"?>
<TextView xmlns:android="http://schemas.android.com/apk/res/android"
android:layout_width="fill_parent"
android:layout_height="fill_parent"
android:text="@string/hello"/>

The general structure of an Android XML layout file is simple: it's a tree of XML elements, wherein each node is the
name of a View class (this example, however, is just one View element). You can use the name of any class that
extends View as an element in your XML layouts, including custom View classes you define in your own code. This
structure makes it very easy to quickly build up UIs, using a more simple structure and syntax than you would use in a
programmatic layout. This model is inspired by the web development model, wherein you can separate the
presentation of your application (its UI) from the application logic used to fetch and fill in data.
In the above XML example, there's just one View element: the TextView, which has four XML attributes. Here's a
summary of what they mean:
Attribute

Meaning

xmlns:android

This is an XML namespace declaration that tells the Android tools that you are going to
refer to common attributes defined in the Android namespace. The outermost tag in
every Android layout file must have this attribute.

android:layout_width

This attribute defines how much of the available width on the screen this View should
consume. In this case, it's the only View so you want it to take up the entire screen,
which is what a value of "fill_parent" means.

android:layout_height

This is just like android:layout_width, except that it refers to available screen height.

64
Copyrighted © 2009: Cerebral
Team Let’s Start Programming
android:text

This sets the text that the TextView should display. In this example, you use a string
resource instead of a hard-coded string value. The hello string is defined in
the res/values/strings.xml file. This is the recommended practice for inserting strings to
your application, because it makes the localization of your application to other
languages graceful, without need to hard-code changes to the layout file. For more
information, see Resources and Internationalization.

These XML layout files belong in the res/layout/ directory of your project. The "res" is short for "resources" and the
directory contains all the non-code assets that your application requires. In addition to layout files, resources also
include assets such as images, sounds, and localized strings.
Landscape layout
When you want a different design for landscape, put your layout XML file inside /res/layout-land. Android will
automatically look here when the layout changes. Without this special landscape layout defined, Android will stretch
the default layout.
The Eclipse plugin automatically creates one of these layout files for you: main.xml. In the "Hello World" application you
just completed, this file was ignored and you created a layout programmatically. This was meant to teach you more
about the Android framework, but you should almost always define your layout in an XML file instead of in your code.
The following procedures will instruct you how to change your existing application to use an XML layout.
1. In the Eclipse Package Explorer, expand the /res/layout/ folder and open main.xml (once opened, you might need
to click the "main.xml" tab at the bottom of the window to see the XML source). Replace the contents with the
following XML:
<?xml version="1.0" encoding="utf-8"?>
<TextView xmlns:android="http://schemas.android.com/apk/res/android"
android:layout_width="fill_parent"
android:layout_height="fill_parent"
android:text="@string/hello"/>

Save the file.
2. Inside the res/values/ folder, open strings.xml. This is where you should save all default text strings for your user
interface. If you're using Eclipse, then ADT will have started you with two strings, hello and app_name.
Revise hello to something else. Perhaps "Hello, Android! I am a string resource!" The entire file should now look
like this:
<?xml version="1.0" encoding="utf-8"?>
<resources>
<string name="hello">Hello, Android! I am a string resource!</string>

65
Copyrighted © 2009: Cerebral
Team Let’s Start Programming
<string name="app_name">Hello, Android</string>
</resources>

3. Now open and modify your HelloAndroid class use the XML layout. Edit the file to look like this:
package com.example.helloandroid;

import android.app.Activity;
import android.os.Bundle;

public class HelloAndroid extends Activity {
/** Called when the activity is first created. */
@Override
public void onCreate(Bundle savedInstanceState) {
super.onCreate(savedInstanceState);
setContentView(R.layout.main);
}
}

When you make this change, type it by hand to try the code-completion feature. As you begin typing "R.layout.main"
the plugin will offer you suggestions. You'll find that it helps in a lot of situations.
Instead of passing setContentView() a View object, you give it a reference to the layout resource. The resource is
identified as R.layout.main, which is actually a compiled object representation of the layout defined
in /res/layout/main.xml. The Eclipse plugin automatically creates this reference for you inside the project's R.java class. If
you're not using Eclipse, then the R.java class will be generated for you when you run Ant to build the application. (More
about the R class in a moment.)
Now re-run your application — because you've created a launch configuration, all you need to do is click the green
arrow icon to run, or select Run > Run History > Android Activity. Other than the change to the TextView string, the
application looks the same. After all, the point was to show that the two different layout approaches produce identical
results.
Tip: Use the shortcut Ctrl-F11 (Cmd-Shift-F11, on Mac) to run your currently visible application.
Continue reading for an introduction to debugging and a little more information on using other IDEs. When you're
ready to learn more, read Application Fundamentals for an introduction to all the elements that make Android
applications work. Also refer to the Developer's Guide introduction page for an overview of the Dev
Guide documentation.
66
Copyrighted © 2009: Cerebral
Team Let’s Start Programming
3.5.1 R class
In Eclipse, open the file named R.java (in the gen/ [Generated Java Files] folder). It should look something like this:
package com.example.helloandroid;

public final class R {
public static final class attr {
}
public static final class drawable {
public static final int icon=0x7f020000;
}
public static final class layout {
public static final int main=0x7f030000;
}
public static final class string {
public static final int app_name=0x7f040001;
public static final int hello=0x7f040000;
}
}

A project's R.java file is an index into all the resources defined in the file. You use this class in your source code as a sort
of short-hand way to refer to resources you've included in your project. This is particularly powerful with the codecompletion features of IDEs like Eclipse because it lets you quickly and interactively locate the specific reference you're
looking for.
It's possible yours looks slightly different than this (perhaps the hexadecimal values are different). For now, notice the
inner class named "layout", and its member field "main". The Eclipse plugin noticed the XML layout file named
main.xml and generated a class for it here. As you add other resources to your project (such as strings in
the res/values/string.xml file or drawables inside the res/drawable/ directory) you'll see R.java change to keep up.
When not using Eclipse, this class file will be generated for you at build time (with the Ant tool).
You should never edit this file by hand.

67
Copyrighted © 2009: Cerebral
Team Let’s Start Programming
3.0.6 Debug Your Project
The Android Plug-in for Eclipse also has excellent integration with the Eclipse debugger. To demonstrate this, introduce
a bug into your code. Change your HelloAndroid source code to look like this:
package com.android.helloandroid;

import android.app.Activity;
import android.os.Bundle;

public class HelloAndroid extends Activity {
/** Called when the activity is first created. */
@Override
public void onCreate(Bundle savedInstanceState) {
super.onCreate(savedInstanceState);
Object o = null;
o.toString();
setContentView(R.layout.main);
}
}

This change simply introduces a NullPointerException into your code. If you run your application again, you'll eventually
see this:

Figure 5: NullPointerException

Press "Force Quit" to terminate the application and close the emulator window.
68
Copyrighted © 2009: Cerebral
Team Let’s Start Programming
To find out more about the error, set a breakpoint in your source code on the line Object o = null; (double-click on the
marker bar next to the source code line). Then select Run > Debug History > Hello, Android from the menu to enter
debug mode. Your app will restart in the emulator, but this time it will suspend when it reaches the breakpoint you set.
You can then step through the code in Eclipse's Debug Perspective, just as you would for any other application.

Figure 6: Debugging

For more information: http://developer.android.com/guide/tutorials/hello-world.html

69
Copyrighted © 2009: Cerebral
Team Let’s Start Programming
Chapter 4: Android Must-Knows
4.0 User Interfaces
4.0.1 User Interface Guidelines
The Android UI team has begun developing guidelines for the interaction and visual design of Android applications. You
may want to read through these guidelines before creating your application design. Some of user interfaces are icons,
widgets, activities, tasks and menus.
For more information: http://developer.android.com/guide/practices/ui_guidelines/index.html

4.0.2 Hello Views
This collection of "Hello World"-style tutorials is designed to get you quickly started with common Android Views and
widgets. The aim is to let you copy and paste these kinds of boring bits so you can focus on developing the code that
makes your Android application rock.
For more information: http://developer.android.com/guide/tutorials/views/index.html

4.0.3 User Interface XML and Java Codes
In an Android application, the user interface is built using View and ViewGroup objects. There are many types of views
and view groups, each of which is a descendant of the View class.
View objects are the basic units of user interface expression on the Android platform. The View class serves as the base
for subclasses called "widgets," which offer fully implemented UI objects, like text fields and buttons. The ViewGroup
class serves as the base for subclasses called "layouts," which offer different kinds of layout architecture, like linear,
tabular and relative.
A View object is a data structure whose properties store the layout parameters and content for a specific rectangular
area of the screen. A View object handles its own measurement, layout, drawing, focus change, scrolling, and
key/gesture interactions for the rectangular area of the screen in which it resides. As an object in the user interface, a
View is also a point of interaction for the user and the receiver of the interaction events.
For more information: http://developer.android.com/guide/topics/ui/index.html
The above site includes:
Declaring Layout, Creating Menus, Creating Dialogs, Handling UI Events, Notifying the User, Applying Styles and Themes,
Building Custom Components, Binding to Data with AdapterView, Common Layout Objects, How Android Draws Views.

4.1 Resources and Assets
Resources are an integral part of an Android application. In general, these are external elements that you want to
include and reference within your application, like images, audio, video, text strings, layouts, themes, etc. Every
Android application contains a directory for resources (res/) and a directory for assets (assets/). Assets are used less
often, because their applications are far fewer. You only need to save data as an asset when you need to read the raw
70
Copyrighted © 2009: Cerebral
Team Let’s Start Programming
bytes. The directories for resources and assets both reside at the top of an Android project tree, at the same level as
your source code directory (src/).
The difference between "resources" and "assets" isn't much on the surface, but in general, you'll use resources to store
your external content much more often than you'll use assets. The real difference is that anything placed in the
resources directory will be easily accessible from your application from the R class, which is compiled by Android.
Whereas, anything placed in the assets directory will maintain its raw file format and, in order to read it, you must use
the AssetManager to read the file as a stream of bytes. So keeping files and data in resources (res/) makes them easily
accessible.
Within the documents of this topic, you'll find information on the kinds of standard resources that are typically used in
an Android application and how to reference them from you code. Resources and Internationalization is where you
should start, to learn more about how Android utilizes project resources. Then, the Available Resource Types document
offers a summary of various resource types and a reference to their specifications.
For more information: http://developer.android.com/guide/topics/resources/index.html

4.2 The AndroidManifest.xml File
Every application must have an AndroidManifest.xml file (with precisely that name) in its root directory. The manifest
presents essential information about the application to the Android system, information the system must have before
it can run any of the application's code. Among other things, the manifest does the following:
•
•

•
•
•
•

•
•

It names the Java package for the application. The package name serves as a unique identifier for the application.
It describes the components of the application — the activities, services, broadcast receivers, and content providers
that the application is composed of. It names the classes that implement each of the components and publishes their
capabilities (for example, which Intent messages they can handle). These declarations let the Android system know
what the components are and under what conditions they can be launched.
It determines which processes will host application components.
It declares which permissions the application must have in order to access protected parts of the API and interact with
other applications.
It also declares the permissions that others are required to have in order to interact with the application's components.
It lists the Instrumentation classes that provide profiling and other information as the application is running. These
declarations are present in the manifest only while the application is being developed and tested; they're removed
before the application is published.
It declares the minimum level of the Android API that the application requires.
It lists the libraries that the application must be linked against.
For more information: http://developer.android.com/guide/topics/manifest/manifest-intro.html

4.3 Intents and Intent Filters
Three of the core components of an application — activities, services, and broadcast receivers — are activated through
messages, called intents. Intent messaging is a facility for late run-time binding between components in the same or
71
Copyrighted © 2009: Cerebral
Team Let’s Start Programming
different applications. The intent itself, an Intent object, is a passive data structure holding an abstract description of an
operation to be performed — or, in the case of broadcasts, a description of something that has happened and is being
announced. There are separate mechanisms for delivering intents to each type of component:
•

An Intent object is passed to Context.startActivity() orActivity.startActivityForResult() to launch an activity or
get an existing activity to do something new.

•

An Intent object is passed to Context.startService() to initiate a service or deliver new instructions to an
ongoing service. Similarly, an intent can be passed to Context.bindService() to establish a connection between
the calling component and a target service. It can optionally initiate the service if it's not already running.

•

Intent objects passed to any of the broadcast methods (such
as Context.sendBroadcast(), Context.sendOrderedBroadcast(), orContext.sendStickyBroadcast()) are delivered
to all interested broadcast receivers. Many kinds of broadcasts originate in system code.

In each case, the Android system finds the appropriate activity, service, or set of broadcast receivers to respond to the
intent, instantiating them if necessary. There is no overlap within these messaging systems: Broadcast intents are
delivered only to broadcast receivers, never to activities or services. An intent passed tostartActivity() is delivered only
to an activity, never to a service or broadcast receiver, and so on.
For more information: http://developer.android.com/guide/topics/intents/intents-filters.html

4.4 Data Storage
A typical desktop operating system provides a common file system that any application can use to store files that can
be read by other applications (perhaps with some access control settings). Android uses a different system: On Android,
all application data (including files) are private to that application.
However, Android also provides a standard way for an application to expose its private data to other applications —
through content providers. A content provider is an optional component of an application that exposes read/write
access to the application's data, subject to whatever restrictions it might impose. Content providers implement a
standard syntax for requesting and modifying data, and a standard mechanism for reading the returned data. Android
supplies a number of content providers for standard data types, such as image, audio, and video files and personal
contact information. For more information on using content providers, see a separate document, Content Providers.
Whether or not you want to export your application's data to others, you need a way to store it. Android provides the
following four mechanisms for storing and retrieving data: Preferences, Files, Databases, and Network.
For more information: http://developer.android.com/guide/topics/data/data-storage.html

4.5 Content Providers
Content providers store and retrieve data and make it accessible to all applications. They're the only way to share data
across applications; there's no common storage area that all Android packages can access.

72
Copyrighted © 2009: Cerebral
Team Let’s Start Programming
Android ships with a number of content providers for common data types (audio, video, images, personal contact
information, and so on). You can see some of them listed in the android.provider package. You can query these
providers for the data they contain (although, for some, you must acquire the proper permission to read the data).
If you want to make your own data public, you have two options: You can create your own content provider (a
ContentProvider subclass) or you can add the data to an existing provider — if there's one that controls the same type
of data and you have permission to write to it.

4.6 Security and Permissions
Android is a multi-process system, in which each application (and parts of the system) runs in its own process. Most
security between applications and the system is enforced at the process level through standard Linux facilities, such as
user and group IDs that are assigned to applications. Additional finer-grained security features are provided through a
"permission" mechanism that enforces restrictions on the specific operations that a particular process can perform, and
per-URI permissions for granting ad-hoc access to specific pieces of data.

4.7 Graphics
Android graphics are powered by a custom 2D graphics library and OpenGL ES 1.0 for high performance 3D graphics.
The most common 2D graphics APIs can be found in the drawable package. OpenGL APIs are available from the
Khronos OpenGL ES package, plus some Android OpenGL utilities.
When starting a project, it's important to consider exactly what your graphical demands will be. Varying graphical tasks
are best accomplished with varying techniques. For example, graphics and animations for a rather static application
should be implemented much differently than graphics and animations for an interactive game or 3D rendering.
For more information: http://developer.android.com/guide/topics/graphics/index.html

4.8 Audio and Video
The Android platform offers built-in encoding/decoding for a variety of common media types, so that you can easily
integrate audio, video, and images into your applications. Accessing the platform's media capabilities is fairly
straightforward — you do so using the same intents and activities mechanism that the rest of Android uses.
Android lets you play audio and video from several types of data sources. You can play audio or video from media files
stored in the application's resources (raw resources), from standalone files in the filesystem, or from a data stream
arriving over a network connection. To play audio or video from your application, use theMediaPlayer class.
The platform also lets you record audio and video, where supported by the mobile device hardware. To record audio or
video, use the MediaRecorder class. Note that the emulator doesn't have hardware to capture audio or video, but actual
mobile devices are likely to provide these capabilities, accessible through the MediaRecorder class.
For a list of media formats for which Android offers built-in support, see the Android Media Formats appendix.
For more information: http://developer.android.com/guide/topics/media/index.html
73
Copyrighted © 2009: Cerebral
Team Let’s Start Programming
4.9 Locations and Maps
Location- and maps-based applications and services are compelling for mobile device users. You can build these
capabilities into your applications using the classes of the android.location package and the Google Maps external
library.
For more information: http://developer.android.com/guide/topics/location/index.html

4.10 App Widgets
App Widgets are miniature application views that can be embedded in other applications (such as the Home screen)
and receive periodic updates. These views are referred to as Widgets in the user interface, and you can publish one with
an App Widget provider. An application component that is able to hold other App Widgets is called an App Widget host.
The screenshot below shows the Music App Widget.
For more information: http://developer.android.com/guide/topics/appwidgets/index.html

74
Copyrighted © 2009: Cerebral
Team Let’s Start Programming
Chapter 5: Planning for Cerebral™
We hope that you have a better picture about the Android platform after reading through the first four chapters and
creating the sample application.
Now we are going to show you how we create our application Cerebral™.

5.0 Conceptualization
Before you start creating any android application, you need to know what is the objective of creating the application
and its target audience.
For Cerebral™, the target audience is the ex-smokers group. Since it is a well known fact that ex-smokers tend to gain
weight easily while quitting smoking, our application is able to let the ex-smokers make a wiser and more informed
choice on food.

5.1 Functionalities
You need to know what are the functionalities that you want to implement in your application. In Cerebral™, some
functionalities are Retrieving food details, Search History, Locate Place. Noting these down and forming concept maps,
you will be able to see a clearer picture.

Retrieve Food
Details
Text Input

Locate Place
GPS

Search
History
View last 20
searches

Cerebral Web
Backend
Interface and
Database

Barcode

Figure 7: Functionalities Concept Map

75
Copyrighted © 2009: Cerebral
Team Let’s Start Programming
5.2 Technicalities
When we talk about technicalities, we are going deeper into the each functionality.
For example in Cerebral™, the Locate Place functionality:

Front-End Code

•Contains method to get user’s current location.
•Contains method to get top 3 nearest locations.

GPS

•Centers the user’s current location.

PyODBC

•To Establish Database connection via SQL queries.

•Contains the Location Table.
•Location’s Latitude & Longitude, Address, Other Details.
•Locations that are displayed means they do sell and have stock
for that product.

MySQL

Figure 8: Locate Place Technicalities

5.3 Functionality Delegation
Delegate the functions to your team members to ensure all functions are covered.

Retrieve Food
Details

Text Input

Locate Place

Nehemiah

Min Qi
Pei Zhen

View last 20
searches

Interface and
Database

Min Qi

Min Qi

Pei Zhen

Nehemiah

Cerebral Web
Backend

GPS

Barcode

Search History

Pei Zhen

Nehemiah

Figure 9: Functionality Delegation

76
Copyrighted © 2009: Cerebral
Team Let’s Start Programming
5.4 Architecture
Knowing the Architecture of the application enables you to be clear how data is transferred and retrieved. This is
especially important if you are interfacing with a real server.

Figure 10: Cerebral Architecture

77
Copyrighted © 2009: Cerebral
Team Let’s Start Programming
Chapter 6: Development for Cerebral™
6.0 Package Explorer

This is how the whole project will look
like in eclipse. It consists of the Source
files, Generated Java Files, the
Android Library being used (Android
1.1), assets, resources (res), Android
Manifest & project default properties.

Figure 11: Package Explorer

6.0.1 Source Files

This is how the Source files look like.
The Java classes are located in each
individual package. It is done in this
way to make the whole project more
organized.

Figure 12: Source Files

78
Copyrighted © 2009: Cerebral
Team Let’s Start Programming
6.0.2 Generated Java Files
R.java class is automatically
generated by the aapt tool from
the resource data it found. It
should not be modified by hand.

Figure 13: Generated Java Files

6.0.3 Android Library

The Android Library shows the different
functionality that the Android Platform
offers e.g. database, location etc. You can
use either Android Library 1.1 or 1.5 with
version 1.5 being the latest version.

Figure 14: Android Library 1.1

6.0.4 Assets
Assets are not commonly used by most applications. You can overlook this.

79
Copyrighted © 2009: Cerebral
Team Let’s Start Programming
6.0.5 Resource Files

The Resource files consist of a few folders,
namely, drawable(graphics), layout
(portrait layouts), layout-land(landscaped
layouts), *raw(media files), values(string
values), *xml(preferences).
* indicates special folders catered for barcode
technology only

Figure 15: Resource Files

6.0.6 Android Manifest
The Android Manifest is used to declare the
various activities and intent filters of the
application. For example, if you want to load
a page, you must declare the name of the
java class file(.java) along with the xml
layout(.xml) of that java class.

Figure 16: Android Manifest

80
Copyrighted © 2009: Cerebral
Team Let’s Start Programming
6.1 User Interfaces
6.1.1 Cerebral™ Icon

The Cerebral™ Application Icon is created
in accordance with Android UI Guidelines
using Photoshop CS3. It is saved as PNG file
transparency format and stored in the
res/drawable folder.

The Icon is declared in the Android Manifest:
<application
android:icon="@drawable/cerebral">

Figure 17: Cerebral Application Icon

81
Copyrighted © 2009: Cerebral
Team Let’s Start Programming
6.1.2 Cerebral™ Splash Screen

The Cerebral™ Splash Screen is similar to a
loading page of any application. It shows an
image on start and removes it after a
specific time to show the first page of an
application.

The splash screen java class is located in the
com.cerebral.main package. The layout is
located under res/layout. The Image and the
timing of the splash screen are editable.

Figure 18: Cerebral Splash Screen

82
Copyrighted © 2009: Cerebral
Team Let’s Start Programming
6.1.3 Cerebral™ Main Page

The Cerebral™ Main Page consists of 3
main functions:
•
•
•

Search Food Product by Text Input
Search Food Product by Barcode
Search History

The User can press any of the buttons to
select functionality.

The Main Page java class is located in the
com.cerebral.main package. The layout is
located under res/layout.

Figure 19: Cerebral Main Page

83
Copyrighted © 2009: Cerebral
Team Let’s Start Programming
6.1.4 Cerebral™ Main Page (Landscape)

Figure 20: Cerebral Main Page (Landscape)

The Cerebral™ Main Page (Landscape) has
the same functions as the previous page.
The only difference is when the User slides
the Android Phone (HTC Dream), the screen
will change to the landscape orientation.

The Main Page java class is still located in
the com.cerebral.main package (same place
as the previous. The layout is located under
res/layout-land.

You need to add a piece of code into the Main
activity in the Android Manifest:
Add:
android:screenOrientation="user"
To:
activity android:name=".Main"
“User” means that the screen will orientate to the
correctly according to whether the phone’s
keyboard is shown or not.

84
Copyrighted © 2009: Cerebral
Team Let’s Start Programming
6.1.5 Retrieve Food Product Details by Text Input
Description
When the User clicks on the “Text” Button, he is
brought to this page. He keys in the product name
and presses the search button. The details of the
product are displayed including its Benefit Level.

Java Codes: TextInput.java
The product name is extracted from the textbox
and set into a variable. The variable is then passed
to the python file using the following java codes:
String url =
"http://192.168.0.136:8080/codeXtreme/cerebrulum.py?s
earchFoodText="+searchWord.getText();

Python Codes
The python file consists of SQL statements which
are executed:
SELECT FoodDetails FROM food WHERE FoodName='"
+ searchFoodText + "'"

Android Manifest
Figure 21: Retrieve Food Product Details by Text Input

XML File (Layout)
The XML File is text.xml. TextView, Buttons &
ScrollView are used.

<activity android:name=".TextInput"
android:label="Input Food Product"
android:configChanges="keyboardHidden|orientation"
android:screenOrientation="user">
<intent-filter>
<action
android:name="android.intent.action.TEXT" />
<category
android:name="android.intent.category.LAUNCHER" />
</intent-filter>
</activity>

85
Copyrighted © 2009: Cerebral
Team Let’s Start Programming
6.1.6 Retrieve Food Product Details by Barcode Scanning

Description
When the User clicks on the “Barcode” Button, he is
brought to this page. He will be able to scan 1D
(Serial) and 2D(QR) barcodes of the food products.
The barcodes will be converted to serial numbers
etc by the embedded decoders in Cerebral™.

Java Codes: com.google.zxing

Figure 22: Before Scanning Barcode

The packages that are named “com.google.zxing”
all belongs to the barcode functionality. The
Barcode codes are provided by “ZXing” or “Zebra
Crossing” and modified by Team LSP©.
The activation of the camera is programmed in
CameraPreview.java class.
The passing of the serial number from the
com.google.zxing package to the
com.cerebral.barcode package is programmed in
the com.google.zxing.client.android’s Intents.java
class and com.cerebral.barcode’s
SerialNoBarcode.java class.
The passing of the serial number from the inner
class to the outer class is crucial as we need to use
the serial number to search for the product’s
details.
Hence, the serial number is passed and processed in
the python file.

Figure 23: Scanning Barcode

86
Copyrighted © 2009: Cerebral
Team Let’s Start Programming
Python Codes
The python file consists of SQL statements which
are executed:
SELECT FoodDetails FROM food WHERE SerialNo='" +
searchFoodSerial + "'"

Figure 24: After Scanning Barcode

Android Manifest
Activation of Barcode Functionality
<activity
android:name="com.google.zxing.client.android.CaptureActivity
"
android:screenOrientation="landscape"
android:configChanges="orientation|keyboardHidden"
android:theme="@android:style/Theme.NoTitleBar.Fullscreen">
Scanning Functionality
<intent-filter>
<action
android:name="com.google.zxing.client.android.SCAN"/>
<category android:name="android.intent.category.DEFAULT"/>
</intent-filter>
Encoding Functionality
<activity
android:name="com.google.zxing.client.android.EncodeActivity"
>
<intent-filter>
<action
android:name="com.google.zxing.client.android.ENCODE"/>
<category android:name="android.intent.category.DEFAULT"/>
</intent-filter>

Figure 25: Barcode Product Details

XML File (Layout)
A few XML files are used due to the complexity of
the barcode functionality. They are scan.xml,
econde.xml and textbarcode.xml.

Retrieve Food Product Details buy Barcode
<activity
android:name="com.cerebral.barcode.SerialNoBarcode"
android:label="Barcode Details"
android:configChanges="keyboardHidden|orientation"
android:screenOrientation="portrait">
<intent-filter>
<action
android:name="android.intent.action.TEXTBARCODE" />
<category
android:name="android.intent.category.LAUNCHER" />
</intent-filter>
</activity>

87
Copyrighted © 2009: Cerebral
Team Let’s Start Programming
6.1.7 Search History

Description
Clicking here will search for the food product details
and also will create a record of the food product
name in the SQLite database.

Figure 26: Text Input Page

For this functionality, you can use the Notepad
Tutorial on the Android Developers website
(http://developer.android.com/guide/tutorials/note
pad/index.html) as a guide. This functionality is
basically developed from the Notepad Tutorial and
certain changes have been made to accommodate
to our application which in this case to save the
search history of the user. This will help to reduce
the time of the user used to search for the same
food product and keep track of what the user has
searched so that when the user forgets what he/she
has searched and he/she want to know what he/she
has searched can used that as a reference.

Java Codes:
com.cerebral.history,
com.cerebral.main
Search History Functionality has been divided into
three different java files which is located at our
project (Cerebral) in ‘src’ folder in
‘com.cerebral.history’ package (History.java and
SearchHistoryDbAdapter.java) and
‘com.cerebral.main’ package (TextInput.java) in the
Package Explorer View.
History.java
History.java file is used to create a list of food
products based on what the user searched. When
the search history records have reached the
maximum limit, this java file allows the user to clear
the search history records.

Figure 27: Search History

SearchHistoryDbAdapter.java
SearchHistoryDbAdapter.java file is used to store
the CRUD (create, retrieve, update, delete)
methods of the database. In addition, the basic
database information (database name, table name,
database version) are also defined in this file.

88
Copyrighted © 2009: Cerebral
Team Let’s Start Programming
Java Codes:
com.cerebral.history,
com.cerebral.main
TextInput.java
The main function of TextInput.java file is to
retrieve the information of the food product
through the usage of python. The roles of the
Search History in here are to create a record of the
food product name, do some validations on the
food product searched (for example, if the text field
to input the name of the food product is blank, it
will not save a blank record) and create a limitation
for the number of search history records to be
stored in the database (for example, when the
number of search history records in the database
have reached twenty then the user will not be
allowed to search for food product until the search
history of the food product is cleared.
Figure 28: Clear History

Android Manifest
<activity android:name="com.cerebral.history.History"
android:label="Search History">
<intent-filter>
<action android:name="android.intent.action.ROW" />
<category
android:name="android.intent.category.LAUNCHER" />
</intent-filter>
</activity>

XML File (Layout)
Several layouts have been used to support the
functionality of Search History. They are located at
our application (Cerebral™) in ‘res’ folder in ‘layout’
package (list.xml, main.xml, row.xml, text.xml) in
the Package Explorer View.

Figure 29: History Cleared

89
Copyrighted © 2009: Cerebral
Team Let’s Start Programming
6.1.8 Alternate Food Product (Text Input)
Description
Alternate Food Product functionality is to allow
the User to make wiser decisions when buying food.
Alternate Food products have a higher benefit level
than those the User has searched.

Java Codes:
com.cerebral.altproducts,
com.cerebral.barcode

Click on the “look for
alternate food
products button” to
display alternate food
products (Figure 31)

Alternate Food Product functionality has been
divided to three different java files which are
located at our project (Cerebral) in ‘src’ folder in
‘com.cerebral.altproducts’ package
(altProducts.java) and ‘com.cerebral.barcode’
package (TextInputBarcode.java) ,
‘com.cerebral.main’ package (TextInput.java) in the
Package Explorer View.
TextInput.java
The main function of TextInput.java file is to
retrieve the information of the food product
through the usage of python. Users would enter
and search for the food product .After the food
detail is displayed, users can click on “look for
alternate food products” (Figure 30) to search for
alternate food product that’s available in the store.
Figure 31 would be shown upon clicking.

Figure 30: Search Food Product Details

altProducts.java
altProducts.java file is used to retrieve alternate list
of food products based on what the user searched.
This will help to users search for healthy food
products that are recommended in the stores. With
a higher benefit level, users can have more choices
in selecting healthier products from different
stores.

Python Codes
The python file consists of SQL statements which
are executed:
("SELECT alternateproduct.alternateProduct FROM
alternateproduct where SerialNo=SerialNo and FoodName='" +
searchWord+"'")

XML File (Layout)
Several layouts have been used to support the
functionality of alternate food products. They are
located at our project (Cerebral) in ‘res’ folder in
‘layout’ package (altmedicine.xml, text.xml,
textbarcode.xml) in the Package Explorer View.

Figure 31: Alternate Food Products

90
Copyrighted © 2009: Cerebral
Team Let’s Start Programming
6.1.9 Alternate Food Product (Barcode)

Description
Alternate Food Product functionality is to allow
the User to make wiser decisions when buying food.
Alternate Food products have a higher benefit level
than those the User has searched.

Java Codes:
com.cerebral.altproducts,
com.cerebral.barcode

Click on the “look for
alternate food
products button” to
display alternate food
products (Figure 33)

SerialNoBarcode.java
SerialNoBarcode.java file is used to scan barcode
and retrieve food name through the usage of
python code. The alternate healthy products in the
database will be retrieved using the input of serial
number.
This allows users to make a wiser decision when
buying the food products.
After scanning, Users would be able to view the
product details. (Figure 32 will be shown).

=Figure 32: Barcode Details

altProducts.java
altProducts.java file is used to retrieve alternate list
of food products based on what the user searched.
This will help to users search for healthy food
products that are recommended in the stores. With
a higher benefit level, users can have more choices
in selecting healthier products from different
stores.

Python Codes
The python file consists of SQL statements which
are executed:
("SELECT alternateproduct.alternateProduct FROM
alternateproduct where SerialNo=SerialNo and SerialNo='" +
searchWord+"'")

Figure 33: Alternate Food Products

Alternate Food Product functionality has been
divided to three different java files which are
located at our project (Cerebral) in ‘src’ folder in
‘com.cerebral.altproducts’ package
(altProducts.java) and ‘com.cerebral.barcode’
package (SerialNoBarcode.java) in the Package
Explorer View.

XML File (Layout)
Several layouts have been used to support the
functionality of alternate food products. They are
located at our project (Cerebral) in ‘res’ folder in
‘layout’ package (altmedicine.xml,
barcodedetails.xml, textbarcode.xml) in the
Package Explorer View.
91

Copyrighted © 2009: Cerebral
Team Let’s Start Programming
6.1.10 Android’s Global Positioning System

Java Codes:
Google Map.java
GoogleMap.java file is used to retrieve and display a
list of food products based on the search input by
the user. The Google map displays the whole
country and city. They can click on the zoom button
to zoom in to view the roads and district to find
their way to the location where sells the food that
they want. This is efficient as it helps users to know
and find their way to the shop.
MapLocation.java
MapLocation.java is able to display the current
location. It also displays the location that sells
alternate healthy food retrieved from the database.
In this case is Toa Payoh HDB Hub. By clicking on
the bubble the map location name will be displayed
(Figure 35)
Figure 34: Google Map with Marked Locations

MapLocationOverlay.java
MapLocationOverlay.java is used to create and
retrieve more than one marker on the map. In this
case is Toa Payoh HDB Hub and Singapore General
Hospital as shown on the map. This helps users to
be able to locate more than 1 place that sells the
food products that they want.( Figure 34)

Figure 35: Zooming In on Location

92
Copyrighted © 2009: Cerebral
Team Let’s Start Programming
6.1.11 Locate Place by GPS (Text Input)
Description
This functionality is to show the user the places that
sell a particular food product that he/she has
searched by Text Input. Information will be shown
on a map. This will help to reduce the search time of
the user in locating the place.

Java Codes:
com.cerebral.locate,
com.cerebral.main
Click on the “Locate
Place” to display the
locations (Figure 35)

Figure 36: Locate Food Product

Click on marker to
show the name of
the place that sells
the product.

Search History Functionality has been divided into
five different java files which is located at our
project (Cerebral) in ‘src’ folder in
‘com.cerebral.locate’ package (GoogleMap.java,
MapLocation.java, SearchHistoryDbAdapter.java),
‘com.cerebral.barcode’ package (SerialNoBarcode)
and ‘com.cerebral.main’ package (TextInput.java) in
the Package Explorer View.
TextInput.java
The main function of TextInput.java file is to
retrieve the information of the food product
through the usage of python. The role of the GPS in
here is to bring intent over to the Google Map
which in this case is to bring the food name over to
the Google Map. The method is shown below:
public void Locate(){
String sw = searchWord.getText().toString();
Intent myIntent = new
Intent(getBaseContext(),GoogleMap.class);
myIntent.putExtra("sw", sw);
startActivityForResult(myIntent, 0);
}

XML File (Layout)
Python Codes
Python code for googleMap.java using Text Input

Several layouts have been used to support the
functionality of alternate food products. They are
located at our project (Cerebral) in ‘res’ folder in
‘layout’ package (google_map.xml, text.xml,
textbarcode.xml) in the Package Explorer View.

("SELECT location.locationName FROM location, food
where food.SerialNo=location.SerialNo and
food.FoodName='"+ searchWord+"'")
Figure 37: Google Map with Marked Locations

93
Copyrighted © 2009: Cerebral
Team Let’s Start Programming
6.1.12 Locate Place by GPS (Barcode)
Description
This functionality is to show the user the places that
sell a particular food product that he/she has
searched by barcode. Information will be shown on
a map. This will help to reduce the search time of
the user in locating the place.

Java Codes:
com.cerebral.locate,
com.cerebral.main
Click on the “Locate
Place” to display the
locations (Figure 35)

Figure 38: Locate Food Product

Click on marker to
show the name of
the place that sells
the product.

Search History Functionality has been divided into
five different java files which is located at our
project (Cerebral) in ‘src’ folder in
‘com.cerebral.locate’ package (GoogleMap.java,
MapLocation.java, SearchHistoryDbAdapter.java),
‘com.cerebral.barcode’ package (SerialNoBarcode)
and ‘com.cerebral.main’ package (TextInput.java) in
the Package Explorer View.
SerialNoBarcode.java
The main function of SerialNoBarcode.java file is
used to scan barcode and retrieve food name using
serial Number stored in the database. The role of
the GPS in here is to bring intent over to the Google
Map which in this case is to bring the food name
over to the Google Map. The method is shown
below:
public void Locate(){
String sw = medicineTitle.getText().toString();
Intent myIntent = new
Intent(getBaseContext(),GoogleMap.class);
myIntent.putExtra("sw", sw);
startActivityForResult(myIntent, 0);
} }

XML File (Layout)
Python Codes
Python code for googleMap.java using
SerialNoBarcode

Several layouts have been used to support the
functionality of alternate food products. They are
located at our project (Cerebral) in ‘res’ folder in
‘layout’ package (google_map.xml, text.xml,
textbarcode.xml) in the Package Explorer View.

("SELECT location.locationName FROM location, food
where food.SerialNo=location.SerialNo and
food.SerialNo='"+ searchWord+"'")
Figure 39: Google Map with Marked Locations

94
Copyrighted © 2009: Cerebral
Team Let’s Start Programming
6.1.13 Cerebral Web™ (Backend) http://www.cerebralweb.mdesignideas.com/index.php
6.1.13.1 Login

Description
Enter Username and Password.
Click “Login” Button to enter site.

User Login
Date, Time and Username are
displayed.

Figure 40: Homepage & Login

6.1.13.2 Homepage

Cerebral Products
Creating, Retrieving, Updating and
Deleting of Food products are
done here.

Figure 41: Homepage

95
Copyrighted © 2009: Cerebral
Team Let’s Start Programming
6.13.1.3 Cerebral™ Products

Add New Product
Click to add new food product.

Figure 42: Retrieval of Food Products

96
Copyrighted © 2009: Cerebral
Team Let’s Start Programming
Add New Product
Enter data into Serial No, Food
Name, Food Description,
Benefit Level, Location Name,
Location Description &
Alternate Product fields.
After which you click “Add
Data” to store the food
product in MySQL Database.

Figure 43: Addition of Food Products

Update Product
Click “Edit” button to edit
product details.

97
Copyrighted © 2009: Cerebral
Team Let’s Start Programming
Update Product
Edit data in Serial No, Food
Name, Food Description,
Benefit Level, Location Name,
Location Description &
Alternate Product fields.
After which you click “Update
Data” to store the updated
food product in MySQL
Database.

Figure 44: Update Food Products

98
Copyrighted © 2009: Cerebral
Team Let’s Start Programming
Delete Button
Click the “Delete” button to
delete the selected products.

Delete Product

Figure 45: Delete Food Products

Click the “OK” button to
confirm the deletion of the
products.

Select Product
Select the food products to
delete.

99
Copyrighted © 2009: Cerebral
Team Let’s Start Programming
Chapter 7: Internet References
7.0 Informational Foundation
Health Promotion Board Healthier Dining - Healthier Dining
HowStuffWorks "How Your Brain Works"
SPRING Singapore - Enabling Enterprise

7.1 Program Codes
7.1.0 Python
pyodbc - Project Hosting on Google Code

7.1.1 Android
7.1.2 Animation
Android Animation 101

7.1.3 Intro
What is API? - A Word Definition From the Webopedia Computer Dictionary
Hello, World | Android Developers
Android FAQs
Package Index | Android Developers
Develop Android applications with Eclipse
developerlife - Tutorials
Designer Android
Main Page - ModMyGPhone Wiki
How to Install APK Files on Android Device Emulator
The Busy Coder's Guide to Android Development
Creating Menus | Android Developers
Taking screenshots on an Android-based phone
Common Tasks and How to Do Them in Android | Android Developers
Google Android (article from Wired) Ebooks Download | Acrobat PDF Files
100
Copyrighted © 2009: Cerebral
Team Let’s Start Programming
Android Developer Challenge winners
Projects tagged ‘feed’, ‘java’, and ‘rss’ - Ohloh
Learning Android Source Code Examples | High Quality Android Tutorials
The 10 Best Google Android Applications

7.1.4 GPS
Google Mobile | Maps for your phone
Displaying Google Maps in the Android Emulator
Using Google Maps in Android
Needful things … » Blog Archiv » Location Based Services on Android - Part 1/3 - MyLocationOverlay
Using Google Maps in Android | mobiForge
Needful things … » Blog Archiv » Location Based Services on Android - Part 2/3 - ItemizedOverlay
Using Google Maps in Android | mobiForge
Journeys in a Mobile World: Android:- Location Based Services
[android-beginners] Re: How do I get Current GPS Location?
Google Maps Latitude, Longitude Popup
Working with Google Android’s Maps (aka Search for Pizza) « Show me the code! – By Davanum Srinivas
Google Mobile - Maps
Map Overlay | Android Competency Center
Hello, MapView | Android Developers | Overlays
GPS You and Friends
ActivityUserMap
TourGuide - Virtual Sightseeing | Hello Android
FrontPage/Tutorials/Map View - Mobdev Wiki
Koders Code Search: GuideActivity.java - Java
Android Tutorial 2: “Hit” testing on a View (MapView) « Pocket Journey
Clickable Map Markers - Android Developers | Google Groups
Programming with Android Part 3 - Building WikiWhere | 2Lines Software
101
Copyrighted © 2009: Cerebral
Team Let’s Start Programming
Sign Up for the Android Maps API - Android Maps API - Google Code

7.1.5 User Interface
A Visual Guide to Android Graphical User Interface Widgets
Hello, Form Stuff | Android Developers
DroidDraw : Graphical User Interface Editor for Android Cell Phone Development and Programming
android-feed-reader - Google Code
Building a Menu for your Android (V1.0 R1) App « Kah – The Developer
How to add text in ImageButton - Jeff Sharkey
Tutorial 1: Transparent Panel (Linear Layout) On MapView (Google Map) « Pocket Journey
Android Developers Blog: Android Layout Tricks #3: Optimize with stubs
Android Developers Blog: User Interface
Gallery Tutorial with File Location | High Quality Android Tutorials
[android-developers] Re: Justify a TextView?: msg#00571 AndroidDevelopers
Orientation In Android | Steven Elliott's Website
Android Essentials - Google Books
Why is my list black? An Android optimization | Go-Android
How to display wifi IP address - Android Community Forums
developerlife - Tutorials » Android ListView and custom adapter

7.1.6 XML Feeds
NewsDroid RSS Reader | Hello Android
android.sax | Android Developers
Writing a SAX-based RSS and Podcast Parser | High Quality Android Tutorials
Build a mobile RSS reader
Tutorial harnesses Android for XML, RSS
Latest Map Of H1N1 Swine Flu Outbreaks
WHO | Influenza A(H1N1)
Medical and Health RSS/XML News Feeds
102
Copyrighted © 2009: Cerebral
Team Let’s Start Programming
Health and Medical RSS Feeds and News Syndication from MedicineNet - Index
Rss4Medics Directory - Respiratory Medicine Feeds
XML.com: What Is RSS
Programming a SAX-RSS Parser In 30 Minutes Flat - CodeCall Programming Forum
rsslight
android-rss
android-aggregator
Working with XML on Android
Code Beach - Android Source Code
NewsDroid RSS Reader | Hello Android
FeedR News Reader Android App Review by AndroidTapp.com | Android Tapp. Android App Reviews

7.1.7 Barcode
Obtaining a Live Camera Preview in Android
Barcode Scanner Apps for Android Reviewed - Advertising Lab: future of advertising and advertising technology
Howstuffworks "How UPC Bar Codes Work"
zxing - Google Code
Official Google Mobile Blog: Google Product Search for Android now with Barcode Scanning
Camera Depreciation
android.hardware.CameraDevice - Android SDK
How can I fix my camera on my phone? - Android Market Help
Android barcode scanner in 6 lines of Python code

7.1.8 Barcode Generators
Free DataMatrix Barcode Image Online Generator ~ IDAutomation
QR-Code Generator
Free Barcode Generator (with Multiple Formats) - by Barcoding Inc.

7.1.9 Others
Google Phone FAQ: Android Platform for Mobile Phones @ Mobility Today
Slow Loading of Android Emulator - PC World
103
Copyrighted © 2009: Cerebral
Team Let’s Start Programming
Icons and MenuItem for Android | mgmblog.com
The Pragmatic Bookshelf | Hello, Android
Android Application | Open Handset Magazine
Android -- Download Squad
Create / Delete AVD
Android 0.9 API 改变中文总结 | Android 开发网
Pushpin
Deprecation - Wikipedia, the free encyclopedia

7.1.10 Google MapKey
Setting the JAVA_HOME environment variable

7.1.11 HTC Dream
You must mount SD card to transfer files after RC29 update
Android Apps Installed on internal mem
Install Apps to Phone using CMD
How to Install APK files on your Google Android Phone

7.1.12 Database SQLite
[android-developers] Re: Including SQLite database with application
ReignDesign | Blog - Using your own SQLite database in Android applications
HELP: Recommendation for Initial Load of Large Data SQLite Database? - Android Developers | Google Groups
How to ship an Android application with a database? - Stack Overflow
[android-beginners] Re: Store prepopulated sqlite : msg#00491 AndroidBeginners
infiniteZest.com: Understanding SQLite packages in Android
android.database.sqlite.SQLiteDatabase - Android SDK

7.1.13 Database MYSQL & PHP
jdbc -> mysql - Android Developers | Google Groups
MySQL :: The world's most popular open source database
CodeProject: Storing Images in MySQL using ASP.NET. Free source code and programming help
PHP/MySQL Tutorial - Part 1
104
Copyrighted © 2009: Cerebral
Team Let’s Start Programming
FYPJ - Cerebral Android App Development (Report)

More Related Content

What's hot

Calculator.ppt Andriod Application topic
Calculator.ppt Andriod Application topicCalculator.ppt Andriod Application topic
Calculator.ppt Andriod Application topicnoor ul ain
 
Android technology- Advantages & Limitations
Android technology- Advantages & LimitationsAndroid technology- Advantages & Limitations
Android technology- Advantages & LimitationsVaibhav Dixit
 
Android seminar-presentation
Android seminar-presentationAndroid seminar-presentation
Android seminar-presentationconnectshilpa
 
Mobile Application Development: Hybrid, Native and Mobile Web Apps
Mobile Application Development: Hybrid, Native and Mobile Web AppsMobile Application Development: Hybrid, Native and Mobile Web Apps
Mobile Application Development: Hybrid, Native and Mobile Web AppsPaul Sons
 
Android project report learning np complete
Android project report learning np completeAndroid project report learning np complete
Android project report learning np completeSubha Deb
 
Mobile application testing report
Mobile application testing reportMobile application testing report
Mobile application testing reportQA Madness
 
FINAL APP DEVELOPMENT REPORT -DONE
FINAL APP DEVELOPMENT REPORT -DONEFINAL APP DEVELOPMENT REPORT -DONE
FINAL APP DEVELOPMENT REPORT -DONESasha Zavala
 
Mobile application development
Mobile application developmentMobile application development
Mobile application developmentEric Cattoir
 
Flutter: Future of App Development
Flutter: Future of App DevelopmentFlutter: Future of App Development
Flutter: Future of App Development9 series
 
Introduction to Mobile Application Development
Introduction to Mobile Application DevelopmentIntroduction to Mobile Application Development
Introduction to Mobile Application DevelopmentTharindu Dassanayake
 
My Project Report Documentation with Abstract & Snapshots
My Project Report Documentation with Abstract & SnapshotsMy Project Report Documentation with Abstract & Snapshots
My Project Report Documentation with Abstract & SnapshotsUsman Sait
 
Mobile Application Development
Mobile Application DevelopmentMobile Application Development
Mobile Application Developmentjini james
 
Introduction to Android, Architecture & Components
Introduction to  Android, Architecture & ComponentsIntroduction to  Android, Architecture & Components
Introduction to Android, Architecture & ComponentsVijay Rastogi
 
Mobile Application Development Services-MobileApptelligence
Mobile Application Development Services-MobileApptelligenceMobile Application Development Services-MobileApptelligence
Mobile Application Development Services-MobileApptelligenceMobileapptelligence
 
Introduction to Android
Introduction to Android Introduction to Android
Introduction to Android Ranjith Kumar
 

What's hot (20)

Android presentation slide
Android presentation slideAndroid presentation slide
Android presentation slide
 
Calculator.ppt Andriod Application topic
Calculator.ppt Andriod Application topicCalculator.ppt Andriod Application topic
Calculator.ppt Andriod Application topic
 
Android technology- Advantages & Limitations
Android technology- Advantages & LimitationsAndroid technology- Advantages & Limitations
Android technology- Advantages & Limitations
 
Android seminar-presentation
Android seminar-presentationAndroid seminar-presentation
Android seminar-presentation
 
Mobile Application Development: Hybrid, Native and Mobile Web Apps
Mobile Application Development: Hybrid, Native and Mobile Web AppsMobile Application Development: Hybrid, Native and Mobile Web Apps
Mobile Application Development: Hybrid, Native and Mobile Web Apps
 
Android Report
Android ReportAndroid Report
Android Report
 
Android report
Android reportAndroid report
Android report
 
Android project report learning np complete
Android project report learning np completeAndroid project report learning np complete
Android project report learning np complete
 
Mobile application testing report
Mobile application testing reportMobile application testing report
Mobile application testing report
 
FINAL APP DEVELOPMENT REPORT -DONE
FINAL APP DEVELOPMENT REPORT -DONEFINAL APP DEVELOPMENT REPORT -DONE
FINAL APP DEVELOPMENT REPORT -DONE
 
Mobile application development
Mobile application developmentMobile application development
Mobile application development
 
Flutter: Future of App Development
Flutter: Future of App DevelopmentFlutter: Future of App Development
Flutter: Future of App Development
 
android report
android reportandroid report
android report
 
Introduction to Mobile Application Development
Introduction to Mobile Application DevelopmentIntroduction to Mobile Application Development
Introduction to Mobile Application Development
 
My Project Report Documentation with Abstract & Snapshots
My Project Report Documentation with Abstract & SnapshotsMy Project Report Documentation with Abstract & Snapshots
My Project Report Documentation with Abstract & Snapshots
 
Android.ppt
Android.pptAndroid.ppt
Android.ppt
 
Mobile Application Development
Mobile Application DevelopmentMobile Application Development
Mobile Application Development
 
Introduction to Android, Architecture & Components
Introduction to  Android, Architecture & ComponentsIntroduction to  Android, Architecture & Components
Introduction to Android, Architecture & Components
 
Mobile Application Development Services-MobileApptelligence
Mobile Application Development Services-MobileApptelligenceMobile Application Development Services-MobileApptelligence
Mobile Application Development Services-MobileApptelligence
 
Introduction to Android
Introduction to Android Introduction to Android
Introduction to Android
 

Viewers also liked

(続) Effective SQLite for Android
(続) Effective SQLite for Android(続) Effective SQLite for Android
(続) Effective SQLite for AndroidShinobu Okano
 
Getting Started With ANDROID
Getting Started With ANDROIDGetting Started With ANDROID
Getting Started With ANDROIDAmit Yadav
 
Android Database Tutorial
Android Database TutorialAndroid Database Tutorial
Android Database TutorialPerfect APK
 
Data Handning with Sqlite for Android
Data Handning with Sqlite for AndroidData Handning with Sqlite for Android
Data Handning with Sqlite for AndroidJakir Hossain
 
BroadcastReceivers in Android
BroadcastReceivers in AndroidBroadcastReceivers in Android
BroadcastReceivers in AndroidPerfect APK
 
Evrdi : Social Diary ( iOS and Android )
Evrdi : Social Diary ( iOS and Android )Evrdi : Social Diary ( iOS and Android )
Evrdi : Social Diary ( iOS and Android )Eakapong Kattiya
 

Viewers also liked (7)

(続) Effective SQLite for Android
(続) Effective SQLite for Android(続) Effective SQLite for Android
(続) Effective SQLite for Android
 
Getting Started With ANDROID
Getting Started With ANDROIDGetting Started With ANDROID
Getting Started With ANDROID
 
Android Database Tutorial
Android Database TutorialAndroid Database Tutorial
Android Database Tutorial
 
Data Handning with Sqlite for Android
Data Handning with Sqlite for AndroidData Handning with Sqlite for Android
Data Handning with Sqlite for Android
 
BroadcastReceivers in Android
BroadcastReceivers in AndroidBroadcastReceivers in Android
BroadcastReceivers in Android
 
Sqlite Multiple Table
Sqlite Multiple TableSqlite Multiple Table
Sqlite Multiple Table
 
Evrdi : Social Diary ( iOS and Android )
Evrdi : Social Diary ( iOS and Android )Evrdi : Social Diary ( iOS and Android )
Evrdi : Social Diary ( iOS and Android )
 

Similar to FYPJ - Cerebral Android App Development (Report)

Windows phone 8 guide for android developers
Windows phone 8  guide for android developersWindows phone 8  guide for android developers
Windows phone 8 guide for android developersKhai Le
 
Mobile Friendly Web Services - Thesis
Mobile Friendly Web Services - ThesisMobile Friendly Web Services - Thesis
Mobile Friendly Web Services - ThesisNiko Kumpu
 
Android tutorial lengkap
Android tutorial lengkapAndroid tutorial lengkap
Android tutorial lengkapdimas137
 
Android tutorial points
Android tutorial pointsAndroid tutorial points
Android tutorial pointsbsb_2209
 
Android tutorials@SH Mengal
Android tutorials@SH MengalAndroid tutorials@SH Mengal
Android tutorials@SH MengalSH Mengal
 
phonegapbydissection
phonegapbydissectionphonegapbydissection
phonegapbydissectionDaniel Rhodes
 
PhoneGap by Dissection
PhoneGap by DissectionPhoneGap by Dissection
PhoneGap by DissectionDaniel_Rhodes
 
Synopsis on android nougat
Synopsis on android nougatSynopsis on android nougat
Synopsis on android nougatPooja Maan
 
Android_Programming_Cookbook.pdf
Android_Programming_Cookbook.pdfAndroid_Programming_Cookbook.pdf
Android_Programming_Cookbook.pdfBasemMohammad2
 
Beginning android application development wei meng lee
Beginning android application development wei meng leeBeginning android application development wei meng lee
Beginning android application development wei meng leeHiệp Lê Quang
 
Google app engine
Google app engineGoogle app engine
Google app engineSuraj Mehta
 

Similar to FYPJ - Cerebral Android App Development (Report) (20)

Windows phone 8 guide for android developers
Windows phone 8  guide for android developersWindows phone 8  guide for android developers
Windows phone 8 guide for android developers
 
Mobile Friendly Web Services - Thesis
Mobile Friendly Web Services - ThesisMobile Friendly Web Services - Thesis
Mobile Friendly Web Services - Thesis
 
Android tutorial
Android tutorialAndroid tutorial
Android tutorial
 
Android tutorial
Android tutorialAndroid tutorial
Android tutorial
 
Android tutorial
Android tutorialAndroid tutorial
Android tutorial
 
Android tutorial lengkap
Android tutorial lengkapAndroid tutorial lengkap
Android tutorial lengkap
 
Android tutorial points
Android tutorial pointsAndroid tutorial points
Android tutorial points
 
Android tutorial
Android tutorialAndroid tutorial
Android tutorial
 
Android tutorial
Android tutorialAndroid tutorial
Android tutorial
 
Android tutorials@SH Mengal
Android tutorials@SH MengalAndroid tutorials@SH Mengal
Android tutorials@SH Mengal
 
Android tutorial
Android tutorialAndroid tutorial
Android tutorial
 
phonegapbydissection
phonegapbydissectionphonegapbydissection
phonegapbydissection
 
PhoneGap by Dissection
PhoneGap by DissectionPhoneGap by Dissection
PhoneGap by Dissection
 
Thesis
ThesisThesis
Thesis
 
Synopsis on android nougat
Synopsis on android nougatSynopsis on android nougat
Synopsis on android nougat
 
Android_Programming_Cookbook.pdf
Android_Programming_Cookbook.pdfAndroid_Programming_Cookbook.pdf
Android_Programming_Cookbook.pdf
 
Beginning android application development wei meng lee
Beginning android application development wei meng leeBeginning android application development wei meng lee
Beginning android application development wei meng lee
 
Live chat srs
Live chat srsLive chat srs
Live chat srs
 
Google app engine
Google app engineGoogle app engine
Google app engine
 
Sood shilpa
Sood shilpaSood shilpa
Sood shilpa
 

More from Nehemiah Tan

Testimonial by Pang Nai Kiat
Testimonial by Pang Nai KiatTestimonial by Pang Nai Kiat
Testimonial by Pang Nai KiatNehemiah Tan
 
FYPJ - Cerebral Android App Development (Presentation)
FYPJ - Cerebral Android App Development (Presentation)FYPJ - Cerebral Android App Development (Presentation)
FYPJ - Cerebral Android App Development (Presentation)Nehemiah Tan
 
Testimonial by Adrian Lim
Testimonial by Adrian LimTestimonial by Adrian Lim
Testimonial by Adrian LimNehemiah Tan
 
Testimonial by Tim Bristow
Testimonial by Tim BristowTestimonial by Tim Bristow
Testimonial by Tim BristowNehemiah Tan
 
Testimonial by Ms. Linda Lewis
Testimonial by Ms. Linda LewisTestimonial by Ms. Linda Lewis
Testimonial by Ms. Linda LewisNehemiah Tan
 
Testimonial by Dr. Billy Bai
Testimonial by Dr. Billy BaiTestimonial by Dr. Billy Bai
Testimonial by Dr. Billy BaiNehemiah Tan
 

More from Nehemiah Tan (6)

Testimonial by Pang Nai Kiat
Testimonial by Pang Nai KiatTestimonial by Pang Nai Kiat
Testimonial by Pang Nai Kiat
 
FYPJ - Cerebral Android App Development (Presentation)
FYPJ - Cerebral Android App Development (Presentation)FYPJ - Cerebral Android App Development (Presentation)
FYPJ - Cerebral Android App Development (Presentation)
 
Testimonial by Adrian Lim
Testimonial by Adrian LimTestimonial by Adrian Lim
Testimonial by Adrian Lim
 
Testimonial by Tim Bristow
Testimonial by Tim BristowTestimonial by Tim Bristow
Testimonial by Tim Bristow
 
Testimonial by Ms. Linda Lewis
Testimonial by Ms. Linda LewisTestimonial by Ms. Linda Lewis
Testimonial by Ms. Linda Lewis
 
Testimonial by Dr. Billy Bai
Testimonial by Dr. Billy BaiTestimonial by Dr. Billy Bai
Testimonial by Dr. Billy Bai
 

Recently uploaded

Unblocking The Main Thread Solving ANRs and Frozen Frames
Unblocking The Main Thread Solving ANRs and Frozen FramesUnblocking The Main Thread Solving ANRs and Frozen Frames
Unblocking The Main Thread Solving ANRs and Frozen FramesSinan KOZAK
 
Bluetooth Controlled Car with Arduino.pdf
Bluetooth Controlled Car with Arduino.pdfBluetooth Controlled Car with Arduino.pdf
Bluetooth Controlled Car with Arduino.pdfngoud9212
 
SIP trunking in Janus @ Kamailio World 2024
SIP trunking in Janus @ Kamailio World 2024SIP trunking in Janus @ Kamailio World 2024
SIP trunking in Janus @ Kamailio World 2024Lorenzo Miniero
 
My INSURER PTE LTD - Insurtech Innovation Award 2024
My INSURER PTE LTD - Insurtech Innovation Award 2024My INSURER PTE LTD - Insurtech Innovation Award 2024
My INSURER PTE LTD - Insurtech Innovation Award 2024The Digital Insurer
 
WordPress Websites for Engineers: Elevate Your Brand
WordPress Websites for Engineers: Elevate Your BrandWordPress Websites for Engineers: Elevate Your Brand
WordPress Websites for Engineers: Elevate Your Brandgvaughan
 
Key Features Of Token Development (1).pptx
Key  Features Of Token  Development (1).pptxKey  Features Of Token  Development (1).pptx
Key Features Of Token Development (1).pptxLBM Solutions
 
Designing IA for AI - Information Architecture Conference 2024
Designing IA for AI - Information Architecture Conference 2024Designing IA for AI - Information Architecture Conference 2024
Designing IA for AI - Information Architecture Conference 2024Enterprise Knowledge
 
Beyond Boundaries: Leveraging No-Code Solutions for Industry Innovation
Beyond Boundaries: Leveraging No-Code Solutions for Industry InnovationBeyond Boundaries: Leveraging No-Code Solutions for Industry Innovation
Beyond Boundaries: Leveraging No-Code Solutions for Industry InnovationSafe Software
 
Human Factors of XR: Using Human Factors to Design XR Systems
Human Factors of XR: Using Human Factors to Design XR SystemsHuman Factors of XR: Using Human Factors to Design XR Systems
Human Factors of XR: Using Human Factors to Design XR SystemsMark Billinghurst
 
New from BookNet Canada for 2024: BNC BiblioShare - Tech Forum 2024
New from BookNet Canada for 2024: BNC BiblioShare - Tech Forum 2024New from BookNet Canada for 2024: BNC BiblioShare - Tech Forum 2024
New from BookNet Canada for 2024: BNC BiblioShare - Tech Forum 2024BookNet Canada
 
Are Multi-Cloud and Serverless Good or Bad?
Are Multi-Cloud and Serverless Good or Bad?Are Multi-Cloud and Serverless Good or Bad?
Are Multi-Cloud and Serverless Good or Bad?Mattias Andersson
 
Connect Wave/ connectwave Pitch Deck Presentation
Connect Wave/ connectwave Pitch Deck PresentationConnect Wave/ connectwave Pitch Deck Presentation
Connect Wave/ connectwave Pitch Deck PresentationSlibray Presentation
 
Nell’iperspazio con Rocket: il Framework Web di Rust!
Nell’iperspazio con Rocket: il Framework Web di Rust!Nell’iperspazio con Rocket: il Framework Web di Rust!
Nell’iperspazio con Rocket: il Framework Web di Rust!Commit University
 
My Hashitalk Indonesia April 2024 Presentation
My Hashitalk Indonesia April 2024 PresentationMy Hashitalk Indonesia April 2024 Presentation
My Hashitalk Indonesia April 2024 PresentationRidwan Fadjar
 
Scanning the Internet for External Cloud Exposures via SSL Certs
Scanning the Internet for External Cloud Exposures via SSL CertsScanning the Internet for External Cloud Exposures via SSL Certs
Scanning the Internet for External Cloud Exposures via SSL CertsRizwan Syed
 
Tech-Forward - Achieving Business Readiness For Copilot in Microsoft 365
Tech-Forward - Achieving Business Readiness For Copilot in Microsoft 365Tech-Forward - Achieving Business Readiness For Copilot in Microsoft 365
Tech-Forward - Achieving Business Readiness For Copilot in Microsoft 3652toLead Limited
 
AI as an Interface for Commercial Buildings
AI as an Interface for Commercial BuildingsAI as an Interface for Commercial Buildings
AI as an Interface for Commercial BuildingsMemoori
 
Dev Dives: Streamline document processing with UiPath Studio Web
Dev Dives: Streamline document processing with UiPath Studio WebDev Dives: Streamline document processing with UiPath Studio Web
Dev Dives: Streamline document processing with UiPath Studio WebUiPathCommunity
 

Recently uploaded (20)

Unblocking The Main Thread Solving ANRs and Frozen Frames
Unblocking The Main Thread Solving ANRs and Frozen FramesUnblocking The Main Thread Solving ANRs and Frozen Frames
Unblocking The Main Thread Solving ANRs and Frozen Frames
 
Bluetooth Controlled Car with Arduino.pdf
Bluetooth Controlled Car with Arduino.pdfBluetooth Controlled Car with Arduino.pdf
Bluetooth Controlled Car with Arduino.pdf
 
SIP trunking in Janus @ Kamailio World 2024
SIP trunking in Janus @ Kamailio World 2024SIP trunking in Janus @ Kamailio World 2024
SIP trunking in Janus @ Kamailio World 2024
 
My INSURER PTE LTD - Insurtech Innovation Award 2024
My INSURER PTE LTD - Insurtech Innovation Award 2024My INSURER PTE LTD - Insurtech Innovation Award 2024
My INSURER PTE LTD - Insurtech Innovation Award 2024
 
WordPress Websites for Engineers: Elevate Your Brand
WordPress Websites for Engineers: Elevate Your BrandWordPress Websites for Engineers: Elevate Your Brand
WordPress Websites for Engineers: Elevate Your Brand
 
Key Features Of Token Development (1).pptx
Key  Features Of Token  Development (1).pptxKey  Features Of Token  Development (1).pptx
Key Features Of Token Development (1).pptx
 
Designing IA for AI - Information Architecture Conference 2024
Designing IA for AI - Information Architecture Conference 2024Designing IA for AI - Information Architecture Conference 2024
Designing IA for AI - Information Architecture Conference 2024
 
Beyond Boundaries: Leveraging No-Code Solutions for Industry Innovation
Beyond Boundaries: Leveraging No-Code Solutions for Industry InnovationBeyond Boundaries: Leveraging No-Code Solutions for Industry Innovation
Beyond Boundaries: Leveraging No-Code Solutions for Industry Innovation
 
Hot Sexy call girls in Panjabi Bagh 🔝 9953056974 🔝 Delhi escort Service
Hot Sexy call girls in Panjabi Bagh 🔝 9953056974 🔝 Delhi escort ServiceHot Sexy call girls in Panjabi Bagh 🔝 9953056974 🔝 Delhi escort Service
Hot Sexy call girls in Panjabi Bagh 🔝 9953056974 🔝 Delhi escort Service
 
Human Factors of XR: Using Human Factors to Design XR Systems
Human Factors of XR: Using Human Factors to Design XR SystemsHuman Factors of XR: Using Human Factors to Design XR Systems
Human Factors of XR: Using Human Factors to Design XR Systems
 
Vulnerability_Management_GRC_by Sohang Sengupta.pptx
Vulnerability_Management_GRC_by Sohang Sengupta.pptxVulnerability_Management_GRC_by Sohang Sengupta.pptx
Vulnerability_Management_GRC_by Sohang Sengupta.pptx
 
New from BookNet Canada for 2024: BNC BiblioShare - Tech Forum 2024
New from BookNet Canada for 2024: BNC BiblioShare - Tech Forum 2024New from BookNet Canada for 2024: BNC BiblioShare - Tech Forum 2024
New from BookNet Canada for 2024: BNC BiblioShare - Tech Forum 2024
 
Are Multi-Cloud and Serverless Good or Bad?
Are Multi-Cloud and Serverless Good or Bad?Are Multi-Cloud and Serverless Good or Bad?
Are Multi-Cloud and Serverless Good or Bad?
 
Connect Wave/ connectwave Pitch Deck Presentation
Connect Wave/ connectwave Pitch Deck PresentationConnect Wave/ connectwave Pitch Deck Presentation
Connect Wave/ connectwave Pitch Deck Presentation
 
Nell’iperspazio con Rocket: il Framework Web di Rust!
Nell’iperspazio con Rocket: il Framework Web di Rust!Nell’iperspazio con Rocket: il Framework Web di Rust!
Nell’iperspazio con Rocket: il Framework Web di Rust!
 
My Hashitalk Indonesia April 2024 Presentation
My Hashitalk Indonesia April 2024 PresentationMy Hashitalk Indonesia April 2024 Presentation
My Hashitalk Indonesia April 2024 Presentation
 
Scanning the Internet for External Cloud Exposures via SSL Certs
Scanning the Internet for External Cloud Exposures via SSL CertsScanning the Internet for External Cloud Exposures via SSL Certs
Scanning the Internet for External Cloud Exposures via SSL Certs
 
Tech-Forward - Achieving Business Readiness For Copilot in Microsoft 365
Tech-Forward - Achieving Business Readiness For Copilot in Microsoft 365Tech-Forward - Achieving Business Readiness For Copilot in Microsoft 365
Tech-Forward - Achieving Business Readiness For Copilot in Microsoft 365
 
AI as an Interface for Commercial Buildings
AI as an Interface for Commercial BuildingsAI as an Interface for Commercial Buildings
AI as an Interface for Commercial Buildings
 
Dev Dives: Streamline document processing with UiPath Studio Web
Dev Dives: Streamline document processing with UiPath Studio WebDev Dives: Streamline document processing with UiPath Studio Web
Dev Dives: Streamline document processing with UiPath Studio Web
 

FYPJ - Cerebral Android App Development (Report)

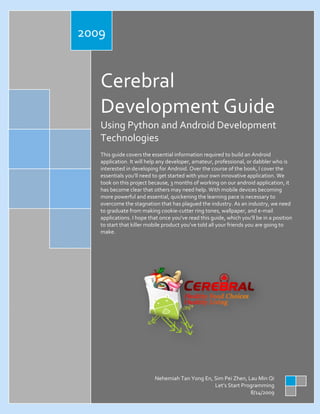
  • 1. 2009 Cerebral Development Guide Using Python and Android Development Technologies This guide covers the essential information required to build an Android application. It will help any developer, amateur, professional, or dabbler who is interested in developing for Android. Over the course of the book, I cover the essentials you’ll need to get started with your own innovative application. We took on this project because, 3 months of working on our android application, it has become clear that others may need help. With mobile devices becoming more powerful and essential, quickening the learning pace is necessary to overcome the stagnation that has plagued the industry. As an industry, we need to graduate from making cookie-cutter ring tones, wallpaper, and e-mail applications. I hope that once you’ve read this guide, which you’ll be in a position to start that killer mobile product you’ve told all your friends you are going to make. Nehemiah Tan Yong En, Sim Pei Zhen, Lau Min Qi Let’s Start Programming 8/14/2009
  • 2. Table of Contents Chapter 1: Introduction 1.0 What You Need to Know to Start .............................................................................................................. 6 1.0.1 Python ................................................................................................................................................................. 6 1.0.2 Android ............................................................................................................................................................... 6 1.0.3 Apache HTTP Server ............................................................................................................................................ 7 1.0.4 SQLite .................................................................................................................................................................. 7 1.0.5 MySQL ................................................................................................................................................................. 7 Chapter 2: Configurations 2.0 Downloading of Software for Python, Eclipse Ganymede, Apache, MySQL .................................................. 8 2.0.1 Python ................................................................................................................................................................ 9 2.0.2 Eclipse Download: Eclipse SDK 3.4.2 .................................................................................................................. 10 2.0.3 Android SDK 1.5 R2 ............................................................................................................................................ 11 2.0.4 Apache HTTP Web Server .................................................................................................................................. 12 2.0.5 MySQL ............................................................................................................................................................... 13 2.0.6 Android USB Windows Installation .................................................................................................................... 16 2.0.7 Google Map API Key Generation ....................................................................................................................... 24 2.0.7.1 Know the location for androiddebug.keystore ........................................................................................... 24 2.0.7.2 In Command Prompt ................................................................................................................................... 27 2.0.7.3 Go to http://code.google.com/android/maps-api-signup.html ................................................................... 28 2.0.8 Environmental Settings .................................................................................................................................... 29 2.0.8.1 Android Environmental Settings ................................................................................................................ 29 2.8.2 Python Environmental Settings ..................................................................................................................... 34 2.0.8.3 Apache Environmental Settings .................................................................................................................. 41 2.0.8.4 MySQL Environmental Settings ................................................................................................................. 46 Chapter 3: Create a Sample Application 3.0 Hello, World Application ......................................................................................................................... 57 3.0.1 Create an AVD .................................................................................................................................................... 57 3.0.2 Create a New Android Project ............................................................................................................................58 3.0.3 Construct the UI ................................................................................................................................................. 61 3.0.4 Run the Application ............................................................................................................................................63 3.0.5 Upgrade the UI to an XML Layout ..................................................................................................................... 64 3.0.6 Debug Your Project ........................................................................................................................................... 68 2 Copyrighted © 2009: Cerebral Team Let’s Start Programming
  • 3. Chapter 4: Android Must-Knows 4.0 User Interfaces ....................................................................................................................................... 70 4.0.1 User Interface Guidelines ................................................................................................................................... 70 4.0.2 Hello Views ........................................................................................................................................................ 70 4.0.3 User Interface XML and Java Codes.................................................................................................................... 70 4.1 Resources and Assets .............................................................................................................................. 70 4.2 The AndroidManifest.xml File .................................................................................................................. 71 4.3 Intents and Intent Filters ......................................................................................................................... 71 4.4 Data Storage .......................................................................................................................................... 72 4.5 Content Providers ................................................................................................................................... 72 4.6 Security and Permissions ........................................................................................................................ 73 4.7 Graphics ................................................................................................................................................ 73 4.8 Audio and Video ..................................................................................................................................... 73 4.9 Locations and Maps ................................................................................................................................ 74 4.10 App Widgets ......................................................................................................................................... 74 Chapter 5: Planning for Cerebral™ 5.0 Conceptualization ................................................................................................................................... 75 5.1 Functionalities ........................................................................................................................................ 75 5.2 Technicalities ......................................................................................................................................... 76 5.3 Functionality Delegation ......................................................................................................................... 76 5.4 Architecture ........................................................................................................................................... 77 Chapter 6: Development for Cerebral™ 6.0 Package Explorer.................................................................................................................................... 78 6.0.1 Source Files ........................................................................................................................................................ 78 6.0.2 Generated Java Files .......................................................................................................................................... 79 6.0.3 Android Library .................................................................................................................................................. 79 6.0.4 Assets ................................................................................................................................................................ 79 6.0.5 Resource Files ................................................................................................................................................... 80 6.0.6 Android Manifest .............................................................................................................................................. 80 6.1 User Interfaces .......................................................................................................................................81 6.1.1 Cerebral™ Icon ................................................................................................................................................... 81 6.1.2 Cerebral™ Splash Screen .................................................................................................................................. 82 6.1.3 Cerebral™ Main Page ......................................................................................................................................... 83 3 Copyrighted © 2009: Cerebral Team Let’s Start Programming
  • 4. 6.1.4 Cerebral™ Main Page (Landscape) .................................................................................................................... 84 6.1.5 Retrieve Food Product Details by Text Input ......................................................................................................85 6.1.6 Retrieve Food Product Details by Barcode Scanning ......................................................................................... 86 6.1.7 Search History ................................................................................................................................................... 88 6.1.8 Alternate Food Product (Text Input).................................................................................................................. 90 6.1.9 Alternate Food Product (Barcode)...................................................................................................................... 91 6.1.10 Android’s Global Positioning System ............................................................................................................... 92 6.1.11 Locate Place by GPS (Text Input) ...................................................................................................................... 93 6.1.12 Locate Place by GPS (Barcode)........................................................................................................................ 94 6.1.13 Cerebral Web™ (Backend) - http://www.cerebralweb.mdesignideas.com/index.php .......................................95 6.1.13.1 Login ..........................................................................................................................................................95 6.1.13.2 Homepage .................................................................................................................................................95 6.13.1.3 Cerebral™ Products .................................................................................................................................. 96 Chapter 7: Internet References 7.0 Informational Foundation...................................................................................................................... 100 7.1 Program Codes ..................................................................................................................................... 100 7.1.0 Python .............................................................................................................................................................. 100 7.1.1 Android ............................................................................................................................................................. 100 7.1.2 Animation......................................................................................................................................................... 100 7.1.3 Intro .................................................................................................................................................................. 100 7.1.4 GPS .................................................................................................................................................................. 101 7.1.5 User Interface ................................................................................................................................................... 102 7.1.6 XML Feeds ........................................................................................................................................................ 102 7.1.7 Barcode ............................................................................................................................................................ 103 7.1.8 Barcode Generators.......................................................................................................................................... 103 7.1.9 Others .............................................................................................................................................................. 103 7.1.10 Google MapKey .............................................................................................................................................. 104 7.1.11 HTC Dream ..................................................................................................................................................... 104 7.1.12 Database SQLite ............................................................................................................................................. 104 7.1.13 Database MYSQL & PHP................................................................................................................................. 104 7.1.14 Anti-Smoking ................................................................................................................................................. 105 7.1.15 WebService ..................................................................................................................................................... 105 7.1.16 Bluetooth........................................................................................................................................................ 105 4 Copyrighted © 2009: Cerebral Team Let’s Start Programming
  • 5. 7.1.17 Android 1.5 ...................................................................................................................................................... 105 7.1.18 Toast .............................................................................................................................................................. 105 7.1.19 Saving File to SD card ..................................................................................................................................... 105 7.1.20 Android FTP ................................................................................................................................................... 105 7.1.21 Dialogs............................................................................................................................................................ 106 7.1.22 Capture Images to SD Card............................................................................................................................. 106 7.1.23 Passing Data Thru Activities ........................................................................................................................... 106 7.1.24 Splash Page .................................................................................................................................................... 106 7.1.25 Storing & Retrieving Images ........................................................................................................................... 106 7.1.26 Python ............................................................................................................................................................ 106 7.1.27 ModMyGPhone............................................................................................................................................... 106 5 Copyrighted © 2009: Cerebral Team Let’s Start Programming
  • 6. Chapter 1: Introduction Before we start, we will have a brief introduction to the technologies we are using in this guide. 1.0 What You Need to Know to Start If you have zero knowledge about the Android Platform then this is even more the guide for you. Throughout the development of our android application, we will be using various technologies and tools. Below are the technologies used: 1.0.1 Python Python is a dynamic object-oriented programming language that can be used for many kinds of software development. It offers strong support for integration with other languages and tools, comes with extensive standard libraries, and can be learned in a few days. In this case, we are using python with Java coding to interface with Apache which is a server to retrieve data. For more information: http://www.python.org/ 1.0.2 Android Android is a software stack for mobile devices that includes an operating system, middleware and key applications. The Android SDK provides the tools and APIs necessary to begin developing applications on the Android platform using the Java programming language. For more information: http://developer.android.com/guide/basics/what-is-android.html Figure 1: Android Architecture 6 Copyrighted © 2009: Cerebral Team Let’s Start Programming
  • 7. 1.0.3 Apache HTTP Server Apache HTTP Server as its name suggest is a server for your android application. The use of the server is to host the database (MySQL) from which you can retrieve your data from. Your laptop will act as a server when the Apache console is run. For more information: http://httpd.apache.org/ 1.0.4 SQLite SQLite is a software library that implements a self-contained, serverless, zero-configuration, transactional SQL database engine. SQLite is the most widely deployed SQL database engine in the world. For more information: http://www.sqlite.org/ 1.0.5 MySQL MySQL is a database management system. A database is a structured collection of data. It may be anything from a simple shopping list to a picture gallery or the vast amounts of information in a corporate network. To add, access, and process data stored in a computer database, you need a database management system such as MySQL Server. Since computers are very good at handling large amounts of data, database management systems play a central role in computing, as standalone utilities, or as parts of other applications. For more information: http://dev.mysql.com/doc/refman/5.0/en/what-is-mysql.html 7 Copyrighted © 2009: Cerebral Team Let’s Start Programming
  • 8. Chapter 2: Configurations 2.0 Downloading of Software for Python, Eclipse Ganymede, Apache, MySQL Go to http://cxa.sit.rp.edu.sg/pages/software.php 8 Copyrighted © 2009: Cerebral Team Let’s Start Programming
  • 9. 2.0.1 Python Dialog Box will appear. Select “Save” to save the installer.    Select the directory to save the installer.     9 Copyrighted © 2009: Cerebral Team Let’s Start Programming
  • 10. 2.0.2 Eclipse Download: Eclipse SDK 3.4.2 Dialog Box will appear. Select “Save” to save the installer. Select the directory to save the installer. 10 Copyrighted © 2009: Cerebral Team Let’s Start Programming
  • 11. 2.0.3 Android SDK 1.5 R2 Dialog Box will appear. Select “Save” to save the installer. Select the directory to save the installer. 11 Copyrighted © 2009: Cerebral Team Let’s Start Programming
  • 12. 2.0.4 Apache HTTP Web Server Go to http://httpd.apache.org/download.cgi to download Apache. Select apache_2.2.13-win32-x86-openssl-0.9.8k.msi Dialog Box will appear. Select “Save” to save the installer. 12 Copyrighted © 2009: Cerebral Team Let’s Start Programming
  • 13. 2.0.5 MySQL Go to http://dev.mysql.com/downloads/ to download MySQL Select MySQL Community Server & Click Download. Click Download. 13 Copyrighted © 2009: Cerebral Team Let’s Start Programming
  • 14. Click “Pick a Mirror”. Click “HTTP”. 14 Copyrighted © 2009: Cerebral Team Let’s Start Programming
  • 15. Dialog Box will appear. Select “Save” to save the installer or “Open” to start the installation. 15 Copyrighted © 2009: Cerebral Team Let’s Start Programming
  • 16. 2.0.6 Android USB Windows Installation Your android phone needs a USB driver in order for your laptop or PC to connect to it. To download the Android USB Windows driver, you can search Google for it. Many sites offer the download. After you have downloaded the driver, connect your Android phone to your laptop or PC. The system will automatically search for the phone driver. If the search is unsuccessful, you have to manually install it as shown below: Select the radio button that says “Install from a list or specific location (Advanced)” Select “Next”. 16 Copyrighted © 2009: Cerebral Team Let’s Start Programming
  • 17. Check the “include this location in the search” checkbox. Click “Browse” to browse for the android driver folder. Navigate and select the android driver folder. Click “OK” 17 Copyrighted © 2009: Cerebral Team Let’s Start Programming
  • 18. Click “Next” Wizard searching for Android driver. 18 Copyrighted © 2009: Cerebral Team Let’s Start Programming
  • 19. Installation of Driver. Installation successful, click “Finish”. 19 Copyrighted © 2009: Cerebral Team Let’s Start Programming
  • 20. Go to Eclipse -> Right click on any working projects-> Run as-> Select run configuration. 20 Copyrighted © 2009: Cerebral Team Let’s Start Programming
  • 21. Select “Target” 21 Copyrighted © 2009: Cerebral Team Let’s Start Programming
  • 22. Leave the default settings and Select run to proceed. 22 Copyrighted © 2009: Cerebral Team Let’s Start Programming
  • 23. If the android driver is successfully installed, you will see the Phone’s Serial Number with a green tick signifying that the phone is online. Select the phone and double click on it to run. 23 Copyrighted © 2009: Cerebral Team Let’s Start Programming
  • 24. 2.0.7 Google Map API Key Generation To configure Google API key, first you have to: Run command prompt 2.0.7.1 Know the location for androiddebug.keystore Go to the default directory where you have stored your .android debug.keystore Select the address for the directory: Example: C:Documents and SettingsL306c07.androiddebug.keystore 24 Copyrighted © 2009: Cerebral Team Let’s Start Programming
  • 25. This would be the address directory for your .androiddebug.keystore Or alternatively you can select window toolbars in Eclipse and select preferences to search for the location for .androiddebug.keystore Select “Preferences” 25 Copyrighted © 2009: Cerebral Team Let’s Start Programming
  • 26. Select Build This would be the directory for your .androiddebug.keystore 26 Copyrighted © 2009: Cerebral Team Let’s Start Programming
  • 27. 2.0.7.2 In Command Prompt Navigate the directory to C:Program FilesJavajre6bin Paste: keytool.exe -list -alias androiddebugkey -keystore "C:Documents and SettingsL306c07.androiddebug.keystore" -storepass android -keypass android Change the directory where you store .androiddebug.keystore in this case is "C:Documents and SettingsL306c07.androiddebug.keystore" A certificate's MD5 fingerprint will be generated Example: 44:7A:96:96:53:2E:E8:58:2B:1F:9D:39:31:7E:2A:57 27 Copyrighted © 2009: Cerebral Team Let’s Start Programming
  • 28. 2.0.7.3 Go to http://code.google.com/android/maps-api-signup.html Paste the certificate's MD5 fingerprint generated by the command prompt into the” My certificate's MD5 fingerprint:” Example: 44:7A:96:96:53:2E:E8:58:2B:1F:9D:39:31:7E:2A:57 Select the checkbox. Click on generate API Key. Paste Example: 44:7A:96:96:53:2E:E8:58:2B:1F:9D:39:31:7E:2A:57 28 Copyrighted © 2009: Cerebral Team Let’s Start Programming
  • 29. 2.0.8 Environmental Settings 2.0.8.1 Android Environmental Settings 1. Unzip downloaded ‘android-sdk-windows-1.5_r2’ and ‘eclipse’ files 2. Install the Java Runtime Environment Click on the ‘Accept’ button to start the installation. Installing… 29 Copyrighted © 2009: Cerebral Team Let’s Start Programming
  • 30. Click on the ‘Finish’ button to complete the installation. 3. Click on the ‘eclipse’ folder and run the ‘eclipse.exe’ file Use the default workspace and click the ‘OK’ button. 30 Copyrighted © 2009: Cerebral Team Let’s Start Programming
  • 31. Click here to process to the workbench. 4. To install Android SDK 1.5 R2 in Eclipse Click on the ‘Window’ button and choose the ‘Preferences’ button. 31 Copyrighted © 2009: Cerebral Team Let’s Start Programming
  • 32. Choose the ‘Android’ tab and click on the ‘Browse’ button. Choose the path for the ‘android-sdk-windows1.5_r2’ folder and click the ‘OK’ button. 32 Copyrighted © 2009: Cerebral Team Let’s Start Programming
  • 33. Click the “Apply” Button Click the “OK” Button. 33 Copyrighted © 2009: Cerebral Team Let’s Start Programming
  • 34. 2.8.2 Python Environmental Settings Select “Install for all users” Click “Next” Select directory to install python. Click “Next” 34 Copyrighted © 2009: Cerebral Team Let’s Start Programming
  • 35. Click “Next” Installing… 35 Copyrighted © 2009: Cerebral Team Let’s Start Programming
  • 36. Click “Finish” to complete installation. Configuring python settings in eclipse Go to Eclipse-> window toolbars-> preferences 36 Copyrighted © 2009: Cerebral Team Let’s Start Programming
  • 37. Select “New…” Enter default Interpreter name as Python, then select “Browse…” 37 Copyrighted © 2009: Cerebral Team Let’s Start Programming
  • 38. Select python.exe from the respective directory. Click “Open”. .Click “OK”. 38 Copyrighted © 2009: Cerebral Team Let’s Start Programming
  • 39. .Click “OK”. 39 Copyrighted © 2009: Cerebral Team Let’s Start Programming
  • 40. Select ok button and the configuration is completed. 40 Copyrighted © 2009: Cerebral Team Let’s Start Programming
  • 41. 2.0.8.3 Apache Environmental Settings Unzip and install apache_2.2.11-win32-x86-openssl-0.9.8i.zip Select “Next” Select “I accept the terms in the license agreement. Click “Next” 41 Copyrighted © 2009: Cerebral Team Let’s Start Programming
  • 42. Click “Next” Enter Network Domain: localhost Server name: nyp.edu.sg Administrator email address: adminNo@nyp.edu.sg Select Port 80 radio button. Select Next button to continue. 42 Copyrighted © 2009: Cerebral Team Let’s Start Programming
  • 43. Click “Next” Click “Next” 43 Copyrighted © 2009: Cerebral Team Let’s Start Programming
  • 44. Click “Install” Installing… 44 Copyrighted © 2009: Cerebral Team Let’s Start Programming
  • 45. Select finish to complete installation 45 Copyrighted © 2009: Cerebral Team Let’s Start Programming
  • 46. 2.0.8.4 MySQL Environmental Settings 1. Unzip ‘mysql-essential-5.1.37-win32.msi’, ‘mysql-connector-odbc-5.1.5-win32’ and ‘mysql-gui-tools-5.0-r12win32’ files 2. Run the MySQL Server 5.1 installer (mysql-essential-5.1.37-win32.msi) Click on the ‘Next’ button to continue with the installation. Leave the setting to the default (Typical Setting) and click on the ‘Next’ to continue with installation. 46 Copyrighted © 2009: Cerebral Team Let’s Start Programming
  • 47. Click on the ‘Install’ button to start the installation. Installing… 47 Copyrighted © 2009: Cerebral Team Let’s Start Programming
  • 48. Click on the ‘Next’ button to continue with the installation. Click on the ‘Next’ button to continue with the installation. 48 Copyrighted © 2009: Cerebral Team Let’s Start Programming
  • 49. Uncheck “Configure the MySQL Server now” Click on the ‘Finish’ button to complete the installation. 3. Run the MySQL Connector/ODBC 5.1 installer (mysql-connector-odbc-5.1.5-win32) to establish a connection between the MySQL and ODBC System Data Source. Click on the ‘Next’ button to continue with the installation. 49 Copyrighted © 2009: Cerebral Team Let’s Start Programming
  • 50. Leave the setting to the default (Typical Setting) and click on the ‘Next’ to continue with installation. Click on the ‘Install’ button to start the installation. 50 Copyrighted © 2009: Cerebral Team Let’s Start Programming
  • 51. Installing… Click on the ‘Finish’ button to complete the installation. 51 Copyrighted © 2009: Cerebral Team Let’s Start Programming
  • 52. 4. Run the MySQL Tool for 5.0 installer (mysql-gui-tools-5.0-r12-win32) to manage MySQL databases through the graphical interface Click on the ‘Next’ button to continue with the installation. Choose the “I accept the terms in the license agreement” option. Click on the ‘Next’ button to continue with the installation. 52 Copyrighted © 2009: Cerebral Team Let’s Start Programming
  • 53. Click on the ‘Next’ button to continue with the installation. Leave the setting to the default (Complete Setup) and click on the ‘Next’ to continue with installation. 53 Copyrighted © 2009: Cerebral Team Let’s Start Programming
  • 54. Click “Install” Installing… 54 Copyrighted © 2009: Cerebral Team Let’s Start Programming
  • 55. Click on the ‘Next’ button to continue with the installation. Click on the ‘Next’ button to continue with the installation. 55 Copyrighted © 2009: Cerebral Team Let’s Start Programming
  • 56. Click “Finish” to complete the installation. 56 Copyrighted © 2009: Cerebral Team Let’s Start Programming
  • 57. Chapter 3: Create a Sample Application If you proceed to this chapter, we assumed that you have configured the above programs correctly in chapter 2. We shall now proceed to make your first sample application to get a taste of how android is like. 3.0 Hello, World Application 3.0.1 Create an AVD In this tutorial, you will run your application in the Android Emulator. Before you can launch the emulator, you must create an Android Virtual Device (AVD). An AVD defines the system image and device settings used by the emulator. To create an AVD, use the "android" tool provided in the Android SDK. Open a command prompt or terminal, navigate to the tools/ directory in the SDK package and execute: android create avd --target 2 --name my_avd The tool now asks if you would like to create a custom hardware profile. For the time being, press Return to skip it ("no" is the default response). That's it. This configures an AVD named "my_avd" that uses the Android 1.5 platform. The AVD is now ready for use in the emulator. In the above command, the --target option is required and specifies the deployment target to run on the emulator. The --name option is also required and defines the name for the new AVD. Navigate to the directory of your android SDK. Type in the required statement and press “Enter”. Figure 2: Create Android Virtual Device (AVD) 57 Copyrighted © 2009: Cerebral Team Let’s Start Programming
  • 58. To learn more about how to use AVDs and the options available to you, refer to the Android Virtual Devices document. 3.0.2 Create a New Android Project After you've created an AVD, the next step is to start a new Android project in Eclipse. 1. From Eclipse, select File > New > Project. If the ADT Plug-in for Eclipse has been successfully installed, the resulting dialog should have a folder labeled "Android" which should contain "Android Project". (After you create one or more Android projects, an entry for "Android XML File" will also be available.) 2. Select "Android Project" and click Next. Figure 3: Create New Android Project 58 Copyrighted © 2009: Cerebral Team Let’s Start Programming
  • 59. 3. Fill in the project details with the following values: • Project name: HelloAndroid • Application name: Hello, Android • Package name: com.example.helloandroid (or your own private namespace) • Create Activity: HelloAndroid • Min SDK Version: 2 Click Finish. Figure 4: Enter data in the relevant fields 59 Copyrighted © 2009: Cerebral Team Let’s Start Programming
  • 60. Here is a description of each field: Project Name This is the Eclipse Project name — the name of the directory that will contain the project files. Application Name This is the human-readable title for your application — the name that will appear on the Android device. Package Name This is the package namespace (following the same rules as for packages in the Java programming language) that you want all your source code to reside under. This also sets the package name under which the stub Activity will be generated. Your package name must be unique across all packages installed on the Android system; for this reason, it's very important to use a standard domain-style package for your applications. The example above uses the "com.example" namespace, which is a namespace reserved for example documentation — when you develop your own applications, you should use a namespace that's appropriate to your organization or entity. Create Activity This is the name for the class stub that will be generated by the plug-in. This will be a subclass of Android's Activity class. An Activity is simply a class that can run and do work. It can create a UI if it chooses, but it doesn't need to. As the checkbox suggests, this is optional, but an Activity is almost always used as the basis for an application. Min SDK Version This value specifies the minimum API Level required by your application. If the API Level entered here matches the API Level provided by one of the available targets, then that Build Target will be automatically selected (in this case, entering "2" as the API Level will select the Android 1.1 target). With each new version of the Android system image and Android SDK, there have likely been additions or changes made to the APIs. When this occurs, a new API Level is assigned to the system image to regulate which applications are allowed to be run. If an application requires an API Level that is higher than the level supported by the device, then the application will not be installed. Other fields: The checkbox for "Use default location" allows you to change the location on disk where the project's files will be generated and stored. "Build Target" is the platform target that your application will be compiled against (this should be selected automatically, based on your Min SDK Version). Notice that the "Build Target" you've selected uses the Android 1.1 platform. This means that your application will be compiled against the Android 1.1 platform library. If you recall, the AVD created above runs on the Android 1.5 platform. These don't have to match; Android applications are forward-compatible, so an application built against the 1.1 platform library will run normally on the 1.5 platform. The reverse is not true. Your Android project is now ready. It should be visible in the Package Explorer on the left. Open the HelloAndroid.java file, located inside HelloAndroid > src > com.example.helloandroid). It should look like this: package com.example.helloandroid; 60 Copyrighted © 2009: Cerebral Team Let’s Start Programming
  • 61. import android.app.Activity; import android.os.Bundle; public class HelloAndroid extends Activity { /** Called when the activity is first created. */ @Override public void onCreate(Bundle savedInstanceState) { super.onCreate(savedInstanceState); setContentView(R.layout.main); } } Notice that the class is based on the Activity class. An Activity is a single application entity that is used to perform actions. An application may have many separate activities, but the user interacts with them one at a time. The onCreate() method will be called by the Android system when your Activity starts — it is where you should perform all initialization and UI setup. An activity is not required to have a user interface, but usually will. Now let's modify some code! 3.0.3 Construct the UI Take a look at the revised code below and then make the same changes to your HelloAndroid class. The bold items are lines that have been added. package com.android.helloandroid; import android.app.Activity; import android.os.Bundle; import android.widget.TextView; public class HelloAndroid extends Activity { /** Called when the activity is first created. */ @Override 61 Copyrighted © 2009: Cerebral Team Let’s Start Programming
  • 62. public void onCreate(Bundle savedInstanceState) { super.onCreate(savedInstanceState); TextView tv = new TextView(this); tv.setText("Hello, Android"); setContentView(tv); } } Tip: An easy way to add import packages to your project is to press Ctrl-Shift-O (Cmd-Shift-O, on Mac). This is an Eclipse shortcut that identifies missing packages based on your code and adds them for you. An Android user interface is composed of hierarchies of objects called Views. A View is a drawable object used as an element in your UI layout, such as a button, image, or (in this case) a text label. Each of these objects is a subclass of the View class and the subclass that handles text is TextView. In this change, you create a TextView with the class constructor, which accepts an Android Context instance as its parameter. A Context is a handle to the system; it provides services like resolving resources, obtaining access to databases and preferences, and so on. The Activity class inherits from Context, and because your HelloAndroid class is a subclass of Activity, it is also a Context. So, you can pass this as your Context reference to the TextView. Next, you define the text content with setText(CharSequence) setText(). Finally, you pass the TextView to setContentView() in order to display it as the content for the Activity UI. If your Activity doesn't call this method, then no UI is present and the system will display a blank screen. There it is — "Hello, World" in Android! The next step, of course, is to see it running. 62 Copyrighted © 2009: Cerebral Team Let’s Start Programming
  • 63. 3.0.4 Run the Application The Eclipse plug-in makes it very easy to run your applications: 1. Select Run > Run. 2. Select "Android Application". To learn more about creating and editing run configurations in Eclipse, refer to Developing In Eclipse, with ADT. The Eclipse ADT will automatically create a new run configuration for your project and the Android Emulator will automatically launch. Once the emulator is booted up, your application will appear after a moment. You should now see something like this: The "Hello, Android" you see in the grey bar is actually the application title. The Eclipse plug-in creates this automatically (the string is defined in theres/values/strings.xml file and referenced by your AndroidManifest.xml file). The text below the title is the actual text that you have created in the TextView object. That concludes the basic "Hello World" tutorial, but you should continue reading for some more valuable information about developing Android applications. 63 Copyrighted © 2009: Cerebral Team Let’s Start Programming
  • 64. 3.0.5 Upgrade the UI to an XML Layout The "Hello, World" example you just completed uses what is called a "programmatic" UI layout. This means that you constructed and built your application's UI directly in source code. If you've done much UI programming, you're probably familiar with how brittle that approach can sometimes be: small changes in layout can result in big sourcecode headaches. It's also very easy to forget to properly connect Views together, which can result in errors in your layout and wasted time debugging your code. That's why Android provides an alternate UI construction model: XML-based layout files. The easiest way to explain this concept is to show an example. Here's an XML layout file that is identical in behavior to the programmaticallyconstructed example: <?xml version="1.0" encoding="utf-8"?> <TextView xmlns:android="http://schemas.android.com/apk/res/android" android:layout_width="fill_parent" android:layout_height="fill_parent" android:text="@string/hello"/> The general structure of an Android XML layout file is simple: it's a tree of XML elements, wherein each node is the name of a View class (this example, however, is just one View element). You can use the name of any class that extends View as an element in your XML layouts, including custom View classes you define in your own code. This structure makes it very easy to quickly build up UIs, using a more simple structure and syntax than you would use in a programmatic layout. This model is inspired by the web development model, wherein you can separate the presentation of your application (its UI) from the application logic used to fetch and fill in data. In the above XML example, there's just one View element: the TextView, which has four XML attributes. Here's a summary of what they mean: Attribute Meaning xmlns:android This is an XML namespace declaration that tells the Android tools that you are going to refer to common attributes defined in the Android namespace. The outermost tag in every Android layout file must have this attribute. android:layout_width This attribute defines how much of the available width on the screen this View should consume. In this case, it's the only View so you want it to take up the entire screen, which is what a value of "fill_parent" means. android:layout_height This is just like android:layout_width, except that it refers to available screen height. 64 Copyrighted © 2009: Cerebral Team Let’s Start Programming
  • 65. android:text This sets the text that the TextView should display. In this example, you use a string resource instead of a hard-coded string value. The hello string is defined in the res/values/strings.xml file. This is the recommended practice for inserting strings to your application, because it makes the localization of your application to other languages graceful, without need to hard-code changes to the layout file. For more information, see Resources and Internationalization. These XML layout files belong in the res/layout/ directory of your project. The "res" is short for "resources" and the directory contains all the non-code assets that your application requires. In addition to layout files, resources also include assets such as images, sounds, and localized strings. Landscape layout When you want a different design for landscape, put your layout XML file inside /res/layout-land. Android will automatically look here when the layout changes. Without this special landscape layout defined, Android will stretch the default layout. The Eclipse plugin automatically creates one of these layout files for you: main.xml. In the "Hello World" application you just completed, this file was ignored and you created a layout programmatically. This was meant to teach you more about the Android framework, but you should almost always define your layout in an XML file instead of in your code. The following procedures will instruct you how to change your existing application to use an XML layout. 1. In the Eclipse Package Explorer, expand the /res/layout/ folder and open main.xml (once opened, you might need to click the "main.xml" tab at the bottom of the window to see the XML source). Replace the contents with the following XML: <?xml version="1.0" encoding="utf-8"?> <TextView xmlns:android="http://schemas.android.com/apk/res/android" android:layout_width="fill_parent" android:layout_height="fill_parent" android:text="@string/hello"/> Save the file. 2. Inside the res/values/ folder, open strings.xml. This is where you should save all default text strings for your user interface. If you're using Eclipse, then ADT will have started you with two strings, hello and app_name. Revise hello to something else. Perhaps "Hello, Android! I am a string resource!" The entire file should now look like this: <?xml version="1.0" encoding="utf-8"?> <resources> <string name="hello">Hello, Android! I am a string resource!</string> 65 Copyrighted © 2009: Cerebral Team Let’s Start Programming
  • 66. <string name="app_name">Hello, Android</string> </resources> 3. Now open and modify your HelloAndroid class use the XML layout. Edit the file to look like this: package com.example.helloandroid; import android.app.Activity; import android.os.Bundle; public class HelloAndroid extends Activity { /** Called when the activity is first created. */ @Override public void onCreate(Bundle savedInstanceState) { super.onCreate(savedInstanceState); setContentView(R.layout.main); } } When you make this change, type it by hand to try the code-completion feature. As you begin typing "R.layout.main" the plugin will offer you suggestions. You'll find that it helps in a lot of situations. Instead of passing setContentView() a View object, you give it a reference to the layout resource. The resource is identified as R.layout.main, which is actually a compiled object representation of the layout defined in /res/layout/main.xml. The Eclipse plugin automatically creates this reference for you inside the project's R.java class. If you're not using Eclipse, then the R.java class will be generated for you when you run Ant to build the application. (More about the R class in a moment.) Now re-run your application — because you've created a launch configuration, all you need to do is click the green arrow icon to run, or select Run > Run History > Android Activity. Other than the change to the TextView string, the application looks the same. After all, the point was to show that the two different layout approaches produce identical results. Tip: Use the shortcut Ctrl-F11 (Cmd-Shift-F11, on Mac) to run your currently visible application. Continue reading for an introduction to debugging and a little more information on using other IDEs. When you're ready to learn more, read Application Fundamentals for an introduction to all the elements that make Android applications work. Also refer to the Developer's Guide introduction page for an overview of the Dev Guide documentation. 66 Copyrighted © 2009: Cerebral Team Let’s Start Programming
  • 67. 3.5.1 R class In Eclipse, open the file named R.java (in the gen/ [Generated Java Files] folder). It should look something like this: package com.example.helloandroid; public final class R { public static final class attr { } public static final class drawable { public static final int icon=0x7f020000; } public static final class layout { public static final int main=0x7f030000; } public static final class string { public static final int app_name=0x7f040001; public static final int hello=0x7f040000; } } A project's R.java file is an index into all the resources defined in the file. You use this class in your source code as a sort of short-hand way to refer to resources you've included in your project. This is particularly powerful with the codecompletion features of IDEs like Eclipse because it lets you quickly and interactively locate the specific reference you're looking for. It's possible yours looks slightly different than this (perhaps the hexadecimal values are different). For now, notice the inner class named "layout", and its member field "main". The Eclipse plugin noticed the XML layout file named main.xml and generated a class for it here. As you add other resources to your project (such as strings in the res/values/string.xml file or drawables inside the res/drawable/ directory) you'll see R.java change to keep up. When not using Eclipse, this class file will be generated for you at build time (with the Ant tool). You should never edit this file by hand. 67 Copyrighted © 2009: Cerebral Team Let’s Start Programming
  • 68. 3.0.6 Debug Your Project The Android Plug-in for Eclipse also has excellent integration with the Eclipse debugger. To demonstrate this, introduce a bug into your code. Change your HelloAndroid source code to look like this: package com.android.helloandroid; import android.app.Activity; import android.os.Bundle; public class HelloAndroid extends Activity { /** Called when the activity is first created. */ @Override public void onCreate(Bundle savedInstanceState) { super.onCreate(savedInstanceState); Object o = null; o.toString(); setContentView(R.layout.main); } } This change simply introduces a NullPointerException into your code. If you run your application again, you'll eventually see this: Figure 5: NullPointerException Press "Force Quit" to terminate the application and close the emulator window. 68 Copyrighted © 2009: Cerebral Team Let’s Start Programming
  • 69. To find out more about the error, set a breakpoint in your source code on the line Object o = null; (double-click on the marker bar next to the source code line). Then select Run > Debug History > Hello, Android from the menu to enter debug mode. Your app will restart in the emulator, but this time it will suspend when it reaches the breakpoint you set. You can then step through the code in Eclipse's Debug Perspective, just as you would for any other application. Figure 6: Debugging For more information: http://developer.android.com/guide/tutorials/hello-world.html 69 Copyrighted © 2009: Cerebral Team Let’s Start Programming
  • 70. Chapter 4: Android Must-Knows 4.0 User Interfaces 4.0.1 User Interface Guidelines The Android UI team has begun developing guidelines for the interaction and visual design of Android applications. You may want to read through these guidelines before creating your application design. Some of user interfaces are icons, widgets, activities, tasks and menus. For more information: http://developer.android.com/guide/practices/ui_guidelines/index.html 4.0.2 Hello Views This collection of "Hello World"-style tutorials is designed to get you quickly started with common Android Views and widgets. The aim is to let you copy and paste these kinds of boring bits so you can focus on developing the code that makes your Android application rock. For more information: http://developer.android.com/guide/tutorials/views/index.html 4.0.3 User Interface XML and Java Codes In an Android application, the user interface is built using View and ViewGroup objects. There are many types of views and view groups, each of which is a descendant of the View class. View objects are the basic units of user interface expression on the Android platform. The View class serves as the base for subclasses called "widgets," which offer fully implemented UI objects, like text fields and buttons. The ViewGroup class serves as the base for subclasses called "layouts," which offer different kinds of layout architecture, like linear, tabular and relative. A View object is a data structure whose properties store the layout parameters and content for a specific rectangular area of the screen. A View object handles its own measurement, layout, drawing, focus change, scrolling, and key/gesture interactions for the rectangular area of the screen in which it resides. As an object in the user interface, a View is also a point of interaction for the user and the receiver of the interaction events. For more information: http://developer.android.com/guide/topics/ui/index.html The above site includes: Declaring Layout, Creating Menus, Creating Dialogs, Handling UI Events, Notifying the User, Applying Styles and Themes, Building Custom Components, Binding to Data with AdapterView, Common Layout Objects, How Android Draws Views. 4.1 Resources and Assets Resources are an integral part of an Android application. In general, these are external elements that you want to include and reference within your application, like images, audio, video, text strings, layouts, themes, etc. Every Android application contains a directory for resources (res/) and a directory for assets (assets/). Assets are used less often, because their applications are far fewer. You only need to save data as an asset when you need to read the raw 70 Copyrighted © 2009: Cerebral Team Let’s Start Programming
  • 71. bytes. The directories for resources and assets both reside at the top of an Android project tree, at the same level as your source code directory (src/). The difference between "resources" and "assets" isn't much on the surface, but in general, you'll use resources to store your external content much more often than you'll use assets. The real difference is that anything placed in the resources directory will be easily accessible from your application from the R class, which is compiled by Android. Whereas, anything placed in the assets directory will maintain its raw file format and, in order to read it, you must use the AssetManager to read the file as a stream of bytes. So keeping files and data in resources (res/) makes them easily accessible. Within the documents of this topic, you'll find information on the kinds of standard resources that are typically used in an Android application and how to reference them from you code. Resources and Internationalization is where you should start, to learn more about how Android utilizes project resources. Then, the Available Resource Types document offers a summary of various resource types and a reference to their specifications. For more information: http://developer.android.com/guide/topics/resources/index.html 4.2 The AndroidManifest.xml File Every application must have an AndroidManifest.xml file (with precisely that name) in its root directory. The manifest presents essential information about the application to the Android system, information the system must have before it can run any of the application's code. Among other things, the manifest does the following: • • • • • • • • It names the Java package for the application. The package name serves as a unique identifier for the application. It describes the components of the application — the activities, services, broadcast receivers, and content providers that the application is composed of. It names the classes that implement each of the components and publishes their capabilities (for example, which Intent messages they can handle). These declarations let the Android system know what the components are and under what conditions they can be launched. It determines which processes will host application components. It declares which permissions the application must have in order to access protected parts of the API and interact with other applications. It also declares the permissions that others are required to have in order to interact with the application's components. It lists the Instrumentation classes that provide profiling and other information as the application is running. These declarations are present in the manifest only while the application is being developed and tested; they're removed before the application is published. It declares the minimum level of the Android API that the application requires. It lists the libraries that the application must be linked against. For more information: http://developer.android.com/guide/topics/manifest/manifest-intro.html 4.3 Intents and Intent Filters Three of the core components of an application — activities, services, and broadcast receivers — are activated through messages, called intents. Intent messaging is a facility for late run-time binding between components in the same or 71 Copyrighted © 2009: Cerebral Team Let’s Start Programming
  • 72. different applications. The intent itself, an Intent object, is a passive data structure holding an abstract description of an operation to be performed — or, in the case of broadcasts, a description of something that has happened and is being announced. There are separate mechanisms for delivering intents to each type of component: • An Intent object is passed to Context.startActivity() orActivity.startActivityForResult() to launch an activity or get an existing activity to do something new. • An Intent object is passed to Context.startService() to initiate a service or deliver new instructions to an ongoing service. Similarly, an intent can be passed to Context.bindService() to establish a connection between the calling component and a target service. It can optionally initiate the service if it's not already running. • Intent objects passed to any of the broadcast methods (such as Context.sendBroadcast(), Context.sendOrderedBroadcast(), orContext.sendStickyBroadcast()) are delivered to all interested broadcast receivers. Many kinds of broadcasts originate in system code. In each case, the Android system finds the appropriate activity, service, or set of broadcast receivers to respond to the intent, instantiating them if necessary. There is no overlap within these messaging systems: Broadcast intents are delivered only to broadcast receivers, never to activities or services. An intent passed tostartActivity() is delivered only to an activity, never to a service or broadcast receiver, and so on. For more information: http://developer.android.com/guide/topics/intents/intents-filters.html 4.4 Data Storage A typical desktop operating system provides a common file system that any application can use to store files that can be read by other applications (perhaps with some access control settings). Android uses a different system: On Android, all application data (including files) are private to that application. However, Android also provides a standard way for an application to expose its private data to other applications — through content providers. A content provider is an optional component of an application that exposes read/write access to the application's data, subject to whatever restrictions it might impose. Content providers implement a standard syntax for requesting and modifying data, and a standard mechanism for reading the returned data. Android supplies a number of content providers for standard data types, such as image, audio, and video files and personal contact information. For more information on using content providers, see a separate document, Content Providers. Whether or not you want to export your application's data to others, you need a way to store it. Android provides the following four mechanisms for storing and retrieving data: Preferences, Files, Databases, and Network. For more information: http://developer.android.com/guide/topics/data/data-storage.html 4.5 Content Providers Content providers store and retrieve data and make it accessible to all applications. They're the only way to share data across applications; there's no common storage area that all Android packages can access. 72 Copyrighted © 2009: Cerebral Team Let’s Start Programming
  • 73. Android ships with a number of content providers for common data types (audio, video, images, personal contact information, and so on). You can see some of them listed in the android.provider package. You can query these providers for the data they contain (although, for some, you must acquire the proper permission to read the data). If you want to make your own data public, you have two options: You can create your own content provider (a ContentProvider subclass) or you can add the data to an existing provider — if there's one that controls the same type of data and you have permission to write to it. 4.6 Security and Permissions Android is a multi-process system, in which each application (and parts of the system) runs in its own process. Most security between applications and the system is enforced at the process level through standard Linux facilities, such as user and group IDs that are assigned to applications. Additional finer-grained security features are provided through a "permission" mechanism that enforces restrictions on the specific operations that a particular process can perform, and per-URI permissions for granting ad-hoc access to specific pieces of data. 4.7 Graphics Android graphics are powered by a custom 2D graphics library and OpenGL ES 1.0 for high performance 3D graphics. The most common 2D graphics APIs can be found in the drawable package. OpenGL APIs are available from the Khronos OpenGL ES package, plus some Android OpenGL utilities. When starting a project, it's important to consider exactly what your graphical demands will be. Varying graphical tasks are best accomplished with varying techniques. For example, graphics and animations for a rather static application should be implemented much differently than graphics and animations for an interactive game or 3D rendering. For more information: http://developer.android.com/guide/topics/graphics/index.html 4.8 Audio and Video The Android platform offers built-in encoding/decoding for a variety of common media types, so that you can easily integrate audio, video, and images into your applications. Accessing the platform's media capabilities is fairly straightforward — you do so using the same intents and activities mechanism that the rest of Android uses. Android lets you play audio and video from several types of data sources. You can play audio or video from media files stored in the application's resources (raw resources), from standalone files in the filesystem, or from a data stream arriving over a network connection. To play audio or video from your application, use theMediaPlayer class. The platform also lets you record audio and video, where supported by the mobile device hardware. To record audio or video, use the MediaRecorder class. Note that the emulator doesn't have hardware to capture audio or video, but actual mobile devices are likely to provide these capabilities, accessible through the MediaRecorder class. For a list of media formats for which Android offers built-in support, see the Android Media Formats appendix. For more information: http://developer.android.com/guide/topics/media/index.html 73 Copyrighted © 2009: Cerebral Team Let’s Start Programming
  • 74. 4.9 Locations and Maps Location- and maps-based applications and services are compelling for mobile device users. You can build these capabilities into your applications using the classes of the android.location package and the Google Maps external library. For more information: http://developer.android.com/guide/topics/location/index.html 4.10 App Widgets App Widgets are miniature application views that can be embedded in other applications (such as the Home screen) and receive periodic updates. These views are referred to as Widgets in the user interface, and you can publish one with an App Widget provider. An application component that is able to hold other App Widgets is called an App Widget host. The screenshot below shows the Music App Widget. For more information: http://developer.android.com/guide/topics/appwidgets/index.html 74 Copyrighted © 2009: Cerebral Team Let’s Start Programming
  • 75. Chapter 5: Planning for Cerebral™ We hope that you have a better picture about the Android platform after reading through the first four chapters and creating the sample application. Now we are going to show you how we create our application Cerebral™. 5.0 Conceptualization Before you start creating any android application, you need to know what is the objective of creating the application and its target audience. For Cerebral™, the target audience is the ex-smokers group. Since it is a well known fact that ex-smokers tend to gain weight easily while quitting smoking, our application is able to let the ex-smokers make a wiser and more informed choice on food. 5.1 Functionalities You need to know what are the functionalities that you want to implement in your application. In Cerebral™, some functionalities are Retrieving food details, Search History, Locate Place. Noting these down and forming concept maps, you will be able to see a clearer picture. Retrieve Food Details Text Input Locate Place GPS Search History View last 20 searches Cerebral Web Backend Interface and Database Barcode Figure 7: Functionalities Concept Map 75 Copyrighted © 2009: Cerebral Team Let’s Start Programming
  • 76. 5.2 Technicalities When we talk about technicalities, we are going deeper into the each functionality. For example in Cerebral™, the Locate Place functionality: Front-End Code •Contains method to get user’s current location. •Contains method to get top 3 nearest locations. GPS •Centers the user’s current location. PyODBC •To Establish Database connection via SQL queries. •Contains the Location Table. •Location’s Latitude & Longitude, Address, Other Details. •Locations that are displayed means they do sell and have stock for that product. MySQL Figure 8: Locate Place Technicalities 5.3 Functionality Delegation Delegate the functions to your team members to ensure all functions are covered. Retrieve Food Details Text Input Locate Place Nehemiah Min Qi Pei Zhen View last 20 searches Interface and Database Min Qi Min Qi Pei Zhen Nehemiah Cerebral Web Backend GPS Barcode Search History Pei Zhen Nehemiah Figure 9: Functionality Delegation 76 Copyrighted © 2009: Cerebral Team Let’s Start Programming
  • 77. 5.4 Architecture Knowing the Architecture of the application enables you to be clear how data is transferred and retrieved. This is especially important if you are interfacing with a real server. Figure 10: Cerebral Architecture 77 Copyrighted © 2009: Cerebral Team Let’s Start Programming
  • 78. Chapter 6: Development for Cerebral™ 6.0 Package Explorer This is how the whole project will look like in eclipse. It consists of the Source files, Generated Java Files, the Android Library being used (Android 1.1), assets, resources (res), Android Manifest & project default properties. Figure 11: Package Explorer 6.0.1 Source Files This is how the Source files look like. The Java classes are located in each individual package. It is done in this way to make the whole project more organized. Figure 12: Source Files 78 Copyrighted © 2009: Cerebral Team Let’s Start Programming
  • 79. 6.0.2 Generated Java Files R.java class is automatically generated by the aapt tool from the resource data it found. It should not be modified by hand. Figure 13: Generated Java Files 6.0.3 Android Library The Android Library shows the different functionality that the Android Platform offers e.g. database, location etc. You can use either Android Library 1.1 or 1.5 with version 1.5 being the latest version. Figure 14: Android Library 1.1 6.0.4 Assets Assets are not commonly used by most applications. You can overlook this. 79 Copyrighted © 2009: Cerebral Team Let’s Start Programming
  • 80. 6.0.5 Resource Files The Resource files consist of a few folders, namely, drawable(graphics), layout (portrait layouts), layout-land(landscaped layouts), *raw(media files), values(string values), *xml(preferences). * indicates special folders catered for barcode technology only Figure 15: Resource Files 6.0.6 Android Manifest The Android Manifest is used to declare the various activities and intent filters of the application. For example, if you want to load a page, you must declare the name of the java class file(.java) along with the xml layout(.xml) of that java class. Figure 16: Android Manifest 80 Copyrighted © 2009: Cerebral Team Let’s Start Programming
  • 81. 6.1 User Interfaces 6.1.1 Cerebral™ Icon The Cerebral™ Application Icon is created in accordance with Android UI Guidelines using Photoshop CS3. It is saved as PNG file transparency format and stored in the res/drawable folder. The Icon is declared in the Android Manifest: <application android:icon="@drawable/cerebral"> Figure 17: Cerebral Application Icon 81 Copyrighted © 2009: Cerebral Team Let’s Start Programming
  • 82. 6.1.2 Cerebral™ Splash Screen The Cerebral™ Splash Screen is similar to a loading page of any application. It shows an image on start and removes it after a specific time to show the first page of an application. The splash screen java class is located in the com.cerebral.main package. The layout is located under res/layout. The Image and the timing of the splash screen are editable. Figure 18: Cerebral Splash Screen 82 Copyrighted © 2009: Cerebral Team Let’s Start Programming
  • 83. 6.1.3 Cerebral™ Main Page The Cerebral™ Main Page consists of 3 main functions: • • • Search Food Product by Text Input Search Food Product by Barcode Search History The User can press any of the buttons to select functionality. The Main Page java class is located in the com.cerebral.main package. The layout is located under res/layout. Figure 19: Cerebral Main Page 83 Copyrighted © 2009: Cerebral Team Let’s Start Programming
  • 84. 6.1.4 Cerebral™ Main Page (Landscape) Figure 20: Cerebral Main Page (Landscape) The Cerebral™ Main Page (Landscape) has the same functions as the previous page. The only difference is when the User slides the Android Phone (HTC Dream), the screen will change to the landscape orientation. The Main Page java class is still located in the com.cerebral.main package (same place as the previous. The layout is located under res/layout-land. You need to add a piece of code into the Main activity in the Android Manifest: Add: android:screenOrientation="user" To: activity android:name=".Main" “User” means that the screen will orientate to the correctly according to whether the phone’s keyboard is shown or not. 84 Copyrighted © 2009: Cerebral Team Let’s Start Programming
  • 85. 6.1.5 Retrieve Food Product Details by Text Input Description When the User clicks on the “Text” Button, he is brought to this page. He keys in the product name and presses the search button. The details of the product are displayed including its Benefit Level. Java Codes: TextInput.java The product name is extracted from the textbox and set into a variable. The variable is then passed to the python file using the following java codes: String url = "http://192.168.0.136:8080/codeXtreme/cerebrulum.py?s earchFoodText="+searchWord.getText(); Python Codes The python file consists of SQL statements which are executed: SELECT FoodDetails FROM food WHERE FoodName='" + searchFoodText + "'" Android Manifest Figure 21: Retrieve Food Product Details by Text Input XML File (Layout) The XML File is text.xml. TextView, Buttons & ScrollView are used. <activity android:name=".TextInput" android:label="Input Food Product" android:configChanges="keyboardHidden|orientation" android:screenOrientation="user"> <intent-filter> <action android:name="android.intent.action.TEXT" /> <category android:name="android.intent.category.LAUNCHER" /> </intent-filter> </activity> 85 Copyrighted © 2009: Cerebral Team Let’s Start Programming
  • 86. 6.1.6 Retrieve Food Product Details by Barcode Scanning Description When the User clicks on the “Barcode” Button, he is brought to this page. He will be able to scan 1D (Serial) and 2D(QR) barcodes of the food products. The barcodes will be converted to serial numbers etc by the embedded decoders in Cerebral™. Java Codes: com.google.zxing Figure 22: Before Scanning Barcode The packages that are named “com.google.zxing” all belongs to the barcode functionality. The Barcode codes are provided by “ZXing” or “Zebra Crossing” and modified by Team LSP©. The activation of the camera is programmed in CameraPreview.java class. The passing of the serial number from the com.google.zxing package to the com.cerebral.barcode package is programmed in the com.google.zxing.client.android’s Intents.java class and com.cerebral.barcode’s SerialNoBarcode.java class. The passing of the serial number from the inner class to the outer class is crucial as we need to use the serial number to search for the product’s details. Hence, the serial number is passed and processed in the python file. Figure 23: Scanning Barcode 86 Copyrighted © 2009: Cerebral Team Let’s Start Programming
  • 87. Python Codes The python file consists of SQL statements which are executed: SELECT FoodDetails FROM food WHERE SerialNo='" + searchFoodSerial + "'" Figure 24: After Scanning Barcode Android Manifest Activation of Barcode Functionality <activity android:name="com.google.zxing.client.android.CaptureActivity " android:screenOrientation="landscape" android:configChanges="orientation|keyboardHidden" android:theme="@android:style/Theme.NoTitleBar.Fullscreen"> Scanning Functionality <intent-filter> <action android:name="com.google.zxing.client.android.SCAN"/> <category android:name="android.intent.category.DEFAULT"/> </intent-filter> Encoding Functionality <activity android:name="com.google.zxing.client.android.EncodeActivity" > <intent-filter> <action android:name="com.google.zxing.client.android.ENCODE"/> <category android:name="android.intent.category.DEFAULT"/> </intent-filter> Figure 25: Barcode Product Details XML File (Layout) A few XML files are used due to the complexity of the barcode functionality. They are scan.xml, econde.xml and textbarcode.xml. Retrieve Food Product Details buy Barcode <activity android:name="com.cerebral.barcode.SerialNoBarcode" android:label="Barcode Details" android:configChanges="keyboardHidden|orientation" android:screenOrientation="portrait"> <intent-filter> <action android:name="android.intent.action.TEXTBARCODE" /> <category android:name="android.intent.category.LAUNCHER" /> </intent-filter> </activity> 87 Copyrighted © 2009: Cerebral Team Let’s Start Programming
  • 88. 6.1.7 Search History Description Clicking here will search for the food product details and also will create a record of the food product name in the SQLite database. Figure 26: Text Input Page For this functionality, you can use the Notepad Tutorial on the Android Developers website (http://developer.android.com/guide/tutorials/note pad/index.html) as a guide. This functionality is basically developed from the Notepad Tutorial and certain changes have been made to accommodate to our application which in this case to save the search history of the user. This will help to reduce the time of the user used to search for the same food product and keep track of what the user has searched so that when the user forgets what he/she has searched and he/she want to know what he/she has searched can used that as a reference. Java Codes: com.cerebral.history, com.cerebral.main Search History Functionality has been divided into three different java files which is located at our project (Cerebral) in ‘src’ folder in ‘com.cerebral.history’ package (History.java and SearchHistoryDbAdapter.java) and ‘com.cerebral.main’ package (TextInput.java) in the Package Explorer View. History.java History.java file is used to create a list of food products based on what the user searched. When the search history records have reached the maximum limit, this java file allows the user to clear the search history records. Figure 27: Search History SearchHistoryDbAdapter.java SearchHistoryDbAdapter.java file is used to store the CRUD (create, retrieve, update, delete) methods of the database. In addition, the basic database information (database name, table name, database version) are also defined in this file. 88 Copyrighted © 2009: Cerebral Team Let’s Start Programming
  • 89. Java Codes: com.cerebral.history, com.cerebral.main TextInput.java The main function of TextInput.java file is to retrieve the information of the food product through the usage of python. The roles of the Search History in here are to create a record of the food product name, do some validations on the food product searched (for example, if the text field to input the name of the food product is blank, it will not save a blank record) and create a limitation for the number of search history records to be stored in the database (for example, when the number of search history records in the database have reached twenty then the user will not be allowed to search for food product until the search history of the food product is cleared. Figure 28: Clear History Android Manifest <activity android:name="com.cerebral.history.History" android:label="Search History"> <intent-filter> <action android:name="android.intent.action.ROW" /> <category android:name="android.intent.category.LAUNCHER" /> </intent-filter> </activity> XML File (Layout) Several layouts have been used to support the functionality of Search History. They are located at our application (Cerebral™) in ‘res’ folder in ‘layout’ package (list.xml, main.xml, row.xml, text.xml) in the Package Explorer View. Figure 29: History Cleared 89 Copyrighted © 2009: Cerebral Team Let’s Start Programming
  • 90. 6.1.8 Alternate Food Product (Text Input) Description Alternate Food Product functionality is to allow the User to make wiser decisions when buying food. Alternate Food products have a higher benefit level than those the User has searched. Java Codes: com.cerebral.altproducts, com.cerebral.barcode Click on the “look for alternate food products button” to display alternate food products (Figure 31) Alternate Food Product functionality has been divided to three different java files which are located at our project (Cerebral) in ‘src’ folder in ‘com.cerebral.altproducts’ package (altProducts.java) and ‘com.cerebral.barcode’ package (TextInputBarcode.java) , ‘com.cerebral.main’ package (TextInput.java) in the Package Explorer View. TextInput.java The main function of TextInput.java file is to retrieve the information of the food product through the usage of python. Users would enter and search for the food product .After the food detail is displayed, users can click on “look for alternate food products” (Figure 30) to search for alternate food product that’s available in the store. Figure 31 would be shown upon clicking. Figure 30: Search Food Product Details altProducts.java altProducts.java file is used to retrieve alternate list of food products based on what the user searched. This will help to users search for healthy food products that are recommended in the stores. With a higher benefit level, users can have more choices in selecting healthier products from different stores. Python Codes The python file consists of SQL statements which are executed: ("SELECT alternateproduct.alternateProduct FROM alternateproduct where SerialNo=SerialNo and FoodName='" + searchWord+"'") XML File (Layout) Several layouts have been used to support the functionality of alternate food products. They are located at our project (Cerebral) in ‘res’ folder in ‘layout’ package (altmedicine.xml, text.xml, textbarcode.xml) in the Package Explorer View. Figure 31: Alternate Food Products 90 Copyrighted © 2009: Cerebral Team Let’s Start Programming
  • 91. 6.1.9 Alternate Food Product (Barcode) Description Alternate Food Product functionality is to allow the User to make wiser decisions when buying food. Alternate Food products have a higher benefit level than those the User has searched. Java Codes: com.cerebral.altproducts, com.cerebral.barcode Click on the “look for alternate food products button” to display alternate food products (Figure 33) SerialNoBarcode.java SerialNoBarcode.java file is used to scan barcode and retrieve food name through the usage of python code. The alternate healthy products in the database will be retrieved using the input of serial number. This allows users to make a wiser decision when buying the food products. After scanning, Users would be able to view the product details. (Figure 32 will be shown). =Figure 32: Barcode Details altProducts.java altProducts.java file is used to retrieve alternate list of food products based on what the user searched. This will help to users search for healthy food products that are recommended in the stores. With a higher benefit level, users can have more choices in selecting healthier products from different stores. Python Codes The python file consists of SQL statements which are executed: ("SELECT alternateproduct.alternateProduct FROM alternateproduct where SerialNo=SerialNo and SerialNo='" + searchWord+"'") Figure 33: Alternate Food Products Alternate Food Product functionality has been divided to three different java files which are located at our project (Cerebral) in ‘src’ folder in ‘com.cerebral.altproducts’ package (altProducts.java) and ‘com.cerebral.barcode’ package (SerialNoBarcode.java) in the Package Explorer View. XML File (Layout) Several layouts have been used to support the functionality of alternate food products. They are located at our project (Cerebral) in ‘res’ folder in ‘layout’ package (altmedicine.xml, barcodedetails.xml, textbarcode.xml) in the Package Explorer View. 91 Copyrighted © 2009: Cerebral Team Let’s Start Programming
  • 92. 6.1.10 Android’s Global Positioning System Java Codes: Google Map.java GoogleMap.java file is used to retrieve and display a list of food products based on the search input by the user. The Google map displays the whole country and city. They can click on the zoom button to zoom in to view the roads and district to find their way to the location where sells the food that they want. This is efficient as it helps users to know and find their way to the shop. MapLocation.java MapLocation.java is able to display the current location. It also displays the location that sells alternate healthy food retrieved from the database. In this case is Toa Payoh HDB Hub. By clicking on the bubble the map location name will be displayed (Figure 35) Figure 34: Google Map with Marked Locations MapLocationOverlay.java MapLocationOverlay.java is used to create and retrieve more than one marker on the map. In this case is Toa Payoh HDB Hub and Singapore General Hospital as shown on the map. This helps users to be able to locate more than 1 place that sells the food products that they want.( Figure 34) Figure 35: Zooming In on Location 92 Copyrighted © 2009: Cerebral Team Let’s Start Programming
  • 93. 6.1.11 Locate Place by GPS (Text Input) Description This functionality is to show the user the places that sell a particular food product that he/she has searched by Text Input. Information will be shown on a map. This will help to reduce the search time of the user in locating the place. Java Codes: com.cerebral.locate, com.cerebral.main Click on the “Locate Place” to display the locations (Figure 35) Figure 36: Locate Food Product Click on marker to show the name of the place that sells the product. Search History Functionality has been divided into five different java files which is located at our project (Cerebral) in ‘src’ folder in ‘com.cerebral.locate’ package (GoogleMap.java, MapLocation.java, SearchHistoryDbAdapter.java), ‘com.cerebral.barcode’ package (SerialNoBarcode) and ‘com.cerebral.main’ package (TextInput.java) in the Package Explorer View. TextInput.java The main function of TextInput.java file is to retrieve the information of the food product through the usage of python. The role of the GPS in here is to bring intent over to the Google Map which in this case is to bring the food name over to the Google Map. The method is shown below: public void Locate(){ String sw = searchWord.getText().toString(); Intent myIntent = new Intent(getBaseContext(),GoogleMap.class); myIntent.putExtra("sw", sw); startActivityForResult(myIntent, 0); } XML File (Layout) Python Codes Python code for googleMap.java using Text Input Several layouts have been used to support the functionality of alternate food products. They are located at our project (Cerebral) in ‘res’ folder in ‘layout’ package (google_map.xml, text.xml, textbarcode.xml) in the Package Explorer View. ("SELECT location.locationName FROM location, food where food.SerialNo=location.SerialNo and food.FoodName='"+ searchWord+"'") Figure 37: Google Map with Marked Locations 93 Copyrighted © 2009: Cerebral Team Let’s Start Programming
  • 94. 6.1.12 Locate Place by GPS (Barcode) Description This functionality is to show the user the places that sell a particular food product that he/she has searched by barcode. Information will be shown on a map. This will help to reduce the search time of the user in locating the place. Java Codes: com.cerebral.locate, com.cerebral.main Click on the “Locate Place” to display the locations (Figure 35) Figure 38: Locate Food Product Click on marker to show the name of the place that sells the product. Search History Functionality has been divided into five different java files which is located at our project (Cerebral) in ‘src’ folder in ‘com.cerebral.locate’ package (GoogleMap.java, MapLocation.java, SearchHistoryDbAdapter.java), ‘com.cerebral.barcode’ package (SerialNoBarcode) and ‘com.cerebral.main’ package (TextInput.java) in the Package Explorer View. SerialNoBarcode.java The main function of SerialNoBarcode.java file is used to scan barcode and retrieve food name using serial Number stored in the database. The role of the GPS in here is to bring intent over to the Google Map which in this case is to bring the food name over to the Google Map. The method is shown below: public void Locate(){ String sw = medicineTitle.getText().toString(); Intent myIntent = new Intent(getBaseContext(),GoogleMap.class); myIntent.putExtra("sw", sw); startActivityForResult(myIntent, 0); } } XML File (Layout) Python Codes Python code for googleMap.java using SerialNoBarcode Several layouts have been used to support the functionality of alternate food products. They are located at our project (Cerebral) in ‘res’ folder in ‘layout’ package (google_map.xml, text.xml, textbarcode.xml) in the Package Explorer View. ("SELECT location.locationName FROM location, food where food.SerialNo=location.SerialNo and food.SerialNo='"+ searchWord+"'") Figure 39: Google Map with Marked Locations 94 Copyrighted © 2009: Cerebral Team Let’s Start Programming
  • 95. 6.1.13 Cerebral Web™ (Backend) http://www.cerebralweb.mdesignideas.com/index.php 6.1.13.1 Login Description Enter Username and Password. Click “Login” Button to enter site. User Login Date, Time and Username are displayed. Figure 40: Homepage & Login 6.1.13.2 Homepage Cerebral Products Creating, Retrieving, Updating and Deleting of Food products are done here. Figure 41: Homepage 95 Copyrighted © 2009: Cerebral Team Let’s Start Programming
  • 96. 6.13.1.3 Cerebral™ Products Add New Product Click to add new food product. Figure 42: Retrieval of Food Products 96 Copyrighted © 2009: Cerebral Team Let’s Start Programming
  • 97. Add New Product Enter data into Serial No, Food Name, Food Description, Benefit Level, Location Name, Location Description & Alternate Product fields. After which you click “Add Data” to store the food product in MySQL Database. Figure 43: Addition of Food Products Update Product Click “Edit” button to edit product details. 97 Copyrighted © 2009: Cerebral Team Let’s Start Programming
  • 98. Update Product Edit data in Serial No, Food Name, Food Description, Benefit Level, Location Name, Location Description & Alternate Product fields. After which you click “Update Data” to store the updated food product in MySQL Database. Figure 44: Update Food Products 98 Copyrighted © 2009: Cerebral Team Let’s Start Programming
  • 99. Delete Button Click the “Delete” button to delete the selected products. Delete Product Figure 45: Delete Food Products Click the “OK” button to confirm the deletion of the products. Select Product Select the food products to delete. 99 Copyrighted © 2009: Cerebral Team Let’s Start Programming
  • 100. Chapter 7: Internet References 7.0 Informational Foundation Health Promotion Board Healthier Dining - Healthier Dining HowStuffWorks "How Your Brain Works" SPRING Singapore - Enabling Enterprise 7.1 Program Codes 7.1.0 Python pyodbc - Project Hosting on Google Code 7.1.1 Android 7.1.2 Animation Android Animation 101 7.1.3 Intro What is API? - A Word Definition From the Webopedia Computer Dictionary Hello, World | Android Developers Android FAQs Package Index | Android Developers Develop Android applications with Eclipse developerlife - Tutorials Designer Android Main Page - ModMyGPhone Wiki How to Install APK Files on Android Device Emulator The Busy Coder's Guide to Android Development Creating Menus | Android Developers Taking screenshots on an Android-based phone Common Tasks and How to Do Them in Android | Android Developers Google Android (article from Wired) Ebooks Download | Acrobat PDF Files 100 Copyrighted © 2009: Cerebral Team Let’s Start Programming
  • 101. Android Developer Challenge winners Projects tagged ‘feed’, ‘java’, and ‘rss’ - Ohloh Learning Android Source Code Examples | High Quality Android Tutorials The 10 Best Google Android Applications 7.1.4 GPS Google Mobile | Maps for your phone Displaying Google Maps in the Android Emulator Using Google Maps in Android Needful things … » Blog Archiv » Location Based Services on Android - Part 1/3 - MyLocationOverlay Using Google Maps in Android | mobiForge Needful things … » Blog Archiv » Location Based Services on Android - Part 2/3 - ItemizedOverlay Using Google Maps in Android | mobiForge Journeys in a Mobile World: Android:- Location Based Services [android-beginners] Re: How do I get Current GPS Location? Google Maps Latitude, Longitude Popup Working with Google Android’s Maps (aka Search for Pizza) « Show me the code! – By Davanum Srinivas Google Mobile - Maps Map Overlay | Android Competency Center Hello, MapView | Android Developers | Overlays GPS You and Friends ActivityUserMap TourGuide - Virtual Sightseeing | Hello Android FrontPage/Tutorials/Map View - Mobdev Wiki Koders Code Search: GuideActivity.java - Java Android Tutorial 2: “Hit” testing on a View (MapView) « Pocket Journey Clickable Map Markers - Android Developers | Google Groups Programming with Android Part 3 - Building WikiWhere | 2Lines Software 101 Copyrighted © 2009: Cerebral Team Let’s Start Programming
  • 102. Sign Up for the Android Maps API - Android Maps API - Google Code 7.1.5 User Interface A Visual Guide to Android Graphical User Interface Widgets Hello, Form Stuff | Android Developers DroidDraw : Graphical User Interface Editor for Android Cell Phone Development and Programming android-feed-reader - Google Code Building a Menu for your Android (V1.0 R1) App « Kah – The Developer How to add text in ImageButton - Jeff Sharkey Tutorial 1: Transparent Panel (Linear Layout) On MapView (Google Map) « Pocket Journey Android Developers Blog: Android Layout Tricks #3: Optimize with stubs Android Developers Blog: User Interface Gallery Tutorial with File Location | High Quality Android Tutorials [android-developers] Re: Justify a TextView?: msg#00571 AndroidDevelopers Orientation In Android | Steven Elliott's Website Android Essentials - Google Books Why is my list black? An Android optimization | Go-Android How to display wifi IP address - Android Community Forums developerlife - Tutorials » Android ListView and custom adapter 7.1.6 XML Feeds NewsDroid RSS Reader | Hello Android android.sax | Android Developers Writing a SAX-based RSS and Podcast Parser | High Quality Android Tutorials Build a mobile RSS reader Tutorial harnesses Android for XML, RSS Latest Map Of H1N1 Swine Flu Outbreaks WHO | Influenza A(H1N1) Medical and Health RSS/XML News Feeds 102 Copyrighted © 2009: Cerebral Team Let’s Start Programming
  • 103. Health and Medical RSS Feeds and News Syndication from MedicineNet - Index Rss4Medics Directory - Respiratory Medicine Feeds XML.com: What Is RSS Programming a SAX-RSS Parser In 30 Minutes Flat - CodeCall Programming Forum rsslight android-rss android-aggregator Working with XML on Android Code Beach - Android Source Code NewsDroid RSS Reader | Hello Android FeedR News Reader Android App Review by AndroidTapp.com | Android Tapp. Android App Reviews 7.1.7 Barcode Obtaining a Live Camera Preview in Android Barcode Scanner Apps for Android Reviewed - Advertising Lab: future of advertising and advertising technology Howstuffworks "How UPC Bar Codes Work" zxing - Google Code Official Google Mobile Blog: Google Product Search for Android now with Barcode Scanning Camera Depreciation android.hardware.CameraDevice - Android SDK How can I fix my camera on my phone? - Android Market Help Android barcode scanner in 6 lines of Python code 7.1.8 Barcode Generators Free DataMatrix Barcode Image Online Generator ~ IDAutomation QR-Code Generator Free Barcode Generator (with Multiple Formats) - by Barcoding Inc. 7.1.9 Others Google Phone FAQ: Android Platform for Mobile Phones @ Mobility Today Slow Loading of Android Emulator - PC World 103 Copyrighted © 2009: Cerebral Team Let’s Start Programming
  • 104. Icons and MenuItem for Android | mgmblog.com The Pragmatic Bookshelf | Hello, Android Android Application | Open Handset Magazine Android -- Download Squad Create / Delete AVD Android 0.9 API 改变中文总结 | Android 开发网 Pushpin Deprecation - Wikipedia, the free encyclopedia 7.1.10 Google MapKey Setting the JAVA_HOME environment variable 7.1.11 HTC Dream You must mount SD card to transfer files after RC29 update Android Apps Installed on internal mem Install Apps to Phone using CMD How to Install APK files on your Google Android Phone 7.1.12 Database SQLite [android-developers] Re: Including SQLite database with application ReignDesign | Blog - Using your own SQLite database in Android applications HELP: Recommendation for Initial Load of Large Data SQLite Database? - Android Developers | Google Groups How to ship an Android application with a database? - Stack Overflow [android-beginners] Re: Store prepopulated sqlite : msg#00491 AndroidBeginners infiniteZest.com: Understanding SQLite packages in Android android.database.sqlite.SQLiteDatabase - Android SDK 7.1.13 Database MYSQL & PHP jdbc -> mysql - Android Developers | Google Groups MySQL :: The world's most popular open source database CodeProject: Storing Images in MySQL using ASP.NET. Free source code and programming help PHP/MySQL Tutorial - Part 1 104 Copyrighted © 2009: Cerebral Team Let’s Start Programming