
Recommended
More Related Content
Similar to NEXLIGHT CRC6100 PROGRAMMING MANUAL
Similar to NEXLIGHT CRC6100 PROGRAMMING MANUAL (20)
Recently uploaded
Recently uploaded (20)
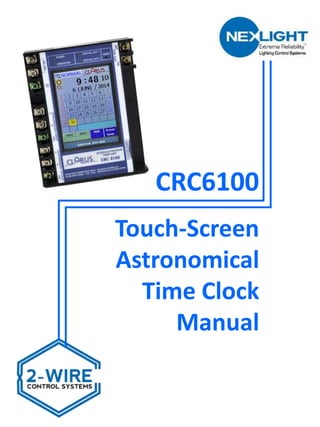
NEXLIGHT CRC6100 PROGRAMMING MANUAL
- 2. Table of Contents… Time Clock Overview. . . . . . . . . . . . . . . . . . . . . . . . . 3 Screen Overview . . . . . . . . . . . . . . . . . . . . . . . . . . . . 4 Setting Daylight Savings Time (DST). . . . . . . . . . . . . 5 Setting Date/Time. . . . . . . . . . . . . . . . . . . . . . . . . . . 6 Astronomical Settings. . . . . . . . . . . . . . . . . . . . . . . . 8 Setting System Settings. . . . . . . . . . . . . . . . . . . . . . . 9 Creating Schedules . . . . . . . . . . . . . . . . . . . . . . . . . . 10 Creating Repeat Schedules. . . . . . . . . . . . . . . . . . . . 13 Editing Special Days. . . . . . . . . . . . . . . . . . . . . . . . . . 17 CRC6100 Time Clock Manual V.1 2
- 3. Time Clock Overview CRC6100 Time Clock Manual V.1 3 Data bus Connection 24 VAC Power Input Additional Time clock Connections Touch Screen Interface miniSD Backup Indicator LED’s: • Power: Lit when sufficient voltage is supplied • Operation: Lit when time clock is not in standby NOTE: Must not be in Standby for timer functions to operate • Special Day 1: Flashing green when time clock is in Special Day 1 operation • Special Day 2: Flashing green when time clock is in Special Day 2 operation
- 4. Screen Overview CRC6100 Time Clock Manual V.1 4 Time and Date Special Day – 1 ------ Control address LCD Auto Off Setting button Special Day – 2 ------ Control address Stand-By ------ Control address Accessing System Menu: To access the system menu, push and hold for at least 2 seconds. The graphic to the right shows the different menus available. Status Icon Area 1. Day/Night status 2. Repeat mode status 3. DST is set 4. Error status 5. If clock is set for 12 hour time standard, screen will display AM or PM +1H AM PM Window for system status indication Override Operation (Push and Hold) • If color is Purple: The selection is active • If color is Green: the selection is inactive Calendar View - Yellow Tile: Current Day - Blue Date: Saturday - Red Date: Sunday - Red Date with Underline: SPD1 - Purple Date with Underline: SPD2 NORMAL 1. Schedule 2. Repeat 3. SPD 5. Local 4. Date/Time 6. DST 7. System 8. Backup 9. SYNC
- 5. CRC6100 Time Clock Manual V.1 5 Setting Daylight Savings Time… 1. Push and hold the NORMAL button for at least two seconds. 2. The screen will go to the 1. Schedule screen as shown to the right. 3. To access the Daylight Savings setting menu, use the arrow up button or push the menu access button until the 6. DST menu is shown. Select Fixed or Float by touching this box Fixed: select if setting by date and time Float: select if setting by month, week, and day Daylight savings time START settings* Daylight savings time END settings* * To change settings: 1. Touch box that needs to be changed 2. Use up or down arrow buttons to select correct setting 3. Once all changes have been made, push and hold SET to confirm changes To place the time clock to follow DST: 1. Make sure that the function is Enabled (NOTE: must be in Enabled mode to make changes 1. If the box shows disabled, touch it and it will cycle to enabled. 2. Push and hold SET to confirm change.
- 6. Setting Date/Time… CRC6100 Time Clock Manual V.1 6 1. Push and hold the NORMAL button for at least two seconds. 2. The screen will go to the 1. Schedule screen as shown to the right. 3. To access the Date/Time setting menu, use the arrow up button or push the menu access button until the 4.Date/Time menu is shown. 4. To set whether the time should be displayed in 12 or 24 hour time: 1. To cycle through options, touch this box 2. If 24 hour time: make the box blank 3. If 12 hour time: select either AM or PM in the box depending on the location’s time 4. Push and hold SET to confirm change 5. To set the hour of the day: 1. Highlight the hour box by touching it 2. Use the up or down arrows to select desired hour 3. Push and hold SET to confirm change 6. To set the minutes of the day: 1. Highlight the minute box by touching it 2. Use the up or down arrows to select desired minutes 3. Push and hold SET to confirm change 7. To set the seconds of the day: 1. Highlight the seconds box by touching it 2. Use the up or down arrows to select desired seconds 3. Push and hold SET to confirm change 5. 6. 7.
- 7. Setting Date/Time… CRC6100 Time Clock Manual V.1 7 8. To set the month of the date: 1. Highlight the month box by touching it 2. Use the up or down arrows to select desired month 3. Press and hold SET to confirm change 9. To set the year of the date: 1. Highlight the year box by touching it 2. Use the up or down arrows to select desired year 3. Press and hold SET to confirm change 10. To set the day of the date: 1. Highlight the desired date by touching it in the calendar view (after month and year have been set). It should be highlighted purple 2. Push and hold SET to confirm change (previous date will show in yellow until time clock is put back in NORMAL mode) 11. To put the time clock back in NORMAL mode: 1. Push the 4.Date/Time button until it cycles through to the NORMAL screen
- 8. Setting Astronomical Settings… CRC6100 Time Clock Manual V.1 8 1. Push and hold the NORMAL button for at least two seconds. 2. The screen will go to the 1. Schedule screen as shown to the right. 3. To access the Local Setting Menu, use the arrow up button or push the menu access button until the 5. Local menu is shown. Set the latitude, longitude and UTC offset using one of the methods below. 4. To set Latitude, Longitude, and UTC offset based of preset city: 1. Set time zone to correct continent area 1. Touch to highlight 2. Use up or down arrow to select desired continent 2. Set closest city to current area 1. Touch to highlight 2. Use up or down arrow to select desired city 3. Push and hold SET to confirm changes 5. To set Latitude, Longitude, and UTC offset (time zone) based of set location*: 1. Set Latitude 1. Touch each area of latitude; use up and down arrows to select desired number 2. Set Longitude 1. Touch each area of longitude; use up and down arrows to select desired number 3. Set UTC Offset 1. Touch each area of UTC offset; use up and down arrows to select desired number 4. Push and hold SET to confirm changes *To find the latitude, longitude, and UTC offset of desired location, please use google.
- 9. CRC6100 Time Clock Manual V.1 9 Setting System Settings… 1. Push and hold the NORMAL button for at least two seconds. 2. The screen will go to the 1. Schedule screen as shown to the right. 3. To access the Local Settings Menu, use the arrow up button or push the menu access button until the 7.System menu is shown. 4. The time clock has the capability of being put in Standby(STBY), Special Day 1(SPD1), or Special Day 2(SPD2) by using an individual address on the system. 1. When the address is ON, the time clock is put in that mode. 2. When the function is OFF, the time clock is in standard mode, unless another function is being used. 3. STBY has priority over all functions. 4. To set: 1. Touch box to highlight desired mode 2. Use up and down arrows to select required address 3. Push and hold set to confirm changes Manufacturer’s Use LCD Brightness Setting (Dimmest) 1-20 (Brightest) LCD Screen Auto Off 1-240 minutes
- 10. CRC6100 Time Clock Manual V.1 10 Creating Schedules… The NexLight 2-Wire system utilizes 4 different types of program addresses: I: Individual relay address that corresponds to one relay on the system G: Group address that contains multiple Individual relay addresses * P: Pattern address is a scene that is stored inside system * D: Dimmer address is used for old systems that still use this address type *Note: Group (G) and Pattern (P) addresses must be created and stored in the System Control Unit (CRC1001) for the schedule to operate correctly. The CRC6100 time clock has a maximum of 40 schedules available. Each schedule has one execute time, but within the schedule the address can be set to turn ON or OFF at that time (Patterns are execute only so will always say ON). Each schedule can control up to 8 addresses with each address having its own command type (ON or OFF, except Patterns). To access the Scheduling Menu: 1. Push and hold the NORMAL button for at least two seconds. 2. The screen will go to the 1. Schedule screen as shown to the right.
- 11. CRC6100 Time Clock Manual V.1 11 Creating Schedules… 1 2 3 5 6 Cancel (1 sec.) Erase (1sec.) Down Up Confirm (1sec.) 4 1. PRG. NO.: This is the number of the program being programmed. Up to 40 are possible. To change: 1. Push the number 1 2. It will start blinking green 3. Use the up/down arrows to cycle to the desired schedule 4. Push and Hold the SET button to confirm setting 2. Operation Setting Type: Allows for the select of Astronomical or Regular Time 1. If time is set to display in 12 hour time mode, AM or PM can be selected 2. If time is set to be Astronomical Time, SUNRISE or SUNSET can be selected To Change: 1. Push the current selection in Box 2. (AM, PM, SUNRISE, or SUNSET) 2. The box will start blinking green 3. Use the up/down arrows to cycle to the desired schedule 4. Push and Hold the SET button to confirm setting
- 12. CRC6100 Time Clock Manual V.1 12 Creating Schedules… 3. Schedule Execution Time: This box will allow the user to set the desired execution time for the selected schedule 1. If the schedule type is astronomical, this time will automatically be set using the latitude, longitude, and UTC offset (time zone) 2. If the schedule type is a normal schedule, the time can be set by pushing the hour or minute box and using the up/down arrows to select the execution time 3. Push and Hold the SET button to confirm setting. 4. Before/After Astronomical Adjustment: This setting allows the schedule to execute up to 90 minutes before or after the calculated astronomical time based of latitude, longitude, and UTC offset (time zone) 1. This is only available when the schedule type is astronomical 2. To change, push the area to the right of the minute time and it will start flashing green 3. Use the up/down arrows to select the required adjustment (+ is for later then, - is for before) 5. Control Addresses for Schedule: This is the area that allows for the programming of IND’s, G’s, and P’s that the schedule will control. 1. It is split into two columns: 4 addresses on the Left and 4 on the right 2. Each column has three places for addressing information 1. The first place allows the type of address to be selected: 1. Individual: I 2. Group: G 3. Pattern: P 4. *Dimmer: D 2. The second place allows the number for the address 1. I : can be any address between 0-1 and 63-4 2. G: can be any address between 1 and 127 3. P: can be any address between 1 and 72 4. *D: can be any address between 1 and 16 3. The third place is used for telling that address what to do 1. I: ON or OFF 2. G: ON or OFF 3. P: Will always be ON because patterns are used for scene control (execute only) 4. *D: ON or OFF 6. Days Setting of Schedule: This is the area that allows for the days of the week or special days the schedule should be ran to be programmed. 1. Push the days that you want the schedule to run 1. Purple square means the day is selected 2. Gray square means the day is not selected 3. Push and Hold the SET button to confirm all settings *note only used in legacy systems
- 13. CRC6100 Time Clock Manual V.1 13 Creating Repeat Schedules… To access the Repeat Menu from the NORMAL screen: NOTE: To access the 2. Repeat screen from the 1. Schedule screen, start at step 3 below. 1. Push and hold the NORMAL button for at least two seconds. 2. The screen will go to the 1. Schedule screen. 3. Touch the up arrow one time to move to the next schedule screen, 2. Repeat. The screen will go to the 2. Repeat screen as shown to the right The Repeat Mode (Repeat Function) can be used to repeat one or any combination of functions that includes any of the following 4 different types of program addresses: NOTE: Only patterns should be used for repeat schedules to avoid any potential issues due to the way that the addresses toggle during execution. I: Individual relay address that corresponds to one relay on the system G: Group address that contains multiple Individual relay addresses P: Pattern address is a scene that is stored inside system D: Dimmer address is used for old systems that still use this address type The CRC6100 time clock has a maximum of 8 repeat programs available. Each program has one start time and one end time. Within each program, a maximum of 4 program addresses can be controlled. An interval time is set to determine how often the program is repeated within the start and stop times that are used. Start and stop times can be times of the day based on a fixed clock or based on sunrise/sunset. Setting flexibility of +/- 90 minutes can be used in conjunction with the sunrise/sunset parameter settings. The repeat function can be used for one or more scheduled days including SPD1 and SPD2. Within the Repeat schedule, each individual program’s repeat function can be turned ON or OFF.
- 14. CRC6100 Time Clock Manual V.1 14 Creating Repeat Schedules… 1 32 4 6 7 8 Cancel (1 sec.) Erase (1sec.) Down Up Confirm (1sec.) 1. Repeat Program Number: This is the number of the schedule being programmed. Up to 8 are possible with 4 addresses allowed per schedule. To change: 1. Push the number 1 2. It will start blinking green 3. Use the up/down arrows to cycle to the desired schedule 4. Push and Hold the SET button to confirm setting 5
- 15. 2. Operation Setting Type: Allows for the selection of OFF or INT(interval) 1. If INT is selected, length of intervals between repeated functions can be selected (see 3. below) 2. If OFF is selected, the program will only repeat one time at the start time that is set. To Change: 1. Push the current selection in Box 2 (INT or OFF) 2. The box will start blinking green 3. Touch box to change 4. Push and Hold the SET button to confirm setting 3. Setting The Time Interval: Allows the user to select the time between repeat cycles. To Change: 1. Press the hours box 2. The box will start blinking green 3. Touch box to change to the desired hours 4. Press the minutes box 5. The box will start blinking green 6. Touch the box to changed to the desired minutes 7. Push and Hold the SET button to confirm setting changes 4. Setting the Start and End Time of Repeat Schedules or setting to Sunrise & Sunset To Change: 1. Press the box to the right of START (box 4 in the previous figure) 2. The box will start blinking green 3. Press the up and down arrows to choose AM, PM, SUNRISE, or SUNSET 4. Push and hold the SET button to confirm setting changes NOTE: If SUNRISE or SUNSET is chosen, skip to step 6 5. Change the START and END times for when the repeat schedule will be enabled. To Change: 1. Press the hours box for START 2. The box will start blinking green 3. Press the up and down arrows to select the desired hour 4. Press the minutes box for START 5. The box will start blinking green 6. Use the up and down arrows to select the desired minutes 7. Push and hold the SET button to confirm setting changes 8. REPEAT these steps 1. through 7. to set the desired END time CRC6100 Time Clock Manual V.1 15 Creating Repeat Schedules…
- 16. 6. Increase or Reduce Time Offset (for sunrise and sunset settings only). This will set the START and END times of the repeat schedule to be +/- up to 90 minutes from actual Sunrise and Sunset times based on your location that was entered on Page 9: Astronomical Settings . 1. Push to select offset time setting box for START (box 6) NOTE: The time offset setting boxes will be grayed out and unavailable unless timer is set to SUNRISE or SUNSET mode 2. The box will start blinking green 3. Press the up and down arrows to select the desired time offset NOTE: The maximum time offset is +/- 90 minutes 4. Push to select offset time setting box for END 5. The box will start blinking green 6. Press the up and down arrows to select the desired time offset 7. Enter which addresses will be repeated in the current program number that you are in. You can set to repeat up to 4 different addresses in each of the 8 available repeat programs. They can be I, G, P, or D addresses. To Change: 1. Press box number 7 in the previous diagram 2. The box will start blinking green 3. Touch box to change to the desired address type 4. Press the next box to the right 5. The box will start blinking green 6. Touch the box to enter/change to the desired address 7. Repeat steps 1. through 6. above to add each desired additional address in the current program 8. Push and Hold the SET button to confirm setting changes. 8. Setting the days that the repeat program will be enabled. You can choose any combination of days of the week in addition to Special Days 1 & 2 (SPD1 & SPD2) To Change: 1. Press the box that corresponds to the day(s) that you want the Repeat Schedules program to be enabled NOTE: You may choose as few as one and as many as all of them 2. All selected boxes will be highlighted in purple (if unselected, they will remain gray) 3. Push and hold the SET button to confirm setting changes CRC6100 Time Clock Manual V.1 16 Creating Repeat Schedules…
- 17. CRC6100 Time Clock Manual V.1 17 Editing Special Days… To access the SPD Menu from the NORMAL screen: 1. Push and hold the NORMAL button for at least two seconds 2. The screen will go to the 1. Schedule screen 3. Touch the up arrow one time to move forward two program screens. The screen will go to the 3. SPD screen as shown to the right The Special Day function can be used to schedule one or any combination of functions for that particular Special Day that includes any of the following 4 different types of program addresses: I: Individual relay address that corresponds to one relay on the system G: Group address that contains multiple Individual relay addresses P: Pattern address is a scene that is stored inside system D: Dimmer address is used for old systems that still use this address type The CRC6100 time clock has 2 Special Day functions available, SPD1 and SPD2. Each Special Day can have up to 40 programs with 8 addresses within each one that can be scheduled to be enabled on the desired Special Day from the Schedule screen. Within the 3. SPD screen , each of the two SPD functions can be set to be enabled on the desired days in 3 ways: Yearly FIXED: A specific month and day are assigned to a Special Day. Ex. October 24th of every year Yearly FLOAT: A month, week, and day are assigned to a Special Day, but will be different from year to year. Ex. 2nd Thursday of every October Period: This setting, also referred to as “Only Once” will only occur one time on the desired month, year, and day. NOTE: The Period setting must be a date within 13 months of the setting date
- 18. CRC6100 Time Clock Manual V.1 18 Editing Special Days… 1 Cancel (1 sec.) Erase (1sec.) Down Up Confirm (1sec.) 1. Select the desired SPD function from the main 3. SPD screen: 1. Push the box labeled number 1 in the diagram above 2. It will start blinking green 3. Use the up and down arrows to select desired SPD function (function descriptions are located on p. 17) 4. Push and hold the set button to confirm settings
- 19. CRC6100 Time Clock Manual V.1 19 Editing Special Days… Yearly FIXED 1 Cancel (1 sec.) Erase (1sec.) Down Up Confirm (1sec.) 1. Select the desired SPD function from the main 3. SPD screen: 1. Push the desired Special Day to be set (SPD1 or SPD2) 2. Selected Special Day will highlight in purple 2. Select the desired month for the Special Day to be set in 1. Push the box labeled number 2 2. It will start blinking green 3. Use the up and down arrows to select desired month 3. Select the desired day(s) to enable the Special Day 1. Push the desired day(s) on the calendar 2. Push and hold the SET button to confirm settings NOTE: When a date is selected for SPD1, the date number will turn red and be partly underlined in red. When a date is selected for SPD2, the date number will turn purple and be partly underlined in purple. If the same date is chosen for both SPD1 & SPD2, it will be partly underlined in both red and purple, but the date number will be red. (see box labeled “a” for the date May 5th) 3 a 2
- 20. CRC6100 Time Clock Manual V.1 20 Editing Special Days… Yearly FLOAT 1 Cancel (1 sec.) Erase (1sec.) Down Up Confirm (1sec.) 1. Select the desired SPD function from the main 3. SPD screen: 1. Push the desired Special Day to be set (SPD1 or SPD2) 2. Selected Special Day will highlight in purple 2. Select the desired month for the Special Day to be set in 1. Push the box labeled number 2. 2. It will start blinking green 3. Use the up and down arrows to select desired month 3. Select the desired day(s) to enable the Special Day 1. Push the desired day(s) on the calendar 2. Push and hold the SET button to confirm settings NOTE: When a date is selected for SPD1, the date box will be partly underlined in red. When a date is selected for SPD2, the date box will be partly underlined in purple. If the same date is chosen for both SPD1 & SPD2, it will be partly underlined in both red and purple. (See box labeled “a” for SPD1 to be enabled on every 3rd Wednesday of May. See box labeled “b” for SPD1 & SPD2 to be enabled on every 4th Wednesday in May) 3 b 2 a
- 21. CRC6100 Time Clock Manual V.1 21 Editing Special Days… Yearly PERIOD (Only Once) 1 Cancel (1 sec.) Erase (1sec.) Down Up Confirm (1sec.) 1. Select the desired SPD function from the main 3. SPD screen: 1. Push the desired Special Day to be set (SPD1 or SPD2) 2. Selected Special Day will highlight in purple 2. Select the desired month and year for the Special Day to be set in 1. Push the box labeled number 2 2. It will start blinking green 3. Use the up and down arrows to select desired month and year NOTE: More than 1 date can be chosen. Selected date(s) must be within 13 months of date that the clock is currently set to 3. Select the desired date(s) to enable the Special Day 1. Push the desired day(s) on the calendar 2. Push and hold the SET button to confirm settings NOTE: When a date is selected for SPD1, the date box will be partly underlined in red. When a date is selected for SPD2, the date box will be partly underlined in purple. If the same date is chosen for both SPD1 & SPD2, it will be partly underlined in both red and purple. (See box labeled “a” for SPD2 to be enabled on May 21st, 2010.) 3 2 a