EdgeofText t mcg
•Download as PPT, PDF•
0 likes•125 views

This document discusses tools for reimagining narrative, including word clouds, stop motion animation, comic creators, and virtual bulletin boards. It provides examples of projects like "Flyaway Frown" using stop motion and turning stories like "The Tortoise and the Hare" into versions with app-controlled robots. The document encourages exploring different formats for telling stories beyond traditional text, such as comics, and sharing ideas and creations.

Recommended
More Related Content
Recently uploaded
Recently uploaded (20)
Featured
Featured (20)
EdgeofText t mcg
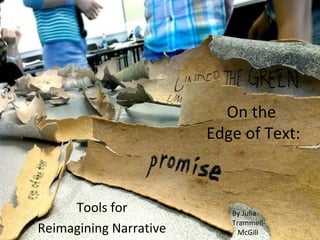
- 1. On the Edge of Text: Tools for Reimagining Narrative By Julia Trammell- McGill
- 2. Once Upon a Time, there was a teacher who decided to become a librarian. . . . . . . . . . . . . . . . . . . . . . And she lived Happily Ever After!
- 3. Cell phone serenading landline demanding endless list of chores there’s always another dish to wash to dry to put away to fill with some new recipe that’s organic and low in fat and gluten free not to mention hopefully delicious or at very least palatable dog says play dog says stay dog says I need to go out NOW kids say play kids say stay out of our way kids say we need to go out NOW and can I borrow your wallet car keys peace of mind mind if you stop by it’s been so long (well, a week) I want to show you my latest mah jong strategy sure mom at least the garden’s silent the weeds simply creep in quietly and hope I won’t notice but I see them from my kitchen window where I’m standing sipping coffee doing nothing but think of all the work I have to do
- 7. Offline
- 10. ? ! ?
- 12. Stop Motion Animation: iMotion
- 15. “The Tortoise & The Hare: Sphero Version”
- 16. www.foldplay.com
- 17. Words optional!
- 18. Offline
- 20. YIKES! Let’s not forget about comics! YIKES! Let’s not forget about comics!
- 26. Comic Life
- 27. Offline
- 33. www.tuxpi.com
- 34. Offline
- 35. “Bark Bytes”
- 36. About the Author
Editor's Notes
- Our narratives can be linear . . .
- Or not. This is a creative nonfiction piece I wrote as a model for middle and high school students. Our writing prompt was to create a piece about distraction. My aim was to show how I am surrounded by distractions and trying to overcome them and make creative writing anyway. I created this piece using Powerpoint and then took a screenshot of it.
- Here are some ideas for reimagining narrative. First, let’s look at shaped text.
- Text may be shaped digitally. This is a Wordle I created for Dr. Kimmel’s “Children’s Literature” 642 class this summer. I had read over 50 children’s books for the class, and tried this as a way of synthesizing my end-of-class information. To make a Wordle, you type (or copy and paste) text into a box and an image is generated, which you can tweak through color, shape, etc. In a Wordle, the more times a word is repeated, the larger its font size becomes. So at a glance, you can see that the words “book,” “poems,” “rights,” “story” etc. were prominent. If Wordle is not working at first, try changing your browser; Firefox works best for me. Wordle is free. Classroom applications include students taking their personal narrative writing and pasting it in, to see which words and themes predominate. Students may also take public speeches and type them in, to see what pops out in terms of emphasis. These activities may be linked to Virginia state standards, including English 5.6 reading nonfiction and comprehending the main idea, and 5.7 and 5.8, writing for a variety of purposes, as well as editing.
- Here I took the exact same text as the previous Wordle—the list of books I read for Children’s Literature this summer—and used Tagxedo. Tagxedo is a free word cloud generator as well, but requires Microsoft’s Silverlight to work, and does not work on Google Chrome. The other main difference is that Tagxedo has defined shapes to use, such as a heart, the globe, a star. I chose the handprint to show how these books imprinted upon me. Classroom applications I’ve seen include students making ones of themselves, as a “getting to know one another” activity at the beginning of the year; and an end-of-year activity, where every student writes a compliment to all the others, and at the end you type up your compliments and see what is created.
- Here are some offline versions of shaped text. My students in 4th and 5th grade have created self portraits out of text. These 4th grade examples are showing student writing at the end of the year, where they reflect on what they have learned in 4th grade. I have done a 5th grade version at the beginning of the year, where they first take a personality test, and then trace their silhouette using their personality descriptors. Our art teacher collaborated on me with both of these projects. For these self portraits, students traced over enlarged copies I made of their school photo.
- This shows the child’s silhouette; there are personality descriptions in colored pencil around the perimeter. To make the personality silhouette, the art teacher used the projector light shining against a blank whiteboard, with the student standing in between. Students took turns tracing silhouettes. Creating concrete or shaped poems is also popular throughout different grade levels.
- This shows a small group collaborative writing project for narrative nonfiction. 5th graders had book groups for the American Revolutionary War; this example shown is from The Keeping Room by Anna Myers. The students cut out footprints and used them to write the steps that resolved the main conflict. Then they taped the footprints down one of the main hallways of the school, so that everyone could enjoy them (and walk in the footsteps of the main character). Sequencing and empathy, a powerful combination! This lesson is from the VDOE website under English Standards of Learning, Reading Fiction, 4.5 and 5.5; the lesson is called “Plot Development and Resolution,” but I call it the “Footprint” lesson.
- Say what?!? Another way to reimagine text is through wordless narrative. My friends traveled to Peru and brought me back a carved gourd. It is divided into 4 sections: one shows villagers working in the fields, the next shows them dancing, then one shows them harvesting, and the next shows them eating and being happy. I show this to students and ask if it tells a story—they will observe that it shows a cycle, it shows work alternating with play, and links with seasons. So you might say this carved gourd wordlessly gives us a narrative, as many works of art do.
- My Children’s Lit class introduced me to a wordless story by Jerry Pinkney that won the 2010 Caldecott Medal; it is a retelling of Aesop’s fable. We might also use the lengthy wordless opening sequence of the Pixar movie “Up” to model wordless narrative. Image source: Pinkney, J. (2009). Cover Illustration for The Lion and The Mouse. New York, NY: Scholastic. Retrieved from http://www.scholastic.com/content5/media/products/08/9780316073608_xlg.jpg.
- (Play the movie) Here is a digital wordless narrative. If picture link doesn’t work, click on this link, or copy and paste it into browser: https://youtu.be/f---xH457U4
- I made “Flyaway Frown” a few years ago, as part of a school professional development session; it was my first stop motion film. I used an iPad and iMotion. Our class was led by a middle school teacher, who does this with her students in small groups. Her strongest piece of advice was to start with detailed storyboarding. She did not allocate an iPad to the student group until their sequencing showed a beginning, middle, and end. She also built in advance “play time” with the app., before filming was due to begin. She said filming itself averages 30 to 90 minutes (aside from the advance prep work). We used the free iMotion app., which worked fine but does have limitations (no editing per se, you get what you see)—you can buy the iMotion full version for $3.99.
- Here are some ideas for using videos and storyboarding to reimagine narrative.
- Videos involve storyboarding and sequencing. If above picture link doesn’t work, try clicking or copying and pasting this link: https://youtu.be/CCQ_hnn6ESM At my Summer Institute for the Production of Instructional Materials class, my small group (“The Harey Librarians”) used an iPad to film our robotic Sphero. We chose to reinvent a fable, “The Tortoise and the Hare,” which supports the 3rd grade English Standard of Learning 3.5, reading folktales. In my 4th and 5th grade classrooms, students have created short videos to show weather forecasts (Science SOL 4.6), summarize biographies (narrative nonfiction English standard for grade 3 upwards), and share book reviews. I have used whatever filming device is available, from a Samsung tablet borrowed from a specialist to a flip camera from the library, to “Photo Booth,” a free camera and video software program on Mac computers.
- “How To” books are another engaging way for students to practice sequencing and organization. In the past, I’ve used an offline paper template for students to create an 8-panel “How to” story (such as, “How to make a peanut butter and jelly sandwich”). But as part of exploring the sandbox in my Production of Instructional Materials 602 class this summer, I encountered a digital version of a foldable “How To” book, at foldplay.com. It is free. I would advise that you have all your images ready, saved in one folder or on the desktop first, to help things flow more smoothly. I created the digital version you see based on the paper one I had made before. This kind of reading and writing supports Virginia English standards 5.2-f, organize content sequentially around major ideas and 5.5-j, cause and effect relationships.
- Words are optional – you can print out the foldable, lightly pencil the sequential numbers on back, and cut them out to make a game card deck. Scramble the cards, and then play with a partner who tries to sequence them in the correct order. You may scaffold this by providing the first and last images as bookends to the sequence, and the child places the other images in between.
- Here’s an example of my “paper” version. Partners swap card decks, play; we go around the whole class doing this. One year, a teacher agreed to combine classes for this final activity (the playing of the game), and the kids really enjoyed going into another class and swapping card decks. The noise level was tremendous, and as luck would have it, our principal was doing a walk-through observation that day. Luckily, she perceived it as engagement rather than disruption.
- I also used this “How to” story to teach transition words; SOL 4.7-h, use transition words for sentence variety. I modeled for students starting with the word “First,” as this student shows here. “First,” “then,” “next,” “afterwards,” “finally” are all examples I remember encouraging them to use.
- The following is a comic I created as part of my sandbox in class 602, Production of Instructional Materials.
- Here is a screenshot of the final version, which appeared on my blog. “Storyboard.that” is free and very user friendly. The free version does allow you to make only 2 storyboards per week, however, which I would think would be very limiting for a classroom teacher. If teachers want to purchase an account, they may get a rate of $9.95 cents a month, with unlimited storyboards. There were a lot of historic costumes in the props, which I thought would support Social Studies standards (such as ancient Rome in 3rd grade, the Civil War in 5th grade).
- Comic Life is a free download and may come already installed on Macs. Users can create comics on the computer using photographs or digital images. In 4th grade, we made a graded Comic Life project where you had to create a comic to show one of the two moves of our state’s capitol (either Jamestown to Williamsburg, or Williamsburg to Richmond) VA Studies Standard 4-c. I’ve also used Comic Life as my classroom newsletter, which you see one example of, above.
- Offline version: you may print out Comic Life blank templates and have students use them as organizers to create their own hand-drawn comics, as shown above.
- Students may also create the entire comic themselves, as I think they’ve been doing since school was invented. This photograph shows a student creating a “fan fiction” comic during my class’s “Peanuts Day.” The work of Charles Schulz was so popular that kids asked for a day devoted to it, so we did so. We created “Peanuts” character word problems for math, and our language arts was reading and writing “Peanuts” comics.
- In 5th grade, I dipped my toe cautiously into political cartoons. It was a challenge to find good models for the kids, but I wanted to see how they would respond to the idea. Their writing prompt was to create a political cartoon showing why the colonies rebelled against King George, as part of Virginia’s Social Studies standard V.S. 5-a, why the Colonies went to war against Great Britain.
- Think beyond the 8 & ½ by 11! Have students put their words on materials other than a typed word document or a piece of paper.
- “Padlet” is an online virtual wall or bulletin board, where students can post notes. It is free. The teacher creates privacy settings including a password to allow entry to post on the wall; you also can monitor posts, and delete or edit as needed. This is one of my students’ padlets, that I used as a weekly exit slip. The prompt in the upper left corner says, “Roll out one thing you learned this week,” and students posted their responses.
- “Tuxpi” is a free photo editing website, where you can create a 4-panel photo booth series, make a motivational or wanted poster, etc., a place to have lots of fun with text and images! It is free, and I used it to create this “wanted” poster of our dog. In the classroom, I’ve had students make a “wanted” poster for an endangered species and provide some facts and a picture about it on the poster.
- Remember your mother—Mother Nature, that is! I’ve had students use markers to put words on bark. You do need to collect the bark ahead of time, dry it and flatten it, usually a few days to a week. I don’t peel the bark off the trees, I collect it as it falls or after a storm. I’ve tried several different activities with this, including scrambling the words and creating found poems; using one word to spark a free-write; scattering the bark-words around the school; and scattering them outside under a tree, and watching as people walk by and do double-takes. (And then we write about that experience!)
- I named the exercise “Bark Bytes.”
- I taught Creative Nonfiction to middle and high-schoolers at UVA’s Young Writers Workshop for 9 years. Since 2009, I have been a public school teacher for Albemarle County Public Schools, at Stony Point Elementary. I became a student in ODU’s Library Sciences program in May of 2016. I love writing, and have published and unpublished pieces in a variety of genres. This self portrait was created by me using the technique discussed earlier, and it’s made of words telling what I learned that year in 4th grade.
- This photo shows you Ameila’s snack—pretzels. Let the children show you where to go with words. Follow their lead.