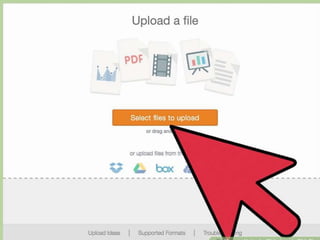
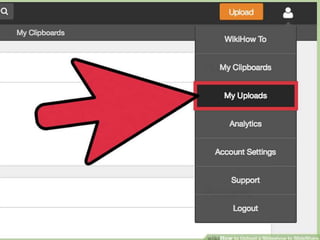
HOW TO UPLOAD A POWERPOINT
PRESENTATION TO SLIDESHARE
Jazelle Jan F. Salazar
11-Pearson
STEP NO.1
 Open SlideShare.net in your web
browser. You’ll need to use a web browser
to upload your slideshow to SlideShare, as
the mobile Application does not support
uploading files.
STEP NO. 2
 Click “Login” and sign in to Slideshare. You’ll
see this link at the top right corner of the website. Type
your login credentials into the blanks or click “Login
with LinkedIn” to use your LinkedIn Credentials
instead. You need to be a LinkedIn member to use
SlideShare. If you don’t have an account with LinkedIn,
Create one now.
STEP NO. 3
Click the orange “ Upload” button.
You’ll see this button at the top right corner
of the page.
STEP NO. 4
Click the “ Select files to upload”and
then a file navigation window will appear.
STEP NO.5
Double-click the file you want to
upload. Once the upload is complete, you’ll
see a thumbnail of the file.
• SlideShare supports the following slideshow
formats: .pdf, .ppt, .pps, .pptx, .ppsx, .potx,
.odp.
• The maximum slideshow file size is 300mb.
STEP NO.6
Type the name of your presentation in
the “ Title” field. By default, the first line
of text in the presentation will appear in the
box. If you don’t want to keep that title,
delete the text and type something new.
STEP NO.7
Choose your Privacy Settings. Click the
Privacy drop-down to make your selection.
• Public: Anyone who searches the SlideShare site could
potentially find and view your slideshow.
• Private: (Anyone with Link) People cannot find your
slideshow by searching SlideShare, but they will be able
to view it if you share with them its URL.
• Private: (Only Me) Your slideshow will only be
accessible y=to you and only when you are logged in to
SlideShare.
STEP NO.8
Choose Category. Click the “Category”
drop-down to pick a category that’s suitable
for your slideshow.
STEP NO. 9
Type the description into the “ Description”
field. What you type in this box depends on what
you plan to do with your slideshow.
• If you make your slideshow public and want people to
find it, type something that’ll give people an idea of
what your presentation is all about.
• If the slideshow will stay private, type something that
will jog your memory.
STEP NO. 10
Add some tags to the Tags box. If you want
people to stumble upon your slideshow when
searching the web ( or browsing SlideShare), type
keywords (“tags”) that pertain to your presentation.
Be sure to separate each tag with a comma.
STEP NO. 11
Click “Publish” to save your slideshow. When
the save is complete, your presentation will appear
on the screen. You can move through the slideshow
using the arrows just beneathe the slides.
• If you want to change the tags, title, description or
category, click the “ Edit” button beneath the preview.
• Click the “Privacy Settings” to change the privacy level
of the slideshow.
STEP NO. 12
View your slideshow from anywhere. Now that
your slideshow is on SlideShare, you can access it
from anywhere. After you log into SlideShare:
• Hover your mouse over your profile photo at the top
right corner of the page.
• Click “My Uploads” in the menu.
• Select your slideshow.
How to Upload a Powerpoint Presentation to SlideShare

How to Upload a Powerpoint Presentation to SlideShare

  • 1.
    HOW TO UPLOADA POWERPOINT PRESENTATION TO SLIDESHARE Jazelle Jan F. Salazar 11-Pearson
  • 2.
    STEP NO.1  OpenSlideShare.net in your web browser. You’ll need to use a web browser to upload your slideshow to SlideShare, as the mobile Application does not support uploading files.
  • 4.
    STEP NO. 2 Click “Login” and sign in to Slideshare. You’ll see this link at the top right corner of the website. Type your login credentials into the blanks or click “Login with LinkedIn” to use your LinkedIn Credentials instead. You need to be a LinkedIn member to use SlideShare. If you don’t have an account with LinkedIn, Create one now.
  • 6.
    STEP NO. 3 Clickthe orange “ Upload” button. You’ll see this button at the top right corner of the page.
  • 8.
    STEP NO. 4 Clickthe “ Select files to upload”and then a file navigation window will appear.
  • 10.
    STEP NO.5 Double-click thefile you want to upload. Once the upload is complete, you’ll see a thumbnail of the file. • SlideShare supports the following slideshow formats: .pdf, .ppt, .pps, .pptx, .ppsx, .potx, .odp. • The maximum slideshow file size is 300mb.
  • 11.
    STEP NO.6 Type thename of your presentation in the “ Title” field. By default, the first line of text in the presentation will appear in the box. If you don’t want to keep that title, delete the text and type something new.
  • 12.
    STEP NO.7 Choose yourPrivacy Settings. Click the Privacy drop-down to make your selection. • Public: Anyone who searches the SlideShare site could potentially find and view your slideshow. • Private: (Anyone with Link) People cannot find your slideshow by searching SlideShare, but they will be able to view it if you share with them its URL. • Private: (Only Me) Your slideshow will only be accessible y=to you and only when you are logged in to SlideShare.
  • 13.
    STEP NO.8 Choose Category.Click the “Category” drop-down to pick a category that’s suitable for your slideshow.
  • 14.
    STEP NO. 9 Typethe description into the “ Description” field. What you type in this box depends on what you plan to do with your slideshow. • If you make your slideshow public and want people to find it, type something that’ll give people an idea of what your presentation is all about. • If the slideshow will stay private, type something that will jog your memory.
  • 15.
    STEP NO. 10 Addsome tags to the Tags box. If you want people to stumble upon your slideshow when searching the web ( or browsing SlideShare), type keywords (“tags”) that pertain to your presentation. Be sure to separate each tag with a comma.
  • 16.
    STEP NO. 11 Click“Publish” to save your slideshow. When the save is complete, your presentation will appear on the screen. You can move through the slideshow using the arrows just beneathe the slides. • If you want to change the tags, title, description or category, click the “ Edit” button beneath the preview. • Click the “Privacy Settings” to change the privacy level of the slideshow.
  • 18.
    STEP NO. 12 Viewyour slideshow from anywhere. Now that your slideshow is on SlideShare, you can access it from anywhere. After you log into SlideShare: • Hover your mouse over your profile photo at the top right corner of the page. • Click “My Uploads” in the menu. • Select your slideshow.