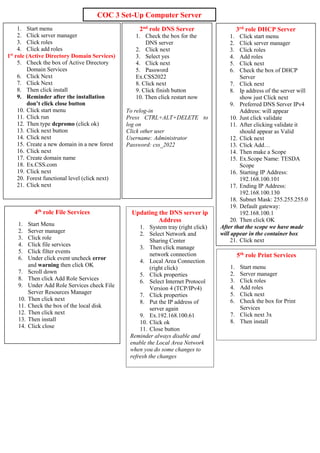
Setup DNS, AD, and File Services on Windows Server
1. COC 3 Set-Up Computer Server
1. Start menu
2. Click server manager
3. Click roles
4. Click add roles
1st
role (Active Directory Domain Services)
5. Check the box of Active Directory
Domain Services
6. Click Next
7. Click Next
8. Then click install
9. Reminder after the installation
don’t click close button
10. Click start menu
11. Click run
12. Then type dcpromo (click ok)
13. Click next button
14. Click next
15. Create a new domain in a new forest
16. Click next
17. Create domain name
18. Ex.CSS.com
19. Click next
20. Forest functional level (click next)
21. Click next
2nd role DNS Server
1. Check the box for the
DNS server
2. Click next
3. Select yes
4. Click next
5. Password
Ex.CSS2022
8. Click next
9. Click finish button
10. Then click restart now
To relog-in
Press CTRL+ALT+DELETE to
log on
Click other user
Username: Administrator
Password: css_2022
3rd role DHCP Server
1. Click start menu
2. Click server manager
3. Click roles
4. Add roles
5. Click next
6. Check the box of DHCP
Server
7. Click next
8. Ip address of the server will
show just Click next
9. Preferred DNS Server IPv4
Address: will appear
10. Just click validate
11. After clicking validate it
should appear as Valid
12. Click next
13. Click Add…
14. Then make a Scope
15. Ex.Scope Name: TESDA
Scope
16. Starting IP Address:
192.168.100.101
17. Ending IP Address:
192.168.100.130
18. Subnet Mask: 255.255.255.0
19. Default gateway:
192.168.100.1
20. Then click OK
After that the scope we have made
will appear in the container box
21. Click next
Under Configure DHCPv6
Stateless Mode just click Disable
Click Next
Then click install
Updating the DNS server ip
Address
1. System tray (right click)
2. Select Network and
Sharing Center
3. Then click manage
network connection
4. Local Area Connection
(right click)
5. Click properties
6. Select Internet Protocol
Version 4 (TCP/IPv4)
7. Click properties
8. Put the IP address of
server again
9. Ex.192.168.100.61
10. Click ok
11. Close button
Reminder always disable and
enable the Local Area Network
when you do some changes to
refresh the changes
4th role File Services
1. Start Menu
2. Server manager
3. Click role
4. Click file services
5. Click filter events
6. Under click event uncheck error
and warning then click OK
7. Scroll down
8. Then click Add Role Services
9. Under Add Role Services check File
Server Resources Manager
10. Then click next
11. Check the box of the local disk
12. Then click next
13. Then install
14. Click close
5th role Print Services
1. Start menu
2. Server manager
3. Click roles
4. Add roles
5. Click next
6. Check the box for Print
Services
7. Click next 3x
8. Then install
2. COC 3 Set-Up Computer Server
Configuring DNS Server:
*Forward Lookup Zone
*Reverse Lookup Zone
*Loop Back IP Address
*Forward Lookup Zone*
Click Start menu
Click server manager
Click (+) roles
Select (+) DNS server
(+) DNS
(+) Server
(+)Forward Lookup Zones
Click the domain we made
Ex.CSS.com
Click server (right click)
Right click properties
Click the box update
associated pointer (PTR)
record then click apply
Then click ok
*Click (+) Reverse lookup zone*
Select Reverse Lookup Zones
Right click select new zone
Click next
Click next
Select IPv4 Reverse Lookup Zone
Then click next
Type Network ID
Ex.192.168.100.61 (IP address server)
Click next
Next
Then finish
(+) reverse lookup zone
Highlight the ip address
Right click
Select New Pointer (PTR)
Add the missing ip 4th
octet of the ip
address
Under host name click browse
Click server (single click)
On record type change it to all records
Then double click server
Double click forward lookup zone
Double the domain
Ex.CSS.com
Find the Start of Authority (SOA) then
select
Click OK
Click Ok
*Loop Back IP address*
Select Reverse Lookup Zone
Right click Loop Back IP address
Select new zone
Click next
IPv4 Reverse Lookup Zone
Click next
Click next
Network ID
Ex.127.0.0.1 (unique IP address of Version 4
“local host”)
Click next
Click next
Click finish
Reverse look up zone ip right click
Loopback address will appear (highlight)
Select new pointer PTR
Then type the 4th
octet ip manually
Host name
Click browse
Select Server
Record types select all records
Server double click
Forward lookup zone double click
CSS.com double click
Then Start of Authority (SOA)
The CSS.com will appear click OK
3. Creating (2 Organizational Unit)
(4 User Accounts)
1. Start Menu
2. Administrative Tools
3. Select Active Directory
Users and Computers
4. Click + CSS.com (highlight)
5. Right click
6. New
7. Organizational Unit
8. In text box put (Admin
Department)
9. Uncheck the box
10. Click ok
Creating 2 accounts
Creating 1st
account
1. Click users
2. On the right side select
Administrator
3. Then click right click
4. First Name: user-1
5. Last Name: optional
6. User logon name: user-1
7. Click next
8. Type the password of the
administrator
9. Check password never
expires
10. Click Next
11. Then finish
Creating 2nd
account
1. Click Administrator right
click copy
2. First Name: user2
3. Last Name: optional
4. User logon name: user-2
5. Click next
6. Type the password of the
administrator
7. Check password never
expires
8. Click Next
9. Then finish
10. Select 2 user account
holding CTRL Drag the 2
accounts going to Admin
Department
Creating 2nd
Organizational Unit
Same procedure in 1st
Organizational
Unit
4. Creating Folder Redirection
Click Start Menu
Computer
Select Local Disk C: open
Right click make new folder
Folder name (REDIRECTION)
Right click folder of Redirection
Then properties
Click sharing tab
Click advanced sharing
Check share this folder
Click permission button
Select everyone (remove)
Put au then check names it should be
underlined Authenticated Users
Click OK
Select Authenticated Users
Under full control check allow
Click apply OK
Click apply OK
Go to security tab
Click edit button
Click add button type au
Select Authenticated Users
Full control allow
Click apply OK
Go to sharing tab
On the network path highlight right click copy
After you close the folder there should be an
icon of person beside the folder
Start menu
Administrative Tools
Select Group Policy Management
Click + forest
Select CSS.com
Click + domain
Click + CSS.com
Select the organizational unit that you created
then right click create a GPO in this domain,
and link it here
Name: New Group Policy Object_1
Click OK
Click the + sign of Admin Department
New group policy should appear
Select new group policy then click ok
Click new group policy object_1
Right click then enforced
Padlock icon should show in the folder
Click on delegation tab
Highlight authenticated users
Click advanced button
Highlight authenticated users
Full control allow all
Click apply then OK
Creating Group Policy Management (GPO)
Click New Group Policy Object_1
Right click select edit
Focus on the User Configuration
Click + sign policies
Click + sign Windows Settings
Click + Folder redirection
Click desktop
Right click properties
Setting select Basic-redirect everyone’s folder
Root path CTRL+V (paste)
On setting tab uncheck all box
Click apply
Click yes
Click OK
Then same on Documents
Right click documents
Click properties
Setting select Basic-redirect everyone’s folder
Root path CTRL+V (paste)
On setting tab uncheck all box
Click apply
Click Yes
Click OK