
Recommended
More Related Content
What's hot
What's hot (20)
Similar to Brochure of drawing, painting and crafts
Similar to Brochure of drawing, painting and crafts (20)
Recently uploaded
Recently uploaded (20)
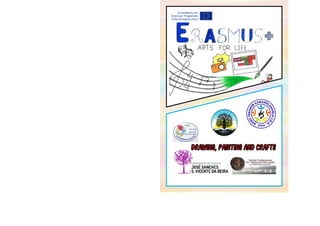
Brochure of drawing, painting and crafts
- 1. Drawing, painting and crafts Drawing, painting and crafts
- 2. Content Latvia 1. Get to know the graphical image processing app and its benefits ….....................................................................................................................page 4 2. Integrated lesson (native language & Drawing)...................................page 14 Poland 3. Art Graphic (workshops) …………….....………........................................page 20 4. The Dot……………………………………………………………….........................…page 28 Turkey 5. Introduction to new words with the integration of the Visual Art…...................................................................................................page 32 Lithuania 6. Circles of friendship.............................................................................page 40 7. Our feelings and emotions………………………..........................……...…page 46 Portugal 8 . Wall painting..........................................................................................page 54
- 3. Lesson plan: Get to know the graphical image processing app and its benefits Teacher name: Raivis Jansons Grade: 5 Subject: ICT Topic Learn to use a drawing program (Paint) using the visual art method Content/Title Copy simplified piece of art by Džemma Skulme, try to emulate it using Virtual Tools offered by the program Goals By trying to imitate the piece of art, the student will be able to use as many opportunities as possible offered by the program
- 4. Objectives To develop interest about art Materials PC, projector, internet
- 5. Introduction: To introduce students to the program “Paint” and to tell about the work to be done in the lesson. Development To find a simple artwork by Džemma Skulme step by step in the internet, paste it on the Program work sheet. Try to imitate the art work step by step with the variety of program tools
- 6. Practice The student in the Internet search engine writes the key phrase "Džemma Skulme" on the computer, selects the section images, finds a work that suits him, pastes it into the "Paint" work page. The student begins to make a sketch with a pencil or a felt-tip pen, gradually developing it into a piece of art. Work is done by using as many different tools as possible. Checking for understanding: Ask the student if they have any questions/what they do not understand. Encourage students to actively use as many tools as possible in the program, to share a positive Feedback
- 7. Closure Each pupil shows his/her work and tells about the difficulties, if any occurred. The teacher gives a comment and shows the possible solution of the problem. The work is saved in the work folder of each pupil on the computer.
- 8. Lesson Plan: Adjective Teacher's Name: Iveta Pucena Class: 9 subject: native language Topic: Usage of adjective Content/Title Yarn, its properties. Goals Defines the word belonging to the word class according to their grammatical characteristics. Tasks Learning to recognize adjectives in different word connections Learning to recognize adjectives in a sentence Materials: Presentation, Video material, Worksheets
- 9. Introduction: The teacher introduces the students with tasks: 1) what is an adjective 2) Identify adjectives in the text. Development: Tasks: Reading the text, underlining of adjectives. Wool products (socks, scarves, gloves), their properties. Wool sweater design Practice: Pupils read the text: How do we get yarn? What are yarn products? How to dye yarn? Students underline the adjectives with wavy lines. Task: Every color should look for a noun ( brown socks, brown gloves, purple grapes) The teacher gives each pupil a piece of wool - socks, scarf or gloves. Pupils should name 3 characteristics of these products. Task: "Be a designer!" Each pupil draws his sweater and thinks where the sweaters will be used - for the celebration, hike, excursion, everyday, etc. Each pupil writes on the leaflet 3 words of the characteristics of a sweater ( for ex.- warm, colorful, thick).
- 10. Checking For Understanding The check of knowledge takes place during the lesson (reading the text, naming the adjectives). Closure At the end of the lesson, the teacher discusses with the students what they did in the lesson. Each student writes his name on the board, a mark for himself. The teacher analyzes the work of each pupil, evaluates his / her cooperation skills, asks students' opinions about the creative work
- 11. Lesson plan: Art Graphic (workshops) Grade: 6 Subject: Visual Art Teacher: Ewa Nowakowska Techniques: graphics, gravure printing, dry needle Aims: student learns graphics as one of the fields of traditional visual arts, - gets to know in practice the specifics of graphics and gravure printing, - gets to know the features of gravure printing, technical possibilities and limitations (matrix, print, printing press), - uses a line as a means of artistic expression (contour, invoice, defining the space) - learns creative solving of artistic problems, development of imagination and plastic thinking, - performs graphic work in printing technique, - takes care of the aesthetics of the work being done.
- 12. The lesson: After familiarizing with the graphic design studio, students were able to design plastic compositions on any topic on sheets similar in size to graphic tiles. In the design work appeared: landscapes, flowers, animals and symbolic compositions. The lecturers then distributed the tiles and tools and discussed the method of making the matrix in detail. After the tiles were developed, the students applied paint on them, choosing the colour according to their own preferences. Then they rub the tiles so that the paint remains only in the grooves. They put paper on the prepared dies and place it in the printing press. By sliding between the two press rollers, the paint from the grooves was pressed onto the paper. The result was a print. The students made two graphics.
- 15. Lesson plan: The Dot Grade: 6-7 Subject: Visual art Materials: presentation, video, sheets of paper, colourful markers Aim: boost creativity, help think outside the box Method: drawing, discussion Techniques: individual, groups, pairs Part 1 Teacher groups students into 4 persons teams They get piece of paper, one per team, and colourful pencils and markers. The command is: made a dot. One dot. Just dot. Once they do it ( one dot per student on each piece of paper) the teacher says: now, make your dot into a picture. Whatever you like, you decide, you work as a team. Make a dot and see where it takes you. Students work for 10 minutes. Then the task is: give your picture a title. The teacher makes a exhibition, puts the pictures up on the wall. Students watch, compare, tell about their pictures.
- 16. Part 2 Teacher plays a video on YouTube https://youtu.be/6xU_5zEfWQU English version for higher level students. But it is illustrated story so it is really easy to follow by the weaker at language ones. They talk about the movie. What happened in the story? What change did the dot make in Vasti's life? What is the dot? Students give their ideas. Have you ever experienced a "dot" in your life? What was it? Tell about it. Part3 (optional) Teacher tells the students to find how people in the works celebrate the International Dot Day - to honour teachers who believe in their students' abilities and to boost creativity.
- 17. Lesson Plan: Introduction to new words with the integration of the Visual Arts Teacher Name : Seval Gegez Grade : 5th grade Subject: English language Topic: Learning the new words using visual arts Content: Focusing on vocabulary by using shapes, numbers, symbols Goals: To teach Letters, numbers, colors, such as to view concepts from different angles. To teach s planned movement, comprehends the importance of planned movement, To improve the ability to think correctly and quickly and make decisions, To make realize the students to know themselves and their abilities better, To give the habit of focusing on a specific subject, To improve the sense of curiosity
- 18. Objectives: -To encourage the students to learn the new words in English -To focus on lots of subject at the same time -To create their own word picture -To establish a relationship between concepts -To teach vocabulary through the visual arts with the help of the imagination Materials: Papers, crayons and a little imagination Introduction: It is a fun and enjoyable game based on finding the word or phrase hidden by the color, posture or position of the letters, shapes or pictures. These include visuals of objects, any shapes or symbols, Roman numerals, valence of elements, musical notes and so on.
- 19. Practice: This activity can be repeated several times so that as many children as possible participate. Also Students can go on it at home. Checking for understanding: Ask students if they have any questions or dont understand what is required, encourage them with positive feedback. Development: Teacher just gives examples of the game that all channels suitable for the child's age can be used. Some of those; Letters and numbers available, Images can be reversed for some words. Parts of the human body can be used Math symbols are available. Syllables can be created by dividing the visuals. The word Art can be obtained by dividing the clock image into two by writing the letter «N» in the center. Music related visuals can be used also We can use some computer icons And wait students creativity
- 20. Closure: Give students the story of the folk song to preparation for a short drama in the class. Ask the children to listen some folk songs and write or draw their emotions on a paper about the music and the story of the song.
- 21. Lesson Plan Circles of friendship Teacher Name Ina Stankeviciute Grade 4 Subject Visual art Topic Circles of friendship Content Circles of friendship Goals Development of creativity, collaboration and cooperation skills. Objective To improve pupils‘ skills to work together. To develop creativity by combining various patterns and colours Materials Pencils, paint sticks and crayons, Paper sheets (A4 and A3), Scissors, Tape Circle tracers (a variety of size)
- 22. Introduction Pupils are divided into the pairs.Ask pupils what does it mean to work in a group under one common Project. Is it easy? What kind of conflicts could appear? How could they be solved? Development Each pair gets a sheet of paper (A4). Working in a pair the pupils choose one color (pencil, marker or crayon). Taking one pencil tohether: one by left hand and another one by right hand, they write down their names and greeting for the others on the page. Practice Working in pairs the pupils fill the pages (A3 – one page for one pair) with the circles of the various size by using tracers and pencils.They choose one circle in the middle of the page and desing it together. After that they choose two circles on the opposite parts of the page and design them individually. Than the page is fold and cut into two parts. The cutted pages are mixed and shared among the pupils. They finish to desing all the circles individually.
- 23. Checking for understanding The pupils who work in one pair try to find their initial pages and join them by using a tape. The pupils should discuss the advantages and disadvantages they face working together and individually. Closure A display of the pictures.
- 24. Lesson plan Our feelings and emotions Grade: 5 Topic Our feelings and emotions Content The pupils improve their knowledge and skills how to recognize emotions and express them in a proper way. During the lesson the pupils follow such steps: 1. “My mood“ 2. “Potrait on the floor“- 3. “Colours of the mood“ Goal Identification of the emotions, self – expression and creativity development
- 25. Objectives: To improve pupils‘ knowledge of the emotions. To identify personal emotions and feelings. To express the emotions through the drawing and colouring. Materials: Pencils and crayons,Chalk,Watercolor or gouache,Paintbrushes,Paper sheets (A4),Silhoutte stencils (silhoutte of a person) (A5)Some wallpaper,Scissors. Introduction: Ask the pupils to name the emotions they know. Explain that emotions are our feelings. Tell them that there is a large variety of them. The feelings change from moment to moment depending on whats going on around us, at home, or with our friends. Ask the pupils to name the emotions they feel today.
- 26. Development Each pupil gets a sheet of paper (A4). Drawing the sun with the rays he has to express his mood. That can be done by using various shapes and colours of the rays. Practice The pupils are divided into the pairs. Each pair has to draw their portraits in actual size. They get some wallpaper (floor can also be used for this task). In turn they lay down and their friends make outlines of them by chalk or crayons. After that they colour their real size sihouttes and add a few personal details to their “portraits“.
- 27. Checking for understanding The pupils get the silhoutte stencils. They draw and colour the hearts expressing how they are feeling now. Closure A display of the real size portraits. The pupils try to identify their friends and the emotions of the portraits.
- 28. Lesson Plan Wall paintings Teacher Name António Diogo Grade 4 Subject Paintings Topic Portuguese murals and traditional games. Content Choosen by the students. Goals Paintings; knowledge of traditional Portugese games. Objective Knowledge of traditional Portugese games; knowledge of exterior painting techniques.
- 29. Materials painting supplies. Introduction Preparing the working groups (10 students each) Development Choosing the painting by group and the way of working it. Practice Choose the painting and perform it. Checking for Understanding doubts. Closure Activity balance with students.