Dahua PTZ Camera.
•Download as DOCX, PDF•
0 likes•14 views

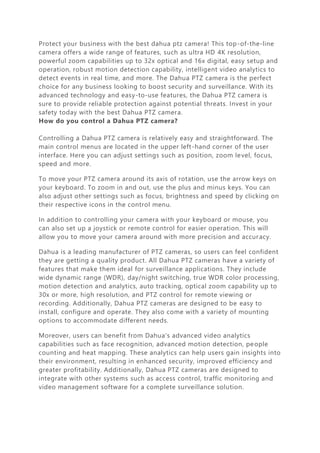
Dahua PTZ Camera,1080P Outdoor/Indoor HD PoE Dome Network Security Camera with IR Cut,2.8-12mm Varifocal Lens,30m Night Vision,IP66 Waterproof

Recommended
More Related Content
Similar to Dahua PTZ Camera.
Similar to Dahua PTZ Camera. (20)
More from Esentia Systems
More from Esentia Systems (20)
Recently uploaded
Recently uploaded (20)
Dahua PTZ Camera.
- 1. Protect your business with the best dahua ptz camera! This top-of-the-line camera offers a wide range of features, such as ultra HD 4K resolution, powerful zoom capabilities up to 32x optical and 16x digital, easy setup and operation, robust motion detection capability, intelligent video analytics to detect events in real time, and more. The Dahua PTZ camera is the perfect choice for any business looking to boost security and surveillance. With its advanced technology and easy-to-use features, the Dahua PTZ camera is sure to provide reliable protection against potential threats. Invest in your safety today with the best Dahua PTZ camera. How do you control a Dahua PTZ camera? Controlling a Dahua PTZ camera is relatively easy and straightforward. The main control menus are located in the upper left-hand corner of the user interface. Here you can adjust settings such as position, zoom level, focus, speed and more. To move your PTZ camera around its axis of rotation, use the arrow keys on your keyboard. To zoom in and out, use the plus and minus keys. You can also adjust other settings such as focus, brightness and speed by clicking on their respective icons in the control menu. In addition to controlling your camera with your keyboard or mouse, you can also set up a joystick or remote control for easier operation. This will allow you to move your camera around with more precision and accuracy. Dahua is a leading manufacturer of PTZ cameras, so users can feel confident they are getting a quality product. All Dahua PTZ cameras have a variety of features that make them ideal for surveillance applications. They include wide dynamic range (WDR), day/night switching, true WDR color processing, motion detection and analytics, auto tracking, optical zoom capability up to 30x or more, high resolution, and PTZ control for remote viewing or recording. Additionally, Dahua PTZ cameras are designed to be easy to install, configure and operate. They also come with a variety of mounting options to accommodate different needs. Moreover, users can benefit from Dahua's advanced video analytics capabilities such as face recognition, advanced motion detection, people counting and heat mapping. These analytics can help users gain insights into their environment, resulting in enhanced security, improved efficiency and greater profitability. Additionally, Dahua PTZ cameras are designed to integrate with other systems such as access control, traffic monitoring and video management software for a complete surveillance solution.
- 2. For peace of mind and reliability, Dahua PTZ cameras are backed by an extensive warranty and technical support. This ensures that users can have confidence in their product and its performance. Dahua ptz camera auto tracking Dahua PTZ Cameras with Auto Tracking enable you to survey large areas quickly and accurately. By using advanced algorithms, the cameras are able to recognize and follow moving objects, eliminating the need for manual operation. It is a great tool for surveillance of large areas or fast-moving targets. The Dahua Auto Tracking Cameras feature a wide range of features to ensure seamless tracking, including line crossing detection, motion detection and auto-zoom. They are also able to recognize and lock onto faces, making them ideal for use in facial recognition applications. Dahua ptz camera configuration Configuring a Dahua PTZ camera can be done through the web-based configuration page. This page is accessed by entering the IP address of your Dahua camera into your web browser’s address bar. Here, you will be able to configure various settings such as pan/tilt speed and preset positions. You can also set up motion detection, alarm I/O and notifications. To begin configuring your Dahua camera, open the configuration page by entering its IP address into your web browser’s address bar. You should now see the main configuration page for your Dahua camera which will list all of its available settings. The first setting you will want to configure is the pan/tilt speed. This setting determines how fast your camera will move when you manually control it with a remote or mouse. You can set this setting from low to high based on your needs. Dahua ip camera installation manual Step 1: Connect the Camera to a Network 1. Plug an Ethernet cable into the LAN port on the camera and then connect it to your router or switch. 2. Using a laptop or PC, open your web browser and type in the IP Address of your camera into the address bar which should take you directly to the login page of the configuration tools.
- 3. 3. The default username and password are both “admin” Step 2: Log in to the Camera 1. After logging in, you will be able to configure various settings such as motion detection, recording schedules, and other camera settings. 2. To access these settings, click on the “Setup” tab in the top menu bar. Step 3: Configure Camera Settings 1. Under the “Setup” tab, you can configure settings such as motion detection, recording schedules and other camera settings. 2. To access these settings, click on the “Camera” tab in the left menu bar. 3. On this page, you can customize the following settings: Resolution: You can choose from a variety of resolutions for your video stream, including HD 1080p and 4K UHD. White Balance: This setting allows you to adjust the color balance of the image to make it look clearer and more natural. Exposure: This setting can be used to adjust the exposure of your camera so that it is not too bright or too dark. 4. Once you have adjusted all of these settings, click “Save” at the bottom of the page to save your changes. Step 4: Set Up a Recording Schedule 1. To access the recording schedule settings, click on the “Recording” tab in the left menu bar. 2. On this page, you can set up a weekly or daily recording schedule for your camera by selecting the days and times that you would like it to record. 3. You can also choose the length of each recording session and specify whether or not you would like motion detection enabled during these times.
- 4. 4. Once you have adjusted all of these settings, click “Save” at the bottom of the page to save your changes. Step 5: Connect to a Monitor 1. To connect your camera to a monitor, you will need an HDMI cable and a compatible monitor or TV with an HDMI port. 2. Connect one end of the HDMI cable to the “HDMI Out” port on the back of your camera and then plug the other end into your monitor or TV. 3. You can then use the “Live View” tab in the left menu bar to view a live video feed from your camera. Step 6: Access Your Camera Remotely 1. To access your camera remotely, you will need to set up port forwarding on your router. 2. This will allow you to access the camera from outside of your home network, such as via a smartphone or laptop. 3. To do this, you will need to log in to your router’s settings page and forward port 8080 (or whichever port you chose during the installation process) to the IP address of your camera. 4. Once this is done, you can access your camera remotely by typing in the external IP address of your router into a web browser.