Quick Installation Guide EWS500AP English
•
0 likes•276 views

Quick Installation Guide EWS500AP English

Recommended
Recommended
More Related Content
What's hot
What's hot (20)
Similar to Quick Installation Guide EWS500AP English
Similar to Quick Installation Guide EWS500AP English (20)
More from EnGenius Europe
More from EnGenius Europe (20)
Recently uploaded
Recently uploaded (20)
Quick Installation Guide EWS500AP English
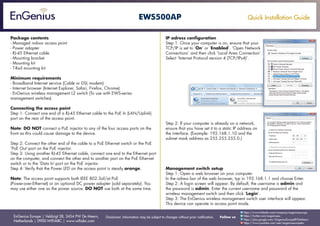
- 1. Quick Installation Guide EnGenius Europe | Veldzigt 28, 3454 PW De Meern, Netherlands | 0900-WIFIABC | www.wifiabc.com Disclaimer: Information may be subject to changes without prior notification. Follow us https://www.linkedin.com/company/engeniuseurope https://plus.google.com/+EngeniusEuropeBVDeMeern https://www.youtube.com/user/engeniuseuropebv https://twitter.com/engeniuseu EWS500AP Package contents - Managed indoor access point - Power adapter - RJ-45 Ethernet cable - Mounting bracket - Mounting kit - T-Rail mounting kit Minimum requirements - Broadband Internet service (Cable or DSL modem) - Internet browser (Internet Explorer, Safari, Firefox, Chrome) - EnGenius wireless management L2 switch (To use with EWS-series management switches) Connecting the access point Step 1: Connect one end of a RJ-45 Ethernet cable to the PoE In (LAN/Uplink) port on the rear of the access point. Note: DO NOT connect a PoE injector to any of the four access ports on the front as this could cause damage to the device. Step 2: Connect the other end of the cable to a PoE Ethernet switch or the PoE ‘PoE Out’-port on the PoE injector. Step 3: Using another RJ-45 Ethernet cable, connect one end to the Ethernet port on the computer, and connect the other end to another port on the PoE Ethernet switch or to the ‘Data In’-port on the PoE injector. Step 4: Verify that the Power LED on the access point is steady orange. Note: The access point supports both IEEE 802.3af/at PoE (Power-over-Ethernet) or an optional DC power adapter (sold separately). You may use either one as the power source. DO NOT use both at the same time. IP adress configuration Step 1: Once your computer is on, ensure that your TCP/IP is set to ‘On’ or ‘Enabled’. ‘Open Network Connections’ and then click ‘Local Area Connection’. Select ‘Internet Protocol version 4 (TCP/IPv4)’. Step 2: If your computer is already on a network, ensure that you have set it to a static IP address on the interface. (Example: 192.168.1.10 and the subnet mask address as 255.255.255.0.) Management switch setup Step 1: Open a web browser on your computer. In the adress bar of the web browser, typ in 192.168.1.1 and choose Enter. Step 2: A login screen will appear. By default, the username is admin and the password is admin. Enter the current username and password of the wireless management switch and then click ‘Login’. Step 3: The EnGenius wireless management switch user interface will appear. This device can operate in access point mode.
- 2. Quick Installation Guide EnGenius Europe | Veldzigt 28, 3454 PW De Meern, Netherlands | 0900-WIFIABC | www.wifiabc.com Disclaimer: Information may be subject to changes without prior notification. Follow us https://www.linkedin.com/company/engeniuseurope https://plus.google.com/+EngeniusEuropeBVDeMeern https://www.youtube.com/user/engeniuseuropebv https://twitter.com/engeniuseu EWS500AP Mounting the access point This access point is designed to be mounted on a wall plate or electrical outlet box. Step 1: Remove the cover of the wall plate. Step 2: Gently pull the required cables through the center of the mounting bracket. Step 3: Align the mounting bracket to the wall plate and affix the mounting bracket to the using the original cover screws. Step 4: Connect the cables to the access point before mounting to the bracket. Step 5: Hook the two tabs on the bottom of the bracket into the slots on the bottom of the access point, and slide the access point down gently until it holds in place. Step 6: Use the bracket screw provided to secure the access point to the bracket.
- 3. Quick Installation Guide EnGenius Europe | Veldzigt 28, 3454 PW De Meern, Netherlands | 0900-WIFIABC | www.wifiabc.com Disclaimer: Information may be subject to changes without prior notification. Follow us https://www.linkedin.com/company/engeniuseurope https://plus.google.com/+EngeniusEuropeBVDeMeern https://www.youtube.com/user/engeniuseuropebv https://twitter.com/engeniuseu EWS500AP Connecting using the 110 Punch-down block The 110 punch-down block can be used to connect the access point to the network instead of the RJ-45 connector. Note: DO NOT connect to both the punch-down block and the PoE (LAN/ Uplink) port to the network at a same time.