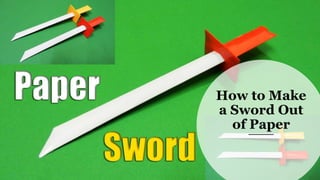
How to Make a Paper Sword in 7 Steps
•Download as PPTX, PDF•
1 like•2,206 views

A sword is a weapon that never loses its fascination. From ninjas to pirates, all the cool guys in stories and childhood movies, seem to have swords. However, it is also not a toy we would want our kids to have to owe to the seemingly violent undertones of the weapon.

Recommended
More Related Content
Similar to How to Make a Paper Sword in 7 Steps
Similar to How to Make a Paper Sword in 7 Steps (20)
More from Design and Printing
More from Design and Printing (8)
Recently uploaded
Recently uploaded (20)
How to Make a Paper Sword in 7 Steps
- 1. How to Make a Sword Out of Paper
- 2. Swords A sword is a weapon that never loses its fascination. From ninjas to pirates, all the cool guys in stories and childhood movies, seem to have swords. However, it is also not a toy we would want our kids to have to owe to the seemingly violent undertones of the weapon. But did you know you don’t have to give a metal or realistic toy sword to your kids? In fact, you can make on at home out of custom cardboard packaging boxes.
- 3. Making a sword Making a sword of your own can be a great project. Not only does it teach you the value of recycling, but it also opens up the creative part of your brain, and you learn to make treasures out of scrap. What’s more, you can use this sword in pretend play, or even as the accessory for costume parties! There is no end to the uses of this little DIY toy! In fact, you can even use it as a decoration for your living room.
- 4. Build Your Sword In this article, we are going to provide you with some inspiration to help you build your sword out of recycled cardboard boxes. So let’s see how we can do this.
- 5. Things You Need A big carton or a cardboard sheet Ruler Pencil Glue Cutter Aluminum foil for the blade Brown cardstock to the hilt Tape Mug to draw around if you are making your template Printing paper Printer
- 6. 1. First of all, you need to draw the image of the sword. There are many styles of swords, for example, a ninja sword, a katana, a pirate sword, a wooden sword, etc. And all of these look different. You need to decide the style you love the best and draw its exact image on the cardboard sheet. You can either draw yourself, measuring accurately with the help of a ruler, or you can also print a template that you’ve found on the internet, and stick it to the cardboard for reference.
- 7. Sword Templates Printing a template will make your work faster and easier. However, you might feel limited if there are only a limited type of sword templates available. Either way, the first step requires you to transfer the image of the sword to the cardboard sheet.
- 8. 2. Next step is to transfer that same image again to another cardboard sheet. We need two sets of these so they can be glued together, on top of each other, to add sturdiness.
- 9. 3. Once both images have been transferred, cut them out using the paper knife. Make sure you cut neatly so the edges don’t fray too much, as it will be hard to smoothen them out later on.
- 10. 4. Glue both the cutouts on top of each other. Make sure the hilt matches with the hilt and the blade matches with the blade. If there is even a little difference in dimensions, the sword will not sit properly and will look shabby.
- 11. 5. Once the sword is glued and the glue has dried, you need to wrap the blade in the aluminum foil to give a shiny, silvery look. You can also use silver spray paint if you want, but the foil gives it an added texture which looks more beautiful.
- 12. 6. Roll the sword in the foil and wrap it completely. Fold and cut the extra part of the foil from the top and run your hand over the complete surface of the blade to smoothen out any bubbles.
- 13. 7. Now the blade is done so let’s turn to the hilt. Use the brown card paper to wrap the hilt to give it a woodsy look. If you want a metal or gold hilt, you can use paper accordingly. Glue the edges of the paper together to secure the hilt. You can make this hilt removable or non- removable according to your preference.
- 14. Sword is Ready Now your sword is ready for play! You can use it as an accessory for your costume or just for play in the backyard. We are sure your kids will love making this and playing with it. And if you need a video tutorial for this sword, here is a link to help you out:
- 15. social Channels FIND US ON SOCIAL CHANNELS THANK YOU! https://www.thecustomboxes.com/