View stored images and delete all with intraoral camera
•Download as PPT, PDF•
2 likes•387 views

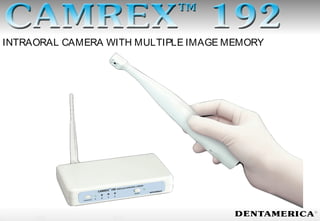
This document provides specifications and instructions for an intraoral camera with wireless transmission and image storage capabilities. It has a 1024x768 resolution wireless receiver that can connect to a monitor via VGA or RCA cables. The intraoral camera handpiece is small, lightweight, and rechargeable. It can freeze and store up to 4 images that can be viewed individually or together. The frequencies of the handpiece and receiver can be adjusted if multiple cameras are in use.

Recommended
More Related Content
What's hot
What's hot (20)
Viewers also liked
Viewers also liked (20)
Similar to View stored images and delete all with intraoral camera
Similar to View stored images and delete all with intraoral camera (20)
Recently uploaded
Recently uploaded (20)
View stored images and delete all with intraoral camera
- 1. INTRAORAL CAMERA WITH MULTIPLE IMAGE MEMORY
- 2. Specification AC 100~240V VGA out 1024x768 Resolution 480 TV Line Dimensions Intraoral Camera L227 x W27 x H32.9 mm Wireless Receiver L172 x W108 x H31 mm Weight 89 g/110 g
- 4. Wireless Camera Handpiece Handpiece Charging Station Wireless Receiver Antenna
- 7. Screw the antenna onto the rear of the receiver and set upright. Plug in the receiver using either of the AC adaptors supplied. The On/Off switch is at the front right of the unit.
- 8. Use the "FREQUENCY" button on the front of the receiver to select frequency A. LED light should indicate the selected frequency. NOTE: The handpiece has been preset to transmit on frequency A. If more than one CAMREX wireless camera is in range, or if there is excessive interference, see below under "Changing Handpiece Frequency".
- 9. The receiver can be connected to a monitor/projector/TV in two ways: 1) Monitor with RCA video input jack: Using the cable provided, connect it to CAMREX's RCA video output at the rear of the receiver. Set the monitor's input source to "VIDEO“. RCA Video Cable
- 10. The receiver can be connected to a monitor/projector/TV in two ways: 2) Monitor with a VGA connector input: Using the cable provided, connect it to the VGA output at the rear of the receiver. Set the monitor's input source to "VGA". VGA Cable
- 11. Handpiece setup The handpiece requires no special setup other than charging the battery. Remember to use a sterile disposable sleeve for each patient. NOTE: Before using CAMREX for the first time, charge the handpiece for at least 6 hours.
- 12. Charging station setup Plug in the charger using either of the AC adaptors supplied. Place the handpiece in the charger with control buttons facing forward, making sure the contacts are engaged and power is off. The charging light should glow orange, turning green when the handpiece is fully charged. When not in use, the CAMREX wireless camera should be placed in the charging station.The handpiece is equipped with a Low Battery LED. Charge the handpiece when the Low Battery lights up.
- 13. Changing handpiece frquency The handpiece has been preset to transmit on frequency A. Ordinarily you will not need to change this unless: --There is more than one CAMREX wireless camera in range. --There is excessive interference. If so: Near the bottom of the handpiece on the camera side is a small opening exposing two small switches. Using apin, lightly and carefully arrange the switches according to the desired frequency as shown:
- 15. Fit a disposable sleeve over the camera handpiece for each new patient. Press the handpiece POWER button. The LEDs around the lens should light and live video should appear on the monitor.
- 16. To freeze an image, press the FREEZE button. The monitor will show a still image and a white storage channel number. To store the image and continue on another channel with live video, press the CHANNEL button. Up to four images can be stored. If you do not wish to store the frozen image, press FREEZE again to return to live video.
- 17. To view stored images press CHANNEL to cycle throughthe four channels and a fifth screen showing all four at once. Stored images are marked with a yellow channel number. To replace a stored image, advance to the image you no longer need and capture a new image as in steps 3, 4 and 5. To delete all tored images, press and hold CHANNEL for two full seconds. Replacing or deleting images requires that the handpiece power be ON.
- 18. 1. Built-in wireless receiver with 4 separate frequencies for optimal signal reception. 2. Video output connects directly to TV or computer monitor through AV or VGA input. 3. CCD technology. Four white LED to provide maximum realistic color reproduction. 4. Mini-head design allows for easy access to the third molar. 5. Simultaneously view all 4 stored images in quadrant format or individual image full screen.
- 19. 6. Easy and convenient battery replacement. 7. Large capacity lithium battery provides 3 hours of continuous use on a full charge for 6 hours. 8. Low battery warning light reminder. 9. Different frequency setting allows to operate multiple sets in the same clinic without interference. 10. Image transmission up to 5M diameter range without blockage.
- 20. Quadrant “Freeze” images can be stored in memory.(One image per channel.) To simultaneously view all four store images in quadrant format, press the channel to display.
- 21. To View the Stored Images: Depress the Channel Select Button. The first Image stored will appear on screen with a yellow channel number that Indicates it is a “Stored Image”. To Delete all Stored Images: Depress the ChannelChannel Select ButtonSelect Button and hold for 22 seconds. The camera will return to “Live” Mode when all stored images have been erased.
- 22. NOTE: If the camera is turned “On” while viewing and a “Live” image appears on screen, the channel is free for use. If the camera is turned “Off” while viewing stored images and no image appears on screen, the channel is free for use.
- 23. FAQFAQ
- 24. Q1Q1 What’s the zoom lens’ function and how to clean it?
- 25. A1A1 The zoom lens is special designed for Dentamerica intraoral cameras and slides easily on and off the camera. 50x magnifying power. Use it to magnifying and examine caries, root canal access etc. You can also attach the surface viewer ring to examine occlusal surfaces. It can be chemically sterilized not autoclavable.
- 26. Q2Q2 How can I store images to a computer?
- 27. A2A2 Optional USB video grabber enables the Camrex to connect to the computer via the USB port and allow you to operate in the professional Camrex imaging software. CAMREX 195 USB1.1 VISTA compatible CAMREX 196 USB2.0 Window XP or below compatible
- 30. Q3Q3 What to do if the image suddenly disappears?
- 31. Q3Q3 Make sure the handpiece and the receiver are set to the same frequency. Adjust the antenna. Change the receiver box location and adjust the reception angle.
- 32. For More Details : Call On : +91-9867496337 Email : info@chromadent.com Visit : www.chromadent.com