SlideShare a Scribd company logo
1 of 12
Download to read offline
Tutorial (Intermediate level):
Orthophoto and DEM Generation with Agisoft PhotoScan Pro
0.8.5
Add photos
To add photos select the Add Photos... command from Workflow menu or click Add
Photos button on Workspace toolbar. In the Add Photos dialog browse the source
folder and select files to be processed. Click Open button.
Mask photos
If loaded photos contain areas or objects NOT to be reconstructed (clouds, smoke,
moving objects, water drops on lens, blurry or distorted areas, etc.) it is
recommended to apply masks to them.
Masks in PhotoScan are represented by contours bounding certain image regions.
Modification of the current mask is performed in Photo View through adding or
subtracting selections. To switch to the Photo View double-click on the
corresponding photo in the Workspace or Photo pane. To create selection use one of
the supported selection tools (available from the Toolbar or Photo menu). The
selection wouldn't be incorporated in the current mask until it is merged with the
mask using Add Selection or Subtract Selection buttons from the Toolbar.
Masked areas could be ignored at Align Photos processing stage (Check Constrain
features by mask option in Align Photos dialog) and are always ignored at Build
Model and Build Texture stages.
Add ground control
At this step coordinate system for the future model is set using camera positions.
Note: If camera positions are unknown this step could be skipped. The align photos
procedure, however, would take more time in this case.
Open Ground Control pane using the corresponding command from the View menu.
Click Import button on the Ground Control pane toolbar and select file
containing camera positions information in the Open dialog.
The easiest way is to load simple character-separated file (*.txt) that contains x- and
y- coordinates and height for each camera position (camera orientation data, i.e.
pitch, roll and yaw values, could also be imported, but the data is not obligatory).
In Import CSV dialog indicate the delimiter according to the structure of the loading
file and select the row to start loading from. Note that rows are numbered starting
from zero; # character indicates a commented line that is not counted while
numbering the rows. Indicate for the program what parameter is specified in each
column through setting correct column numbers in the Columns section of the
dialog. Columns are numbered from zero as well. Check your settings in the sample
data field in Import CSV dialog.
Click Open button. The data will be loaded into the Ground Control pane.
Import EXIF Ground Control pane toolbar button can also be used to load camera
positions information if EXIF meta-data is available.
Then click on the Settings button in the Ground Control pane and in the Ground
Control Settings dialog select corresponding coordinate system from the list.
Click OK and camera positions will be marked in Model View using their
geographical coordinates:
Align photos
At this stage PhotoScan refines the camera position for each photo and builds the
point cloud model.
Select Align Photos command from the Workflow menu.
Set the following recommended values for the parameters in the Align Photos dialog:
Accuracy: High (higher accuracy setting helps to obtain more accurate camera
positions estimates. Lower accuracy setting can be used to get rough camera
positions in a shorter period of time)
Pair preselection: Ground Control (in ground control preselection mode PhotoScan
matches only overlapping images, which significantly speeds up the
procedure in case of hundreds of photos)
Constrain features by mask: Enabled (if any masks are applied). Otherwise,
Disabled
Click OK button to start photo alignment.
Place markers
Markers are used to optimize camera positions and orientation data, which allows for
better model reconstruction results.
To generate quality orthophoto at least 10 ground control points (GCP) should be
marked evenly within the area to be processed.
To be able to follow guided marker placement approach (that would be faster and
easier) you need to reconstruct geometry first.
Select Build Geometry... command from the Workflow menu and specify following
parameters in the Build Geometry dialog:
Click OK button.
Then, when the geometry is built (it usually takes a few seconds), open a photo
where a GCP is visible in Photo View double-clicking on its icon in the Photo pane.
Switch to marker editing mode using Edit Markers toolbar button. Zoom in to
locate the GCP on the photo and place a marker in the corresponding point of the
image using Create Marker command from the photo context menu available on
right-click on the opened photo in the corresponding position:
Select the marker on the Ground Control pane. Then filter images in Photo pane
using Filter by Markers Photo pane toolbar button.
Now you need to check the marker location on every related photo and refine its
position if necessary to provide maximum accuracy. Open each photo where the
created marker is visible. Zoom in and drag the marker to the correct location using
the mouse in the Edit Markers mode.
Repeat the described step for every GCP.
Finally, import marker coordinates from a file. Click Import button on the
Ground Control pane toolbar and select file containing GCP coordinates data in the
Open dialog. The easiest way is to load simple character-separated file (*.txt) that
contain markers name, x-, y- coordinates and height.
In Import CSV dialog indicate the delimiter according to the structure of the file and
select the row to start loading from. Note that rows are numbered starting from zero;
# character indicates a commented line that is not counted while numbering the rows.
Indicate for the program what parameter is specified in each column through setting
correct column numbers in the Columns section of the dialog. Columns are
numbered from zero as well. Check your settings in the sample data field in Import
CSV dialog:
Click OK button. The data will be loaded into the Ground Control pane.
Optimize photo alignment
To achieve higher accuracy in calculating camera external and internal parameters
and to correct possible distortion (e.g. “bowl effect” and etc.) optimization
procedure should be run. This step is especially recommended if the ground control
point coordinates are known almost precisely (several centimeters accuracy) (marker
based optimization procedure).
Click the Settings button in the Ground Control pane and in the Ground Control
Settings dialog select corresponding coordinate system from the list according to the
GCP coordinates data.
Set the following values for the parameters in Measurement accuracy section:
Camera accuracy: 10
Marker accuracy: 0 (PhotoScan will assume that markers coordinates are known
exactly, which can help to obtain more accurate results. The marker
accuracy is recommended to be set at 0 value if the real marker accuracy is
within 0.02 m)
Projection accuracy: 0.1
Click OK button.
On the Ground Control pane uncheck all photos and check the markers to be used in
optimization procedure. The rest of the markers that are not taken into account can
serve as control points to evaluate the optimization results.
Click Optimize button on the Ground Control pane toolbar.
Select camera parameters you would like to optimize. Click OK button to start
optimization process.
Set bounding box
This step is optional since PhotoScan automatically calculates bounding box
dimensions and location. It is recommended, however, to check if any correction is
needed as geometry reconstruction procedure is applied only to the area inside the
bounding box and odd points exclusion may speed up the process.
Bounding box is resizable and rotatable with the help of Resize Region and
Rotate Region tools from the Toolbar.
Important: The red-colored side of the bounding box indicates the plane that would
be treated as ground plane and has to be set under the model.
Build geometry
3D model reconstruction is a computationally intensive operation, it can take a long
time, depending on the quantity and resolution of loaded photos and selected target
quality.
Select Build Geometry command from the Workflow menu.
Set the following recommended values for the parameters in the Build Geometry
dialog:
Object type: Height-field
Target quality: Medium (higher quality takes quite a long time and demands more
computational resources)
Geometry type: Smooth (smooth geometry type means that nearly all the holes will
be filled) or Sharp (sharp geometry type means exact reconstruction method
without any additional geometry)
Face count: 0 (it means that the maximum face number will not be restricted)
Filter threshold: 0
Hole threshold: 10
Click OK button to start building geometry.
Edit geometry
PhotoScan tends to produce 3D models with excessive geometry resolution. That's
why it is strongly recommended to decimate mesh to avoid unreasonable time-
consumption at orthophoto export stage.
To decimate 3D model select Decimate Mesh... command from the Tools menu.
In the Decimate Mesh dialog specify the target number of faces that should remain in
the final model. For orthophoto generation task it is recommended to downsize the
number of faces to several millions. Click OK button.
If the geometry was built with sharp type setting, to generate holeless orthophoto at
the final stage use Close Holes... command from the Tools menu at geometry editing
stage. In Close Holes dialog select the size of the largest hole to be closed (in
percentage of the total model size).
Click OK button to start holes closing procedure.
Build texture
This step is not really needed in the orthophoto export workflow, but it might be
necessary to inspect a textured model before exporting it or it might be useful for
precise marker placement.
Set the following recommended values for the parameters in the Build Texture
dialog:
Mapping mode: Orthophoto
Blending mode: Mosaic
Atlas width and height: 4096-8192 (it is not reasonable to use higher values for
orthophoto generation)
Click OK button to start building texture.
Generate orthophoto
Select Export Orthophoto -> Export JPEG/TIFF/PNG command from File menu.
Set the following recommended values for the parameters in the Export Orthophoto
dialog:
Projection type: Geographic
Projection: by default the projection set in the Ground Control Settings is used
Blending mode: Mosaic
Fill holes: if the holes were not closed at edit geometry step, check this option to
generate holeless orthophoto
Pixel size: maximum effective resolution is shown by default
Split in blocks: 4096x4096 (if the exported area is large it is recommended to
enable Split in blocks feature, since the memory consumption is rather high
at exporting stage)
Region: set the boundaries of the model's part that should be projected and
presented as orthophoto.
Click Export... button and then specify target file name and select type of the
exported file (e.g. GeoTIFF). Click Save button to start orthophoto generation.
Note: If the model is to be located in Google Earth Standard version, Write KML file
option should be checked in Export Orthophoto dialog. The reason is that Google
Earth Standard version is unable to extract georeferencing data from a GeoTIFF file,
so georeferencing information has to be duplicated in
a KML file to make it possible for Google Earth Standard version to read it.
Export Google KML option could be chosen in the beginning of the orthophoto
generation step (File- Export Orthophoto -> Export Google KML). Note that this
option is active only if the model was georeferenced in WGS 84 datum. In fact,
Google Earth is able to georeference models only in WGS 84 datum.
Generate DEM
Select Export DEM command from File menu.
Set the following recommended values for the parameters in the Export DEM dialog:
Projection type: Geographic
Projection: by default the projection set in the Ground Control Settings is used
Crop invalid DEM: check this option to crop the regions with unreliable elevation
data, since they are visible on less than two source photos
Pixel size: you can increase the effective resolution compared to the default value
Split in blocks: 4096x4096 (if the exported area is large it is recommended to
enable Split in blocks feature, since the memory consumption is rather high
at exporting stage)
Region: set the boundaries of the model's part that should be presented as DEM.
Click Export... button and then specify target file name and select type of the
exported file (e.g. GeoTIFF). Click Save button to start DEM generation.

More Related Content

Similar to Tutorial il-orthophoto-dem-neogeo

Similar to Tutorial il-orthophoto-dem-neogeo (20)

Axis vm stepbystep
Axis vm stepbystepAxis vm stepbystep
Axis vm stepbystep
 
Cnc tutorial mastercam
Cnc tutorial mastercamCnc tutorial mastercam
Cnc tutorial mastercam
 
Simplymap guide
Simplymap guideSimplymap guide
Simplymap guide
 
Xmastcamcribboard
XmastcamcribboardXmastcamcribboard
Xmastcamcribboard
 
CIM and automation laboratory manual
CIM and automation laboratory manualCIM and automation laboratory manual
CIM and automation laboratory manual
 
Surface machining
Surface machiningSurface machining
Surface machining
 
How to design a report with fine report reporting tool
How to design a report with  fine report reporting toolHow to design a report with  fine report reporting tool
How to design a report with fine report reporting tool
 
Digitization arc gis
Digitization arc gisDigitization arc gis
Digitization arc gis
 
Dipole
DipoleDipole
Dipole
 
Ansys iges tutorial
Ansys iges tutorialAnsys iges tutorial
Ansys iges tutorial
 
Civil 3d workflow
Civil 3d workflowCivil 3d workflow
Civil 3d workflow
 
Civil 3d Workflow_NOLOGO
Civil 3d Workflow_NOLOGOCivil 3d Workflow_NOLOGO
Civil 3d Workflow_NOLOGO
 
Digital manager software
Digital manager softwareDigital manager software
Digital manager software
 
Coord transform 082014
Coord transform 082014Coord transform 082014
Coord transform 082014
 
Manual gis
Manual gisManual gis
Manual gis
 
Chapter 02
Chapter 02Chapter 02
Chapter 02
 
Workshop3 pump-geo
Workshop3 pump-geoWorkshop3 pump-geo
Workshop3 pump-geo
 
MSC Generator
MSC GeneratorMSC Generator
MSC Generator
 
Clipping Path Service-Photo Editor PH
Clipping Path Service-Photo Editor PHClipping Path Service-Photo Editor PH
Clipping Path Service-Photo Editor PH
 
lecture_slides_esteem2019-231.pdf
lecture_slides_esteem2019-231.pdflecture_slides_esteem2019-231.pdf
lecture_slides_esteem2019-231.pdf
 

Recently uploaded

exhuma plot and synopsis from the exhuma movie.pptx
exhuma plot and synopsis from the exhuma movie.pptxexhuma plot and synopsis from the exhuma movie.pptx
exhuma plot and synopsis from the exhuma movie.pptxKurikulumPenilaian
 
San Jon Motel, Motel/Residence, San Jon NM
San Jon Motel, Motel/Residence, San Jon NMSan Jon Motel, Motel/Residence, San Jon NM
San Jon Motel, Motel/Residence, San Jon NMroute66connected
 
Lucknow 💋 Virgin Call Girls Lucknow | Book 8923113531 Extreme Naughty Call Gi...
Lucknow 💋 Virgin Call Girls Lucknow | Book 8923113531 Extreme Naughty Call Gi...Lucknow 💋 Virgin Call Girls Lucknow | Book 8923113531 Extreme Naughty Call Gi...
Lucknow 💋 Virgin Call Girls Lucknow | Book 8923113531 Extreme Naughty Call Gi...anilsa9823
 
Lucknow 💋 Cheap Call Girls In Lucknow Finest Escorts Service 8923113531 Avail...
Lucknow 💋 Cheap Call Girls In Lucknow Finest Escorts Service 8923113531 Avail...Lucknow 💋 Cheap Call Girls In Lucknow Finest Escorts Service 8923113531 Avail...
Lucknow 💋 Cheap Call Girls In Lucknow Finest Escorts Service 8923113531 Avail...anilsa9823
 
Bridge Fight Board by Daniel Johnson dtjohnsonart.com
Bridge Fight Board by Daniel Johnson dtjohnsonart.comBridge Fight Board by Daniel Johnson dtjohnsonart.com
Bridge Fight Board by Daniel Johnson dtjohnsonart.comthephillipta
 
FULL ENJOY - 9953040155 Call Girls in Burari | Delhi
FULL ENJOY - 9953040155 Call Girls in Burari | DelhiFULL ENJOY - 9953040155 Call Girls in Burari | Delhi
FULL ENJOY - 9953040155 Call Girls in Burari | DelhiMalviyaNagarCallGirl
 
FULL ENJOY - 9953040155 Call Girls in Paschim Vihar | Delhi
FULL ENJOY - 9953040155 Call Girls in Paschim Vihar | DelhiFULL ENJOY - 9953040155 Call Girls in Paschim Vihar | Delhi
FULL ENJOY - 9953040155 Call Girls in Paschim Vihar | DelhiMalviyaNagarCallGirl
 
The First Date by Daniel Johnson (Inspired By True Events)
The First Date by Daniel Johnson (Inspired By True Events)The First Date by Daniel Johnson (Inspired By True Events)
The First Date by Daniel Johnson (Inspired By True Events)thephillipta
 
Aminabad @ Book Call Girls in Lucknow - 450+ Call Girl Cash Payment 🍵 8923113...
Aminabad @ Book Call Girls in Lucknow - 450+ Call Girl Cash Payment 🍵 8923113...Aminabad @ Book Call Girls in Lucknow - 450+ Call Girl Cash Payment 🍵 8923113...
Aminabad @ Book Call Girls in Lucknow - 450+ Call Girl Cash Payment 🍵 8923113...akbard9823
 
(NEHA) Call Girls Ahmedabad Booking Open 8617697112 Ahmedabad Escorts
(NEHA) Call Girls Ahmedabad Booking Open 8617697112 Ahmedabad Escorts(NEHA) Call Girls Ahmedabad Booking Open 8617697112 Ahmedabad Escorts
(NEHA) Call Girls Ahmedabad Booking Open 8617697112 Ahmedabad EscortsCall girls in Ahmedabad High profile
 
FULL ENJOY - 9953040155 Call Girls in New Ashok Nagar | Delhi
FULL ENJOY - 9953040155 Call Girls in New Ashok Nagar | DelhiFULL ENJOY - 9953040155 Call Girls in New Ashok Nagar | Delhi
FULL ENJOY - 9953040155 Call Girls in New Ashok Nagar | DelhiMalviyaNagarCallGirl
 
Charbagh / best call girls in Lucknow - Book 🥤 8923113531 🪗 Call Girls Availa...
Charbagh / best call girls in Lucknow - Book 🥤 8923113531 🪗 Call Girls Availa...Charbagh / best call girls in Lucknow - Book 🥤 8923113531 🪗 Call Girls Availa...
Charbagh / best call girls in Lucknow - Book 🥤 8923113531 🪗 Call Girls Availa...gurkirankumar98700
 
RAK Call Girls Service # 971559085003 # Call Girl Service In RAK
RAK Call Girls Service # 971559085003 # Call Girl Service In RAKRAK Call Girls Service # 971559085003 # Call Girl Service In RAK
RAK Call Girls Service # 971559085003 # Call Girl Service In RAKedwardsara83
 
FULL ENJOY - 9953040155 Call Girls in Indirapuram | Delhi
FULL ENJOY - 9953040155 Call Girls in Indirapuram | DelhiFULL ENJOY - 9953040155 Call Girls in Indirapuram | Delhi
FULL ENJOY - 9953040155 Call Girls in Indirapuram | DelhiMalviyaNagarCallGirl
 
Call Girl Service In Dubai #$# O56521286O #$# Dubai Call Girls
Call Girl Service In Dubai #$# O56521286O #$# Dubai Call GirlsCall Girl Service In Dubai #$# O56521286O #$# Dubai Call Girls
Call Girl Service In Dubai #$# O56521286O #$# Dubai Call Girlsparisharma5056
 
Lucknow 💋 Escorts Service Lucknow Phone No 8923113531 Elite Escort Service Av...
Lucknow 💋 Escorts Service Lucknow Phone No 8923113531 Elite Escort Service Av...Lucknow 💋 Escorts Service Lucknow Phone No 8923113531 Elite Escort Service Av...
Lucknow 💋 Escorts Service Lucknow Phone No 8923113531 Elite Escort Service Av...anilsa9823
 
FULL ENJOY - 9953040155 Call Girls in Moti Nagar | Delhi
FULL ENJOY - 9953040155 Call Girls in Moti Nagar | DelhiFULL ENJOY - 9953040155 Call Girls in Moti Nagar | Delhi
FULL ENJOY - 9953040155 Call Girls in Moti Nagar | DelhiMalviyaNagarCallGirl
 
FULL ENJOY - 9953040155 Call Girls in Gtb Nagar | Delhi
FULL ENJOY - 9953040155 Call Girls in Gtb Nagar | DelhiFULL ENJOY - 9953040155 Call Girls in Gtb Nagar | Delhi
FULL ENJOY - 9953040155 Call Girls in Gtb Nagar | DelhiMalviyaNagarCallGirl
 
Downtown Call Girls O5O91O128O Pakistani Call Girls in Downtown
Downtown Call Girls O5O91O128O Pakistani Call Girls in DowntownDowntown Call Girls O5O91O128O Pakistani Call Girls in Downtown
Downtown Call Girls O5O91O128O Pakistani Call Girls in Downtowndajasot375
 

Recently uploaded (20)

exhuma plot and synopsis from the exhuma movie.pptx
exhuma plot and synopsis from the exhuma movie.pptxexhuma plot and synopsis from the exhuma movie.pptx
exhuma plot and synopsis from the exhuma movie.pptx
 
San Jon Motel, Motel/Residence, San Jon NM
San Jon Motel, Motel/Residence, San Jon NMSan Jon Motel, Motel/Residence, San Jon NM
San Jon Motel, Motel/Residence, San Jon NM
 
Lucknow 💋 Virgin Call Girls Lucknow | Book 8923113531 Extreme Naughty Call Gi...
Lucknow 💋 Virgin Call Girls Lucknow | Book 8923113531 Extreme Naughty Call Gi...Lucknow 💋 Virgin Call Girls Lucknow | Book 8923113531 Extreme Naughty Call Gi...
Lucknow 💋 Virgin Call Girls Lucknow | Book 8923113531 Extreme Naughty Call Gi...
 
Bur Dubai Call Girls # 971504361175 # Call Girls In Bur Dubai || (UAE)
Bur Dubai Call Girls # 971504361175 # Call Girls In Bur Dubai || (UAE)Bur Dubai Call Girls # 971504361175 # Call Girls In Bur Dubai || (UAE)
Bur Dubai Call Girls # 971504361175 # Call Girls In Bur Dubai || (UAE)
 
Lucknow 💋 Cheap Call Girls In Lucknow Finest Escorts Service 8923113531 Avail...
Lucknow 💋 Cheap Call Girls In Lucknow Finest Escorts Service 8923113531 Avail...Lucknow 💋 Cheap Call Girls In Lucknow Finest Escorts Service 8923113531 Avail...
Lucknow 💋 Cheap Call Girls In Lucknow Finest Escorts Service 8923113531 Avail...
 
Bridge Fight Board by Daniel Johnson dtjohnsonart.com
Bridge Fight Board by Daniel Johnson dtjohnsonart.comBridge Fight Board by Daniel Johnson dtjohnsonart.com
Bridge Fight Board by Daniel Johnson dtjohnsonart.com
 
FULL ENJOY - 9953040155 Call Girls in Burari | Delhi
FULL ENJOY - 9953040155 Call Girls in Burari | DelhiFULL ENJOY - 9953040155 Call Girls in Burari | Delhi
FULL ENJOY - 9953040155 Call Girls in Burari | Delhi
 
FULL ENJOY - 9953040155 Call Girls in Paschim Vihar | Delhi
FULL ENJOY - 9953040155 Call Girls in Paschim Vihar | DelhiFULL ENJOY - 9953040155 Call Girls in Paschim Vihar | Delhi
FULL ENJOY - 9953040155 Call Girls in Paschim Vihar | Delhi
 
The First Date by Daniel Johnson (Inspired By True Events)
The First Date by Daniel Johnson (Inspired By True Events)The First Date by Daniel Johnson (Inspired By True Events)
The First Date by Daniel Johnson (Inspired By True Events)
 
Aminabad @ Book Call Girls in Lucknow - 450+ Call Girl Cash Payment 🍵 8923113...
Aminabad @ Book Call Girls in Lucknow - 450+ Call Girl Cash Payment 🍵 8923113...Aminabad @ Book Call Girls in Lucknow - 450+ Call Girl Cash Payment 🍵 8923113...
Aminabad @ Book Call Girls in Lucknow - 450+ Call Girl Cash Payment 🍵 8923113...
 
(NEHA) Call Girls Ahmedabad Booking Open 8617697112 Ahmedabad Escorts
(NEHA) Call Girls Ahmedabad Booking Open 8617697112 Ahmedabad Escorts(NEHA) Call Girls Ahmedabad Booking Open 8617697112 Ahmedabad Escorts
(NEHA) Call Girls Ahmedabad Booking Open 8617697112 Ahmedabad Escorts
 
FULL ENJOY - 9953040155 Call Girls in New Ashok Nagar | Delhi
FULL ENJOY - 9953040155 Call Girls in New Ashok Nagar | DelhiFULL ENJOY - 9953040155 Call Girls in New Ashok Nagar | Delhi
FULL ENJOY - 9953040155 Call Girls in New Ashok Nagar | Delhi
 
Charbagh / best call girls in Lucknow - Book 🥤 8923113531 🪗 Call Girls Availa...
Charbagh / best call girls in Lucknow - Book 🥤 8923113531 🪗 Call Girls Availa...Charbagh / best call girls in Lucknow - Book 🥤 8923113531 🪗 Call Girls Availa...
Charbagh / best call girls in Lucknow - Book 🥤 8923113531 🪗 Call Girls Availa...
 
RAK Call Girls Service # 971559085003 # Call Girl Service In RAK
RAK Call Girls Service # 971559085003 # Call Girl Service In RAKRAK Call Girls Service # 971559085003 # Call Girl Service In RAK
RAK Call Girls Service # 971559085003 # Call Girl Service In RAK
 
FULL ENJOY - 9953040155 Call Girls in Indirapuram | Delhi
FULL ENJOY - 9953040155 Call Girls in Indirapuram | DelhiFULL ENJOY - 9953040155 Call Girls in Indirapuram | Delhi
FULL ENJOY - 9953040155 Call Girls in Indirapuram | Delhi
 
Call Girl Service In Dubai #$# O56521286O #$# Dubai Call Girls
Call Girl Service In Dubai #$# O56521286O #$# Dubai Call GirlsCall Girl Service In Dubai #$# O56521286O #$# Dubai Call Girls
Call Girl Service In Dubai #$# O56521286O #$# Dubai Call Girls
 
Lucknow 💋 Escorts Service Lucknow Phone No 8923113531 Elite Escort Service Av...
Lucknow 💋 Escorts Service Lucknow Phone No 8923113531 Elite Escort Service Av...Lucknow 💋 Escorts Service Lucknow Phone No 8923113531 Elite Escort Service Av...
Lucknow 💋 Escorts Service Lucknow Phone No 8923113531 Elite Escort Service Av...
 
FULL ENJOY - 9953040155 Call Girls in Moti Nagar | Delhi
FULL ENJOY - 9953040155 Call Girls in Moti Nagar | DelhiFULL ENJOY - 9953040155 Call Girls in Moti Nagar | Delhi
FULL ENJOY - 9953040155 Call Girls in Moti Nagar | Delhi
 
FULL ENJOY - 9953040155 Call Girls in Gtb Nagar | Delhi
FULL ENJOY - 9953040155 Call Girls in Gtb Nagar | DelhiFULL ENJOY - 9953040155 Call Girls in Gtb Nagar | Delhi
FULL ENJOY - 9953040155 Call Girls in Gtb Nagar | Delhi
 
Downtown Call Girls O5O91O128O Pakistani Call Girls in Downtown
Downtown Call Girls O5O91O128O Pakistani Call Girls in DowntownDowntown Call Girls O5O91O128O Pakistani Call Girls in Downtown
Downtown Call Girls O5O91O128O Pakistani Call Girls in Downtown
 

Tutorial il-orthophoto-dem-neogeo

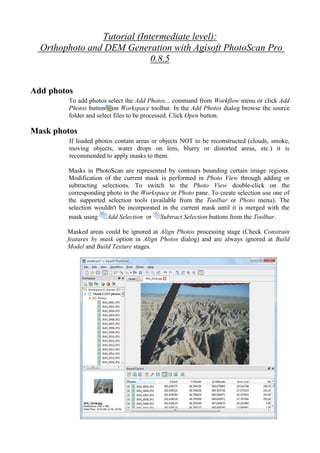
  • 1. Tutorial (Intermediate level): Orthophoto and DEM Generation with Agisoft PhotoScan Pro 0.8.5 Add photos To add photos select the Add Photos... command from Workflow menu or click Add Photos button on Workspace toolbar. In the Add Photos dialog browse the source folder and select files to be processed. Click Open button. Mask photos If loaded photos contain areas or objects NOT to be reconstructed (clouds, smoke, moving objects, water drops on lens, blurry or distorted areas, etc.) it is recommended to apply masks to them. Masks in PhotoScan are represented by contours bounding certain image regions. Modification of the current mask is performed in Photo View through adding or subtracting selections. To switch to the Photo View double-click on the corresponding photo in the Workspace or Photo pane. To create selection use one of the supported selection tools (available from the Toolbar or Photo menu). The selection wouldn't be incorporated in the current mask until it is merged with the mask using Add Selection or Subtract Selection buttons from the Toolbar. Masked areas could be ignored at Align Photos processing stage (Check Constrain features by mask option in Align Photos dialog) and are always ignored at Build Model and Build Texture stages.
  • 2. Add ground control At this step coordinate system for the future model is set using camera positions. Note: If camera positions are unknown this step could be skipped. The align photos procedure, however, would take more time in this case. Open Ground Control pane using the corresponding command from the View menu. Click Import button on the Ground Control pane toolbar and select file containing camera positions information in the Open dialog. The easiest way is to load simple character-separated file (*.txt) that contains x- and y- coordinates and height for each camera position (camera orientation data, i.e. pitch, roll and yaw values, could also be imported, but the data is not obligatory). In Import CSV dialog indicate the delimiter according to the structure of the loading file and select the row to start loading from. Note that rows are numbered starting from zero; # character indicates a commented line that is not counted while numbering the rows. Indicate for the program what parameter is specified in each column through setting correct column numbers in the Columns section of the dialog. Columns are numbered from zero as well. Check your settings in the sample data field in Import CSV dialog. Click Open button. The data will be loaded into the Ground Control pane.
  • 3. Import EXIF Ground Control pane toolbar button can also be used to load camera positions information if EXIF meta-data is available. Then click on the Settings button in the Ground Control pane and in the Ground Control Settings dialog select corresponding coordinate system from the list. Click OK and camera positions will be marked in Model View using their geographical coordinates:
  • 4. Align photos At this stage PhotoScan refines the camera position for each photo and builds the point cloud model. Select Align Photos command from the Workflow menu. Set the following recommended values for the parameters in the Align Photos dialog: Accuracy: High (higher accuracy setting helps to obtain more accurate camera positions estimates. Lower accuracy setting can be used to get rough camera positions in a shorter period of time) Pair preselection: Ground Control (in ground control preselection mode PhotoScan matches only overlapping images, which significantly speeds up the procedure in case of hundreds of photos) Constrain features by mask: Enabled (if any masks are applied). Otherwise, Disabled Click OK button to start photo alignment. Place markers Markers are used to optimize camera positions and orientation data, which allows for better model reconstruction results. To generate quality orthophoto at least 10 ground control points (GCP) should be marked evenly within the area to be processed. To be able to follow guided marker placement approach (that would be faster and easier) you need to reconstruct geometry first. Select Build Geometry... command from the Workflow menu and specify following parameters in the Build Geometry dialog: Click OK button.
  • 5. Then, when the geometry is built (it usually takes a few seconds), open a photo where a GCP is visible in Photo View double-clicking on its icon in the Photo pane. Switch to marker editing mode using Edit Markers toolbar button. Zoom in to locate the GCP on the photo and place a marker in the corresponding point of the image using Create Marker command from the photo context menu available on right-click on the opened photo in the corresponding position: Select the marker on the Ground Control pane. Then filter images in Photo pane using Filter by Markers Photo pane toolbar button.
  • 6. Now you need to check the marker location on every related photo and refine its position if necessary to provide maximum accuracy. Open each photo where the created marker is visible. Zoom in and drag the marker to the correct location using the mouse in the Edit Markers mode. Repeat the described step for every GCP. Finally, import marker coordinates from a file. Click Import button on the Ground Control pane toolbar and select file containing GCP coordinates data in the Open dialog. The easiest way is to load simple character-separated file (*.txt) that contain markers name, x-, y- coordinates and height. In Import CSV dialog indicate the delimiter according to the structure of the file and select the row to start loading from. Note that rows are numbered starting from zero; # character indicates a commented line that is not counted while numbering the rows. Indicate for the program what parameter is specified in each column through setting correct column numbers in the Columns section of the dialog. Columns are numbered from zero as well. Check your settings in the sample data field in Import CSV dialog: Click OK button. The data will be loaded into the Ground Control pane. Optimize photo alignment To achieve higher accuracy in calculating camera external and internal parameters and to correct possible distortion (e.g. “bowl effect” and etc.) optimization procedure should be run. This step is especially recommended if the ground control point coordinates are known almost precisely (several centimeters accuracy) (marker based optimization procedure).
  • 7. Click the Settings button in the Ground Control pane and in the Ground Control Settings dialog select corresponding coordinate system from the list according to the GCP coordinates data. Set the following values for the parameters in Measurement accuracy section: Camera accuracy: 10 Marker accuracy: 0 (PhotoScan will assume that markers coordinates are known exactly, which can help to obtain more accurate results. The marker accuracy is recommended to be set at 0 value if the real marker accuracy is within 0.02 m) Projection accuracy: 0.1 Click OK button. On the Ground Control pane uncheck all photos and check the markers to be used in optimization procedure. The rest of the markers that are not taken into account can serve as control points to evaluate the optimization results. Click Optimize button on the Ground Control pane toolbar. Select camera parameters you would like to optimize. Click OK button to start optimization process.
  • 8. Set bounding box This step is optional since PhotoScan automatically calculates bounding box dimensions and location. It is recommended, however, to check if any correction is needed as geometry reconstruction procedure is applied only to the area inside the bounding box and odd points exclusion may speed up the process. Bounding box is resizable and rotatable with the help of Resize Region and Rotate Region tools from the Toolbar. Important: The red-colored side of the bounding box indicates the plane that would be treated as ground plane and has to be set under the model. Build geometry 3D model reconstruction is a computationally intensive operation, it can take a long time, depending on the quantity and resolution of loaded photos and selected target quality. Select Build Geometry command from the Workflow menu. Set the following recommended values for the parameters in the Build Geometry dialog:
  • 9. Object type: Height-field Target quality: Medium (higher quality takes quite a long time and demands more computational resources) Geometry type: Smooth (smooth geometry type means that nearly all the holes will be filled) or Sharp (sharp geometry type means exact reconstruction method without any additional geometry) Face count: 0 (it means that the maximum face number will not be restricted) Filter threshold: 0 Hole threshold: 10 Click OK button to start building geometry. Edit geometry PhotoScan tends to produce 3D models with excessive geometry resolution. That's why it is strongly recommended to decimate mesh to avoid unreasonable time- consumption at orthophoto export stage. To decimate 3D model select Decimate Mesh... command from the Tools menu. In the Decimate Mesh dialog specify the target number of faces that should remain in the final model. For orthophoto generation task it is recommended to downsize the number of faces to several millions. Click OK button. If the geometry was built with sharp type setting, to generate holeless orthophoto at the final stage use Close Holes... command from the Tools menu at geometry editing stage. In Close Holes dialog select the size of the largest hole to be closed (in percentage of the total model size). Click OK button to start holes closing procedure. Build texture This step is not really needed in the orthophoto export workflow, but it might be necessary to inspect a textured model before exporting it or it might be useful for precise marker placement.
  • 10. Set the following recommended values for the parameters in the Build Texture dialog: Mapping mode: Orthophoto Blending mode: Mosaic Atlas width and height: 4096-8192 (it is not reasonable to use higher values for orthophoto generation) Click OK button to start building texture. Generate orthophoto Select Export Orthophoto -> Export JPEG/TIFF/PNG command from File menu.
  • 11. Set the following recommended values for the parameters in the Export Orthophoto dialog: Projection type: Geographic Projection: by default the projection set in the Ground Control Settings is used Blending mode: Mosaic Fill holes: if the holes were not closed at edit geometry step, check this option to generate holeless orthophoto Pixel size: maximum effective resolution is shown by default Split in blocks: 4096x4096 (if the exported area is large it is recommended to enable Split in blocks feature, since the memory consumption is rather high at exporting stage) Region: set the boundaries of the model's part that should be projected and presented as orthophoto. Click Export... button and then specify target file name and select type of the exported file (e.g. GeoTIFF). Click Save button to start orthophoto generation. Note: If the model is to be located in Google Earth Standard version, Write KML file option should be checked in Export Orthophoto dialog. The reason is that Google Earth Standard version is unable to extract georeferencing data from a GeoTIFF file, so georeferencing information has to be duplicated in a KML file to make it possible for Google Earth Standard version to read it. Export Google KML option could be chosen in the beginning of the orthophoto generation step (File- Export Orthophoto -> Export Google KML). Note that this option is active only if the model was georeferenced in WGS 84 datum. In fact, Google Earth is able to georeference models only in WGS 84 datum.
  • 12. Generate DEM Select Export DEM command from File menu. Set the following recommended values for the parameters in the Export DEM dialog: Projection type: Geographic Projection: by default the projection set in the Ground Control Settings is used Crop invalid DEM: check this option to crop the regions with unreliable elevation data, since they are visible on less than two source photos Pixel size: you can increase the effective resolution compared to the default value Split in blocks: 4096x4096 (if the exported area is large it is recommended to enable Split in blocks feature, since the memory consumption is rather high at exporting stage) Region: set the boundaries of the model's part that should be presented as DEM. Click Export... button and then specify target file name and select type of the exported file (e.g. GeoTIFF). Click Save button to start DEM generation.