Datavideo HDR-60 Desktop HD-SDI 1080p Hard Disk Recorder
•
0 likes•490 views

The Datavideo HDR-60 is a hard drive based video recorder, with removable hard drive enclosure, designed for studio desktop applications.

Recommended
More Related Content
What's hot
Viewers also liked
Viewers also liked (18)
Similar to Datavideo HDR-60 Desktop HD-SDI 1080p Hard Disk Recorder
Similar to Datavideo HDR-60 Desktop HD-SDI 1080p Hard Disk Recorder (20)
More from AV ProfShop
More from AV ProfShop (20)
Recently uploaded
Recently uploaded (19)
Datavideo HDR-60 Desktop HD-SDI 1080p Hard Disk Recorder
- 2. Table of contents Warranty ........................................................................................................................................................................... 3 Disposal............................................................................................................................................................................ 3 Packing List ..................................................................................................................................................................... 3 Connections & Controls ................................................................................................................................................. 4 Front Panel......................................................................................................................................................... 4 Rear Panel ......................................................................................................................................................... 6 MENU Key Function ........................................................................................................................................................ 7 TOOL........................................................................................................................................................................ 7 FIRMWARE REVISION ..................................................................................................................................... 7 ERASE THIS BIN............................................................................................................................................... 7 FORMAT MEDIA................................................................................................................................................ 7 UPRGRADE FIRMWARE.................................................................................................................................. 7 UN LOCK MEDIA............................................................................................................................................... 8 SETUP...................................................................................................................................................................... 9 RECORD SETUP .............................................................................................................................................. 9 PLAY SETUP ................................................................................................................................................... 10 SYSTEM SETUP ..............................................................................................................................................11 SAVE SETUP................................................................................................................................................... 12 RECALL SETUP .............................................................................................................................................. 12 STATUS .................................................................................................................................................................. 12 How to Assemble 2.5" HDD in Removable Rack........................................................................................................ 13 HDR-60/70 GPI Pin Define............................................................................................................................................. 14 HDR-60/70 RS-232/422 Control Command.................................................................................................................. 15 Specifications ................................................................................................................................................................ 19 Service & Support ......................................................................................................................................................... 20 2
- 3. Warranty Standard Warranty • Datavideo equipment is guaranteed against any manufacturing defects for one year from the date of purchase. • The original purchase invoice or other documentary evidence should be supplied at the time of any request for 3 repair under warranty. • Damage caused by accident, misuse, unauthorized repairs, sand, grit or water is not covered by this warranty. • All mail or transportation costs including insurance are at the expense of the owner. • All other claims of any nature are not covered. • Cables & batteries are not covered under warranty. • Warranty only valid within the country or region of purchase. • Your statutory rights are not affected. Two Year Warranty • All Datavideo products purchased after 01-Oct.-2008 qualify for a free one year extension to the standard Warranty, providing the product is registered with Datavideo within 30 days of purchase. For information on how to register please visit www.datavideo-tek.com or contact your local Datavideo office or authorized Distributors • Certain parts with limited lifetime expectancy such as LCD Panels, DVD Drives, Hard Drives are only covered for the first 10,000 hours, or 1 year (whichever comes first). Any second year warranty claims must be made to your local Datavideo office or one of its authorized Distributors before the extended warranty expires. Disposal For EU Customers only - WEEE Marking This symbol on the product indicates that it will not be treated as household waste. It must be handed over to the applicable take back scheme for the recycling of electrical and electronic equipment. For more detailed information about the recycling of this product, please contact your local Datavideo office. Packing List The following items should be included in the box. If any items are missing please contact your supplier. 1 x HDR -60 units 1 x Accessory note 1 x Quick Start Guide
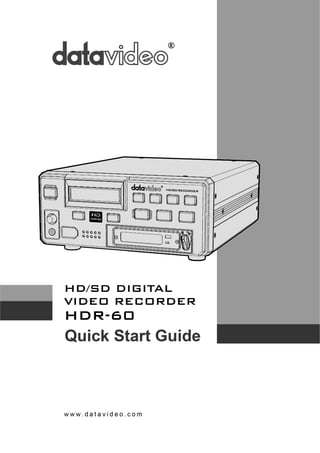
- 4. 4 Connections & Controls Front Panel Power On / Off Button. This is a soft power on / off button which powers the unit on from standby; the main power on / off switch is on the rear. Display Panel. Shows bin number, time code, audio meters or the Menu Display. Menu Button. This calls up the menu display which is navigated using the Previous / Next Buttons. Note1: In play state, press MENU button, display panel will show the information of playing file. Note2: In record state, press MENU button, display panel will show the information of recording file. Fwd / Rew Buttons. In playback state, these buttons will operate as Fast Forward and Rewind Buttons. On playing state, press Fwd or Rew button and then press Previous / Next Buttons; If pressed multiple times, HDR-60 will fast play forward or rewind in x1, x3, x6, x9, and x12. Record Mode Button. When you want to record press the Record Mode button first. In Record Mode (Record Mode button light on), press play button, HDR-60 must be internal conversion to play state, so need to wait 3~5 seconds. In Play Mode (Record Mode button light off), press play button, HDR-60 is on play state, so HDR-60 can play file immediately. Note: In Record Mode playing file, if HDR-60 SDI source lost signal, the playing file’s video and audio will be not synchronized, so please play file on the Play Mode.
- 5. To start recording press the Record Button and Play Button simultaneously. Note1: Unit will not record if no video signal is present. Note2: In HDR-60 play state, press Record button, display panel will show the CH1~CH4 audio meters; press Record button again will show the CH5~CH8 audio meters. Play / Pause Button. Starts playback of a bin, or pauses playback of a bin- status will be displayed on the Display Panel. Note1: In HDE-60 play state, press and hold PLAY button and press Fwd or Rew button, HDR-60 will skip 8 seconds. Note2: In pause state, press and hold PAUSE button and press Fwd or Rew button, HDR-60 will skip to next or previous clip. How to select a clip in a bin on an HDR-60 in Play mode? How to select a clip in a bin on an HDR-60 in Play mode? In other words: When a bin contains 4 clips, how can I get direct access to clip #3 or # 4, without having to play clip #1 and #2 first? You can do following: #1. Play from clip 1 #2. Pause and use combination keys to skip to next clip: Press and hold play key during pause and press fast forward key to skip to next clip. #3. After #2 is done, HDR will start to play next clip. You need to pause and use combination keys again in order to skip to following clips. Stop Button. In stop state, press and hold PLAY button 4 second and then release PLAY button, HDR-60 will play last the 15 second of a bin. Previous / Next Buttons. Navigate up and down between recorded bins and menu options. Audio Monitor Level Adjustments allow you to adjust the headphone volume. Stereo mini jack plug for stereo headphone. The Audio Input Level LEDs show the audio input levels from the incoming source. 2.5" Removable HDD Rack, SATA & USB interface connecting to a PC for file transfer. 5
- 6. 6 Rear Panel The GPI socket can be used for external control. The HDR-60 can accept pulse or level trigger inputs to activate record or playback and pause commands. Mini XLR inputs and Outputs for Balanced Audio Connection. Black Burst input/ output Can be used as a video reference source when synchronization other devices to the HDR-60. HD/SD-SDI input and loop through output connectors. HDR-60 can use an internal or external time code source. In RECORD state, the source time code will through to output. In PLAY state, the output time code source is from the HDR-60 playing file. HDMI Out Ports. Ports for connecting to HDMI external devices. HD- SDI input, output and pass-through output connectors. 4:2:2 SDI Video data supports SMPTE 292M standard at 1.5Gbps. RS-232/422 user selectable remote control (select in menu). DC In Socket. Connect the supplied 12V PSU to this socket. Power On/Off Switch. Grounding Terminal. When connecting this unit to any other component, make sure that it is properly grounded by connecting this terminal to an appropriate point. When connecting, use the socket and be sure to use wire with a cross-sectional area of at least 1.0 mm2.
- 7. MENU Key Function TOOL FIRMWARE REVISION Display the HDR-60 firmware information: CODEC, HOST, REC…etc. 7 Press the (MENU) button into the menu mode. Press the (ENTER) button once into the TOOL menu. Press the (ENTER) button into the FIRMWARE REVISION menu. Press the (NEXT) button to see other Firmware information. ERASE THIS BIN ERASE THIS BIN is used for deleting individual bins from the HDR-60. Press the (MENU) button into the menu mode. Press the (ENTER) button into the TOOL menu. Press the (NEXT) button to select the ERASE THIS BIN menu. Press the (ENTER) button into the ERASE THIS BIN menu. Press the (ENTER) button to erase the selected bin - The bin duration will return to 00:00:00:00. FORMAT MEDIA Format Media will remove all bins from the hard drive. Press the (MENU) button into the menu mode. Press the (ENTER) button into the TOOL menu. Press the (NEXT) button twice to select the FORMAT MEDIA menu. Press the (ENTER) button into the FORMAT MEDIA menu. Press the (FORMAT) Button to erase the selected bin - The bin duration will return to 00:00:00:00 After a few seconds the HDR-60 will return to normal. Note: When your 2.5’’ HDD has format media, and then first time you connect the HDD to computer, the computer needs about 20 seconds to link this HDD.
- 8. UPRGRADE FIRMWARE Update the HDR-60 firmware step: 1. Select the FORMAT MEDIA to format 2.5’’ HDD. 2. Turn off the HDR-60 power. 3. Move out the 2.5''HDD of HDR-60. 4. Connect it to your computer. 5. Rename FW file to “flash.bin”. 6. Copy the firmware update file (flash.bin) to the root directory of 2.5’’HDD. 7. Insert the 2.5’’ HDD in the HDR-60 and select the UPGRADE FIRMWARE option and follow the instructions UPGRADE FINISH! WARNING: Wait until you see th en reboot system. 8 PLEASE POWER CYCLE! Press the (MENU) button into the menu mode. Press the (ENTER) button into the TOOL menu. Press the (NEXT) button three times to select the UPRGRADE FIRMWARE menu. Press the (ENTER) button to upgrade the HDR-60 firmware. *NB: The process will take approximately few minutes to complete. UNLOCK MEDIA After you record file at HDR-60, the 2.5’’HDD format is read only, if you want copy computer file to this 2.5’’HDD, you need unlock media for 2.5’’ HDD. Press the (MENU) button into the menu mode. Press the (ENTER) button into the TOOL menu. Press the (NEXT) button four times to select the UNLOCK MEDIA menu. Press the (ENTER) button to unlock media files.
- 9. 9 SETUP RECORD SETUP Press the (MENU) button into the menu mode. Press the (NEXT) button to select the SETUP menu. Press the (ENTER) button into the SETUP menu. Press the (ENTER) button into the RECORD SETUP menu. Press the (ENTER) button into the SET HD ENCODE FORMAT / SET SD ENCODE FORMAT / SET REC FILE TYPE / SET REC CHANNEL NUM / SET SD ASPECT RATIO / TIME-LAPSE SETUP / PWR ON AUTO-RECORD menu. SET HD ENCODE FORMAT Setting the HD video encode format to LONG GOP or I FRAME ONLY (encode Intra frame only). SET SD ENCODE FORMAT Setting the SD video encode format to LONG GOP or I FRAME ONLY (encode Intra frame only). SET REC FILE TYPE Setting the record file type is mxf or mov in HD and SD. SET REC CHANNEL NUM Audio channel selection: User can select to record 2, 4, 8 channels of audio. SET SD ASPECT RATIO Sets the SD aspect ratio to 16:9 or 4:3. TIME-LAPSE SETUP Setting the TIME-LAPSE ON/ OFF. Setting the TIME-LAPSE FRAME RATE (1 frame / 1 sec). Setting the TIME-LAPSE CYCLE (y frame per x sec). PWR ON AUTO- RECORD Setting the POWER ON AUTO-RECORDS mode on / off.
- 10. 10 PLAY SETUP Press the (MENU) button into the menu mode. Press the (NEXT) button to select the SETUP menu. Press the (ENTER) button into the SETUP menu. Press the (NEXT) button to select the PLAY SETUP menu. Press the (ENTER) button into the PLAY SETUP menu. Press the (ENTER) button into the SET LOOP PLAY / POWER ON AUTO-PLAY / SET GEN LOCK / SET PLAY CENTRIC / menu. SET LOOP PLAY Setting the LOOP PLAY mode (on / off). POWER ON AUTO-PLAY Setting the POWER ON AUTO-PLAY mode (on / off). SET GEN LOCK Setting the GEN LOCK mode (on / off). Note: On Record Mode or recording is no GEN-LOCK function; only on play mode have the GEN-LOCK function. SET PLAY CENTRIC Setting the PLAY CENTRIC mode (bin / clip). clip = When LOOP PLAY mode is on, HDR-70 will loop play clip file. When LOOP PLAY mode is off, HDR-70 will pause at the end of the clip. bin = When LOOP PLAY mode is on, HDR-70 will play all clips of bin file till reach to the end of last clip and then loop back to beginning of the clip 1. When LOOP PLAY mode is off, HDR-70 will pause at the end of the bin. *1 bin = 99 clip (max).
- 11. 11 SYSTEM SETUP Press the (MENU) button into the menu mode. Press the (NEXT) button to select the SETUP menu. Press the (ENTER) button into the SETUP menu. Press the (NEXT) button twice to select the SYSTEM SETUP menu. Press the (ENTER) button into the SYSTEM SETUP menu. Press the (ENTER) button into the SET AUDIO MONITOR / SELECT AUDIO SOURCE / SET TIMECODE / SET GPI / SET REMOTE INTERFACE / SET BUZZER / SET LONG TIME STOP / DATE & TIME SETUP menu. SET AUDIO MONITOR Setting the AUDIO MONITOR display channel 1&2, 3&4, 5&6 or 7&8. SET AUDIO SOURCE Setting the AUDIO SOURCE (CH1&2) from SDI or XLR (analog input). SET TIMECODE Setting the TIME CODE running at INTERNAL RCA RUN / INTERNAL FREE RUN / EXTERNAL TC IN or EXTERNAL SDI TC. SET GPI SET GPI MODE - Setting the GPI mode at PULSE or LEVEL. SET GPI FUNCTION - Setting the GPI start trigger for recording or playing. SET REMOTE INTERFACE Setting the remote control from RS-232 or RS-422. SET BUZZER This buzzer will be activated to alarm if there is a "un-recoverable" defect of HDR-60/70. That means if there is a critical error happened, e.g. when HDR-60/70 is under "recording" mode, but somebody did a mistake to open the Hard Disk Drive, then the Buzzer will alarm to warn the user (of course if you turn the switch OFF from the setting menu, then the buzzer will NOT alarm!). SET LONG TIME STOP Setting the HOLD 1 SEC TO STOP function on / off. DATE & TIME SETUP Setting the DATE & TIME.
- 12. 12 SAVE SETUP Press the (MENU) button into the menu mode. Press the (NEXT) button into the SETUP menu. Press the (ENTER) button into the SETUP menu. Press the (NEXT) button three times to select the SAVE SETUP menu. Press the (ENTER) button into the SAVE SETUP menu. Press the (NEXT) button to select save to the USER #1 or USER #2. Press the (ENTER) button to confirm your select. RECALL SETUP Press the (MENU) button into the menu mode. Press the (NEXT) button into the SETUP menu. Press the (ENTER) button into the SETUP menu. Press the (NEXT) button four times to select the RECALL SETUP menu. Press the (ENTER) button into the RECALL SETUP menu. Press the (NEXT) button to select load USER #1 / USER #2 or FACTORY DEFAULT file. Press the (ENTER) button to confirm your select. STATUS Press the (MENU) button into the menu mode. Press the (NEXT) button twice into the STATUS menu. Press the (ENTER) button into the STATUS menu. Press the (NEXT) button to see the FILE FORMAT / REC BIT-RATE (HD/SD) / INPUT / AUDIO / TIME CODE status.
- 13. How to Assemble 2.5" HDD in Removable Rack 1. Remove two screws from the 2.5" removable HDD rack rear cover then pull out the PCB. 2. Assemble four screws to fasten 2.5" HDD on PCB. 13 3. Push PCB into the HDD rack. 4. Assemble two screws to fasten HD rack rear cover. 5. Push 2.5" HDD Removable rack into HDR-60 then turn button to left lock the rack.
- 14. 14 HDR-60/70 GPI Pin Define
- 15. HDR-60/70 RS-232/422 Control Command 1. Interface Overview Standard transmission rate on the interface bus is 38400 bits per seconds (bps) 1 Start bit + 8 Data bits + 1 Parity bit + 1 Stop bit. Odd Parity 15 2. Command Table Command Name Response Data Common Transport Control 20h, 00h, 20h Stop 10h, 01h, 11h 20h, 01h, 21h Play 10h, 01h, 11h 20h, 02h, 22h Record 10h, 01h, 11h 21h, 02h, 00h, 23h Record Pause 10h, 01h, 11h Common Trick Play 21h, 11h,, 00h, 32h Play Pause 10h, 01h, 11h 20h, 10h, 30h Fast Forward 10h, 01h, 11h 21h, 13h,, nn, csum Shuttle Forward 10h, 01h, 11h 20h, 15h, 35h Jump Forward 10h, 01h, 11h 20h, 20h, 40h Fast Rewind 10h, 01h, 11h 21h, 23h,, nn, csum Shuttle Reverse 10h, 01h, 11h 20h, 25h, 45h Jump Reverse 10h, 01h, 11h Vender Unique Control 01h, F0h, nn, csum Select Bin(1~99) 10h, 01h, 11h 00h, F1h, F1h Next Bin 10h, 01h, 11h 00h, F2h, F2h Previous Bin 10h, 01h, 11h Common System Control 00h, 11h, 11h Device Type Request 12h, 11h, 00h, 00h, 23h Vender Unique Control (External) 02h, F3h, 01h, nn, csum Select Bin & Delete(1~99) 10h, 01h, 11h 02h, F3h, 02h, xx, csum Idle mode select Record/Play 10h, 01h, 11h 02h, F3h, 02h, 00h, F7h Play Mode 10h, 01h, 11h 02h, F3h, 02h, 01h, F8h Recorder Mode 10h, 01h, 11h 02h, F3h, 04h, xx, csum Audio Input Select 10h, 01h, 11h 02h, F3h, 04h, 00h, F9h Audio Input :SDI 10h, 01h, 11h 02h, F3h, 04h, 01h, FAh Audio Input :XLR 10h, 01h, 11h 02h, F3h, 05h, xx, csum HD Rec Format (I-only/LGOP) 10h, 01h, 11h 02h, F3h, 05h, 00h, FAh HD Long-GOP 10h, 01h, 11h 02h, F3h, 05h, 01h, FBh HD I frame only 10h, 01h, 11h 02h, F3h, 06h, xx, csum Bit Rate Select (HD) 10h, 01h, 11h LGOP:10/25/35/50/65/120 10h, 01h, 11h I-only:100/125 10h, 01h, 11h 02h, F3h, 07h, xx, csum Bit Rate Select (SD) 10h, 01h, 11h LGOP:8/15/30/50 10h, 01h, 11h I-only:25/50 10h, 01h, 11h 02h, F3h, 09h, xx, csum SD Aspect 4x3 or 16x9 10h, 01h, 11h 02h, F3h, 09h, 00h, FEh SD Aspect :4x3 10h, 01h, 11h 02h, F3h, 09h, 01h, FFh SD Aspect :16x9 10h, 01h, 11h 02h, F3h, 0Ah, xx, csum SD Rec Format (I-only/LGOP) 10h, 01h, 11h 02h, F3h, 0Ah, 00h, FFh SD Long-GOP 10h, 01h, 11h 02h, F3h, 0Ah, 01h, 00h SD I frame only 10h, 01h, 11h 02h, F5h, 08, xx, csum Loop Play control 10h, 01h, 11h 02h, F5h, 08h, 00h, FFh Disable Loop Play 10h, 01h, 11h 02h, F5h, 08h, 01h, 00h Enable Loop Play 10h, 01h, 11h Vender Unique System Control 21h, F1h, 00h, 12h Next (Right key) 10h, 01h, 11h 21h, F1h, 01h, 13h Next Bin 10h, 01h, 11h 21h, F1h, 02h, 14h Next Clip 10h, 01h, 11h 21h, F2h, 00h, 13h Previous (Left Key) 10h, 01h, 11h
- 16. Command Name Response Data 21h, F2h, 01h, 14h Previous Bin 10h, 01h, 11h 21h, F2h, 02h, 15h Previous Clip 10h, 01h, 11h Vender Unique System Commands (External) 01h, F6h, 00, F7h Make Media File (Unlock Media) 10h, 01h, 11h 01h, F6h, 01, F8h Empty Current Bin 10h, 01h, 11h 01h, F6h, 02, F9h Empty All (Format Media) 10h, 01h, 11h 16 Sense Control 61h, 0Ch, 04h, 71h Start Time code Sense 74h, 00h, TC(3:0), csum 61h, 0Dh, 04h, 72h Current Frame Offset 74h, 0Dh, [4 bytes] , csum 61h, 20h, 0Fh, 90h Status Sense 7Fh, 20h, [15 bytes], csum 61h, 20h, xnh, csum Variable Status Sense 7nh, 20h, [n bytes], csum Vender Unique Sense Control 62h, F2h, 05h, 00h, 59h Firmware Revision Sense (Recorder) 79h, F2h, 05h, 00h, [7 bytes] , csum 62h, F2h, 05h, 01h, 5Ah Firmware Revision Sense (Host) 79h, F2h, 05h, 01h, [7 bytes] , csum 62h, F2h, 05h, 02h, 5Bh Firmware Revision Sense (CODEC) 79h, F2h, 05h, 02h, [7 bytes] , csum 3. Return Data 10h 01h : ACK 10h 01h csum When a command from the CONTROLLER is received normally, the DEVICE returns this command as acknowledgment 11h 12h : NAK 11h 12h Data byte csum When a communication error is detected or an undefined COMMAND is received, the DEVICE returns this command as not-acknowledgment. Bit-7 to Bit-0 of Data byte will be set in accordance with the contents. [Data byte] Bit-7 Bit-6 Bit-5 Bit-4 Bit-3 Bit-2 Bit-1 Bit-0 0 0 Parity Error INHIBIT CHECKSUM ERROR 0 UNDEFINED COMMAND 12h 11h : DEVICE TYTPE 12h 11h Device byte1 Device byte2 csum The“00h, 11h, 11h : DEVICE TYPE REQUEST” command is used for asking the specifications of the HDR-60/70 used as DEVICE. When the DEVICE receives this command, it attaches 2-bytes specification data to “12h 11h : DEVICE TYPE” and sends the information to the CONTROLLER. HDR-60/70: 12h , 11h, 00h, 00h, csum, 4. Trick Play 21h 13h nn csum : Shuttle Forward 21h 23h nn csum : Shuttle Reverse nn speed Command Forward Command Reverse 62h 12X 21h 13h 62h 96h 21h 23h 62h A6h 5E h 9X 21h 13h 5E h 92h 21h 23h 5E h A2h 58 h 6X 21h 13h 58h 8Ch 21h 23h 58h 9Ch 4F h 3X 21h 13h 4F h 83h 21h 23h 4F h 93h 40h 1X 21h 13h 40h 74h 21h 23h 40h 84h
- 17. 17 5. Vender Unique System Control 21h, F1h, 02h, 14h : Next Clip 21h, F2h, 02h, 15h : Previous Clip Note: Only can do clip-change at play-pause 6. Firmware Revision Sense Data[7bytes] Firmware Revision Sense (Recorder) Byte[0]: ROM Byte [1]: FW Major Byte [2]: FW Minor Byte [3]: File System Byte [4]: FPGA Byte [5]: RBF Byte [6]: ESP Firmware Revision Sense (Host) Byte [0]: FW Major Byte [1]: FW Minor Byte [2]: Control CMD Major Byte [3]: Control CMD Minor Byte [4]: Bootloader Minor Byte [5]: 0x00 Byte [6]: 0x00 Firmware Revision Sense (Codec) Byte [0]: Codec Bootloader Major Byte [1]: Codec Bootloader Minor Byte [2]: Codec Host Major Byte [3]: Codec Host Minor Byte [4]: Codec Major Byte [5]: Codec Minor Byte [6]: 0x00 7. Variable Status Sense 61h, 20 h, xnh, csum The return-byte is variable for Status Sense. The 3rd byte of command: MSD (Bit7~4, x): Indicates the initial byte index of the to be returned. LSD (Bit3~0, n): Indicates the number of data bytes to be returned.
- 18. 8. Status Sense Control Command Response Bytes 18 Mode Status: 0=Play Mode 1=Record Mode Status Byte Bit 7 Bit 6 Bit 5 Bit 4 Bit 3 Bit 2 Bit 1 Bit 0 0 Busy 0 Cartridge Out 0 0 Wrong Media 0 Local enable 1 0 0 Stop 0 Rewind Fast Forward Record Play 2 0 0 0 0 Reverse Still (Pause) 0 3 0 0 0 0 0 0 Video in 0 4 1 0 0 0 1 0 0 0 5 0 0 0 0 0 0 0 6 0 0 0 0 0 0 0 0 7 0 0 0 0 0 0 0 0 8 0 0 Near End of Disk (panic mode) End of disk 0 0 0 Mode Status 9 0 0 0 0 0 0 0 0 10 BIN7 BIN6 BIN5 BIN4 BIN3 BIN2 BIN1 BIN0 11 File Length byte 0 FL0 FL0 FL0 FL0 FL0 FL0 FL0 12 Length Byte 1 FL1 FL1 FL1 FL1 FL1 FL1 FL1 13 Length Byte 2 FL2 FL2 FL2 FL2 FL2 FL2 FL2 14 Length Byte 3 FL3 FL3 FL3 FL3 FL3 FL3 FL3 Revision History: Revision 00 31(02/27/2014) 1. Add REC-Pause Command 2. Support Variable status sense 3. Add Wrong format/Mode in status sense response byte. Revision 00 2A(01/08/2014) 1. Not support slow play Revision 00 29(01/03/2014) 1. Add Trick play command 2. Add select clip command 3. Busy bit will be set at change status 4. Add Parity error bit Revision 00 28(10/31/2013) Revision 00 27(10/29/2013) Revision 00 02 (08/25/2013) Revised on 11/14/2012
- 19. 19 Specifications HDD Size HDD: 250/320/500/750 GB SSD: 120/128/240/256/480/512 GB HD/SD-SDI Video Input Time code HD/SD-SDI Video Output HDMI Time code IN/OUT Time code Balance Audio Analog 2-CH Audio Input HD/SD-SDI ( 8CH) Balance Audio Analog 2-CH Audio Output HD/SD-SDI (8CH) HDMI / 4 CH Headphone REC / PLAY File Format MXF OP1A File System NTFS RS-232/RS-422 Record BIN: 99 Bins@99Clips/Bin Pre-record(I-frame only; Maximum 4 sec) Power On Record Power On Play Timelapse Rec (I-frame only) Misc. Reference In/Out IN & Loop through, Black Burst and Tri-Level signal Video Format SD 50/59.94 Hz HD 720P@50/59.94/60 1080i@50/59.94/60 1080P@23.976/24 Color Format (4:2:0/4:2:2) MPEG2 Long GOP MPEG2 Long GOP HD 1. 10Mbps 4:2:0 1440x1080/1280x720 2. 25Mbps 4:2:0 1440x1080/1280x720 3. 35Mbps 4:2:2 1920x1080/1280x720 4. 50 Mbps 4:2:2 1920x1080/1280x720 5. 65Mbps 4:2:2 1920x1080/1280x720 6. 120Mbps 4:2:2 1920x1080/1280x720 MPEG2 Long GOP SD 1. 8Mbps 4:2:0 720x480/720x576 2. 15Mbps 4:2:2 720x480/720x576 3. 30Mbps 4:2:2 720x480/720x576 4. 50Mbps 4:2:2 720x480/720x576 Codec MPEG2 i-Frame Only MPEG2 I-Frame Only HD 1. 100Mbps 4:2:2 1920x1080/1280x720 2. 125Mbps 4:2:2 1920x1080/1280x720 MPEG2 I-Frame Only SD 1. 25Mbps 4:2:2 720x480/720x576 2. 50Mbps 4:2:2 720x480/720x576 PWR Consumption 12V / 1.5A (16W)
- 20. 20