Handheld Photometer Manual
•
0 likes•191 views

This document provides instructions for using a handheld photometer that interfaces with Android devices to analyze nitrate and phosphate levels in water, soil, and plant samples using enzyme-based test kits. It describes downloading the app, pairing the photometer, taking readings, managing sample lists, and basic troubleshooting. The photometer allows on-site analysis of samples and storage of results.

Recommended
Recommended
More Related Content
Similar to Handheld Photometer Manual
Similar to Handheld Photometer Manual (20)
Handheld Photometer Manual
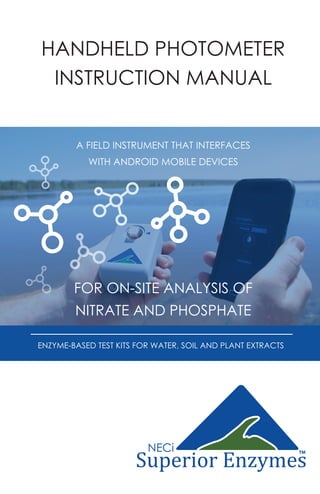
- 1. HANDHELD PHOTOMETER INSTRUCTION MANUAL A FIELD INSTRUMENT THAT INTERFACES WITH ANDROID MOBILE DEVICES FOR ON-SITE ANALYSIS OF NITRATE AND PHOSPHATE ENZYME-BASED TEST KITS FOR WATER, SOIL AND PLANT EXTRACTS TM
- 2. TABLE OF CONTENTS © 2016 NECi: The Nitrate Elimination Company, Inc. GETTING STARTED DOWNLOAD APP SOFTWARE PAIR THE PHOTOMETER PHOTOMETER OVERVIEW LOADING CUVETTES APP SOFTWARE OVERVIEW BLANKING THE PHOTOMETER MANAGE SAMPLE LISTS MODIFYING SAMPLE LISTS MODIFYING SAMPLES TAKE INDIVIDUAL READING SETTINGS TROUBLESHOOTING NOTES pg 1 pg 2 pg 2 pg 3 pg 3 pg 4 pg 5 pg 6 pg 7 pg 8 pg 9 pg 10 pg 11 pg 12 TM
- 3. GETTING STARTED Thank you for choosing NECi Superior Enzymes’ Handheld Photometer. The photometer is supplied charged and ready to pair with any Android device. Please Note the Following Before Use: Do not submerge this device. While it is designed for field use, it is not waterproof. This device is designed for use with NECi’s enzyme based test kits for nitrate and phosphate analysis. We cannot guarantee that it will provide accurate results with other chemical methods or products. Prevent dust, dirt, liquid, and other particulates from entering the cuvette holder and charging ports. NECi’s handheld photometer is currently optimized for use with Android devices only. Stay tuned for expanded device compatibility in the future. Devices running Android 4.0 or newer are recommended, although the photometer should work with any Android device. It should be noted that some issues may arise when using Android version 5.0 or 5.01 specifically regarding Bluetooth connection. To resolve these issues, simply reset the Bluetooth connection (Turn off and then on again). Contact NECi for further support at photometer@nitrate.com or (906) 296-1130. To check which version of the Android software is installed on your device, refer to: Settings > About Phone/Tablet > Android Version 1
- 4. PAIR THE PHOTOMETER 4. Make sure “Auto-update is checked by selecting in the upper right corner. 1. Search “NECi Photometer” in the Play Store 2. Select INSTALL 3. Select ACCEPT 1. Navigate to your device’s main settings, then select Bluetooth settings. Make sure Bluetooth is turned on. 2. Press the photometer power switch for 1 second or until the power indicator turns red. The light will turn green when the photometer is ready to use*. *If the power light does not turn on, charge for at least 4 hours, or until the battery indicator is not illuminated red. 4. The photometer will now appear in the Bluetooth menu under available devices. This should match the device ID printed on the side of your photometer. Select the device then select “Pair” when prompted. 7. Find and open the NECi Photometer App. 8. Select Settings. 9. Choose on Selected Photometer, then select the device ID printed on the side of your photometer. *If the device ID does not appear in this menu, click “Cancel” and tap on Selected Photometer again to view your device. Contact support for further assistance. DOWNLOAD APP SOFTWARE 2 www.nitrate.com
- 5. LOADING CUVETTES When using the phosphate kits, line up the arrow located on one of the faces of the cuvette with the light source indicator on the photometer. Nitrate kits may be loaded in either direction. Cuvettes should be handled on the sides only. Wipe both faces of each cuvette with a clean lens cloth or facial tissue prior to reading for best results. PHOTOMETER OVERVIEW CUVETTE HOLDER LIGHT SOURCE INDICATOR POWER SWITCH POWER INDICATORBATTERY INDICATOR When charging and below 100% battery life, this light will be illuminated red. Light turns off when fully charged. Light is red when device is powered on. Light turns green when ready to use. CHARGING PORT 3BIOTECHNOLOGY PEOPLE CAN USE FACES SIDES
- 6. APP SOFTWARE OVERVIEW Take readings and store them in an exportable sample list. Take a reading and display the result without storing it in a sample list. Selected analyte is designated in blue Once the analyte is chosen, select the sample type by using the icons displayed below, which should match the kit. To display results in raw absorbance or if your have for a custom kit, use the advanced options. Standard Range Water Phosphate Sample Options Advanced Options Nitrate Sample Options Soil Plant Petiole Forage Low Range Water Low RangeStandard Range Custom RangeAbsorbance Software development information and additional options. Contact info for troubleshooting and questions. 4 www.nitrate.com 5- 20 ppm P
- 7. Phosphate Kit Blank Pour contents of tube with white dot into cuvette with white dot. Cap cuvette. Fill cuvette with white dot with clean, clear, tap water. Cap cuvette. Load blank cuvette into photometer cuvette holder (pg 3) Nitrate Kit Blank Blanking the photometer is essential for obtaining accurate results. This tells the device what “zero” is. The photometer must be blanked every time it is turned on and every time it is measuring a different analyte (switched between nitrate and phosphate). Each kit will be supplied with a designated blank cuvette which is marked with a white dot sticker. 5 BLANKING THE PHOTOMETER BIOTECHNOLOGY PEOPLE CAN USE 2. Load Cuvette, Select “Blank” 4. Blanking is Complete Press to return to menu 1. Select Settings 3. Wait for Blanking
- 8. MANAGE SAMPLE LISTS 6 www.nitrate.com Type in the desired list name. Select Nitrate or Phosphate by tapping. Select sample type by swiping left & right. If GPS tracking is desired, make sure this box is checked. Tap the “Save” button. The new sample list should now appear under “Manage Sample Lists”. Tap and hold on a list to modify the name or to delete it. Once sample lists are created, they will appear here. Tap the to create a new list. 3 3 4 4 1 1 2 2 6 6 5 5
- 9. Exporting Sample Lists as CSV Files Adding Samples to a List Choose a name for the sample. If a name is not chosen, the application will automatically assign a name. If sample is ready to be analyzed*, select “Take Reading” to retrieve result from the paired photometer. Select “Get Location” to record the current location. Select “Get Current Date/Time” to record the sample collection time. When all information is entered, select “Save”. Select desired list to export. Tap the icon Select the application you wish to share the CSV with. To return to the sample list, tap the icon. 7BIOTECHNOLOGY PEOPLE CAN USE Select the desired sample list from the table. Tap the to add a sample. 3 3 4 4 1 1 2 2 6 6 5 5 7 7 3 3 4 4 1 1 2 2 *Sample information may be collected and saved on-site, with the option of adding result readings at a later time. See page 8 for instructions
- 10. Pressing and holding a sample will enable selection of multiple samples to move & delete selected samples. 8 Adding Readings to Samples www.nitrate.com To add a reading to a previously created sample, tap on the desired sample, then select “Take Reading”. Tap the “Save” button to return to the sample list. Modifying Groups of Samples Moving Samples to a Different List Deleting Samples To move the selected samples to a different list, tap the icon. To group delete samples, tap on the icon. Select “OK” to proceed.
- 11. TAKE INDIVIDUAL READING This function will quickly display an individual sample result without saving it to a sample list. The photometer must be blanked for the correct analyte before taking a reading.* *Refer to page 5 for instructions on how to blank the device. 9BIOTECHNOLOGY PEOPLE CAN USE Tap to select nitrate or phosphate Swipe sideways to choose sample type, or display result in Absorbance Units (AU) Select “Take Reading” Load the next sample and select “Take Reading” again to display the next result. 3 3 4 1 1 2 2
- 12. SETTINGS 10 www.nitrate.com This shows which photometer is currently paired if multiple photometers are being used. Select this check box if you would like to simplify significant digits and round negative results to 0. Select this option if the software crashes or is not behaving properly. This will allow the user to e-mail a report to the development team to resolve the issue and correct future releases of the software. Use this to help the tech support team resolve your issue. This function is essential for obtaining accurate results. Refer to page 5 for detailed blanking instructions.
- 13. TROUBLESHOOTING Device is not responding, slowly responding, or crashing repeatedly Make sure the photometer is fully charged, (at least 4 hours of charging time). Reset Pairing 1. Under settings, go to “Bluetooth”. 2. Locate the photometer that is paired with the device. 3. Unpair the device by tapping the icon on the right side that corresponds to the device name and then select “Unpair”. 4. Re-pair the device by choosing it in the list of available devices to pair. 5. Wait for the dialogue box called “Bluetooth pairing request”, select OK. Device is responding but displaying incorrect results 1. Make sure device is fully charged, (at least 4 hours of charging time). 2. If measuring results of the phosphate test kits, make sure that the arrow on the top of the cuvette is pointing towards the arrow on the top of the cuvette and that the cuvette is clean and free of dust and fingerprints. 3. Make sure that the kit instructions were closely and carefully followed. 11BIOTECHNOLOGY PEOPLE CAN USE
- 15. 13 BIOTECHNOLOGY PEOPLE CAN USE
- 16. 334 Hecla Street Lake Linden, MI 49945 1.906.296.1115 Tech/General 1.888.NITRATE Toll Free/Orders Sales: sales@nitrate.com Support: photometer@nitrate.com www.nitrate.com Join Our Community We’re Looking for Your Feedback Most of our products have been developed with the help of our customers. In order to continue improving this tool, we invite you to share your opinions, questions, and comments with us. Together, we can put accurate and reliable data into the hands of many. We strive for customer satisfaction, and would like to make sure that environmental testing with our enzymes is easy and fun, while obtaining data that is accurate and reliable. Thank You for Supporting NECi Superior Enzymes! TM