SlideShare a Scribd company logo
1 of 34
Master’s Thesis: Mitral Valve Load Capture Method
Author: Aleksandar Tegzes
Last updated on: 3-Aug-12
Contents
1 Scope...................................................................................................................................................4
2 Credits.................................................................................................................................................4
3 Background.........................................................................................................................................4
4 Motivation...........................................................................................................................................6
5 Literature Research of other Similar Load Capturing Systems..............................................................6
6 High Level Method Overview of Mitral Valve Repair Approach...........................................................8
7 Experiment Supporting Hardware Overview.....................................................................................15
7.1 Guide Wire and Puncture Wire....................................................................................................15
7.2 Dilator and Sheath Catheter.........................................................................................................15
7.3 Catheter, Anchors and Interfacing Receptacles for Instrument Attachment...............................15
7.4 Instrument Guiding Catheter.......................................................................................................17
7.5 Implant to Anchor Mating Catheter.............................................................................................18
7.6 Mitral Annulus Approximating Catheter......................................................................................18
7.7 Data Acquisition - High-Speed Bridge Module for Load/Pressure/Strain/Torque Measurements
NI 9237 ..............................................................................................................................................19
7.8 Millar Pressure Catheter..............................................................................................................19
7.9 Philips IE-33 Ultrasound System with X7-2 and X7-2t probes......................................................19
7.10 Catheter Rail and Guide Line Organizing System.......................................................................20
8 Load Sensing Instrument ...................................................................................................................20
8.1 Sensing Method-Free Body Diagram............................................................................................20
8.2 Flexible Cabling ...........................................................................................................................23
8.3 Mechanical Design.......................................................................................................................24
8.4 Manufacturing Method................................................................................................................28
9 Testing Method Prior to Experiment..................................................................................................30
9.1 Linearity/Gain Testing and Instrumentation................................................................................30
9.2 Qualification Test Procedure........................................................................................................31
10 Experiment Hardware Performance Results....................................................................................32
Saved on 3-Aug-12 2 of 34
11 General LC Performance Discussion.................................................................................................32
11.1 Mechanical Supporting Hardware Issues...................................................................................33
12 Recommendations...........................................................................................................................34
Saved on 3-Aug-12 3 of 34
1 Scope
This document is intended to capture the latest method and the hardware used to acquire Mitral Valve
Loading measurements, to discuss the quality of the results obtained in the Nov 16 2011 load sensing
experiment trial, and to suggest recommendations for the hardware to perform further research.
2 Credits
Throughout the design process of the load capture instrument I received design and testing support
from Jon Dahlgren(Peng), Neil Bulman-Fleming, Darrell Harrington, Derrick To, Brendan Lloyd, Kelly
Watkinson and John Funk.
3 Background
Mitral valve regurgitation constitutes a major health problem worldwide; just in North America it effects
nearly 3 million people. The mitral valve is the valve that allows blood to flow between the left upper
heart chamber (left atrium) and the left lower heart chamber (left ventricle). Mitral valve regurgitation
(MR) is the leaking or backflow of blood through the mitral valve from the ventricle back to the atrium.
If serious, this condition can lead to a backup of blood in the left atrium and the lungs, causing
enlargement of and damage to the left ventricle and left atrium, leading to heart failure.
Mitral valve regurgitation has several causes, including:
Deterioration of the valve with age - The mitral valve opens and shuts tens of thousands of times every
day. Sometimes age-related wear and tear on the valve causes mitral valve regurgitation.
Prior heart attack - A heart attack can damage the area of the heart muscle that supports the mitral
valve, affecting the function of the valve. In fact, if the damage is extensive enough, a heart attack may
result in sudden and severe mitral valve regurgitation.
Annular dilation – The annulus of the mitral valve progressively dilates after myocardial infarction or in
chronic heart failure causing the mitral leaflets to no longer co-apt sufficiently
Mitral valve prolapse - Mitral valve prolapse is a condition in which the leaflets and supporting cords of
the mitral valve weaken. The result is that with each contraction of the left ventricle, the valve leaflets
flip (prolapse) up into the left atrium. This common heart defect prevents the mitral valve from closing
tightly and leads to regurgitation. However, mitral valve prolapse is common and the vast majority of
people who have it never develop severe regurgitation.
Damaged cords - Mitral valve regurgitation may result from damage to the cords that anchor the flaps
of the mitral valve to the heart wall. Over time, these cords may stretch, or suddenly tear, especially in
people with mitral valve prolapse. A tear of these cords can cause substantial leakage through the
mitral valve and may require heart surgery to repair.
Saved on 3-Aug-12 4 of 34
Rheumatic fever — a complication of strep throat and once a common childhood illness in the United
States — can damage the mitral valve, leading to mitral valve regurgitation later in life. Rheumatic fever
can damage the mitral valve in two main ways. The infection may cause the leaflets of the valve to
thicken, limiting the valve's ability to open. This results in narrowing of the valve, a condition known as
mitral valve stenosis. The infection may also cause scarring of the mitral leaflets leading to
regurgitation. People with rheumatic fever, which is still common in countries where antibiotic use isn't
common, may have both mitral valve stenosis and mitral valve regurgitation.
Endocarditis - The mitral valve may be damaged by endocarditis, an infection inside the heart that can
involve the heart valves.
Congenital heart defects - It is possible to be born with a defect in the heart, including a mitral valve in
which regurgitation occurs.
Figure 1: Surgically Implanted Mitral Annuloplasty Ring.
Most often mitral valve regurgitation is mild and develops slowly. Because no symptoms may be
present for decades, the affected person may be completely unaware that he or she has this condition.
However, some people eventually progress to having severe mitral valve regurgitation. This condition
causes complications and troublesome symptoms such as shortness of breath, a racing or irregular
heartbeat, or chest pain. MR can get worse over time and lead to changes in the heart’s size and higher
pressures in the left atrium and lungs.
A landmark study was conducted by the Mayo Clinic in Rochester, Minn [1]. Researchers found that
people with severe mitral valve regurgitation are five times more likely to die prematurely than people
with mild or no regurgitation. This group of patients also has a six-fold increased risk of congestive heart
failure, heart attack and other cardiac problems.
The current common method of treating mitral regurgitation is mitral valve surgery, an open heart
procedure. The typical method used to eliminate mitral regurgitation is to shrink the mitral annulus by
installing an annuloplasty ring as shown in Figure 1: Surgically Implanted Mitral Annuloplasty Ring. As
with any open heart surgery, there is a significant mortality risk and a lengthy recovery time associated
with mitral valve repair or replacement.
Saved on 3-Aug-12 5 of 34
4 Motivation
The team designing the mitral valve repair system needs to know the forces the implants are subjected
to in order to design components with sufficient margins of safety. Undersizing of components has
negative outcomes such as metal fatigue failures. There is multitude of restrictions (such as sheath size)
associated with percutaneous access. Under such restrictions oversizing of components may steer the
project towards a number of negative side-effects, such as: increased sheath size, increased chance of
obstructing blood flow, greater chance of thrombosis(due to increased blood contact), increased
difficulty of positioning the implant as well as increased complexity of mechanical solution. All of these
additional challenges could in turn allow one of our competitors to design a slender more elegant
solution to fix the same problem; therefore, it is imperative to know the loads experienced by the
hardware in the mitral annulus. The goal of this project was to develop a set of reusable load sensing
hardware to collect mitral valve loading data.
5 Literature Research of other Similar Load Capturing Systems
1. Flexible Edwards-Duromedics annuloplasty prosthesis rings were implanted into 13 pigs and the
deformation of the rings as a function of force was characterized in vitro. The prosthesis rings
had built in strain gages at variousl locations to measure force exerted on the implant. In vivo
the prosthesis rings deformed enough to suggested a maximum loading force of about 6-8N.
Hasenkam JM, . "What force can the myocardium generate on a prosthetic mitral valve ring? An animal
experimental study.." J Heart Valve Dis. 324.9 (1994): n. page. Web. 22 Mar. 2012.
<http://www.ncbi.nlm.nih.gov/pubmed/8087273>.
2. Small C-ring shaped transducer that uses strain gages in wheatstone bridge formation. The
transducer is implanted in vivo and is used to measure dynamically measure forces on each
individual chordae used to fix the leaflet in place.
Nielsen SL, . "Miniature C-shaped transducers for chordae tendineae force measurements.." Ann
Biomed Eng.. 7.1050 (2004): n. page. Web. 22 Mar. 2012.
<http://www.ncbi.nlm.nih.gov/pubmed/15446501>.
3. Several strain gages mounted on saddle shaped and flat shaped rings were implanted in vivo.
The study determined that saddle shaped rings exhibit lower forces and more uniformly
distributed forces on the mitral valve than flat rings.
Morten O. Jensen, . "Saddle-Shaped Mitral Valve Annuloplasty Rings Experience Lower Forces Compared
With Flat Rings." (2008): n. page. Web. 22 Mar. 2012.
<http://circ.ahajournals.org/content/118/14_suppl_1/S250.short>.
4. Flat annuloplasty ring that contains several strain gages mounted around the perimeter to
measure the forces exerted on the implant in vivo.
Saved on 3-Aug-12 6 of 34
Jensen MO, . "What Forces Act on a Flat Rigid Mitral Annuloplasty Ring?." The Journal of Heart Valve
Diseas. (2008): n. page. Web. 22 Mar. 2012. <http://www.icr-
heart.com/journal/content/2008/may/pdfs/Jensen_3607.pdf>.
5. Micro-embolisms were introduced into the coronary arteries to emulate ischemic mitral
regurgitation. Miniature force transducers that have mounted strain gages were used to
monitor chordae loadings on the leaflet from the side that suffered an ischemic event.
Sten Lyager Nielsen, . "Imbalanced chordal force distribution causes acute ischemic mitral regurgitation:
Mechanistic insights from chordae tendineae force measurements in pigs." Journal of Thoracic and
Cardiovascular Surgery. 129.3 (2004): n. page. Web. 22 Mar. 2012.
<http://www.sciencedirect.com/science/article/pii/S0022522304011560>.
6. Mitral regurgitation has been correlated to non-uniform distribution of chordae forces on the
leaflets. Miniature strain gage force trasducers are used to monitor the forces.
Nielsen SL, . "Imbalanced chordal force distribution causes acute ischemic mitral regurgitation:
mechanistic insights from chordae tendineae force measurements in pigs.." J Thorac Cardiovasc Surg..
525.31 (2005): n. page. Web. 22 Mar. 2012. <http://www.ncbi.nlm.nih.gov/pubmed/15746734>.
7. Miniature strain gage force trasducers are used to monitor the forces on four chordae per heart.
The differential tension between primary and secondary is monitored using strain gage
transducers.
Lomholt M, . "Differential tension between secondary and primary mitral chordae in an acute in-vivo
porcine model.." J Heart Valve Dis.. 337.45 (2002): n. page. Web. 22 Mar. 2012.
<http://www.ncbi.nlm.nih.gov/pubmed/12056724>.
8. In vitro quantification of the forces exerted on the mitral valve leaflets based on position of
papillary muscle with respect to the annulus. Specifically the increase in chordae tension can
disrupt the coaptation of the leaflets.
Jensen MO, . "Improved in vitro quantification of the force exerted by the papillary muscle on the left
ventricular wall: three-dimensional force vector measurement system.." Ann Biomed Eng.. 13.406
(2001): n. page. Web. 22 Mar. 2012. <http://www.ncbi.nlm.nih.gov/pubmed/11400721>.
9. Essentially a digital calliper with a modified strain gauge attached. Not an implant, the device is
used outside of the body to measure the force over a guide linethat is used to teather a leaflet
in place
Morten O. Jensen, . "External approach to in vivo force measurement on mitral valve traction suture." .
N.p., 2011. Web. 21 Mar 2012. <http://www.jbiomech.com/article/S0021-9290(11)00716-0/abstract>.
10. Wireless transmission force transducer system that is used to transmit the forces in the jaw due
to bruxism. The system uses a piezoresistive strain gage sensing method and transmits the
signal using Zigbee wireless module.
Saved on 3-Aug-12 7 of 34
TAY AH ONG, ANDREW, . "Developmaent of a Wireless Force Sensor." (2006): n. page. Web. 22 Mar.
2012. http://scholarbank.nus.edu.sg/handle/10635/27874
11. Cantilever images used in the document:
Dr. Kingsbury. "CANTILEVER FLEXURE." 25 May. 2005. Arizona State University. 24 Apr. 2012.
<http://enpub.fulton.asu.edu/imtl/HTML/Manuals/MC105_Cantilever_Flexure.htm>.
6 High Level Method Overview of Mitral Valve Repair Approach
Figure 2-Mechanical Schematic of Load Cell Set Up
In order to determine the force needed to approximate the annulus in such a way that MR can be
reduced, a load sensing instrument is used to real time sense the forces experienced by the implant as
shown in Figure 2-Mechanical Schematic of Load Cell Set Up. In order to install the implant, the
following steps are performed:
Saved on 3-Aug-12 8 of 34
Figure 3-Femoral Vein Access
1. Femoral vein venous access is made around the groin area as shown in Figure 3-Femoral Vein
Access
2. A guide wire is inserted from the groin area all the way into the right atrium
Figure 4-Trans-Septal Puncture
3. A trans-septal puncture is made using a brackenborough needle wire under 3-d echo and
fluoroscopy as shown in Figure 4-Trans-Septal Puncture
Saved on 3-Aug-12 9 of 34
4. A flexible sheath is inserted from access point all the way into the left atrium (this sheath is used
as a delivery conduit for the implant)
Figure 5-Tissue Anchor
5. Under 3-d echocardiography guidance two tissue to implant anchors (as shown in Figure 5-
Tissue Anchor) are inserted into the left atrium using catheters via the sheath just around the
commissure areas. A third anchor is inserted into the posterior portion of the mitral annulus
just above the leaflet insertion line. Shown in Figure 6-Nov 15 Anchor Deployment Results
Figure 6-Nov 15 Anchor Deployment Results
6. To prevent any line entanglements or crossovers of guiding lines, mount the lines on the D-rings
as shown in Figure 7-Proximal Organizing D-Ring and Figure 8-Distal Organizing D-Ring and the
Organizing Linear Rail as shown in Figure 9-Organizing Linear Rail on which the D-rings can
locked in different locations.
Saved on 3-Aug-12 10 of 34
Figure 7-Proximal Organizing D-Ring
Figure 8-Distal Organizing D-Ring
Saved on 3-Aug-12 11 of 34
Figure 9-Organizing Linear Rail
Figure 10-Load Sensing Instrument Sliding Down the Sheath
7. Snare in Load Cell Ring against the steering catheter and preload the pivot string to 5N (+/-1 N)
8. Pre-Load guiding lines to 2N (+/-1 N) by sliding the distal D-Ring back until each guide line is pre-
loaded evenly
9. Under fluoroscopy slide the load cell down the sheath using an instrument guiding catheter into
the sheath with concave shape of the load cell oriented such that it follows the concave bend in
the sheath as shown in Figure 10-Load Sensing Instrument Sliding Down the Sheath. Don’t allow
the instrument to rotate in the sheath more than +/-45 degrees during the push down as this
can cause entanglement of the guiding lines
10. Just before the load cell exits the sheath into left atrium loosen off the guide lines by sliding the
distal ring forward and allow 30mm (+/-10mm) of slack in all of the guide lines
11. Detach the steering catheter pivot string and gently pull back the steering catheter
Saved on 3-Aug-12 12 of 34
12. Gently slide the anchor to instrument mating catheter until the distal tip of the sheath is
reached
13. Just before coming out of the sheath loosen off the guide lines and allow 30mm(+/-10mm) of
slack in all of the guiding lines by sliding forward the distal D-Ring organizer
14. Snare P1 (location shown in Figure 2-Mechanical Schematic of Load Cell Set Up) guide line
through the anchor to instrument mating catheter and pre-tension all of the guide line to ~2N as
shown in Figure 11-Anchor to Implant Mating Catheter Step 1 and Figure 12-Anchor to Implant
Mating Catheter Step 2.
Figure 11-Anchor to Implant Mating Catheter Step 1
Figure 12-Anchor to Implant Mating Catheter Step 2
Saved on 3-Aug-12 13 of 34
15. Slowly advance the anchor to instrument mating catheter and steer it as necessary against the
receptacle mating surface (use flouro). Once aligned co-axially with the receptacle and auger
head, pull gently with 7lbs (using a force scale shown in Figure 13-Force Scale) until you can feel
a click through the guide line
Figure 13-Force Scale
16. Retrieve the anchor to instrument mating catheter, replace the guide line on the organizing ring
and repeat steps 7-11 with the P3 guiding guide line (location shown in Figure 2-Mechanical
Schematic of Load Cell Set Up)
17. Slide mitral annulus approximating catheter as shown in Figure 14-Mitral Annulus
Approximating Catheter Distal Tip and Figure 15-Mitral Annulus Approximating Catheter
Proximal Handle onto the P2 guide line (location shown in Figure 2-Mechanical Schematic of
Load Cell Set Up) and navigate it into the atrium until it is within 5mm(+/-3mm) of the load cell
ring
Figure 14-Mitral Annulus Approximating Catheter Distal Tip
Figure 15-Mitral Annulus Approximating Catheter Proximal Handle
Saved on 3-Aug-12 14 of 34
A mitral annulus approximating catheter is used to alter the distance between the implant and the
tissue anchor by varying the guide line length. The loads sensed by the implant are communicated
through a wire to a laptop data acquisition system. By altering the blood pressure, heart rate and
mitral annulus Anterior/Posterior dimension of the porcine specimen mitral valve in vivo, we can
observe how force changes with various parameters. Under the assumption that the loading force
varies as a function of blood pressure, the overall goal of the project is to take the collected data
and extrapolate the force results from the porcine model to estimate forces one might observe in a
human mitral valve.
7 Experiment Supporting Hardware Overview
In order to install the load sensing instrument into the atrium there is multitude of supporting hardware
needed in conjunction with the actual load sensing instrument.
7.1 Guide Wire and Puncture Wire
By using fluoroscopy and echocardiography a j-shaped wire is navigated from the groaning access to the
right atrium via inferior vena cava. A thin section of tissue is punctured between the right atrium and
the left atrium. A standard kit of parts used by interventional cardiologists to create trans-septal
punctures is listed here:
7.2 Dilator and Sheath Catheter
Once a guide wire is inside the atrium, a sheath (essentially a conduit) is inserted from the groin access
to the left atrium. In the lumen of the sheath there is a conical-tipped dilator that has an outside
diameter slide-fitting with the inside diameter of the sheath, thereby co-axially aligning the two. The
current sheath size used for percutaneous mitral valve repair procedure is 22Fr ID, which is
approximately 7.33mm. Sheath and dilator insertion over a guide wire is a standard method
interventional cardiologists use to deliver anything into a heart.
7.3 Catheter, Anchors and Interfacing Receptacles for Instrument Attachment
Both “omni directional” (or “omni”) and “helical” style catheters are used to install the anchors into the
atrium.
Saved on 3-Aug-12 15 of 34
Figure 16-Omni Catheter
The omni catheters are used for P1 and P2 (location shown in Figure 2-Mechanical Schematic of Load
Cell Set Up) anchor installation (Figure 16-Omni Catheter) and the helical catheter is used for P3 anchor
installation (Figure 17-Helical Catheter).
Figure 17-Helical Catheter
Machined from solid 316 stainless steel, auger style anchors (Figure 5-Tissue Anchor) are utilized in the
experiment. Anti-unwinding barbs are used for P2 anchors in order to reduce the likelihood of anchors
unwinding during mitral annulus approximations. The anchor heads and the receptacle bodies share the
same conical interface geometry as shown in Figure 18-Receptacle and Anchor Head Mated that is used
to immobilize the anchors with respect to the instrument interface.
Saved on 3-Aug-12 16 of 34
Figure 18-Receptacle and Anchor Head Mated
7.4 Instrument Guiding Catheter
An instrument guiding catheter is used position the load cell (LC) sensing instrument from the proximal
end of the sheath to the distal end which terminates in the left atrium. Its primary functions are to:
• Prevent the LC from rotating inside the sheath, because this can entangle the guide line that
extend from the anchors to entrance of the sheath outside of the body
• Allow the user to retract the LC from the atrium if an inappropriately sized LC was initially
inserted
Figure 19-Instrument Guiding Catheter - Detached
Figure 20-Instrument Guiding Catheter - Attached
These tasks are accomplished by utilizing a pseudo-universal joint (as shown in Figure 19-Instrument
Guiding Catheter - Detached and Figure 20-Instrument Guiding Catheter - Attached) between the load
cell and the guiding catheter. The joint is formed with a guide line that can be released and re-engaged
as required.
Saved on 3-Aug-12 17 of 34
7.5 Implant to Anchor Mating Catheter
Once the anchors have been placed in the atrium and the LC is inserted, the implant to anchor mating
catheter is used to fasten the anchors to the LC. The mating catheter’s primary functions are to:
• Co-axially align the mating catheter with the load cell receptacle
• Co-axially pull the anchor via the guide line through the LC until a “click” is felt through the
guide line
• Pull on the guide line with just enough tension to click the assemblies together, but making sure
not to exceed the tensile strength of the guide line
Figure 21-Implant to Anchor Mating Catheter
The mating catheter can align itself well to the implant located in the atrium because it uses a hinge
joint which can swing the plunger assembly down into position(as shown inFigure 11-Anchor to Implant
Mating Catheter Step 1, Figure 12-Anchor to Implant Mating Catheter Step 2, Figure 21-Implant to
Anchor Mating Catheter). The plunger assembly uses a cone tip (similar to a dilator tip within a sheath
set-up) to co-axially locate the anchor guide line with respect to the catheter mating body. Once on top
of the LC receptacle the anchor can be clicked into the LC. It is worth noting that the head of the anchor
displaces the space occupied by the plunger in the mating catheter. The maximum tension in the guide
line is observed with a force dial indicator(as shown in Figure 13-Force Scale) attached to the proximal
end of the guide line.
7.6 Mitral Annulus Approximating Catheter
Once the LC is clicked into the anchors installed in the atrium the Anterior/Posterior dimension of the
heart can be altered using mitral annulus approximating catheter. The catheter’s primary functions are
to:
• Approximate in a repeatable manner the distance between the LC and the P2 anchor
Saved on 3-Aug-12 18 of 34
• Allow the release of tension in the guide line such that the signal output from the LC is nearly
zero
The mitral annulus approximating catheter accomplishes this task by having a truncated cone tip (as
shown in Figure 14-Mitral Annulus Approximating Catheter Distal Tip, Figure 15-Mitral Annulus
Approximating Catheter Proximal Handle) placed onto a compression spring with a very low pre-load.
The low pre-load in the compression spring allows the tip of the catheter to easily deflect when a guide
line pulls it down towards the middle of the LC. The guide line extends from P2 through the LC and
through tip of the mitral annulus approximating catheter.
7.7 Data Acquisition - High-Speed Bridge Module for
Load/Pressure/Strain/Torque Measurements NI 9237
The data acquisition module (DAQ) is used to sample the analog voltage signal (1000Hz) obtained from
the LC and store it onto a PC. The DAQ is also used to sample the Millar Pressure Catheter and the signal
is also sampled and stored onto a PC. Full DAQ specifications can be found here:
http://sine.ni.com/nips/cds/view/p/lang/en/nid/208791
7.8 Millar Pressure Catheter
The Millar pressure catheter is used to gather data about the ventricular blood pressure experienced
during the time of LC data acquisition. Full specifications of the catheter used for the experiment can be
viewed here:
http://millar.com/products/clinical/pressure/mikro-cath/mikro-cath-disposable-pressure-catheter
7.9 Philips IE-33 Ultrasound System with X7-2 and X7-2t probes
An echocardiography machine is used as a primary imaging method by interventional cardiologists. On
this project it is used to aid in creating trans-septal punctures, for guidance during anchor insertions into
the atrium, as well as assessment of the Anterior/Posterior dimension approximation needed to achieve
desired therapy. The X7-2t transesophageal probe is used in two windows:
In the first window, the probe is placed on top of the left atrial appendage with the head facing towards
either P1 or P3 locations. The section view that results bisects commissural P1 and P3 areas. A
corresponding perpendicular section obtained in x-plane mode bisects Anterior/Posterior dimension of
the annulus. In the 3-d view the annulus is viewed from directly above the annulus, giving an ideal view
for anchor insertions.
In the second window, the probe is placed underneath the pericardial sac against the ventricle just
under the left atrial appendage to get a sectioned annulus view. A perpendicular 90 degree view is
obtained in the x-plane configuration and it bisects the annulus vertically. In a 3-d view the annulus is
viewed from the P2 anchoring location looking towards the left ventricular outflow tract.
Saved on 3-Aug-12 19 of 34
7.10 Catheter Rail and Guide Line Organizing System
A rail system was used to aid in holding and organizing all of the equipment necessary for anchor
insertions. The catheter rail system’s primary functional requirements are to:
• Store and allow easy insertion into the sheath and allow manipulation of controls of various
catheters used for anchor and LC insertion
• Organize and prevent entanglement of guide lines that extend from anchors through the sheath
and outside of the body
• Hold and strain-relieve the sheath that is inserted into the body
• Restrain the probe holder that is used to fix the echo probe in a particular imaging window
position
• Simplify the method of maintaining tension in different anchor guide lines during LC insertion
Guide line organizing D-rings attached onto linearly sliding elbows and the elbows can be affixed once
desired position is achieved as shown in Figure 7-Proximal Organizing D-Ring, Figure 8-Distal Organizing
D-Ring and Figure 9-Organizing Linear Rail.
8 Load Sensing Instrument
Figure 22 - Load Sensing Instrument
The LC’s (as shown in Figure 22 - Load Sensing Instrument) primary objective is to capture mitral valve
loading data that a P2 anchors exerts onto the ring implant as the Anterior/Posterior dimension is
altered. In the following sections various details of the mechanical design will be discussed in depth.
8.1 Sensing Method-Free Body Diagram
In order to sense the loads, a flexible mechanical element in the form of an S beam is used in
conjunction with two displacement (strain) sensing elements. A free body below shows Figure 23
Flexure Free Body Diagram that S-beam flexure applications have areas of the beam that experience
both tension and compression.
Saved on 3-Aug-12 20 of 34
Figure 23 Flexure Free Body Diagram
By placing strain gages on the areas of where compression and tension occurs we are able to sense the
load exerted onto the implant.
8.1.1 Strain Gage Overview
Strain gages have the ability to alter the resistance of the conductive paths as they are subjected to
compressive or tensile strains. They are constructed by wrapping long serpentine-patterned conductive
paths made of copper which when subjected to compressive and tensile strains which effect the cross-
sectional area of the conductive paths, which in turn facilitates copper’s property to change its
resistance as a function of cross-section.
Figure 24-Strain Gauge Used for LC by OMEGA
These miniature SGT-350TY (as shown in Figure 24-Strain Gauge Used for LC by OMEGA) strain gages
were used to sense the strain in the load sensing instrument. These strain gauges have a baseline
impedence of approximately 350ohms.
Saved on 3-Aug-12 21 of 34
8.1.2 Wheatstone Full vs Half Bridge Configuration
Figure 25-Wheatstone Bridge Resistance Network
A wheatstone bridge (shown in Figure 25-Wheatstone Bridge Resistance Network) or half-bridge is often
used to sample analog signals generated by the resistance changes that occur in strain gages. In the
configuration above a typical arrangement would consist of allowing R1 and Rx to experience
compressive strains and having R2 and R3 experience tensile strains. In such a configuration the
compressive elements would see a decrease in resistance and the tensile elements would see an
increase in resistance thus maximizing the Vg potential going from left to right. Similarly if the loading
configuration were reversed a maximum potential in Vg would occur going from right to left.
Figure 26 -Half Bridge Configuration Resistance Network
Because of the limited space available on the load sensing instrument only two sensing elements are
used, thus a half bridge configuration results as shown in Figure 26 -Half Bridge Configuration Resistance
Network. In such a configuration R1 could be a compressive strain element and R2 could be a tensile
strain element. The excitation voltages for V+ and V- are +5V and -5V respectively, which are supplied
by the DAQ when it is configured into half bridge mode. In such a configuration the output from the
Saved on 3-Aug-12 22 of 34
Half Bridge Resistive Network and the input to the DAQ is around 0V. Similar to a full bridge
configuration a potential is would be generated going from right to left; however, in a half bridge
configuration the amplitude of the signal would be reduced by one half. Inverse loading scenario would
similarly give a potential Vg going from left to right.
Once the analog signal is generated it is continuously sampled by the digital acquisition board which is
connected to a PC where the data is recorded.
8.2 Flexible Cabling
Stainless steel braided cabling is used as a conductive path from the load sensing instrument to the
outside of the body.
8.2.1 Selection
From early load sensing experiments copper braided cables were determined to be much more prone to
fatigue breakages, therefore stainless steel cabling were used instead.
INSERT PICTURE OF CABLING
Considerations when using stainless cabling:
• Stainless steel cabling is a relatively high resistance conductive element (about 40ohms/meter)
so the offset for each LC varied due to slight bridge leg conductive path differences.
• Cable resistance varies as a function of temperature, so it is important to conduct experiments
once steady state temperature of the cable is reached.
• Soldering stainless cables to copper surfaces is more difficult and it requires specialized flux. We
used Certainium 100.
• The Certainium 100 flux affects the adherence of sealant that is used to encapsulate the sensing
instrument, so it is important to full wash away all of the residue flux prior to potting.
• The silicone jacket that encapsulates the wires is difficult to adhere to. Sandblasting the exterior
of it with 25um beads has been observed to help.
• The stainless steel cable bundle consists of three individual conductors. The shielded red and
blue conductors were used as the bridge power and the large strand of wire as the sensor
output.
o This scheme reduced the sensitivity of stainless cable to temperature variations.
o The electrical noise from the environment is substantially reduced on signal output.
8.2.2 Cable Routing and Strain Relief
The biggest consideration with cable routing was strain relief. There is a solder joint between the strain
gage leads and the stainless steel cabling, and that joint can’t see any movement from the heart if it is to
survive the experiment. The strain relief is shared partially between the tight friction fit and 90 degree
Saved on 3-Aug-12 23 of 34
bend between silicone jacket and the LC as well as by the urethane that encapsulates the system. It has
proven to be a reliable method of strain relief.
Figure 27-Load Sensing Instrument Solid Model
8.3 Mechanical Design
The mechanical design of the load sensing instrument as shown in Figure 27-Load Sensing Instrument
Solid Model has undergone more than 5 iterations. The current iteration facilitates features such as:
• High density of features that allow the device to be deployed percutaneously
• Strain relief for the stainless steel cabling
• Mechanical hard-stop on flexure to prevent damage caused by overloading
• Minimal urethane encapsulating volume that allows further size reduction
• Nitinol receptacles that allow percutaneous deployment of the load sensing instrument
• Single mount machining operation strategy for better repeatability and tolerance of parts
8.3.1 Flexure Sizing
The flexure thickness is sized using the SolidWorks FEA add-on function, Simulation as shown in Figure
28 - LC Flexure Stress, Figure 29 - LC Flexure Displacement and Figure 30 - LC Flexure Strain. material
used is stainless steel 17-4 precipitation hardened. It is the highest yield strength stainless steel that can
be acutely used in a physiological environment. It is desirable to size the thickness with only a slight
factor of safety because we want to attain maximum possible deflection of strain gauges in order to
produce a good signal strength. The flexure is sized to yield at 10lbs load. Mechanical hard-stops are
positioned such that they prevent over loading on mechanical assemblies. Minimal flexure length is
Saved on 3-Aug-12 24 of 34
used to accommodate placement of 2 strain gages with minimal room between them, which is needed
for routing conducting cables.
Figure 28 - LC Flexure Stress
Figure 29 - LC Flexure Displacement
Saved on 3-Aug-12 25 of 34
Figure 30 - LC Flexure Strain
The software flexure thickness sizing analysis is verified using classical mechanics of materials analysis
methods. In order to model the flexure shown a symmetric loading condition is identified at the center
of the flexure the load cell member, where the flexure behaves like the free-end of a rigidly supported
cantilever beam with a single point load as shown in Figure 31 - Cantilever Beam.
Figure 31 - Cantilever Beam
The maximum stress in the beam is found at upper proximal insertion point in the cantilever beam
shown in Figure 31 - Cantilever Beam. In classical solid mechanics analysis of the model shown the
maximum stress in the beam is characterized by Equation 1 - Stress in Cantilever Beam.
Equation 1 - Stress in Cantilever Beam
Saved on 3-Aug-12 26 of 34
Where I is the second polar moment of Inertia shown in Figure 32 - Second Polar Moment of Inertia of
Rectangular Section and is calculated by Equation 2 - Second Polar Moment of Inertia of Rectangular
Section.
Figure 32 - Second Polar Moment of Inertia of Rectangular Section
Equation 2 - Second Polar Moment of Inertia of Rectangular Section
And consequently by solving for thickness of flexure member h we can determine the minimum flexure
thickness as a function of maximum permissible stress. The maximum permissible stress is determined
by taking a typical yield stress of 17-4 PH stainless steel and dividing it by the factor of safety as shown in
Equation 3 - Maximum Permissible Stress.
Equation 3 - Maximum Permissible Stress
By combining equations 1,2 and 3 and solving for flexure thickness h, the minimum permissible flexure
thickness is determined. Furthermore, the mechanical hard stops, which are used to prevent over-travel
of the load cell flexure, are positioned after calculating the maximum deflection that a cantilever beam
as shown in
Equation 4 - Deflection of Cantilever Beam
Saved on 3-Aug-12 27 of 34
The deflection observed in the actual flexure is exactly twice of what is calculated due to the symmetry
approximation.
8.3.2 Scalable Architecture
The idea of having multiple sizes of load sensing instruments is a requirement that is driven by
anatomical and morphological variations in our porcine specimens in conjunction with expected
positional accuracy limitations of anchor deployments. The 5 sizes (measured center to center of anchor
positions) that the LCs are manufactured in are: 26mm, 28mm, 32mm, 36mm and 40mm (36mm size
shown in Figure 22 - Load Sensing Instrument).
8.4 Manufacturing Method
Although many improvements in load sensing instrument manufacturing have been made, it is still time
consuming and challenging to assemble each load cell.
8.4.1 Assembly Procedure and Estimated Manufacturing Time
Approximate time breakdown needed to assemble a load sensing instrument:
• Machining the main body of LC (15 min set-up time and 35 min run time)
• Deburring of main body of LC and making sure all dimensions are within spec (20min)
• Machining of upper bar (5 min set-up and 15 min run time)
• Machine the steering nipple (5 min set-up and 10 min run time)
• Sandblasting the main body of LC and washing all contaminants off with alcohol (10min)
• Super-gluing strain gages onto main body of LC (5min labor time and let it sit for 2hrs for full
cure)
• Soldering on stainless cable to the strain gage and test functionality (15min)
• Pot the main body of LC assembly in urethane (5min labour and 36hrs for full cure)
• Weld on steering nipple and upper bar assembly (15min)
• Solder and crimp on the connector to the DAQ (10min)
All of the above mentioned steps add up to approximately 3 hours of labour to assemble each load
sensing instrument assuming there are no problems encountered during the assembly process. Each
animal trail requires multiples of each size, so that equates to at least 10 unique devices. Although
there is some labour saving that can be achieved by running multiple of above mentioned tasks in
parallel, I suspect that more than 40% reduction of the estimated time is not possible.
8.4.2 Four Axis Machining
By utilizing 3 axis of conventional CNC machining as well as one rotary axis of the mounted component,
great time savings can be achieved. Specifically each load sensing ski assembly can be machined from a
single part mounting configuration, without time consuming mounting and re-mounting of machined
Saved on 3-Aug-12 28 of 34
parts. Additionally, better tolerances of the machined components can be achieved because all of the
features can be referenced directly from each other, where as conventional jigging of machined
components usually implies referencing from a jig positions.
8.4.3 Sealing Method
Sealing of the LC is a big challenge since it turns out that perfect and permanent hermetic sealing is
impossible to achieve using conventional polymer sealing methods. After making sample strain gage
assemblies mounted on 17-4 stainless plates and testing nearly 2 dozen configurations in a systematic
manner, I have come up with the following recommendations:
• Use Loctite urethane fl-11 to encapsulate the load cells (they have proved to seal for at least 4
times as long as the next leading system)
• Aerate using a vacuum chamber the urethane once it has been mixed as quickly as possible
before applying it to the sealing assembly, this will reduce the bubbles naturally formed as it
cures
o A method to potentially improve this in the future is to use cavity where you pressure
inject the urethane to minimize bubble formation
• Apply the urethane within 3min of it being mixed together, because as it hardens it stops
flowing as easily
• Sandblast both the 17-4 stainless components as well as the silicone jacket protecting the
conducting elements
• Wash the residue off the assemblies using several alcohol baths with each subsequent bath
being more clean than the last
• Use water soluble solder flux, so that it can come off easier off the assemblies after they have
been soldered together
• Minimize the use of certainium 100 needed to achieve a solder joint between stainless steel
cabling and the leads coming off the strain gages
• Do not sand the urethane after it is cured, because this may expose some micro porosity vias
that can tunnel right down to the circuit
8.4.4 Welding Sequence
Counter-intuitively, the welding of the upper bar to the main ski-body is done after the assembly has
been potted. This is done to ensure that there is adequate separation between the upper bar and the
urethane that seals the strain gages. If the urethane is adhered to the upper bar the load cell will not
exhibit linear load to signal behaviour and it will also have hysteretic behaviour near the zero loading
condition.
Saved on 3-Aug-12 29 of 34
When welding the upper bar to the ski it is important to keep a close eye on the temperature rise of the
potted urethane assembly. Air cooling can be used to keep the assembly temperature below 70 deg.
Failing to do so can compromise the seal and render the whole assembly useless.
9 Testing Method Prior to Experiment
• I received a lot of help with load sensing instrument calibration from Darrell Harrington. It is
important to obtain precise measurements of the signal output as a function of load in an
environment as similar as practicable to the environment of the actual experiments. Initially,
one device was characterized in detail to evaluate performance. Measured properties of the
fully-characterized device included gain, offset, linearity, hysteresis, repeatability, temperature
dependence, sensitivity to off-axis loads, drift, and noise.
A limited subset of these tests was performed on subsequent devices.
9.1 Linearity/Gain Testing and Instrumentation
Prior to use in vivo, each of the load sensing instruments is subjected to a qualification test in which its
signal output is measured as a function of applied load. The load is applied using a Lloyd LF Plus
mechanical tester as shown in Error: Reference source not found which has an integrated 100N load cell
mounted to its crosshead. The mechanical tester’s load cell is connected to the device by a compliant
tension spring and thin steel wires. The mass of the spring is zeroed out before each test.
Figure 33-Lloyd Mechanical Tester
Saved on 3-Aug-12 30 of 34
The test configuration shown in Figure 34- Submerged Load Cell Testing Set-Upis used to test the load
sensing instruments in a submerged saline environment at body temperature under maximum expected
loads.
Figure 34- Submerged Load Cell Testing Set-Up
9.2 Qualification Test Procedure
1. Insert a load cell into a holding jig
2. Insert the holding jig into a 37 degree saline bath beaker along with the stainless steel cabling
3. Wait for signal output to stabilize and take a baseline load cell output reading
4. Ramp up the load from 0N to 10N in 1N increments, while taking a signal output sample at each
level
5. Ramp up the load from 10N to 0N in 1N increments, while taking a signal output sample at each
level
6. Wait for signal output to stabilize and take a second baseline load cell output reading
7. Plot the signal output as a function of load .
8. Evaluate the gain, offset, linearity and hysteresis. If all are within acceptable ranges, proceed.
Command the mechanical tester to apply a cyclic load of 0 to 10N for 500 cycles
9. Repeat linearity characterization, step 3 through 6, after endurance cycling to verify that there
are no changes in load sensing instrument performance
Saved on 3-Aug-12 31 of 34
10 Experiment Hardware Performance Results
The following diagram illustrates the typical signal quality obtained in vivo during the experiment. The
red line represents the force measurements and the blue represents the pressure transducer
measurements. Pressure was measured by a Millar catheter, which has a miniature full-bridge pressure
transducer at the distal end. Force and pressure were simultaneously sampled at 5000 Hz with a
National Instruments NI-9237 data acquisition board. The ekg signal was simultaneously sampled at 1
kHz with a NI cDAQ-9174 data acquisition board.
11 General LC Performance Discussion
Device performance meets or exceeds all major requirements:
• The typical gain of 0.2 (mV/V)/N corresponds to 2 mV/V at full-scale (output bridge voltage /
input voltage). This is very good for a half-bridge configuration.
• As shown in the above figure, signal to noise ratio is excellent for the features of interest.
• Repeatability .09N typical full-scale, comparing pre- and post-cycling data
• Hysteresis .04N typical full-scale
• Nonlinearity .01N typical full-scale
o Off-axis sensitivity is the only significant performance issue. As expected, gain varied by
a fairly large amount, up to 30 %, for a range of rotation of +/- 45 degrees about the
Saved on 3-Aug-12 32 of 34
device short axis perpendicular to the nominal load direction. This variation was not
symmetric about the nominal direction. Flexure thickness variation was the main factor
contributing to variability in signal output as a function of load
• All of the sealant failures were caught during validation of the equipment and once validated
none of the load sensing instruments ever had a sealing failure throughout the remainder of
testing. Defects were clearly revealed by a large degree of hysteresis and drift during the
qualification test.
• During endurance cycling mechanical failures occasionally occurred due to poor weld quality
• The web thickness dimension of the flexure requires tight tolerances of +/-25um, otherwise the
gain of the load sensing instrumentation varies too much to guarantee the same
• Bubbles created during the urethane curing process would sometimes create vias through the
sealing enclosure that would tunnel water from the surface of the urethane down to the strain
gage
• Electrical noise coming from the force transducer appears to be on the same order of magnitude
as the pressure transducer
• During the experiment the calibration seemed to be offset from the nominal values observed in
the lab
o This is expected to be a side-effect of uneven heating of the stainless conducting cables
 This phenomenon was mitigated in the experiment by taking a nominal baseline
when the LC was inserted into the atrium but with no load applied to the A/P
approximating catheter. The potential impact of baseline error on the peak
measured loads was on the order of 0.1N, which is tolerable.
o Offset changes could also induced by mechanical stress on the cables, not only in the
load cell but also the pressure transducer.
11.1 Mechanical Supporting Hardware Issues
• The receptacles had trouble clicking in, and the guide lines used to click them in would snap
before they were fully inserted
o A better receptacle solution is needed to make percutaneous click-ins of load cells more
repeatable
o Lower force to click in and lower click in vs pull out of receptacle force ratio
o A nice to have provision on the next generation receptacle would be reversibility of
clicking in anchors into the implant in the event that an improperly sized implant is
inserted and requires exchanging for a different size implant
Saved on 3-Aug-12 33 of 34
o The guiding line was prone to fraying and occasionally broke during clicking in
procedure, thus a better suture material would also be necessary
• The anterior-posterior approximating catheter could not full release the approximating force
o This is believed to be a side-effect of thrombus starting to form around the upper bar
and drastically increasing the friction of the sliding
12 Recommendations
• Better injecting and degassing of the urethane is needed to reduce the number of bubbles
present in the enclosure
• Smaller overall size of the implant would be preferred in the future in order to simplify sliding
down the sheath around the bend area, this proved to be problematic at times with 40mm ring
and maximum sheath curvature
o Consider using quarter bridge sensing system to further reduce size
o Review smallest available strain gauge size and consider using it instead
• The order of welding and sealing during load cell assembly needs to be revised because this is a
very risk step that can ruin the part just before completion
o This might be easy to solve by welding the upper bar on first and attaching some Teflon
tape to the bottom of the upper bar before urethane encapsulating takes place
Saved on 3-Aug-12 34 of 34

More Related Content

What's hot

Blood Flow Through Cerebral Aneurysms
Blood Flow Through Cerebral AneurysmsBlood Flow Through Cerebral Aneurysms
Blood Flow Through Cerebral Aneurysms
Khambrel Simpson
 
1. cardiovascular system
1. cardiovascular system1. cardiovascular system
1. cardiovascular system
Ahmad Hamadi
 
Hearts crown living pipes
Hearts crown  living pipesHearts crown  living pipes
Hearts crown living pipes
Dr.Abdul Shaikh
 
Cardiovascular System.ppt
Cardiovascular System.pptCardiovascular System.ppt
Cardiovascular System.ppt
Shama
 

What's hot (19)

AVR - MVR all you need to know about Valve Repair & Replacement
AVR - MVR all you need to know about Valve Repair & ReplacementAVR - MVR all you need to know about Valve Repair & Replacement
AVR - MVR all you need to know about Valve Repair & Replacement
 
Coronary heart disease l os ws
Coronary heart disease  l os wsCoronary heart disease  l os ws
Coronary heart disease l os ws
 
Mitral valve anatomy - ppt by kunwar sidharth
Mitral valve    anatomy - ppt by kunwar sidharthMitral valve    anatomy - ppt by kunwar sidharth
Mitral valve anatomy - ppt by kunwar sidharth
 
Angioplasty
AngioplastyAngioplasty
Angioplasty
 
05 the heart
05   the heart05   the heart
05 the heart
 
Blood Flow Through Cerebral Aneurysms
Blood Flow Through Cerebral AneurysmsBlood Flow Through Cerebral Aneurysms
Blood Flow Through Cerebral Aneurysms
 
Mitral Valve Replacement Surgery in India
Mitral Valve Replacement Surgery in IndiaMitral Valve Replacement Surgery in India
Mitral Valve Replacement Surgery in India
 
LAA Watchman
LAA WatchmanLAA Watchman
LAA Watchman
 
Heart valve
Heart valveHeart valve
Heart valve
 
Chest Heart and Lungs
Chest Heart and LungsChest Heart and Lungs
Chest Heart and Lungs
 
A case of ASD - Sinus Venosus type
A case of ASD - Sinus Venosus typeA case of ASD - Sinus Venosus type
A case of ASD - Sinus Venosus type
 
1. cardiovascular system
1. cardiovascular system1. cardiovascular system
1. cardiovascular system
 
Hearts crown living pipes
Hearts crown  living pipesHearts crown  living pipes
Hearts crown living pipes
 
Heart murmurs
Heart murmursHeart murmurs
Heart murmurs
 
Carotid doppler
Carotid dopplerCarotid doppler
Carotid doppler
 
Cardiovascular System.ppt
Cardiovascular System.pptCardiovascular System.ppt
Cardiovascular System.ppt
 
Cardiac venous system
Cardiac venous systemCardiac venous system
Cardiac venous system
 
Blood Clots in Brain
Blood Clots in BrainBlood Clots in Brain
Blood Clots in Brain
 
ICD10-CM , ICD10-PCS cardiovascular presentation
ICD10-CM ,  ICD10-PCS cardiovascular presentation ICD10-CM ,  ICD10-PCS cardiovascular presentation
ICD10-CM , ICD10-PCS cardiovascular presentation
 

Viewers also liked

Certificates Shagjhuu.E MTU Engine Series 60
Certificates Shagjhuu.E MTU Engine Series 60Certificates Shagjhuu.E MTU Engine Series 60
Certificates Shagjhuu.E MTU Engine Series 60
SHAGJKHUU Erdenetsetseg
 
THESIS - US VOTER KNOWLEDGE
THESIS - US VOTER KNOWLEDGETHESIS - US VOTER KNOWLEDGE
THESIS - US VOTER KNOWLEDGE
Kevin Lambert
 

Viewers also liked (12)

Night Life Powerpoint Presentation
Night Life Powerpoint PresentationNight Life Powerpoint Presentation
Night Life Powerpoint Presentation
 
Certificates Shagjhuu.E MTU Engine Series 60
Certificates Shagjhuu.E MTU Engine Series 60Certificates Shagjhuu.E MTU Engine Series 60
Certificates Shagjhuu.E MTU Engine Series 60
 
Stardust
StardustStardust
Stardust
 
Mohamd Mekawi CV
Mohamd Mekawi CVMohamd Mekawi CV
Mohamd Mekawi CV
 
Ping pong game
Ping pong  gamePing pong  game
Ping pong game
 
THESIS - US VOTER KNOWLEDGE
THESIS - US VOTER KNOWLEDGETHESIS - US VOTER KNOWLEDGE
THESIS - US VOTER KNOWLEDGE
 
Mining industry mailing list (1)
Mining industry mailing list (1)Mining industry mailing list (1)
Mining industry mailing list (1)
 
Republica bolivariana de venezuela
Republica bolivariana de venezuelaRepublica bolivariana de venezuela
Republica bolivariana de venezuela
 
Getting Started
Getting StartedGetting Started
Getting Started
 
світ цікавих фактів
світ цікавих фактівсвіт цікавих фактів
світ цікавих фактів
 
Technology users lists
Technology users listsTechnology users lists
Technology users lists
 
Strategies to Reduce Turnover at Your Dealership
Strategies to Reduce Turnover at Your DealershipStrategies to Reduce Turnover at Your Dealership
Strategies to Reduce Turnover at Your Dealership
 

Similar to Mitral Valve Load Capture Method LinkedIn Modification Oct 24 2016

Myocardial infarction
Myocardial infarctionMyocardial infarction
Myocardial infarction
adolescent4u
 
Mitral valve stenosis powerpoint
Mitral valve stenosis powerpointMitral valve stenosis powerpoint
Mitral valve stenosis powerpoint
kayanalevy25
 
Harb griffin2017 article-mitral_valvediseasea_comprehensi
Harb griffin2017 article-mitral_valvediseasea_comprehensiHarb griffin2017 article-mitral_valvediseasea_comprehensi
Harb griffin2017 article-mitral_valvediseasea_comprehensi
gisa_legal
 
Carotid endarterectomy
Carotid endarterectomyCarotid endarterectomy
Carotid endarterectomy
Liew Boon Seng
 
Cardiac valvulopathy - Maria Bouzaid
Cardiac valvulopathy - Maria BouzaidCardiac valvulopathy - Maria Bouzaid
Cardiac valvulopathy - Maria Bouzaid
mariabouzaid98
 

Similar to Mitral Valve Load Capture Method LinkedIn Modification Oct 24 2016 (20)

INDICATIONS FOR VALVULAR SURGERIES
INDICATIONS FOR VALVULAR SURGERIESINDICATIONS FOR VALVULAR SURGERIES
INDICATIONS FOR VALVULAR SURGERIES
 
VALVULAR HEART DISEASE.ppt
VALVULAR HEART DISEASE.pptVALVULAR HEART DISEASE.ppt
VALVULAR HEART DISEASE.ppt
 
Myocardial infarction
Myocardial infarctionMyocardial infarction
Myocardial infarction
 
Mitral valve
Mitral valveMitral valve
Mitral valve
 
Heart related problems
Heart related problemsHeart related problems
Heart related problems
 
IVMS- Basic Medical Science of Valvular Heart Disease
IVMS- Basic Medical Science of Valvular Heart DiseaseIVMS- Basic Medical Science of Valvular Heart Disease
IVMS- Basic Medical Science of Valvular Heart Disease
 
Mitral Valve Disease - Types, Causes, and Symptoms.pdf
Mitral Valve Disease - Types, Causes, and Symptoms.pdfMitral Valve Disease - Types, Causes, and Symptoms.pdf
Mitral Valve Disease - Types, Causes, and Symptoms.pdf
 
Mitral valve stenosis powerpoint
Mitral valve stenosis powerpointMitral valve stenosis powerpoint
Mitral valve stenosis powerpoint
 
Mitral valve stenosis powerpoint
Mitral valve stenosis powerpointMitral valve stenosis powerpoint
Mitral valve stenosis powerpoint
 
valve replacement and reconstruction.pptx
valve replacement and reconstruction.pptxvalve replacement and reconstruction.pptx
valve replacement and reconstruction.pptx
 
Surgical repair and replacement of diseased valves ppt.
Surgical repair and replacement of diseased valves ppt.Surgical repair and replacement of diseased valves ppt.
Surgical repair and replacement of diseased valves ppt.
 
Valvulopathies n
Valvulopathies nValvulopathies n
Valvulopathies n
 
Valvulopathies
ValvulopathiesValvulopathies
Valvulopathies
 
Harb griffin2017 article-mitral_valvediseasea_comprehensi
Harb griffin2017 article-mitral_valvediseasea_comprehensiHarb griffin2017 article-mitral_valvediseasea_comprehensi
Harb griffin2017 article-mitral_valvediseasea_comprehensi
 
Carotid endarterectomy
Carotid endarterectomyCarotid endarterectomy
Carotid endarterectomy
 
Ihd
IhdIhd
Ihd
 
Valve in-valve implantation into a failed mechanical prosthetic aortic valve
Valve in-valve implantation into a failed mechanical prosthetic aortic valveValve in-valve implantation into a failed mechanical prosthetic aortic valve
Valve in-valve implantation into a failed mechanical prosthetic aortic valve
 
Cardiac tamponade lesson plan
Cardiac tamponade lesson planCardiac tamponade lesson plan
Cardiac tamponade lesson plan
 
Neha diwan presentation on aortic aneurysm
Neha diwan presentation on aortic aneurysmNeha diwan presentation on aortic aneurysm
Neha diwan presentation on aortic aneurysm
 
Cardiac valvulopathy - Maria Bouzaid
Cardiac valvulopathy - Maria BouzaidCardiac valvulopathy - Maria Bouzaid
Cardiac valvulopathy - Maria Bouzaid
 

Mitral Valve Load Capture Method LinkedIn Modification Oct 24 2016

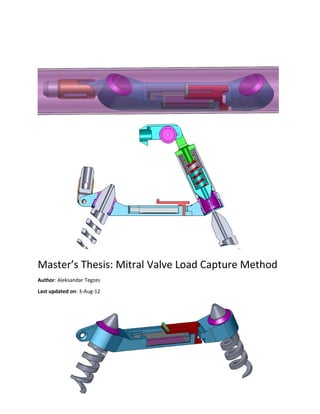
  • 1. Master’s Thesis: Mitral Valve Load Capture Method Author: Aleksandar Tegzes Last updated on: 3-Aug-12
  • 2. Contents 1 Scope...................................................................................................................................................4 2 Credits.................................................................................................................................................4 3 Background.........................................................................................................................................4 4 Motivation...........................................................................................................................................6 5 Literature Research of other Similar Load Capturing Systems..............................................................6 6 High Level Method Overview of Mitral Valve Repair Approach...........................................................8 7 Experiment Supporting Hardware Overview.....................................................................................15 7.1 Guide Wire and Puncture Wire....................................................................................................15 7.2 Dilator and Sheath Catheter.........................................................................................................15 7.3 Catheter, Anchors and Interfacing Receptacles for Instrument Attachment...............................15 7.4 Instrument Guiding Catheter.......................................................................................................17 7.5 Implant to Anchor Mating Catheter.............................................................................................18 7.6 Mitral Annulus Approximating Catheter......................................................................................18 7.7 Data Acquisition - High-Speed Bridge Module for Load/Pressure/Strain/Torque Measurements NI 9237 ..............................................................................................................................................19 7.8 Millar Pressure Catheter..............................................................................................................19 7.9 Philips IE-33 Ultrasound System with X7-2 and X7-2t probes......................................................19 7.10 Catheter Rail and Guide Line Organizing System.......................................................................20 8 Load Sensing Instrument ...................................................................................................................20 8.1 Sensing Method-Free Body Diagram............................................................................................20 8.2 Flexible Cabling ...........................................................................................................................23 8.3 Mechanical Design.......................................................................................................................24 8.4 Manufacturing Method................................................................................................................28 9 Testing Method Prior to Experiment..................................................................................................30 9.1 Linearity/Gain Testing and Instrumentation................................................................................30 9.2 Qualification Test Procedure........................................................................................................31 10 Experiment Hardware Performance Results....................................................................................32 Saved on 3-Aug-12 2 of 34
  • 3. 11 General LC Performance Discussion.................................................................................................32 11.1 Mechanical Supporting Hardware Issues...................................................................................33 12 Recommendations...........................................................................................................................34 Saved on 3-Aug-12 3 of 34
  • 4. 1 Scope This document is intended to capture the latest method and the hardware used to acquire Mitral Valve Loading measurements, to discuss the quality of the results obtained in the Nov 16 2011 load sensing experiment trial, and to suggest recommendations for the hardware to perform further research. 2 Credits Throughout the design process of the load capture instrument I received design and testing support from Jon Dahlgren(Peng), Neil Bulman-Fleming, Darrell Harrington, Derrick To, Brendan Lloyd, Kelly Watkinson and John Funk. 3 Background Mitral valve regurgitation constitutes a major health problem worldwide; just in North America it effects nearly 3 million people. The mitral valve is the valve that allows blood to flow between the left upper heart chamber (left atrium) and the left lower heart chamber (left ventricle). Mitral valve regurgitation (MR) is the leaking or backflow of blood through the mitral valve from the ventricle back to the atrium. If serious, this condition can lead to a backup of blood in the left atrium and the lungs, causing enlargement of and damage to the left ventricle and left atrium, leading to heart failure. Mitral valve regurgitation has several causes, including: Deterioration of the valve with age - The mitral valve opens and shuts tens of thousands of times every day. Sometimes age-related wear and tear on the valve causes mitral valve regurgitation. Prior heart attack - A heart attack can damage the area of the heart muscle that supports the mitral valve, affecting the function of the valve. In fact, if the damage is extensive enough, a heart attack may result in sudden and severe mitral valve regurgitation. Annular dilation – The annulus of the mitral valve progressively dilates after myocardial infarction or in chronic heart failure causing the mitral leaflets to no longer co-apt sufficiently Mitral valve prolapse - Mitral valve prolapse is a condition in which the leaflets and supporting cords of the mitral valve weaken. The result is that with each contraction of the left ventricle, the valve leaflets flip (prolapse) up into the left atrium. This common heart defect prevents the mitral valve from closing tightly and leads to regurgitation. However, mitral valve prolapse is common and the vast majority of people who have it never develop severe regurgitation. Damaged cords - Mitral valve regurgitation may result from damage to the cords that anchor the flaps of the mitral valve to the heart wall. Over time, these cords may stretch, or suddenly tear, especially in people with mitral valve prolapse. A tear of these cords can cause substantial leakage through the mitral valve and may require heart surgery to repair. Saved on 3-Aug-12 4 of 34
  • 5. Rheumatic fever — a complication of strep throat and once a common childhood illness in the United States — can damage the mitral valve, leading to mitral valve regurgitation later in life. Rheumatic fever can damage the mitral valve in two main ways. The infection may cause the leaflets of the valve to thicken, limiting the valve's ability to open. This results in narrowing of the valve, a condition known as mitral valve stenosis. The infection may also cause scarring of the mitral leaflets leading to regurgitation. People with rheumatic fever, which is still common in countries where antibiotic use isn't common, may have both mitral valve stenosis and mitral valve regurgitation. Endocarditis - The mitral valve may be damaged by endocarditis, an infection inside the heart that can involve the heart valves. Congenital heart defects - It is possible to be born with a defect in the heart, including a mitral valve in which regurgitation occurs. Figure 1: Surgically Implanted Mitral Annuloplasty Ring. Most often mitral valve regurgitation is mild and develops slowly. Because no symptoms may be present for decades, the affected person may be completely unaware that he or she has this condition. However, some people eventually progress to having severe mitral valve regurgitation. This condition causes complications and troublesome symptoms such as shortness of breath, a racing or irregular heartbeat, or chest pain. MR can get worse over time and lead to changes in the heart’s size and higher pressures in the left atrium and lungs. A landmark study was conducted by the Mayo Clinic in Rochester, Minn [1]. Researchers found that people with severe mitral valve regurgitation are five times more likely to die prematurely than people with mild or no regurgitation. This group of patients also has a six-fold increased risk of congestive heart failure, heart attack and other cardiac problems. The current common method of treating mitral regurgitation is mitral valve surgery, an open heart procedure. The typical method used to eliminate mitral regurgitation is to shrink the mitral annulus by installing an annuloplasty ring as shown in Figure 1: Surgically Implanted Mitral Annuloplasty Ring. As with any open heart surgery, there is a significant mortality risk and a lengthy recovery time associated with mitral valve repair or replacement. Saved on 3-Aug-12 5 of 34
  • 6. 4 Motivation The team designing the mitral valve repair system needs to know the forces the implants are subjected to in order to design components with sufficient margins of safety. Undersizing of components has negative outcomes such as metal fatigue failures. There is multitude of restrictions (such as sheath size) associated with percutaneous access. Under such restrictions oversizing of components may steer the project towards a number of negative side-effects, such as: increased sheath size, increased chance of obstructing blood flow, greater chance of thrombosis(due to increased blood contact), increased difficulty of positioning the implant as well as increased complexity of mechanical solution. All of these additional challenges could in turn allow one of our competitors to design a slender more elegant solution to fix the same problem; therefore, it is imperative to know the loads experienced by the hardware in the mitral annulus. The goal of this project was to develop a set of reusable load sensing hardware to collect mitral valve loading data. 5 Literature Research of other Similar Load Capturing Systems 1. Flexible Edwards-Duromedics annuloplasty prosthesis rings were implanted into 13 pigs and the deformation of the rings as a function of force was characterized in vitro. The prosthesis rings had built in strain gages at variousl locations to measure force exerted on the implant. In vivo the prosthesis rings deformed enough to suggested a maximum loading force of about 6-8N. Hasenkam JM, . "What force can the myocardium generate on a prosthetic mitral valve ring? An animal experimental study.." J Heart Valve Dis. 324.9 (1994): n. page. Web. 22 Mar. 2012. <http://www.ncbi.nlm.nih.gov/pubmed/8087273>. 2. Small C-ring shaped transducer that uses strain gages in wheatstone bridge formation. The transducer is implanted in vivo and is used to measure dynamically measure forces on each individual chordae used to fix the leaflet in place. Nielsen SL, . "Miniature C-shaped transducers for chordae tendineae force measurements.." Ann Biomed Eng.. 7.1050 (2004): n. page. Web. 22 Mar. 2012. <http://www.ncbi.nlm.nih.gov/pubmed/15446501>. 3. Several strain gages mounted on saddle shaped and flat shaped rings were implanted in vivo. The study determined that saddle shaped rings exhibit lower forces and more uniformly distributed forces on the mitral valve than flat rings. Morten O. Jensen, . "Saddle-Shaped Mitral Valve Annuloplasty Rings Experience Lower Forces Compared With Flat Rings." (2008): n. page. Web. 22 Mar. 2012. <http://circ.ahajournals.org/content/118/14_suppl_1/S250.short>. 4. Flat annuloplasty ring that contains several strain gages mounted around the perimeter to measure the forces exerted on the implant in vivo. Saved on 3-Aug-12 6 of 34
  • 7. Jensen MO, . "What Forces Act on a Flat Rigid Mitral Annuloplasty Ring?." The Journal of Heart Valve Diseas. (2008): n. page. Web. 22 Mar. 2012. <http://www.icr- heart.com/journal/content/2008/may/pdfs/Jensen_3607.pdf>. 5. Micro-embolisms were introduced into the coronary arteries to emulate ischemic mitral regurgitation. Miniature force transducers that have mounted strain gages were used to monitor chordae loadings on the leaflet from the side that suffered an ischemic event. Sten Lyager Nielsen, . "Imbalanced chordal force distribution causes acute ischemic mitral regurgitation: Mechanistic insights from chordae tendineae force measurements in pigs." Journal of Thoracic and Cardiovascular Surgery. 129.3 (2004): n. page. Web. 22 Mar. 2012. <http://www.sciencedirect.com/science/article/pii/S0022522304011560>. 6. Mitral regurgitation has been correlated to non-uniform distribution of chordae forces on the leaflets. Miniature strain gage force trasducers are used to monitor the forces. Nielsen SL, . "Imbalanced chordal force distribution causes acute ischemic mitral regurgitation: mechanistic insights from chordae tendineae force measurements in pigs.." J Thorac Cardiovasc Surg.. 525.31 (2005): n. page. Web. 22 Mar. 2012. <http://www.ncbi.nlm.nih.gov/pubmed/15746734>. 7. Miniature strain gage force trasducers are used to monitor the forces on four chordae per heart. The differential tension between primary and secondary is monitored using strain gage transducers. Lomholt M, . "Differential tension between secondary and primary mitral chordae in an acute in-vivo porcine model.." J Heart Valve Dis.. 337.45 (2002): n. page. Web. 22 Mar. 2012. <http://www.ncbi.nlm.nih.gov/pubmed/12056724>. 8. In vitro quantification of the forces exerted on the mitral valve leaflets based on position of papillary muscle with respect to the annulus. Specifically the increase in chordae tension can disrupt the coaptation of the leaflets. Jensen MO, . "Improved in vitro quantification of the force exerted by the papillary muscle on the left ventricular wall: three-dimensional force vector measurement system.." Ann Biomed Eng.. 13.406 (2001): n. page. Web. 22 Mar. 2012. <http://www.ncbi.nlm.nih.gov/pubmed/11400721>. 9. Essentially a digital calliper with a modified strain gauge attached. Not an implant, the device is used outside of the body to measure the force over a guide linethat is used to teather a leaflet in place Morten O. Jensen, . "External approach to in vivo force measurement on mitral valve traction suture." . N.p., 2011. Web. 21 Mar 2012. <http://www.jbiomech.com/article/S0021-9290(11)00716-0/abstract>. 10. Wireless transmission force transducer system that is used to transmit the forces in the jaw due to bruxism. The system uses a piezoresistive strain gage sensing method and transmits the signal using Zigbee wireless module. Saved on 3-Aug-12 7 of 34
  • 8. TAY AH ONG, ANDREW, . "Developmaent of a Wireless Force Sensor." (2006): n. page. Web. 22 Mar. 2012. http://scholarbank.nus.edu.sg/handle/10635/27874 11. Cantilever images used in the document: Dr. Kingsbury. "CANTILEVER FLEXURE." 25 May. 2005. Arizona State University. 24 Apr. 2012. <http://enpub.fulton.asu.edu/imtl/HTML/Manuals/MC105_Cantilever_Flexure.htm>. 6 High Level Method Overview of Mitral Valve Repair Approach Figure 2-Mechanical Schematic of Load Cell Set Up In order to determine the force needed to approximate the annulus in such a way that MR can be reduced, a load sensing instrument is used to real time sense the forces experienced by the implant as shown in Figure 2-Mechanical Schematic of Load Cell Set Up. In order to install the implant, the following steps are performed: Saved on 3-Aug-12 8 of 34
  • 9. Figure 3-Femoral Vein Access 1. Femoral vein venous access is made around the groin area as shown in Figure 3-Femoral Vein Access 2. A guide wire is inserted from the groin area all the way into the right atrium Figure 4-Trans-Septal Puncture 3. A trans-septal puncture is made using a brackenborough needle wire under 3-d echo and fluoroscopy as shown in Figure 4-Trans-Septal Puncture Saved on 3-Aug-12 9 of 34
  • 10. 4. A flexible sheath is inserted from access point all the way into the left atrium (this sheath is used as a delivery conduit for the implant) Figure 5-Tissue Anchor 5. Under 3-d echocardiography guidance two tissue to implant anchors (as shown in Figure 5- Tissue Anchor) are inserted into the left atrium using catheters via the sheath just around the commissure areas. A third anchor is inserted into the posterior portion of the mitral annulus just above the leaflet insertion line. Shown in Figure 6-Nov 15 Anchor Deployment Results Figure 6-Nov 15 Anchor Deployment Results 6. To prevent any line entanglements or crossovers of guiding lines, mount the lines on the D-rings as shown in Figure 7-Proximal Organizing D-Ring and Figure 8-Distal Organizing D-Ring and the Organizing Linear Rail as shown in Figure 9-Organizing Linear Rail on which the D-rings can locked in different locations. Saved on 3-Aug-12 10 of 34
  • 11. Figure 7-Proximal Organizing D-Ring Figure 8-Distal Organizing D-Ring Saved on 3-Aug-12 11 of 34
  • 12. Figure 9-Organizing Linear Rail Figure 10-Load Sensing Instrument Sliding Down the Sheath 7. Snare in Load Cell Ring against the steering catheter and preload the pivot string to 5N (+/-1 N) 8. Pre-Load guiding lines to 2N (+/-1 N) by sliding the distal D-Ring back until each guide line is pre- loaded evenly 9. Under fluoroscopy slide the load cell down the sheath using an instrument guiding catheter into the sheath with concave shape of the load cell oriented such that it follows the concave bend in the sheath as shown in Figure 10-Load Sensing Instrument Sliding Down the Sheath. Don’t allow the instrument to rotate in the sheath more than +/-45 degrees during the push down as this can cause entanglement of the guiding lines 10. Just before the load cell exits the sheath into left atrium loosen off the guide lines by sliding the distal ring forward and allow 30mm (+/-10mm) of slack in all of the guide lines 11. Detach the steering catheter pivot string and gently pull back the steering catheter Saved on 3-Aug-12 12 of 34
  • 13. 12. Gently slide the anchor to instrument mating catheter until the distal tip of the sheath is reached 13. Just before coming out of the sheath loosen off the guide lines and allow 30mm(+/-10mm) of slack in all of the guiding lines by sliding forward the distal D-Ring organizer 14. Snare P1 (location shown in Figure 2-Mechanical Schematic of Load Cell Set Up) guide line through the anchor to instrument mating catheter and pre-tension all of the guide line to ~2N as shown in Figure 11-Anchor to Implant Mating Catheter Step 1 and Figure 12-Anchor to Implant Mating Catheter Step 2. Figure 11-Anchor to Implant Mating Catheter Step 1 Figure 12-Anchor to Implant Mating Catheter Step 2 Saved on 3-Aug-12 13 of 34
  • 14. 15. Slowly advance the anchor to instrument mating catheter and steer it as necessary against the receptacle mating surface (use flouro). Once aligned co-axially with the receptacle and auger head, pull gently with 7lbs (using a force scale shown in Figure 13-Force Scale) until you can feel a click through the guide line Figure 13-Force Scale 16. Retrieve the anchor to instrument mating catheter, replace the guide line on the organizing ring and repeat steps 7-11 with the P3 guiding guide line (location shown in Figure 2-Mechanical Schematic of Load Cell Set Up) 17. Slide mitral annulus approximating catheter as shown in Figure 14-Mitral Annulus Approximating Catheter Distal Tip and Figure 15-Mitral Annulus Approximating Catheter Proximal Handle onto the P2 guide line (location shown in Figure 2-Mechanical Schematic of Load Cell Set Up) and navigate it into the atrium until it is within 5mm(+/-3mm) of the load cell ring Figure 14-Mitral Annulus Approximating Catheter Distal Tip Figure 15-Mitral Annulus Approximating Catheter Proximal Handle Saved on 3-Aug-12 14 of 34
  • 15. A mitral annulus approximating catheter is used to alter the distance between the implant and the tissue anchor by varying the guide line length. The loads sensed by the implant are communicated through a wire to a laptop data acquisition system. By altering the blood pressure, heart rate and mitral annulus Anterior/Posterior dimension of the porcine specimen mitral valve in vivo, we can observe how force changes with various parameters. Under the assumption that the loading force varies as a function of blood pressure, the overall goal of the project is to take the collected data and extrapolate the force results from the porcine model to estimate forces one might observe in a human mitral valve. 7 Experiment Supporting Hardware Overview In order to install the load sensing instrument into the atrium there is multitude of supporting hardware needed in conjunction with the actual load sensing instrument. 7.1 Guide Wire and Puncture Wire By using fluoroscopy and echocardiography a j-shaped wire is navigated from the groaning access to the right atrium via inferior vena cava. A thin section of tissue is punctured between the right atrium and the left atrium. A standard kit of parts used by interventional cardiologists to create trans-septal punctures is listed here: 7.2 Dilator and Sheath Catheter Once a guide wire is inside the atrium, a sheath (essentially a conduit) is inserted from the groin access to the left atrium. In the lumen of the sheath there is a conical-tipped dilator that has an outside diameter slide-fitting with the inside diameter of the sheath, thereby co-axially aligning the two. The current sheath size used for percutaneous mitral valve repair procedure is 22Fr ID, which is approximately 7.33mm. Sheath and dilator insertion over a guide wire is a standard method interventional cardiologists use to deliver anything into a heart. 7.3 Catheter, Anchors and Interfacing Receptacles for Instrument Attachment Both “omni directional” (or “omni”) and “helical” style catheters are used to install the anchors into the atrium. Saved on 3-Aug-12 15 of 34
  • 16. Figure 16-Omni Catheter The omni catheters are used for P1 and P2 (location shown in Figure 2-Mechanical Schematic of Load Cell Set Up) anchor installation (Figure 16-Omni Catheter) and the helical catheter is used for P3 anchor installation (Figure 17-Helical Catheter). Figure 17-Helical Catheter Machined from solid 316 stainless steel, auger style anchors (Figure 5-Tissue Anchor) are utilized in the experiment. Anti-unwinding barbs are used for P2 anchors in order to reduce the likelihood of anchors unwinding during mitral annulus approximations. The anchor heads and the receptacle bodies share the same conical interface geometry as shown in Figure 18-Receptacle and Anchor Head Mated that is used to immobilize the anchors with respect to the instrument interface. Saved on 3-Aug-12 16 of 34
  • 17. Figure 18-Receptacle and Anchor Head Mated 7.4 Instrument Guiding Catheter An instrument guiding catheter is used position the load cell (LC) sensing instrument from the proximal end of the sheath to the distal end which terminates in the left atrium. Its primary functions are to: • Prevent the LC from rotating inside the sheath, because this can entangle the guide line that extend from the anchors to entrance of the sheath outside of the body • Allow the user to retract the LC from the atrium if an inappropriately sized LC was initially inserted Figure 19-Instrument Guiding Catheter - Detached Figure 20-Instrument Guiding Catheter - Attached These tasks are accomplished by utilizing a pseudo-universal joint (as shown in Figure 19-Instrument Guiding Catheter - Detached and Figure 20-Instrument Guiding Catheter - Attached) between the load cell and the guiding catheter. The joint is formed with a guide line that can be released and re-engaged as required. Saved on 3-Aug-12 17 of 34
  • 18. 7.5 Implant to Anchor Mating Catheter Once the anchors have been placed in the atrium and the LC is inserted, the implant to anchor mating catheter is used to fasten the anchors to the LC. The mating catheter’s primary functions are to: • Co-axially align the mating catheter with the load cell receptacle • Co-axially pull the anchor via the guide line through the LC until a “click” is felt through the guide line • Pull on the guide line with just enough tension to click the assemblies together, but making sure not to exceed the tensile strength of the guide line Figure 21-Implant to Anchor Mating Catheter The mating catheter can align itself well to the implant located in the atrium because it uses a hinge joint which can swing the plunger assembly down into position(as shown inFigure 11-Anchor to Implant Mating Catheter Step 1, Figure 12-Anchor to Implant Mating Catheter Step 2, Figure 21-Implant to Anchor Mating Catheter). The plunger assembly uses a cone tip (similar to a dilator tip within a sheath set-up) to co-axially locate the anchor guide line with respect to the catheter mating body. Once on top of the LC receptacle the anchor can be clicked into the LC. It is worth noting that the head of the anchor displaces the space occupied by the plunger in the mating catheter. The maximum tension in the guide line is observed with a force dial indicator(as shown in Figure 13-Force Scale) attached to the proximal end of the guide line. 7.6 Mitral Annulus Approximating Catheter Once the LC is clicked into the anchors installed in the atrium the Anterior/Posterior dimension of the heart can be altered using mitral annulus approximating catheter. The catheter’s primary functions are to: • Approximate in a repeatable manner the distance between the LC and the P2 anchor Saved on 3-Aug-12 18 of 34
  • 19. • Allow the release of tension in the guide line such that the signal output from the LC is nearly zero The mitral annulus approximating catheter accomplishes this task by having a truncated cone tip (as shown in Figure 14-Mitral Annulus Approximating Catheter Distal Tip, Figure 15-Mitral Annulus Approximating Catheter Proximal Handle) placed onto a compression spring with a very low pre-load. The low pre-load in the compression spring allows the tip of the catheter to easily deflect when a guide line pulls it down towards the middle of the LC. The guide line extends from P2 through the LC and through tip of the mitral annulus approximating catheter. 7.7 Data Acquisition - High-Speed Bridge Module for Load/Pressure/Strain/Torque Measurements NI 9237 The data acquisition module (DAQ) is used to sample the analog voltage signal (1000Hz) obtained from the LC and store it onto a PC. The DAQ is also used to sample the Millar Pressure Catheter and the signal is also sampled and stored onto a PC. Full DAQ specifications can be found here: http://sine.ni.com/nips/cds/view/p/lang/en/nid/208791 7.8 Millar Pressure Catheter The Millar pressure catheter is used to gather data about the ventricular blood pressure experienced during the time of LC data acquisition. Full specifications of the catheter used for the experiment can be viewed here: http://millar.com/products/clinical/pressure/mikro-cath/mikro-cath-disposable-pressure-catheter 7.9 Philips IE-33 Ultrasound System with X7-2 and X7-2t probes An echocardiography machine is used as a primary imaging method by interventional cardiologists. On this project it is used to aid in creating trans-septal punctures, for guidance during anchor insertions into the atrium, as well as assessment of the Anterior/Posterior dimension approximation needed to achieve desired therapy. The X7-2t transesophageal probe is used in two windows: In the first window, the probe is placed on top of the left atrial appendage with the head facing towards either P1 or P3 locations. The section view that results bisects commissural P1 and P3 areas. A corresponding perpendicular section obtained in x-plane mode bisects Anterior/Posterior dimension of the annulus. In the 3-d view the annulus is viewed from directly above the annulus, giving an ideal view for anchor insertions. In the second window, the probe is placed underneath the pericardial sac against the ventricle just under the left atrial appendage to get a sectioned annulus view. A perpendicular 90 degree view is obtained in the x-plane configuration and it bisects the annulus vertically. In a 3-d view the annulus is viewed from the P2 anchoring location looking towards the left ventricular outflow tract. Saved on 3-Aug-12 19 of 34
  • 20. 7.10 Catheter Rail and Guide Line Organizing System A rail system was used to aid in holding and organizing all of the equipment necessary for anchor insertions. The catheter rail system’s primary functional requirements are to: • Store and allow easy insertion into the sheath and allow manipulation of controls of various catheters used for anchor and LC insertion • Organize and prevent entanglement of guide lines that extend from anchors through the sheath and outside of the body • Hold and strain-relieve the sheath that is inserted into the body • Restrain the probe holder that is used to fix the echo probe in a particular imaging window position • Simplify the method of maintaining tension in different anchor guide lines during LC insertion Guide line organizing D-rings attached onto linearly sliding elbows and the elbows can be affixed once desired position is achieved as shown in Figure 7-Proximal Organizing D-Ring, Figure 8-Distal Organizing D-Ring and Figure 9-Organizing Linear Rail. 8 Load Sensing Instrument Figure 22 - Load Sensing Instrument The LC’s (as shown in Figure 22 - Load Sensing Instrument) primary objective is to capture mitral valve loading data that a P2 anchors exerts onto the ring implant as the Anterior/Posterior dimension is altered. In the following sections various details of the mechanical design will be discussed in depth. 8.1 Sensing Method-Free Body Diagram In order to sense the loads, a flexible mechanical element in the form of an S beam is used in conjunction with two displacement (strain) sensing elements. A free body below shows Figure 23 Flexure Free Body Diagram that S-beam flexure applications have areas of the beam that experience both tension and compression. Saved on 3-Aug-12 20 of 34
  • 21. Figure 23 Flexure Free Body Diagram By placing strain gages on the areas of where compression and tension occurs we are able to sense the load exerted onto the implant. 8.1.1 Strain Gage Overview Strain gages have the ability to alter the resistance of the conductive paths as they are subjected to compressive or tensile strains. They are constructed by wrapping long serpentine-patterned conductive paths made of copper which when subjected to compressive and tensile strains which effect the cross- sectional area of the conductive paths, which in turn facilitates copper’s property to change its resistance as a function of cross-section. Figure 24-Strain Gauge Used for LC by OMEGA These miniature SGT-350TY (as shown in Figure 24-Strain Gauge Used for LC by OMEGA) strain gages were used to sense the strain in the load sensing instrument. These strain gauges have a baseline impedence of approximately 350ohms. Saved on 3-Aug-12 21 of 34
  • 22. 8.1.2 Wheatstone Full vs Half Bridge Configuration Figure 25-Wheatstone Bridge Resistance Network A wheatstone bridge (shown in Figure 25-Wheatstone Bridge Resistance Network) or half-bridge is often used to sample analog signals generated by the resistance changes that occur in strain gages. In the configuration above a typical arrangement would consist of allowing R1 and Rx to experience compressive strains and having R2 and R3 experience tensile strains. In such a configuration the compressive elements would see a decrease in resistance and the tensile elements would see an increase in resistance thus maximizing the Vg potential going from left to right. Similarly if the loading configuration were reversed a maximum potential in Vg would occur going from right to left. Figure 26 -Half Bridge Configuration Resistance Network Because of the limited space available on the load sensing instrument only two sensing elements are used, thus a half bridge configuration results as shown in Figure 26 -Half Bridge Configuration Resistance Network. In such a configuration R1 could be a compressive strain element and R2 could be a tensile strain element. The excitation voltages for V+ and V- are +5V and -5V respectively, which are supplied by the DAQ when it is configured into half bridge mode. In such a configuration the output from the Saved on 3-Aug-12 22 of 34
  • 23. Half Bridge Resistive Network and the input to the DAQ is around 0V. Similar to a full bridge configuration a potential is would be generated going from right to left; however, in a half bridge configuration the amplitude of the signal would be reduced by one half. Inverse loading scenario would similarly give a potential Vg going from left to right. Once the analog signal is generated it is continuously sampled by the digital acquisition board which is connected to a PC where the data is recorded. 8.2 Flexible Cabling Stainless steel braided cabling is used as a conductive path from the load sensing instrument to the outside of the body. 8.2.1 Selection From early load sensing experiments copper braided cables were determined to be much more prone to fatigue breakages, therefore stainless steel cabling were used instead. INSERT PICTURE OF CABLING Considerations when using stainless cabling: • Stainless steel cabling is a relatively high resistance conductive element (about 40ohms/meter) so the offset for each LC varied due to slight bridge leg conductive path differences. • Cable resistance varies as a function of temperature, so it is important to conduct experiments once steady state temperature of the cable is reached. • Soldering stainless cables to copper surfaces is more difficult and it requires specialized flux. We used Certainium 100. • The Certainium 100 flux affects the adherence of sealant that is used to encapsulate the sensing instrument, so it is important to full wash away all of the residue flux prior to potting. • The silicone jacket that encapsulates the wires is difficult to adhere to. Sandblasting the exterior of it with 25um beads has been observed to help. • The stainless steel cable bundle consists of three individual conductors. The shielded red and blue conductors were used as the bridge power and the large strand of wire as the sensor output. o This scheme reduced the sensitivity of stainless cable to temperature variations. o The electrical noise from the environment is substantially reduced on signal output. 8.2.2 Cable Routing and Strain Relief The biggest consideration with cable routing was strain relief. There is a solder joint between the strain gage leads and the stainless steel cabling, and that joint can’t see any movement from the heart if it is to survive the experiment. The strain relief is shared partially between the tight friction fit and 90 degree Saved on 3-Aug-12 23 of 34
  • 24. bend between silicone jacket and the LC as well as by the urethane that encapsulates the system. It has proven to be a reliable method of strain relief. Figure 27-Load Sensing Instrument Solid Model 8.3 Mechanical Design The mechanical design of the load sensing instrument as shown in Figure 27-Load Sensing Instrument Solid Model has undergone more than 5 iterations. The current iteration facilitates features such as: • High density of features that allow the device to be deployed percutaneously • Strain relief for the stainless steel cabling • Mechanical hard-stop on flexure to prevent damage caused by overloading • Minimal urethane encapsulating volume that allows further size reduction • Nitinol receptacles that allow percutaneous deployment of the load sensing instrument • Single mount machining operation strategy for better repeatability and tolerance of parts 8.3.1 Flexure Sizing The flexure thickness is sized using the SolidWorks FEA add-on function, Simulation as shown in Figure 28 - LC Flexure Stress, Figure 29 - LC Flexure Displacement and Figure 30 - LC Flexure Strain. material used is stainless steel 17-4 precipitation hardened. It is the highest yield strength stainless steel that can be acutely used in a physiological environment. It is desirable to size the thickness with only a slight factor of safety because we want to attain maximum possible deflection of strain gauges in order to produce a good signal strength. The flexure is sized to yield at 10lbs load. Mechanical hard-stops are positioned such that they prevent over loading on mechanical assemblies. Minimal flexure length is Saved on 3-Aug-12 24 of 34
  • 25. used to accommodate placement of 2 strain gages with minimal room between them, which is needed for routing conducting cables. Figure 28 - LC Flexure Stress Figure 29 - LC Flexure Displacement Saved on 3-Aug-12 25 of 34
  • 26. Figure 30 - LC Flexure Strain The software flexure thickness sizing analysis is verified using classical mechanics of materials analysis methods. In order to model the flexure shown a symmetric loading condition is identified at the center of the flexure the load cell member, where the flexure behaves like the free-end of a rigidly supported cantilever beam with a single point load as shown in Figure 31 - Cantilever Beam. Figure 31 - Cantilever Beam The maximum stress in the beam is found at upper proximal insertion point in the cantilever beam shown in Figure 31 - Cantilever Beam. In classical solid mechanics analysis of the model shown the maximum stress in the beam is characterized by Equation 1 - Stress in Cantilever Beam. Equation 1 - Stress in Cantilever Beam Saved on 3-Aug-12 26 of 34
  • 27. Where I is the second polar moment of Inertia shown in Figure 32 - Second Polar Moment of Inertia of Rectangular Section and is calculated by Equation 2 - Second Polar Moment of Inertia of Rectangular Section. Figure 32 - Second Polar Moment of Inertia of Rectangular Section Equation 2 - Second Polar Moment of Inertia of Rectangular Section And consequently by solving for thickness of flexure member h we can determine the minimum flexure thickness as a function of maximum permissible stress. The maximum permissible stress is determined by taking a typical yield stress of 17-4 PH stainless steel and dividing it by the factor of safety as shown in Equation 3 - Maximum Permissible Stress. Equation 3 - Maximum Permissible Stress By combining equations 1,2 and 3 and solving for flexure thickness h, the minimum permissible flexure thickness is determined. Furthermore, the mechanical hard stops, which are used to prevent over-travel of the load cell flexure, are positioned after calculating the maximum deflection that a cantilever beam as shown in Equation 4 - Deflection of Cantilever Beam Saved on 3-Aug-12 27 of 34
  • 28. The deflection observed in the actual flexure is exactly twice of what is calculated due to the symmetry approximation. 8.3.2 Scalable Architecture The idea of having multiple sizes of load sensing instruments is a requirement that is driven by anatomical and morphological variations in our porcine specimens in conjunction with expected positional accuracy limitations of anchor deployments. The 5 sizes (measured center to center of anchor positions) that the LCs are manufactured in are: 26mm, 28mm, 32mm, 36mm and 40mm (36mm size shown in Figure 22 - Load Sensing Instrument). 8.4 Manufacturing Method Although many improvements in load sensing instrument manufacturing have been made, it is still time consuming and challenging to assemble each load cell. 8.4.1 Assembly Procedure and Estimated Manufacturing Time Approximate time breakdown needed to assemble a load sensing instrument: • Machining the main body of LC (15 min set-up time and 35 min run time) • Deburring of main body of LC and making sure all dimensions are within spec (20min) • Machining of upper bar (5 min set-up and 15 min run time) • Machine the steering nipple (5 min set-up and 10 min run time) • Sandblasting the main body of LC and washing all contaminants off with alcohol (10min) • Super-gluing strain gages onto main body of LC (5min labor time and let it sit for 2hrs for full cure) • Soldering on stainless cable to the strain gage and test functionality (15min) • Pot the main body of LC assembly in urethane (5min labour and 36hrs for full cure) • Weld on steering nipple and upper bar assembly (15min) • Solder and crimp on the connector to the DAQ (10min) All of the above mentioned steps add up to approximately 3 hours of labour to assemble each load sensing instrument assuming there are no problems encountered during the assembly process. Each animal trail requires multiples of each size, so that equates to at least 10 unique devices. Although there is some labour saving that can be achieved by running multiple of above mentioned tasks in parallel, I suspect that more than 40% reduction of the estimated time is not possible. 8.4.2 Four Axis Machining By utilizing 3 axis of conventional CNC machining as well as one rotary axis of the mounted component, great time savings can be achieved. Specifically each load sensing ski assembly can be machined from a single part mounting configuration, without time consuming mounting and re-mounting of machined Saved on 3-Aug-12 28 of 34
  • 29. parts. Additionally, better tolerances of the machined components can be achieved because all of the features can be referenced directly from each other, where as conventional jigging of machined components usually implies referencing from a jig positions. 8.4.3 Sealing Method Sealing of the LC is a big challenge since it turns out that perfect and permanent hermetic sealing is impossible to achieve using conventional polymer sealing methods. After making sample strain gage assemblies mounted on 17-4 stainless plates and testing nearly 2 dozen configurations in a systematic manner, I have come up with the following recommendations: • Use Loctite urethane fl-11 to encapsulate the load cells (they have proved to seal for at least 4 times as long as the next leading system) • Aerate using a vacuum chamber the urethane once it has been mixed as quickly as possible before applying it to the sealing assembly, this will reduce the bubbles naturally formed as it cures o A method to potentially improve this in the future is to use cavity where you pressure inject the urethane to minimize bubble formation • Apply the urethane within 3min of it being mixed together, because as it hardens it stops flowing as easily • Sandblast both the 17-4 stainless components as well as the silicone jacket protecting the conducting elements • Wash the residue off the assemblies using several alcohol baths with each subsequent bath being more clean than the last • Use water soluble solder flux, so that it can come off easier off the assemblies after they have been soldered together • Minimize the use of certainium 100 needed to achieve a solder joint between stainless steel cabling and the leads coming off the strain gages • Do not sand the urethane after it is cured, because this may expose some micro porosity vias that can tunnel right down to the circuit 8.4.4 Welding Sequence Counter-intuitively, the welding of the upper bar to the main ski-body is done after the assembly has been potted. This is done to ensure that there is adequate separation between the upper bar and the urethane that seals the strain gages. If the urethane is adhered to the upper bar the load cell will not exhibit linear load to signal behaviour and it will also have hysteretic behaviour near the zero loading condition. Saved on 3-Aug-12 29 of 34
  • 30. When welding the upper bar to the ski it is important to keep a close eye on the temperature rise of the potted urethane assembly. Air cooling can be used to keep the assembly temperature below 70 deg. Failing to do so can compromise the seal and render the whole assembly useless. 9 Testing Method Prior to Experiment • I received a lot of help with load sensing instrument calibration from Darrell Harrington. It is important to obtain precise measurements of the signal output as a function of load in an environment as similar as practicable to the environment of the actual experiments. Initially, one device was characterized in detail to evaluate performance. Measured properties of the fully-characterized device included gain, offset, linearity, hysteresis, repeatability, temperature dependence, sensitivity to off-axis loads, drift, and noise. A limited subset of these tests was performed on subsequent devices. 9.1 Linearity/Gain Testing and Instrumentation Prior to use in vivo, each of the load sensing instruments is subjected to a qualification test in which its signal output is measured as a function of applied load. The load is applied using a Lloyd LF Plus mechanical tester as shown in Error: Reference source not found which has an integrated 100N load cell mounted to its crosshead. The mechanical tester’s load cell is connected to the device by a compliant tension spring and thin steel wires. The mass of the spring is zeroed out before each test. Figure 33-Lloyd Mechanical Tester Saved on 3-Aug-12 30 of 34
  • 31. The test configuration shown in Figure 34- Submerged Load Cell Testing Set-Upis used to test the load sensing instruments in a submerged saline environment at body temperature under maximum expected loads. Figure 34- Submerged Load Cell Testing Set-Up 9.2 Qualification Test Procedure 1. Insert a load cell into a holding jig 2. Insert the holding jig into a 37 degree saline bath beaker along with the stainless steel cabling 3. Wait for signal output to stabilize and take a baseline load cell output reading 4. Ramp up the load from 0N to 10N in 1N increments, while taking a signal output sample at each level 5. Ramp up the load from 10N to 0N in 1N increments, while taking a signal output sample at each level 6. Wait for signal output to stabilize and take a second baseline load cell output reading 7. Plot the signal output as a function of load . 8. Evaluate the gain, offset, linearity and hysteresis. If all are within acceptable ranges, proceed. Command the mechanical tester to apply a cyclic load of 0 to 10N for 500 cycles 9. Repeat linearity characterization, step 3 through 6, after endurance cycling to verify that there are no changes in load sensing instrument performance Saved on 3-Aug-12 31 of 34
  • 32. 10 Experiment Hardware Performance Results The following diagram illustrates the typical signal quality obtained in vivo during the experiment. The red line represents the force measurements and the blue represents the pressure transducer measurements. Pressure was measured by a Millar catheter, which has a miniature full-bridge pressure transducer at the distal end. Force and pressure were simultaneously sampled at 5000 Hz with a National Instruments NI-9237 data acquisition board. The ekg signal was simultaneously sampled at 1 kHz with a NI cDAQ-9174 data acquisition board. 11 General LC Performance Discussion Device performance meets or exceeds all major requirements: • The typical gain of 0.2 (mV/V)/N corresponds to 2 mV/V at full-scale (output bridge voltage / input voltage). This is very good for a half-bridge configuration. • As shown in the above figure, signal to noise ratio is excellent for the features of interest. • Repeatability .09N typical full-scale, comparing pre- and post-cycling data • Hysteresis .04N typical full-scale • Nonlinearity .01N typical full-scale o Off-axis sensitivity is the only significant performance issue. As expected, gain varied by a fairly large amount, up to 30 %, for a range of rotation of +/- 45 degrees about the Saved on 3-Aug-12 32 of 34
  • 33. device short axis perpendicular to the nominal load direction. This variation was not symmetric about the nominal direction. Flexure thickness variation was the main factor contributing to variability in signal output as a function of load • All of the sealant failures were caught during validation of the equipment and once validated none of the load sensing instruments ever had a sealing failure throughout the remainder of testing. Defects were clearly revealed by a large degree of hysteresis and drift during the qualification test. • During endurance cycling mechanical failures occasionally occurred due to poor weld quality • The web thickness dimension of the flexure requires tight tolerances of +/-25um, otherwise the gain of the load sensing instrumentation varies too much to guarantee the same • Bubbles created during the urethane curing process would sometimes create vias through the sealing enclosure that would tunnel water from the surface of the urethane down to the strain gage • Electrical noise coming from the force transducer appears to be on the same order of magnitude as the pressure transducer • During the experiment the calibration seemed to be offset from the nominal values observed in the lab o This is expected to be a side-effect of uneven heating of the stainless conducting cables  This phenomenon was mitigated in the experiment by taking a nominal baseline when the LC was inserted into the atrium but with no load applied to the A/P approximating catheter. The potential impact of baseline error on the peak measured loads was on the order of 0.1N, which is tolerable. o Offset changes could also induced by mechanical stress on the cables, not only in the load cell but also the pressure transducer. 11.1 Mechanical Supporting Hardware Issues • The receptacles had trouble clicking in, and the guide lines used to click them in would snap before they were fully inserted o A better receptacle solution is needed to make percutaneous click-ins of load cells more repeatable o Lower force to click in and lower click in vs pull out of receptacle force ratio o A nice to have provision on the next generation receptacle would be reversibility of clicking in anchors into the implant in the event that an improperly sized implant is inserted and requires exchanging for a different size implant Saved on 3-Aug-12 33 of 34
  • 34. o The guiding line was prone to fraying and occasionally broke during clicking in procedure, thus a better suture material would also be necessary • The anterior-posterior approximating catheter could not full release the approximating force o This is believed to be a side-effect of thrombus starting to form around the upper bar and drastically increasing the friction of the sliding 12 Recommendations • Better injecting and degassing of the urethane is needed to reduce the number of bubbles present in the enclosure • Smaller overall size of the implant would be preferred in the future in order to simplify sliding down the sheath around the bend area, this proved to be problematic at times with 40mm ring and maximum sheath curvature o Consider using quarter bridge sensing system to further reduce size o Review smallest available strain gauge size and consider using it instead • The order of welding and sealing during load cell assembly needs to be revised because this is a very risk step that can ruin the part just before completion o This might be easy to solve by welding the upper bar on first and attaching some Teflon tape to the bottom of the upper bar before urethane encapsulating takes place Saved on 3-Aug-12 34 of 34