SlideShare a Scribd company logo
1 of 108
Download to read offline
LAN-Cell 3
4G / 3G Cellular Router + VPN + Firewall

User’s Guide
Version 5.1
CONTENTS
ABOUT THIS USER'S GUIDE ................................................................................................................................. VI
SAFETY WARNINGS .............................................................................................................................................. VII
CHAPTER 1:

INTRODUCTION ..............................................................................................................................1

1.1

Key Features .............................................................................................................................................1

1.2

Package Contents .....................................................................................................................................2

CHAPTER 2:

HARDWARE.....................................................................................................................................3

2.1

Front LEDs ................................................................................................................................................3

2.2

Rear Panel ................................................................................................................................................4

2.3

Multi-Function Mounting Base ...................................................................................................................5

2.4

Modem-Lock

2.5

Hardware Setup ........................................................................................................................................6

CHAPTER 3:

TM

..........................................................................................................................................5

ACCESSING THE LAN-CELL 3 ......................................................................................................7

3.1

Start-up and Login .....................................................................................................................................7

3.2

Navigating the User Interface ....................................................................................................................8

3.3

Menu Structure ..........................................................................................................................................9

CHAPTER 4:

QUICK SETUP .............................................................................................................................. 10

4.1

USB Modem Configuration .................................................................................................................... 10

4.2

WAN Configuration .................................................................................................................................. 11

4.3

LAN Configuration .................................................................................................................................. 12

4.4

Wi-Fi Configuration................................................................................................................................. 12

4.5

Password ................................................................................................................................................ 13

CHAPTER 5:

STATUS MENU ............................................................................................................................. 14

5.1

Router ..................................................................................................................................................... 14

5.2

Traffic ...................................................................................................................................................... 17

5.3

Session ................................................................................................................................................... 18

5.4

User/DHCP ............................................................................................................................................. 19

5.5

Current Users ......................................................................................................................................... 20
CHAPTER 6:

SETUP MENU ............................................................................................................................... 21

6.1

WAN ....................................................................................................................................................... 21

6.2

WAN Advanced ...................................................................................................................................... 28

6.3

LAN......................................................................................................................................................... 30

6.4

Static Routing ......................................................................................................................................... 31

6.5

DHCP Server .......................................................................................................................................... 34

6.6

DDNS ..................................................................................................................................................... 35

6.7

MAC Address Clone ............................................................................................................................... 37

6.8

VLAN ...................................................................................................................................................... 38

6.9

Time........................................................................................................................................................ 39

CHAPTER 7:

WIRELESS (WI-FI) MENU ............................................................................................................ 41

7.1

Basic Setup ............................................................................................................................................ 41

7.2

Advanced Setup ..................................................................................................................................... 45

7.3

WDS Setup ............................................................................................................................................. 47

7.4

Universal Repeater Setup ...................................................................................................................... 48

7.5

WPS Setup ............................................................................................................................................. 49

CHAPTER 8:

SECURITY MENU ......................................................................................................................... 50

8.1

Firewall ................................................................................................................................................... 50

8.2

IP Access Control ................................................................................................................................... 52

8.3

Outbound MAC ACL ............................................................................................................................... 55

8.4

OpenDNS ............................................................................................................................................... 58

8.5

Web Filtering .......................................................................................................................................... 59

8.6

VPN / PPTP ............................................................................................................................................ 61

8.7

VPN / IPsec ............................................................................................................................................ 63

CHAPTER 9:

APPLICATIONS MENU ................................................................................................................ 68

9.1

Port Forwarding ...................................................................................................................................... 68

9.2

Virtual Hosts ........................................................................................................................................... 71

9.3

Streaming / Pass-Through ..................................................................................................................... 73

9.4

UPnP ...................................................................................................................................................... 74

CHAPTER 10:

QUALITY OF SERVICE (QOS) MENU ..................................................................................... 75

10.1

Bandwidth Management ........................................................................................................................ 75

10.2

Throughput Optimizer............................................................................................................................. 79

10.3

Ultra-NAT ................................................................................................................................................ 80

10.4

Session Manager ................................................................................................................................... 81
CHAPTER 11:

ADMIN MENU ........................................................................................................................... 82

11.1

System Management ............................................................................................................................. 82

11.2

SNMP ..................................................................................................................................................... 84

11.3

System Utilities ....................................................................................................................................... 85

11.4

Log.......................................................................................................................................................... 87

APPENDIX .............................................................................................................................................................. 89
Troubleshooting ................................................................................................................................................ 89
Common Carrier Specific Issues ..................................................................................................................... 91
Specifications .................................................................................................................................................... 92
LAN-Cell 3 Default Settings .............................................................................................................................. 94
Legal Information .............................................................................................................................................. 95
Certifications ..................................................................................................................................................... 95
Proxicast Limited Warranty .............................................................................................................................. 97
Customer Support ............................................................................................................................................. 98
INDEX ...................................................................................................................................................................... 99
Document Revision History
April 2, 2012

Initial 5.1 Version
About This User's Guide
Intended Audience
This manual is intended for user who need to configure the LAN-Cell 3 using the device’s embedded web
interface. You should have at least a basic knowledge of TCP/IP networking concepts and topology.

Related Documentation
•

Quick Start Guide
The Quick Start Guide is designed to help you get up and running right away. It contains information on
setting up your network and configuring for Internet access.

·

Firmware Release Notes
Every new LAN-Cell firmware release includes a description of the new features and improvements.

·

Proxicast Support Web Site
Please refer to http://support.proxicast.com for additional support documentation and access to our
Knowledgebase.

Syntax Conventions
•

The LAN-Cell 3 may be referred to as the “LAN-Cell”, the “device” or the “system”.

•

The LAN-Cell 3’s wired Ethernet WAN interface may be referred to as “WAN”, “Wired WAN” “Ethernet
WAN”, “WAN (Ethernet)” or “WAN 1”.

•

The LAN-Cell’s USB modem interface may be referred to was “Cellular”, “CELL”, “USB”, WAN (USB
Modem)” or “WAN 2”

•

Product labels, screen names, field labels and field choices are all in bold font.

•

A key stroke is denoted by square brackets and uppercase text, for example, [ENTER] means the “enter”
or “return” key on your keyboard.

•

“Enter” means for you to type one or more characters and then press the [ENTER] key. “Select” or “choose”
means for you to use one of the predefined choices.

•

A right angle bracket ( > ) within a screen name denotes a mouse click. For example, Management > Log
means you first click Management menu, then the Log sub menu to get to that screen.

•

The example screens shown in the User’s Guide may differ slightly from the actual screens on the
LAN-Cell, depending on the firmware version the LAN-Cell is running.
Safety Warnings
•

Do NOT use this product near water.

•

Do NOT expose your device to dampness, dust or corrosive liquids.

•

Do NOT store things on the device.

•

Do NOT install, use, or service this device during a thunderstorm.

•

Connect ONLY suitable accessories to the device.

•

Do NOT open the device or unit. Opening or removing covers can expose you to dangerous high voltage
points or other risks. ONLY qualified service personnel should service or disassemble this device. Please
contact your vendor for further information.

•

Make sure to connect the cables to the correct ports.

•

Place connecting cables carefully so that no one will step on them or stumble over them.

•

Use ONLY an appropriate power adaptor or cord for your device.

•

Connect the power adaptor or cord to the right supply voltage (for example, 110V AC in North America or
230V AC in Europe).

•

Do NOT allow anything to rest on the power adaptor or cord and do NOT place the product where anyone
can walk on the power adaptor or cord.

•

Do NOT use the device if the power adaptor or cord is damaged as it might cause electrocution.

•

Do not use the device outside, and make sure all the connections are indoors. There is a remote risk of
electric shock from lightning.

•

Do NOT obstruct the device ventilation slots, as insufficient airflow may harm your device.

•

Antenna Warning! This device meets ETSI and FCC certification requirements when using the included
antenna(s).

•

If you wall mount your device, make sure that no electrical lines, gas or water pipes will be damaged.

This product is recyclable. Dispose of it properly.
CHAPTER 1: INTRODUCTION
The LAN-Cell 3 is Proxicast’s third generation of enterprise-grade secure cellular gateways. This model features
customer accessible and removable “4G/3G” USB cellular modems -- the same ones commonly used to provide
high-speed 4G/3G cellular connectivity to laptops. The USB modem seamlessly becomes a WAN interface for the
LAN-Cell’s router and is fully integrated with all of the LAN-Cell’s security, performance, and management
capabilities.
As with its predecessors, the LAN-Cell 3 is loaded with security features including VPN, firewall and access control.
The LAN-Cell 3 adds improved throughput, support for 4G cellular modems, bandwidth management, NAT, port
forwarding, policy routing, DHCP server and many other powerful features required for complex and demanding
applications.
The LAN-Cell 3 also has a built-in IEEE 802.11 b/g/n Wi-Fi radio that functions as both an access point and a WAN
bridge. This allows Wi-Fi devices to securely communicate with the LAN-Cell and access the wired network or
Internet. It also enables the LAN-Cell to use available Wi-Fi networks for even higher speed Internet access.
The LAN-Cell 3’s all metal construction coupled with its unique Multi-Function Mounting System and
patent-pending Modem-LOCK

TM

system make it the perfect choice for applications where a high-performance,

secure, reliable and rugged cellular router is required.

1.1
·

Key Features
Multiple Broadband WAN Connections (4G/3G + 802.11 b/g/n + xDSL/cable modem)
The LAN-Cell 3 supports multiple broadband technologies, including 4G/3G, 802.11 b/g/n and xDSL/cable
modems. You can create a mobile broadband connection using a 4G/3G modem or switch to fixed line
connection using a xDSL/cable modem. It also supports the latest 802.11n technology for Wi-Fi on the WAN.

·

4G/3G USB Modem Support
With support for over 100 different 4G/3G USB modems on dozens of mobile networks worldwide, the
LAN-Cell 3 allows you to use your existing 4G/3G modem and service provider to create a mobile broadband
sharing connection. (Find the list of currently compatible modems on our web site.)

·

Dual WAN Load Balance and Failover
Proxicast’s LAN-Cell 3 supports load balancing and failover functions between fixed-line (xDSL/cable
modem), Wi-Fi, and 4G/3G service, offering non-stop network connectivity.

1
·

IPsec Server & Client
The LAN-Cell 3’s embedded IPSec VPN features allow remote users to make secure connections to devices
which normally cannot run VPN software. The LAN-Cell can also establish site-to-site IPSec tunnels to
existing corporate VPN servers for enterprise-level data security.

·

Quality of Service (Bandwidth Management)
Proxicast’s LAN-Cell 3 is able to automatically monitor your bandwidth usage, prioritize traffic, and allocate
bandwidth to all applications and users. At the same time, it also is able to provide users with the freedom to
customize their bandwidth allocation to meet special requirements. Policy-based bandwidth allocation and
routing give the user complete control over how WAN resources are utilized.

·

Industrial Design
Designed specifically for industrial and mobile applications, the LAN-Cell 3’s rugged steel chassis and unique
Multi-Function Mounting Base provide physical security along with conveniences such as power-locking,
cable management and our patent-pending Modem-LOCK USB modem retention system.

·

Energy Efficient
The LAN-Cell 3’s low power consumption SOC chip makes it ideal for solar or battery-powered installations.

1.2

Package Contents
• LAN-Cell 3
• Multi-Function Mounting Base with Modem-LOCK
• 120/240 VAC to 12 VDC Power Adapter
• 2x 3 dBi Wi-Fi Antennas
• 1x CAT5e Cable
• 4x Rubber Feet
• Mounting Hardware Kit
• Quick Start Guide

2
CHAPTER 2: HARDWARE
2.1

Front LEDs

Figure 1: LAN-Cell 3 Front Panel

LABEL

LED STATE

DESCRIPTION
USB 2.0 port for 4G/3G USB modems only

MODEM

USB modem is initializing
– or –
Flashing
USB

USB modem is not registered on the carrier network
– or –
There is no compatible cellular service available at the current location

Solid

USB modem has made a connection & has been assigned an IP address

Wi-Fi

Solid

The LAN-Cell’s internal Wi-Fi radio is enabled

OS

Solid

An internal OS error has occurred

PWR

Solid

Power is on

Flashing

Power-on Self Test is in progress (approx. 60 sec)

Solid

LAN-Cell is at normal operational status

Solid

Link Status on the wired WAN Ethernet port

Flashing

Data activity on the wired WAN Ethernet port

Solid

Link Status on the corresponding LAN Ethernet port

Flashing

Data activity on the corresponding LAN Ethernet port

STAT

WAN

LAN 1-4
EJECT USB

Press & hold for 5 seconds. Wait for LED to stop flashing. Remove USB modem.
Press & hold for 5 seconds until the STAT LED begins to flash. Wait for STAT LED to
stay on solid. This returns the LAN-Cell to its default settings:

RESET

LAN IP = 192.168.1.1:8080
Username/Password = admin/1234
3
2.2

Rear Panel

Figure 2: LAN-Cell 3 Rear Panel

LABEL
Wi-Fi (B)

*

DESCRIPTION
Attach one of the supplied cylindrical Wi-Fi antennas to this RP-SMA (reverse polarity) connector if
using the LAN-Cell’s integrated 802.11 b/g/n radio.

LAN 1-4

Connect equipment to these ports with Ethernet cables. These ports are auto-negotiating (supporting

(yellow)

10, 100, 1000 Mbps) and auto-sensing (adjusts to the Ethernet cable type: straight-through vs.
cross-over).

WAN

Connect a cable/DSL modem or other 10/100/1000 Ethernet-based WAN equipment to this

(blue)

auto-sensing/auto-negotiating port.

PWR

Connect the included 12V DC power adapter to this jack. This is a 2.1mm center pin positive
connector.
Power Switch. Insert a #6-32 screw into the Multi-Function Mounting Base to prevent accidental

ON/OFF

disengagement of the switch.
Wi-Fi (A)

*

Attach one of the supplied cylindrical Wi-Fi antennas to this RP-SMA (reverse polarity) connector if
using the LAN-Cell’s integrated 802.11 b/g/n radio.

* Attaching other types of antennas (such antennas with standard SMA, TNC or FME connectors) to this jack
may damage the antennas and/or Wi-Fi antenna jack!

4
2.3

Multi-Function Mounting Base

The LAN-Cell 3’s Multi-Function Mounting provides:
A. Wall and deck mounting options
B. Multiple external antenna mounting points
C. Cable management slots & tie-down posts
D. Power switch & plug locking features
E. Modem-LOCK™ USB modem retention system

Figure 3: Mounting Base

2.4

Figure 4: Power Lock Features

Modem-LockTM

The LAN-Cell 3’s patent-pending Modem-LOCK system is a mechanism for securing a USB modem to prevent it
from being removed or coming loose in mobile applications.
Simply insert a USB modem into the LAN-Cell 3’s USB port. Then slide the Modem-LOCK against the modem. Use
the four screws (2 front, 2 rear) to secure the Modem-LOCK into place (Figure 5).

Figure 5: Modem-LOCK

5
2.5

Hardware Setup

2.5.1

Power On

Plug one end of the provided power adapter into LAN-Cell 3’s DC power port and the other end into a power outlet.
Depress the Power push-button on the rear of the unit. After about 60 seconds, the LAN-Cell 3 will be operational
when its PWR LED and STAT LED are both constantly on

2.5.2

Install LAN Connection

Plug one end of an Ethernet cable into your computer’s network port and the other end into one of LAN-Cell 3’s
four LAN ports on the rear panel. The corresponding LAN LED will be green and will flash indicating LAN traffic.

2.5.3

Install WAN Connection

Choose one or more ways to connect LAN-Cell 3 to the Internet.
A. Connect via 3G/4G USB Modem
Plug a supported 3G/4G USB modem into LAN-Cell 3’s USB port on the front panel.
B. Connect via xDSL, cable modem or other wired Ethernet service
Plug an Ethernet cable from your Ethernet WAN device (e.g. DSL modem) into LAN-Cell 3’s WAN port on
the rear panel.
The LAN-Cell 3 supports 2 simultaneous WAN connections for both fail-over and load-balancing operations.

2.5.4

Install Wi-Fi Connection

Attach the 2 RP-SMA antennas to the A & B Wi-Fi antenna jacks on the rear panel. These antennas provide both
Wi-Fi service to LAN devices and can be configured as an optional WAN connection in place of a wired Ethernet
WAN connection.

6
CHAPTER 3: ACCESSING THE LAN-CELL 3
Initial setup of the LAN-Cell 3 must be done using an Ethernet cable – the internal Wi-Fi Access Point is disabled
by default as a security precaution.
Configure your PC to receive an automatic its IP address information automatically (DHCP) or set your PC’s IP
address to 192.168.1.2, netmask= 255.255.255.0 and default gateway=192.168.1.1. If you are unfamiliar with how
to configure your PC’s TCP/IP settings, please refer to the Appendix.

3.1

Start-up and Login

Open any Web browser. In the address box, enter [HTTP://192.168.1.1:8080]

When you successfully connect to the configuration interface for LAN-Cell 3, the login screen will appear (Figure 6).
Enter your username as [admin] and your password as [1234]. These are filled in initially as a convenience. You
will then see the LAN-Cell 3’s Router Status page (Figure 7). Changing the login password is highly recommended.
See the Admin > Management screen.

Figure 6: LAN-Cell 3 Login Screen
7
Figure 7: Router Status Screen

3.2

Navigating the User Interface

The LAN-Cell’s web management interface is divided into 3 sections (Figure 8):

1. Drop-down Navigation Menus
2. The Status Summary Column
3.

Configuration Parameters
8
Figure 8: LAN-Cell 3 Screen Layout
To expand a drop-down menu, click on the menu title. Then select the desired sub-menu. Chapters 5 through 11
provide details on each of the LAN-Cell 3’s menu options.
The Status Summary column is shown on the right side of every screen to provide a quick overview of the
LAN-Cell’s key operating parameters. The Enable/Disable buttons allow you to easily change an interface’s status.
Configuration parameters are entered on the main panel of each screen. Screens are divided into logical
parameters groupings labeled with black bands.

3.3

Menu Structure

Status

Provides real-time and historical information about the LAN-Cell’s operation.

Setup

Changes the LAN-Cell’s LAN, WAN, DHCP, DDNS, Time and other settings. WAN configures the USB
modem and wired Ethernet connections. WAN Advanced configures fail-over modes and related settings.

Wireless (Wi-Fi)

Configures the LAN-Cell’s embedded 802.11 b/g/n Wi-Fi radio.

Security

Includes screens for configuring the LAN-Cell’s firewall, filtering, and VPN features.

Applications

Port-Forwarding, DMZ and other application-specific settings.

QoS

Enables Quality-of-Service (bandwidth management) and performance enhancing features.

Admin

Includes system management, firmware updates, utilities and system event logging.

9
CHAPTER 4: QUICK SETUP
4.1

USB Modem Configuration

The LAN-Cell 3 auto-recognizes and configures itself for over 100 different USB modem models on dozens of
cellular service provider networks. Please refer to the LAN-Cell 3 Firmware Release Notes for the list of currently
supported modems.

The USB modem may need to be activated with a cellular service provider before it can used in the LAN-Cell 3
Follow the service provider or modem manufacturer’s instructions for activating, testing, and updating the firmware
on the USB modem before attempting to use it in the LAN-Cell 3.

Some modems require cellular service provider specific settings to be entered on the LAN-Cell 3’s Setup > WAN
screen. If the USB modem and carrier settings are not auto-detected, obtain the following information from the
service provider:

Parameter

Your Cellular Carrier’s Settings

Modem Manufacturer*

The original equipment manufacturer, not the ISP’s brand

Modem Model #*

The original equipment manufacturers’ model

APN

†

Authentication Type
Username / Password
ISP Access #
PIN Code
*

Φ

#777 for CDMA, *99# for GSM

‡

This information is often on the modem’s label; sometimes under a removable cover.

† APN applies only to GSM carriers. Many GSM carriers operate different APNs for different types of data service plans.
Φ The LAN-Cell does not use the phone number assigned to the USB modem. That number is used only by the provider.
‡ The 4 digit PIN code field is required only if the SIM/RUIM is has been locked.

On the Setup > WAN screen (Figure 9), begin by selecting the USB modem brand and model. Next select the
location, service provider name and specific APN setting (if required). If you are using a “custom” APN, select the
Manual option and enter the custom APN value in the Access Point Name field.

10
Figure 9: USB Modem Setup
Proxicast recommends implementing the WAN Fail-Over Connectivity Check found on the Setup > WAN
Advanced screen for maximum 4G/3G connection reliability. By default, this feature is enabled and configured to
ping a high-availability server.

4.2

WAN Configuration

The bottom half of the SETUP > WAN screen (Figure 10) is used to configure the LAN-Cell 3’s Wired Ethernet
WAN interface. For most Ethernet connections, the default DHCP client mode is sufficient. If your WAN interface
has been assigned a static IP address, select “Static IP” from the Connection Type drop-down and enter the
appropriate TCP/IP setting values. If your Ethernet connection uses the PPPoE protocol, select that Connection
Type and enter your login information.

The LAN-Cell 3’s Wi-Fi radio can also be used in place of the wired Ethernet WAN connection. For more
information on this option, see Section 6.1.6.

11
Figure 10: Ethernet WAN Setup

4.3

LAN Configuration

If you need to change the LAN-Cell 3’s default LAN subnet (192.168.1.1 / 255.255.255.0), go to the Setup > LAN
screen (Figure 11) and enter the IP address to assign to the LAN-Cell and select the desired subnet mask from the
drop-down list. The LAN-Cell’s DHCP server will automatically adjust to serve addresses from the new subnet.

Figure 11: Ethernet LAN Setup

4.4

Wi-Fi Configuration

The LAN-Cell 3’s internal 802.11 b/g/n Wi-Fi radio is disabled by default as a security precaution. To provide
laptops, tablets and other Wi-Fi devices with Internet connectivity through the LAN-Cell, go to the Wireless (Wi-Fi)
> Basic screen (Figure 12) and enable the wireless connection.

12
Figure 12: Wi-Fi Basic Setup
Only SSID1 will be enabled by default. You may change the SSID Name to suit your preference. We strongly
recommend that you change the Security Mode to prevent authorized access to your Internet connection. The
LAN-Cell 3 also supports a second SSID. This is most often used when you wish to provide “guest” access to your
Internet service, but maintain guest devices on a different LAN subnet than your other devices.

4.5

Password

To change the LAN-Cell 3’s default password, select the Admin > Management screen (Figure 13). Enter the new
password (case sensitive) and re-enter the value to confirm.

Figure 13: Changing the Admin Password
13
CHAPTER 5: STATUS MENU
5.1

Router

Figure 14: Router Status
14
5.1.1

Router Information

Model Name

Product model name is shown.

Firmware Version

The firmware version this device is running.

Current Time

Current system time

Running Time

The period of time LAN-Cell 3 has been running.

5.1.2

WAN (USB Modem)

MAC Address

MAC Address of the USB Modem (Direct IP modems only)

Connection Type

The current connection type (wwan or DirectIP)

IP Address

WAN IP address

Subnet Mask

Subnet mask

Gateway

IP address of the remote gateway

5.1.3

WAN (Ethernet)

MAC Address

MAC Address of the WAN port

Connection Type

The current connection type (PPPoE, Static IP, and DHCP)

IP Address

WAN IP address

Subnet Mask

Subnet mask

Gateway

IP address of the remote gateway

15
5.1.4

LAN

MAC Address

MAC Address of the LAN switch

IP Address

Internal IP Address of the LAN-Cell 3

Subnet Mask

Subnet mask in the internal network

DHCP Service

DHCP service enabled or disabled

DHCP Start IP Address

DHCP Start IP address

DHCP End IP Address

DHCP End IP address

Max DHCP Clients

The maximum IP addressed which can be assigned to PCs connecting to the network

5.1.5

Wi-Fi

Wireless Channel

Wireless Channel in use (default is 6)

Wireless SSID 1

SSID1 of the LAN-Cell

MAC Address 1

MAC Address for SSID1

Wireless SSID 2

SSID2 of the LAN-Cell

MAC Address 2

MAC Address for SSID2

16
5.2

Traffic

Click on Status > Traffic and then choose the graph scale from two hours, one day, one week, and one
month. You will see the graph in Figure 15. You can monitor your download and upload throughput.

Figure 15: Traffic Status Graph
17
5.3

Session

Click on Status > Session and choose the graph scale from two hours, one day, one week, and one month.
You will now see the graph in Figure 16. TCP, UDP, ICMP, and total session information is displayed.

Figure 16: Session Status
18
5.4

User/DHCP

Displays a table of the system LAN users and their IP addresses, MAC addresses and remaining DHCP
lease times.

Figure 17: User/DHCP Status

Name

DHCP client name

IP Address

IP address which is assigned to this client

MAC Address

MAC address of this client

Expiration Time

The remaining time of the IP assignment

19
5.5

Current Users

Displays a table of the system LAN and WAN users and their IP addresses.

Figure 18: Current Users

IP Address

IP address assigned by Static ARP matching

MAC Address

MAC address in the Static ARP matching

ARP Type

Static or dynamic

20
CHAPTER 6: SETUP MENU
6.1

WAN

6.1.1

WAN (USB Modem)

Figure 19: Setup WAN USB Modem
21
WAN

Select Enable/Disable to enable/disable USB WAN

Connection Type

PPP or DirectIP modems

Modem Brand

Choose your modem’s brand. Select Auto for automatic detection.

Modem Model

Choose your modem’s model number. Select Auto for automatic detection.
Choose Auto to use an APN preo-programmed into your USB modem. Select by

APN Type

Service Provider for to the ISP you use, or otherwise choose Manual to assign
desired APN.

Location
Service Provider

Access Point Name (APN)

Choose your country.
Choose your cellular service provider and the Access Point Name (APN) will be
automatically assigned.
Enter APN string offered by the ISP if you select Manual for APN Type. Leave this
field blank if your ISP does not use APN’s (e.g. CDMA networks).

Personal Identification

Enter PIN code required by your modem. Leave it blank if a PIN code has not been

Number (PIN)

assigned.

Authentication Type

Typically “Auto” or select CHAP/PAP/None as required.

User Name

The user name required by the ISP (blank if your ISP doesn’t require a username).

Password

The password required by the ISP (blank if your ISP doesn’t require a username).
Enter ISP Access Number required by the ISP to connect to their data network (GSM

ISP Access Number

default *99***1#

CDMA default #777).

DO NOT enter the phone number assigned to the USB modem.
Connection Mode
PPP Echo Interval
PPP Retry Threshold
MTU
TurboLink

Typically “Auto” or can be used to force the modem to operate in a specific mode (if
supported by the modem).
PPP echo will ensure whether the link is still up or not (default interval 20 seconds)
When PPP echo retry exceeds PPP Retry Threshold (default 5 times), the connection
is recognized as down.
PPP maximum transmission unit: up to 1492 bytes (PPP’s header is 8 bytes).
Although typically not required, enable “TurboLink” to improve the connection stability.
(Please note that TurboLink function will increase your 3G/4G data usage)
Enable to allow the USB WAN to make a client connection to a remote PPTP server.

PPTP VPN Client

If enabled, enter the PPTP username, password, VPN host IP address and MPPE128
parameters required for the PPTP VPN connection.

22
6.1.2

WAN (Ethernet)

LAN-Cell 3 supports four WAN connection types in addition to the USB Modem: DHCP, Static, PPPoE, Wi-Fi-Client.
Select the appropriate connection type from the pull-down menu. The screen will expose the related fields for each
type of WAN connection.

Figure 20: WAN (Ethernet) Connection Types

6.1.3

DHCP (automatic IP address assignment)

The IP address is automatically assigned to you by your ISP (most common Ethernet WAN option).

Figure 21: Setup WAN Ethernet DHCP

23
WAN

Select Enable/Disable to enable/disable WAN

Connection Type

DHCP

Host Name

Some ISP and DHCP servers ask for the Host Name of the DHCP client before assigning an
IP address. In this case, enter your Host Name.

MTU

Maximum Transmission Unit (1500 is the default for Ethernet)

Bigpond Login

If you are using the “Bigpond” system, please enable this item

Bigpond Login
Server
Bigpond Login
User Name
Bigpond Login
Password

Please choose the Bigpond server.

Please enter your User Name provided by Bigpond

Please enter your Password provided by Bigpond
Enable to allow the WAN to make a client connection to a remote PPTP server.

PPTP VPN Client

If enabled,

enter the PPTP username, password, VPN host IP address and MPPE128 parameters
required for the PPTP VPN connection.

6.1.4

Static (Fixed IP address assignment)

The IP address, subnet mask, gateway, and DNS server are provided by your ISP.

Figure 22: Setup WAN Ethernet Static IP

24
WAN

Select Enable / Disable to enable/disable WAN.

Connection Type

Static IP

External IP Address

The external IP addresses assigned by the ISP.

Netmask

The netmask assigned by the ISP.

Gateway

The gateway assigned by the ISP.

Static DNS 1

The static DNS 1 assigned by the ISP.

Static DNS 2

The static DNS 2 assigned by the ISP.

MTU

Maximum Transmission Unit (1500 is the default for Ethernet)
Enable to allow the WAN to make a client connection to a remote PPTP server.

PPTP VPN Client

If

enabled, enter the PPTP username, password, VPN host IP address and MPPE128
parameters required for the PPTP VPN connection.

6.1.5

PPPoE (connected by username/password)

If your ISP provides the username and password, please enter the information accordingly.

Provided by
your ISP

Figure 23: Setup WAN Ethernet PPPoE

WAN

Select Enable/Disable to enable/disable WAN

Connection Type

PPPoE

Authentication Type

Typically “Auto” or select CHAP/PAP/None as required.

User Name

The user name assigned by the ISP.

Password

The password assigned by the ISP.
25
PPP Echo Interval
PPP Retry Threshold

PPP MTU

PPP echo will ensure whether the link is still up or not (default interval 20 seconds)
When PPP echo retry exceeds PPP Retry Threshold (default 5 times), the
connection would be recognized as down.
PPP maximum transmission unit: up to 1492 bytes (PPP’s header is 8 bytes)(This
value should be less than MTU value at least 8 bytes ).
Enable to allow the WAN to make a client connection to a remote PPTP server.

PPTP VPN Client

If

enabled, enter the PPTP username, password, VPN host IP address and
MPPE128 parameters required for the PPTP VPN connection.

6.1.6

Wi-Fi Client

The LAN-Cell 3’s built-in Wi-Fi radio can be used as a WAN interface to establish a connection to an external Wi-Fi
network. Whenever the LAN-Cell 3 detects the target Wi-Fi network, it will automatically make a connection to this
network. This option disables the Ethernet WAN interface, but the LAN-Cell 3 can still function as a local Wi-Fi
access point while connected to the remote Wi-Fi network. Note: the LAN-Cell 3’s Wi-Fi radio must first be enabled
on the Wireless (Wi-Fi) > Basic screen.

Figure 24: Setup WAN Wi-Fi Client

WAN

Select Enable/Disable to enable/disable WAN

Connection Type

Wi-Fi Client

Target SSID

Enter the SSID of the external target Wi-Fi network to connect to.

Target BSSID (MAC)

Enter the BSSID to connect to. The BSSID is optional if you set the target SSID.

Wireless Channel

Select the Wi-Fi channel number used by the target Wi-Fi network.
26
When operating in 40 MHz mode the access point will use an extended channel
Extension Channel

either below or above the current channel. Optimal selection will depend on the
channels of other networks in the area.
Click this button to display a table of visible Wi-Fi networks. Select the desired

Site Survey

network from the Site Survey table and the associated SSID and channel
information will be automatically entered.
Select the Security Mode which matches the target Wi-Fi network. Enter the

Security Mode

associated security information (such as pre-shared keys) required by the target
Wi-Fi network.
Enable to allow the WAN to make a client connection to a remote PPTP server.

PPTP VPN Client

If

enabled, enter the PPTP username, password, VPN host IP address and
MPPE128 parameters required for the PPTP VPN connection.

27
6.2

WAN Advanced

The WAN Advanced screen configures several advanced WAN settings including:
·

Fail-Over

·

Load Balancing

·

Keep-Alive

The settings are the same for both the USB and Ethernet WAN interfaces.

Figure 25: Setup WAN Advanced
Connection Mode

Always On: WAN connection is always established and routes traffic as required.
Backup Standby: WAN connection is always established but only routes traffic
when primary WAN is down (route on demand)
Backup: WAN connection is only established and only routes traffic when primary
WAN is down (connect on demand + route on demand).

Fail-Over to WAN

If one of the WAN’s is marked as “Backup” or “Backup Standby”, the other WAN
will allow you select that WAN as the backup for the current WAN (e.g. if you want
the Ethernet WAN to be primary and have it fail-over to use the USB WAN when
necessary, mark the USB WAN as “Backup Standby”, and select USB WAN as
the “Fail-Over to WAN” for the Ethernet WAN interface.

Load Balance Weight

The weight for session-based multi-path routes. Sessions will be established in
weighted round-robin fashion on the WANs as new requests are received from
LAN devices. Increase the Load Balance Weight of one WAN versus the other to
have a higher percentage of traffic flow out that WAN when both WANs are active.
Note: finer-grained control over WAN traffic can be achieved using the Static
Routing feature.
28
Fail-Over Connectivity

Enable/disable the use of ICMP (ping) packets to determine if a WAN interface is

Check (ping)

currently up.

Consecutive Failure

The number of consecutive pings that must fail to be acknowledged before the

Tolerance

interface is marked as down.

Max Reply Wait Time

The maximum number of seconds to wait for each ping to be acknowledged
(maximum latency) before assuming the ping to have failed.

Ping Target Type

Default Gateway: sends ICMP packets to the ISP’s default gateway address.
Note: many ISP’s do not support ICMP replies from their default gateways.
Custom: sends ICMP packets to an IP address of your choosing.

Target IP

Enter the IP address of the custom host target to be used.

29
6.3

LAN

Figure 26: Setup LAN

Sets the internal LAN IP address of the LAN-Cell 3.
Internal IP Address

Note: The LAN-Cell’s built-in DHCP Server will automatically adjust to
the IP address and subnet entered.

Subnet Mask
Spanning Tree Protocol (STP)
MTU

Select the appropriate subnet mask from the list.
Click Enable to avoid cyclic topology caused by incorrect connection of
your internal network.
Maximum transmission unit: up to 1500 bytes.

30
6.4

Static Routing

6.4.1

Static Routing Settings

Figure 27: Setup Static Routing

Static Routing

6.4.2

Choose Enable/Disable to enable/disable the static routing feature.

Add Routing Rule
Click on the [Add] button. The screen shown in Figure 28 will open.

Figure 28: Add Static Routing Rule
31
Sequence Number

This defines the sequence of the Routing rules. If a packet fits the conditions
set by the Routing rules, the packet will then be sorted according to the first
Routing rule from the top of the list.

Rule Name

Descriptive name of the Routing rule. Rule names may not contain spaces.

Rule Enable

Enable/Disable this Routing rule

Internal IP Range

Set up the internal IP range for this rule.

External IP Range

Set up the external IP range for this rule.

Protocol

Set up the protocol (TCP or UDP) for the to be enabled.

Service Port Range

Set up the Service Port Range (e.g., HTTP is TCP/80) for the to be enabled.

External Interface

Select which External Interface (USB WAN, Ethernet WAN or LAN) for the
packets to go through, IF the packet fits the condition of this rule. If your LAN
includes another Internet gateway device, you can create a “traffic redirect”
rule using the LAN interface to send selected traffic to the other gateway.

Routing Gateway

Default Gateway: Use the default gateway of the selected external interface.
Static Gateway: Use the specific gateway IP address entered.

Gateway IP Address

6.4.3

IP address of the static gateway.

Static Routing Examples

This example forces all E-Mail sent through the LAN-Cell to go through the USB WAN interface exclusively. All
other types of traffic is unaffected by this rule.
Rule Name

SMTP-to-USB

Enable

Enable

Internal IP Range

Blank (applied to all)

External IP Range

Blank (applied to all)

Protocol

TCP

Service Port Range

25:25 (SMTP Port:25)

External Interface

WAN USB

Routing Gateway

Default Gateway

This type of rule can be used to create policies that direct specific types of traffic to specific interfaces. It can also
be used to segment the LAN traffic for load balancing and other purposes.

32
This example forces traffic associated with a specific test PC (192.168.1.27) on the LAN to communicate only with
the Headquarters network (24.3.85.1/24) using a specific gateway address (12.85.33.147).
Rule Name

Test-PC-to-HQ

Enable

Enable

Internal IP Range

192.168.1.27 - 192.168.1.27

External IP Range

24.3.85.1 – 24.3.85.254

Protocol

*

External Interface

WAN Ethernet

Routing Gateway

Static Gateway

Gateway IP

12.85.33.147

You can combine the Static Routing Rules with the LAN-Cell 3’s WAN Load-Balancing Weights and the Quality of
Service (QoS) Bandwidth Management features to gain precise control over which devices and protocols use
specific interface resources.

33
6.5

DHCP Server

Figure 29: Setup DHCP Services

DHCP Server
DHCP Starting IP
Address
Max DHCP Clients
DHCP Lease Time

Domain

Select Enable/Disable to enable/disable DHCP Server.
The DHCP starting IP address offered by the DHCP Server. The DHCP Server is
limited to a Class-C (/24) subnet and automatically adopts the subnet that the
LAN-Cell’s LAN interface is assigned to.
The maximum number of the IP addresses supported by the DHCP server.
Please choose lease time from the selection list. You can choose 1 Hour, 3 Hours,
6 Hours, 1 Day, 3 Days, or 7 Days.
Enter a domain name if LAN devices require a domain assignment as part of the
DHCP information.
DNS Relay: DHCP devices will be assigned the LAN-Cell’s LAN IP address as their
DNS Server. The LAN-Cell will relay all DNS requests to the appropriate external
DNS server. This is the default and most common mode of operation.
ISP DNS Server: The DNS Servers from WAN ISP will be relayed to DHCP clients.

DHCP DNS Server

OpenDNS Server: DNS Servers operated by the OpenDNS project will be relayed

Type

to DHCP clients.
Google DNS Server: DNS Servers operated by Google will be assigned to DHCP
devices.

Currently 8.8.8.8 and 8.8.4.4 are used.

Custom: Enter the appropriate DNS addresses in the fields below. These will be
relayed to DHCP devices.
34
6.6

DDNS

DDNS (Dynamic Domain Name Service) allows an “internet domain name” to be assigned to a computer/router
which has a dynamic IP address. This makes it possible for other internet devices to connect to the
computer/router without needing to trace the changing IP addresses themselves. To enable DDNS, you will first
need to sign up for DDNS services from one of the supported DDNS service providers such as DynDNS.org,
TZO.com or ZoneEdit.com.
DDNS is useful when combined with the virtual host and/or port-forwarding features. It allows internet users to
connect to your virtual host by using a domain name, rather than an IP address. The DDNS service helps users to
locate the right IP address by the domain name.
For example, assume that you wish to remotely access a web server embedded in one of your LAN devices, but
you obtain a different IP address from your ISP every time you connect to the internet. In this case, you will need to
enable DDNS, so users can connect to your web server through a fixed domain name without regard for the
changing IP address of your WAN connection.
Note: As a service to its customers, Proxicast operates a Dynamic DNS service which is automatically updated
each time a LAN-Cell WAN IP changes. The DDNS host name is the serial number of the LAN-Cell 3 in
the”proxidns.com” domain. For example: 00501863C748.proxidns.com
This “permanent” DDNS name is always available but cannot be changed. To create your own hostname,
register with one of the supported DDNS service providers before configuring the LAN-Cell’s DDNS
settings.

Figure 30: Setup DDNS Service
35
DDNS Service
DDNS Service
Provider
User Name

Password

Select Enable to enable DDNS service.
Select Disable to disable DDNS service.
Select the desired DDNS service provider from the list.
Enter your username for your DDNS service provider account. We recommend
avoiding special characters (#, $, &, @, etc) in your password.
Enter your password for your DDNS service provider account. We recommend
avoiding special characters (#, $, &, @, etc) in your password.
Enter the full-qualified domain name (FQDN) assigned by your DDNS service
provider for this specific LAN-Cell. Enter the entire domain name, e.g.:

Host Name

myrouter.mydomain.com
You must define this hostname within your DDNS service provider account before
it can be updated by the LAN-Cell. The hostname must match exactly on both the
DDNS account and this screen.

Custom Server

If your DDNS service provider assigns you a custom update server, enter that
value here.
Once your DDNS values have been saved, this button is enabled to force the

Synchronize Now

LAN-Cell to attempt to update the DDNS service provider with the latest WAN IP
address. Check the Log for full results.

The DDNS settings are the same for both the USB and Ethernet WAN interfaces. If both WAN interfaces will be
operating simultaneously, enter a different hostname for each WAN interface. If the WANs are being used in
fail-over (backup) mode, enter the same hostname for both interfaces.

36
6.7

MAC Address Clone

Some ISPs only allow a registered MAC address to access to the internet. To bypass the requirement, you need to
set up a cloned MAC address for LAN-Cell 3 using the pre-registered MAC address.

Figure 31: Setup MAC Address Clone

Clone WAN MAC

If your ISP grants access only to a fixed MAC address, select Enable.
If your ISP does not enforce access control, please select Disable.
If the PC you use to configure LAN-Cell 3 is the device which has the MAC address

MAC Address

authorized to access the internet, press Get My MAC button. Or you can type in the
MAC Address which has been granted access by your ISP.

37
6.8

VLAN

A virtual local area network, or VLAN, is a group of hosts which communicate as if they were attached to the same
broadcast domain, regardless of their physical location. A VLAN has the same attributes as a physical local area
network (LAN), but it allows for end stations to be grouped together even if they are not located on the same
network switch. Port-based VLAN function is provided in LAN-Cell 3 for users to assist with managing the LAN and
WLAN groups, for example to reduce broadcast traffic that might be sent from the Ethernet LAN to Wi-Fi clients.

1.

Click on [Add] to add a VLAN group.

2.

Configure the VLAN group by simply checking the box to associate the group members

Figure 32: Setup VLANs

*

A total of 16 VLAN groups can be set in the LAN-Cell 3.

**

Tagged VLAN only applied to the physical ports.

***

Changing VLAN settings will cause the LAN-Cell 3 to reboot in order for the changes to take effect.

38
6.9

Time

Figure 33: Setup Time Servers & Automatic Reboot

Time Synchronization
Time Server Type

Select Enable/Disable to enable/disable Time Synchronization
Select to use a pre-defined pool of time servers on the Internet or your
own time server.

Time Server Area

If Server Pool is selected, choose the Time Server by location.

NTP Server Address

If Manual is selected, enter the IP address of your Time Server (NTP).

Time Zone

Select Time Zone according to your location.

Periodic Synchronization

Select Enable/Disable to enable/disable Periodic Synchronization

Daylight Savings Support

Enable/Disable automatic time adjustment for Daylight Savings Time.

Synchronization interval

Action

Select from Every Hour, Every 6 Hours, Every 12 Hours, Every Day, and
Every Week.
Click the Synchronize Now button to contact the time server for an
immediate update.
39
Enter the number of minutes of run-time before the LAN-Cell 3
Reboot Interval

automatically reboots. The Interval count-down timer will restart once the
LAN-Cell 3 has finished rebooting. Leave this field blank to disable the
automatic reboot Interval timer.
Enter the time of day (based on the LAN-Cell’s current time) at which the

Daily Reboot

LAN-Cell 2 will automatically restart. Set this value to NONE to disable
the daily reboot timer.

Note: You can combine the Interval and Daily reboot timers to have the LAN-Cell 3 restart under conditions. For
example you may desire the LAN-Cell to restart every 8 hours and always at 1 AM UTC so that you have at
least one known reboot time. If the Daily Timer is used, do not set the Interval timer greater than 1440
minutes (24 hours).

40
CHAPTER 7: WIRELESS (Wi-Fi) MENU
7.1

Basic Setup

The LAN-Cell 3’s multiple simultaneous SSIDs provide the ability to create separate security mode and key
settings for both convenience and increased protection. For example, internal users can configure their network
devices to access the first SSID with the WPA2 PSK (Pre-Shared Key), while visitors can be assigned to the
second SSID with a WEP key that changes periodically. In addition, the SSIDs can be isolated to prevent malicious
attacks and local area network access for visitors using the second SSID. This provides an extremely convenient
approach for providing access internet access for visitors while enforcing strong security protection at all times.

7.1.1

Wi-Fi Settings

Figure 34: Setup Wi-Fi Basic

Wireless

Select Enable if you would like to turn on the wireless radio.

Connection

Select Disable if you would like to turn off the wireless radio.

Wireless Mode

Select the wireless mode for 802.11b/g/n or mixed use.

Transmission
Power
Wireless Channel

Select the transmission power class from 10%, 25%, 50%, 75%, and 100%.
Select which Wi-Fi channel to be used. For non-US, Canada, Taiwan locations, see
Wireless > Advanced to select the appropriate region and channel range.

Wireless Isolation

Select Enable if you would like to prevent communication between the SSID’s.

Between SSIDs

Select Enable if you would like to allow communication between the SSID’s

41
7.1.2

SSID Settings

Each SSID can be configured with its own attributes. Further, various security modes are available based on your
needs and preference: Disable, WEP, WPA Pre-Shared Key, WPA, WPA2 Pre-Shared Key, and WPA2. However, it
is important to note that all devices under the SSID must use the same security mode.
Different methods will grant different levels of security. Using encryption – where data packets are encrypted
before transmission - can prevent data packets from being analyzed by un-trusted parties. However, higher the
security level is, the lower the data throughput becomes.

Figure 35: Wi-Fi SSID1

Wireless SSID
Wireless SSID
Name
Wireless SSID
Broadcasting

Select Enable if you would like to turn on this SSID.
Select Disable if you would like to turn off this SSID.
Enter name you would like to assign to this SSID.
LAN-Cell 3 broadcasts SSID periodically. Select Enable to turn it on or Disable to turn it off.
Enabling SSID Broadcasting makes it convenient for users to find and connect to the
LAN-Cell 3. Disabling SSID broadcasting enhances the security by hiding SSID information.

Wi-Fi Multimedia

Select Enable to prioritize different traffic types based on their characteristics.

(WMM)

For example, VoIP or video traffic will have higher priorities over ordinary traffic.
Select Enable if you would like to prevent access to other network devices connecting to this

Wireless Isolation

SSID.
Select Disable if you would like to allow access to other network devices connecting to this
SSID.

Security Mode

Select the desired Security Mode for this SSID and one of the following sets of additional
fields will be displayed.

42
7.1.3

WEP

Figure 36: WEP Settings

WEP Key Index
WEP Key (1~4)

7.1.4

WEP Key Index indicates which WEP key is used for data encryption.
64-bit WEP: type 10 hexadecimal digits or 5 ASCII characters
128-bit WEP: type 26 hexadecimal digits or 13 ASCII characters.

WPA/WPA2 Pre-shared Key

Figure 37: WPA/WPA2 PSK Settings

Key
Encryption Mode

Pre-shared Key serves as the credential for the packet encryption. This same
value must be entered in all Wi-Fi devices connecting to this SSID.
TKIP & AES are supported.

43
7.1.5

WPA/WPA2 Radius

Figure 38: WPA/WPA2 Radius Settings

Radius Server IP Address

Enter the RADIUS server’s IP address.

Radius Server Port

Enter the RADIUS server’s port number. The default port is 1812.

Radius Key

Enter the RADIUS server’s Key.

Encryption Method

Select TKIP or AES for the packet encryption.

Rekey Method

Select method for determining when new key is required.

Rekey Time Interval

Enter the frequency of key renewals in seconds.

Rekey Packet Interval

Enter the frequency of key renewals in number of packets.

Pre-authentication

Enable pre-authentication if required by your Radius server

7.1.6

SSID2 Guest LAN

Users connecting to SSID2 can be segregated into their own local area network to provide Internet service while
preventing access to other devices on the primary LAN. Enter the Guest LAN starting IP address which will be
assigned to the LAN-Cell, and the corresponding subnet mark. Guest Wi-Fi devices will be assigned a DHCP
address in this subnet.

Figure 39: Wi-Fi Guest LAN
44
7.2

Advanced Setup

Figure 40: Wi-Fi Advanced Settings

45
Region

Choose the region in which the LAN-Cell is currently operating (sets channels).

Fragmentation

Enter the fragmentation bytes. The default value is 2346 bytes.

RTS

Enter the RTS seconds. The default value is 2347 seconds.

DTim

Enter the DTim seconds. The default value is 1.

Beacon Interval

Enter the interval to send a beacon. The default value is 100 milliseconds.

Header Preamble

Choose Long or Short header preamble.

TxMode

Choose different transmission mode.

MPDU

MSDU Aggregate

Tx Burst

Packet Aggregate

MPDU data length. The transmission rate is increased when you choose a larger
number, but usually the max value will be 4 in the wireless card
A kind of packet aggregation method, it can improve the transmission efficiency.
Please make sure you Wireless card has this function supported.
Some 802.11g wireless cards support this mode. The transmission rate can be
increased when this function is enabled.
An aggregation method like A-MSDU, it can improve the transmission efficiency.
Please make sure you Wireless card has this function supported.

HT Control Field

Choose Enable/Disable. It is useful when you need to debug the wireless network.

Reverse Direction Grant

Choose Enable/Disable. The response time can be shorter enable this function is
enabled.

Link Adapt

Short Guard Interval (SGI)

Operation Mode

Choose Enable/Disable. The function is used to dynamically change the
modulation and encoding mechanism between wireless devices.
Choose Enable/Disable. Short GI can improve the transmission rate, but with less
immunity when interference exists.
Choose Mixed mode or Greenfield. You may choose Greenfield mode to increase
the transmission rate when you using 802.11n wireless network only.

HT Band Width

Using HT20MHz or HT20/40MHz

Block Ack Setup

Choose Enable/Disable. If your Wi-Fi Card supports the Block Ack mechanism, it

Automatically

can improve the data transmission efficiency when this function is enabled.

Block Ack Window Size

Specify a Block Ack window size.

Reject Block Ack

Choose Enable to reject the request of BA from another other Wireless device.

MCS

Select transmission (connection) speed.

46
7.3

WDS Setup

A wireless distribution system (WDS) is a system enabling the wireless interconnection of access points in an
802.11 network. It allows a wireless network’s coverage area to be expanded using multiple access points without
a wired backbone to link the APs.
The LAN-Cell 3 supports 2 modes of WDS operation:
·

Bridging: APs communicate only with each other and don't allow wireless clients to access them.

·

Repeating: APs communicate with each other and with wireless clients.

All base stations in a wireless distribution system must be configured to use the same radio channel, method of
encryption (none, WEP, or WPA) and the same encryption keys. They may be configured to different service set
identifiers (SSIDs). WDS also requires every base station to be configured to forward to others in the system.

Figure 41: Wi-Fi Wireless Distribution System
47
WDS

MAC Address [1~4]

Select Enable to enable WDS function.
Select Disable to disable WDS function.
Enter the MAC addresses of the other bridged wireless devices. Maximum of 4
devices are allowed to be bridged together.

Make sure of the following in order for WDS to work correctly:
(1) All WDS devices must use the same radio channel.
(2) All WDS devices must use the same encryption mode and encryption keys.

7.4

Universal Repeater Setup

The Universal Repeater function is similar to WDS in that it is used to essentially enlarge the area of wireless
network coverage. However, unlike WDS, Universal Repeater offers simplicity in configuration requirements, as
users only need to configure the current AP as a client, and to connect it to the second AP’s SSID (or BSSID).
However, you need to ensure that the two APs are using the same wireless channel and security mode (and key)
for Universal Repeater to work correctly.

Figure 42: Wi-Fi Universal Repeater Setup

Universal Repeater
Target SSID
Target BSSID (MAC)

Select Enable to enable Universal Repeater function.
Select Disable to disable Universal Repeater function.
Enter the target SSID to connect to.
Enter the target BSSID to connect to. The BSSID is optional if you setup the
target SSID.
48
Security Mode
Wireless Channel

Choose the security mode the target AP uses, and enter the key if needed.
Select which Wi-Fi channel to be used. For non-US, Canada, Taiwan locations,
see Wireless > Advanced to select the appropriate region and channel range.
When operating in 40 MHz mode the access point will use an extended channel

Extension Channel

either below or above the current channel. Optimal selection will depend on the
channels of other networks in the area.
Click this button to display a table of visible Wi-Fi networks. Select the desired

Site Survey

network from the Site Survey table and the associated SSID and channel
information will be automatically entered.
Select the Security Mode which matches the target Wi-Fi network. Enter the

Security Mode

associated security information (such as pre-shared keys) required by the
target Wi-Fi network.

7.5

WPS Setup

Wi-Fi Protected Setup (WPS) is a computing standard that allows easy establishment of a secure wireless network.
Although easy to setup, WPS connections are inherently less secure than manually configured WPA/WPA2
connections. The LAN-Cell 3 supports two different types of WPS:
·

PIN Method: A Personal Identification Number (PIN) is generated by the LAN-Cell. This PIN must then be
entered at the "representant" of the network (other AP or client device).

·

Push-Button-Method: The user simply has to push the button on the LAN-Cell 3 screen and either an
actual or virtual one on the new wireless client device.

Figure 43: Wi-Fi WPS Setup

49
CHAPTER 8: SECURITY MENU
8.1

Firewall

The LAN-Cell 3 has several firewall-related security features designed to protect LAN devices from unwanted
access and attack from WAN (and even other LAN) connections. By default, these WAN protections are enabled
and all “inbound” connections from WAN devices are blocked, except for TCP Port 8080 which is used by the
LAN-Cell 3’s web management interface. The LAN-Cell 3 will automatically open other ports for inbound access as
you define VPN, Port-Forwarding, and Virtual Host rules (see the Applications menu). You do not need to explicitly
define firewall rules for remote access purposes.

Figure 44: Firewall Setup

SPI Firewall Protection

Select Enable to enable SPI Firewall Protection.
Select Disable to disable SPI Firewall Protection.

TCP SYN DoS Protection

Check to enable TCP SYN DoS Protection.
Uncheck to disable TCP SYN DoS Protection.

TCP SYN DoS attack sends a flood of TCP/SYN (connection requests),
causing the LAN-Cell to consume computing resources (e.g. memory, CPU)
to reply and continuously wait for the incoming packets.

The LAN-Cell 3 is able to detect TCP SYN DoS attacks and limit the
resource consumption by lowering the incoming request rate by fast
recycling of the resource. Therefore, the LAN-Cell 3 is still able to serve
normal traffic while it is under such an attack.
50
ICMP Broadcasting

Check to enable ICMP Broadcasting Protection.

Protection

Uncheck to disable ICMP Broadcasting Protection.

ICMP broadcasting attack is a type of DoS attacks. A flood of ICMP
broadcasting packets is generated and sent to LAN-Cell 3. Consequently,
this LAN-Cell will experience a high number of interruptions and
consumption of computing resources.

The LAN-Cell 3 is able to stop responding to ICMP broadcasting echo
packets in order to avoid a potential ICMP broadcasting DoS attack.
ICMP Redirect Protection

Check to enable ICMP Redirect Protection.
Uncheck to disable ICMP Redirect Protection.

An ICMP redirect message is a way to change the existing routing path.
Generally, ICMP redirect packets should not be sent, and so when there is
the occurrence that ICMP redirect packets are sent, it is important to note
that it is very likely to be used as a means for a network attack.
Broadcast Storming

Check to enable Broadcast Storm Protection.
Check to disable Broadcast Storm Protection.

A broadcast storm is a situation in which messages are broadcast on a
network, and each message prompts a receiving node to respond by
broadcasting its own messages on the network that in turn prompt further
responses, and so on. This snowball effect can have a serious negative
impact on network performance.

See also Spanning Tree Protocol to reduce broadcast loops on the LAN.

51
8.2

IP Access Control

IP Access Control is used to either allow or deny specific types of “outbound” connections from specific LAN IP
addresses. Each rule defines a custom Access Control List (ACL) that the LAN-Cell 3 uses to determine if a packet
is to be routed or not. By default, the LAN-Cell 3 allows all LAN devices to connect to all external ports on any WAN
interface.

Outbound IP Access Control rules are typically used to limit end-user access to one or more Internet services that
have been deemed an inappropriate use of the WAN connection. The rules can also be used to create routing
policies that force specific types of traffic to flow through specific WAN interfaces (e.g. all E-Mail must go through
the Ethernet WAN only).

8.2.1

IP ACL Settings

Figure 45: IP Access Control Setup

IP Access Control

Select Enable to enable ACL.
Select Disable to disable ACL.

Default IP Access

Check Allow to allow LAN devices to communicate with the WAN interfaces except

Control Action

for the ACL rules (deny rules) defined in the table below.
Check Deny to prevent LAN devices from communicating with the WAN interfaces
except for the ACL rules (permit rules) defined in the table below.
52
8.2.2

ACL Rules

Click on the [Add] button to display the following screen:

Figure 46: IP ACL Rule Setup

Sequence Number

This defines the sequence of the ACL rules. Packets are matched against the rules
in the order displayed until a match is found.

Rule Name

Name of the ACL rule.

No spaces are permitted.

Rule Enable

Enable/Disable this ACL rule

External Interface

Please select which External Interface (USB WAN or Ethernet WAN) you want a
packet to go through, IF the packet fits the condition of this ACL rule. Select “*” to
allow the LAN-Cell to determine the best available WAN interface to use.

Internal IP Range

Set up the internal IP range for this ACL rule. Only packets from devices in this
range will be filtered by this rule. Leave blank to apply to all LAN devices.

External IP Range

Set up the external IP range for this ACL rule. Only packets destined for IP
addresses in this range will be filtered by this rule. Leave blank to have this rule
apply to all non-LAN addresses.

Protocol

Set up the protocol (TCP or UDP or both) for the ACL to be enabled. Select “*” to
apply this rule to all packet types.

Service Port Range

Set up the Service Port Range (e.g., HTTP is TCP/80) for the ACL to be enabled.
Leave blank to apply this rule to all ports.

Action

Select whether the LAN-Cell should ALLOW / DENY packets which match this rule.
53
8.2.3

IP ACL Rule Example

Assume for example that a company does not wish to allow employees to use the MSN Windows Live Messenger
system over the USB WAN interface. The LAN-Cell 3 administrator can set up an ACL Deny action rejecting the
traffic going out to the external IP address range used by MSN.

Figure 47: MSN ACL Example

Rule Name

Block-MSN-Messenger

Rule Enable

Enable

External Interface

WAN (USB Modem)

Internal IP Range

{blank} (applies to all LAN devices)

External IP Range

64.4.50.96 to 64.4.50.127 (IP address range for MSN server)

Protocol

TCP/UDP

Service Port Range

1863 (MSN port)

Action

DENY

54
8.3

Outbound MAC ACL

Similar to IP Access Control, Outbound MAC ACL Control is used to either allow or deny specific devices identified
by their unique Media Access Control (MAC) addresses from making “outbound” connections. The MAC rules also
enable you to “statically” assign an IP address from the LAN-Cell 3’s DHCP pool to a specific MAC address.

8.3.1

MAC ACL Settings

Figure 48: Outbound MAC Address Control Setup

Outbound MAC Access

Choose Enable/Disable to enable/disable MAC Access Control

Control
Default Outbound MAC

The default ACL action of the ACL rules. When you add the individual rules, they

Access Control Action

can be viewed as exceptions and take effect relative to the default action.

55
8.3.2

MAC ACL Rules

Click on the [Add] button to display the following screen:

Figure 49: MAC ACL Rule Setup

Sequence Number

This defines the sequence (priority) of all the MAC ACL actions.

Rule Name

Name of the MAC access rule. Spaces are not allowed.

MAC

Set up the MAC Address to which you would like to enable the MAC ACL action.
Format the MAC address as: 00:00:00:00:00:00

Action

Select whether the LAN-Cell should ALLOW / DENY packets matching this rule.

ACL Enabled

Enable/Disable this MAC access rule.

Static ARP Enabled

Enable/Disable this Static ARP rule.

Static DHCP Enabled

Enable/Disable this Static DHCP rule.

IP

The IP address to assign via static ARP or static DHCP. The address must be
within the DHCP pool configured for the LAN-Cell and the DHCP Server feature
must be enabled.

56
8.3.3

MAC ACL Rule Example

Assume that you have an IP camera that only accepts DHCP addresses and you need to assign it a static IP
address (192.168.1.40) so that it can be remotely accessed.

Figure 50: MAC ACL Rule Example

Sequence Number

1

Rule Name

Static-IP-For-Camera

MAC

00:1B:39:01:2F;1C

Action

Allow

ACL Enable

Enable

Static ARP Enabled

Disabled

Static DHCP
Enabled
IP

Enable
192.168.1.40

57
8.4

OpenDNS

OpenDNS is a leading provider of security and infrastructure services including integrated Web content filtering,
anti-phishing and DNS. OpenDNS services can secure networks from online threats and enforce Internet-use
policies. Please refer to http://www.opendns.com for more information and to establish an account.

Figure 51: OpenDNS Settings

OpenDNS Service

Choose Enable/Disable to enable/disable OpenDNS

OpenDNS Username

Enter your OpenDNS user name.

OpenDNS Password

Enter your OpenDNS password.

DNS Query Redirection to
OpenDNS DNS Servers
OpenDNS Label

Choose Enable/Disable to enable/disable the data flow redirect to the
OpenDNS Server. Users can get advanced content filtering function through
this setting.
Enter the OpenDNS Label.

58
8.5

Web Filtering

Web filtering allows the LAN-Cell 3 administrator to restrict access to various web resources based on keywords as
well as to restrict certain types of potentially dangerous web page content such as ActiveX and Java.

8.5.1

Web Filtering Setup

Figure 52: Web Filtering Settings

Web Filtering

Choose Enable/Disable to enable/disable Web Filtering

ActiveX Filtering

Choose Enable/Disable to enable/disable ActiveX Filtering

Java/JavaScript Filtering

Choose Enable/Disable to enable/disable Java/JavaScript Filtering

Proxy Filtering

Choose Enable/Disable to enable/disable Proxy Filtering

59
8.5.2

Added Web Filtering Rules

Click on the [Add] button to display the following screen:

Figure 53: Add Web Filtering Rule

Sequence Number

This defines the sequence (priority) of all the Web Filtering rules

Rule Enable

Choose Enable/Disable to enable/disable this Web Filtering rule

Filter Keyword

Enter the Keyword

Filter Type

Choose URL or Sever

Action

Select ALLOW / DENY

8.5.3

Web Filtering Rule Example

To block access to Facebook web pages, enter the following settings:

Figure 54: Web Filtering Rule Example

60
8.6

VPN / PPTP

The Point-to-Point Tunneling Protocol (PPTP) is a method for implementing virtual private networks. PPTP uses a
control channel over TCP and a GRE tunnel operating to encapsulate PPP packets.

The PPTP settings in this

section define the parameters and user access rules when the LAN-Cell 3 is acting as a PPTP “server” allowing
connections from remote PPTP clients such as Windows PC’s. The LAN-Cell 3 can also act as a PPTP “client” –
see the PPTP section under each WAN interface.

8.6.1

VPN / PPTP Settings

Figure 55: PPTP VPN Settings

61
PPTP

Choose Enable/Disable to enable/disable the PPTP Server.

MTU

Enter MTU value. The default value is 1482 bytes.

VPN Start IP Address

Enter the VPN start IP address. The default value is 192.168.39.1.

Max VPN Clients

Enter the max number of VPN clients allowed.

Auto DNS

Choose Enable/Disable to enable/disable Auto DNS.

DNS

Enter the DNS server if you chose Disable for Auto DNS.

CHAP Enable

Choose Enable/Disable to enable/disable CHAP for VPN authentication.

MSCHAP Enable

Choose Enable/Disable to enable/disable MSCHAP for VPN authentication.

MSCHAP v2 Enable

Choose Enable/Disable to enable/disable MSCHAP v2 for VPN authentication.

MPP128 Enable

Choose Enable/Disable to enable/disable MPP128 encryption.

Proxy ARP Enable

Choose Enable/Disable to enable/disable Proxy ARP.

NAT Enable

Choose Enable/Disable to enable/disable NAT.

8.6.2

Add VPN / PPTP User Rule

Click on the [Add] button to display the following screen:

Figure 56: Add PPTP VPN User

Sequence Number

This defines the sequence of the PPTP rules.

Rule Enable

Enable/Disable this PPTP rule

User Name

Enter PPTP user name.

Password

Enter PPTP password.

62
8.7

VPN / IPsec

Internet Protocol Security (IPsec) is a standards-based protocol suite for securing Internet Protocol (IP)
communications by authenticating and encrypting each IP packet of a communication session. IPsec also includes
protocols for establishing mutual authentication between agents at the beginning of the session and negotiation of
cryptographic keys to be used during the session.
IPsec is an extremely popular and robust end-to-end security scheme operating in the Internet Layer of the Internet
Protocol Suite. It can be used to protect data flows between a pair of security gateways (Net-to-Net Mode), or
between a security gateway and a remote device (Remote User Mode). The LAN-Cell 3 supports both modes and
is interoperable with a wide variety of IPSec-compliant software and hardware products from numerous vendors.
When configuring an IPSec VPN connection, keep the following in mind:
·

All VPN parameters much match EXACTLY between the 2 devices.

·

It is helpful can have simultaneous access to the parameter and log screens of both devices during setup
and testing.

·

The network on the LAN side of the LAN-Cell and on the “private” side of your other VPN equipment must
be on different subnets.

·

Most users find it easiest to configure net-to-net VPNs if both end-points have static public IP addresses.
Contact your ISP or cellular network operator to determine if static IP addresses are available. Otherwise,
you will need to define a Dynamic DNS hostname for your LAN-Cell that has a dynamic IP address.

·

The LAN-Cell can be either the VPN initiator or responder for net-to-net VPNs. It is the responder for
Remote User VPNs.

·

All intervening network hardware between the VPN end-points must support IPSec VPN pass-through and
allow ESP (encrypted, Type 50) packets in addition to IKE and NAT-T requests on UDP ports 500 & 4500.

·

Proxicast IPSec VPN Client for Windows is the easiest way to configure a remote user VPN tunnel on a
Windows PC. A fully-functional 30 day evaluation copy can be downloaded from the Proxicast web site.

·

Additional LAN-Cell VPN configuration examples are available on the Proxicast Support web site in the
TechNotes and Knowledgebase areas.

63
8.7.1

VPN / IPsec Settings

Figure 57: IPSec VPN Settings

IPsec

8.7.2

Select Enable/Disable to enable/disable IPsec.

Add VPN / IPsec Net-to-Net Rule

In this example, a Net-to-Net VPN connection will be established between an existing VPN concentrator on the
Headquarters network and a LAN-Cell 3 at a remote office location.

Figure 58: Net-to-Net IPSec Example

64
Click on the [Add] button to display the following screen:

Figure 59: IPSec Net-to-Net VPN Settings

Sequence Number

This defines the sequence of the IPsec rules.

Connection Name

Name of the IPsec rule. Spaces are not permitted.

Rule Enable

Enable/Disable this IPsec rule

VPN Mode

Net-to-Net or Remote-User

Local External Interface

Choose the external WAN for this IPSec rule to use.

Local Subnet IP

Enter the subnet IP address on the LAN-side of the local LAN-Cell which will be
visible to the remote VPN subnet.

Local Subnet Netmask

Enter the netmask for the local VPN gateway.

Remote Gateway

Enter the IP address or domain name of the remote VPN gateway. This option is
required in Net-to-Net mode.

Remote Subnet IP

Enter the subnet IP address of the remote VPN gateway. This option is required in
Net-to-Net mode.

Remote Subnet Netmask

Enter the subnet netmask of the remote VPN gateway. This option is required in
Net-to-Net mode.

Connection Initiation

Check to force the LAN-Cell to always attempt to initiate a VPN connection to the
remote gateway. If uncheck, the VPN will not be established unless the remote
gateway initiates a connection or traffic on the local LAN subnet is destined for the
remote subnet.

IKE Key Mode

At this time, only Pre-Shared Key (PSK) is supported.
65
Preshared Key

Enter the preshared key. The key should be at least an 8-digit ASCII string.

DPD Enable

Enable/disable Dead Peer Detection (DPD).

DPD Interval

Enter the number of seconds between checks for a dead peer.

DPD Timeout

Enter the number of seconds to wait for a response before declaring the peer dead.

Phase 1 Mode

Select Main or Aggressive Mode. Must match the setting on the remote gateway.

Phase 1 Local ID

Enter the phase 1 Local ID.

Phase 1 Remote ID

Enter the phase 1 Remote ID.

Phase 1 Lifetime

Enter the phase 1 lifetime. This value is between 3600 and 28800 seconds.

Phase 2 Lifetime

Enter the phase 2 lifetime. This value is between 3600 and 28800 seconds.

Phase 1 Authentication

Choose the phase 1 authentication as MD5 or SHA1.

Phase I Encryption

Choose the phase 1 encryption as DES, 3DES or AES.

Phase 1 Group Key

Choose the phase 1 group key management as DH1, DH2 or DH5.

Management
Phase 2 Authentication

Choose the phase 2 authentication as MD5 or SHA1.

Phase 2 Encryption

Choose the phase 2 encryption as DES, 3DES or AES.

Phase 2 Group Key

Choose the phase 2 group key management as DH1, DH2 or DH5. This setting is

Management (PFS)

also known as Perfect Forward Secrecy.

8.7.3

Add VPN / IPsec Remote User Rule

In this example, a Remote User VPN connection will be established between with the LAN-Cell 3 functioning as the
VPN Server and remote PC as the client using the Proxicast IPSec VPN Client for Windows software. The
LAN-Cell has a dynamic IP address but can be accessed via its dynamic DNS name 001B39123456.proxidns.com.

Figure 60: Remote User IPSec Example
66
Click on the [Add] button to display the following screen and select VPN Mode = Remote User:

Figure 61: IPSec Remote User VPN Settings

The settings for a Remote User VPN are essentially the same as for a Net-to-Net VPN except that the Remote
Gateway and Network information is not required since the remote will be a single unknown IP address.
This same configuration is used if the VPN PC is directly connected to the Internet, for example via Wi-Fi hotspot
or its own cellular modem card.
NOTE: You cannot make a Remote User VPN connection to a LAN-Cell that has a private IP address; you must
request a public IP address from your ISP.

If you cannot obtain a public IP address for the LAN-Cell, then you

must have the LAN-Cell initiate a Net-to-Net VPN connection to another VPN server in order to remotely access
devices attached to the LAN-Cell.

67
CHAPTER 9: APPLICATIONS MENU
9.1

Port Forwarding

The LAN-Cell 3 provides Network Address Translation (NAT) services to protect private LAN IP addresses from
access by users on the external WAN. Port-Forwarding is a technique to selectively allow remote users to access
selected devices and services on the private LAN.
The LAN-Cell 3 supports both Port Forwarding and Port Translation features. These features are integrated with
the LAN-Cell’s firewall feature. Creating new port forwarding/translation rules automatically opens the
corresponding ports in the firewall – no other configuration is necessary.
The port forwarding function gives remote users access to devices on the local network via the public WAN IP
address. Users can assign a specific external port range to a local server (IP address). Furthermore, users can
specify a different internal port range to be associated with external ports in a port forwarding rule. When the
LAN-Cell 3 receives an external request to access any one of the configured external ports, it will redirect the
request to the corresponding internal server and change its destination port to one of the internal ports specified.
This allows multiple LAN devices with the same port (e.g. port 80) to be accessed remotely without having to
change their settings.
By enabling the DMZ Host Function, you can set up a Demilitarized Zone (DMZ) host, that is, a particular computer
which is fully exposed to the Internet. This may be necessary for certain applications that use random ports or
when you do not know the specific ports required for remote access.

68
9.1.1

Port Forward Settings

Figure 62: Port Forwarding Settings

Port Forwarding

9.1.2

Select Enable / Disable to enable/disable Port Forwarding

Add Port Range Forwarding Rule

Click on the [Add] button to display the following screen:

Figure 63: Add Port Forward Rule

69
This defines the sequences (priorities) of the port forwarding rules. If a packet
Sequence Number

fits the conditions set up by the port forwarding rules, the packet will then be
forwarded according to the first matching rule in the sequence.

Rule Name

Enter the name of the port forwarding rule. Must not contain spaces.

Rule Enabled

Check/Uncheck to enable/disable this port forwarding rule.
Choose USB or Ethernet WAN as the External port forwarding interface.

External Interface

Each WAN interface must have its own port forwarding rules, so duplicate
rules if using the LAN-Cell in a WAN fail-over configuration.

Protocol

Choose TCP, UDP or TCP/UDP for the rule to be applied.

External Port Range

Set up the External Port Range for the rule to capture.

Internal IP

Set up the Internal IP (single address) where incoming packets will be
directed when the rule is matched.
Set up the Internal Port Range where the rule will send matched packets. The

Internal Port Range

internal and external port ranges must contain the same number of ports, but
can be different to enable port translation.

9.1.3

DMZ Settings

Figure 64: DMZ Settings

DMZ

Select Enable to enable DMZ function.
Select Disable to disable DMZ function.
Enter the IP address of a particular host on the LAN which will receive all the packets
originally going to the corresponding WAN port / Public IP.

DMZ IP Address
NOTE: Be sure to add a Port Forward rule for the LAN-Cell 3’s remote management
interface port (default=8080) before forwarding all WAN packets to a DMZ host.
70
9.2

Virtual Hosts

Virtual Hosts function similarly to DMZ hosts, except that Virtual Hosts enable different WAN IP addresses to be
mapped to different LAN IP addresses. This is most useful when your WAN has been assigned multiple static
public IP addresses (not common for cellular connections). If you have only 1 WAN IP address, use DMZ.

9.2.1

Virtual Host Settings

Figure 65: Virtual Host Settings

Virtual Hosets

9.2.2

Select Enable / Disable to enable/disable Virtual Hosts

Add a Virtual Host Rule

Click on the [Add] button to display the following screen:

Figure 66: Virtual Host Rule
71
Sequence Number

This defines the sequences (priorities) of the Virtual Host rules.

Rule Name

Enter the name of the Virtual Host rule. Must not contain spaces.

Rule Enabled

Check/Uncheck to enable/disable this rule.

External Interface

Choose USB or Ethernet WAN as the External interface

External IP Address

Enter one of the IP addresses assigned to the WAN by your ISP.

Mapped LAN IP Address

Enter the Internal LAN IP (single address) where incoming packets will be
directed when the rule is matched.

72
9.3

Streaming / Pass-Through

You can enhance your media streaming quality by enabling RTSP, MSS, and H.323 protocols. Also, the
LAN-Cell 3’s VPN Pass-through functionality can also be enabled on this screen. All of these features are enabled
by default. Disable unused settings to reduce system overhead.

Figure 67: Application / Streaming Setup

RTSP

Select Enable/Disable to enable/disable RTSP

MMS

Select Enable/Disable to enable/disable MMS

H.323

Select Enable/Disable to enable/disable H.323

IPSec Pass-through

Select Enable/Disable to enable/disable IPSec Pass-through

PPTP Pass-through

Select Enable/Disable to enable/disable PPTP Pass-through

73
9.4

UPnP

Universal Plug and Play (UPnP) is a set of networking protocols that permits networked devices, such as personal
computers, printers, Internet gateways, Wi-Fi access points and mobile devices to seamlessly discover each
other's presence on the network and establish functional network services for communications.

Figure 68: UPnP Setup

UPnP

Select Enable/Disable to enable/disable UPnP

UPnP Port

Enter the number for UPnP port.

74
CHAPTER 10: QUALITY OF SERVICE (QoS) MENU
10.1

Bandwidth Management

The LAN-Cell 3’s Bandwidth Management feature provides two powerful and unique mechanisms to manage
bandwidth: Static Bandwidth Management (SBM) and Dynamic Bandwidth Management (DBM). SBM provides
users with the option to allocate a fixed amount of bandwidth for a specific computer or a particular application,
while DBM intellectually manages the rest of the bandwidth while all the time satisfying the complicated bandwidth
requirements/settings of SBM.

10.1.1

Bandwidth Management Settings

To effectively utilize the Bandwidth Management system, you must accurately specify the bandwidth available on a
WAN interface. Bandwidth Management then allocates bandwidth according to this information. You can obtain the
maximum bandwidth information from your ISP, or use a “speed-test” web-site application to determine your typical
actual bandwidth available. Bandwidth Management will be more effective if you are conservative when specifying
the maximum bandwidth per interface.

Figure 69: Bandwidth Management Setup
75
Bandwidth Management

Select Enable/Disable to enable/disable Bandwidth Management.

Bandwidth Type

Select the correct bandwidth type according to your Internet service

(Download/Upload)

subscription. If the bandwidth type is not available on the list, select Custom.
Enter the value to customize download bandwidth. Note that the value is

Download Bandwidth

specified in kilobits per second (Kbps). Multiply kilobytes/sec (KB/s) by 8 to
get Kbps. Divide megabytes/sec (MB/s) by 1000 to get Kbps.

Upload Bandwidth
Router Reserved
Bandwidth

Enter the value to customize upload bandwidth.
Enter the value to provide bandwidth buffer for the LAN-Cell 3’s use. Do not
set this value to 0 or the LAN-Cell may become inaccessible during periods
of heavy traffic.

Figure 70: Bandwidth Management Rules

76
10.1.2

Add SBM Rules

Click on the [Add] button to display the following screen:

Figure 71: Add Static Bandwidth Rule

In this example, 50% of the bandwidth on the USB WAN interface is being dedicated to the VNC application (TCP
Port 5900). If the interface is less than 50% loaded, VNC will be allocated additional bandwidth up to the maximum
available but will never be restricted to less than half of the available bandwidth, assuring reasonable performance
for this application regardless of any WAN traffic.

Sequence Number

This defines the sequence of the SBM rules. If a packet fits the conditions set
by the SBM rules, the packet will then be sorted according to the first SBM
rule from the top of the list.

Rule Name

Name of the SBM rule. Spaces are not allowed.

Rule Enable

Enable/Disable this SBM rule.

Internal IP

The internal LAN IP address for this SBM rule.

Protocol

Set up the protocol (TCP or UDP) for the rule.

External Interface

Select which External Interface (USB WAN or Ethernet WAN) you want a
packet to go through, IF the packet fits the condition of this SBM rule.

Service Port Range

Set up the Service Port Range for the SBM rule.

Bandwidth Allocation

Select allocation by Ratio or By Bandwidth.

Ratio

The portion of the external interface’s bandwidth to be allocated to this rule.

Download

Enter the reserved download bandwidth.

Upload

Enter the reserved upload bandwidth.

77
Use Additional Bandwidth

Check this box if you wish to allow the traffic matching this SBM rule to be

when Available

able to utilize the whole bandwidth when the bandwidth is idle.

Use Maximal Ratio

Percentage of the WAN interface’s total bandwidth to apply to this rule.

10.1.3

Add DBM Rules

Dynamic Bandwidth Rules define which LAN IP addresses are to be included in the dynamic bandwidth allocation
scheme. The default is all LAN IP addresess; however in for some applications you may wish to limit the IPs
included in DBM. You may create a maximum of 16 DBM rules.
Click on the [Add] button to display the following screen:

Figure 72: Add Dynamic Bandwidth Rule

Sequence Number

This defines the sequence of the DBM rules.

Rule Name

Name of the DBM rule. Spaces are not allowed.

Rule Enable

Enable/Disable this DBM rule

Internal IP Range

Set up the internal IP range for this DBM rule.

78
10.2

Throughput Optimizer

The LAN-Cell 3’s Throughput Optimizer feature transmits the defined high-priority packets types to optimize
network utilization and minimize delays. All of the pre-defined packet types are enabled for optimization by default.
Disable them only if performance of other applications is adversely affected.

Figure 73: Throughput Optimizer Settings

Throughput Optimzer

Select Enable/Disable to enable/disable the Throughput Optimizer.

TCP ACK

Select Enable/Disable to enable/disable TCP ACK priority

ICMP

Select Enable/Disable to enable/disable ICMP priority

DNS

Select Enable/Disable to enable/disable DNS priority

SSH

Select Enable/Disable to enable/disable SSH priority

Telnet (BBS)

Select Enable/Disable to enable/disable Telnet (BBS) priority

TCP Max Segment Size

Select Enable/Disable to enable/disable TCP Max Segment Size

79
10.3

Ultra-NAT

Network Address Translation (NAT) is often a performance bottleneck in routers and firewalls. Generic routers are
generally insufficient when dealing with a high-speed broadband network. Ultra-NAT is designed to solve this
problem by accelerating NAT performance allowing the LAN-Cell 3 to maximize the higher speed networks and to
reserve system performance for other features such as ACL and VPN servers.
The LAN-Cell 3 also has a hardware acceleration feature that can improve NAT performance; however, Hardware
NAT acceleration cannot be enabled if any of the following features are also enabled:
·

Bandwidth Management

·

Web Filtering

·

Wi-Fi Universal Repeater

·

VPN/PPTP

Figure 74: Ultra-NAT Settings

Hardware NAT

Select Enable/Disable to enable/disable Hardware NAT acceleration.

Ultra-NAT

Select Enable/Disable to enable/disable Ultra-NAT.

80
10.4

Session Manager

Session manager will automatically recycle old/dead sessions to get better connection efficiency. Users can
choose the recycle rate to optimize the connection efficiency especially for applications which rapidly open and
close many ports (e.g. P2P downloads, games, etc.)

Figure 75: Session Manager Settings

Recycle Mode

Select Fast/Regular/Slow recycle rate

81
CHAPTER 11: ADMIN MENU
11.1

System Management

The Management screen is used to perform various administrative tasks on the LAN-Cell 2 such as changing the
login password, saving and restoring system settings, and performing firmware upgrades.

Figure 76: System Management Settings

82
Administrator Password

Maximum input is 36 alphanumeric characters (case sensitive)

Re-type Password

Enter the password again to confirm.
Select Enable to enable Remote Management.
Select Disable to disable Remote Management

Remote Management
If remote management is enabled, users may access the LAN-Cell’s
web configuration screens via a WAN (Internet) connection.
Management Port

HTTP port which to which remote LAN-Cell administrators connect.
(Default port is 8080)
Press the Reboot Router button to initiate an immediate reboot of the

Reboot Router

LAN-Cell. See the Setup > Time screen to configured regularly
scheduled reboots.

Export Configuration

Click Export to save the current configuration settings to a file.
Click Restore to restore the LAN-Cell 3 to its factory default system

Restore Default Configuration

settings:
LAN IP = 192.168.1.1:8080
Username/Password = admin/1234

Import Configuration

Click Browse and Import to load a previously saved configuration file.

Upgrade Firmware

Click Browse and Upgrade to load a firmware upgrade image.

83
11.2

SNMP

Simple Network Management Protocol (SNMP) is an Internet-standard protocol for monitoring and managing
devices on IP networks. It is used by network management systems to monitor network-attached devices for
conditions that warrant administrative attention. The SNMP Management Information Base (MIB) for the
LAN-Cell 3 is available on the Proxicast Support web site.

Figure 77: SNMP Settings

SNMP
SNMP Read Community
SNMP UDP Port

Choose Enable/Disable to enable/disable the SNMP agent.
The Community String required for read access to SNMP values. Default
value is “public”. At this time, only read access is permitted.
UDP port on which the SNMP agent is listening.
String (25 characters) which identifies this specific LAN-Cell 3 device.

System Name

Value is displayed on the upper right of the LAN-Cell’s management pages
and returned as OID:

System Location

System Contact

1.3.6.1.2.1.1.5.0

String (25 characters) which can be used to identify the location of this
LAN-Cell. Returned as OID: 1.3.6.1.2.1.1.6.0
String (25 characters) which can be used to identify the contact information
for this LAN-Cell. Returned as OID: 1.3.6.1.2.1.1.4.0

84
11.3

System Utilities

The System Utilities screen provides several useful tools for network and device diagnostics.

Figure 78: System Utilities

11.3.1

Ping (ICMP)

The Ping utility sends a series of ICMP packets to a designated IP address to test communications with that IP.
Select the interface through which to send the ping, ie. LAN, WAN.
Interface

Selecting “*” will send the ping to the best available interface based
on the LAN-Cell 3’s current routing table.

Target Host

Enter the IP address to send the ping to.

Number of Packets

Specify the number of ICMP packets to send out.

Ping

Press the button to send ping ing packets.
85
Proxicast LAN-Cell 3 User Guide

More Related Content

What's hot

Motorola solutions ap7181 access point installation guide wi ng 5.5 version...
Motorola solutions ap7181 access point installation guide   wi ng 5.5 version...Motorola solutions ap7181 access point installation guide   wi ng 5.5 version...
Motorola solutions ap7181 access point installation guide wi ng 5.5 version...Advantec Distribution
 
Motorola ap650 access point installation guide (part no. 72 e 131207-01 rev. d )
Motorola ap650 access point installation guide (part no. 72 e 131207-01 rev. d )Motorola ap650 access point installation guide (part no. 72 e 131207-01 rev. d )
Motorola ap650 access point installation guide (part no. 72 e 131207-01 rev. d )Advantec Distribution
 
Manual 770 extreme3
Manual 770 extreme3Manual 770 extreme3
Manual 770 extreme3luisbes
 
지브라PDA Zebra MC55A0-HC 2D 헬스케어PDA 의료용모바일컴퓨터 산업용PDA 바코드PDA 매뉴얼
지브라PDA Zebra MC55A0-HC 2D 헬스케어PDA 의료용모바일컴퓨터 산업용PDA 바코드PDA 매뉴얼지브라PDA Zebra MC55A0-HC 2D 헬스케어PDA 의료용모바일컴퓨터 산업용PDA 바코드PDA 매뉴얼
지브라PDA Zebra MC55A0-HC 2D 헬스케어PDA 의료용모바일컴퓨터 산업용PDA 바코드PDA 매뉴얼HION IT
 
Manual x58 20 super computer
Manual x58 20 super computerManual x58 20 super computer
Manual x58 20 super computerliourte
 
Zxsdr bs8906 e product description(configured with b8100) 20100825
Zxsdr bs8906 e product description(configured with b8100) 20100825Zxsdr bs8906 e product description(configured with b8100) 20100825
Zxsdr bs8906 e product description(configured with b8100) 20100825Adeep Asaad
 
Motorola air defense configuring an ap650 running wing 5.x as a sensor only
Motorola air defense configuring an ap650 running wing 5.x as a sensor onlyMotorola air defense configuring an ap650 running wing 5.x as a sensor only
Motorola air defense configuring an ap650 running wing 5.x as a sensor onlyAdvantec Distribution
 
Fire Extinguisher 4 zone conventional fire control panel manual
Fire Extinguisher 4 zone conventional fire control panel manualFire Extinguisher 4 zone conventional fire control panel manual
Fire Extinguisher 4 zone conventional fire control panel manualVedard Security Alarm System Store
 
Gvp 201 &-gvp-201_w_user's_manual_2011_v1.21 backup
Gvp 201 &-gvp-201_w_user's_manual_2011_v1.21 backupGvp 201 &-gvp-201_w_user's_manual_2011_v1.21 backup
Gvp 201 &-gvp-201_w_user's_manual_2011_v1.21 backupWeb Technology
 
Motorola solutions ap 6511 access point installation guide - wi ng 5.5 versio...
Motorola solutions ap 6511 access point installation guide - wi ng 5.5 versio...Motorola solutions ap 6511 access point installation guide - wi ng 5.5 versio...
Motorola solutions ap 6511 access point installation guide - wi ng 5.5 versio...Advantec Distribution
 
Motorola solutions ap6522 access point installation guide wi ng 5.5 version...
Motorola solutions ap6522 access point installation guide   wi ng 5.5 version...Motorola solutions ap6522 access point installation guide   wi ng 5.5 version...
Motorola solutions ap6522 access point installation guide wi ng 5.5 version...Advantec Distribution
 
Motorola solutions ap 6521 access point installation guide - wi ng 5.5 versio...
Motorola solutions ap 6521 access point installation guide - wi ng 5.5 versio...Motorola solutions ap 6521 access point installation guide - wi ng 5.5 versio...
Motorola solutions ap 6521 access point installation guide - wi ng 5.5 versio...Advantec Distribution
 
Motorola ap 8232 access point installation guide mn000032 a01
Motorola ap 8232 access point installation guide mn000032 a01Motorola ap 8232 access point installation guide mn000032 a01
Motorola ap 8232 access point installation guide mn000032 a01Advantec Distribution
 

What's hot (19)

Motorola solutions ap7181 access point installation guide wi ng 5.5 version...
Motorola solutions ap7181 access point installation guide   wi ng 5.5 version...Motorola solutions ap7181 access point installation guide   wi ng 5.5 version...
Motorola solutions ap7181 access point installation guide wi ng 5.5 version...
 
Yaskawa V1000 Instuction Manuel
Yaskawa V1000 Instuction ManuelYaskawa V1000 Instuction Manuel
Yaskawa V1000 Instuction Manuel
 
N68 vs3 ucc
N68 vs3 uccN68 vs3 ucc
N68 vs3 ucc
 
Motorola ap650 access point installation guide (part no. 72 e 131207-01 rev. d )
Motorola ap650 access point installation guide (part no. 72 e 131207-01 rev. d )Motorola ap650 access point installation guide (part no. 72 e 131207-01 rev. d )
Motorola ap650 access point installation guide (part no. 72 e 131207-01 rev. d )
 
安川A1000系列英文版
安川A1000系列英文版安川A1000系列英文版
安川A1000系列英文版
 
Wireshark user guide-a4
Wireshark user guide-a4Wireshark user guide-a4
Wireshark user guide-a4
 
Manual 770 extreme3
Manual 770 extreme3Manual 770 extreme3
Manual 770 extreme3
 
지브라PDA Zebra MC55A0-HC 2D 헬스케어PDA 의료용모바일컴퓨터 산업용PDA 바코드PDA 매뉴얼
지브라PDA Zebra MC55A0-HC 2D 헬스케어PDA 의료용모바일컴퓨터 산업용PDA 바코드PDA 매뉴얼지브라PDA Zebra MC55A0-HC 2D 헬스케어PDA 의료용모바일컴퓨터 산업용PDA 바코드PDA 매뉴얼
지브라PDA Zebra MC55A0-HC 2D 헬스케어PDA 의료용모바일컴퓨터 산업용PDA 바코드PDA 매뉴얼
 
Manual x58 20 super computer
Manual x58 20 super computerManual x58 20 super computer
Manual x58 20 super computer
 
Zxsdr bs8906 e product description(configured with b8100) 20100825
Zxsdr bs8906 e product description(configured with b8100) 20100825Zxsdr bs8906 e product description(configured with b8100) 20100825
Zxsdr bs8906 e product description(configured with b8100) 20100825
 
Motorola air defense configuring an ap650 running wing 5.x as a sensor only
Motorola air defense configuring an ap650 running wing 5.x as a sensor onlyMotorola air defense configuring an ap650 running wing 5.x as a sensor only
Motorola air defense configuring an ap650 running wing 5.x as a sensor only
 
Fire Extinguisher 4 zone conventional fire control panel manual
Fire Extinguisher 4 zone conventional fire control panel manualFire Extinguisher 4 zone conventional fire control panel manual
Fire Extinguisher 4 zone conventional fire control panel manual
 
Gvp 201 &-gvp-201_w_user's_manual_2011_v1.21 backup
Gvp 201 &-gvp-201_w_user's_manual_2011_v1.21 backupGvp 201 &-gvp-201_w_user's_manual_2011_v1.21 backup
Gvp 201 &-gvp-201_w_user's_manual_2011_v1.21 backup
 
Motorola solutions ap 6511 access point installation guide - wi ng 5.5 versio...
Motorola solutions ap 6511 access point installation guide - wi ng 5.5 versio...Motorola solutions ap 6511 access point installation guide - wi ng 5.5 versio...
Motorola solutions ap 6511 access point installation guide - wi ng 5.5 versio...
 
Sr528 Solar Water Heater Controller Manual Wireless Function
Sr528 Solar Water Heater Controller Manual Wireless FunctionSr528 Solar Water Heater Controller Manual Wireless Function
Sr528 Solar Water Heater Controller Manual Wireless Function
 
Motorola solutions ap6522 access point installation guide wi ng 5.5 version...
Motorola solutions ap6522 access point installation guide   wi ng 5.5 version...Motorola solutions ap6522 access point installation guide   wi ng 5.5 version...
Motorola solutions ap6522 access point installation guide wi ng 5.5 version...
 
Motorola solutions ap 6521 access point installation guide - wi ng 5.5 versio...
Motorola solutions ap 6521 access point installation guide - wi ng 5.5 versio...Motorola solutions ap 6521 access point installation guide - wi ng 5.5 versio...
Motorola solutions ap 6521 access point installation guide - wi ng 5.5 versio...
 
Dse8620 operators-manual
Dse8620 operators-manualDse8620 operators-manual
Dse8620 operators-manual
 
Motorola ap 8232 access point installation guide mn000032 a01
Motorola ap 8232 access point installation guide mn000032 a01Motorola ap 8232 access point installation guide mn000032 a01
Motorola ap 8232 access point installation guide mn000032 a01
 

Viewers also liked

Social Media Marketing for Micro-Breweries
Social Media Marketing for Micro-BreweriesSocial Media Marketing for Micro-Breweries
Social Media Marketing for Micro-BreweriesCooking With Social
 
Вебинар
ВебинарВебинар
ВебинарElo4ka444
 
Анализируем планируем, педсовет Pptx
Анализируем планируем, педсовет PptxАнализируем планируем, педсовет Pptx
Анализируем планируем, педсовет PptxElo4ka444
 
Книга путь и шествие мастера
Книга путь и шествие мастераКнига путь и шествие мастера
Книга путь и шествие мастераElo4ka444
 
Формирование инновационной образовательной среды, семинар Pptx
Формирование инновационной образовательной среды, семинар PptxФормирование инновационной образовательной среды, семинар Pptx
Формирование инновационной образовательной среды, семинар PptxElo4ka444
 
Тьюторское сопровождение, педсовет Ppt
Тьюторское сопровождение, педсовет PptТьюторское сопровождение, педсовет Ppt
Тьюторское сопровождение, педсовет PptElo4ka444
 
Приоритет инновациям, семинар Ppt
Приоритет   инновациям, семинар PptПриоритет   инновациям, семинар Ppt
Приоритет инновациям, семинар PptElo4ka444
 
Освітній округ
Освітній округ Освітній округ
Освітній округ Elo4ka444
 
Proxicast PocketPORT 2 User Guide
Proxicast PocketPORT 2 User GuideProxicast PocketPORT 2 User Guide
Proxicast PocketPORT 2 User GuideProxicast, LLC
 
Адаптация пятиклассников, семинар Pptx
Адаптация пятиклассников, семинар PptxАдаптация пятиклассников, семинар Pptx
Адаптация пятиклассников, семинар PptxElo4ka444
 
Управління закладом освіти в сучасних умовах
Управління закладом освіти в сучасних умовахУправління закладом освіти в сучасних умовах
Управління закладом освіти в сучасних умовахElo4ka444
 
Самопрезентация текст
Самопрезентация   текстСамопрезентация   текст
Самопрезентация текстElo4ka444
 
Горизонты управления школой, обл. семинар Pptx
Горизонты управления школой, обл. семинар PptxГоризонты управления школой, обл. семинар Pptx
Горизонты управления школой, обл. семинар PptxElo4ka444
 
Имидж лицея, педсовет Ppt
Имидж лицея, педсовет PptИмидж лицея, педсовет Ppt
Имидж лицея, педсовет PptElo4ka444
 
Проектная деятельность, педсовет Ppt
Проектная деятельность, педсовет PptПроектная деятельность, педсовет Ppt
Проектная деятельность, педсовет PptElo4ka444
 
Ecommerce Metrics Book
Ecommerce Metrics BookEcommerce Metrics Book
Ecommerce Metrics Booknetcurate
 
De la prehistòria a la història
De la prehistòria a la història De la prehistòria a la història
De la prehistòria a la història Ximpas1BA
 
Gaunt and thin... fears for Pet Shop Boy Chris's health; NEW WORRIES OVER GAY...
Gaunt and thin... fears for Pet Shop Boy Chris's health; NEW WORRIES OVER GAY...Gaunt and thin... fears for Pet Shop Boy Chris's health; NEW WORRIES OVER GAY...
Gaunt and thin... fears for Pet Shop Boy Chris's health; NEW WORRIES OVER GAY...brashscenery6348
 
Props/Equipment list
Props/Equipment listProps/Equipment list
Props/Equipment listElliottChyi
 
Cuento
CuentoCuento
Cuentoutm
 

Viewers also liked (20)

Social Media Marketing for Micro-Breweries
Social Media Marketing for Micro-BreweriesSocial Media Marketing for Micro-Breweries
Social Media Marketing for Micro-Breweries
 
Вебинар
ВебинарВебинар
Вебинар
 
Анализируем планируем, педсовет Pptx
Анализируем планируем, педсовет PptxАнализируем планируем, педсовет Pptx
Анализируем планируем, педсовет Pptx
 
Книга путь и шествие мастера
Книга путь и шествие мастераКнига путь и шествие мастера
Книга путь и шествие мастера
 
Формирование инновационной образовательной среды, семинар Pptx
Формирование инновационной образовательной среды, семинар PptxФормирование инновационной образовательной среды, семинар Pptx
Формирование инновационной образовательной среды, семинар Pptx
 
Тьюторское сопровождение, педсовет Ppt
Тьюторское сопровождение, педсовет PptТьюторское сопровождение, педсовет Ppt
Тьюторское сопровождение, педсовет Ppt
 
Приоритет инновациям, семинар Ppt
Приоритет   инновациям, семинар PptПриоритет   инновациям, семинар Ppt
Приоритет инновациям, семинар Ppt
 
Освітній округ
Освітній округ Освітній округ
Освітній округ
 
Proxicast PocketPORT 2 User Guide
Proxicast PocketPORT 2 User GuideProxicast PocketPORT 2 User Guide
Proxicast PocketPORT 2 User Guide
 
Адаптация пятиклассников, семинар Pptx
Адаптация пятиклассников, семинар PptxАдаптация пятиклассников, семинар Pptx
Адаптация пятиклассников, семинар Pptx
 
Управління закладом освіти в сучасних умовах
Управління закладом освіти в сучасних умовахУправління закладом освіти в сучасних умовах
Управління закладом освіти в сучасних умовах
 
Самопрезентация текст
Самопрезентация   текстСамопрезентация   текст
Самопрезентация текст
 
Горизонты управления школой, обл. семинар Pptx
Горизонты управления школой, обл. семинар PptxГоризонты управления школой, обл. семинар Pptx
Горизонты управления школой, обл. семинар Pptx
 
Имидж лицея, педсовет Ppt
Имидж лицея, педсовет PptИмидж лицея, педсовет Ppt
Имидж лицея, педсовет Ppt
 
Проектная деятельность, педсовет Ppt
Проектная деятельность, педсовет PptПроектная деятельность, педсовет Ppt
Проектная деятельность, педсовет Ppt
 
Ecommerce Metrics Book
Ecommerce Metrics BookEcommerce Metrics Book
Ecommerce Metrics Book
 
De la prehistòria a la història
De la prehistòria a la història De la prehistòria a la història
De la prehistòria a la història
 
Gaunt and thin... fears for Pet Shop Boy Chris's health; NEW WORRIES OVER GAY...
Gaunt and thin... fears for Pet Shop Boy Chris's health; NEW WORRIES OVER GAY...Gaunt and thin... fears for Pet Shop Boy Chris's health; NEW WORRIES OVER GAY...
Gaunt and thin... fears for Pet Shop Boy Chris's health; NEW WORRIES OVER GAY...
 
Props/Equipment list
Props/Equipment listProps/Equipment list
Props/Equipment list
 
Cuento
CuentoCuento
Cuento
 

Similar to Proxicast LAN-Cell 3 User Guide

Ap650 installation guide_72_e-131207-01_revd
Ap650 installation guide_72_e-131207-01_revdAp650 installation guide_72_e-131207-01_revd
Ap650 installation guide_72_e-131207-01_revdAdvantec Distribution
 
Motorola ap650 access point installation guide (part no. 72 e 131207-01 rev. d )
Motorola ap650 access point installation guide (part no. 72 e 131207-01 rev. d )Motorola ap650 access point installation guide (part no. 72 e 131207-01 rev. d )
Motorola ap650 access point installation guide (part no. 72 e 131207-01 rev. d )Advantec Distribution
 
Ap650 installation guide_72_e-131207-01_revd
Ap650 installation guide_72_e-131207-01_revdAp650 installation guide_72_e-131207-01_revd
Ap650 installation guide_72_e-131207-01_revdAdvantec Distribution
 
Motorola solutions wing 4.4 ap7131 n access point product reference guide (pa...
Motorola solutions wing 4.4 ap7131 n access point product reference guide (pa...Motorola solutions wing 4.4 ap7131 n access point product reference guide (pa...
Motorola solutions wing 4.4 ap7131 n access point product reference guide (pa...Advantec Distribution
 
B 65270 en-07
B 65270 en-07B 65270 en-07
B 65270 en-07mt7038
 
Billion BiPAC 7300NX Router Manual
Billion BiPAC 7300NX Router ManualBillion BiPAC 7300NX Router Manual
Billion BiPAC 7300NX Router ManualFanus van Straten
 
Juniper netscreen 25
Juniper netscreen 25Juniper netscreen 25
Juniper netscreen 25rikvar
 
Motorola solutions wing 4.4 ap51xx access point product reference guide (part...
Motorola solutions wing 4.4 ap51xx access point product reference guide (part...Motorola solutions wing 4.4 ap51xx access point product reference guide (part...
Motorola solutions wing 4.4 ap51xx access point product reference guide (part...Advantec Distribution
 
Motorola solutions rfs4011 integrated service controller installation guide ...
Motorola solutions rfs4011 integrated service controller installation guide  ...Motorola solutions rfs4011 integrated service controller installation guide  ...
Motorola solutions rfs4011 integrated service controller installation guide ...Advantec Distribution
 
Dir 120 A1 Manual V100 (I)
Dir 120  A1 Manual  V100 (I)Dir 120  A1 Manual  V100 (I)
Dir 120 A1 Manual V100 (I)guest77fb61
 
아보PDA ARBOR Gladius5 2D 5.5인치 안드로이드 산업용PDA 바코드PDA 매뉴얼
아보PDA ARBOR Gladius5 2D 5.5인치 안드로이드 산업용PDA 바코드PDA 매뉴얼아보PDA ARBOR Gladius5 2D 5.5인치 안드로이드 산업용PDA 바코드PDA 매뉴얼
아보PDA ARBOR Gladius5 2D 5.5인치 안드로이드 산업용PDA 바코드PDA 매뉴얼HION IT
 
Nexaira Nexconnect Router User Guide (quantum-wireless.com)
Nexaira Nexconnect Router User Guide (quantum-wireless.com)Nexaira Nexconnect Router User Guide (quantum-wireless.com)
Nexaira Nexconnect Router User Guide (quantum-wireless.com)Ari Zoldan
 
Motorola solutions wing 5.3 wireless controller system reference guide (part ...
Motorola solutions wing 5.3 wireless controller system reference guide (part ...Motorola solutions wing 5.3 wireless controller system reference guide (part ...
Motorola solutions wing 5.3 wireless controller system reference guide (part ...Advantec Distribution
 
Subscriber mgmt-solution-layer2-wholesale
Subscriber mgmt-solution-layer2-wholesaleSubscriber mgmt-solution-layer2-wholesale
Subscriber mgmt-solution-layer2-wholesalealexandr martynjuk
 
Alternatives for-securing-virtual-networks
Alternatives for-securing-virtual-networksAlternatives for-securing-virtual-networks
Alternatives for-securing-virtual-networksJustin Cletus
 

Similar to Proxicast LAN-Cell 3 User Guide (20)

Manuale
ManualeManuale
Manuale
 
Manuale
ManualeManuale
Manuale
 
Ap650 installation guide_72_e-131207-01_revd
Ap650 installation guide_72_e-131207-01_revdAp650 installation guide_72_e-131207-01_revd
Ap650 installation guide_72_e-131207-01_revd
 
Motorola ap650 access point installation guide (part no. 72 e 131207-01 rev. d )
Motorola ap650 access point installation guide (part no. 72 e 131207-01 rev. d )Motorola ap650 access point installation guide (part no. 72 e 131207-01 rev. d )
Motorola ap650 access point installation guide (part no. 72 e 131207-01 rev. d )
 
Ap650 installation guide_72_e-131207-01_revd
Ap650 installation guide_72_e-131207-01_revdAp650 installation guide_72_e-131207-01_revd
Ap650 installation guide_72_e-131207-01_revd
 
Motorola solutions wing 4.4 ap7131 n access point product reference guide (pa...
Motorola solutions wing 4.4 ap7131 n access point product reference guide (pa...Motorola solutions wing 4.4 ap7131 n access point product reference guide (pa...
Motorola solutions wing 4.4 ap7131 n access point product reference guide (pa...
 
Motorola solutions wing 4.4 ap7131 n access point product reference guide (pa...
Motorola solutions wing 4.4 ap7131 n access point product reference guide (pa...Motorola solutions wing 4.4 ap7131 n access point product reference guide (pa...
Motorola solutions wing 4.4 ap7131 n access point product reference guide (pa...
 
B 65270 en-07
B 65270 en-07B 65270 en-07
B 65270 en-07
 
Billion BiPAC 7300NX Router Manual
Billion BiPAC 7300NX Router ManualBillion BiPAC 7300NX Router Manual
Billion BiPAC 7300NX Router Manual
 
Juniper netscreen 25
Juniper netscreen 25Juniper netscreen 25
Juniper netscreen 25
 
Motorola solutions wing 4.4 ap51xx access point product reference guide (part...
Motorola solutions wing 4.4 ap51xx access point product reference guide (part...Motorola solutions wing 4.4 ap51xx access point product reference guide (part...
Motorola solutions wing 4.4 ap51xx access point product reference guide (part...
 
Motorola solutions rfs4011 integrated service controller installation guide ...
Motorola solutions rfs4011 integrated service controller installation guide  ...Motorola solutions rfs4011 integrated service controller installation guide  ...
Motorola solutions rfs4011 integrated service controller installation guide ...
 
Dir 120 A1 Manual V100 (I)
Dir 120  A1 Manual  V100 (I)Dir 120  A1 Manual  V100 (I)
Dir 120 A1 Manual V100 (I)
 
아보PDA ARBOR Gladius5 2D 5.5인치 안드로이드 산업용PDA 바코드PDA 매뉴얼
아보PDA ARBOR Gladius5 2D 5.5인치 안드로이드 산업용PDA 바코드PDA 매뉴얼아보PDA ARBOR Gladius5 2D 5.5인치 안드로이드 산업용PDA 바코드PDA 매뉴얼
아보PDA ARBOR Gladius5 2D 5.5인치 안드로이드 산업용PDA 바코드PDA 매뉴얼
 
Nexaira Nexconnect Router User Guide (quantum-wireless.com)
Nexaira Nexconnect Router User Guide (quantum-wireless.com)Nexaira Nexconnect Router User Guide (quantum-wireless.com)
Nexaira Nexconnect Router User Guide (quantum-wireless.com)
 
Motorola solutions wing 5.3 wireless controller system reference guide (part ...
Motorola solutions wing 5.3 wireless controller system reference guide (part ...Motorola solutions wing 5.3 wireless controller system reference guide (part ...
Motorola solutions wing 5.3 wireless controller system reference guide (part ...
 
Motorola solutions wing 5.3 wireless controller system reference guide (part ...
Motorola solutions wing 5.3 wireless controller system reference guide (part ...Motorola solutions wing 5.3 wireless controller system reference guide (part ...
Motorola solutions wing 5.3 wireless controller system reference guide (part ...
 
Subscriber mgmt-solution-layer2-wholesale
Subscriber mgmt-solution-layer2-wholesaleSubscriber mgmt-solution-layer2-wholesale
Subscriber mgmt-solution-layer2-wholesale
 
438 ii-manual
438 ii-manual438 ii-manual
438 ii-manual
 
Alternatives for-securing-virtual-networks
Alternatives for-securing-virtual-networksAlternatives for-securing-virtual-networks
Alternatives for-securing-virtual-networks
 

Recently uploaded

Scanning the Internet for External Cloud Exposures via SSL Certs
Scanning the Internet for External Cloud Exposures via SSL CertsScanning the Internet for External Cloud Exposures via SSL Certs
Scanning the Internet for External Cloud Exposures via SSL CertsRizwan Syed
 
Search Engine Optimization SEO PDF for 2024.pdf
Search Engine Optimization SEO PDF for 2024.pdfSearch Engine Optimization SEO PDF for 2024.pdf
Search Engine Optimization SEO PDF for 2024.pdfRankYa
 
WordPress Websites for Engineers: Elevate Your Brand
WordPress Websites for Engineers: Elevate Your BrandWordPress Websites for Engineers: Elevate Your Brand
WordPress Websites for Engineers: Elevate Your Brandgvaughan
 
Nell’iperspazio con Rocket: il Framework Web di Rust!
Nell’iperspazio con Rocket: il Framework Web di Rust!Nell’iperspazio con Rocket: il Framework Web di Rust!
Nell’iperspazio con Rocket: il Framework Web di Rust!Commit University
 
Vector Databases 101 - An introduction to the world of Vector Databases
Vector Databases 101 - An introduction to the world of Vector DatabasesVector Databases 101 - An introduction to the world of Vector Databases
Vector Databases 101 - An introduction to the world of Vector DatabasesZilliz
 
Dev Dives: Streamline document processing with UiPath Studio Web
Dev Dives: Streamline document processing with UiPath Studio WebDev Dives: Streamline document processing with UiPath Studio Web
Dev Dives: Streamline document processing with UiPath Studio WebUiPathCommunity
 
Integration and Automation in Practice: CI/CD in Mule Integration and Automat...
Integration and Automation in Practice: CI/CD in Mule Integration and Automat...Integration and Automation in Practice: CI/CD in Mule Integration and Automat...
Integration and Automation in Practice: CI/CD in Mule Integration and Automat...Patryk Bandurski
 
Commit 2024 - Secret Management made easy
Commit 2024 - Secret Management made easyCommit 2024 - Secret Management made easy
Commit 2024 - Secret Management made easyAlfredo García Lavilla
 
SIP trunking in Janus @ Kamailio World 2024
SIP trunking in Janus @ Kamailio World 2024SIP trunking in Janus @ Kamailio World 2024
SIP trunking in Janus @ Kamailio World 2024Lorenzo Miniero
 
Unleash Your Potential - Namagunga Girls Coding Club
Unleash Your Potential - Namagunga Girls Coding ClubUnleash Your Potential - Namagunga Girls Coding Club
Unleash Your Potential - Namagunga Girls Coding ClubKalema Edgar
 
Developer Data Modeling Mistakes: From Postgres to NoSQL
Developer Data Modeling Mistakes: From Postgres to NoSQLDeveloper Data Modeling Mistakes: From Postgres to NoSQL
Developer Data Modeling Mistakes: From Postgres to NoSQLScyllaDB
 
Advanced Test Driven-Development @ php[tek] 2024
Advanced Test Driven-Development @ php[tek] 2024Advanced Test Driven-Development @ php[tek] 2024
Advanced Test Driven-Development @ php[tek] 2024Scott Keck-Warren
 
CloudStudio User manual (basic edition):
CloudStudio User manual (basic edition):CloudStudio User manual (basic edition):
CloudStudio User manual (basic edition):comworks
 
"ML in Production",Oleksandr Bagan
"ML in Production",Oleksandr Bagan"ML in Production",Oleksandr Bagan
"ML in Production",Oleksandr BaganFwdays
 
New from BookNet Canada for 2024: BNC CataList - Tech Forum 2024
New from BookNet Canada for 2024: BNC CataList - Tech Forum 2024New from BookNet Canada for 2024: BNC CataList - Tech Forum 2024
New from BookNet Canada for 2024: BNC CataList - Tech Forum 2024BookNet Canada
 
Anypoint Exchange: It’s Not Just a Repo!
Anypoint Exchange: It’s Not Just a Repo!Anypoint Exchange: It’s Not Just a Repo!
Anypoint Exchange: It’s Not Just a Repo!Manik S Magar
 
My INSURER PTE LTD - Insurtech Innovation Award 2024
My INSURER PTE LTD - Insurtech Innovation Award 2024My INSURER PTE LTD - Insurtech Innovation Award 2024
My INSURER PTE LTD - Insurtech Innovation Award 2024The Digital Insurer
 
Artificial intelligence in cctv survelliance.pptx
Artificial intelligence in cctv survelliance.pptxArtificial intelligence in cctv survelliance.pptx
Artificial intelligence in cctv survelliance.pptxhariprasad279825
 
DevoxxFR 2024 Reproducible Builds with Apache Maven
DevoxxFR 2024 Reproducible Builds with Apache MavenDevoxxFR 2024 Reproducible Builds with Apache Maven
DevoxxFR 2024 Reproducible Builds with Apache MavenHervé Boutemy
 
Unraveling Multimodality with Large Language Models.pdf
Unraveling Multimodality with Large Language Models.pdfUnraveling Multimodality with Large Language Models.pdf
Unraveling Multimodality with Large Language Models.pdfAlex Barbosa Coqueiro
 

Recently uploaded (20)

Scanning the Internet for External Cloud Exposures via SSL Certs
Scanning the Internet for External Cloud Exposures via SSL CertsScanning the Internet for External Cloud Exposures via SSL Certs
Scanning the Internet for External Cloud Exposures via SSL Certs
 
Search Engine Optimization SEO PDF for 2024.pdf
Search Engine Optimization SEO PDF for 2024.pdfSearch Engine Optimization SEO PDF for 2024.pdf
Search Engine Optimization SEO PDF for 2024.pdf
 
WordPress Websites for Engineers: Elevate Your Brand
WordPress Websites for Engineers: Elevate Your BrandWordPress Websites for Engineers: Elevate Your Brand
WordPress Websites for Engineers: Elevate Your Brand
 
Nell’iperspazio con Rocket: il Framework Web di Rust!
Nell’iperspazio con Rocket: il Framework Web di Rust!Nell’iperspazio con Rocket: il Framework Web di Rust!
Nell’iperspazio con Rocket: il Framework Web di Rust!
 
Vector Databases 101 - An introduction to the world of Vector Databases
Vector Databases 101 - An introduction to the world of Vector DatabasesVector Databases 101 - An introduction to the world of Vector Databases
Vector Databases 101 - An introduction to the world of Vector Databases
 
Dev Dives: Streamline document processing with UiPath Studio Web
Dev Dives: Streamline document processing with UiPath Studio WebDev Dives: Streamline document processing with UiPath Studio Web
Dev Dives: Streamline document processing with UiPath Studio Web
 
Integration and Automation in Practice: CI/CD in Mule Integration and Automat...
Integration and Automation in Practice: CI/CD in Mule Integration and Automat...Integration and Automation in Practice: CI/CD in Mule Integration and Automat...
Integration and Automation in Practice: CI/CD in Mule Integration and Automat...
 
Commit 2024 - Secret Management made easy
Commit 2024 - Secret Management made easyCommit 2024 - Secret Management made easy
Commit 2024 - Secret Management made easy
 
SIP trunking in Janus @ Kamailio World 2024
SIP trunking in Janus @ Kamailio World 2024SIP trunking in Janus @ Kamailio World 2024
SIP trunking in Janus @ Kamailio World 2024
 
Unleash Your Potential - Namagunga Girls Coding Club
Unleash Your Potential - Namagunga Girls Coding ClubUnleash Your Potential - Namagunga Girls Coding Club
Unleash Your Potential - Namagunga Girls Coding Club
 
Developer Data Modeling Mistakes: From Postgres to NoSQL
Developer Data Modeling Mistakes: From Postgres to NoSQLDeveloper Data Modeling Mistakes: From Postgres to NoSQL
Developer Data Modeling Mistakes: From Postgres to NoSQL
 
Advanced Test Driven-Development @ php[tek] 2024
Advanced Test Driven-Development @ php[tek] 2024Advanced Test Driven-Development @ php[tek] 2024
Advanced Test Driven-Development @ php[tek] 2024
 
CloudStudio User manual (basic edition):
CloudStudio User manual (basic edition):CloudStudio User manual (basic edition):
CloudStudio User manual (basic edition):
 
"ML in Production",Oleksandr Bagan
"ML in Production",Oleksandr Bagan"ML in Production",Oleksandr Bagan
"ML in Production",Oleksandr Bagan
 
New from BookNet Canada for 2024: BNC CataList - Tech Forum 2024
New from BookNet Canada for 2024: BNC CataList - Tech Forum 2024New from BookNet Canada for 2024: BNC CataList - Tech Forum 2024
New from BookNet Canada for 2024: BNC CataList - Tech Forum 2024
 
Anypoint Exchange: It’s Not Just a Repo!
Anypoint Exchange: It’s Not Just a Repo!Anypoint Exchange: It’s Not Just a Repo!
Anypoint Exchange: It’s Not Just a Repo!
 
My INSURER PTE LTD - Insurtech Innovation Award 2024
My INSURER PTE LTD - Insurtech Innovation Award 2024My INSURER PTE LTD - Insurtech Innovation Award 2024
My INSURER PTE LTD - Insurtech Innovation Award 2024
 
Artificial intelligence in cctv survelliance.pptx
Artificial intelligence in cctv survelliance.pptxArtificial intelligence in cctv survelliance.pptx
Artificial intelligence in cctv survelliance.pptx
 
DevoxxFR 2024 Reproducible Builds with Apache Maven
DevoxxFR 2024 Reproducible Builds with Apache MavenDevoxxFR 2024 Reproducible Builds with Apache Maven
DevoxxFR 2024 Reproducible Builds with Apache Maven
 
Unraveling Multimodality with Large Language Models.pdf
Unraveling Multimodality with Large Language Models.pdfUnraveling Multimodality with Large Language Models.pdf
Unraveling Multimodality with Large Language Models.pdf
 

Proxicast LAN-Cell 3 User Guide

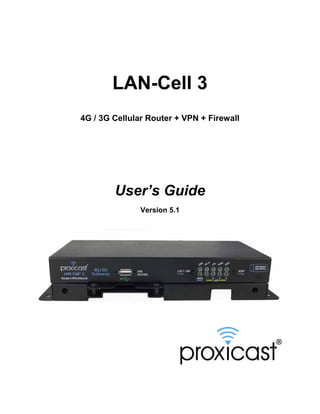
  • 1. LAN-Cell 3 4G / 3G Cellular Router + VPN + Firewall User’s Guide Version 5.1
  • 2. CONTENTS ABOUT THIS USER'S GUIDE ................................................................................................................................. VI SAFETY WARNINGS .............................................................................................................................................. VII CHAPTER 1: INTRODUCTION ..............................................................................................................................1 1.1 Key Features .............................................................................................................................................1 1.2 Package Contents .....................................................................................................................................2 CHAPTER 2: HARDWARE.....................................................................................................................................3 2.1 Front LEDs ................................................................................................................................................3 2.2 Rear Panel ................................................................................................................................................4 2.3 Multi-Function Mounting Base ...................................................................................................................5 2.4 Modem-Lock 2.5 Hardware Setup ........................................................................................................................................6 CHAPTER 3: TM ..........................................................................................................................................5 ACCESSING THE LAN-CELL 3 ......................................................................................................7 3.1 Start-up and Login .....................................................................................................................................7 3.2 Navigating the User Interface ....................................................................................................................8 3.3 Menu Structure ..........................................................................................................................................9 CHAPTER 4: QUICK SETUP .............................................................................................................................. 10 4.1 USB Modem Configuration .................................................................................................................... 10 4.2 WAN Configuration .................................................................................................................................. 11 4.3 LAN Configuration .................................................................................................................................. 12 4.4 Wi-Fi Configuration................................................................................................................................. 12 4.5 Password ................................................................................................................................................ 13 CHAPTER 5: STATUS MENU ............................................................................................................................. 14 5.1 Router ..................................................................................................................................................... 14 5.2 Traffic ...................................................................................................................................................... 17 5.3 Session ................................................................................................................................................... 18 5.4 User/DHCP ............................................................................................................................................. 19 5.5 Current Users ......................................................................................................................................... 20
  • 3. CHAPTER 6: SETUP MENU ............................................................................................................................... 21 6.1 WAN ....................................................................................................................................................... 21 6.2 WAN Advanced ...................................................................................................................................... 28 6.3 LAN......................................................................................................................................................... 30 6.4 Static Routing ......................................................................................................................................... 31 6.5 DHCP Server .......................................................................................................................................... 34 6.6 DDNS ..................................................................................................................................................... 35 6.7 MAC Address Clone ............................................................................................................................... 37 6.8 VLAN ...................................................................................................................................................... 38 6.9 Time........................................................................................................................................................ 39 CHAPTER 7: WIRELESS (WI-FI) MENU ............................................................................................................ 41 7.1 Basic Setup ............................................................................................................................................ 41 7.2 Advanced Setup ..................................................................................................................................... 45 7.3 WDS Setup ............................................................................................................................................. 47 7.4 Universal Repeater Setup ...................................................................................................................... 48 7.5 WPS Setup ............................................................................................................................................. 49 CHAPTER 8: SECURITY MENU ......................................................................................................................... 50 8.1 Firewall ................................................................................................................................................... 50 8.2 IP Access Control ................................................................................................................................... 52 8.3 Outbound MAC ACL ............................................................................................................................... 55 8.4 OpenDNS ............................................................................................................................................... 58 8.5 Web Filtering .......................................................................................................................................... 59 8.6 VPN / PPTP ............................................................................................................................................ 61 8.7 VPN / IPsec ............................................................................................................................................ 63 CHAPTER 9: APPLICATIONS MENU ................................................................................................................ 68 9.1 Port Forwarding ...................................................................................................................................... 68 9.2 Virtual Hosts ........................................................................................................................................... 71 9.3 Streaming / Pass-Through ..................................................................................................................... 73 9.4 UPnP ...................................................................................................................................................... 74 CHAPTER 10: QUALITY OF SERVICE (QOS) MENU ..................................................................................... 75 10.1 Bandwidth Management ........................................................................................................................ 75 10.2 Throughput Optimizer............................................................................................................................. 79 10.3 Ultra-NAT ................................................................................................................................................ 80 10.4 Session Manager ................................................................................................................................... 81
  • 4. CHAPTER 11: ADMIN MENU ........................................................................................................................... 82 11.1 System Management ............................................................................................................................. 82 11.2 SNMP ..................................................................................................................................................... 84 11.3 System Utilities ....................................................................................................................................... 85 11.4 Log.......................................................................................................................................................... 87 APPENDIX .............................................................................................................................................................. 89 Troubleshooting ................................................................................................................................................ 89 Common Carrier Specific Issues ..................................................................................................................... 91 Specifications .................................................................................................................................................... 92 LAN-Cell 3 Default Settings .............................................................................................................................. 94 Legal Information .............................................................................................................................................. 95 Certifications ..................................................................................................................................................... 95 Proxicast Limited Warranty .............................................................................................................................. 97 Customer Support ............................................................................................................................................. 98 INDEX ...................................................................................................................................................................... 99
  • 5. Document Revision History April 2, 2012 Initial 5.1 Version
  • 6. About This User's Guide Intended Audience This manual is intended for user who need to configure the LAN-Cell 3 using the device’s embedded web interface. You should have at least a basic knowledge of TCP/IP networking concepts and topology. Related Documentation • Quick Start Guide The Quick Start Guide is designed to help you get up and running right away. It contains information on setting up your network and configuring for Internet access. · Firmware Release Notes Every new LAN-Cell firmware release includes a description of the new features and improvements. · Proxicast Support Web Site Please refer to http://support.proxicast.com for additional support documentation and access to our Knowledgebase. Syntax Conventions • The LAN-Cell 3 may be referred to as the “LAN-Cell”, the “device” or the “system”. • The LAN-Cell 3’s wired Ethernet WAN interface may be referred to as “WAN”, “Wired WAN” “Ethernet WAN”, “WAN (Ethernet)” or “WAN 1”. • The LAN-Cell’s USB modem interface may be referred to was “Cellular”, “CELL”, “USB”, WAN (USB Modem)” or “WAN 2” • Product labels, screen names, field labels and field choices are all in bold font. • A key stroke is denoted by square brackets and uppercase text, for example, [ENTER] means the “enter” or “return” key on your keyboard. • “Enter” means for you to type one or more characters and then press the [ENTER] key. “Select” or “choose” means for you to use one of the predefined choices. • A right angle bracket ( > ) within a screen name denotes a mouse click. For example, Management > Log means you first click Management menu, then the Log sub menu to get to that screen. • The example screens shown in the User’s Guide may differ slightly from the actual screens on the LAN-Cell, depending on the firmware version the LAN-Cell is running.
  • 7. Safety Warnings • Do NOT use this product near water. • Do NOT expose your device to dampness, dust or corrosive liquids. • Do NOT store things on the device. • Do NOT install, use, or service this device during a thunderstorm. • Connect ONLY suitable accessories to the device. • Do NOT open the device or unit. Opening or removing covers can expose you to dangerous high voltage points or other risks. ONLY qualified service personnel should service or disassemble this device. Please contact your vendor for further information. • Make sure to connect the cables to the correct ports. • Place connecting cables carefully so that no one will step on them or stumble over them. • Use ONLY an appropriate power adaptor or cord for your device. • Connect the power adaptor or cord to the right supply voltage (for example, 110V AC in North America or 230V AC in Europe). • Do NOT allow anything to rest on the power adaptor or cord and do NOT place the product where anyone can walk on the power adaptor or cord. • Do NOT use the device if the power adaptor or cord is damaged as it might cause electrocution. • Do not use the device outside, and make sure all the connections are indoors. There is a remote risk of electric shock from lightning. • Do NOT obstruct the device ventilation slots, as insufficient airflow may harm your device. • Antenna Warning! This device meets ETSI and FCC certification requirements when using the included antenna(s). • If you wall mount your device, make sure that no electrical lines, gas or water pipes will be damaged. This product is recyclable. Dispose of it properly.
  • 8. CHAPTER 1: INTRODUCTION The LAN-Cell 3 is Proxicast’s third generation of enterprise-grade secure cellular gateways. This model features customer accessible and removable “4G/3G” USB cellular modems -- the same ones commonly used to provide high-speed 4G/3G cellular connectivity to laptops. The USB modem seamlessly becomes a WAN interface for the LAN-Cell’s router and is fully integrated with all of the LAN-Cell’s security, performance, and management capabilities. As with its predecessors, the LAN-Cell 3 is loaded with security features including VPN, firewall and access control. The LAN-Cell 3 adds improved throughput, support for 4G cellular modems, bandwidth management, NAT, port forwarding, policy routing, DHCP server and many other powerful features required for complex and demanding applications. The LAN-Cell 3 also has a built-in IEEE 802.11 b/g/n Wi-Fi radio that functions as both an access point and a WAN bridge. This allows Wi-Fi devices to securely communicate with the LAN-Cell and access the wired network or Internet. It also enables the LAN-Cell to use available Wi-Fi networks for even higher speed Internet access. The LAN-Cell 3’s all metal construction coupled with its unique Multi-Function Mounting System and patent-pending Modem-LOCK TM system make it the perfect choice for applications where a high-performance, secure, reliable and rugged cellular router is required. 1.1 · Key Features Multiple Broadband WAN Connections (4G/3G + 802.11 b/g/n + xDSL/cable modem) The LAN-Cell 3 supports multiple broadband technologies, including 4G/3G, 802.11 b/g/n and xDSL/cable modems. You can create a mobile broadband connection using a 4G/3G modem or switch to fixed line connection using a xDSL/cable modem. It also supports the latest 802.11n technology for Wi-Fi on the WAN. · 4G/3G USB Modem Support With support for over 100 different 4G/3G USB modems on dozens of mobile networks worldwide, the LAN-Cell 3 allows you to use your existing 4G/3G modem and service provider to create a mobile broadband sharing connection. (Find the list of currently compatible modems on our web site.) · Dual WAN Load Balance and Failover Proxicast’s LAN-Cell 3 supports load balancing and failover functions between fixed-line (xDSL/cable modem), Wi-Fi, and 4G/3G service, offering non-stop network connectivity. 1
  • 9. · IPsec Server & Client The LAN-Cell 3’s embedded IPSec VPN features allow remote users to make secure connections to devices which normally cannot run VPN software. The LAN-Cell can also establish site-to-site IPSec tunnels to existing corporate VPN servers for enterprise-level data security. · Quality of Service (Bandwidth Management) Proxicast’s LAN-Cell 3 is able to automatically monitor your bandwidth usage, prioritize traffic, and allocate bandwidth to all applications and users. At the same time, it also is able to provide users with the freedom to customize their bandwidth allocation to meet special requirements. Policy-based bandwidth allocation and routing give the user complete control over how WAN resources are utilized. · Industrial Design Designed specifically for industrial and mobile applications, the LAN-Cell 3’s rugged steel chassis and unique Multi-Function Mounting Base provide physical security along with conveniences such as power-locking, cable management and our patent-pending Modem-LOCK USB modem retention system. · Energy Efficient The LAN-Cell 3’s low power consumption SOC chip makes it ideal for solar or battery-powered installations. 1.2 Package Contents • LAN-Cell 3 • Multi-Function Mounting Base with Modem-LOCK • 120/240 VAC to 12 VDC Power Adapter • 2x 3 dBi Wi-Fi Antennas • 1x CAT5e Cable • 4x Rubber Feet • Mounting Hardware Kit • Quick Start Guide 2
  • 10. CHAPTER 2: HARDWARE 2.1 Front LEDs Figure 1: LAN-Cell 3 Front Panel LABEL LED STATE DESCRIPTION USB 2.0 port for 4G/3G USB modems only MODEM USB modem is initializing – or – Flashing USB USB modem is not registered on the carrier network – or – There is no compatible cellular service available at the current location Solid USB modem has made a connection & has been assigned an IP address Wi-Fi Solid The LAN-Cell’s internal Wi-Fi radio is enabled OS Solid An internal OS error has occurred PWR Solid Power is on Flashing Power-on Self Test is in progress (approx. 60 sec) Solid LAN-Cell is at normal operational status Solid Link Status on the wired WAN Ethernet port Flashing Data activity on the wired WAN Ethernet port Solid Link Status on the corresponding LAN Ethernet port Flashing Data activity on the corresponding LAN Ethernet port STAT WAN LAN 1-4 EJECT USB Press & hold for 5 seconds. Wait for LED to stop flashing. Remove USB modem. Press & hold for 5 seconds until the STAT LED begins to flash. Wait for STAT LED to stay on solid. This returns the LAN-Cell to its default settings: RESET LAN IP = 192.168.1.1:8080 Username/Password = admin/1234 3
  • 11. 2.2 Rear Panel Figure 2: LAN-Cell 3 Rear Panel LABEL Wi-Fi (B) * DESCRIPTION Attach one of the supplied cylindrical Wi-Fi antennas to this RP-SMA (reverse polarity) connector if using the LAN-Cell’s integrated 802.11 b/g/n radio. LAN 1-4 Connect equipment to these ports with Ethernet cables. These ports are auto-negotiating (supporting (yellow) 10, 100, 1000 Mbps) and auto-sensing (adjusts to the Ethernet cable type: straight-through vs. cross-over). WAN Connect a cable/DSL modem or other 10/100/1000 Ethernet-based WAN equipment to this (blue) auto-sensing/auto-negotiating port. PWR Connect the included 12V DC power adapter to this jack. This is a 2.1mm center pin positive connector. Power Switch. Insert a #6-32 screw into the Multi-Function Mounting Base to prevent accidental ON/OFF disengagement of the switch. Wi-Fi (A) * Attach one of the supplied cylindrical Wi-Fi antennas to this RP-SMA (reverse polarity) connector if using the LAN-Cell’s integrated 802.11 b/g/n radio. * Attaching other types of antennas (such antennas with standard SMA, TNC or FME connectors) to this jack may damage the antennas and/or Wi-Fi antenna jack! 4
  • 12. 2.3 Multi-Function Mounting Base The LAN-Cell 3’s Multi-Function Mounting provides: A. Wall and deck mounting options B. Multiple external antenna mounting points C. Cable management slots & tie-down posts D. Power switch & plug locking features E. Modem-LOCK™ USB modem retention system Figure 3: Mounting Base 2.4 Figure 4: Power Lock Features Modem-LockTM The LAN-Cell 3’s patent-pending Modem-LOCK system is a mechanism for securing a USB modem to prevent it from being removed or coming loose in mobile applications. Simply insert a USB modem into the LAN-Cell 3’s USB port. Then slide the Modem-LOCK against the modem. Use the four screws (2 front, 2 rear) to secure the Modem-LOCK into place (Figure 5). Figure 5: Modem-LOCK 5
  • 13. 2.5 Hardware Setup 2.5.1 Power On Plug one end of the provided power adapter into LAN-Cell 3’s DC power port and the other end into a power outlet. Depress the Power push-button on the rear of the unit. After about 60 seconds, the LAN-Cell 3 will be operational when its PWR LED and STAT LED are both constantly on 2.5.2 Install LAN Connection Plug one end of an Ethernet cable into your computer’s network port and the other end into one of LAN-Cell 3’s four LAN ports on the rear panel. The corresponding LAN LED will be green and will flash indicating LAN traffic. 2.5.3 Install WAN Connection Choose one or more ways to connect LAN-Cell 3 to the Internet. A. Connect via 3G/4G USB Modem Plug a supported 3G/4G USB modem into LAN-Cell 3’s USB port on the front panel. B. Connect via xDSL, cable modem or other wired Ethernet service Plug an Ethernet cable from your Ethernet WAN device (e.g. DSL modem) into LAN-Cell 3’s WAN port on the rear panel. The LAN-Cell 3 supports 2 simultaneous WAN connections for both fail-over and load-balancing operations. 2.5.4 Install Wi-Fi Connection Attach the 2 RP-SMA antennas to the A & B Wi-Fi antenna jacks on the rear panel. These antennas provide both Wi-Fi service to LAN devices and can be configured as an optional WAN connection in place of a wired Ethernet WAN connection. 6
  • 14. CHAPTER 3: ACCESSING THE LAN-CELL 3 Initial setup of the LAN-Cell 3 must be done using an Ethernet cable – the internal Wi-Fi Access Point is disabled by default as a security precaution. Configure your PC to receive an automatic its IP address information automatically (DHCP) or set your PC’s IP address to 192.168.1.2, netmask= 255.255.255.0 and default gateway=192.168.1.1. If you are unfamiliar with how to configure your PC’s TCP/IP settings, please refer to the Appendix. 3.1 Start-up and Login Open any Web browser. In the address box, enter [HTTP://192.168.1.1:8080] When you successfully connect to the configuration interface for LAN-Cell 3, the login screen will appear (Figure 6). Enter your username as [admin] and your password as [1234]. These are filled in initially as a convenience. You will then see the LAN-Cell 3’s Router Status page (Figure 7). Changing the login password is highly recommended. See the Admin > Management screen. Figure 6: LAN-Cell 3 Login Screen 7
  • 15. Figure 7: Router Status Screen 3.2 Navigating the User Interface The LAN-Cell’s web management interface is divided into 3 sections (Figure 8): 1. Drop-down Navigation Menus 2. The Status Summary Column 3. Configuration Parameters 8
  • 16. Figure 8: LAN-Cell 3 Screen Layout To expand a drop-down menu, click on the menu title. Then select the desired sub-menu. Chapters 5 through 11 provide details on each of the LAN-Cell 3’s menu options. The Status Summary column is shown on the right side of every screen to provide a quick overview of the LAN-Cell’s key operating parameters. The Enable/Disable buttons allow you to easily change an interface’s status. Configuration parameters are entered on the main panel of each screen. Screens are divided into logical parameters groupings labeled with black bands. 3.3 Menu Structure Status Provides real-time and historical information about the LAN-Cell’s operation. Setup Changes the LAN-Cell’s LAN, WAN, DHCP, DDNS, Time and other settings. WAN configures the USB modem and wired Ethernet connections. WAN Advanced configures fail-over modes and related settings. Wireless (Wi-Fi) Configures the LAN-Cell’s embedded 802.11 b/g/n Wi-Fi radio. Security Includes screens for configuring the LAN-Cell’s firewall, filtering, and VPN features. Applications Port-Forwarding, DMZ and other application-specific settings. QoS Enables Quality-of-Service (bandwidth management) and performance enhancing features. Admin Includes system management, firmware updates, utilities and system event logging. 9
  • 17. CHAPTER 4: QUICK SETUP 4.1 USB Modem Configuration The LAN-Cell 3 auto-recognizes and configures itself for over 100 different USB modem models on dozens of cellular service provider networks. Please refer to the LAN-Cell 3 Firmware Release Notes for the list of currently supported modems. The USB modem may need to be activated with a cellular service provider before it can used in the LAN-Cell 3 Follow the service provider or modem manufacturer’s instructions for activating, testing, and updating the firmware on the USB modem before attempting to use it in the LAN-Cell 3. Some modems require cellular service provider specific settings to be entered on the LAN-Cell 3’s Setup > WAN screen. If the USB modem and carrier settings are not auto-detected, obtain the following information from the service provider: Parameter Your Cellular Carrier’s Settings Modem Manufacturer* The original equipment manufacturer, not the ISP’s brand Modem Model #* The original equipment manufacturers’ model APN † Authentication Type Username / Password ISP Access # PIN Code * Φ #777 for CDMA, *99# for GSM ‡ This information is often on the modem’s label; sometimes under a removable cover. † APN applies only to GSM carriers. Many GSM carriers operate different APNs for different types of data service plans. Φ The LAN-Cell does not use the phone number assigned to the USB modem. That number is used only by the provider. ‡ The 4 digit PIN code field is required only if the SIM/RUIM is has been locked. On the Setup > WAN screen (Figure 9), begin by selecting the USB modem brand and model. Next select the location, service provider name and specific APN setting (if required). If you are using a “custom” APN, select the Manual option and enter the custom APN value in the Access Point Name field. 10
  • 18. Figure 9: USB Modem Setup Proxicast recommends implementing the WAN Fail-Over Connectivity Check found on the Setup > WAN Advanced screen for maximum 4G/3G connection reliability. By default, this feature is enabled and configured to ping a high-availability server. 4.2 WAN Configuration The bottom half of the SETUP > WAN screen (Figure 10) is used to configure the LAN-Cell 3’s Wired Ethernet WAN interface. For most Ethernet connections, the default DHCP client mode is sufficient. If your WAN interface has been assigned a static IP address, select “Static IP” from the Connection Type drop-down and enter the appropriate TCP/IP setting values. If your Ethernet connection uses the PPPoE protocol, select that Connection Type and enter your login information. The LAN-Cell 3’s Wi-Fi radio can also be used in place of the wired Ethernet WAN connection. For more information on this option, see Section 6.1.6. 11
  • 19. Figure 10: Ethernet WAN Setup 4.3 LAN Configuration If you need to change the LAN-Cell 3’s default LAN subnet (192.168.1.1 / 255.255.255.0), go to the Setup > LAN screen (Figure 11) and enter the IP address to assign to the LAN-Cell and select the desired subnet mask from the drop-down list. The LAN-Cell’s DHCP server will automatically adjust to serve addresses from the new subnet. Figure 11: Ethernet LAN Setup 4.4 Wi-Fi Configuration The LAN-Cell 3’s internal 802.11 b/g/n Wi-Fi radio is disabled by default as a security precaution. To provide laptops, tablets and other Wi-Fi devices with Internet connectivity through the LAN-Cell, go to the Wireless (Wi-Fi) > Basic screen (Figure 12) and enable the wireless connection. 12
  • 20. Figure 12: Wi-Fi Basic Setup Only SSID1 will be enabled by default. You may change the SSID Name to suit your preference. We strongly recommend that you change the Security Mode to prevent authorized access to your Internet connection. The LAN-Cell 3 also supports a second SSID. This is most often used when you wish to provide “guest” access to your Internet service, but maintain guest devices on a different LAN subnet than your other devices. 4.5 Password To change the LAN-Cell 3’s default password, select the Admin > Management screen (Figure 13). Enter the new password (case sensitive) and re-enter the value to confirm. Figure 13: Changing the Admin Password 13
  • 21. CHAPTER 5: STATUS MENU 5.1 Router Figure 14: Router Status 14
  • 22. 5.1.1 Router Information Model Name Product model name is shown. Firmware Version The firmware version this device is running. Current Time Current system time Running Time The period of time LAN-Cell 3 has been running. 5.1.2 WAN (USB Modem) MAC Address MAC Address of the USB Modem (Direct IP modems only) Connection Type The current connection type (wwan or DirectIP) IP Address WAN IP address Subnet Mask Subnet mask Gateway IP address of the remote gateway 5.1.3 WAN (Ethernet) MAC Address MAC Address of the WAN port Connection Type The current connection type (PPPoE, Static IP, and DHCP) IP Address WAN IP address Subnet Mask Subnet mask Gateway IP address of the remote gateway 15
  • 23. 5.1.4 LAN MAC Address MAC Address of the LAN switch IP Address Internal IP Address of the LAN-Cell 3 Subnet Mask Subnet mask in the internal network DHCP Service DHCP service enabled or disabled DHCP Start IP Address DHCP Start IP address DHCP End IP Address DHCP End IP address Max DHCP Clients The maximum IP addressed which can be assigned to PCs connecting to the network 5.1.5 Wi-Fi Wireless Channel Wireless Channel in use (default is 6) Wireless SSID 1 SSID1 of the LAN-Cell MAC Address 1 MAC Address for SSID1 Wireless SSID 2 SSID2 of the LAN-Cell MAC Address 2 MAC Address for SSID2 16
  • 24. 5.2 Traffic Click on Status > Traffic and then choose the graph scale from two hours, one day, one week, and one month. You will see the graph in Figure 15. You can monitor your download and upload throughput. Figure 15: Traffic Status Graph 17
  • 25. 5.3 Session Click on Status > Session and choose the graph scale from two hours, one day, one week, and one month. You will now see the graph in Figure 16. TCP, UDP, ICMP, and total session information is displayed. Figure 16: Session Status 18
  • 26. 5.4 User/DHCP Displays a table of the system LAN users and their IP addresses, MAC addresses and remaining DHCP lease times. Figure 17: User/DHCP Status Name DHCP client name IP Address IP address which is assigned to this client MAC Address MAC address of this client Expiration Time The remaining time of the IP assignment 19
  • 27. 5.5 Current Users Displays a table of the system LAN and WAN users and their IP addresses. Figure 18: Current Users IP Address IP address assigned by Static ARP matching MAC Address MAC address in the Static ARP matching ARP Type Static or dynamic 20
  • 28. CHAPTER 6: SETUP MENU 6.1 WAN 6.1.1 WAN (USB Modem) Figure 19: Setup WAN USB Modem 21
  • 29. WAN Select Enable/Disable to enable/disable USB WAN Connection Type PPP or DirectIP modems Modem Brand Choose your modem’s brand. Select Auto for automatic detection. Modem Model Choose your modem’s model number. Select Auto for automatic detection. Choose Auto to use an APN preo-programmed into your USB modem. Select by APN Type Service Provider for to the ISP you use, or otherwise choose Manual to assign desired APN. Location Service Provider Access Point Name (APN) Choose your country. Choose your cellular service provider and the Access Point Name (APN) will be automatically assigned. Enter APN string offered by the ISP if you select Manual for APN Type. Leave this field blank if your ISP does not use APN’s (e.g. CDMA networks). Personal Identification Enter PIN code required by your modem. Leave it blank if a PIN code has not been Number (PIN) assigned. Authentication Type Typically “Auto” or select CHAP/PAP/None as required. User Name The user name required by the ISP (blank if your ISP doesn’t require a username). Password The password required by the ISP (blank if your ISP doesn’t require a username). Enter ISP Access Number required by the ISP to connect to their data network (GSM ISP Access Number default *99***1# CDMA default #777). DO NOT enter the phone number assigned to the USB modem. Connection Mode PPP Echo Interval PPP Retry Threshold MTU TurboLink Typically “Auto” or can be used to force the modem to operate in a specific mode (if supported by the modem). PPP echo will ensure whether the link is still up or not (default interval 20 seconds) When PPP echo retry exceeds PPP Retry Threshold (default 5 times), the connection is recognized as down. PPP maximum transmission unit: up to 1492 bytes (PPP’s header is 8 bytes). Although typically not required, enable “TurboLink” to improve the connection stability. (Please note that TurboLink function will increase your 3G/4G data usage) Enable to allow the USB WAN to make a client connection to a remote PPTP server. PPTP VPN Client If enabled, enter the PPTP username, password, VPN host IP address and MPPE128 parameters required for the PPTP VPN connection. 22
  • 30. 6.1.2 WAN (Ethernet) LAN-Cell 3 supports four WAN connection types in addition to the USB Modem: DHCP, Static, PPPoE, Wi-Fi-Client. Select the appropriate connection type from the pull-down menu. The screen will expose the related fields for each type of WAN connection. Figure 20: WAN (Ethernet) Connection Types 6.1.3 DHCP (automatic IP address assignment) The IP address is automatically assigned to you by your ISP (most common Ethernet WAN option). Figure 21: Setup WAN Ethernet DHCP 23
  • 31. WAN Select Enable/Disable to enable/disable WAN Connection Type DHCP Host Name Some ISP and DHCP servers ask for the Host Name of the DHCP client before assigning an IP address. In this case, enter your Host Name. MTU Maximum Transmission Unit (1500 is the default for Ethernet) Bigpond Login If you are using the “Bigpond” system, please enable this item Bigpond Login Server Bigpond Login User Name Bigpond Login Password Please choose the Bigpond server. Please enter your User Name provided by Bigpond Please enter your Password provided by Bigpond Enable to allow the WAN to make a client connection to a remote PPTP server. PPTP VPN Client If enabled, enter the PPTP username, password, VPN host IP address and MPPE128 parameters required for the PPTP VPN connection. 6.1.4 Static (Fixed IP address assignment) The IP address, subnet mask, gateway, and DNS server are provided by your ISP. Figure 22: Setup WAN Ethernet Static IP 24
  • 32. WAN Select Enable / Disable to enable/disable WAN. Connection Type Static IP External IP Address The external IP addresses assigned by the ISP. Netmask The netmask assigned by the ISP. Gateway The gateway assigned by the ISP. Static DNS 1 The static DNS 1 assigned by the ISP. Static DNS 2 The static DNS 2 assigned by the ISP. MTU Maximum Transmission Unit (1500 is the default for Ethernet) Enable to allow the WAN to make a client connection to a remote PPTP server. PPTP VPN Client If enabled, enter the PPTP username, password, VPN host IP address and MPPE128 parameters required for the PPTP VPN connection. 6.1.5 PPPoE (connected by username/password) If your ISP provides the username and password, please enter the information accordingly. Provided by your ISP Figure 23: Setup WAN Ethernet PPPoE WAN Select Enable/Disable to enable/disable WAN Connection Type PPPoE Authentication Type Typically “Auto” or select CHAP/PAP/None as required. User Name The user name assigned by the ISP. Password The password assigned by the ISP. 25
  • 33. PPP Echo Interval PPP Retry Threshold PPP MTU PPP echo will ensure whether the link is still up or not (default interval 20 seconds) When PPP echo retry exceeds PPP Retry Threshold (default 5 times), the connection would be recognized as down. PPP maximum transmission unit: up to 1492 bytes (PPP’s header is 8 bytes)(This value should be less than MTU value at least 8 bytes ). Enable to allow the WAN to make a client connection to a remote PPTP server. PPTP VPN Client If enabled, enter the PPTP username, password, VPN host IP address and MPPE128 parameters required for the PPTP VPN connection. 6.1.6 Wi-Fi Client The LAN-Cell 3’s built-in Wi-Fi radio can be used as a WAN interface to establish a connection to an external Wi-Fi network. Whenever the LAN-Cell 3 detects the target Wi-Fi network, it will automatically make a connection to this network. This option disables the Ethernet WAN interface, but the LAN-Cell 3 can still function as a local Wi-Fi access point while connected to the remote Wi-Fi network. Note: the LAN-Cell 3’s Wi-Fi radio must first be enabled on the Wireless (Wi-Fi) > Basic screen. Figure 24: Setup WAN Wi-Fi Client WAN Select Enable/Disable to enable/disable WAN Connection Type Wi-Fi Client Target SSID Enter the SSID of the external target Wi-Fi network to connect to. Target BSSID (MAC) Enter the BSSID to connect to. The BSSID is optional if you set the target SSID. Wireless Channel Select the Wi-Fi channel number used by the target Wi-Fi network. 26
  • 34. When operating in 40 MHz mode the access point will use an extended channel Extension Channel either below or above the current channel. Optimal selection will depend on the channels of other networks in the area. Click this button to display a table of visible Wi-Fi networks. Select the desired Site Survey network from the Site Survey table and the associated SSID and channel information will be automatically entered. Select the Security Mode which matches the target Wi-Fi network. Enter the Security Mode associated security information (such as pre-shared keys) required by the target Wi-Fi network. Enable to allow the WAN to make a client connection to a remote PPTP server. PPTP VPN Client If enabled, enter the PPTP username, password, VPN host IP address and MPPE128 parameters required for the PPTP VPN connection. 27
  • 35. 6.2 WAN Advanced The WAN Advanced screen configures several advanced WAN settings including: · Fail-Over · Load Balancing · Keep-Alive The settings are the same for both the USB and Ethernet WAN interfaces. Figure 25: Setup WAN Advanced Connection Mode Always On: WAN connection is always established and routes traffic as required. Backup Standby: WAN connection is always established but only routes traffic when primary WAN is down (route on demand) Backup: WAN connection is only established and only routes traffic when primary WAN is down (connect on demand + route on demand). Fail-Over to WAN If one of the WAN’s is marked as “Backup” or “Backup Standby”, the other WAN will allow you select that WAN as the backup for the current WAN (e.g. if you want the Ethernet WAN to be primary and have it fail-over to use the USB WAN when necessary, mark the USB WAN as “Backup Standby”, and select USB WAN as the “Fail-Over to WAN” for the Ethernet WAN interface. Load Balance Weight The weight for session-based multi-path routes. Sessions will be established in weighted round-robin fashion on the WANs as new requests are received from LAN devices. Increase the Load Balance Weight of one WAN versus the other to have a higher percentage of traffic flow out that WAN when both WANs are active. Note: finer-grained control over WAN traffic can be achieved using the Static Routing feature. 28
  • 36. Fail-Over Connectivity Enable/disable the use of ICMP (ping) packets to determine if a WAN interface is Check (ping) currently up. Consecutive Failure The number of consecutive pings that must fail to be acknowledged before the Tolerance interface is marked as down. Max Reply Wait Time The maximum number of seconds to wait for each ping to be acknowledged (maximum latency) before assuming the ping to have failed. Ping Target Type Default Gateway: sends ICMP packets to the ISP’s default gateway address. Note: many ISP’s do not support ICMP replies from their default gateways. Custom: sends ICMP packets to an IP address of your choosing. Target IP Enter the IP address of the custom host target to be used. 29
  • 37. 6.3 LAN Figure 26: Setup LAN Sets the internal LAN IP address of the LAN-Cell 3. Internal IP Address Note: The LAN-Cell’s built-in DHCP Server will automatically adjust to the IP address and subnet entered. Subnet Mask Spanning Tree Protocol (STP) MTU Select the appropriate subnet mask from the list. Click Enable to avoid cyclic topology caused by incorrect connection of your internal network. Maximum transmission unit: up to 1500 bytes. 30
  • 38. 6.4 Static Routing 6.4.1 Static Routing Settings Figure 27: Setup Static Routing Static Routing 6.4.2 Choose Enable/Disable to enable/disable the static routing feature. Add Routing Rule Click on the [Add] button. The screen shown in Figure 28 will open. Figure 28: Add Static Routing Rule 31
  • 39. Sequence Number This defines the sequence of the Routing rules. If a packet fits the conditions set by the Routing rules, the packet will then be sorted according to the first Routing rule from the top of the list. Rule Name Descriptive name of the Routing rule. Rule names may not contain spaces. Rule Enable Enable/Disable this Routing rule Internal IP Range Set up the internal IP range for this rule. External IP Range Set up the external IP range for this rule. Protocol Set up the protocol (TCP or UDP) for the to be enabled. Service Port Range Set up the Service Port Range (e.g., HTTP is TCP/80) for the to be enabled. External Interface Select which External Interface (USB WAN, Ethernet WAN or LAN) for the packets to go through, IF the packet fits the condition of this rule. If your LAN includes another Internet gateway device, you can create a “traffic redirect” rule using the LAN interface to send selected traffic to the other gateway. Routing Gateway Default Gateway: Use the default gateway of the selected external interface. Static Gateway: Use the specific gateway IP address entered. Gateway IP Address 6.4.3 IP address of the static gateway. Static Routing Examples This example forces all E-Mail sent through the LAN-Cell to go through the USB WAN interface exclusively. All other types of traffic is unaffected by this rule. Rule Name SMTP-to-USB Enable Enable Internal IP Range Blank (applied to all) External IP Range Blank (applied to all) Protocol TCP Service Port Range 25:25 (SMTP Port:25) External Interface WAN USB Routing Gateway Default Gateway This type of rule can be used to create policies that direct specific types of traffic to specific interfaces. It can also be used to segment the LAN traffic for load balancing and other purposes. 32
  • 40. This example forces traffic associated with a specific test PC (192.168.1.27) on the LAN to communicate only with the Headquarters network (24.3.85.1/24) using a specific gateway address (12.85.33.147). Rule Name Test-PC-to-HQ Enable Enable Internal IP Range 192.168.1.27 - 192.168.1.27 External IP Range 24.3.85.1 – 24.3.85.254 Protocol * External Interface WAN Ethernet Routing Gateway Static Gateway Gateway IP 12.85.33.147 You can combine the Static Routing Rules with the LAN-Cell 3’s WAN Load-Balancing Weights and the Quality of Service (QoS) Bandwidth Management features to gain precise control over which devices and protocols use specific interface resources. 33
  • 41. 6.5 DHCP Server Figure 29: Setup DHCP Services DHCP Server DHCP Starting IP Address Max DHCP Clients DHCP Lease Time Domain Select Enable/Disable to enable/disable DHCP Server. The DHCP starting IP address offered by the DHCP Server. The DHCP Server is limited to a Class-C (/24) subnet and automatically adopts the subnet that the LAN-Cell’s LAN interface is assigned to. The maximum number of the IP addresses supported by the DHCP server. Please choose lease time from the selection list. You can choose 1 Hour, 3 Hours, 6 Hours, 1 Day, 3 Days, or 7 Days. Enter a domain name if LAN devices require a domain assignment as part of the DHCP information. DNS Relay: DHCP devices will be assigned the LAN-Cell’s LAN IP address as their DNS Server. The LAN-Cell will relay all DNS requests to the appropriate external DNS server. This is the default and most common mode of operation. ISP DNS Server: The DNS Servers from WAN ISP will be relayed to DHCP clients. DHCP DNS Server OpenDNS Server: DNS Servers operated by the OpenDNS project will be relayed Type to DHCP clients. Google DNS Server: DNS Servers operated by Google will be assigned to DHCP devices. Currently 8.8.8.8 and 8.8.4.4 are used. Custom: Enter the appropriate DNS addresses in the fields below. These will be relayed to DHCP devices. 34
  • 42. 6.6 DDNS DDNS (Dynamic Domain Name Service) allows an “internet domain name” to be assigned to a computer/router which has a dynamic IP address. This makes it possible for other internet devices to connect to the computer/router without needing to trace the changing IP addresses themselves. To enable DDNS, you will first need to sign up for DDNS services from one of the supported DDNS service providers such as DynDNS.org, TZO.com or ZoneEdit.com. DDNS is useful when combined with the virtual host and/or port-forwarding features. It allows internet users to connect to your virtual host by using a domain name, rather than an IP address. The DDNS service helps users to locate the right IP address by the domain name. For example, assume that you wish to remotely access a web server embedded in one of your LAN devices, but you obtain a different IP address from your ISP every time you connect to the internet. In this case, you will need to enable DDNS, so users can connect to your web server through a fixed domain name without regard for the changing IP address of your WAN connection. Note: As a service to its customers, Proxicast operates a Dynamic DNS service which is automatically updated each time a LAN-Cell WAN IP changes. The DDNS host name is the serial number of the LAN-Cell 3 in the”proxidns.com” domain. For example: 00501863C748.proxidns.com This “permanent” DDNS name is always available but cannot be changed. To create your own hostname, register with one of the supported DDNS service providers before configuring the LAN-Cell’s DDNS settings. Figure 30: Setup DDNS Service 35
  • 43. DDNS Service DDNS Service Provider User Name Password Select Enable to enable DDNS service. Select Disable to disable DDNS service. Select the desired DDNS service provider from the list. Enter your username for your DDNS service provider account. We recommend avoiding special characters (#, $, &, @, etc) in your password. Enter your password for your DDNS service provider account. We recommend avoiding special characters (#, $, &, @, etc) in your password. Enter the full-qualified domain name (FQDN) assigned by your DDNS service provider for this specific LAN-Cell. Enter the entire domain name, e.g.: Host Name myrouter.mydomain.com You must define this hostname within your DDNS service provider account before it can be updated by the LAN-Cell. The hostname must match exactly on both the DDNS account and this screen. Custom Server If your DDNS service provider assigns you a custom update server, enter that value here. Once your DDNS values have been saved, this button is enabled to force the Synchronize Now LAN-Cell to attempt to update the DDNS service provider with the latest WAN IP address. Check the Log for full results. The DDNS settings are the same for both the USB and Ethernet WAN interfaces. If both WAN interfaces will be operating simultaneously, enter a different hostname for each WAN interface. If the WANs are being used in fail-over (backup) mode, enter the same hostname for both interfaces. 36
  • 44. 6.7 MAC Address Clone Some ISPs only allow a registered MAC address to access to the internet. To bypass the requirement, you need to set up a cloned MAC address for LAN-Cell 3 using the pre-registered MAC address. Figure 31: Setup MAC Address Clone Clone WAN MAC If your ISP grants access only to a fixed MAC address, select Enable. If your ISP does not enforce access control, please select Disable. If the PC you use to configure LAN-Cell 3 is the device which has the MAC address MAC Address authorized to access the internet, press Get My MAC button. Or you can type in the MAC Address which has been granted access by your ISP. 37
  • 45. 6.8 VLAN A virtual local area network, or VLAN, is a group of hosts which communicate as if they were attached to the same broadcast domain, regardless of their physical location. A VLAN has the same attributes as a physical local area network (LAN), but it allows for end stations to be grouped together even if they are not located on the same network switch. Port-based VLAN function is provided in LAN-Cell 3 for users to assist with managing the LAN and WLAN groups, for example to reduce broadcast traffic that might be sent from the Ethernet LAN to Wi-Fi clients. 1. Click on [Add] to add a VLAN group. 2. Configure the VLAN group by simply checking the box to associate the group members Figure 32: Setup VLANs * A total of 16 VLAN groups can be set in the LAN-Cell 3. ** Tagged VLAN only applied to the physical ports. *** Changing VLAN settings will cause the LAN-Cell 3 to reboot in order for the changes to take effect. 38
  • 46. 6.9 Time Figure 33: Setup Time Servers & Automatic Reboot Time Synchronization Time Server Type Select Enable/Disable to enable/disable Time Synchronization Select to use a pre-defined pool of time servers on the Internet or your own time server. Time Server Area If Server Pool is selected, choose the Time Server by location. NTP Server Address If Manual is selected, enter the IP address of your Time Server (NTP). Time Zone Select Time Zone according to your location. Periodic Synchronization Select Enable/Disable to enable/disable Periodic Synchronization Daylight Savings Support Enable/Disable automatic time adjustment for Daylight Savings Time. Synchronization interval Action Select from Every Hour, Every 6 Hours, Every 12 Hours, Every Day, and Every Week. Click the Synchronize Now button to contact the time server for an immediate update. 39
  • 47. Enter the number of minutes of run-time before the LAN-Cell 3 Reboot Interval automatically reboots. The Interval count-down timer will restart once the LAN-Cell 3 has finished rebooting. Leave this field blank to disable the automatic reboot Interval timer. Enter the time of day (based on the LAN-Cell’s current time) at which the Daily Reboot LAN-Cell 2 will automatically restart. Set this value to NONE to disable the daily reboot timer. Note: You can combine the Interval and Daily reboot timers to have the LAN-Cell 3 restart under conditions. For example you may desire the LAN-Cell to restart every 8 hours and always at 1 AM UTC so that you have at least one known reboot time. If the Daily Timer is used, do not set the Interval timer greater than 1440 minutes (24 hours). 40
  • 48. CHAPTER 7: WIRELESS (Wi-Fi) MENU 7.1 Basic Setup The LAN-Cell 3’s multiple simultaneous SSIDs provide the ability to create separate security mode and key settings for both convenience and increased protection. For example, internal users can configure their network devices to access the first SSID with the WPA2 PSK (Pre-Shared Key), while visitors can be assigned to the second SSID with a WEP key that changes periodically. In addition, the SSIDs can be isolated to prevent malicious attacks and local area network access for visitors using the second SSID. This provides an extremely convenient approach for providing access internet access for visitors while enforcing strong security protection at all times. 7.1.1 Wi-Fi Settings Figure 34: Setup Wi-Fi Basic Wireless Select Enable if you would like to turn on the wireless radio. Connection Select Disable if you would like to turn off the wireless radio. Wireless Mode Select the wireless mode for 802.11b/g/n or mixed use. Transmission Power Wireless Channel Select the transmission power class from 10%, 25%, 50%, 75%, and 100%. Select which Wi-Fi channel to be used. For non-US, Canada, Taiwan locations, see Wireless > Advanced to select the appropriate region and channel range. Wireless Isolation Select Enable if you would like to prevent communication between the SSID’s. Between SSIDs Select Enable if you would like to allow communication between the SSID’s 41
  • 49. 7.1.2 SSID Settings Each SSID can be configured with its own attributes. Further, various security modes are available based on your needs and preference: Disable, WEP, WPA Pre-Shared Key, WPA, WPA2 Pre-Shared Key, and WPA2. However, it is important to note that all devices under the SSID must use the same security mode. Different methods will grant different levels of security. Using encryption – where data packets are encrypted before transmission - can prevent data packets from being analyzed by un-trusted parties. However, higher the security level is, the lower the data throughput becomes. Figure 35: Wi-Fi SSID1 Wireless SSID Wireless SSID Name Wireless SSID Broadcasting Select Enable if you would like to turn on this SSID. Select Disable if you would like to turn off this SSID. Enter name you would like to assign to this SSID. LAN-Cell 3 broadcasts SSID periodically. Select Enable to turn it on or Disable to turn it off. Enabling SSID Broadcasting makes it convenient for users to find and connect to the LAN-Cell 3. Disabling SSID broadcasting enhances the security by hiding SSID information. Wi-Fi Multimedia Select Enable to prioritize different traffic types based on their characteristics. (WMM) For example, VoIP or video traffic will have higher priorities over ordinary traffic. Select Enable if you would like to prevent access to other network devices connecting to this Wireless Isolation SSID. Select Disable if you would like to allow access to other network devices connecting to this SSID. Security Mode Select the desired Security Mode for this SSID and one of the following sets of additional fields will be displayed. 42
  • 50. 7.1.3 WEP Figure 36: WEP Settings WEP Key Index WEP Key (1~4) 7.1.4 WEP Key Index indicates which WEP key is used for data encryption. 64-bit WEP: type 10 hexadecimal digits or 5 ASCII characters 128-bit WEP: type 26 hexadecimal digits or 13 ASCII characters. WPA/WPA2 Pre-shared Key Figure 37: WPA/WPA2 PSK Settings Key Encryption Mode Pre-shared Key serves as the credential for the packet encryption. This same value must be entered in all Wi-Fi devices connecting to this SSID. TKIP & AES are supported. 43
  • 51. 7.1.5 WPA/WPA2 Radius Figure 38: WPA/WPA2 Radius Settings Radius Server IP Address Enter the RADIUS server’s IP address. Radius Server Port Enter the RADIUS server’s port number. The default port is 1812. Radius Key Enter the RADIUS server’s Key. Encryption Method Select TKIP or AES for the packet encryption. Rekey Method Select method for determining when new key is required. Rekey Time Interval Enter the frequency of key renewals in seconds. Rekey Packet Interval Enter the frequency of key renewals in number of packets. Pre-authentication Enable pre-authentication if required by your Radius server 7.1.6 SSID2 Guest LAN Users connecting to SSID2 can be segregated into their own local area network to provide Internet service while preventing access to other devices on the primary LAN. Enter the Guest LAN starting IP address which will be assigned to the LAN-Cell, and the corresponding subnet mark. Guest Wi-Fi devices will be assigned a DHCP address in this subnet. Figure 39: Wi-Fi Guest LAN 44
  • 52. 7.2 Advanced Setup Figure 40: Wi-Fi Advanced Settings 45
  • 53. Region Choose the region in which the LAN-Cell is currently operating (sets channels). Fragmentation Enter the fragmentation bytes. The default value is 2346 bytes. RTS Enter the RTS seconds. The default value is 2347 seconds. DTim Enter the DTim seconds. The default value is 1. Beacon Interval Enter the interval to send a beacon. The default value is 100 milliseconds. Header Preamble Choose Long or Short header preamble. TxMode Choose different transmission mode. MPDU MSDU Aggregate Tx Burst Packet Aggregate MPDU data length. The transmission rate is increased when you choose a larger number, but usually the max value will be 4 in the wireless card A kind of packet aggregation method, it can improve the transmission efficiency. Please make sure you Wireless card has this function supported. Some 802.11g wireless cards support this mode. The transmission rate can be increased when this function is enabled. An aggregation method like A-MSDU, it can improve the transmission efficiency. Please make sure you Wireless card has this function supported. HT Control Field Choose Enable/Disable. It is useful when you need to debug the wireless network. Reverse Direction Grant Choose Enable/Disable. The response time can be shorter enable this function is enabled. Link Adapt Short Guard Interval (SGI) Operation Mode Choose Enable/Disable. The function is used to dynamically change the modulation and encoding mechanism between wireless devices. Choose Enable/Disable. Short GI can improve the transmission rate, but with less immunity when interference exists. Choose Mixed mode or Greenfield. You may choose Greenfield mode to increase the transmission rate when you using 802.11n wireless network only. HT Band Width Using HT20MHz or HT20/40MHz Block Ack Setup Choose Enable/Disable. If your Wi-Fi Card supports the Block Ack mechanism, it Automatically can improve the data transmission efficiency when this function is enabled. Block Ack Window Size Specify a Block Ack window size. Reject Block Ack Choose Enable to reject the request of BA from another other Wireless device. MCS Select transmission (connection) speed. 46
  • 54. 7.3 WDS Setup A wireless distribution system (WDS) is a system enabling the wireless interconnection of access points in an 802.11 network. It allows a wireless network’s coverage area to be expanded using multiple access points without a wired backbone to link the APs. The LAN-Cell 3 supports 2 modes of WDS operation: · Bridging: APs communicate only with each other and don't allow wireless clients to access them. · Repeating: APs communicate with each other and with wireless clients. All base stations in a wireless distribution system must be configured to use the same radio channel, method of encryption (none, WEP, or WPA) and the same encryption keys. They may be configured to different service set identifiers (SSIDs). WDS also requires every base station to be configured to forward to others in the system. Figure 41: Wi-Fi Wireless Distribution System 47
  • 55. WDS MAC Address [1~4] Select Enable to enable WDS function. Select Disable to disable WDS function. Enter the MAC addresses of the other bridged wireless devices. Maximum of 4 devices are allowed to be bridged together. Make sure of the following in order for WDS to work correctly: (1) All WDS devices must use the same radio channel. (2) All WDS devices must use the same encryption mode and encryption keys. 7.4 Universal Repeater Setup The Universal Repeater function is similar to WDS in that it is used to essentially enlarge the area of wireless network coverage. However, unlike WDS, Universal Repeater offers simplicity in configuration requirements, as users only need to configure the current AP as a client, and to connect it to the second AP’s SSID (or BSSID). However, you need to ensure that the two APs are using the same wireless channel and security mode (and key) for Universal Repeater to work correctly. Figure 42: Wi-Fi Universal Repeater Setup Universal Repeater Target SSID Target BSSID (MAC) Select Enable to enable Universal Repeater function. Select Disable to disable Universal Repeater function. Enter the target SSID to connect to. Enter the target BSSID to connect to. The BSSID is optional if you setup the target SSID. 48
  • 56. Security Mode Wireless Channel Choose the security mode the target AP uses, and enter the key if needed. Select which Wi-Fi channel to be used. For non-US, Canada, Taiwan locations, see Wireless > Advanced to select the appropriate region and channel range. When operating in 40 MHz mode the access point will use an extended channel Extension Channel either below or above the current channel. Optimal selection will depend on the channels of other networks in the area. Click this button to display a table of visible Wi-Fi networks. Select the desired Site Survey network from the Site Survey table and the associated SSID and channel information will be automatically entered. Select the Security Mode which matches the target Wi-Fi network. Enter the Security Mode associated security information (such as pre-shared keys) required by the target Wi-Fi network. 7.5 WPS Setup Wi-Fi Protected Setup (WPS) is a computing standard that allows easy establishment of a secure wireless network. Although easy to setup, WPS connections are inherently less secure than manually configured WPA/WPA2 connections. The LAN-Cell 3 supports two different types of WPS: · PIN Method: A Personal Identification Number (PIN) is generated by the LAN-Cell. This PIN must then be entered at the "representant" of the network (other AP or client device). · Push-Button-Method: The user simply has to push the button on the LAN-Cell 3 screen and either an actual or virtual one on the new wireless client device. Figure 43: Wi-Fi WPS Setup 49
  • 57. CHAPTER 8: SECURITY MENU 8.1 Firewall The LAN-Cell 3 has several firewall-related security features designed to protect LAN devices from unwanted access and attack from WAN (and even other LAN) connections. By default, these WAN protections are enabled and all “inbound” connections from WAN devices are blocked, except for TCP Port 8080 which is used by the LAN-Cell 3’s web management interface. The LAN-Cell 3 will automatically open other ports for inbound access as you define VPN, Port-Forwarding, and Virtual Host rules (see the Applications menu). You do not need to explicitly define firewall rules for remote access purposes. Figure 44: Firewall Setup SPI Firewall Protection Select Enable to enable SPI Firewall Protection. Select Disable to disable SPI Firewall Protection. TCP SYN DoS Protection Check to enable TCP SYN DoS Protection. Uncheck to disable TCP SYN DoS Protection. TCP SYN DoS attack sends a flood of TCP/SYN (connection requests), causing the LAN-Cell to consume computing resources (e.g. memory, CPU) to reply and continuously wait for the incoming packets. The LAN-Cell 3 is able to detect TCP SYN DoS attacks and limit the resource consumption by lowering the incoming request rate by fast recycling of the resource. Therefore, the LAN-Cell 3 is still able to serve normal traffic while it is under such an attack. 50
  • 58. ICMP Broadcasting Check to enable ICMP Broadcasting Protection. Protection Uncheck to disable ICMP Broadcasting Protection. ICMP broadcasting attack is a type of DoS attacks. A flood of ICMP broadcasting packets is generated and sent to LAN-Cell 3. Consequently, this LAN-Cell will experience a high number of interruptions and consumption of computing resources. The LAN-Cell 3 is able to stop responding to ICMP broadcasting echo packets in order to avoid a potential ICMP broadcasting DoS attack. ICMP Redirect Protection Check to enable ICMP Redirect Protection. Uncheck to disable ICMP Redirect Protection. An ICMP redirect message is a way to change the existing routing path. Generally, ICMP redirect packets should not be sent, and so when there is the occurrence that ICMP redirect packets are sent, it is important to note that it is very likely to be used as a means for a network attack. Broadcast Storming Check to enable Broadcast Storm Protection. Check to disable Broadcast Storm Protection. A broadcast storm is a situation in which messages are broadcast on a network, and each message prompts a receiving node to respond by broadcasting its own messages on the network that in turn prompt further responses, and so on. This snowball effect can have a serious negative impact on network performance. See also Spanning Tree Protocol to reduce broadcast loops on the LAN. 51
  • 59. 8.2 IP Access Control IP Access Control is used to either allow or deny specific types of “outbound” connections from specific LAN IP addresses. Each rule defines a custom Access Control List (ACL) that the LAN-Cell 3 uses to determine if a packet is to be routed or not. By default, the LAN-Cell 3 allows all LAN devices to connect to all external ports on any WAN interface. Outbound IP Access Control rules are typically used to limit end-user access to one or more Internet services that have been deemed an inappropriate use of the WAN connection. The rules can also be used to create routing policies that force specific types of traffic to flow through specific WAN interfaces (e.g. all E-Mail must go through the Ethernet WAN only). 8.2.1 IP ACL Settings Figure 45: IP Access Control Setup IP Access Control Select Enable to enable ACL. Select Disable to disable ACL. Default IP Access Check Allow to allow LAN devices to communicate with the WAN interfaces except Control Action for the ACL rules (deny rules) defined in the table below. Check Deny to prevent LAN devices from communicating with the WAN interfaces except for the ACL rules (permit rules) defined in the table below. 52
  • 60. 8.2.2 ACL Rules Click on the [Add] button to display the following screen: Figure 46: IP ACL Rule Setup Sequence Number This defines the sequence of the ACL rules. Packets are matched against the rules in the order displayed until a match is found. Rule Name Name of the ACL rule. No spaces are permitted. Rule Enable Enable/Disable this ACL rule External Interface Please select which External Interface (USB WAN or Ethernet WAN) you want a packet to go through, IF the packet fits the condition of this ACL rule. Select “*” to allow the LAN-Cell to determine the best available WAN interface to use. Internal IP Range Set up the internal IP range for this ACL rule. Only packets from devices in this range will be filtered by this rule. Leave blank to apply to all LAN devices. External IP Range Set up the external IP range for this ACL rule. Only packets destined for IP addresses in this range will be filtered by this rule. Leave blank to have this rule apply to all non-LAN addresses. Protocol Set up the protocol (TCP or UDP or both) for the ACL to be enabled. Select “*” to apply this rule to all packet types. Service Port Range Set up the Service Port Range (e.g., HTTP is TCP/80) for the ACL to be enabled. Leave blank to apply this rule to all ports. Action Select whether the LAN-Cell should ALLOW / DENY packets which match this rule. 53
  • 61. 8.2.3 IP ACL Rule Example Assume for example that a company does not wish to allow employees to use the MSN Windows Live Messenger system over the USB WAN interface. The LAN-Cell 3 administrator can set up an ACL Deny action rejecting the traffic going out to the external IP address range used by MSN. Figure 47: MSN ACL Example Rule Name Block-MSN-Messenger Rule Enable Enable External Interface WAN (USB Modem) Internal IP Range {blank} (applies to all LAN devices) External IP Range 64.4.50.96 to 64.4.50.127 (IP address range for MSN server) Protocol TCP/UDP Service Port Range 1863 (MSN port) Action DENY 54
  • 62. 8.3 Outbound MAC ACL Similar to IP Access Control, Outbound MAC ACL Control is used to either allow or deny specific devices identified by their unique Media Access Control (MAC) addresses from making “outbound” connections. The MAC rules also enable you to “statically” assign an IP address from the LAN-Cell 3’s DHCP pool to a specific MAC address. 8.3.1 MAC ACL Settings Figure 48: Outbound MAC Address Control Setup Outbound MAC Access Choose Enable/Disable to enable/disable MAC Access Control Control Default Outbound MAC The default ACL action of the ACL rules. When you add the individual rules, they Access Control Action can be viewed as exceptions and take effect relative to the default action. 55
  • 63. 8.3.2 MAC ACL Rules Click on the [Add] button to display the following screen: Figure 49: MAC ACL Rule Setup Sequence Number This defines the sequence (priority) of all the MAC ACL actions. Rule Name Name of the MAC access rule. Spaces are not allowed. MAC Set up the MAC Address to which you would like to enable the MAC ACL action. Format the MAC address as: 00:00:00:00:00:00 Action Select whether the LAN-Cell should ALLOW / DENY packets matching this rule. ACL Enabled Enable/Disable this MAC access rule. Static ARP Enabled Enable/Disable this Static ARP rule. Static DHCP Enabled Enable/Disable this Static DHCP rule. IP The IP address to assign via static ARP or static DHCP. The address must be within the DHCP pool configured for the LAN-Cell and the DHCP Server feature must be enabled. 56
  • 64. 8.3.3 MAC ACL Rule Example Assume that you have an IP camera that only accepts DHCP addresses and you need to assign it a static IP address (192.168.1.40) so that it can be remotely accessed. Figure 50: MAC ACL Rule Example Sequence Number 1 Rule Name Static-IP-For-Camera MAC 00:1B:39:01:2F;1C Action Allow ACL Enable Enable Static ARP Enabled Disabled Static DHCP Enabled IP Enable 192.168.1.40 57
  • 65. 8.4 OpenDNS OpenDNS is a leading provider of security and infrastructure services including integrated Web content filtering, anti-phishing and DNS. OpenDNS services can secure networks from online threats and enforce Internet-use policies. Please refer to http://www.opendns.com for more information and to establish an account. Figure 51: OpenDNS Settings OpenDNS Service Choose Enable/Disable to enable/disable OpenDNS OpenDNS Username Enter your OpenDNS user name. OpenDNS Password Enter your OpenDNS password. DNS Query Redirection to OpenDNS DNS Servers OpenDNS Label Choose Enable/Disable to enable/disable the data flow redirect to the OpenDNS Server. Users can get advanced content filtering function through this setting. Enter the OpenDNS Label. 58
  • 66. 8.5 Web Filtering Web filtering allows the LAN-Cell 3 administrator to restrict access to various web resources based on keywords as well as to restrict certain types of potentially dangerous web page content such as ActiveX and Java. 8.5.1 Web Filtering Setup Figure 52: Web Filtering Settings Web Filtering Choose Enable/Disable to enable/disable Web Filtering ActiveX Filtering Choose Enable/Disable to enable/disable ActiveX Filtering Java/JavaScript Filtering Choose Enable/Disable to enable/disable Java/JavaScript Filtering Proxy Filtering Choose Enable/Disable to enable/disable Proxy Filtering 59
  • 67. 8.5.2 Added Web Filtering Rules Click on the [Add] button to display the following screen: Figure 53: Add Web Filtering Rule Sequence Number This defines the sequence (priority) of all the Web Filtering rules Rule Enable Choose Enable/Disable to enable/disable this Web Filtering rule Filter Keyword Enter the Keyword Filter Type Choose URL or Sever Action Select ALLOW / DENY 8.5.3 Web Filtering Rule Example To block access to Facebook web pages, enter the following settings: Figure 54: Web Filtering Rule Example 60
  • 68. 8.6 VPN / PPTP The Point-to-Point Tunneling Protocol (PPTP) is a method for implementing virtual private networks. PPTP uses a control channel over TCP and a GRE tunnel operating to encapsulate PPP packets. The PPTP settings in this section define the parameters and user access rules when the LAN-Cell 3 is acting as a PPTP “server” allowing connections from remote PPTP clients such as Windows PC’s. The LAN-Cell 3 can also act as a PPTP “client” – see the PPTP section under each WAN interface. 8.6.1 VPN / PPTP Settings Figure 55: PPTP VPN Settings 61
  • 69. PPTP Choose Enable/Disable to enable/disable the PPTP Server. MTU Enter MTU value. The default value is 1482 bytes. VPN Start IP Address Enter the VPN start IP address. The default value is 192.168.39.1. Max VPN Clients Enter the max number of VPN clients allowed. Auto DNS Choose Enable/Disable to enable/disable Auto DNS. DNS Enter the DNS server if you chose Disable for Auto DNS. CHAP Enable Choose Enable/Disable to enable/disable CHAP for VPN authentication. MSCHAP Enable Choose Enable/Disable to enable/disable MSCHAP for VPN authentication. MSCHAP v2 Enable Choose Enable/Disable to enable/disable MSCHAP v2 for VPN authentication. MPP128 Enable Choose Enable/Disable to enable/disable MPP128 encryption. Proxy ARP Enable Choose Enable/Disable to enable/disable Proxy ARP. NAT Enable Choose Enable/Disable to enable/disable NAT. 8.6.2 Add VPN / PPTP User Rule Click on the [Add] button to display the following screen: Figure 56: Add PPTP VPN User Sequence Number This defines the sequence of the PPTP rules. Rule Enable Enable/Disable this PPTP rule User Name Enter PPTP user name. Password Enter PPTP password. 62
  • 70. 8.7 VPN / IPsec Internet Protocol Security (IPsec) is a standards-based protocol suite for securing Internet Protocol (IP) communications by authenticating and encrypting each IP packet of a communication session. IPsec also includes protocols for establishing mutual authentication between agents at the beginning of the session and negotiation of cryptographic keys to be used during the session. IPsec is an extremely popular and robust end-to-end security scheme operating in the Internet Layer of the Internet Protocol Suite. It can be used to protect data flows between a pair of security gateways (Net-to-Net Mode), or between a security gateway and a remote device (Remote User Mode). The LAN-Cell 3 supports both modes and is interoperable with a wide variety of IPSec-compliant software and hardware products from numerous vendors. When configuring an IPSec VPN connection, keep the following in mind: · All VPN parameters much match EXACTLY between the 2 devices. · It is helpful can have simultaneous access to the parameter and log screens of both devices during setup and testing. · The network on the LAN side of the LAN-Cell and on the “private” side of your other VPN equipment must be on different subnets. · Most users find it easiest to configure net-to-net VPNs if both end-points have static public IP addresses. Contact your ISP or cellular network operator to determine if static IP addresses are available. Otherwise, you will need to define a Dynamic DNS hostname for your LAN-Cell that has a dynamic IP address. · The LAN-Cell can be either the VPN initiator or responder for net-to-net VPNs. It is the responder for Remote User VPNs. · All intervening network hardware between the VPN end-points must support IPSec VPN pass-through and allow ESP (encrypted, Type 50) packets in addition to IKE and NAT-T requests on UDP ports 500 & 4500. · Proxicast IPSec VPN Client for Windows is the easiest way to configure a remote user VPN tunnel on a Windows PC. A fully-functional 30 day evaluation copy can be downloaded from the Proxicast web site. · Additional LAN-Cell VPN configuration examples are available on the Proxicast Support web site in the TechNotes and Knowledgebase areas. 63
  • 71. 8.7.1 VPN / IPsec Settings Figure 57: IPSec VPN Settings IPsec 8.7.2 Select Enable/Disable to enable/disable IPsec. Add VPN / IPsec Net-to-Net Rule In this example, a Net-to-Net VPN connection will be established between an existing VPN concentrator on the Headquarters network and a LAN-Cell 3 at a remote office location. Figure 58: Net-to-Net IPSec Example 64
  • 72. Click on the [Add] button to display the following screen: Figure 59: IPSec Net-to-Net VPN Settings Sequence Number This defines the sequence of the IPsec rules. Connection Name Name of the IPsec rule. Spaces are not permitted. Rule Enable Enable/Disable this IPsec rule VPN Mode Net-to-Net or Remote-User Local External Interface Choose the external WAN for this IPSec rule to use. Local Subnet IP Enter the subnet IP address on the LAN-side of the local LAN-Cell which will be visible to the remote VPN subnet. Local Subnet Netmask Enter the netmask for the local VPN gateway. Remote Gateway Enter the IP address or domain name of the remote VPN gateway. This option is required in Net-to-Net mode. Remote Subnet IP Enter the subnet IP address of the remote VPN gateway. This option is required in Net-to-Net mode. Remote Subnet Netmask Enter the subnet netmask of the remote VPN gateway. This option is required in Net-to-Net mode. Connection Initiation Check to force the LAN-Cell to always attempt to initiate a VPN connection to the remote gateway. If uncheck, the VPN will not be established unless the remote gateway initiates a connection or traffic on the local LAN subnet is destined for the remote subnet. IKE Key Mode At this time, only Pre-Shared Key (PSK) is supported. 65
  • 73. Preshared Key Enter the preshared key. The key should be at least an 8-digit ASCII string. DPD Enable Enable/disable Dead Peer Detection (DPD). DPD Interval Enter the number of seconds between checks for a dead peer. DPD Timeout Enter the number of seconds to wait for a response before declaring the peer dead. Phase 1 Mode Select Main or Aggressive Mode. Must match the setting on the remote gateway. Phase 1 Local ID Enter the phase 1 Local ID. Phase 1 Remote ID Enter the phase 1 Remote ID. Phase 1 Lifetime Enter the phase 1 lifetime. This value is between 3600 and 28800 seconds. Phase 2 Lifetime Enter the phase 2 lifetime. This value is between 3600 and 28800 seconds. Phase 1 Authentication Choose the phase 1 authentication as MD5 or SHA1. Phase I Encryption Choose the phase 1 encryption as DES, 3DES or AES. Phase 1 Group Key Choose the phase 1 group key management as DH1, DH2 or DH5. Management Phase 2 Authentication Choose the phase 2 authentication as MD5 or SHA1. Phase 2 Encryption Choose the phase 2 encryption as DES, 3DES or AES. Phase 2 Group Key Choose the phase 2 group key management as DH1, DH2 or DH5. This setting is Management (PFS) also known as Perfect Forward Secrecy. 8.7.3 Add VPN / IPsec Remote User Rule In this example, a Remote User VPN connection will be established between with the LAN-Cell 3 functioning as the VPN Server and remote PC as the client using the Proxicast IPSec VPN Client for Windows software. The LAN-Cell has a dynamic IP address but can be accessed via its dynamic DNS name 001B39123456.proxidns.com. Figure 60: Remote User IPSec Example 66
  • 74. Click on the [Add] button to display the following screen and select VPN Mode = Remote User: Figure 61: IPSec Remote User VPN Settings The settings for a Remote User VPN are essentially the same as for a Net-to-Net VPN except that the Remote Gateway and Network information is not required since the remote will be a single unknown IP address. This same configuration is used if the VPN PC is directly connected to the Internet, for example via Wi-Fi hotspot or its own cellular modem card. NOTE: You cannot make a Remote User VPN connection to a LAN-Cell that has a private IP address; you must request a public IP address from your ISP. If you cannot obtain a public IP address for the LAN-Cell, then you must have the LAN-Cell initiate a Net-to-Net VPN connection to another VPN server in order to remotely access devices attached to the LAN-Cell. 67
  • 75. CHAPTER 9: APPLICATIONS MENU 9.1 Port Forwarding The LAN-Cell 3 provides Network Address Translation (NAT) services to protect private LAN IP addresses from access by users on the external WAN. Port-Forwarding is a technique to selectively allow remote users to access selected devices and services on the private LAN. The LAN-Cell 3 supports both Port Forwarding and Port Translation features. These features are integrated with the LAN-Cell’s firewall feature. Creating new port forwarding/translation rules automatically opens the corresponding ports in the firewall – no other configuration is necessary. The port forwarding function gives remote users access to devices on the local network via the public WAN IP address. Users can assign a specific external port range to a local server (IP address). Furthermore, users can specify a different internal port range to be associated with external ports in a port forwarding rule. When the LAN-Cell 3 receives an external request to access any one of the configured external ports, it will redirect the request to the corresponding internal server and change its destination port to one of the internal ports specified. This allows multiple LAN devices with the same port (e.g. port 80) to be accessed remotely without having to change their settings. By enabling the DMZ Host Function, you can set up a Demilitarized Zone (DMZ) host, that is, a particular computer which is fully exposed to the Internet. This may be necessary for certain applications that use random ports or when you do not know the specific ports required for remote access. 68
  • 76. 9.1.1 Port Forward Settings Figure 62: Port Forwarding Settings Port Forwarding 9.1.2 Select Enable / Disable to enable/disable Port Forwarding Add Port Range Forwarding Rule Click on the [Add] button to display the following screen: Figure 63: Add Port Forward Rule 69
  • 77. This defines the sequences (priorities) of the port forwarding rules. If a packet Sequence Number fits the conditions set up by the port forwarding rules, the packet will then be forwarded according to the first matching rule in the sequence. Rule Name Enter the name of the port forwarding rule. Must not contain spaces. Rule Enabled Check/Uncheck to enable/disable this port forwarding rule. Choose USB or Ethernet WAN as the External port forwarding interface. External Interface Each WAN interface must have its own port forwarding rules, so duplicate rules if using the LAN-Cell in a WAN fail-over configuration. Protocol Choose TCP, UDP or TCP/UDP for the rule to be applied. External Port Range Set up the External Port Range for the rule to capture. Internal IP Set up the Internal IP (single address) where incoming packets will be directed when the rule is matched. Set up the Internal Port Range where the rule will send matched packets. The Internal Port Range internal and external port ranges must contain the same number of ports, but can be different to enable port translation. 9.1.3 DMZ Settings Figure 64: DMZ Settings DMZ Select Enable to enable DMZ function. Select Disable to disable DMZ function. Enter the IP address of a particular host on the LAN which will receive all the packets originally going to the corresponding WAN port / Public IP. DMZ IP Address NOTE: Be sure to add a Port Forward rule for the LAN-Cell 3’s remote management interface port (default=8080) before forwarding all WAN packets to a DMZ host. 70
  • 78. 9.2 Virtual Hosts Virtual Hosts function similarly to DMZ hosts, except that Virtual Hosts enable different WAN IP addresses to be mapped to different LAN IP addresses. This is most useful when your WAN has been assigned multiple static public IP addresses (not common for cellular connections). If you have only 1 WAN IP address, use DMZ. 9.2.1 Virtual Host Settings Figure 65: Virtual Host Settings Virtual Hosets 9.2.2 Select Enable / Disable to enable/disable Virtual Hosts Add a Virtual Host Rule Click on the [Add] button to display the following screen: Figure 66: Virtual Host Rule 71
  • 79. Sequence Number This defines the sequences (priorities) of the Virtual Host rules. Rule Name Enter the name of the Virtual Host rule. Must not contain spaces. Rule Enabled Check/Uncheck to enable/disable this rule. External Interface Choose USB or Ethernet WAN as the External interface External IP Address Enter one of the IP addresses assigned to the WAN by your ISP. Mapped LAN IP Address Enter the Internal LAN IP (single address) where incoming packets will be directed when the rule is matched. 72
  • 80. 9.3 Streaming / Pass-Through You can enhance your media streaming quality by enabling RTSP, MSS, and H.323 protocols. Also, the LAN-Cell 3’s VPN Pass-through functionality can also be enabled on this screen. All of these features are enabled by default. Disable unused settings to reduce system overhead. Figure 67: Application / Streaming Setup RTSP Select Enable/Disable to enable/disable RTSP MMS Select Enable/Disable to enable/disable MMS H.323 Select Enable/Disable to enable/disable H.323 IPSec Pass-through Select Enable/Disable to enable/disable IPSec Pass-through PPTP Pass-through Select Enable/Disable to enable/disable PPTP Pass-through 73
  • 81. 9.4 UPnP Universal Plug and Play (UPnP) is a set of networking protocols that permits networked devices, such as personal computers, printers, Internet gateways, Wi-Fi access points and mobile devices to seamlessly discover each other's presence on the network and establish functional network services for communications. Figure 68: UPnP Setup UPnP Select Enable/Disable to enable/disable UPnP UPnP Port Enter the number for UPnP port. 74
  • 82. CHAPTER 10: QUALITY OF SERVICE (QoS) MENU 10.1 Bandwidth Management The LAN-Cell 3’s Bandwidth Management feature provides two powerful and unique mechanisms to manage bandwidth: Static Bandwidth Management (SBM) and Dynamic Bandwidth Management (DBM). SBM provides users with the option to allocate a fixed amount of bandwidth for a specific computer or a particular application, while DBM intellectually manages the rest of the bandwidth while all the time satisfying the complicated bandwidth requirements/settings of SBM. 10.1.1 Bandwidth Management Settings To effectively utilize the Bandwidth Management system, you must accurately specify the bandwidth available on a WAN interface. Bandwidth Management then allocates bandwidth according to this information. You can obtain the maximum bandwidth information from your ISP, or use a “speed-test” web-site application to determine your typical actual bandwidth available. Bandwidth Management will be more effective if you are conservative when specifying the maximum bandwidth per interface. Figure 69: Bandwidth Management Setup 75
  • 83. Bandwidth Management Select Enable/Disable to enable/disable Bandwidth Management. Bandwidth Type Select the correct bandwidth type according to your Internet service (Download/Upload) subscription. If the bandwidth type is not available on the list, select Custom. Enter the value to customize download bandwidth. Note that the value is Download Bandwidth specified in kilobits per second (Kbps). Multiply kilobytes/sec (KB/s) by 8 to get Kbps. Divide megabytes/sec (MB/s) by 1000 to get Kbps. Upload Bandwidth Router Reserved Bandwidth Enter the value to customize upload bandwidth. Enter the value to provide bandwidth buffer for the LAN-Cell 3’s use. Do not set this value to 0 or the LAN-Cell may become inaccessible during periods of heavy traffic. Figure 70: Bandwidth Management Rules 76
  • 84. 10.1.2 Add SBM Rules Click on the [Add] button to display the following screen: Figure 71: Add Static Bandwidth Rule In this example, 50% of the bandwidth on the USB WAN interface is being dedicated to the VNC application (TCP Port 5900). If the interface is less than 50% loaded, VNC will be allocated additional bandwidth up to the maximum available but will never be restricted to less than half of the available bandwidth, assuring reasonable performance for this application regardless of any WAN traffic. Sequence Number This defines the sequence of the SBM rules. If a packet fits the conditions set by the SBM rules, the packet will then be sorted according to the first SBM rule from the top of the list. Rule Name Name of the SBM rule. Spaces are not allowed. Rule Enable Enable/Disable this SBM rule. Internal IP The internal LAN IP address for this SBM rule. Protocol Set up the protocol (TCP or UDP) for the rule. External Interface Select which External Interface (USB WAN or Ethernet WAN) you want a packet to go through, IF the packet fits the condition of this SBM rule. Service Port Range Set up the Service Port Range for the SBM rule. Bandwidth Allocation Select allocation by Ratio or By Bandwidth. Ratio The portion of the external interface’s bandwidth to be allocated to this rule. Download Enter the reserved download bandwidth. Upload Enter the reserved upload bandwidth. 77
  • 85. Use Additional Bandwidth Check this box if you wish to allow the traffic matching this SBM rule to be when Available able to utilize the whole bandwidth when the bandwidth is idle. Use Maximal Ratio Percentage of the WAN interface’s total bandwidth to apply to this rule. 10.1.3 Add DBM Rules Dynamic Bandwidth Rules define which LAN IP addresses are to be included in the dynamic bandwidth allocation scheme. The default is all LAN IP addresess; however in for some applications you may wish to limit the IPs included in DBM. You may create a maximum of 16 DBM rules. Click on the [Add] button to display the following screen: Figure 72: Add Dynamic Bandwidth Rule Sequence Number This defines the sequence of the DBM rules. Rule Name Name of the DBM rule. Spaces are not allowed. Rule Enable Enable/Disable this DBM rule Internal IP Range Set up the internal IP range for this DBM rule. 78
  • 86. 10.2 Throughput Optimizer The LAN-Cell 3’s Throughput Optimizer feature transmits the defined high-priority packets types to optimize network utilization and minimize delays. All of the pre-defined packet types are enabled for optimization by default. Disable them only if performance of other applications is adversely affected. Figure 73: Throughput Optimizer Settings Throughput Optimzer Select Enable/Disable to enable/disable the Throughput Optimizer. TCP ACK Select Enable/Disable to enable/disable TCP ACK priority ICMP Select Enable/Disable to enable/disable ICMP priority DNS Select Enable/Disable to enable/disable DNS priority SSH Select Enable/Disable to enable/disable SSH priority Telnet (BBS) Select Enable/Disable to enable/disable Telnet (BBS) priority TCP Max Segment Size Select Enable/Disable to enable/disable TCP Max Segment Size 79
  • 87. 10.3 Ultra-NAT Network Address Translation (NAT) is often a performance bottleneck in routers and firewalls. Generic routers are generally insufficient when dealing with a high-speed broadband network. Ultra-NAT is designed to solve this problem by accelerating NAT performance allowing the LAN-Cell 3 to maximize the higher speed networks and to reserve system performance for other features such as ACL and VPN servers. The LAN-Cell 3 also has a hardware acceleration feature that can improve NAT performance; however, Hardware NAT acceleration cannot be enabled if any of the following features are also enabled: · Bandwidth Management · Web Filtering · Wi-Fi Universal Repeater · VPN/PPTP Figure 74: Ultra-NAT Settings Hardware NAT Select Enable/Disable to enable/disable Hardware NAT acceleration. Ultra-NAT Select Enable/Disable to enable/disable Ultra-NAT. 80
  • 88. 10.4 Session Manager Session manager will automatically recycle old/dead sessions to get better connection efficiency. Users can choose the recycle rate to optimize the connection efficiency especially for applications which rapidly open and close many ports (e.g. P2P downloads, games, etc.) Figure 75: Session Manager Settings Recycle Mode Select Fast/Regular/Slow recycle rate 81
  • 89. CHAPTER 11: ADMIN MENU 11.1 System Management The Management screen is used to perform various administrative tasks on the LAN-Cell 2 such as changing the login password, saving and restoring system settings, and performing firmware upgrades. Figure 76: System Management Settings 82
  • 90. Administrator Password Maximum input is 36 alphanumeric characters (case sensitive) Re-type Password Enter the password again to confirm. Select Enable to enable Remote Management. Select Disable to disable Remote Management Remote Management If remote management is enabled, users may access the LAN-Cell’s web configuration screens via a WAN (Internet) connection. Management Port HTTP port which to which remote LAN-Cell administrators connect. (Default port is 8080) Press the Reboot Router button to initiate an immediate reboot of the Reboot Router LAN-Cell. See the Setup > Time screen to configured regularly scheduled reboots. Export Configuration Click Export to save the current configuration settings to a file. Click Restore to restore the LAN-Cell 3 to its factory default system Restore Default Configuration settings: LAN IP = 192.168.1.1:8080 Username/Password = admin/1234 Import Configuration Click Browse and Import to load a previously saved configuration file. Upgrade Firmware Click Browse and Upgrade to load a firmware upgrade image. 83
  • 91. 11.2 SNMP Simple Network Management Protocol (SNMP) is an Internet-standard protocol for monitoring and managing devices on IP networks. It is used by network management systems to monitor network-attached devices for conditions that warrant administrative attention. The SNMP Management Information Base (MIB) for the LAN-Cell 3 is available on the Proxicast Support web site. Figure 77: SNMP Settings SNMP SNMP Read Community SNMP UDP Port Choose Enable/Disable to enable/disable the SNMP agent. The Community String required for read access to SNMP values. Default value is “public”. At this time, only read access is permitted. UDP port on which the SNMP agent is listening. String (25 characters) which identifies this specific LAN-Cell 3 device. System Name Value is displayed on the upper right of the LAN-Cell’s management pages and returned as OID: System Location System Contact 1.3.6.1.2.1.1.5.0 String (25 characters) which can be used to identify the location of this LAN-Cell. Returned as OID: 1.3.6.1.2.1.1.6.0 String (25 characters) which can be used to identify the contact information for this LAN-Cell. Returned as OID: 1.3.6.1.2.1.1.4.0 84
  • 92. 11.3 System Utilities The System Utilities screen provides several useful tools for network and device diagnostics. Figure 78: System Utilities 11.3.1 Ping (ICMP) The Ping utility sends a series of ICMP packets to a designated IP address to test communications with that IP. Select the interface through which to send the ping, ie. LAN, WAN. Interface Selecting “*” will send the ping to the best available interface based on the LAN-Cell 3’s current routing table. Target Host Enter the IP address to send the ping to. Number of Packets Specify the number of ICMP packets to send out. Ping Press the button to send ping ing packets. 85