SlideShare a Scribd company logo
1 of 17
Parabolic Solar Cooker: Installation Instructions
         Watershed Organization Trust


                              Contents
Notes Before You Begin………….....…………………………………………………..page

Kit Inventory………………………………………………………………………………....page

Assembly……………………………………………………………………………………….page
Part 1: Base………………………………………………………………………......page
Part 2: Parabolic Frame…………………………………………………………..page
Part 3: Reflectors…………………………………………………………………….page
Part 4: Pot Support…………………………………………………………………page

Final Notes, Observations……………………………………………………………….page

Appendix……………………………………………………………………………………….. page
Notes Before You Begin…
The solar parabolic cookers can be used as a supplement to
conventional cooking methods that use gas or fuel-wood for
cooking.

The cooker works best under direct sunlight. Even if the sun-
light is being partially hindered by clouds, its effectiveness is
considerably reduced.

Nevertheless, under direct sunlight, the performance of the
cooker is remarkable. In most of our project areas, it has been
estimated that such clear sky days are available for 6 to 8
months in a year. So this cooker should help reduce the
dependence on gas and fire-wood considerably.

The size of the cooker that is currently being installed can
effectively cook for about 30 adults (or 35-40 school students).
As most of the household cooking takes place during early
mornings or late in the evening, this cooker might not be
suitable. However, schools and Anganwadis do their cooking
later in the day for the mid-day meal scheme. Hence, these
cookers are ideally suited for them. Amongst such schools, it is
recommended to focus on the smaller schools with less than
60 students.

Prior to assembly, the cooker has been packed in two boxes.
One contains the upper dish components, reflectors etc. The
other box contains the lower base components and wheels.
While transporting boxes to the place of assembly, make sure
that a proper pair of boxes has been chosen!
Kit Inventory

         4 Castor Wheels
         Two Cross Members (Base)


         Central Connecting Member
         (Base) – 2 pcs


         Two Vertical Stand Members
         (Base) – 2pcs


         6 (3pair) Vertical Support Beams

         4 (2pair) Frame Support Beams


         28 Dish Flats


         2 Clutch Plates
         6 Connecting Flats (Dish Beams)
         4 Tie Flats
         2 Dish Connecting flats (mount
         Dish to Stand), one Clutch Side
Kit Inventory


2 Pot-Holding Pipes         Grill for Pot           2 Pot-Support Flats


BOLTS


                      B            C                D       E         F

     A
                                                    W

A    Secures dish connectors and connector plates to the base
B    Secures the Base components
C    Secures the pot-holding pipes and flat
D    Secures the dish frame and vertical support beams
E    Secures the four tie flats to the dish frame
F    Secures dish flats to dish frame and vertical support beams
W    Secures the wheels to cross members, and pot-holding flats to
     pot-holding pipe.
Kit Inventory


                            Dish Reflector Sheets


                            Copper Wire, 2 different lengths


Utility Kit:
      Protective Eyewear
      Paintbrush
      Extra Paint (not shown)
      Pliers (not shown)
      4 Wrenches of varying size


You may also need (not included):
    Scissors or a knife
    Metal Clippers
    Extra Pliers
    A Hammer
Assembly
                   Part One: The Base


              3

                            2
   1


1. Mount the four wheels on the ends of the two cross
   members, using W bolts.
2. Also using W bolts, connect the two pieces of the central
   connecting member
3. Secure the central connecting member to the center of the
   two cross members on each end simultaneously with the
   vertical stand members using B bolts.
4. Make sure hooks on the cross member faces outwards
   (highlighted in picture above)
5. You may tighten W bolts with wrench, but do not tighten B
   bolts with wrench yet. (will be done after mounting dish)
Part Two: The Parabolic Dish
1. Using D bolts and connecting flats, assemble the 3 pairs of vertical
support beams. The outside vertical support beams should joined using the
specialized connecting flats provided in the kit**


Note that the bolt heads in the joint on the left must be facing outwards in
order to not obstruct the movement of the dish. It is recommended that for
the joint on the right as well, the bolt heads face outwards.


 2. Using D bolts and connecting flats, connect the central vertical support
 beam to a pair of frame support beams on each end. These two frame
 supports will form the top and bottom of the dish.
 **Put all bolts in place by hand first, and then tighten them all with a wrench, after all bolts in
 the dish are in place.
3. Using D bolts, connect the other two pairs of outer vertical support
beams to the ends of the frame support beams.


4. Using E bolts, connect a tie flat to the left, right, upper, and lower frame
support beams.
5. Begin to connect the dish flats to the central and outer vertical support
 beams using F bolts.
 6. The dish flats have two ends – the one with the straight edge is connected
 to the central support beams, while the one with the slanted edge is
 connected to the outer vertical support beams. Tighten bolts by hand.


7. After all the dish flats have been connected, all the bolts of the dish may
be tightened by wrenches.
8. Before mounting the dish onto the base, slide the full clutch plate (the
one without the open space) onto the side of the vertical stand member
(base) that will hold the larger of the two dish connecting flats.


9. Mount the dish onto the base. Place the second clutch plate behind the
larger dish connecting flat, and secure the assembly with the two A bolts.

10. After ensuring that the entire dish flips from one side to the other
without any obstruction, the B bolts of the base may be tightened.
Part Three: The Reflectors

1. Prepare the Reflectors. Use the shorter copper wires to thread through
the 4 middle pairs of holes, leaving the last pair open on each end:


                                                           Front


                                                           Back


2. For 3 of the reflector sheets, repeat step 1 using the longer wires. These
will be placed over the central vertical support beam.
3. 2 of the reflector sheets have a hole in the center – these are meant to fit
over the pot-holding pipes at the ends.
4. Begin installing reflector sheets in the middle of the dish. Using pliers,
wrap one of the reflectors with the longer wires around the central vertical
support beam. This is easier with two people: one holds the reflector in
place while the other secures the wires to the dish flats. Each subsequent
reflector should overlap the previous by at least the width of one finger.
5. The outermost spaces for the reflectors in the middle section should be
reserved for the reflectors with holes in the middle, which should fit around
the dish connecting joints when they are installed.

6. When the middle section is complete, remove the protective tape from
each reflector.

7. Repeat step 4 for the remaining top and bottom sections. For these,
additional wires should be used in the top pair of holes to secure the
bottom (or top) section reflectors to the middle section. It is possible that
only one of the holes from each reflector can be used, if there is not enough
overlap between middle and bottom (or top) section reflectors. As reflectors
are added outwards from the center, individual reflectors should be angled
slightly to account for the curve of the dish (top and bottom sections only).


8. When the top and bottom sections arecomplete, remove the protective
tape from each reflector.
PartFour: Pot Support


It is suggested that the pot-support is connected at the end
(after fastening all the reflectors to the dish frame), as it might
get in the way of the person holding the reflectors.
1. Slide the end-reflector which has
                                        the hole onto the pot-holding pipe.


2. Using a C bolt, secure the pot-
holding pipe onto the dish
connecting flat. This may require the
use of a hammer.


                                         3. Secure the end-reflector.
                                         4. Repeat on the other side.
5. Secure the pot-support flats to the pot-holding pipes using W bolts.


 6. Place the grill so that it rests on the pot-support flats.
Final Notes and Observations…
Once the assembly is complete, it is important to complete the
session with a proper demonstration of the complete setup.

The benefits of the cooker must be effectively communicated to
both the school staff as well as the person who does the cooking. It
is important to focus on the staff as the ownership lies with them,
and they are also responsible for the maintenance.

The woman who does the cooking at the school is a very key person
as the whole project’s success hinges on her. If she is not motivated
to make efforts to use the cooker, the project is without any doubt
going to fail.

Some other observations made during the last phase of installations
are as follows:

•Pre-dispatch inspection is very important, as a number of boxes
had one or more parts missing.
•We create a considerable amount of garbage while unpacking and
assembling each unit. We need to ensure the school is comfortable
disposing this on their own, else bring it back in your jeep and
dispose at the local raddi-wala near town area.
•It is quite difficult to do the assembly on a hot day, although such
weather is better for demonstration purposes!
•It is important to visit each installation regularly for a couple of
months after the installation to check on how well the it is being
used.
•Shivaji, Devram, Pawan, Rajesh, Mihir and Arjuna know the
complete installation process quite well and can be relied upon to
provide assembly training.

More Related Content

Similar to Solar cooker installation

Grande Palazzo Pool Water Fountain
Grande Palazzo Pool Water FountainGrande Palazzo Pool Water Fountain
Grande Palazzo Pool Water FountainBrook Kavanugh
 
iMovR Cadence Express Standing Desk Converter Installation Manual
iMovR Cadence Express Standing Desk Converter Installation ManualiMovR Cadence Express Standing Desk Converter Installation Manual
iMovR Cadence Express Standing Desk Converter Installation ManualiMovR
 
plano gabinete servidores
plano gabinete servidoresplano gabinete servidores
plano gabinete servidoresAlejandro Jerez
 
8 x 10 Frame Tent Installation Instructions
8 x 10 Frame Tent Installation Instructions8 x 10 Frame Tent Installation Instructions
8 x 10 Frame Tent Installation Instructionscelinatent
 
Cadence plus installation manual
Cadence plus installation manualCadence plus installation manual
Cadence plus installation manualiMovR
 
8 x 12 Frame Tent Installation Instructions
8 x 12 Frame Tent Installation Instructions8 x 12 Frame Tent Installation Instructions
8 x 12 Frame Tent Installation Instructionscelinatent
 
8 x 8 Frame Tent Setup Directions
8 x 8 Frame Tent Setup Directions8 x 8 Frame Tent Setup Directions
8 x 8 Frame Tent Setup Directionscelinatent
 
Effective heat installation guid
Effective heat installation guidEffective heat installation guid
Effective heat installation guidDon Pell
 
20 x 30 Presto Canopy Tent
20 x 30 Presto Canopy Tent20 x 30 Presto Canopy Tent
20 x 30 Presto Canopy Tentcelinatent
 
iMovr Omega Olympus Manual 12 24-15
iMovr Omega Olympus Manual 12 24-15iMovr Omega Olympus Manual 12 24-15
iMovr Omega Olympus Manual 12 24-15iMovR
 
49ers Stadium_56468_INS-5Shts_6-2014
49ers Stadium_56468_INS-5Shts_6-201449ers Stadium_56468_INS-5Shts_6-2014
49ers Stadium_56468_INS-5Shts_6-2014Mike Castillo
 
Mitra Stats Project Final
Mitra Stats Project FinalMitra Stats Project Final
Mitra Stats Project Finalshonabunch1
 
iMovR Cadence Standing Desk Converter Installation Manual
iMovR Cadence Standing Desk Converter Installation ManualiMovR Cadence Standing Desk Converter Installation Manual
iMovR Cadence Standing Desk Converter Installation ManualiMovR
 
Make a fan with a vacuum cleaner
Make a fan with a vacuum cleanerMake a fan with a vacuum cleaner
Make a fan with a vacuum cleanerDealing
 
8 x 16 Frame Tent Installation Instructions
8 x 16 Frame Tent Installation Instructions8 x 16 Frame Tent Installation Instructions
8 x 16 Frame Tent Installation Instructionscelinatent
 

Similar to Solar cooker installation (20)

Build-It: Bicycle Hacksaw
Build-It: Bicycle HacksawBuild-It: Bicycle Hacksaw
Build-It: Bicycle Hacksaw
 
How to assemble a sink base vanity
How to assemble a sink base vanityHow to assemble a sink base vanity
How to assemble a sink base vanity
 
Grande Palazzo Pool Water Fountain
Grande Palazzo Pool Water FountainGrande Palazzo Pool Water Fountain
Grande Palazzo Pool Water Fountain
 
iMovR Cadence Express Standing Desk Converter Installation Manual
iMovR Cadence Express Standing Desk Converter Installation ManualiMovR Cadence Express Standing Desk Converter Installation Manual
iMovR Cadence Express Standing Desk Converter Installation Manual
 
plano gabinete servidores
plano gabinete servidoresplano gabinete servidores
plano gabinete servidores
 
8 x 10 Frame Tent Installation Instructions
8 x 10 Frame Tent Installation Instructions8 x 10 Frame Tent Installation Instructions
8 x 10 Frame Tent Installation Instructions
 
Doc 1010
Doc 1010Doc 1010
Doc 1010
 
Cadence plus installation manual
Cadence plus installation manualCadence plus installation manual
Cadence plus installation manual
 
8 x 12 Frame Tent Installation Instructions
8 x 12 Frame Tent Installation Instructions8 x 12 Frame Tent Installation Instructions
8 x 12 Frame Tent Installation Instructions
 
8 x 8 Frame Tent Setup Directions
8 x 8 Frame Tent Setup Directions8 x 8 Frame Tent Setup Directions
8 x 8 Frame Tent Setup Directions
 
Effective heat installation guid
Effective heat installation guidEffective heat installation guid
Effective heat installation guid
 
6000manual8
6000manual86000manual8
6000manual8
 
20 x 30 Presto Canopy Tent
20 x 30 Presto Canopy Tent20 x 30 Presto Canopy Tent
20 x 30 Presto Canopy Tent
 
Rolling Art Rack Panels Installation Instructions
Rolling Art Rack Panels Installation InstructionsRolling Art Rack Panels Installation Instructions
Rolling Art Rack Panels Installation Instructions
 
iMovr Omega Olympus Manual 12 24-15
iMovr Omega Olympus Manual 12 24-15iMovr Omega Olympus Manual 12 24-15
iMovr Omega Olympus Manual 12 24-15
 
49ers Stadium_56468_INS-5Shts_6-2014
49ers Stadium_56468_INS-5Shts_6-201449ers Stadium_56468_INS-5Shts_6-2014
49ers Stadium_56468_INS-5Shts_6-2014
 
Mitra Stats Project Final
Mitra Stats Project FinalMitra Stats Project Final
Mitra Stats Project Final
 
iMovR Cadence Standing Desk Converter Installation Manual
iMovR Cadence Standing Desk Converter Installation ManualiMovR Cadence Standing Desk Converter Installation Manual
iMovR Cadence Standing Desk Converter Installation Manual
 
Make a fan with a vacuum cleaner
Make a fan with a vacuum cleanerMake a fan with a vacuum cleaner
Make a fan with a vacuum cleaner
 
8 x 16 Frame Tent Installation Instructions
8 x 16 Frame Tent Installation Instructions8 x 16 Frame Tent Installation Instructions
8 x 16 Frame Tent Installation Instructions
 

Recently uploaded

Introduction to Multilingual Retrieval Augmented Generation (RAG)
Introduction to Multilingual Retrieval Augmented Generation (RAG)Introduction to Multilingual Retrieval Augmented Generation (RAG)
Introduction to Multilingual Retrieval Augmented Generation (RAG)Zilliz
 
Exploring Multimodal Embeddings with Milvus
Exploring Multimodal Embeddings with MilvusExploring Multimodal Embeddings with Milvus
Exploring Multimodal Embeddings with MilvusZilliz
 
MS Copilot expands with MS Graph connectors
MS Copilot expands with MS Graph connectorsMS Copilot expands with MS Graph connectors
MS Copilot expands with MS Graph connectorsNanddeep Nachan
 
Apidays New York 2024 - APIs in 2030: The Risk of Technological Sleepwalk by ...
Apidays New York 2024 - APIs in 2030: The Risk of Technological Sleepwalk by ...Apidays New York 2024 - APIs in 2030: The Risk of Technological Sleepwalk by ...
Apidays New York 2024 - APIs in 2030: The Risk of Technological Sleepwalk by ...apidays
 
Mcleodganj Call Girls 🥰 8617370543 Service Offer VIP Hot Model
Mcleodganj Call Girls 🥰 8617370543 Service Offer VIP Hot ModelMcleodganj Call Girls 🥰 8617370543 Service Offer VIP Hot Model
Mcleodganj Call Girls 🥰 8617370543 Service Offer VIP Hot ModelDeepika Singh
 
TrustArc Webinar - Unlock the Power of AI-Driven Data Discovery
TrustArc Webinar - Unlock the Power of AI-Driven Data DiscoveryTrustArc Webinar - Unlock the Power of AI-Driven Data Discovery
TrustArc Webinar - Unlock the Power of AI-Driven Data DiscoveryTrustArc
 
AWS Community Day CPH - Three problems of Terraform
AWS Community Day CPH - Three problems of TerraformAWS Community Day CPH - Three problems of Terraform
AWS Community Day CPH - Three problems of TerraformAndrey Devyatkin
 
Strategies for Landing an Oracle DBA Job as a Fresher
Strategies for Landing an Oracle DBA Job as a FresherStrategies for Landing an Oracle DBA Job as a Fresher
Strategies for Landing an Oracle DBA Job as a FresherRemote DBA Services
 
Cloud Frontiers: A Deep Dive into Serverless Spatial Data and FME
Cloud Frontiers:  A Deep Dive into Serverless Spatial Data and FMECloud Frontiers:  A Deep Dive into Serverless Spatial Data and FME
Cloud Frontiers: A Deep Dive into Serverless Spatial Data and FMESafe Software
 
Strategize a Smooth Tenant-to-tenant Migration and Copilot Takeoff
Strategize a Smooth Tenant-to-tenant Migration and Copilot TakeoffStrategize a Smooth Tenant-to-tenant Migration and Copilot Takeoff
Strategize a Smooth Tenant-to-tenant Migration and Copilot Takeoffsammart93
 
ICT role in 21st century education and its challenges
ICT role in 21st century education and its challengesICT role in 21st century education and its challenges
ICT role in 21st century education and its challengesrafiqahmad00786416
 
DBX First Quarter 2024 Investor Presentation
DBX First Quarter 2024 Investor PresentationDBX First Quarter 2024 Investor Presentation
DBX First Quarter 2024 Investor PresentationDropbox
 
MINDCTI Revenue Release Quarter One 2024
MINDCTI Revenue Release Quarter One 2024MINDCTI Revenue Release Quarter One 2024
MINDCTI Revenue Release Quarter One 2024MIND CTI
 
Apidays New York 2024 - Scaling API-first by Ian Reasor and Radu Cotescu, Adobe
Apidays New York 2024 - Scaling API-first by Ian Reasor and Radu Cotescu, AdobeApidays New York 2024 - Scaling API-first by Ian Reasor and Radu Cotescu, Adobe
Apidays New York 2024 - Scaling API-first by Ian Reasor and Radu Cotescu, Adobeapidays
 
Rising Above_ Dubai Floods and the Fortitude of Dubai International Airport.pdf
Rising Above_ Dubai Floods and the Fortitude of Dubai International Airport.pdfRising Above_ Dubai Floods and the Fortitude of Dubai International Airport.pdf
Rising Above_ Dubai Floods and the Fortitude of Dubai International Airport.pdfOrbitshub
 
WSO2's API Vision: Unifying Control, Empowering Developers
WSO2's API Vision: Unifying Control, Empowering DevelopersWSO2's API Vision: Unifying Control, Empowering Developers
WSO2's API Vision: Unifying Control, Empowering DevelopersWSO2
 
Elevate Developer Efficiency & build GenAI Application with Amazon Q​
Elevate Developer Efficiency & build GenAI Application with Amazon Q​Elevate Developer Efficiency & build GenAI Application with Amazon Q​
Elevate Developer Efficiency & build GenAI Application with Amazon Q​Bhuvaneswari Subramani
 
Apidays New York 2024 - The Good, the Bad and the Governed by David O'Neill, ...
Apidays New York 2024 - The Good, the Bad and the Governed by David O'Neill, ...Apidays New York 2024 - The Good, the Bad and the Governed by David O'Neill, ...
Apidays New York 2024 - The Good, the Bad and the Governed by David O'Neill, ...apidays
 
ProductAnonymous-April2024-WinProductDiscovery-MelissaKlemke
ProductAnonymous-April2024-WinProductDiscovery-MelissaKlemkeProductAnonymous-April2024-WinProductDiscovery-MelissaKlemke
ProductAnonymous-April2024-WinProductDiscovery-MelissaKlemkeProduct Anonymous
 

Recently uploaded (20)

Introduction to Multilingual Retrieval Augmented Generation (RAG)
Introduction to Multilingual Retrieval Augmented Generation (RAG)Introduction to Multilingual Retrieval Augmented Generation (RAG)
Introduction to Multilingual Retrieval Augmented Generation (RAG)
 
Exploring Multimodal Embeddings with Milvus
Exploring Multimodal Embeddings with MilvusExploring Multimodal Embeddings with Milvus
Exploring Multimodal Embeddings with Milvus
 
MS Copilot expands with MS Graph connectors
MS Copilot expands with MS Graph connectorsMS Copilot expands with MS Graph connectors
MS Copilot expands with MS Graph connectors
 
Apidays New York 2024 - APIs in 2030: The Risk of Technological Sleepwalk by ...
Apidays New York 2024 - APIs in 2030: The Risk of Technological Sleepwalk by ...Apidays New York 2024 - APIs in 2030: The Risk of Technological Sleepwalk by ...
Apidays New York 2024 - APIs in 2030: The Risk of Technological Sleepwalk by ...
 
Understanding the FAA Part 107 License ..
Understanding the FAA Part 107 License ..Understanding the FAA Part 107 License ..
Understanding the FAA Part 107 License ..
 
Mcleodganj Call Girls 🥰 8617370543 Service Offer VIP Hot Model
Mcleodganj Call Girls 🥰 8617370543 Service Offer VIP Hot ModelMcleodganj Call Girls 🥰 8617370543 Service Offer VIP Hot Model
Mcleodganj Call Girls 🥰 8617370543 Service Offer VIP Hot Model
 
TrustArc Webinar - Unlock the Power of AI-Driven Data Discovery
TrustArc Webinar - Unlock the Power of AI-Driven Data DiscoveryTrustArc Webinar - Unlock the Power of AI-Driven Data Discovery
TrustArc Webinar - Unlock the Power of AI-Driven Data Discovery
 
AWS Community Day CPH - Three problems of Terraform
AWS Community Day CPH - Three problems of TerraformAWS Community Day CPH - Three problems of Terraform
AWS Community Day CPH - Three problems of Terraform
 
Strategies for Landing an Oracle DBA Job as a Fresher
Strategies for Landing an Oracle DBA Job as a FresherStrategies for Landing an Oracle DBA Job as a Fresher
Strategies for Landing an Oracle DBA Job as a Fresher
 
Cloud Frontiers: A Deep Dive into Serverless Spatial Data and FME
Cloud Frontiers:  A Deep Dive into Serverless Spatial Data and FMECloud Frontiers:  A Deep Dive into Serverless Spatial Data and FME
Cloud Frontiers: A Deep Dive into Serverless Spatial Data and FME
 
Strategize a Smooth Tenant-to-tenant Migration and Copilot Takeoff
Strategize a Smooth Tenant-to-tenant Migration and Copilot TakeoffStrategize a Smooth Tenant-to-tenant Migration and Copilot Takeoff
Strategize a Smooth Tenant-to-tenant Migration and Copilot Takeoff
 
ICT role in 21st century education and its challenges
ICT role in 21st century education and its challengesICT role in 21st century education and its challenges
ICT role in 21st century education and its challenges
 
DBX First Quarter 2024 Investor Presentation
DBX First Quarter 2024 Investor PresentationDBX First Quarter 2024 Investor Presentation
DBX First Quarter 2024 Investor Presentation
 
MINDCTI Revenue Release Quarter One 2024
MINDCTI Revenue Release Quarter One 2024MINDCTI Revenue Release Quarter One 2024
MINDCTI Revenue Release Quarter One 2024
 
Apidays New York 2024 - Scaling API-first by Ian Reasor and Radu Cotescu, Adobe
Apidays New York 2024 - Scaling API-first by Ian Reasor and Radu Cotescu, AdobeApidays New York 2024 - Scaling API-first by Ian Reasor and Radu Cotescu, Adobe
Apidays New York 2024 - Scaling API-first by Ian Reasor and Radu Cotescu, Adobe
 
Rising Above_ Dubai Floods and the Fortitude of Dubai International Airport.pdf
Rising Above_ Dubai Floods and the Fortitude of Dubai International Airport.pdfRising Above_ Dubai Floods and the Fortitude of Dubai International Airport.pdf
Rising Above_ Dubai Floods and the Fortitude of Dubai International Airport.pdf
 
WSO2's API Vision: Unifying Control, Empowering Developers
WSO2's API Vision: Unifying Control, Empowering DevelopersWSO2's API Vision: Unifying Control, Empowering Developers
WSO2's API Vision: Unifying Control, Empowering Developers
 
Elevate Developer Efficiency & build GenAI Application with Amazon Q​
Elevate Developer Efficiency & build GenAI Application with Amazon Q​Elevate Developer Efficiency & build GenAI Application with Amazon Q​
Elevate Developer Efficiency & build GenAI Application with Amazon Q​
 
Apidays New York 2024 - The Good, the Bad and the Governed by David O'Neill, ...
Apidays New York 2024 - The Good, the Bad and the Governed by David O'Neill, ...Apidays New York 2024 - The Good, the Bad and the Governed by David O'Neill, ...
Apidays New York 2024 - The Good, the Bad and the Governed by David O'Neill, ...
 
ProductAnonymous-April2024-WinProductDiscovery-MelissaKlemke
ProductAnonymous-April2024-WinProductDiscovery-MelissaKlemkeProductAnonymous-April2024-WinProductDiscovery-MelissaKlemke
ProductAnonymous-April2024-WinProductDiscovery-MelissaKlemke
 

Solar cooker installation

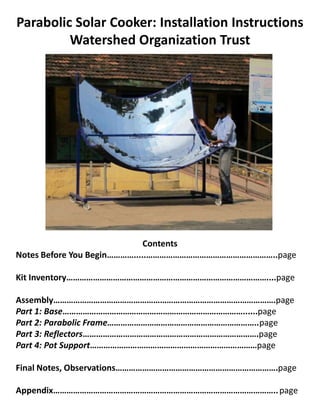
  • 1. Parabolic Solar Cooker: Installation Instructions Watershed Organization Trust Contents Notes Before You Begin………….....…………………………………………………..page Kit Inventory………………………………………………………………………………....page Assembly……………………………………………………………………………………….page Part 1: Base………………………………………………………………………......page Part 2: Parabolic Frame…………………………………………………………..page Part 3: Reflectors…………………………………………………………………….page Part 4: Pot Support…………………………………………………………………page Final Notes, Observations……………………………………………………………….page Appendix……………………………………………………………………………………….. page
  • 2. Notes Before You Begin… The solar parabolic cookers can be used as a supplement to conventional cooking methods that use gas or fuel-wood for cooking. The cooker works best under direct sunlight. Even if the sun- light is being partially hindered by clouds, its effectiveness is considerably reduced. Nevertheless, under direct sunlight, the performance of the cooker is remarkable. In most of our project areas, it has been estimated that such clear sky days are available for 6 to 8 months in a year. So this cooker should help reduce the dependence on gas and fire-wood considerably. The size of the cooker that is currently being installed can effectively cook for about 30 adults (or 35-40 school students). As most of the household cooking takes place during early mornings or late in the evening, this cooker might not be suitable. However, schools and Anganwadis do their cooking later in the day for the mid-day meal scheme. Hence, these cookers are ideally suited for them. Amongst such schools, it is recommended to focus on the smaller schools with less than 60 students. Prior to assembly, the cooker has been packed in two boxes. One contains the upper dish components, reflectors etc. The other box contains the lower base components and wheels. While transporting boxes to the place of assembly, make sure that a proper pair of boxes has been chosen!
  • 3. Kit Inventory 4 Castor Wheels Two Cross Members (Base) Central Connecting Member (Base) – 2 pcs Two Vertical Stand Members (Base) – 2pcs 6 (3pair) Vertical Support Beams 4 (2pair) Frame Support Beams 28 Dish Flats 2 Clutch Plates 6 Connecting Flats (Dish Beams) 4 Tie Flats 2 Dish Connecting flats (mount Dish to Stand), one Clutch Side
  • 4. Kit Inventory 2 Pot-Holding Pipes Grill for Pot 2 Pot-Support Flats BOLTS B C D E F A W A Secures dish connectors and connector plates to the base B Secures the Base components C Secures the pot-holding pipes and flat D Secures the dish frame and vertical support beams E Secures the four tie flats to the dish frame F Secures dish flats to dish frame and vertical support beams W Secures the wheels to cross members, and pot-holding flats to pot-holding pipe.
  • 5. Kit Inventory Dish Reflector Sheets Copper Wire, 2 different lengths Utility Kit: Protective Eyewear Paintbrush Extra Paint (not shown) Pliers (not shown) 4 Wrenches of varying size You may also need (not included): Scissors or a knife Metal Clippers Extra Pliers A Hammer
  • 6. Assembly Part One: The Base 3 2 1 1. Mount the four wheels on the ends of the two cross members, using W bolts. 2. Also using W bolts, connect the two pieces of the central connecting member 3. Secure the central connecting member to the center of the two cross members on each end simultaneously with the vertical stand members using B bolts. 4. Make sure hooks on the cross member faces outwards (highlighted in picture above) 5. You may tighten W bolts with wrench, but do not tighten B bolts with wrench yet. (will be done after mounting dish)
  • 7. Part Two: The Parabolic Dish
  • 8. 1. Using D bolts and connecting flats, assemble the 3 pairs of vertical support beams. The outside vertical support beams should joined using the specialized connecting flats provided in the kit** Note that the bolt heads in the joint on the left must be facing outwards in order to not obstruct the movement of the dish. It is recommended that for the joint on the right as well, the bolt heads face outwards. 2. Using D bolts and connecting flats, connect the central vertical support beam to a pair of frame support beams on each end. These two frame supports will form the top and bottom of the dish. **Put all bolts in place by hand first, and then tighten them all with a wrench, after all bolts in the dish are in place.
  • 9. 3. Using D bolts, connect the other two pairs of outer vertical support beams to the ends of the frame support beams. 4. Using E bolts, connect a tie flat to the left, right, upper, and lower frame support beams.
  • 10. 5. Begin to connect the dish flats to the central and outer vertical support beams using F bolts. 6. The dish flats have two ends – the one with the straight edge is connected to the central support beams, while the one with the slanted edge is connected to the outer vertical support beams. Tighten bolts by hand. 7. After all the dish flats have been connected, all the bolts of the dish may be tightened by wrenches. 8. Before mounting the dish onto the base, slide the full clutch plate (the one without the open space) onto the side of the vertical stand member (base) that will hold the larger of the two dish connecting flats. 9. Mount the dish onto the base. Place the second clutch plate behind the larger dish connecting flat, and secure the assembly with the two A bolts. 10. After ensuring that the entire dish flips from one side to the other without any obstruction, the B bolts of the base may be tightened.
  • 11. Part Three: The Reflectors 1. Prepare the Reflectors. Use the shorter copper wires to thread through the 4 middle pairs of holes, leaving the last pair open on each end: Front Back 2. For 3 of the reflector sheets, repeat step 1 using the longer wires. These will be placed over the central vertical support beam. 3. 2 of the reflector sheets have a hole in the center – these are meant to fit over the pot-holding pipes at the ends. 4. Begin installing reflector sheets in the middle of the dish. Using pliers, wrap one of the reflectors with the longer wires around the central vertical support beam. This is easier with two people: one holds the reflector in place while the other secures the wires to the dish flats. Each subsequent reflector should overlap the previous by at least the width of one finger.
  • 12. 5. The outermost spaces for the reflectors in the middle section should be reserved for the reflectors with holes in the middle, which should fit around the dish connecting joints when they are installed. 6. When the middle section is complete, remove the protective tape from each reflector. 7. Repeat step 4 for the remaining top and bottom sections. For these, additional wires should be used in the top pair of holes to secure the bottom (or top) section reflectors to the middle section. It is possible that only one of the holes from each reflector can be used, if there is not enough overlap between middle and bottom (or top) section reflectors. As reflectors are added outwards from the center, individual reflectors should be angled slightly to account for the curve of the dish (top and bottom sections only). 8. When the top and bottom sections arecomplete, remove the protective tape from each reflector.
  • 13. PartFour: Pot Support It is suggested that the pot-support is connected at the end (after fastening all the reflectors to the dish frame), as it might get in the way of the person holding the reflectors.
  • 14. 1. Slide the end-reflector which has the hole onto the pot-holding pipe. 2. Using a C bolt, secure the pot- holding pipe onto the dish connecting flat. This may require the use of a hammer. 3. Secure the end-reflector. 4. Repeat on the other side.
  • 15. 5. Secure the pot-support flats to the pot-holding pipes using W bolts. 6. Place the grill so that it rests on the pot-support flats.
  • 16.
  • 17. Final Notes and Observations… Once the assembly is complete, it is important to complete the session with a proper demonstration of the complete setup. The benefits of the cooker must be effectively communicated to both the school staff as well as the person who does the cooking. It is important to focus on the staff as the ownership lies with them, and they are also responsible for the maintenance. The woman who does the cooking at the school is a very key person as the whole project’s success hinges on her. If she is not motivated to make efforts to use the cooker, the project is without any doubt going to fail. Some other observations made during the last phase of installations are as follows: •Pre-dispatch inspection is very important, as a number of boxes had one or more parts missing. •We create a considerable amount of garbage while unpacking and assembling each unit. We need to ensure the school is comfortable disposing this on their own, else bring it back in your jeep and dispose at the local raddi-wala near town area. •It is quite difficult to do the assembly on a hot day, although such weather is better for demonstration purposes! •It is important to visit each installation regularly for a couple of months after the installation to check on how well the it is being used. •Shivaji, Devram, Pawan, Rajesh, Mihir and Arjuna know the complete installation process quite well and can be relied upon to provide assembly training.