1. EQUIVALENTS UNIT COVERAGE: UNIT 1 & UNIT 2
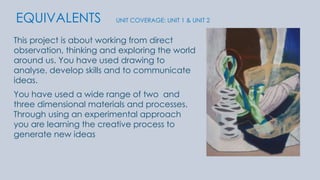
This project is about working from direct
observation, thinking and exploring the world
around us. You have used drawing to
analyse, develop skills and to communicate
ideas.
You have used a wide range of two and
three dimensional materials and processes.
Through using an experimental approach
you are learning the creative process to
generate new ideas
2. EQUIVALENTS
COVERAGE: UNIT 1 & UNIT 2
THE ASSIGNMENT IS DESIGNED TO PRODUCED OPPORTUNITIES TO PRODUCE
EVIDENCE FOR THESE UNITS
Unit 1:
2D 3D Visual Language
You need to produce work, which
demonstrates development of skills and
creativity in using visual language
The work should be organised and
annotated to show your evaluative skills and
development over time. Also
experimentation with mark-making and
object-making techniques, formal elements
and sources.
Evidence should be from contextual studies,
developmental and/or final project work
Unit 2:
Materials, Techniques and Processes
Produce work, which demonstrates
your understanding of skills in using
media, materials, techniques,
processes and associated
technology. This should include;
samples, trials, notes, records and
exploratory project work
4. CREATING STUDIES FROM DIFFERENT SOURCES
Assessment criteria: Examples of ‘primary and secondary sources with a description of how others have used visual
language in their work.
This still life is an
example of a
primary source, as it
is the original piece
not a copy, for
example a photo or
painting.
This image here is a secondary
source, as it is a collage based
on the primary still life.
As part of out study of the still
life, we created different
studies from the primary source
itself and our previous studies.
Therefore we gained
experience of recreating the
same image from a range of
different sources.
A B
My collage
The primary source
5. FORMAL ELEMENTS, MARK MAKING
AND OBJECT MAKING
Assessment criteria: examples of your work where you have used a combination of formal elements, mark-making and object-making
to develop ideas and intentions.
Line drawing- different thickness of lines can
show an objects state (dark lines = hard/solid)
Tone- use of tone
creates shadow
and depth in an
image. Different
contrasts can
create different
effects.
This is high in contrast, shadow is much darker
than in reality.
Texture-mark making, techniques such as
crosshatching can create the impression
of texture.
6. VISUAL LANGUAGE
Assessment criteria: An example and commentary of how you have used visual language in your work and how it has been
influenced by others’ work.
Visual language is a system of
communication using visual
elements. Use of different shapes
and colour is a form of visual
language. For example in
Matisse's piece he uses curved
shapes and earthy tones in order
for the image to seem natural.
The main object in my still life
(left) was a metal weighing
scale. Using more rectangular
shapes and harder lines shows its
solid form.
The main feature of this painting is the
way in which colour is used. They give it
warmth. I used the same colours to
recreate this, I like how it contradicts with
the solid metal (more unnatural) that the
still life is made from.
My piece-influenced by
the visual language
shown in Matisse's piece.
Oil painting by Matisse
7. WORKING WITH DIFFERENT MATERIALS
Assessment criteria: Examples where you have worked with a range of techniques with information describing the
characteristics of materials you have used
Metal work- we were using relatively soft metals
and therefore easily malleable. Using clamps,
guillotines and hammers to create the right
shapes and sizes. Clamping the metal enable you
to bend the metal more easily, for example when
creating tight curves or corners.
Welding the metal was done with a spot welder.
Wood work- to shape the wood a number of
different tools were needed which resulted in
learning a variety of different techniques. For
example how to angle the wood to create the
curved corners on each piece.
8. SAFETY AND DEVELOPMENT OF WORK
Assessment criteria: Use materials, techniques and technology safely in creating and developing work. Experiment and
explore the potential of using these to develop ideas
Example: Demonstration of techniques and Health & Safety rules of working in the workshop. Examples of work developed;
drawings, colour studies, collages, models and how you have developed them.
Safety :
Safety rules in the workshop:
• Always wear an apron to prevent harm to clothes and skin.
• When using the equipment wear goggles to prevent sawdust/
slinters/sparks harming the eyes.
• Only one person on a piece of equipment at a time. Crowding
can cause accidents.
• Shoes must not be open toed and rigid to prevent harm
• Keep fingers away from blades and sanders.
It is important to know what each
tool is used for, e.g. the band saw is
used for straight lines, you would use
the fret saw to cut sharper curves.
Band saw
My safety/techniques
notes in sketch book.
Each technique was demonstrated
before we were able to use the
equipment. This prevents harm to
the user and also the equipment.
E.g. we were shown to keep fingers
away from the band saw to use
specific tools to push through
smaller pieces of wood.
9. SAFETY AND DEVELOPMENT OF WORK
Assessment criteria: Use materials, techniques and technology safely in creating and developing work. Experiment and
explore the potential of using these to develop ideas
Development:
A series of object making techniques used to develop my ideas.
Started with basic
models working
from images we
took of the still life.
Using materials
such as cardboard
to create basic
shapes.
We then developed
our designs further
using card.
Abstracting the
original images in
order to focus on
shape. I decided to
keep the overall shape
of the design however
swap the curves for
geometric shapes
For my final piece we were
using resistant materials
such as wood. I recreated
my previous card design,
adapting it slightly. I curved
the wood to make the
piece look less like a stack
of bricks and also
positioned them as if it were
spiralling upward to show
movement.
Model 1 Model 2 Model 3-Final
model
10. PROJECT EVALUATION
Assessment criteria: evaluation of your work is vital to your development as an artist/designer –it is important to question your
approach, what have you learnt, how have you developed an idea and what you would do differently in future to improve.
By the end of this project, my goal was to create a 3d piece incorporating what I have learnt throughout this unit, to do with primary and
secondary sources, formal elements, and also how to develop my ideas. Here I will evaluate how effective my research and development
was, and will also review the overall success of my final piece.
A key factor which contributes to the efficiency and detail of my research is time management, I believe my time management overall
was good, all artist research was handed in on time. The only difficulty being that in some pieces, my 3D/relief collage for example, I was
unable to finish in class this meant completing it in my own time. In class I found time limits difficult when in balance with quality of finished
work, however by the end of the half-term I believe I was able to order myself so work could be finished on time to a high standard. The
stage of the project I found most difficult was the design development of my 3D final outcome (making models using cardboard and
other objects) this was hard as we had limited time to brainstorm ideas and therefore my design kept changing as I went along, this
slowed the development process. Despite this once my ideas were clear it was easy to create my final piece and complete my
sketchbook.
I researched into a range of artists to gather inspiration from a variety of sources. We had to research artists from a
range of different genres, in order to gather ideas from a mix of styles, such as collage or cubism. For example I
studied a Henri Matisse oil painting, focusing on colour. I found research focusing on particular elements of the work
(such as colour) most useful as it allowed me to learn more about how to use this concept e.g. colour to create a
certain effect such as mood or environment. These studies were useful in developing my skills and creating inspiration for
later pieces. For my research I used websites such as Wikiart to gain information.
Here I used the colours studied in the Matisse to paint my still life work in the same style, the earthy tones contradict with
the original materials the still life is made from, and the scales were solid metal. So by researching and using colour I was
able to put the warmth of the Matisse into my still life.
11. Development of ideas was important to gain the most out of my research. On the most part I feel I developed
my ideas well and to a great extent. For example on the collage extension projects I believe I used my
research well to form my ideas and then developed these further. For example I saw texture was a key element
in Picasso’s collages, therefore I made it the main feature of my 2D collage, developing this idea of texture I
then bought in more materials to build up my 3D collage. I believe I could have done more in developing my
experiments with formal elements, perhaps repeating studies to discover more approaches to sketching
techniques such tone and texture. I used drawings to develop my work, for example when developing my still
life work on the formal elements. I drew some studies of this still life before attempting a final sketch.
In my 3D model I felt that development from my second card design to the final outcome went well, I was able to stick to the design
but also modify it to suit the materials available, and create a better finish. For my final model I used wood, as I wanted to stick to the
same materials the still life was made from as I was already abstracting its overall shape.
This abstraction was influenced by cubist models and painting I have researched, such as Juan Gris. The process of creating my piece
was cutting the cuboid pieces to exact size using the band saw. Following that using a number of sanding machines. I wanted to
round out my pieces (I gave them a concave edge) to make the model more interesting and make it flow better as a complete
model not just individual pieces stacked on top of one another, which is what I felt the card model looked like.
My Final Outcome
This final outcomes main features are its shape, a simplified, tactile version of the original shape is shown throughout the development.
This meant that qualities found in the original still life could still be seen in my final design.
The original brief for the still life was to develop work from primary and secondary sources. My model was based on the original still life
but also, my sketches and collage, this meant I had a range of different views to approach my design from.
Overall, from this project as a whole I have learnt how to use a range of new techniques, creating studies
from a range of different sources and using a number of materials, ink, acrylic, metal and wood. I have
learnt how to communicate my ideas through visual elements such as shape and colour. How to present
my work clearly I have found difficult however I believe my sketchbook does show how my presentation skills
have progressed. Now I have learnt to develop designs and use a number of techniques, If given the
chance to repeat the project I would create more complex designs which will allow me to develop my
work more.