Zoom H4n Digital Recorder
•Download as PPTX, PDF•
2 likes•4,082 views

A brief presentation outlining the basic operation and use of the Zoom H4n digital 2-track recorder. A very popular unit well suited for double system sound recording for film and video applications.

Recommended
More Related Content
More from FilmTVsound
More from FilmTVsound (14)
Recently uploaded
Recently uploaded (20)
Zoom H4n Digital Recorder
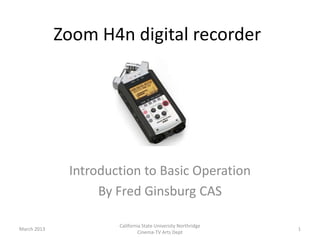
- 1. Zoom H4n digital recorder Introduction to Basic Operation By Fred Ginsburg CAS California State University Northridge March 2013 1 Cinema-TV Arts Dept
- 2. Zoom H4n features • Can record 2 tracks of audio from either the built-in mic or from external XLR (or ¼-inch) mic inputs. • Can record two pair of stereo inputs simultaneously from the built-in mic AND the XLR mic inputs. • Could function as a 4 track multitrack capable of sync playback of tracks while recording or overdubbing new tracks; mixdown; effects. March 2013 California State University Northridge 2 Cinema-TV Arts Dept
- 3. Stereo Mode (recommended) • Conventional recording of two tracks. • Select either “Mic” or “1+2” from the front panel. • Mic refers to the built-in stereo mic, or plugging a stereo mini (external) mic into the hole on the back. • 1+2 refers to the combo XLR or ¼-inch inputs. California State University Northridge March 2013 Cinema-TV Arts Dept 3
- 4. STAMINA mode • Accessed via switch inside battery compartment • Allows extended recording time from batteries • Limits you to MP3 or 44.1k settings, which are lower quality • NOT RECOMMENDED! March 2013 4
- 5. 4CH mode • Records four tracks simultaneously as two pair of stereo tracks. • Could record live ambiance or surround from built-in stereo mic along with XLR inputs from external mics. • More practical for recording live events, such as concerts or performances. • Not all that useful for general film production. March 2013 California State University Northridge 5 Cinema-TV Arts Dept
- 6. MTR (multitrack) mode • Functions as a simple multitrack music recorder, recording up to 4 tracks one or two at a time. • Allows overdubbing, or combining live tracks with pre-recorded tracks. • Not recommended. Better to do this kind of recording with computer software that is properly suited to the task. California State University Northridge March 2013 Cinema-TV Arts Dept 6
- 7. Front Controls March 2013 California State University Northridge 7 Cinema-TV Arts Dept
- 8. Rear Controls California State University Northridge March 2013 8 Cinema-TV Arts Dept
- 9. Getting Started • Install two AA alkaline batteries • Make sure that STAMINA switch is OFF • Insert SD card. California State University Northridge March 2013 9 Cinema-TV Arts Dept
- 10. Power ON by sliding the HOLD switch on the side of the unit. California State University Northridge March 2013 Cinema-TV Arts Dept 10
- 11. Format your SD card • Press MENU • Rotate scroll wheel to SD CARD and press to “enter” • Select FORMAT and press. • Press in the scroll wheel to Confirm when prompted by pressing again. California State University Northridge March 2013 11 Cinema-TV Arts Dept
- 12. Select recording MODE • Press MENU • Rotate scroll wheel to MODE • Press in the scroll wheel to “enter” • Scroll to STEREO (or other mode) • Press in the scroll wheel to “enter” California State University Northridge March 2013 12 Cinema-TV Arts Dept
- 13. Select recording quality WAV48k/16bit • MP3 = compressed • 44.1 = audio CD • 16bit/48k = professional choice • 24bit/48k = highest quality, but make sure your edit system supports it California State University Northridge March 2013 13 Cinema-TV Arts Dept
- 14. Recording • Select MIC (built-in) or 1+2 (XLR inputs) • Press REC button once to enter standby (meters are now active) • Note that circular light blinks in standby March 2013 California State University Northridge 14 Cinema-TV Arts Dept
- 15. Set levels • Set recording levels around -20dB, up to -12dB, but never exceed 0dB ever! • Press (blinking) REC button again to begin recording. • Press STOP button to end recording. California State University Northridge 2/28/2013 Cinema-TV Arts Dept 15
- 16. Recording with only one mic • MONO MIX record mode puts single mic input onto both recording channels. • Convenient for headphone monitoring. California State University Northridge March 2013 16 Cinema-TV Arts Dept
- 17. Pre Record function • Records the two seconds of audio that occurred PRIOR to going from standby into RECORD, and then adds that audio to the beginning of your file. • Prevents you from missing the “start” of a session. • You have to wait; cannot begin recording again immediately after stop. California State University Northridge March 2013 17 Cinema-TV Arts Dept
- 18. Low Cut function California State University Northridge March 2013 18 Cinema-TV Arts Dept
- 19. Compressor Limiter California State University Northridge March 2013 19 Cinema-TV Arts Dept
- 20. Automatic Recording Level • Automatic Level Control of recording level • NOT RECOMMENDED! • System searches for any audio, and does not know good dialog or SFX from background noises • Does not know whispers from shouts, or dramatic pauses March 2013 20
- 21. Zoom H4n is complex • This presentation only covers basic recording for film, video, and multi-media applications. • The unit has many more features & functions, mainly intended for amateur music recording and editing. • For more detailed instructions, go online and search H4n-manual.pdf March 2013 California State University Northridge 21 Cinema-TV Arts Dept