Lesson 5 - Create Projects And Upload Files
•
0 likes•337 views

How This Lesson Will Help You This lesson will provide you with the steps used to setup the collaborative workspace where you can upload and share artwork, images, and other digital assets with your colleagues. Topics in This Lesson After completing this lesson, you will be able to: • Define and Create a Project • Upload Files Into a Project • Describe Additional Upload Options

Recommended
More Related Content
Similar to Lesson 5 - Create Projects And Upload Files
Similar to Lesson 5 - Create Projects And Upload Files (20)
More from Informatica
More from Informatica (13)
Recently uploaded
Recently uploaded (20)
Lesson 5 - Create Projects And Upload Files
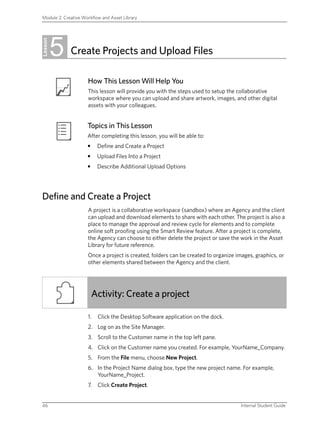
- 1. Module 2: Creative Workflow and Asset Library 5 Lesson Create Projects and Upload Files How This Lesson Will Help You This lesson will provide you with the steps used to setup the collaborative workspace where you can upload and share artwork, images, and other digital assets with your colleagues. Topics in This Lesson After completing this lesson, you will be able to: • Define and Create a Project • Upload Files Into a Project • Describe Additional Upload Options Define and Create a Project A project is a collaborative workspace (sandbox) where an Agency and the client can upload and download elements to share with each other. The project is also a place to manage the approval and review cycle for elements and to complete online soft proofing using the Smart Review feature. After a project is complete, the Agency can choose to either delete the project or save the work in the Asset Library for future reference. Once a project is created, folders can be created to organize images, graphics, or other elements shared between the Agency and the client. Activity: Create a project 1. Click the Desktop Software application on the dock. 2. Log on as the Site Manager. 3. Scroll to the Customer name in the top left pane. 4. Click on the Customer name you created. For example, YourName_Company. 5. From the File menu, choose New Project. 6. In the Project Name dialog box, type the new project name. For example, YourName_Project. 7. Click Create Project. 46 Internal Student Guide
- 2. Create Projects and Upload Files The new project appears in the left pane under Projects. 8. Be sure the Project name that you just created is selected. 9. On the File menu, choose New Folder. An Untitled Folder appears in the top pane. 10. Name the folder Images. Upload Files Into a Project You can upload pictures, graphics, text, or other digital assets as elements to a project. See the Appendix for a comprehensive list of the Creative Workflow 3.0 supported file types. Activity: Upload files to a project 1. Log on to the Desktop Software as the Site Manager. 2. Scroll to the Customer name in the top left pane. 3. Click on the Customer name. For example, YourName_Company. 4. Click the arrow beside Projects to expand it. 5. Click on the Project that needs files added. For example, YourName_Project. 6. Click on the Images folder within the project. 7. On your computer, browse to the Resource CD and locate the first set of images for this lesson. Or use the images and network path provided by the instructor for the images. To connect to the server, on the Mac menu, click Go, and choose Connect to Server. Enter Server address. For example: smb://araxi 8. From the ImagesSet1 folder, select and drag these images from your computer to the Images folder file display area: cactusclimbHR_cmyk.tif – man41.tif – running01.tif – carte_def.tif – foot_fond_blue_flat.tif – test.tif – skate_supreme_dev_gray.tif – skate_supreme_dev.tif – Internal Support for Portal Products 47
- 3. Module 2: Creative Workflow and Asset Library The Upload window appears with the files in the Elements to Upload dialog box. 9. Click Uploads. The Uploads & Downloads window appears and displays the upload process, number of files processed, and time to complete processing. The upload may take some time to complete 10. Click the Uploads tab to view processing information. 11. Click the triangle beside the item in the name column to display information about each element uploaded. Any error or warning messages related to the upload process will appear in the Processing Results frame at the bottom of the window. Select or deselect the icons at the bottom of the Uploads tab to display or hide error, warning, and general information about the uploads . Desktop Software—Uploads Tab View 12. Once the upload is complete, return to the Elements tab. 13. Toggle between the three displays (Gallery, List, and Table) of the content in the Images folder using the icons at the bottom of the window. 48 Internal Student Guide
- 4. Create Projects and Upload Files Describe Additional Upload Options Files can also be uploaded by using one of the following processes. • Select File > Upload. • Click the Upload Files icon at the bottom of the Elements tab. Identify Supported File Formats Various file formats are supported in theCreative Workflow/Asset Library environment. To view supported file formats • Use the Creative Workflow online help to search for a list of supported file formats. Lesson Summary After completing this lesson, you are now able to: • Define and Create a Project • Upload Files Into a Project • Describe Additional Upload Options Internal Support for Portal Products 49