Book Sex Workers Available Kolkata Call Girls Service Airport Kolkata ✔ 62971...
How to paint any pattern on your walls
1. How to Paint any Pattern on your Walls
If you’ve ever seen a magazine picture with a cute checkered, zigzagged or striped wall and
thought “if only I could do that,” these tips are for you. Those accent walls are in right now and
this is a project you can do, from start to finish, in just one afternoon.
An accent wall is a great way to add interest, colour and style to a room. It also helps to ground a
large room or a space with very tall ceilings and can even be the perfect backdrop for a bed,
vanity or desk.
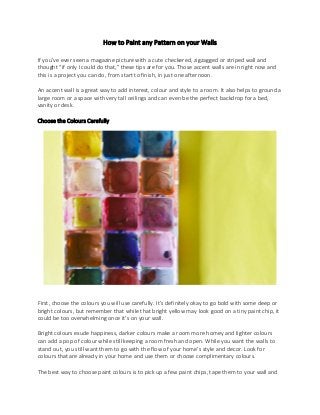
Choose the Colours Carefully
First, choose the colours you will use carefully. It’s definitely okay to go bold with some deep or
bright colours, but remember that while that bright yellow may look good on a tiny paint chip, it
could be too overwhelming once it’s on your wall.
Bright colours exude happiness, darker colours make a room more homey and lighter colours
can add a pop of colour while still keeping a room fresh and open. While you want the walls to
stand out, you still want them to go with the flow of your home’s style and decor. Look for
colours that are already in your home and use them or choose complimentary colours.
The best way to choose paint colours is to pick up a few paint chips, tape them to your wall and
2. then live with them for a few days. Look at the colours in different lights at different times of the
day so you can decide which ones look the best.
Depending on the kind of pattern you are painting, you may need more than one colour. For
example, if you’re adding a few broad stripes, you’ll need a background colour and a colour for
the stripes. One simple way to make an accent wall blend in with the rest of the room is to use
the existing wall colour as the base colour and then pick a different colour for the design.
Prepare the Walls
Once you’ve chosen the colours and are ready to start painting, prepare the wall first. Move
furniture out of your way and cover furniture and the floor with drop cloths. Then, use a damp
rag to wipe the entire wall clean, making sure to focus on corners that collect cobwebs and
baseboards that are prone to being dusty.
If you notice any scratches, dents or holes, use plaster to fix them. Be sure to sand the area
smooth when you are done and then wipe away any dust and leftover plaster.
Then, when the wall is completely dry, you can start to tape it off. Use painter’s tape to make
crisp corners and tape off things like light switch plates, outlet covers, light fixtures and anything
else on the wall.
If you are using one colour as the base, paint the wall that colour. Start with a paintbrush and cut
3. in from the corners on the sides and top of the wall and around fixtures to make the rest of the
job easier.
Walls that are very dark will require a primer. Use this first, according to the directions on the
package, and then let it dry before you add the paint.
Then, use a paint roller to make broad “W” shapes across the wall until you have covered it
completely. If you want, you can use a paint sprayer to make covering the entire wall fast and
easy. When the wall is completely dry you can start to prepare it for the design.
Plan and Tape off Your Design
Now you’re ready to start planning and creating your design. The easiest way to do this is to start
with a sketch. Use graph paper to draw a box that represents your wall, to scale. Then, draw in
your design so that it is evenly spaced and centred.
For example, if you are going for diamonds, draw several diagonal lines, that are of equidistance
from each other, going both directions across the wall. You can use this technique for stripes,
squares or any other pattern.
Then, use a tape measure and a pencil to mark out the pattern on your wall. Make lines and dots
to mark measurements so you know where you need to draw lines. Use a chalk snap line to
make the pattern on your wall. Stand back and make sure everything looks perfect before you
move on to the next step.
Use painter’s tape on top of the chalk lines to create the design. Make sure you lay it down flat,
smooth and level. Again, stand back and make sure the pattern still looks perfectly aligned.
Now, use a paint roller and the second colour to create the design. The tape guides will help you
keep the paint where you want it and make it easy to create clean, crisp lines.
Unveil the Finished Product
Let the paint start to dry but while it is still slightly tacky, remove the painter’s tape. If you wait
until it is completely dry, the paint will peel and leave rough edges when you remove the tape.
Pull up on the tape firmly, pulling it away from the painted side of the wall to leave a crisp line.
If you notice any mistakes, rough edges or patches that don’t look right, fix them now. Use a
paintbrush to make touch ups and if needed, use a roller to fill in larger sections.
Now, let the paint dry completely. It’s a good idea to let it dry overnight so you don’t risk
smudging or damaging your pattern. When it is all the way dry, you can come back with a slightly
damp rag and wipe the chalk marks off the wall and stand back and admire your work!
4. Painting a pattern on a wall is a project anyone with a measuring tape and paint can take on. The
effect is detailed and makes a statement, but the project itself is a simple one you can do in just
one afternoon.
To find out how we can help you with your painting and decorating, please see
http://www.hss.com/cl/1014400/Painting-and-Decorating.html