HMCS Vancouver Pre-Deployment Brief - May 2024 (Web Version).pptx
ACCUPLACER_auto_proctoring_exam_5.2022.pptx
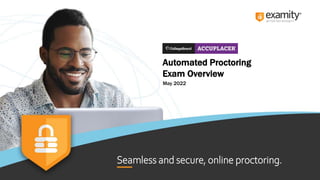
1. Seamless and secure, online proctoring..
May 2022
Automated Proctoring
Exam Overview
2. 1
Step 1: Sign in to Examity
Step 2: Start Exam
Step 3: Systems Check
Step 4: Install Extension and Grant Permissions
Step 5: Authentication
Step 6: Review Instructions
Step 7: User Agreement
Step 8: Screen Launch
Step 9: Begin Exam/Examity Sidebar
Step 10: End Proctoring Session
Step 11: Survey (Optional)
3. Automated Proctoring Exam Overview
2
Sign in to
Examity
1
Click
Start Exam
2
Systems
Check
3
Install Examity
Extension and
Grant Permissions
4
Authentication
5
Review
Instructions
6
User
Agreement
7
Screen
Launch
8
Begin Exam/
Examity Sidebar
9
End Proctoring
Session
10
Survey
(Optional)
11
4. Automated Proctoring Exam Overview
3
Sign in to
Examity
1
The test-taker will need to sign in to Examity, if they have not already done so, using
the link provided in the welcome email: https://on.examity.com/V5/x/217
5. Automated Proctoring Exam Overview
4
Start Exam
2
Once logged in, the test-taker will see their exam card on their dashboard.
The automated exam workflow does not require the test-taker to schedule their exam.
The test-taker can click Start Exam and start their exam session immediately.
6. Automated Proctoring Exam Overview
5
System Check
3
The test-taker will be prompted to complete the systems check and then press Next.
7. Automated Proctoring Exam Overview
6
Install the
Examity
Extension
4
Next, the test-taker will need to install the Examity extension by selecting Add Extension.
8. Automated Proctoring Exam Overview
7
Install the
Examity
Extension
Add to Chrome
4
A pop-up window will appear. The test-taker will need to click on Add to Chrome.
9. Automated Proctoring Exam Overview
8
Install the
Examity
Extension
Add Extension
4
Then, the test-taker can click Add Extension to complete the extension setup process.
Once added, the test-taker will continue to the authentication process.
10. Automated Proctoring Exam Overview
9
Grant
Permissions
Allow webcam
and microphone
access
4
The test-taker will now be prompted to grant permission to access their webcam and
microphone. They will click “Allow” when prompted.
11. Automated Proctoring Exam Overview
10
Grant
Permissions
Click continue
4
Once permissions have been granted, the test-taker will click “continue” to proceed through
the authentication process.
12. Automated Proctoring Exam Overview
11
Authentication
Face
Verification
5
The first part of the authentication process is the face verification. The test-taker will need to
take a photo – and retake if necessary – and then click Use Photo and Continue.
13. Automated Proctoring Exam Overview
12
Authentication
ID Verification
5
The second part of the authentication is the ID verification. The test-taker will need to take a
live picture of their ID and then select Use Photo and Continue.
14. Automated Proctoring Exam Overview
13
Authentication
Challenge
Question
5
The final step of the authentication process is the challenge questions section. The test-taker
will be asked one of the three challenge questions, enter in the answer, and then click Next.
15. Automated Proctoring Exam Overview
14
Review
Instructions
6
The test-taker will be able to review a list of the Examity standard rules, along with any
additional and special instructions if applicable.
16. Automated Proctoring Exam Overview
15
User Agreement
7
The test-taker will also need to review the User agreements and then click I Agree And I’m Ready To
Begin The Exam. If the test-taker chooses I do not agree, then they will NOT be able to take the exam.
17. Automated Proctoring Exam Overview
16
Screen Launch
8
Now, the test-taker will be prompted to launch the screen share by clicking Launch.
18. Automated Proctoring Exam Overview
17
Screen Launch
8
Then, they will need to select their entire screen and click Share.
19. Automated Proctoring Exam Overview
18
Begin Exam/
Examity Sidebar
9
The test-taker is now brought to the exam page. They will see a sidebar appear to the right of the
screen, followed by a Learning Your Sidebar pop-up. The test-taker will need to click through the
prompts showcasing how to utilize this feature for the duration of the exam.
20. Automated Proctoring Exam Overview
19
Begin Exam/
Examity Sidebar
9
The test-taker will need to click through all steps of the sidebar information pop-up
and then press Continue To Exam.
21. Automated Proctoring Exam Overview
20
End Proctoring
Session
10
Once the test-taker completes the exam, they will need to officially end the session
with Examity by clicking End Proctoring Session, then choose End [the] Session.
22. Automated Proctoring Exam Overview
21
Survey
(Optional)
11
The exam screen automatically closes after the session ends and the test-taker will now
see a survey. This survey is optional and provides Examity with feedback on the exam experience.