Download free for 30 days
Sign in
Upload
Language (EN)
Support
Business
Mobile
Social Media
Marketing
Technology
Art & Photos
Career
Design
Education
Presentations & Public Speaking
Government & Nonprofit
Healthcare
Internet
Law
Leadership & Management
Automotive
Engineering
Software
Recruiting & HR
Retail
Sales
Services
Science
Small Business & Entrepreneurship
Food
Environment
Economy & Finance
Data & Analytics
Investor Relations
Sports
Spiritual
News & Politics
Travel
Self Improvement
Real Estate
Entertainment & Humor
Health & Medicine
Devices & Hardware
Lifestyle
Change Language
Language
English
Español
Português
Français
Deutsche
Cancel
Save
Submit search
EN
Uploaded by
Kei Kusakari
PPT, PDF
4,794 views
UIImagePickerController よもやま話
「iPhone勉強会 at 京都」2008年12月13日の発表資料です。
Technology
◦
Read more
5
Save
Share
Embed
Embed presentation
Download
Downloaded 52 times
1
/ 31
2
/ 31
3
/ 31
4
/ 31
5
/ 31
6
/ 31
7
/ 31
8
/ 31
9
/ 31
10
/ 31
11
/ 31
12
/ 31
13
/ 31
14
/ 31
15
/ 31
16
/ 31
17
/ 31
18
/ 31
19
/ 31
20
/ 31
21
/ 31
22
/ 31
23
/ 31
24
/ 31
25
/ 31
26
/ 31
27
/ 31
28
/ 31
29
/ 31
30
/ 31
31
/ 31
More Related Content
PDF
Tinder風なUIを実装する際のアイデアと実装例紹介
by
Fumiya Sakai
PPTX
Image view問題
by
Kojiro_ijoko86
PPTX
あんさんぶるガールズ!最初の企画書
by
Kei Kusakari
PPT
スペツナズArts企画素案
by
Yasuhiro Yamaguchi
PPT
「箱入り娘」RTS for Nintendo3DS企画素案
by
Yasuhiro Yamaguchi
PPT
一騎打ちゲーム素案
by
Yasuhiro Yamaguchi
PDF
【CEDEC2013】月商1億円超えタイトルのディレクター達が語る、成功するオンラインゲーム開発&運営の秘訣
by
モノビット エンジン
ODP
Strike backアクションゲーム企画素案 for SmarPhone
by
Yasuhiro Yamaguchi
Tinder風なUIを実装する際のアイデアと実装例紹介
by
Fumiya Sakai
Image view問題
by
Kojiro_ijoko86
あんさんぶるガールズ!最初の企画書
by
Kei Kusakari
スペツナズArts企画素案
by
Yasuhiro Yamaguchi
「箱入り娘」RTS for Nintendo3DS企画素案
by
Yasuhiro Yamaguchi
一騎打ちゲーム素案
by
Yasuhiro Yamaguchi
【CEDEC2013】月商1億円超えタイトルのディレクター達が語る、成功するオンラインゲーム開発&運営の秘訣
by
モノビット エンジン
Strike backアクションゲーム企画素案 for SmarPhone
by
Yasuhiro Yamaguchi
Viewers also liked
PDF
企画書Danryhm
by
Kent Takamatsu
PDF
#69_ゲームデザインのはなし(後編)
by
Yoshihiro Furukawa
PPT
GigaSpaces XAP in Five Minutes
by
Nati Shalom
PDF
CEDEC2016 「コントラスト」で考えるゲームデザイン・レベルデザイン
by
Kouji Ohno
PDF
CEDEC2013 ソーシャルゲームの開発現場でUXについて思いっきりあがいてみた1年間の話
by
Takahiro YAMAGUCHI
PPTX
データに振り回されて失敗した あんなことやこんなこと ~ゲームのために必要な本当の ビジネス・アナリティクス~
by
Daisuke Nogami
PPTX
ゲーム制作初心者が知るべき8つのこと
by
MASA_T_O
PPTX
スマートフォンゲーム企画書制作のポイント
by
Tetsuya Kimura
PPTX
ゲーム仕様書の書き方 ~大久保磨編~ ver.1.2.0
by
Osamu Ohkubo
PPTX
決定版:サービスの盛り上がり具合をユーザの数(DAU)から読み解く方法
by
Daisuke Nogami
PPTX
DAUを評価指標から捨てた会社の話 #tokyowebmining
by
Tokoroten Nakayama
企画書Danryhm
by
Kent Takamatsu
#69_ゲームデザインのはなし(後編)
by
Yoshihiro Furukawa
GigaSpaces XAP in Five Minutes
by
Nati Shalom
CEDEC2016 「コントラスト」で考えるゲームデザイン・レベルデザイン
by
Kouji Ohno
CEDEC2013 ソーシャルゲームの開発現場でUXについて思いっきりあがいてみた1年間の話
by
Takahiro YAMAGUCHI
データに振り回されて失敗した あんなことやこんなこと ~ゲームのために必要な本当の ビジネス・アナリティクス~
by
Daisuke Nogami
ゲーム制作初心者が知るべき8つのこと
by
MASA_T_O
スマートフォンゲーム企画書制作のポイント
by
Tetsuya Kimura
ゲーム仕様書の書き方 ~大久保磨編~ ver.1.2.0
by
Osamu Ohkubo
決定版:サービスの盛り上がり具合をユーザの数(DAU)から読み解く方法
by
Daisuke Nogami
DAUを評価指標から捨てた会社の話 #tokyowebmining
by
Tokoroten Nakayama
Similar to UIImagePickerController よもやま話
PDF
iPhoneカメラアプリ開発入門(第1回)
by
Takashi Ohtsuka
PDF
スポイトができるまで
by
Ngoc Dao
PDF
⑭iPhoneアプリを作ってみよう!(超初心者向け)その2
by
Nishida Kansuke
PDF
iOS 10 new Camera
by
Gaprot
PDF
[iOS 8] iOS8勉強会 PhotoKit
by
Shingo Hiraya
KEY
I phonedevws20121028ci filter
by
ZuQ9Nn
PDF
【第4回】はじめてのスマートフォン&タブレット入門講座
by
Takaaki Mizuta
PDF
AVFoundationを使った無音カメラアプリの作り方
by
Takashi Ohtsuka
PDF
カメラアプリ開発入門3
by
Takashi Ohtsuka
PDF
Photos vs Assets Library - いまさら始めるPhotos.framework
by
Kaname Noto
PDF
Vol3 photo
by
Photoruction Support
PDF
Vol3 photo
by
Photoruction Support
PDF
Spresense Study meeting#1 How to use the Camera board
by
義則 太田
iPhoneカメラアプリ開発入門(第1回)
by
Takashi Ohtsuka
スポイトができるまで
by
Ngoc Dao
⑭iPhoneアプリを作ってみよう!(超初心者向け)その2
by
Nishida Kansuke
iOS 10 new Camera
by
Gaprot
[iOS 8] iOS8勉強会 PhotoKit
by
Shingo Hiraya
I phonedevws20121028ci filter
by
ZuQ9Nn
【第4回】はじめてのスマートフォン&タブレット入門講座
by
Takaaki Mizuta
AVFoundationを使った無音カメラアプリの作り方
by
Takashi Ohtsuka
カメラアプリ開発入門3
by
Takashi Ohtsuka
Photos vs Assets Library - いまさら始めるPhotos.framework
by
Kaname Noto
Vol3 photo
by
Photoruction Support
Vol3 photo
by
Photoruction Support
Spresense Study meeting#1 How to use the Camera board
by
義則 太田
UIImagePickerController よもやま話
1.
UIImagePickerController よもやま話 http://www.spookies.co.jp
草苅 景 [email_address]
2.
はじめに
3.
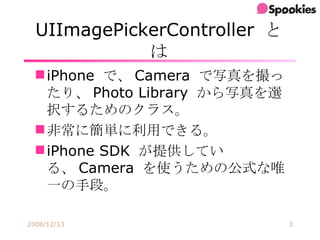
UIImagePickerController とは
iPhone で、 Camera で写真を撮ったり、 Photo Library から写真を選択するためのクラス。 非常に簡単に利用できる。 iPhone SDK が提供している、 Camera を使うための公式な唯一の手段。
4.
実際の ソースコード
5.
@interface CameraViewController :
UIViewController <UIImagePickerControllerDelegate, UINavigationControllerDelegate> { UIImagePickerController* cameraController; } @property (nonatomic, assign) UIImagePickerController* cameraController; @end
6.
#define SOURCETYPE
UIImagePickerControllerSourceTypeCamera (省略) if(![UIImagePickerController isSourceTypeAvailable:SOURCETYPE]){ return; } cameraController = [[[UIImagePickerController alloc] init] retain]; cameraController.sourceType = SOURCETYPE; cameraController.delegate = self; cameraController.allowsImageEditing = NO; [self.view.superview addSubview:cameraController.view]; //[self presentModalViewController:cameraController animated:YES];
7.
UIImagePickerControllerSourceType
8.
UIImagePickerControllerSourceType UIImagePickerControllerSourceTypeCamera Camera
で撮影。 UIImagePickerControllerSourceTypePhotoLibrary Photo Library から画像選択。 UIImagePickerControllerSourceTypeSavedPhotosAlbum SavedPhotoAlbum から画像選択。
9.
Photo Library Saved
Photo Album
10.
Camera
11.
UIImagePickerControllerDelegate
12.
-(void)imagePickerController:(UIImagePickerController *)picker didFinishPickingImage:(UIImage
*)image editingInfo:(NSDictionary *)editingInfo; { [picker release]; // 写真選択時の処理 } - (void)imagePickerControllerDidCancel:(UIImagePickerController *)picker { [picker release]; // キャンセル時の処理 }
13.
UIImagePickerController に茶茶を入れる
14.
allowsImageEditing =NO
15.
画像編集しない場合 UINavigationControllerDelegate
を実装。 Camera, PhotoLibrary 共に表示をいじれる。 - (void)navigationController:(UINavigationController *)navigationController willShowViewController:(UIViewController *)viewController animated:(BOOL)animated { // 画面カスタマイズコード }
16.
ToyCamera っぽい
カメラインターフェース を実現
17.
ここを消したい
18.
for (UIView* view
in currentView.subviews) { NSLog(@"view is a %@", [view description]); } ひたすら掘ります
19.
その結果
20.
- (void)navigationController:(UINavigationController *)navigationController
willShowViewController:(UIViewController *)viewController animated:(BOOL)animated { UIView* cameraView = [viewController.view.subviews objectAtIndex:0]; UIView* cropOverlay = [cameraView.subviews objectAtIndex:3]; UIView* imgView = [cropOverlay.subviews objectAtIndex:0]; UIView* lcdLayer = [cropOverlay.subviews objectAtIndex:1]; [imgView setHidden: YES]; [lcdLayer setHidden: YES]; }
21.
allowsImageEditing = YES
22.
こんな感じで 表示したい
23.
いろいろやり方を考えた なんとか
allowsImageEditing 画面起動をハンドリングしたい。 方法を発見できず。 PhotoLibrary 全体に View を載せて、自前判定。 キャンセルが押されたとき、スクロールされた場合などの処理が複雑。 PhotoLibrary の Photo 上に同じ大きさの透明な View を載せる。 Photo 1 つずつのオブジェクトまで辿りつけなかった。
24.
最終的に行き着いたやり方
25.
View の時間監視
26.
(省略) [NSTimer scheduledTimerWithTimeInterval:1
target:self selector:@selector(checkView) userInfo:nil repeats:YES]; touchView = [[MyTouchView alloc] init]; touchView.frame = CGRectMake(0, 0, 320, 480); touchView.backgroundColor = [UIColor blueColor]; touchView.opaque = YES; touchView.alpha = 0.5; touchView.cameraviewcontroller = self; [self.view.superview addSubview:touchView]; [self.view.superview sendSubviewToBack:touchView]; }
27.
- (void)checkView {
UIView* temp; [touchView.superview sendSubviewToBack:touchView]; if ((temp = [self getViewFromArray:self.view.superview.subviews num:2]) != nil) { if((temp = [self getViewFromArray:temp.subviews num:0]) != nil) { if((temp = [self getViewFromArray:temp.subviews num:1]) != nil) { if(([[temp description] length] > 15) && ([[[temp description] substringToIndex:15] isEqualToString:@"<PLCropOverlay:"])) { [touchView.superview bringSubviewToFront:touchView]; } } } } }
28.
- (UIView *)getViewFromArray:(NSArray*)viewArray
num:(int)i { if([viewArray count] <= i) return nil; return [viewArray objectAtIndex:i]; }
29.
最後に
30.
非公開 API を使えばもう少しいろいろできるみたいです。
興味がある方はそちらも調べてみて下さい。
31.
ご静聴ありがとうございました!
Download

![UIImagePickerController よもやま話 http://www.spookies.co.jp 草苅 景 [email_address]](https://image.slidesharecdn.com/iphone-20081213-1229183373639554-1/85/UIImagePickerController-1-320.jpg)


![#define SOURCETYPE UIImagePickerControllerSourceTypeCamera (省略) if(![UIImagePickerController isSourceTypeAvailable:SOURCETYPE]){ return; } cameraController = [[[UIImagePickerController alloc] init] retain]; cameraController.sourceType = SOURCETYPE; cameraController.delegate = self; cameraController.allowsImageEditing = NO; [self.view.superview addSubview:cameraController.view]; //[self presentModalViewController:cameraController animated:YES];](https://image.slidesharecdn.com/iphone-20081213-1229183373639554-1/85/UIImagePickerController-6-320.jpg)


![-(void)imagePickerController:(UIImagePickerController *)picker didFinishPickingImage:(UIImage *)image editingInfo:(NSDictionary *)editingInfo; { [picker release]; // 写真選択時の処理 } - (void)imagePickerControllerDidCancel:(UIImagePickerController *)picker { [picker release]; // キャンセル時の処理 }](https://image.slidesharecdn.com/iphone-20081213-1229183373639554-1/85/UIImagePickerController-12-320.jpg)


![for (UIView* view in currentView.subviews) { NSLog(@"view is a %@", [view description]); } ひたすら掘ります](https://image.slidesharecdn.com/iphone-20081213-1229183373639554-1/85/UIImagePickerController-18-320.jpg)

![- (void)navigationController:(UINavigationController *)navigationController willShowViewController:(UIViewController *)viewController animated:(BOOL)animated { UIView* cameraView = [viewController.view.subviews objectAtIndex:0]; UIView* cropOverlay = [cameraView.subviews objectAtIndex:3]; UIView* imgView = [cropOverlay.subviews objectAtIndex:0]; UIView* lcdLayer = [cropOverlay.subviews objectAtIndex:1]; [imgView setHidden: YES]; [lcdLayer setHidden: YES]; }](https://image.slidesharecdn.com/iphone-20081213-1229183373639554-1/85/UIImagePickerController-20-320.jpg)


![(省略) [NSTimer scheduledTimerWithTimeInterval:1 target:self selector:@selector(checkView) userInfo:nil repeats:YES]; touchView = [[MyTouchView alloc] init]; touchView.frame = CGRectMake(0, 0, 320, 480); touchView.backgroundColor = [UIColor blueColor]; touchView.opaque = YES; touchView.alpha = 0.5; touchView.cameraviewcontroller = self; [self.view.superview addSubview:touchView]; [self.view.superview sendSubviewToBack:touchView]; }](https://image.slidesharecdn.com/iphone-20081213-1229183373639554-1/85/UIImagePickerController-26-320.jpg)
![- (void)checkView { UIView* temp; [touchView.superview sendSubviewToBack:touchView]; if ((temp = [self getViewFromArray:self.view.superview.subviews num:2]) != nil) { if((temp = [self getViewFromArray:temp.subviews num:0]) != nil) { if((temp = [self getViewFromArray:temp.subviews num:1]) != nil) { if(([[temp description] length] > 15) && ([[[temp description] substringToIndex:15] isEqualToString:@"<PLCropOverlay:"])) { [touchView.superview bringSubviewToFront:touchView]; } } } } }](https://image.slidesharecdn.com/iphone-20081213-1229183373639554-1/85/UIImagePickerController-27-320.jpg)
![- (UIView *)getViewFromArray:(NSArray*)viewArray num:(int)i { if([viewArray count] <= i) return nil; return [viewArray objectAtIndex:i]; }](https://image.slidesharecdn.com/iphone-20081213-1229183373639554-1/85/UIImagePickerController-28-320.jpg)


![[iOS 8] iOS8勉強会 PhotoKit](https://cdn.slidesharecdn.com/ss_thumbnails/20140918ios8photokit-140918045759-phpapp01-thumbnail.jpg?width=640&height=640&fit=bounds)