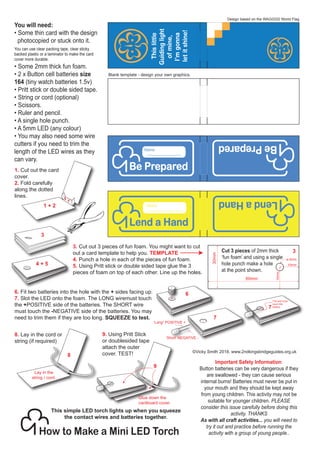
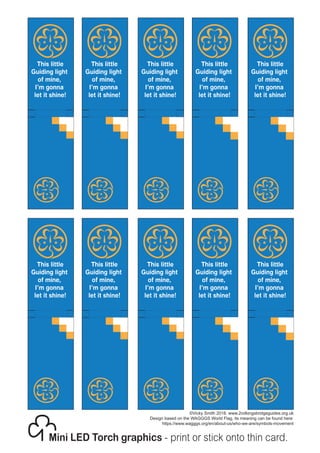
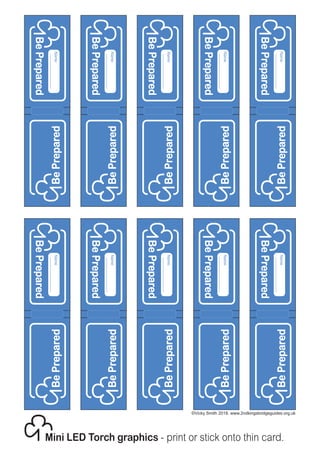
Be Prepared
Name
Be
Prepared
This
little
Guiding
light
of
mine,
I’m
gonna
let
it
shine!
You will need:
• Some thin card with the design
photocopied or stuck onto it.
You can use clear packing tape, clear sticky
backed plastic or a laminator to make the card
cover more durable.
• Some 2mm thick fun foam.
• 2 x Button cell batteries size
164 (tiny watch batteries 1.5v)
• Pritt stick or double sided tape.
• String or cord (optional)
• Scissors.
• Ruler and pencil.
• A single hole punch.
• A 5mm LED (any colour)
• You may also need some wire
cutters if you need to trim the
length of the LED wires as they
can vary.
Cut 3 pieces of 2mm thick
‘fun foam’ and using a single
hole punch make a hole
at the point shown.
60mm
30mm
10mm
10mm
ø 5mm
Important Safety Information:
Button batteries can be very dangerous if they
are swallowed - they can cause serious
internal burns! Batteries must never be put in
your mouth and they should be kept away
from young children. This activity may not be
suitable for younger children. PLEASE
consider this issue carefully before doing this
activity. THANKS
As with all craft activities... you will need to
try it out and practice before running the
activity with a group of young people..
How to Make a Mini LED Torch
Lend a Hand
Name
Lend
a
Hand
‘Long” POSITIVE +
‘Short’ NEGATIVE -
The end must
touch the
battery
1 + 2
Glue down the
cardboard cover.
Lay in the
string / cord.
1. Cut out the card
cover.
2. Fold carefully
along the dotted
lines.
3. Cut out 3 pieces of fun foam. You might want to cut
out a card template to help you. TEMPLATE
4. Punch a hole in each of the pieces of fun foam.
5. Using Pritt stick or double sided tape glue the 3
pieces of foam on top of each other. Line up the holes.
6. Fit two batteries into the hole with the + sides facing up.
7. Slot the LED onto the foam. The LONG wiremust touch
the +POSITIVE side of the batteries. The SHORT wire
must touch the -NEGATIVE side of the batteries. You may
need to trim them if they are too long. SQUEEZE to test.
8. Lay in the cord or
string (if required)
9. Using Pritt Stick
or doublesided tape
attach the outer
cover. TEST! ©Vicky Smith 2018. www.2ndkingsbridgeguides.org.uk
3
4 + 5
6
7
7
8
9
This simple LED torch lights up when you squeeze
the contact wires and batteries together.
3
Blank template - design your own graphics.
Design based on the WAGGGS World Flag
This little
Guiding light
of mine,
I’m gonna
let it shine!
This little
Guiding light
of mine,
I’m gonna
let it shine!
This little
Guiding light
of mine,
I’m gonna
let it shine!
This little
Guiding light
of mine,
I’m gonna
let it shine!
This little
Guiding light
of mine,
I’m gonna
let it shine!
Mini LED Torch graphics - print or stick onto thin card.
©Vicky Smith 2018. www.2ndkingsbridgeguides.org.uk
Design based on the WAGGGS World Flag, its meaning can be found here:
https://www.wagggs.org/en/about-us/who-we-are/symbols-movement
This little
Guiding light
of mine,
I’m gonna
let it shine!
This little
Guiding light
of mine,
I’m gonna
let it shine!
This little
Guiding light
of mine,
I’m gonna
let it shine!
This little
Guiding light
of mine,
I’m gonna
let it shine!
This little
Guiding light
of mine,
I’m gonna
let it shine!
Be
Prepared
Name
Be
Prepared
Be
Prepared
Name
Be
Prepared
Be
Prepared
Name
Be
Prepared
Be
Prepared
Name
Be
Prepared
Be
Prepared
Name
Be
Prepared
Be
Prepared
Name
Be
Prepared
Be
Prepared
Name
Be
Prepared
Be
Prepared
Name
Be
Prepared
Be
Prepared
Name
Be
Prepared
Be
Prepared
Name
Be
Prepared
Mini LED Torch graphics - print or stick onto thin card.
©Vicky Smith 2018. www.2ndkingsbridgeguides.org.uk
Mini LED Torch graphics - print or stick onto thin card.
Design your own graphics for your LED Torch.
Lend
a
Hand
Name
Lend
a
Hand
Name
Lend
a
Hand
Name
Lend
a
Hand
Name
Lend
a
Hand
Name
Lend
a
Hand
Name
Lend
a
Hand
Name
Lend
a
Hand
Name
Lend
a
Hand
Name
Lend
a
Hand
Name
Lend
a
Hand
Name
Lend
a
Hand
Name
Lend
a
Hand
Name
Lend
a
Hand
Name
Lend
a
Hand
Name
Lend
a
Hand
Name
Lend
a
Hand
Name
Lend
a
Hand
Name
Lend
a
Hand
Name
Lend
a
Hand
Name
©Vicky Smith 2018. www.2ndkingsbridgeguides.org.uk
Mini LED Torch graphics - print or stick onto thin card.
Design your own graphics for your LED Torch.
©Vicky Smith 2018. www.2ndkingsbridgeguides.org.uk

Torch graphics .pdf

  • 1.
    Be Prepared Name Be Prepared This little Guiding light of mine, I’m gonna let it shine! You willneed: • Some thin card with the design photocopied or stuck onto it. You can use clear packing tape, clear sticky backed plastic or a laminator to make the card cover more durable. • Some 2mm thick fun foam. • 2 x Button cell batteries size 164 (tiny watch batteries 1.5v) • Pritt stick or double sided tape. • String or cord (optional) • Scissors. • Ruler and pencil. • A single hole punch. • A 5mm LED (any colour) • You may also need some wire cutters if you need to trim the length of the LED wires as they can vary. Cut 3 pieces of 2mm thick ‘fun foam’ and using a single hole punch make a hole at the point shown. 60mm 30mm 10mm 10mm ø 5mm Important Safety Information: Button batteries can be very dangerous if they are swallowed - they can cause serious internal burns! Batteries must never be put in your mouth and they should be kept away from young children. This activity may not be suitable for younger children. PLEASE consider this issue carefully before doing this activity. THANKS As with all craft activities... you will need to try it out and practice before running the activity with a group of young people.. How to Make a Mini LED Torch Lend a Hand Name Lend a Hand ‘Long” POSITIVE + ‘Short’ NEGATIVE - The end must touch the battery 1 + 2 Glue down the cardboard cover. Lay in the string / cord. 1. Cut out the card cover. 2. Fold carefully along the dotted lines. 3. Cut out 3 pieces of fun foam. You might want to cut out a card template to help you. TEMPLATE 4. Punch a hole in each of the pieces of fun foam. 5. Using Pritt stick or double sided tape glue the 3 pieces of foam on top of each other. Line up the holes. 6. Fit two batteries into the hole with the + sides facing up. 7. Slot the LED onto the foam. The LONG wiremust touch the +POSITIVE side of the batteries. The SHORT wire must touch the -NEGATIVE side of the batteries. You may need to trim them if they are too long. SQUEEZE to test. 8. Lay in the cord or string (if required) 9. Using Pritt Stick or doublesided tape attach the outer cover. TEST! ©Vicky Smith 2018. www.2ndkingsbridgeguides.org.uk 3 4 + 5 6 7 7 8 9 This simple LED torch lights up when you squeeze the contact wires and batteries together. 3 Blank template - design your own graphics. Design based on the WAGGGS World Flag
  • 2.
    This little Guiding light ofmine, I’m gonna let it shine! This little Guiding light of mine, I’m gonna let it shine! This little Guiding light of mine, I’m gonna let it shine! This little Guiding light of mine, I’m gonna let it shine! This little Guiding light of mine, I’m gonna let it shine! Mini LED Torch graphics - print or stick onto thin card. ©Vicky Smith 2018. www.2ndkingsbridgeguides.org.uk Design based on the WAGGGS World Flag, its meaning can be found here: https://www.wagggs.org/en/about-us/who-we-are/symbols-movement This little Guiding light of mine, I’m gonna let it shine! This little Guiding light of mine, I’m gonna let it shine! This little Guiding light of mine, I’m gonna let it shine! This little Guiding light of mine, I’m gonna let it shine! This little Guiding light of mine, I’m gonna let it shine!
  • 3.
  • 4.
    Mini LED Torchgraphics - print or stick onto thin card. Design your own graphics for your LED Torch. Lend a Hand Name Lend a Hand Name Lend a Hand Name Lend a Hand Name Lend a Hand Name Lend a Hand Name Lend a Hand Name Lend a Hand Name Lend a Hand Name Lend a Hand Name Lend a Hand Name Lend a Hand Name Lend a Hand Name Lend a Hand Name Lend a Hand Name Lend a Hand Name Lend a Hand Name Lend a Hand Name Lend a Hand Name Lend a Hand Name ©Vicky Smith 2018. www.2ndkingsbridgeguides.org.uk
  • 5.
    Mini LED Torchgraphics - print or stick onto thin card. Design your own graphics for your LED Torch. ©Vicky Smith 2018. www.2ndkingsbridgeguides.org.uk