
Recommended
More Related Content
What's hot
What's hot (20)
Similar to Szdalos
Similar to Szdalos (20)
Recently uploaded
Recently uploaded (20)
Szdalos
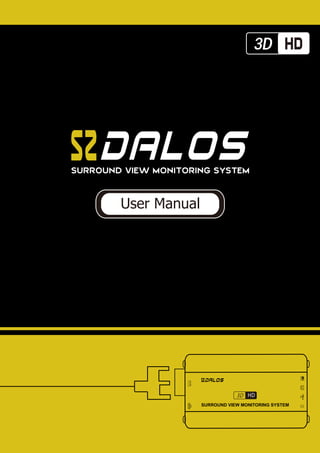
- 1. User Manual 3D HD SURROUND VIEW MONITORING SYSTEM
- 2. Safety Tips and Brief Introduction Main Features Installation 3.1、Wire Routing 3.2、Cameras Installation 3.3、Host Device Installation 4.1、Calibration Parameters Setting 4.2、Calibration Tape Sticking 4.3、Cameras Angle Adjusting 5.1、Working Modes 5.2、Parameters Setting and Menu Description 5.3、Video Recording Functions 4.4、Placing Packing Box 4.5、Calibration Points Marking 4.6、Image Calculation Camera Calibration User settings Specification FAQ Tips & Warranty CONTENTS 1
- 3. Safety Tips Please read this manual carefully before using and pay attention to this section for the safety Instructions. It is strongly recommended not to operate this system while driving. Never unplug the host device when power is connected. The host device can’t be sinked in any kind of liquid. Beware of the heat dissipated on the host device during operation. It is recommended to have this system installed by an authorized installer. SZDALOS 3D HD SVM system is a parking and driving assistant system which offers the road situation around the vehicle to eliminate blind spots and thus works perfectly as a visual guide for safe parking and driving. There may be a slight difference between the screen image content with actual surroundings of the vehicle. Please handle this case according to actual situation. 2
- 4. Brief Introduction This guide provides the basic illustration of the SZDALOS 3D HD SVM system, operating principle and basic concept to help users to understand the whole system installation proce- dure, camera calibration steps, and how to interact with the system menu. The SZDALOS 3D HD Surround View Monitoring Technology synthesizes images from four cameras to create a true 3D sophisticated view of a vehicle's surroundings. The technology enables flexible omni-directional monitoring around a vehicle from a dynamically definable perspective." Such technology can display the complete vision of the positioning and moving path of the vehicle, it covers blind spot and thus works perfectly as a safe parking and driving guide even when restricted by adjacent vehicles and objects, parking line, etc. The system offers various SVM system configurations like -HDMI/LVDS/AV with alternative version of 2D or 3D. Additionally, this system also integrated full channel car DVR function with 24 hours videos loop recording. Guide Brief Introduction of System 3
- 5. Product Features Four 180 degrees ultra wide fish-eye cameras Seamless video merging based on dual core ARM CPU and hardware high efficiency acceleration engine. Arbitrary and dynamic 3D mode angle switching for better surrounding environment obser- vation Independent Fish-eye calibration parameter and algorithm for each camera. OE quality for main chipset with well protected circuit and devices in order to achieve the best system performance and stability. High video recording resolution up to 1080p Smart power management for a more effective consumption. The simplest calibration steps with calibration tape and packing box. Supports alternative recording via TF card and USB disk 3D video de-interlacing and noise reduction technology for CVBS signal decoding. Product Features 4
- 6. Main application scenarios Optional Function Features Profile 3D & 360° Seamless Merging 360° Blind Spots Coverage Dynamic & Intelligent View Angle Switching Flexible Omni-directional Monitoring Exclusive Fish-eye Distortion Correction Guided Camera Calibration a.Driving Video Recording b.24 Hour Parking Monitoring c.G-sensor Triggered Recording d.Visual Radar Extension Note: This manual gives a basic and general feature description of the system, but it may vary from specific product model and application case. Please consult our sales team for more detailed information. Product Features Narrow Road/Lane Side parking Reverse parking Blind Spots Coverage Turning assist Car DVRCrowded Road Slope pathway Evidence during road accident 5
- 7. System Hardware Installation Installation Steps 1 3 5 7 2 4 6 Wire routing inside the car Cameras Installation Wiring Test Host Installation Please refer to wiring diagram for more details. Please also be alert for the color and connector size of each cable. Wire routing should start from cameras to the host device side. All the cables should be gathered to the host device side It is strongly recommended for the host to be installed inside/behind the glove box for easy remove of TF card or USB disk. Functional Test To test the main functions and settings of the host device. Side Camera’s Angle Adjusting Rolling the camera to select a proper angle to be aligned with the reference guide line on the screen. Do not turn on the power before all the wires are connected correctly. Do not unplug the device when powered on. Camera Calibration Camera calibration can be guided step by step with the help of system menu, once the calibration data is completely collected, system software will complete the video merging automatically. Please refer to the corresponding section for detail installation steps. Embedded or external installation for side cameras depends on the size of the side mirrors and also depends on the space available for installation especially for large vehicles. Pay attention when disassemble the side mirrors to protect it from being broken, and please also be careful when drill installation holes under the plastic cover of the mirrors. 6
- 8. Wiring Diagram 7 Host Device 01 02 03 04 05 06 07 08 09 1110 13 14 15 16 DVD Trigger Camera extend cable 12 AV-OUT Power Cable IR Receive Pink line ACC Yellow VBAT+ Black GND (Left Turning)(Reversing) (Right Turning) same with cable 14, either-or same with cable 13, either-or (High Beam) same with cable 15, either-or same with cable 16, either-or ! DO NOT Connect Reversing Gear Signal (Front CAM) (Back CAM) (Left CAM) (Right CAM) 3D HD SURROUND VIEW MONITORING SYSTEM
- 9. Cameras Distribution 1 2 3 54 2 1 5 3 4 Front Camera Left Camera Right CameraHost Rear Camera Schematic Drawing Top view 8 ® 1 2 3 4 5
- 10. Wire Routing Flow Chart Wire Routing & Process Front Camera 1.Disassemble the glove box 2.Distribute the cable of front camera from the car logo position and go along with the original wire distributing tube to the glove box position. Rear Camera 1.Disassemble the inner panel of the trunk. 2.Distribute the cable of the rear camera from the license plate lamp and go along the original wire distribution tube to the glove box position. Left and Right Cameras 1.Disassemble the side mirrors and remove the side trim panels of front doors 2.Disassemble the glass lens of side mirrors, extend the cables of side cameras from the original tube of side mirrors to the interlayers of the front doors. 3.Gathering all the cables from the interlay- ers of cab doors to the glove box position. 9 ! (Instructions on how to disassemble the two glass lens of side wing mirrors) In General, Most of Japanese cars are has plastic-buckle structure for side mirrors, the inner upside part of the side mirror is a “L” shape buckle , while the bottom side is U-shaped. Using the flat plastic screw driver and gently insert to the middle bottom position to remove the glass lens, please pay full attention to protect it from being broken. German cars usually use round head clip, the steps to disassemble the side mirrors is similar.
- 11. 1.Insert the front camera to the center of the front vehicle logo. 2.Connect the front camera with the cables. 3.Please double check the field of the view is wide enough from the system preview menu window, and the camera should not be obstructed by front bumper. 4.Fix the front camera with screw and the metal pad accessories. In the middle of vehicle logo The Installation method of front camera: Inside the front turbogrid plates installation 10 Front Camera Camera Installation
- 12. Rear Camera Installation Steps 1.Disassemble the inner panel of the trunk and take out the left license plate LED. 2.Stick locating plate of the rear camera in the right place for drilling a hole, and then drill a hole to install the camera on the position of the left side of license plate lamp. 3.Distribute the cable of the rear camera from the license plate lamp and go along the original wire distribu- tion tube to the glove box position. 4.To connect reversing signal of the rear camera extending cable to the 12V +ve signal of the reversing lamp. 11 Rear Camera Camera Installation
- 13. Side Cameras Embedded Installation Drilling Location Diagram Drilling position (Appropriate) Choose a proper drill bit according to the camera size Find a flat area near to the edge of the wing mirror bottom plastic shell as much as possible for getting enough pixel content. You should leave enough spare space for the glass face of wing mirrors so that the glass face can be adjusted freely. Inaddition, keep in mind that camera field of view (FOV) should not becovered by the plastic shells. Outboard installation 12 aluminum fastening ring bottom of the wing mirror shell lock screw camera cover plate Spherical camera Embedded rubber pad External rubber seat Camera shell Camera Installation 23.5mm
- 14. Right and Left Camera Installation Camera Installation Drilling hole diameter of outboard mounting is "6mm", Drilling hole diameter of embedded mounting is "18 ~ 26mm", Please select the appropriate location to drill the hole for universal cameral models. And keep in mind that the glass face of the side mirror should be adjusted so that the embedded camera should not block the movement of the glass. 1.As shown in the left picture, stick the locating plate of the rear camera to the bottom of the side mirrors. 2.Using the corresponding drilling bit to drill holes at the bottom of plastic shell, and then tear off the positioning stick- ers. 3.Select the embedded mounting or external outboard mounting for side cameras according to the spare space of the plastic shell. 4.If the drilling location available in the bottom of the plastic shell is not flat, please use a rubber pad provided along with the product packing list. 5.Install the internal spherical camera core, and connect the cables, then lock screw of side cameras tightly but keep the spherical camera core of side cameras can still be rotated. 7.Open the center screen to see the preview image of the side cameras, keep in mind that keep the left calibra- tion tap visible while get as many pixel as possible, and a another important comments is that keep all the calibration point distributed properly on the center screen. Recommended distribution is list blow. 13 TIP
- 15. Cameras Angle Adjusting Camera Installation For adapting to different shape of side mirror plastic shell, the angle and direction of side cameras are always designed to be free adjusted. Rotate the side cameras according to the image to keep vehicle body in image closely to the side calibration line and mean- while keep the pixel in wider angles and farther places can be captured as many as possible. Keep the left and right calibration point distributed in symmetrical position in the screen. Next step, the mirroring setting of the camera sensor need to be set according to camera installation direction. The guideline for this setting is to make the pixel content of the image as same as the instruction show in the system calibration preview menu. Generally speaking, except for the rear camera, all other cameras must be original image. 14 50° 50°
- 16. Host Device Installation Steps Host Device Installation 1.Disassemble the panel of central control unit, and connect the reversing video channel of DVD monitor or other display screen(AV in). 2. The host control unit installation: IR Mode: Put the infrared receiver in a proper position. Rotary encoder Mode: Selecting an appropriate position of the central control panel or beside the hand grip of the vehicle to drill a hole of 3.5mm in diameter, using the screw to fix the bottom panel, and connect the cables to the tool cabinet. 3. Please connect the positive of the left/right turning signal from the fuse box to host wire harness, or from side mirror turning LED indicator to the camera side of the cable. 4.Fix the host device in the glove box or the space behind the central control panel, DO NOT cover the heat dissipation hole. 15
- 17. 16 1 2 3 4 5 6 Key Number Description Function [1] MODE Enter Setting Menu [2] UP In SVM Mode, short press enter high beam mode, press again back to SVM mode In SVM Mode, long press 2 seonds enter into 4CH recording mode In Menu menu, select last menu option In SVM model, long press enter into 360 rotateable mode Confirm selected option In SVM model, long press enter into right 360 rotatable mode In SVM mode, long press enter into reversing gear mode In menu setting, select next menu option [3] RIGHT [4] [5] [6] DOWN LEFT Confirm Remote Controller Introduction Camera Calibration
- 18. 17 Calibration Parameters Setting First of all, please press the "MODE" button on the remote controller in a short time to enter system menu,the default passwords is “360”, then press the “OK” button to Image Calibration Menu. Second, please select the correct calibration size for the applied vehicle model, set the shadow area and each step of the shadow setting is 5cm,then select the camera sensor type, please keep it as the default if you are not sure with the sensor type. Camera Calibration
- 19. 18 Calibration Tape Position As the menu diagram shows, pasting the calibration tape around the vehicle. Please refer to the calibration pictures of different vehicle models and sizes to select the correct one for matching your vehicle. TIP 1.5M 1.5M 1.5M 1M 3M 1.5M 2M 1M 1.5M F1 F2 B1 B2 R1 R2 L1 L2 Light-Duty Vehicle Medium-Duty Vehicle 1.5M 1.5M 1.5M 1M 4M 1.5M 2.5M 1.5M 1.5M F1 F2 B1 B2 R1 R2 L1 L2 Camera Calibration
- 20. 19 Calibration Tape Position 1.5M 1.5M 1.5M 1M 5M 1.5M 2.5M 1.5M 1.5M F1 F2 B1 B2 R1 R2 L1 L2 B1 Mark Heavy-Duty Vehicle Camera Calibration 30cm 25cm 10cm
- 21. Calibration Points Marking 20 You can start calibrating the four cameras one by one when the cursor is twinkling. Moving the cursor to the corresponding locations by the remote controller buttons of up/down/left/right, then press the “ok” button to mark the current calibration point in the screen and then the system menu will guide you to the next calibration pixel point in order from 1 to 8 one by one, please see the correct location and sequence of the calibration points as below pictures: Press the red “Mode” button to toggle to previous calibration point selection when needed. The calibration locations of No.7 calibration pixel point and No.8 calibration pixel point between the front&rear cameras and the sides cameras are totally different. The more accurate calibration points you mark, the better quality of the panoramic image merging will be. TIP Camera Calibration
- 22. 21 Placing Packing Box There are always 8 calibration points for each camera which need to be marked in the screen, the third pixel point and forth calibration point are always special points which are actually the diagonal corner of the packing box. The SVM packing boxes can be divided into outer and inner one so that each packing box can be used for calibration 1 camera each time. Put the 2 packing boxes (Outer and Inner) in the correct position separate- ly as the pictures above illustrated. You can also use other boxes instead as a calibration reference objects, the dimension requirements of the box must be 30cm in height and 25cm in width. Camera Calibration TIP
- 23. 22 Calibration Points Marking You can start calibrating the four cameras one by one when the cursor is twinkling. Moving the cursor to the corresponding locations by the remote controller buttons of up/down/left/right, then press the “ok” button to mark the current calibration point in the screen and then the system menu will guide you to the next calibration pixel point in order from 1 to 8 one by one, please see the correct location and sequence of the calibration points as below pictures: Press the red “Mode” button to toggle to previous calibration point selection when needed. The calibration locations of No.7 calibration pixel point and No.8 calibration pixel point between the front&rear cameras and the sides cameras are totally different. The more accurate calibration points you mark, the better quality of the panoramic image merging will be. Camera Calibration TIP
- 24. 23 Placing Packing Box There are always 8 calibration points for each camera which need to be marked in the screen, the third pixel point and forth calibration point are always special points which are actually the diagonal corner of the packing box. The SVM packing boxes can be divided into outer and inner one so that each packing box can be used for calibration 1 camera each time. Put the 2 packing boxes (Outer and Inner) in the correct position separate- ly as the pictures above illustrated. You can also use other boxes instead as a calibration reference objects, the dimension requirements of the box must be 30cm in height and 25cm in width. Camera Calibration TIP
- 25. 24 Calibration Points Marking You can start calibrating the four cameras one by one when the cursor is twinkling. Moving the cursor to the corresponding locations by the remote controller buttons of up/down/left/right, then press the “ok” button to mark the current calibration point in the screen and then the system menu will guide you to the next calibration pixel point in order from 1 to 8 one by one, please see the correct location and sequence of the calibration points as below pictures: Press the red “Mode” button to toggle to previous calibration point selection when needed. Camera Calibration The calibration locations of No.7 calibration pixel point and No.8 calibration pixel point between the front&rear cameras and the sides cameras are totally different. The more accurate calibration points you mark, the better quality of the panoramic image merging will be. TIP
- 26. 25 Placing Packing Box There are always 8 calibration points for each camera which need to be marked in the screen, the third pixel point and forth calibration point are always special points which are actually the diagonal corner of the packing box. The SVM packing boxes can be divided into outer and inner one so that each packing box can be used for calibration 1 camera each time. Put the 2 packing boxes (Outer and Inner) in the correct position separate- ly as the pictures above illustrated. You can also use other boxes instead as a calibration reference objects, the dimension requirements of the box must be 30cm in height and 25cm in width. Camera Calibration TIP
- 27. 26 Image Calculation Press “OK” to go ahead. Please do not shut down during this operation, System will reboot automatically. Camera Calibration
- 28. 27 Visual angles Distributing Modes Full Screen Default view Reversing view Left view (Turning signal) Right view Split Screen Menu User Settings Window Configuration Left view Right view Left rear view Right rear view User Settings
- 29. 28 Parameters Setting and Menu Description User Settings Menu Item Turn Signal Wakeup Activate Turn Signal Emergency Blinker Wakeup High Beam Function 3D Dynamic Angle Function ON/OFF ON/OFF ON/OFF ON/OFF ON/OFF List Options Description Turning Signal is optional after engine is fired, this option is a global switch for left and right turning indicator, when this option is set to ON, when the turning event is triggered, the SVM system will response to this event, and vice, versa. When the SVM is going to standby mode, this option is use to control whether the SVM system can be activated from Emergency Blinker, and you can also use Emergency Blinker to set it back to standby mode again when this option is set to ON. Just like the turning signal, high beam signal is useful to toggle the free-eye point and change the view angle for surround safety. 3D Dynamic Angle,mears the view angle will directly switch to next one without any motion carve. When the SVM is going to standby mode, this option is use to control whether the SVM system can be activated through turning signals.
- 30. 29 User Settings Menu Item Language Settings Vehicle Type System Mode Settings Adjust The Screen Y Position Adjust The Screen X Position Reversing Mode Turning Mode Driving Mode English/ Simplified Chinese Vehicle Type 1...... Vehicle Type 5 Split Screen -9 ~ +9 Pixel -9 ~ +9 Pixel Stardard View / WideAngle / Original Image Front Side View / Speeial View / Rear Side View Standard View / Original Image / Mirrorred View List Options Description Screen TCON horizontal front porch and back porch control. Screen TCON vertical front porch and back porch control. Please refer to the AVM signal diagram Please refer to the AVM signal diagram Please refer to the AVM signal diagram
- 31. 30 Menu Item System Restore Upgrade Options Version Information Permission Setting Reserved Menu Default/ User Preference Default/ Upgrade 3D Mode/ Upgrade All Export Calibration Data Import Calibration Data Default Default List Options Description Default is not functional at this moments, and choose user preference to restore user preference of video settings/win- dow configurations etc. Default is not functional at this moments, and choose firmware when you are about to update the firmware for the core board and choose Car 3D Model if you are about to change another Car Model for better match with the car brand. HW.6030.R3.25 SW.6030.R3.42 FW.6030.R2.12 User Settings
- 32. 31 User Settings Menu Item Hazard Blinker Trigger Duration Display Turn Delay Revering/Turning Trigger Duration Trigger Delay Parking Surveilance List Options Description Since the system can be activated through external Emergency Blinker, you can also set the duration time, but do remember to turn ON the Emergency Blinker Activation function first in Function Settings Menu. This option is similar as Emergency Blinker Wakeup Duration, you can adjust the duration time for Turning/Reversing signal here also. Screen saver mode after turnning/reversing trigger Parking Monitoring will be activated after 3 minutes when ACC is off Since some specific DVD model will have a problem with AV-IN signal is coming at the early phase during system boot. Please set this option to 10s~15s if this kind of DVD you are using have such problem. 30S/1Min/ 3Min/5Min/ Intinity 0S/10S/15S/30S Infinity 0S/3S/5S/ 10S/30S 0S/3S/5S Disable
- 33. 32 Video Recording Functions 1. Long press “Mode” button to switch to recording system menu. 2. Press the “OK” button to stop current recording. 3. Using “Up/Down” button to navigate between recorded files as per date and timeline. 4. Press “OK” button again if the current recording file is just the right one you want to playback, and you can enlarge any of the 4 cameras to full screen mode by pressing left /right/up/down Button. Menu Item Saturation Brightness Contrast Sharpness -9~+9 -9~+9 -9~+9 -7~+8 List Options Description Adjust input video saturation Adjust input video contrast Adjust input video sharpness Adjust input video brightness User Settings
- 34. Basic Settings Menu Item Date Language Time Watermark Format Factory Reset Firmware Info Change system time Format the TF Card or USB Disk English/Simplified Chinese ON/OFF List Options Description Recording Parameters 33
- 35. Silent Driving Mode is the most frequency used while driving, the recording system will continuously take the outside video and record the compressed video on the recording media such as TF card or USB disk. Note that USB disk have a higher priority over TF card. Silent Driving Mode Continously Recording Parking Assistant Mode Continously Recording Driving Assistant Mode Continously Recording Power off Mode Continously Recording SVM Core Board: 0.05W Recording Board: 1.8W SVM Core Board: 2.5W Recording Board: 1.8W SVM Core Board: ~0W Recording Board: ~0W SVM Core Board: 2.5W Recording Board: 1.8W Silent Driving Mode Power Off Mode Driving Assistant Mode Parking Assistant Mode 34 During this mode, maximum power is expected to consume, since both the recording board and SVM core board is full functional. But this mode will never last for a long time, driving assistant mode is usually last for several seconds, and parking assistant mode usually work for 1~2 mins. The system is power off except for the Real Time Clock chip and G-sensor, and the whole system is also capable to awake from the vibration events. But under some special case such like the battery is lower than 11V, and system will never be awaked except for the event of engine start. Smart Power Management Strategy
- 36. 35 Specification Packing List Host Front Camera Main Wire Harness Front Extend Cable Rear Extend Cable Left Extend Cable Right Extend Cable Drilling Bit IR Receiver Button Calibration Tape Rear Camera Left Camera Right Camera Remotre Controller TIP For button connection, one terminal connect to BAT+ on the power cable, the other termi- nal connect to High Beam (High beam is the small red cable on the front extension cable).
- 37. 36 Specification Datasheet Type Specification Video Video Interface Input / Output Impedance Amplitude AV out / HDMI 75Ω Typical 1Vpp, 1.2Vpp Maximum 27M 74.25MHZ 1280X720@30fps AHD1.0(Nextchip) 70dB Optional Yes Yes Bosch H.264 Baseline@L3.1 1080p@15fps 5Mbps,3Gbyte/Hour USB Disk(High Priority)/TF 32G SDIO3.0/SDIO2.0 32G USB2.0 460mA 200mA <10mA 123*81*25mm(Host Metal box) 220g -30℃~+85℃ -40℃~+105℃ 0~95% Bandwidth Sampling Frequency Resolution Signal standard SNR High beam Left/Right Turning Blinker Reversing Lamp BM250E Algorithm Resolution Bitrates Recording Media TF CARD USB Disk 4-CH DVR + SVM mode 4-CH DVR mode Sleep Mode L*W*H Normal Working Storage Relative Humidity Indicator Lamp /Blinker G-sensor Compression Disk Capacity Power Consumption Dimension Weight Environments Voltage Tolerance Working Voltage 9.5V~36V
- 38. Surround View Monitoring System International Enquiry: Shenzhen Dalos Electronics Co., Ltd Email : szdalos@yeah.net Website : http://www.chinadalos.com
- 39. 37 FAQ 1 2 3 4 Some part of the image is blank after execution of Fast Merging mode Picture after merging is not accurate or seamless Some part of the picture after merging is mirrored The corner part of the picture is blank If you are indeed confirmed that all these above-mentioned steps are correct, please use your smart phone to take a photo after you finish each step when move done all cross cursor to these corresponding calibration points to us, our system can dump all these calibration data to TF card and our technical team will help you to find the root cause of the problem once we get your calibration data. Please contact our sales if you need more instructions on how to dump the calibration data. This problem is mainly caused by the installation position, and it usually occurs with the lower chassis vehicles .The picture quality captured by the camera will be poor and so that the calibration error will be magnified. This issue could be result of lack of enough care taken while moving the cursor between the calibration points . If you have selected some OEM camera from your own supplier chain, please confirm whether the image from the sensor is mirrored or not, and if mirrored, please choose the mirror function in the menu. These problem may be caused by the camera itself, please make sure if the camera get sufficient pixel content after camera installation(whether the installation position is too close to the ground)
- 40. 38 FAQ 5The merging result failed 1. Be careful to choose a proper vehicle size when starting the camera calibration. The vehicle type parameter must be set according to the size of the vehicle. Mismatch could result to such issues. 2. Make sure there should be no obtuse mistakes e.g., while calibrating the rear camera you are mistakenly choosing the front camera or making a mistake for the left/right direction. 3. Please use your smart phone to take a photo after you finish each step when move done all cross cursor to these corresponding calibration points to us, our system can dump all these calibration data to TF card and our technical team will help you to find the root of the problem once we get your calibration data. Please contact us if you need more instructions on how to dump the calibration data.