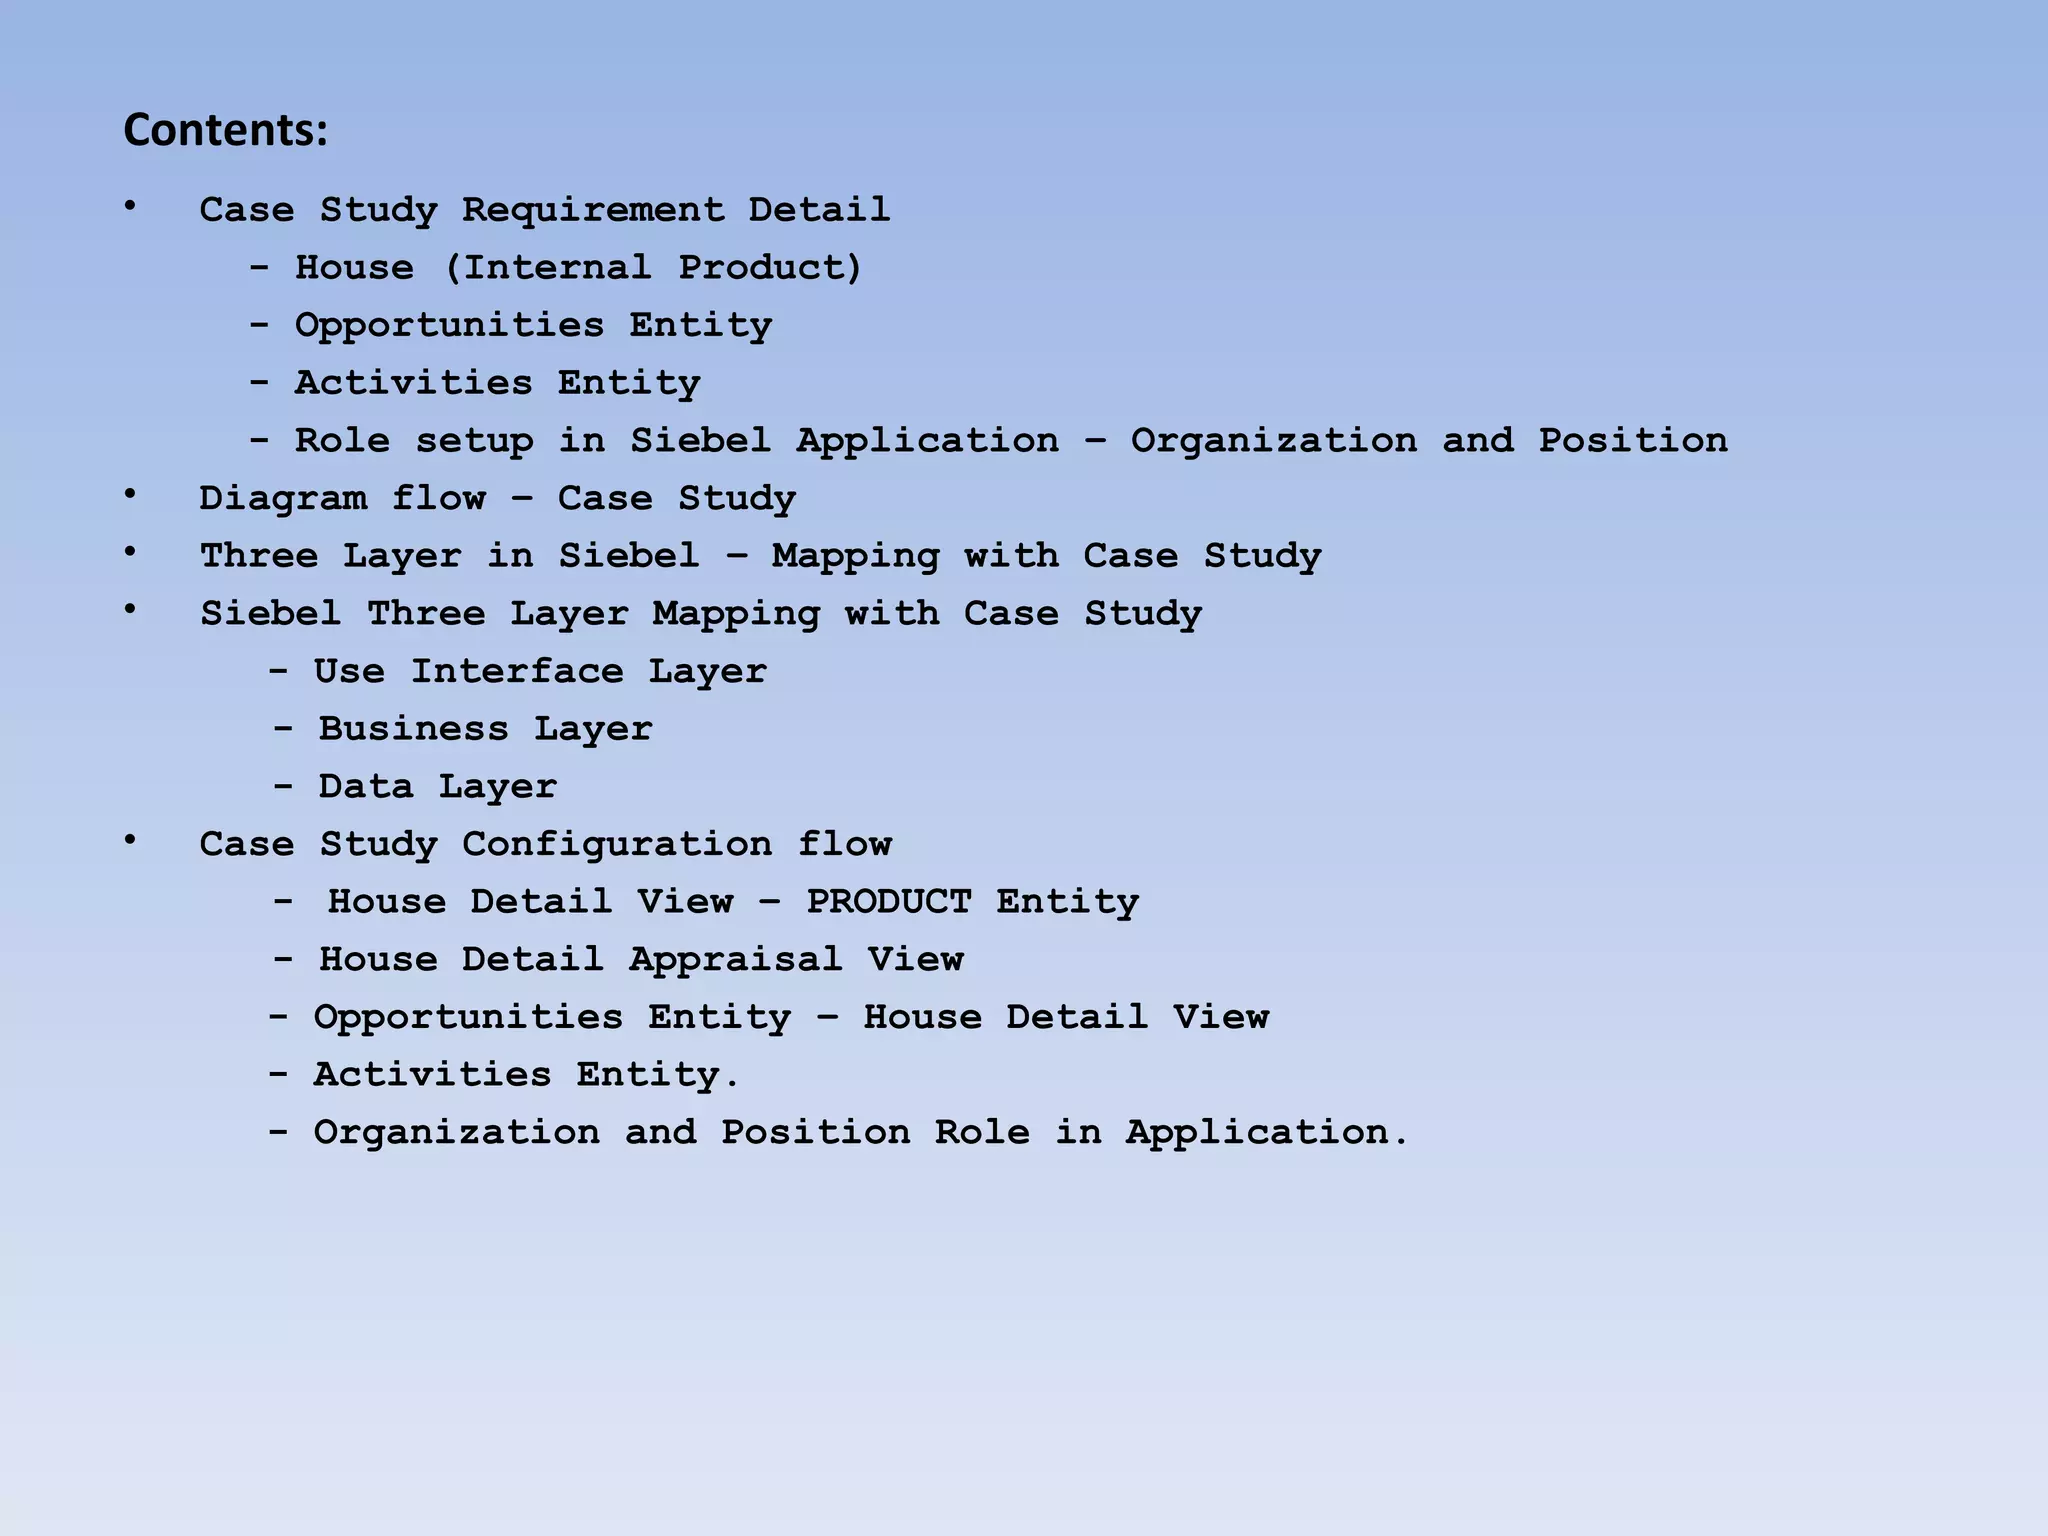
This document outlines the configuration steps for a Siebel case study assignment involving houses for sale. It includes:
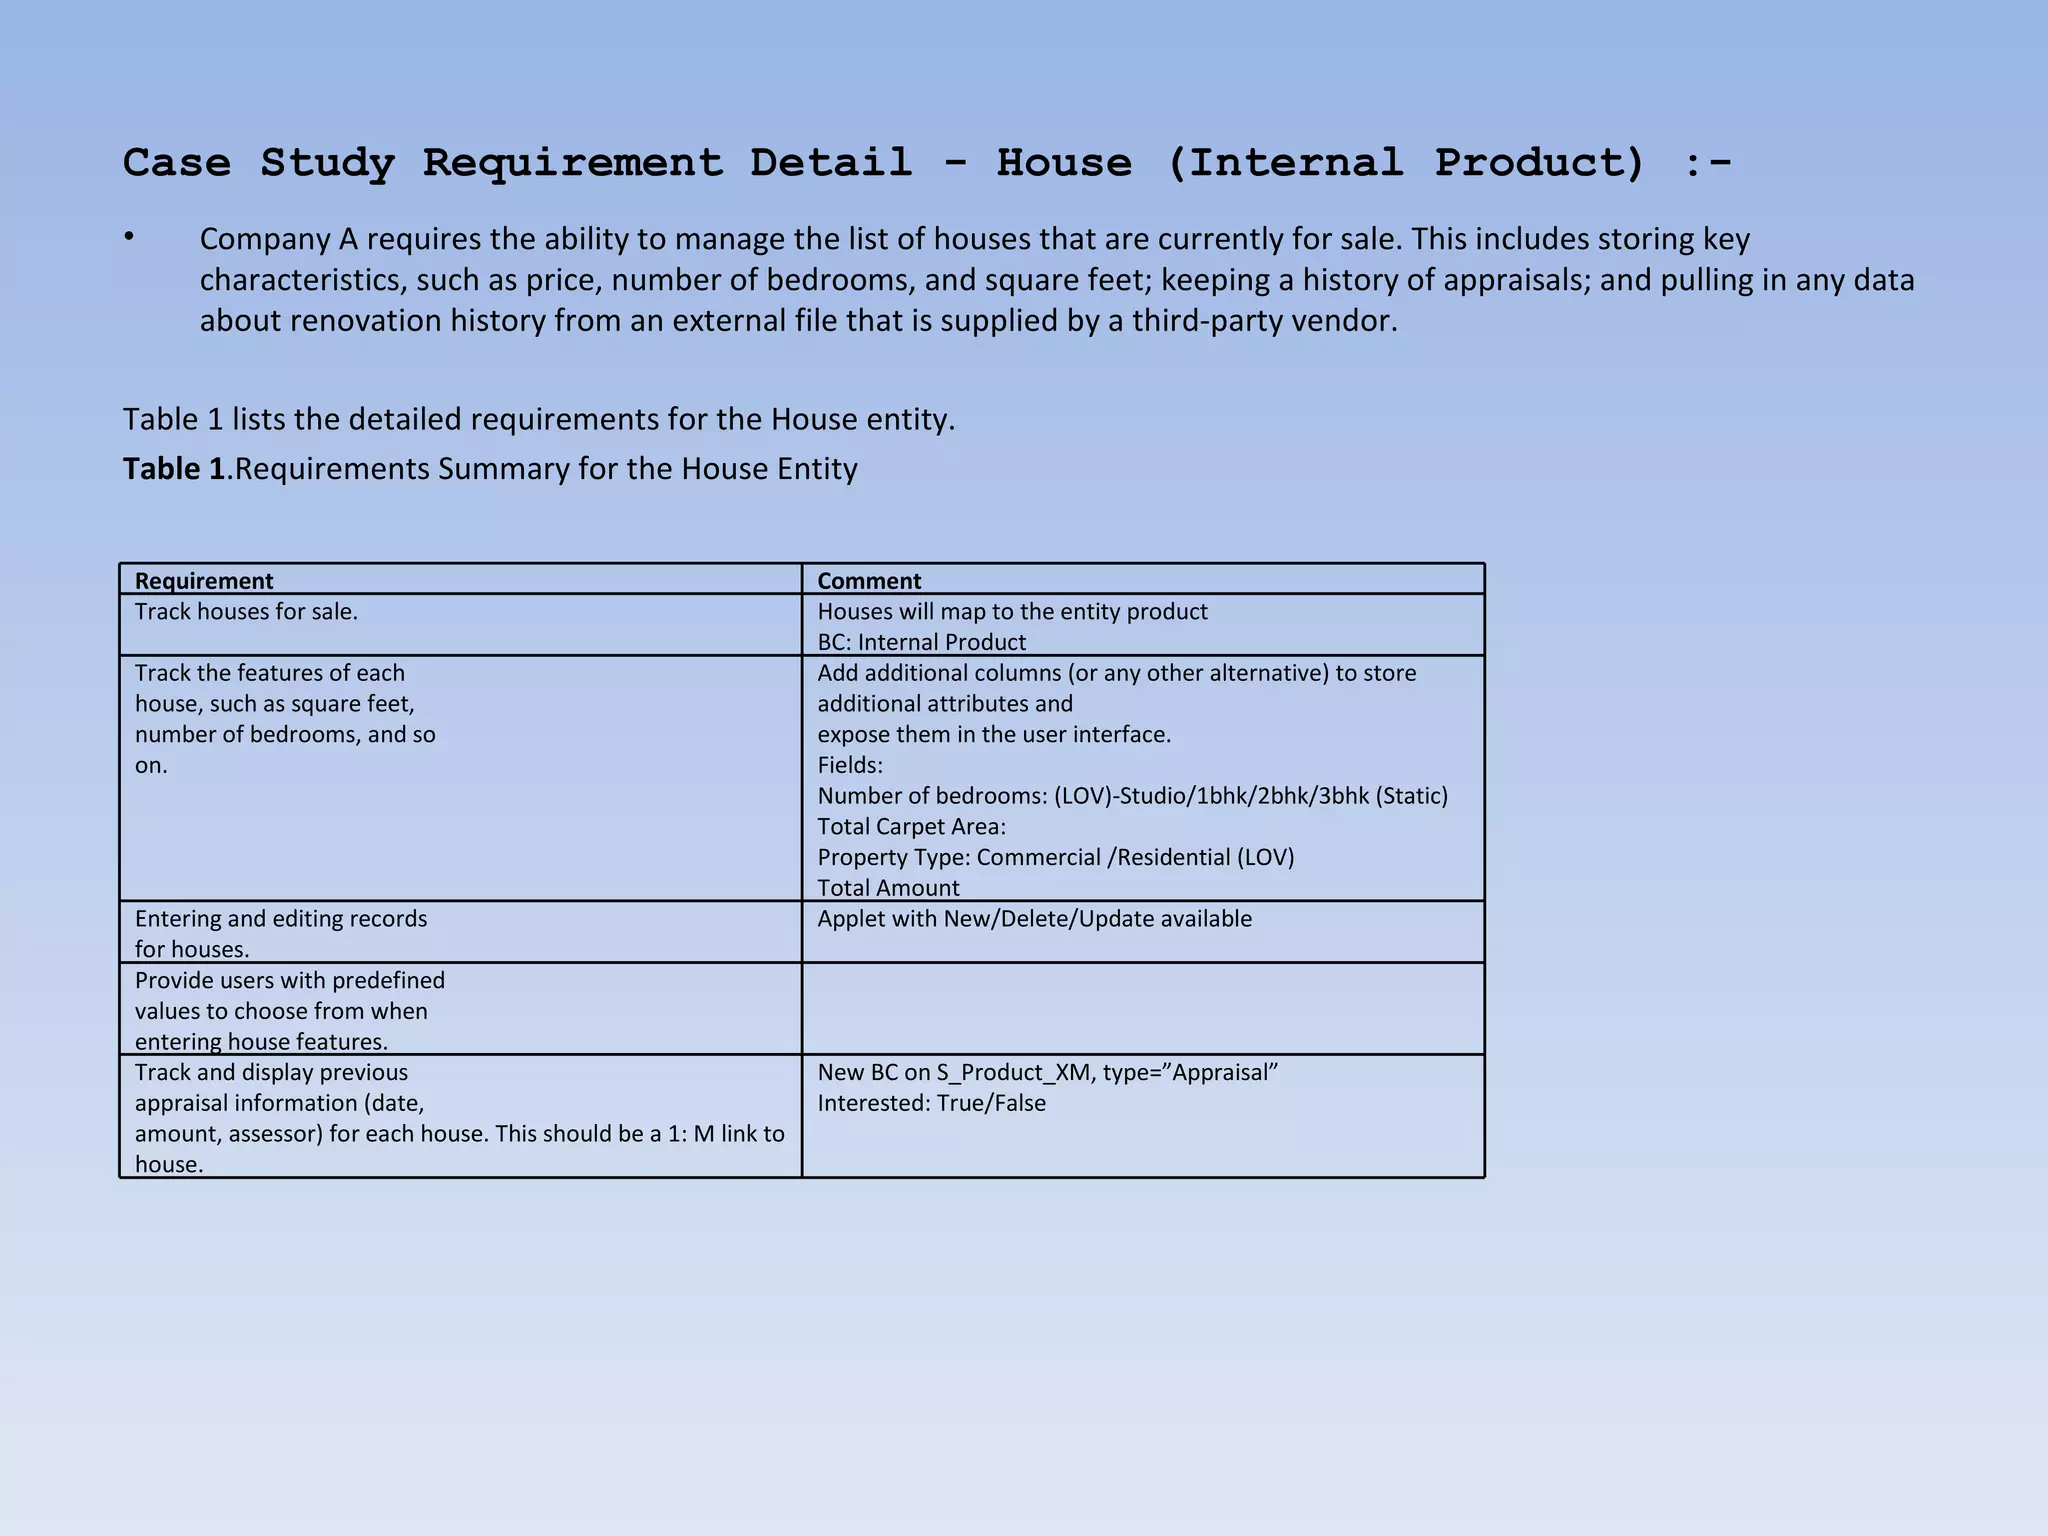
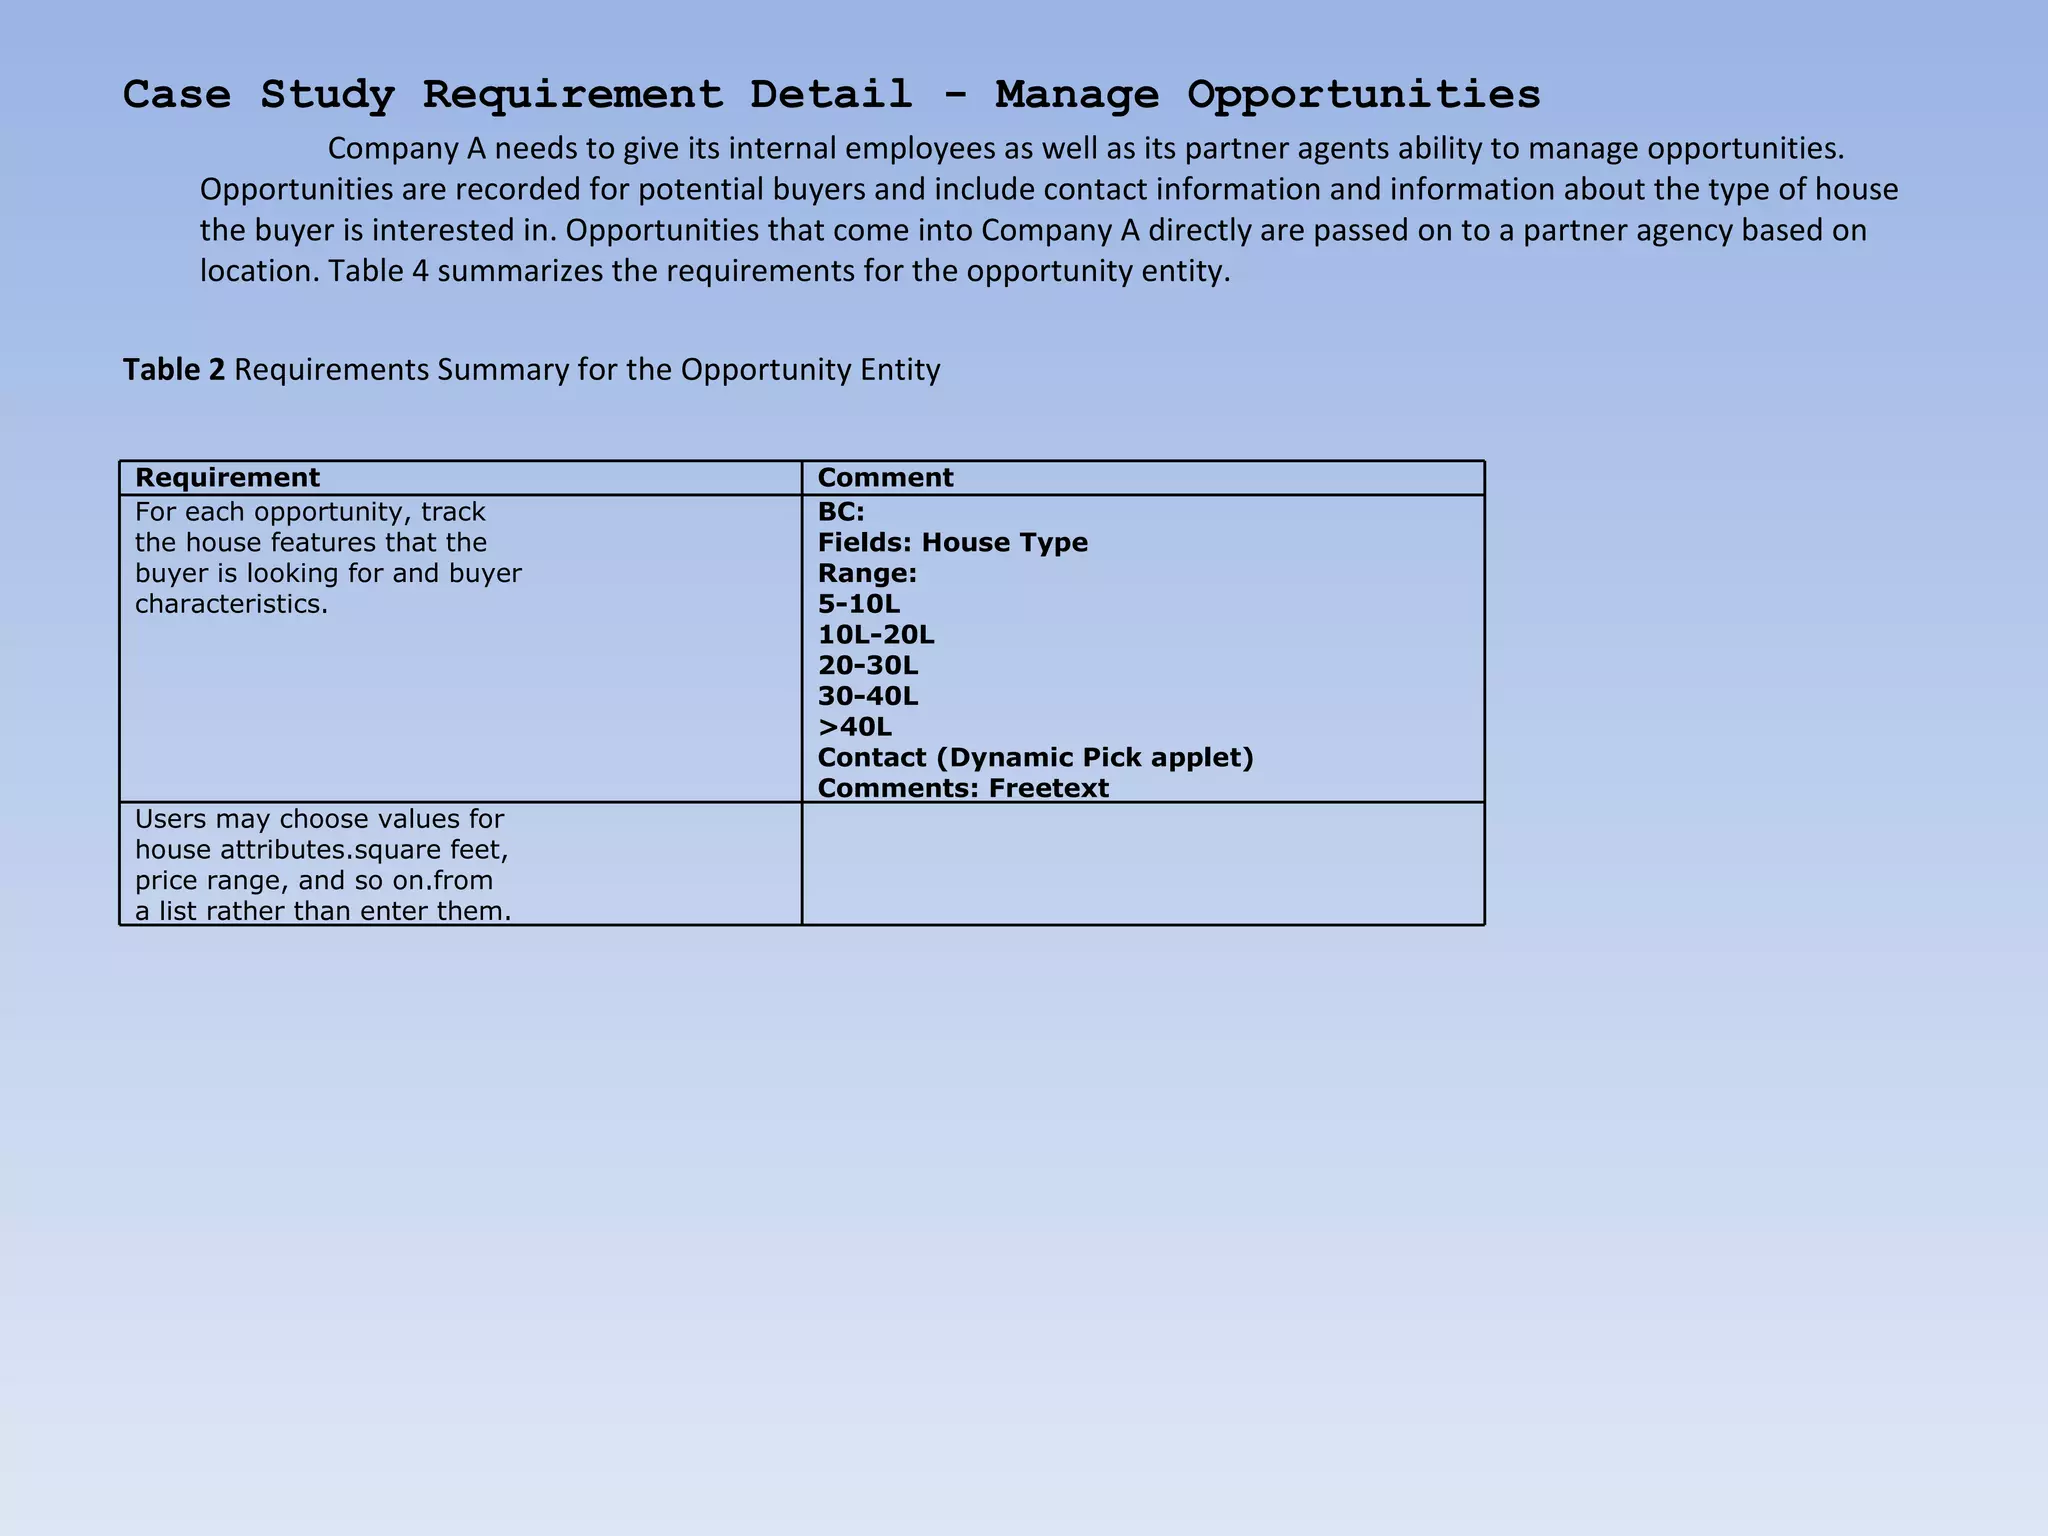
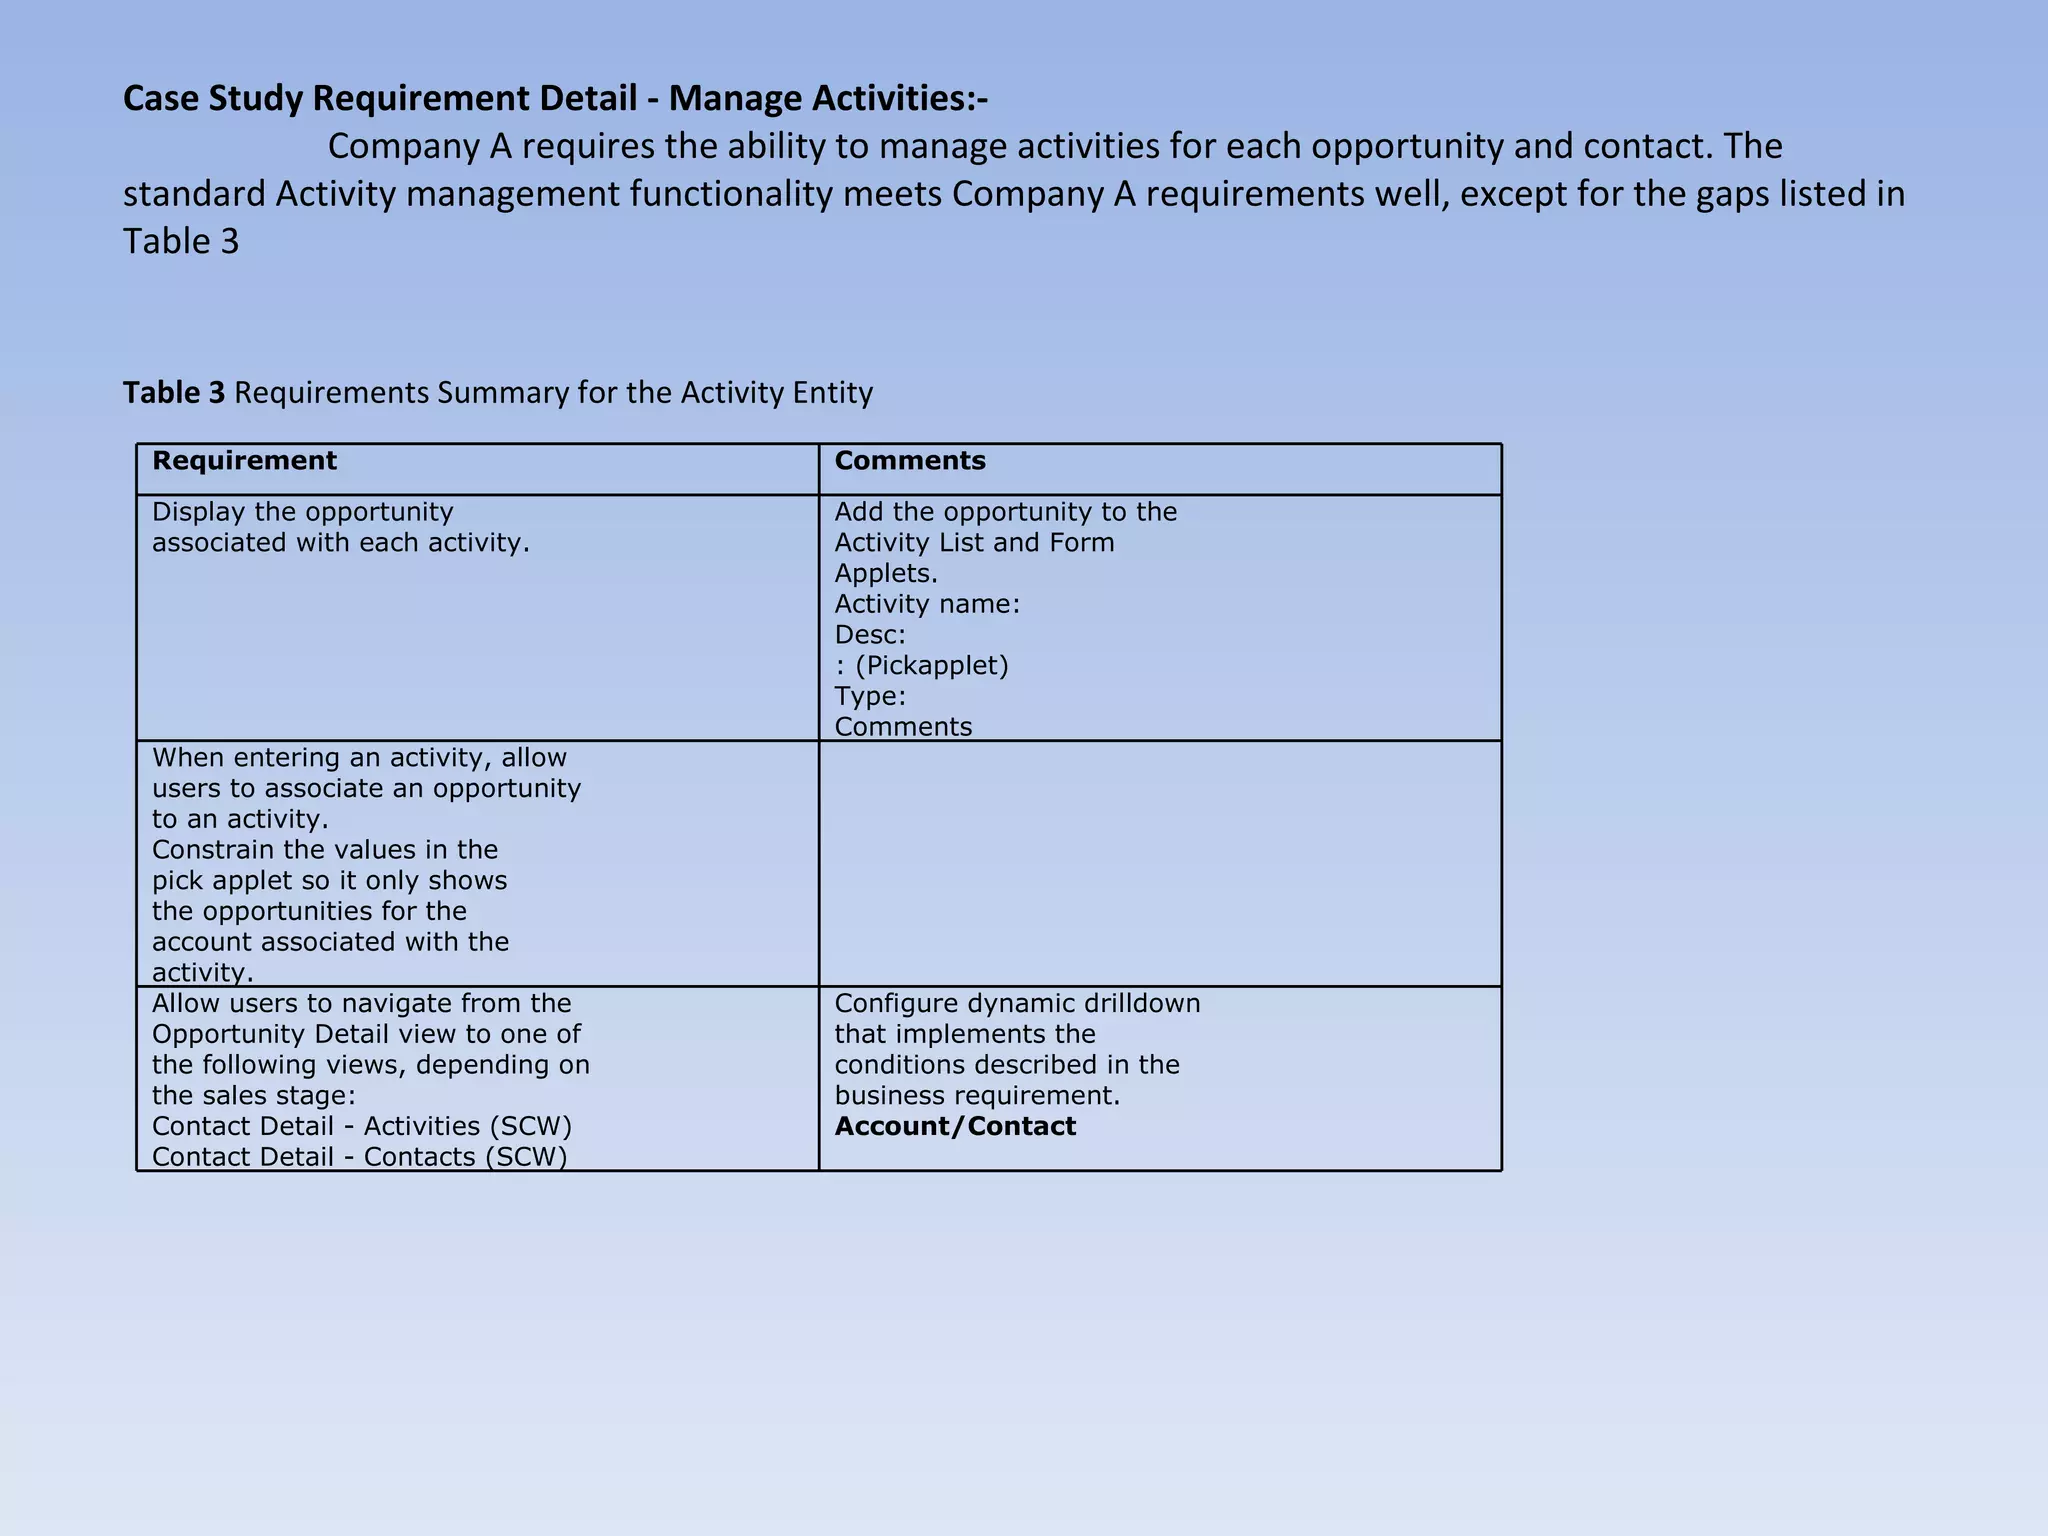
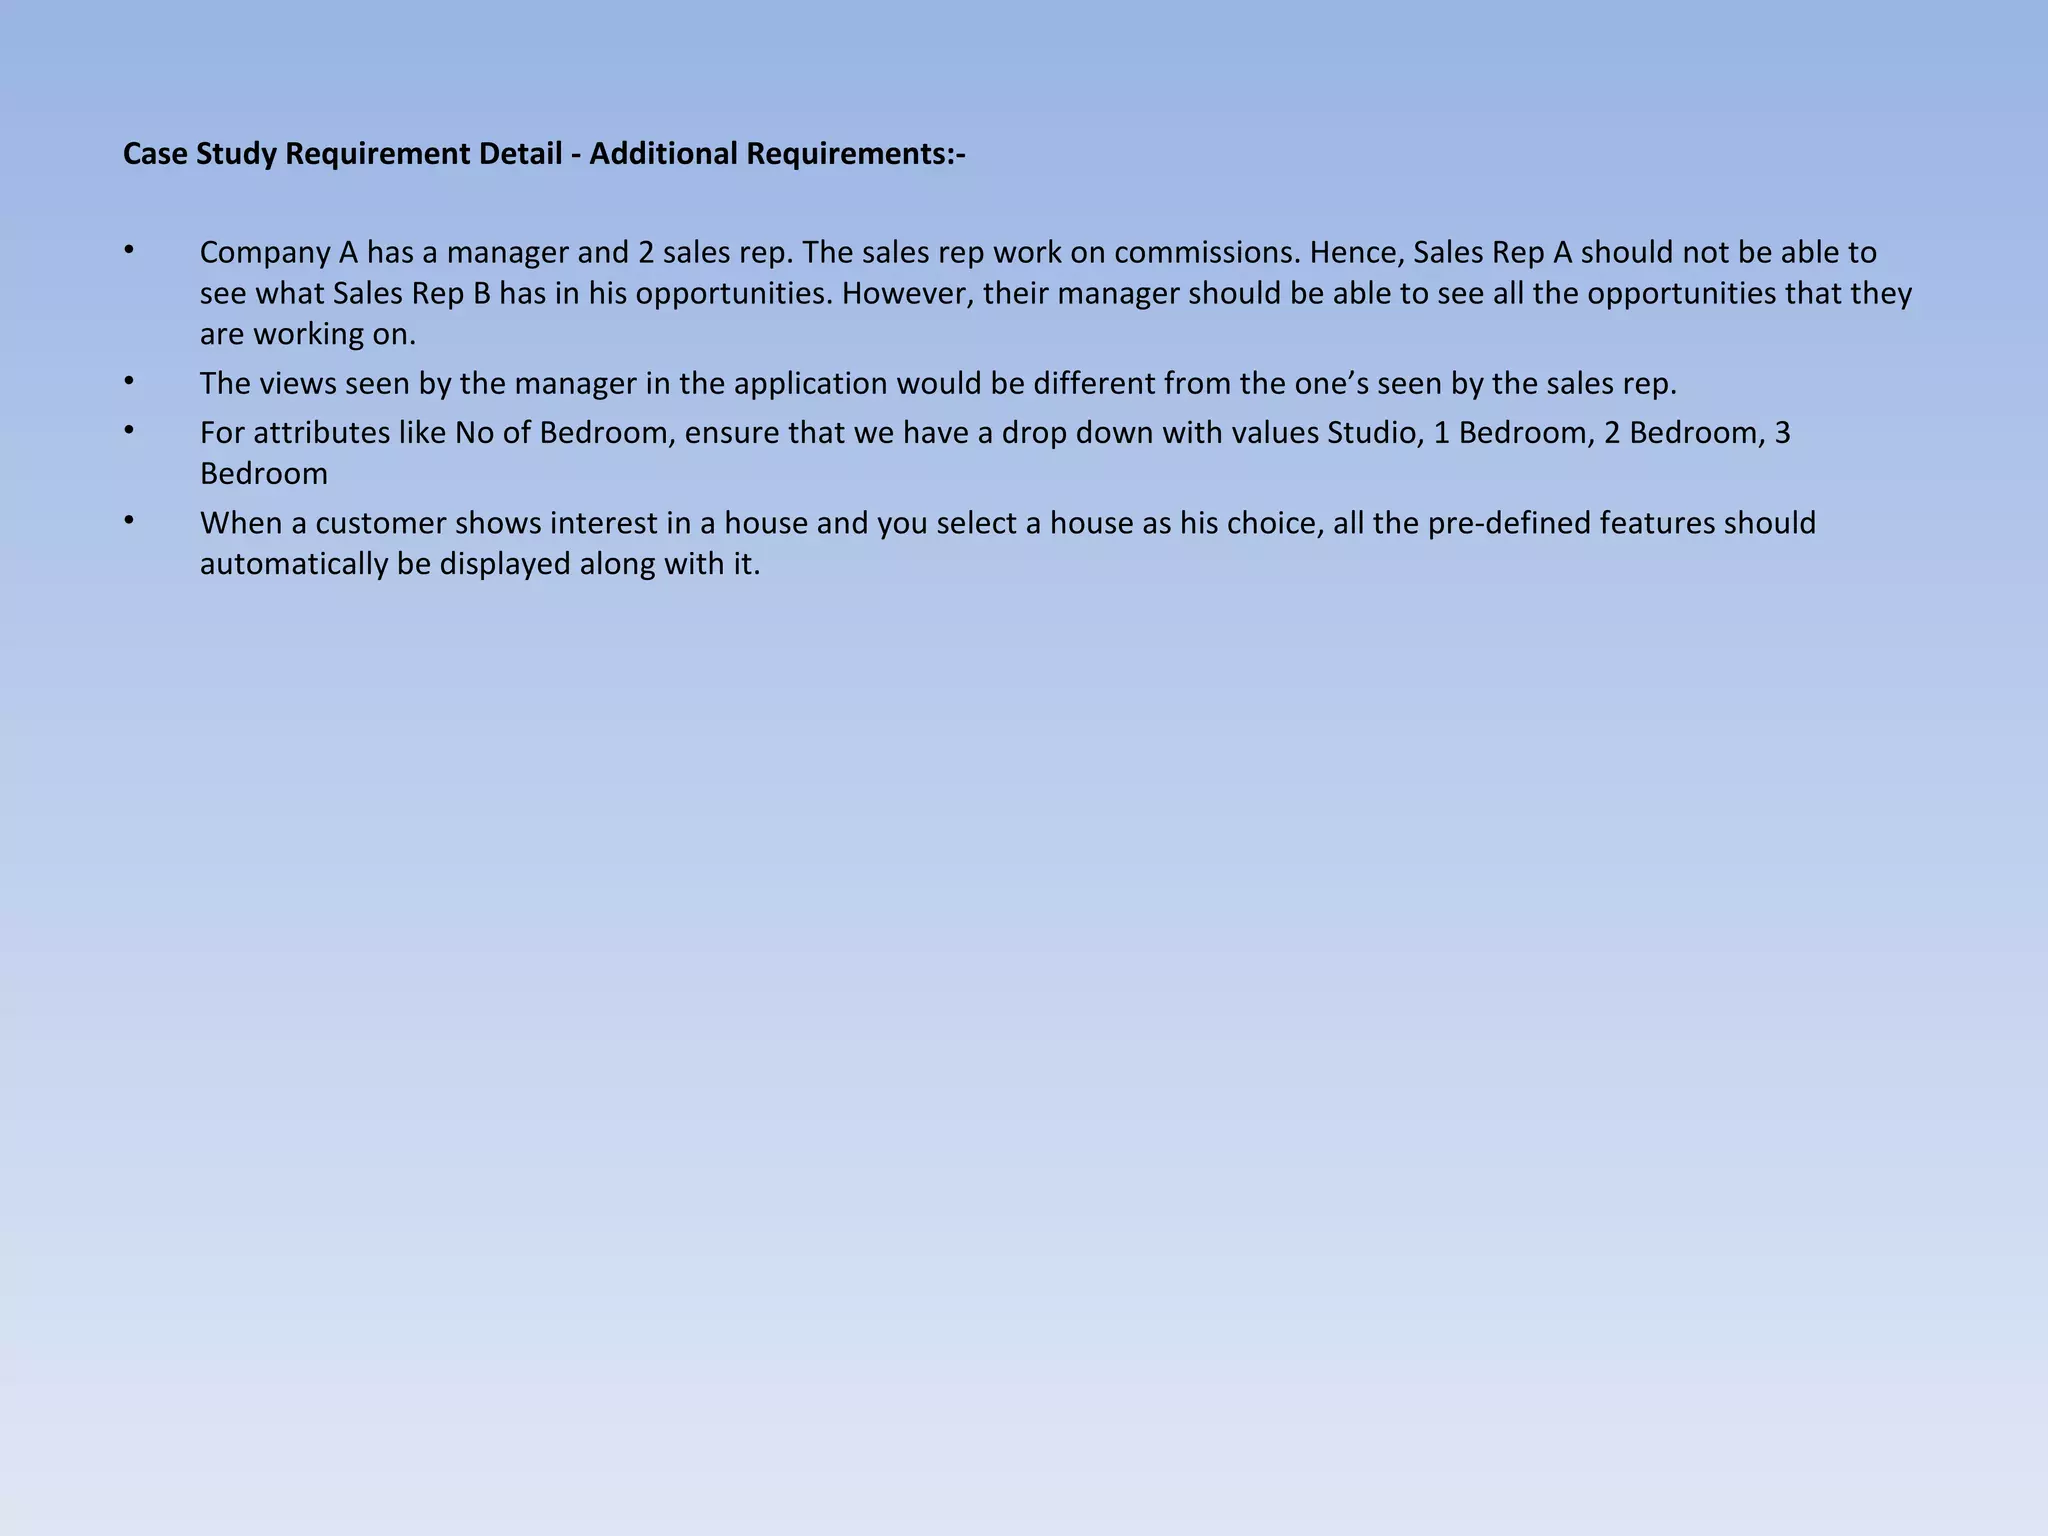
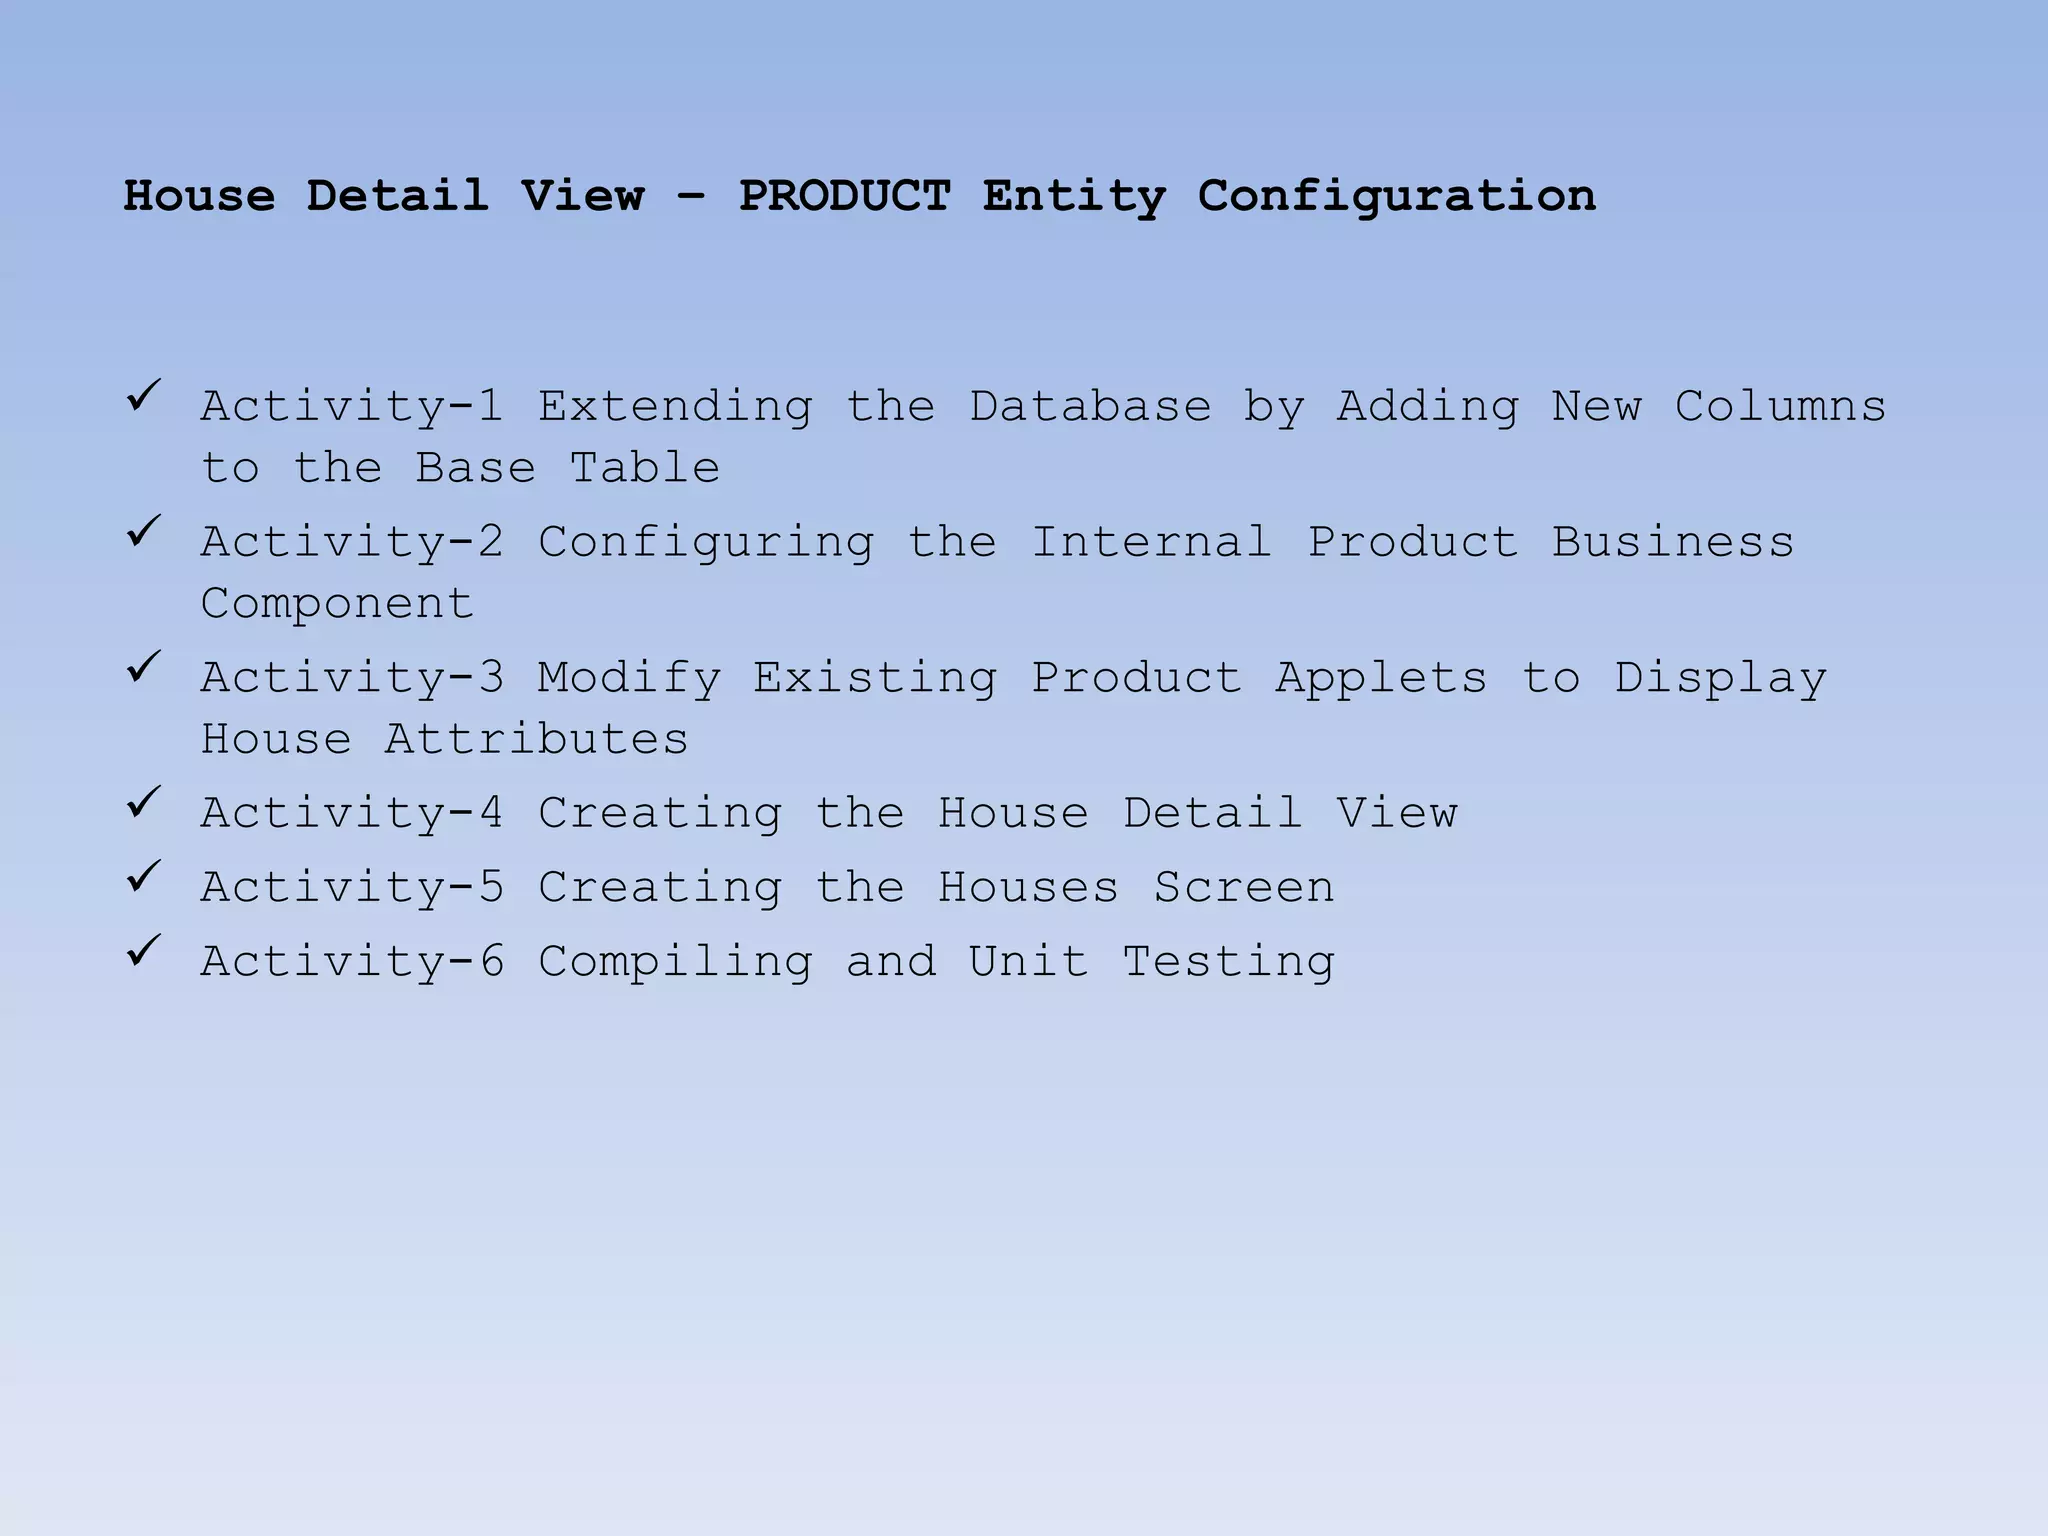
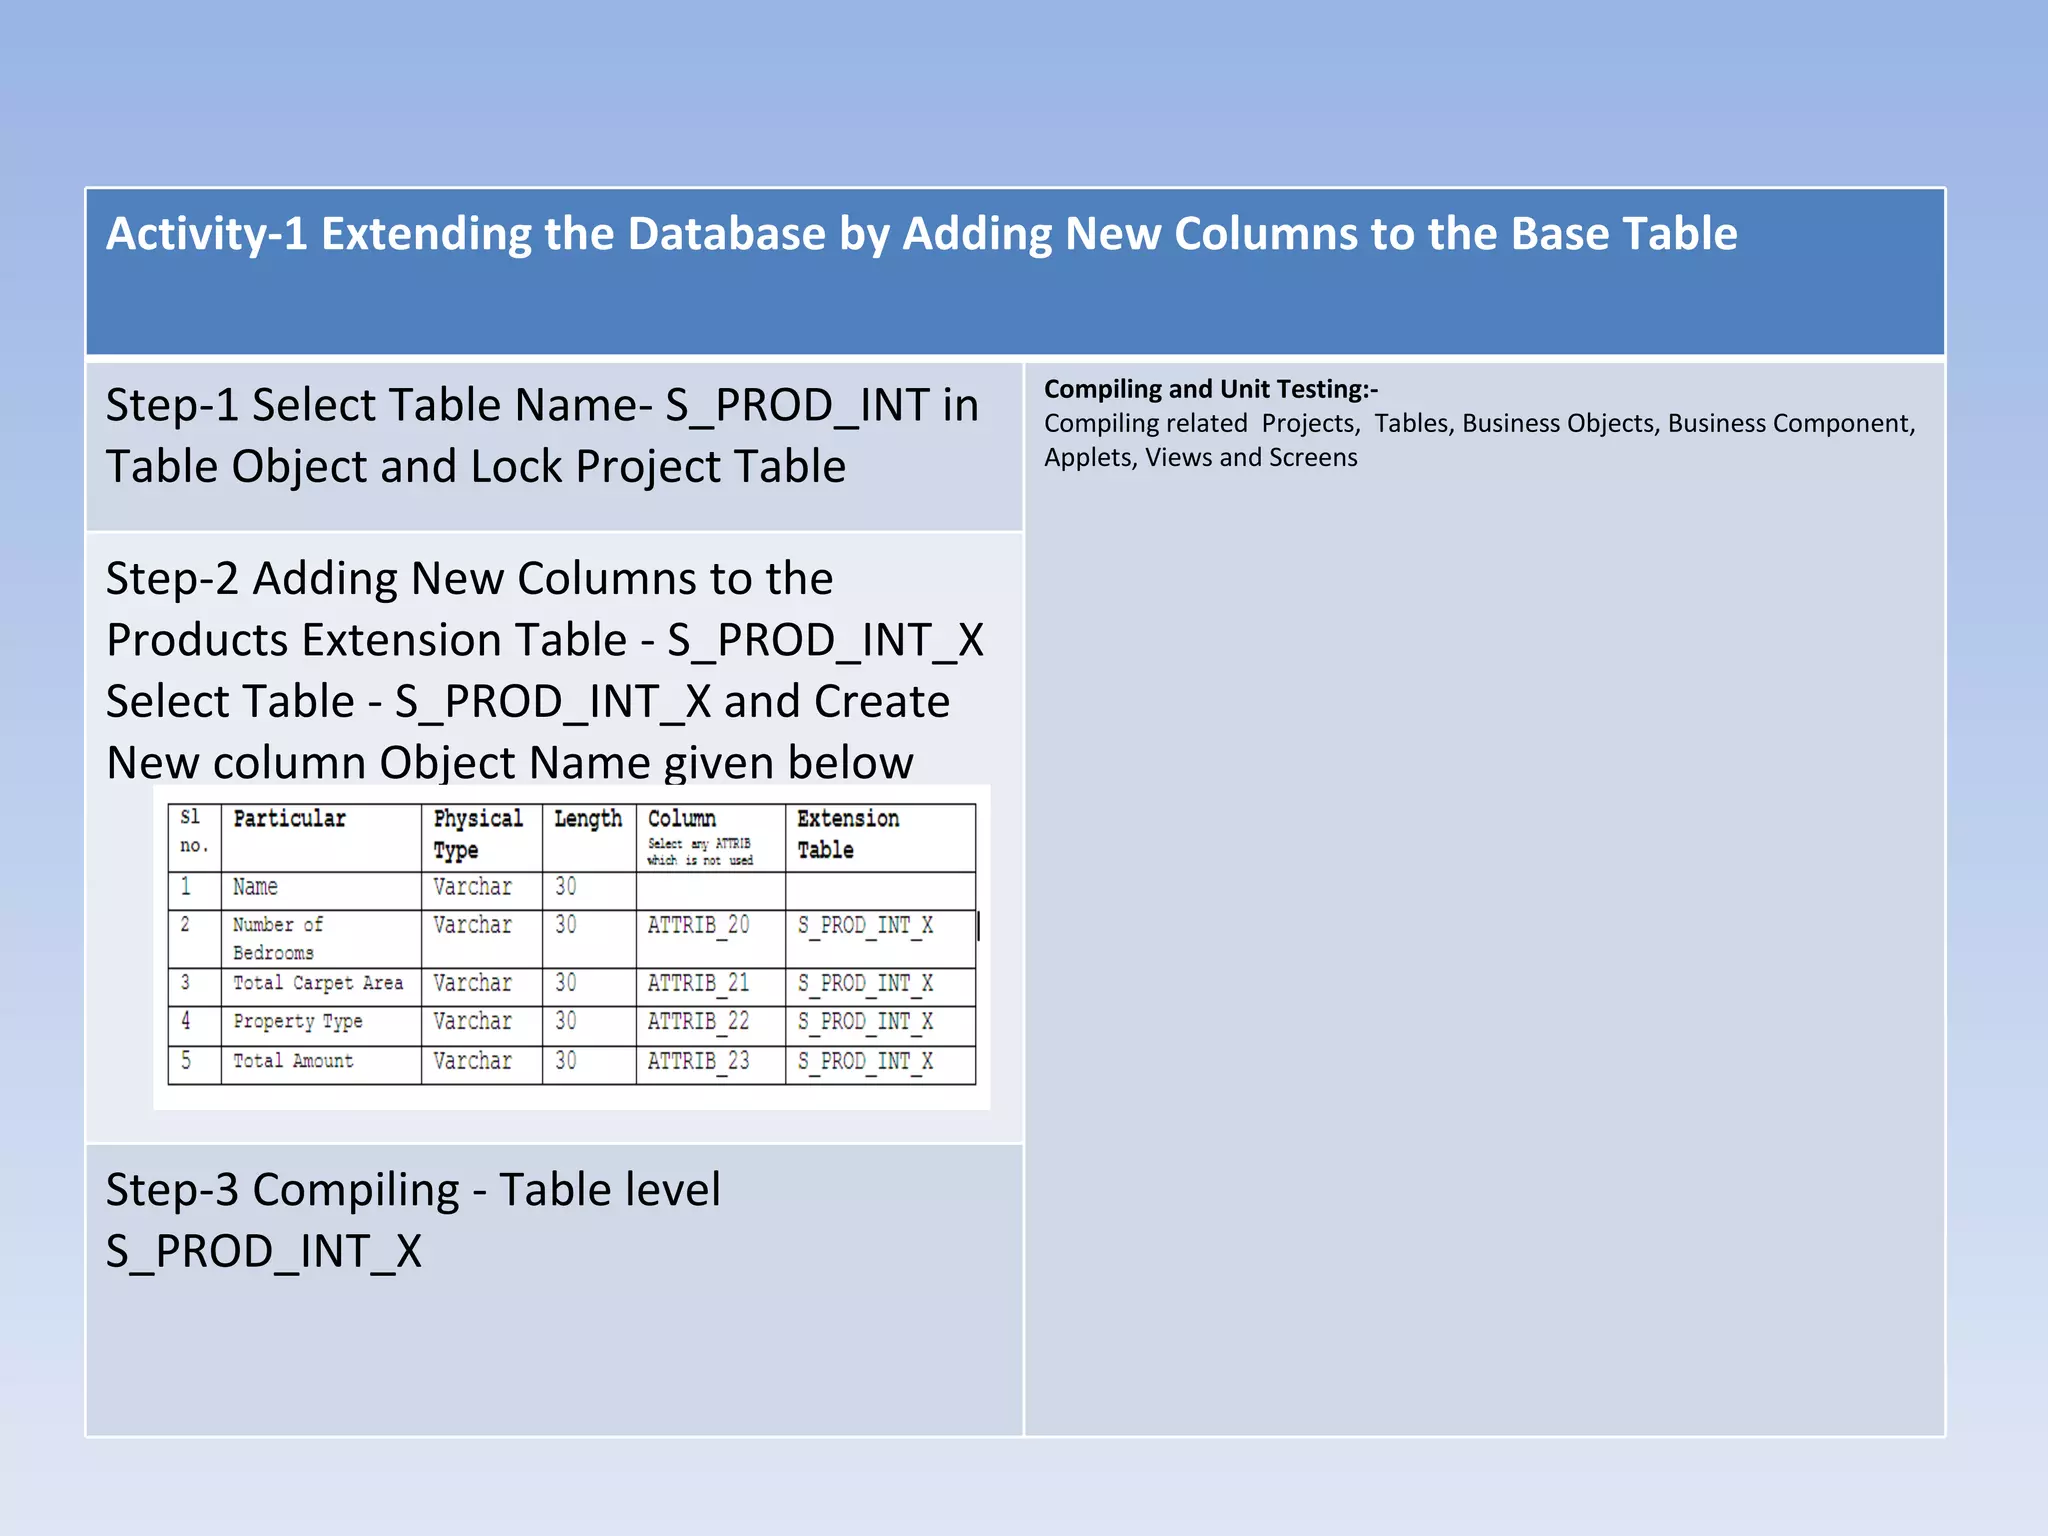
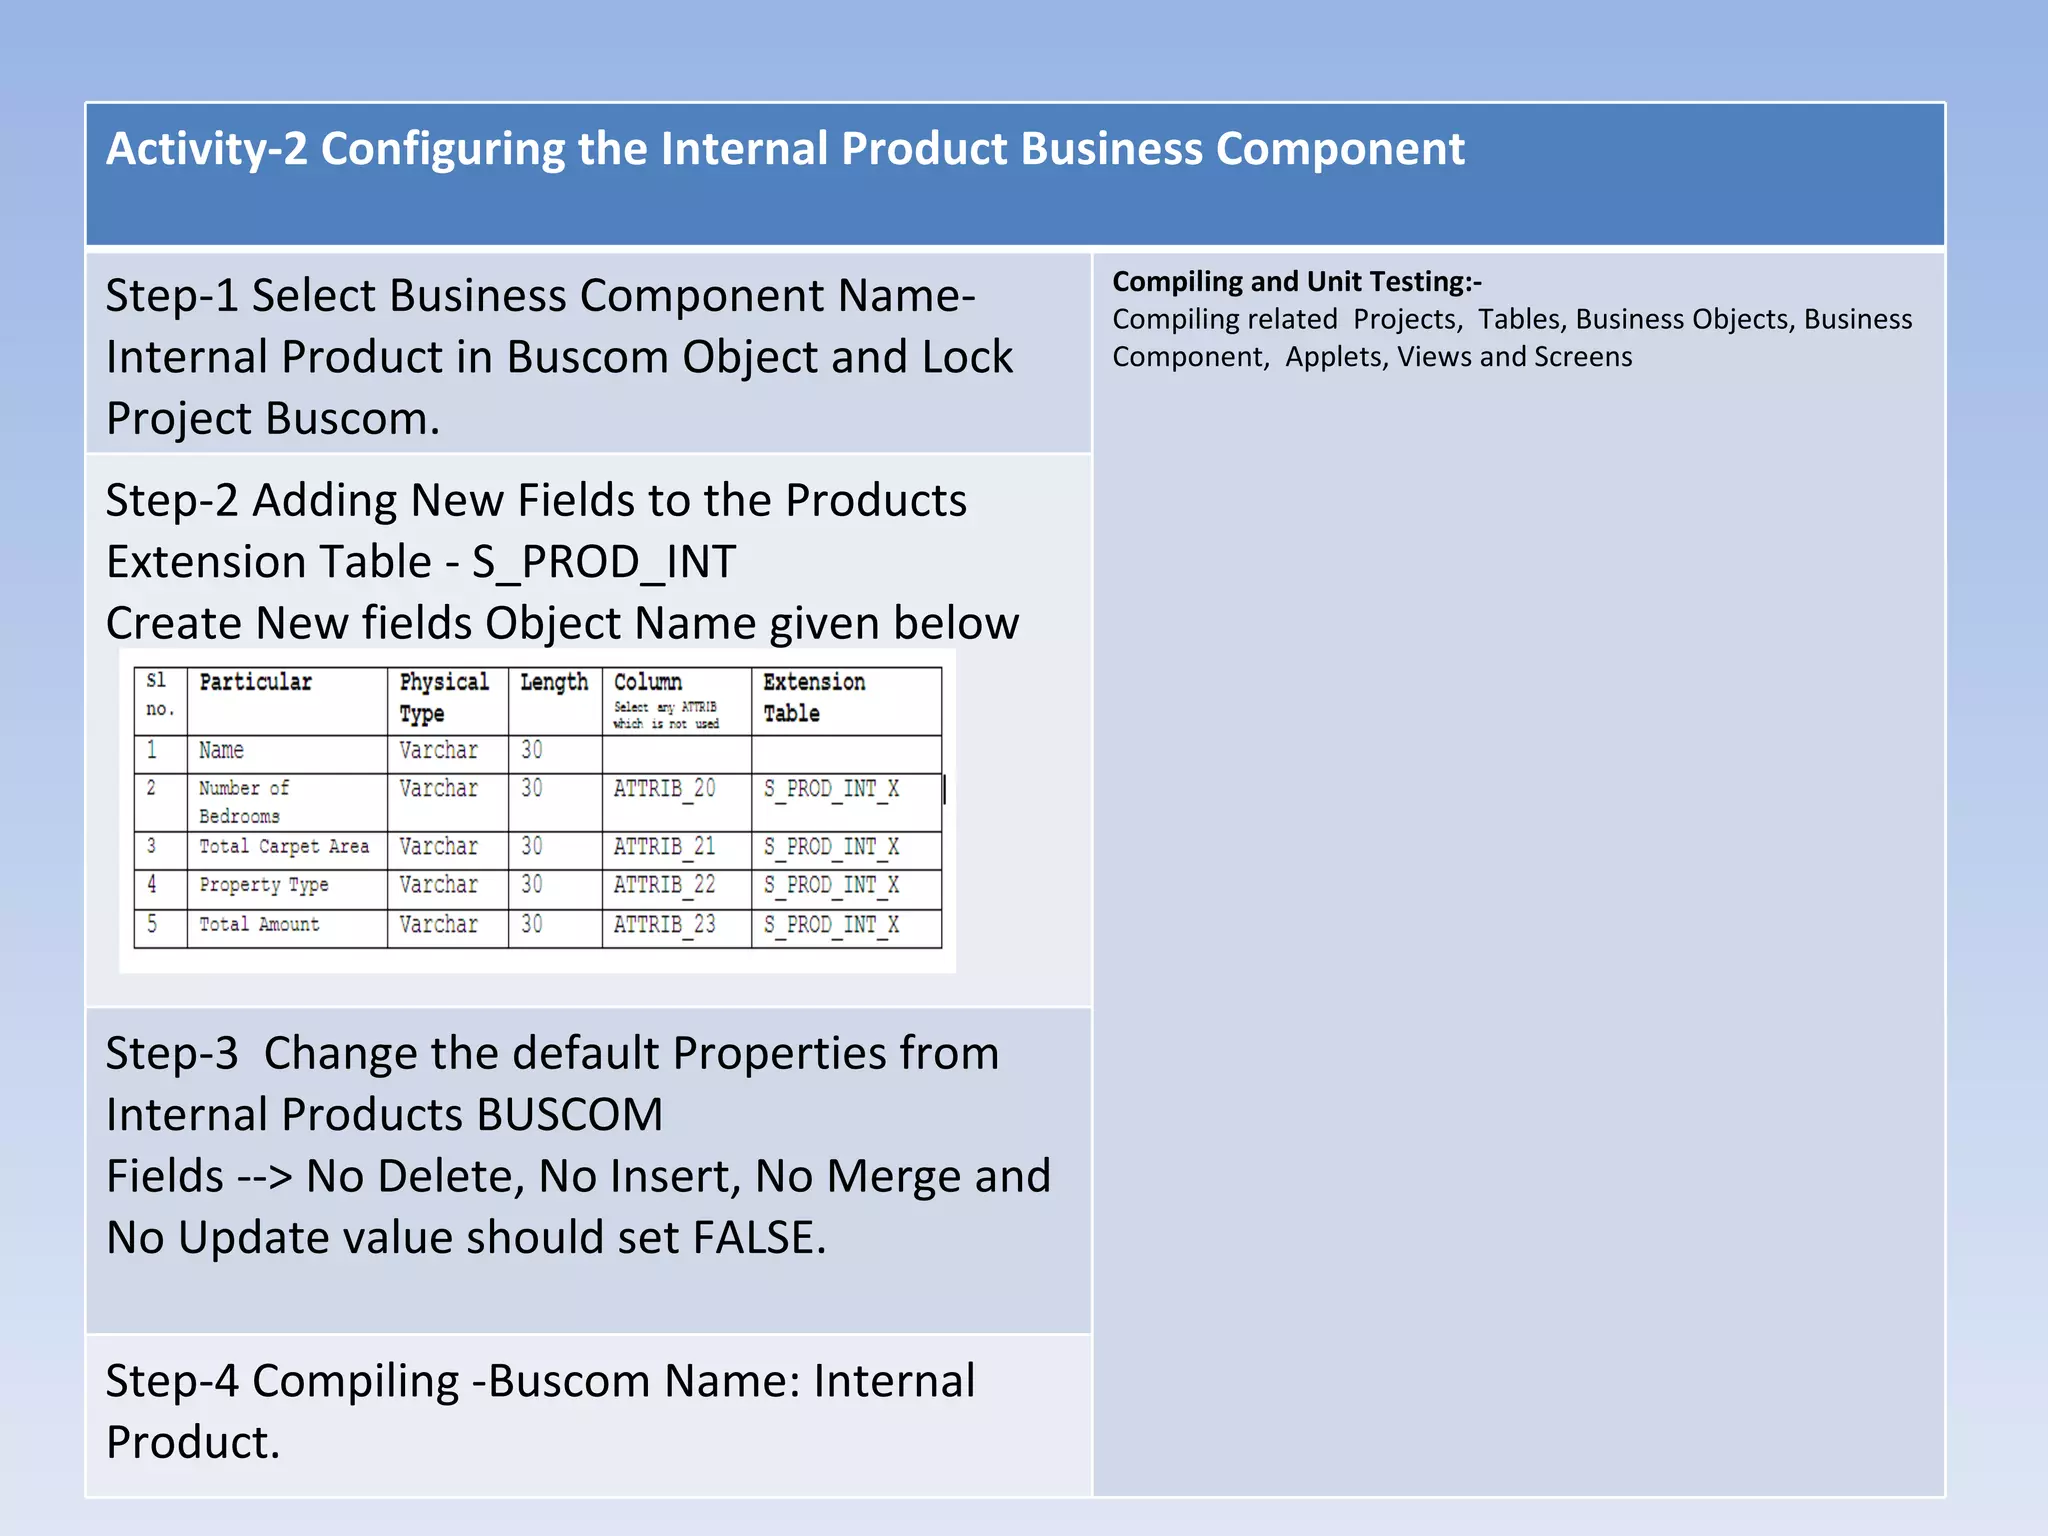
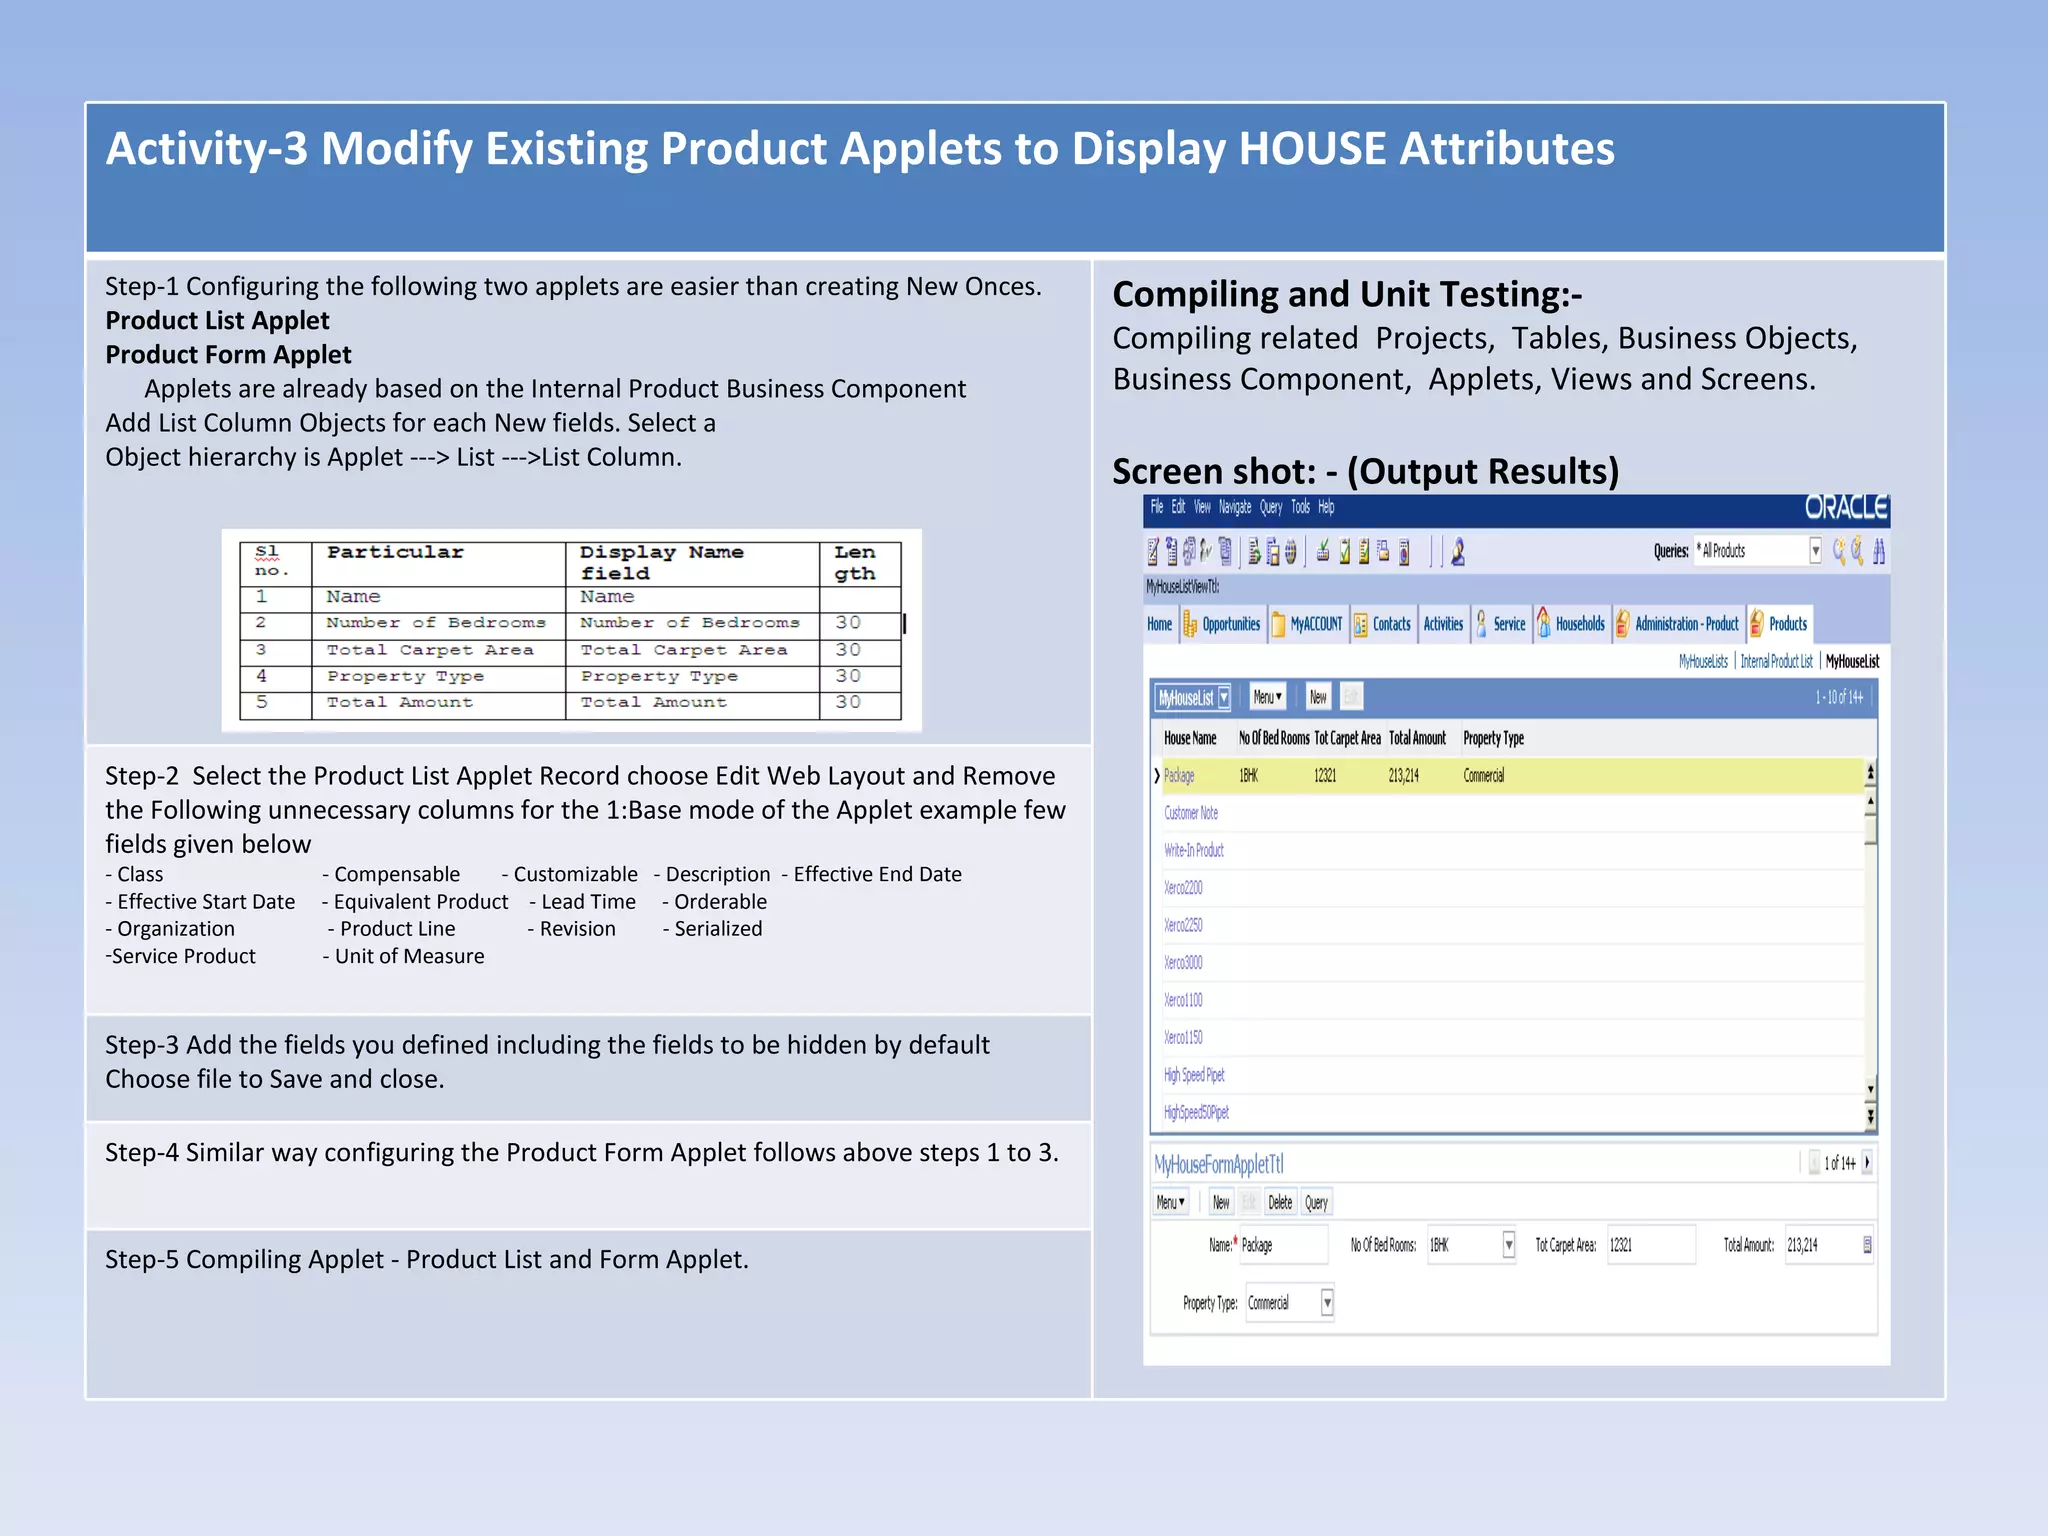
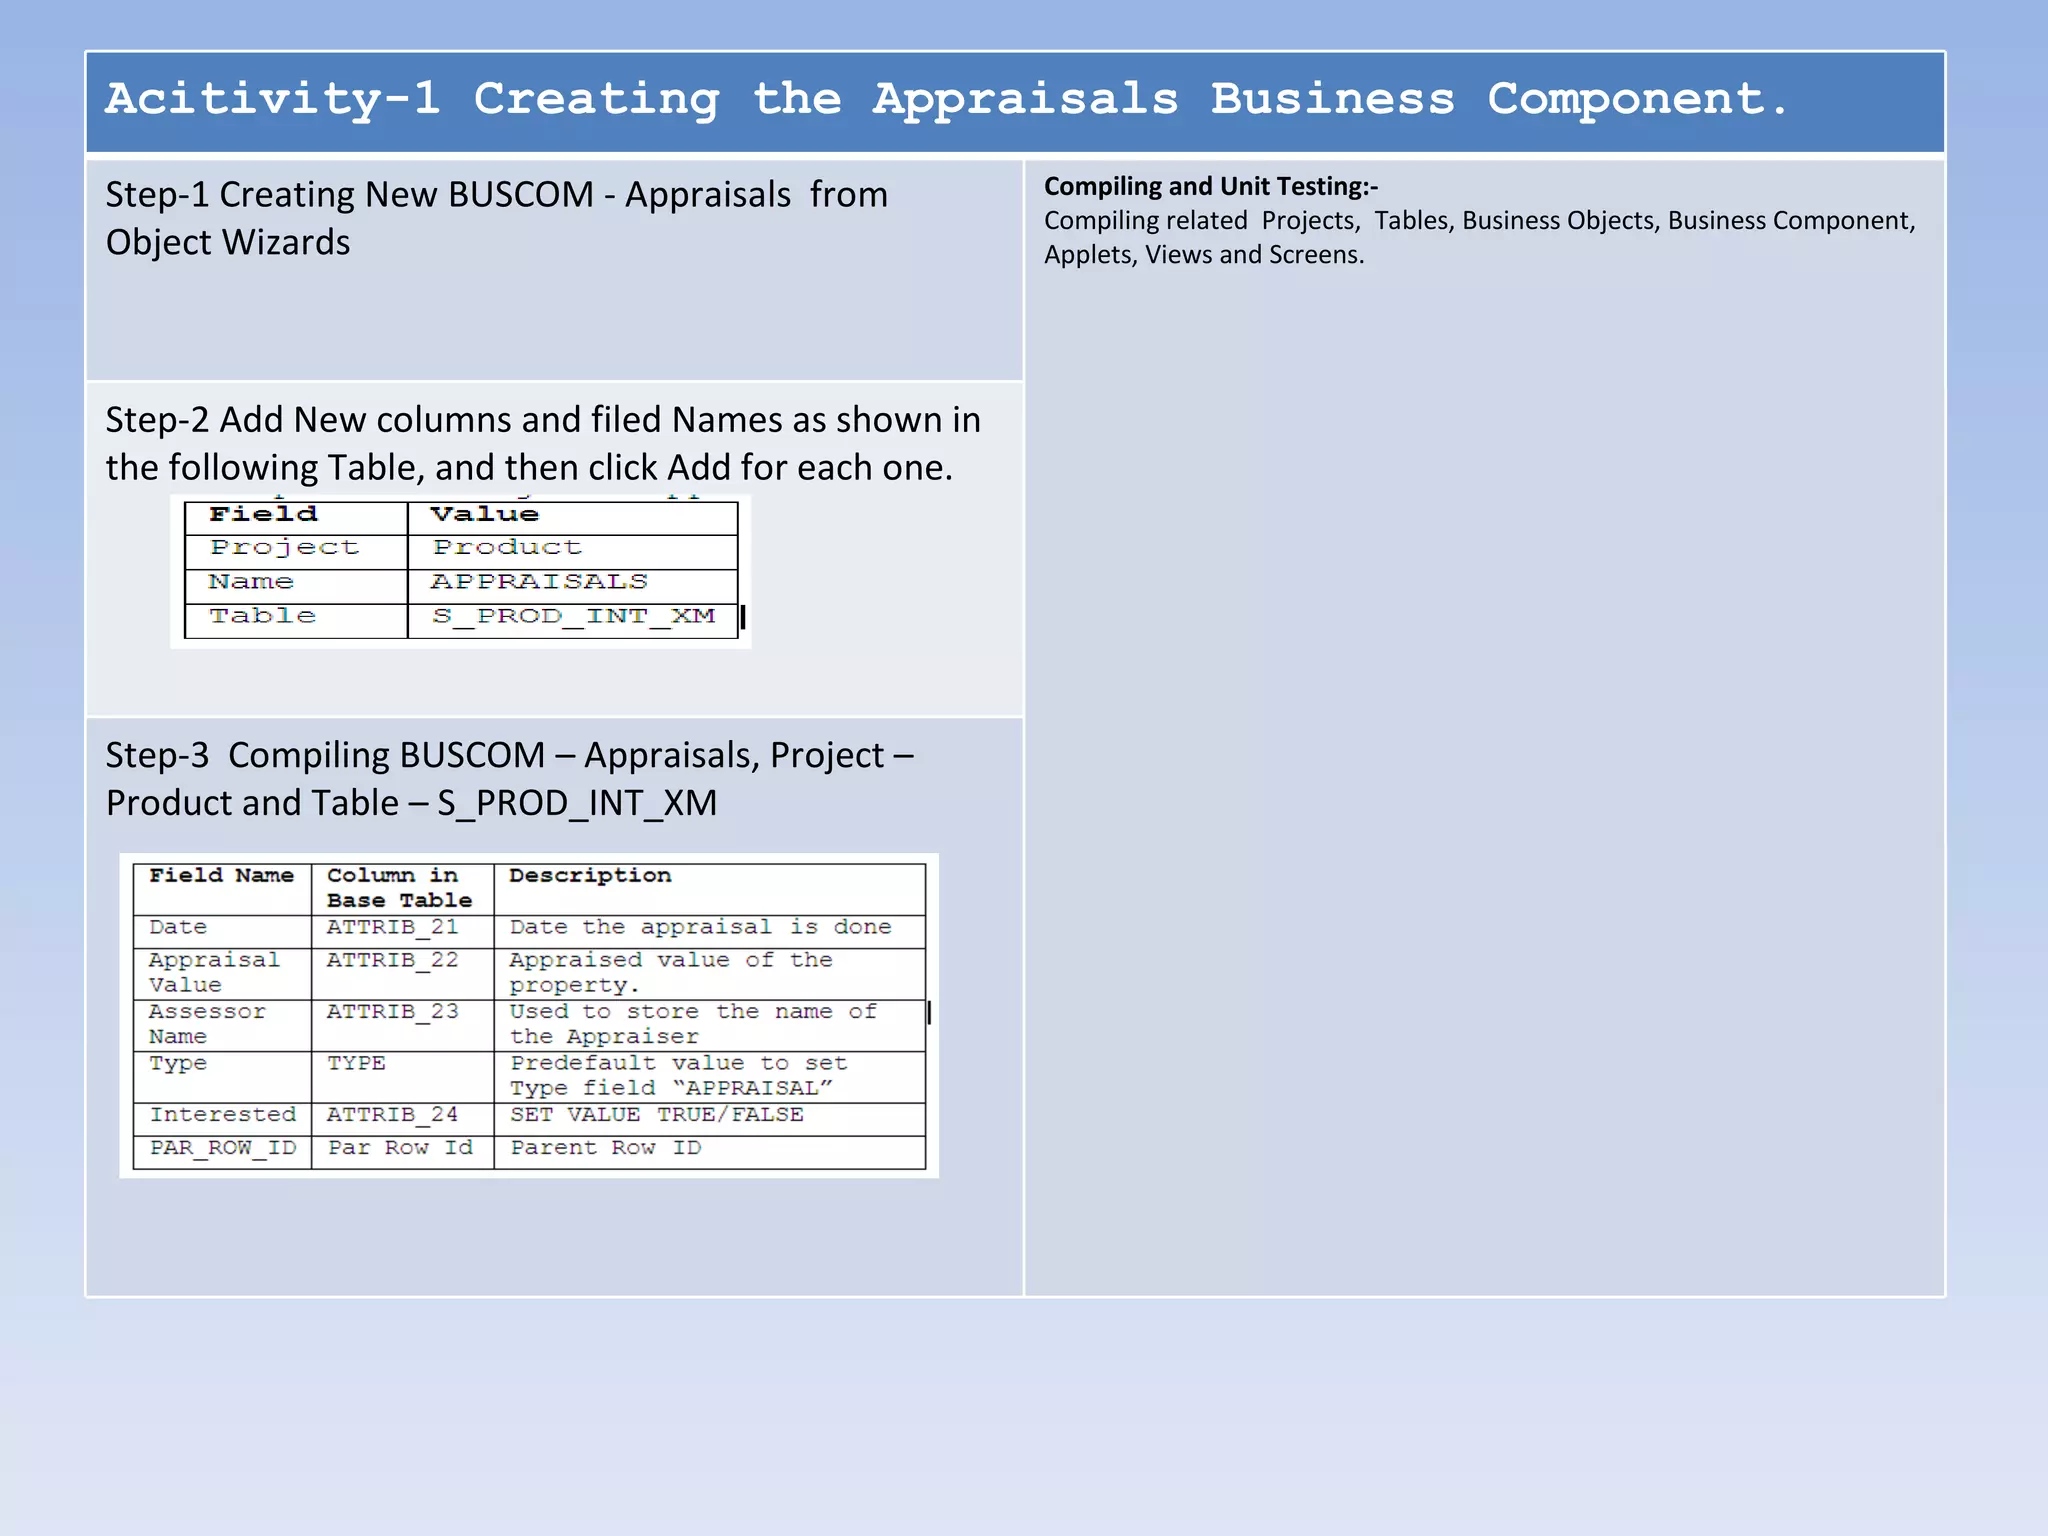
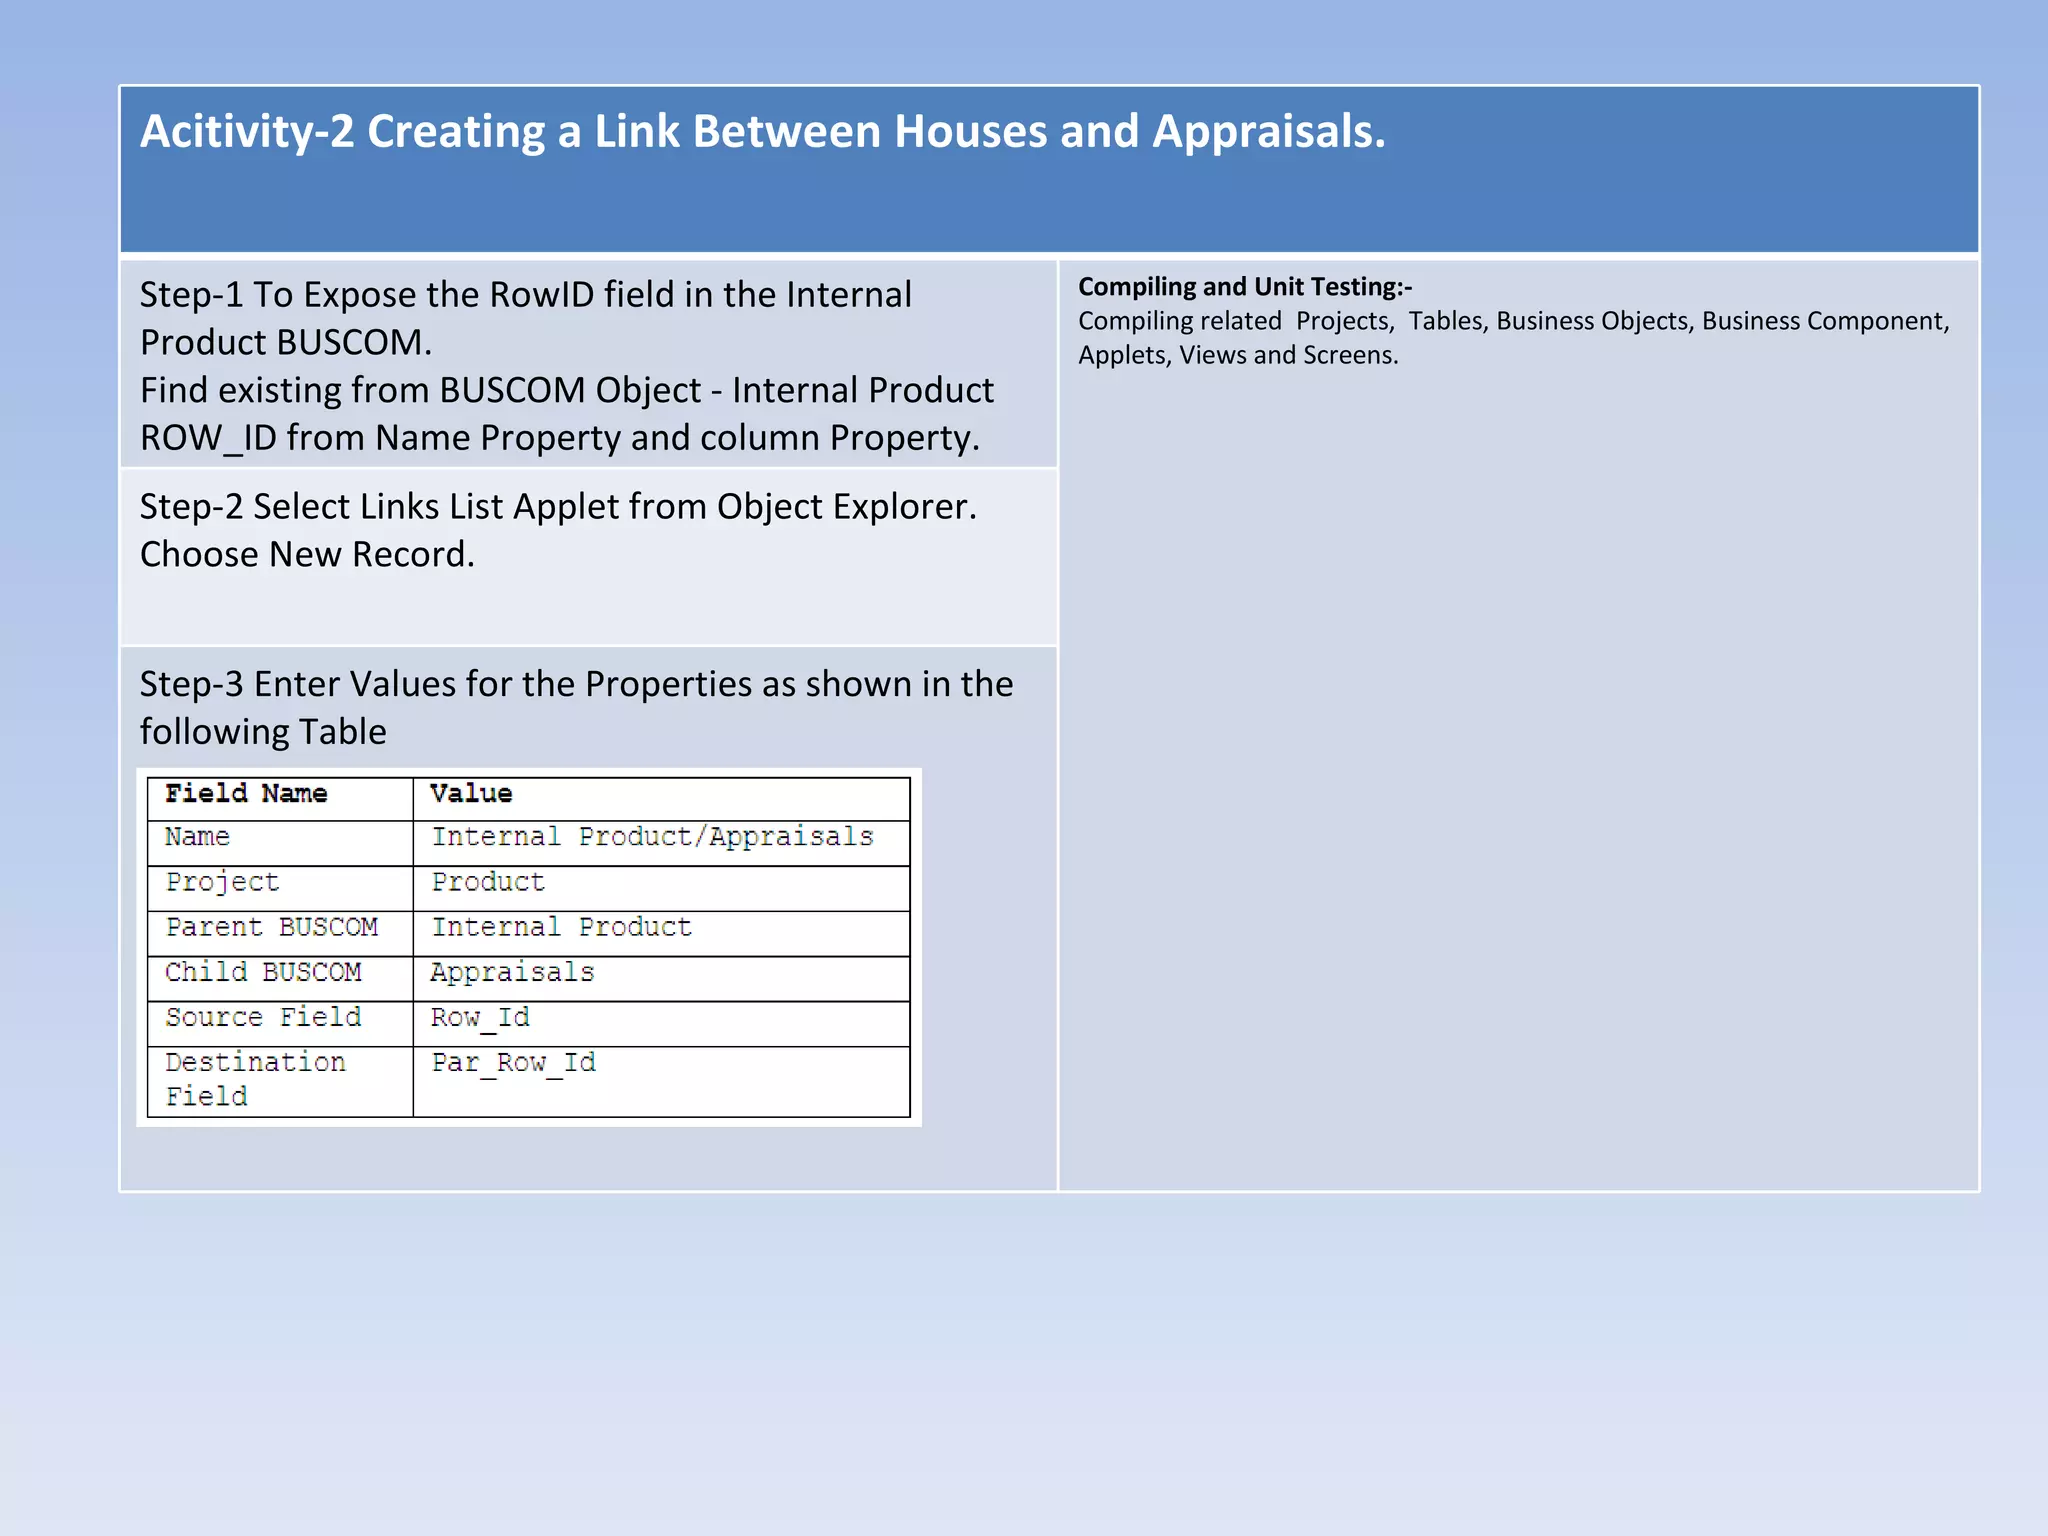
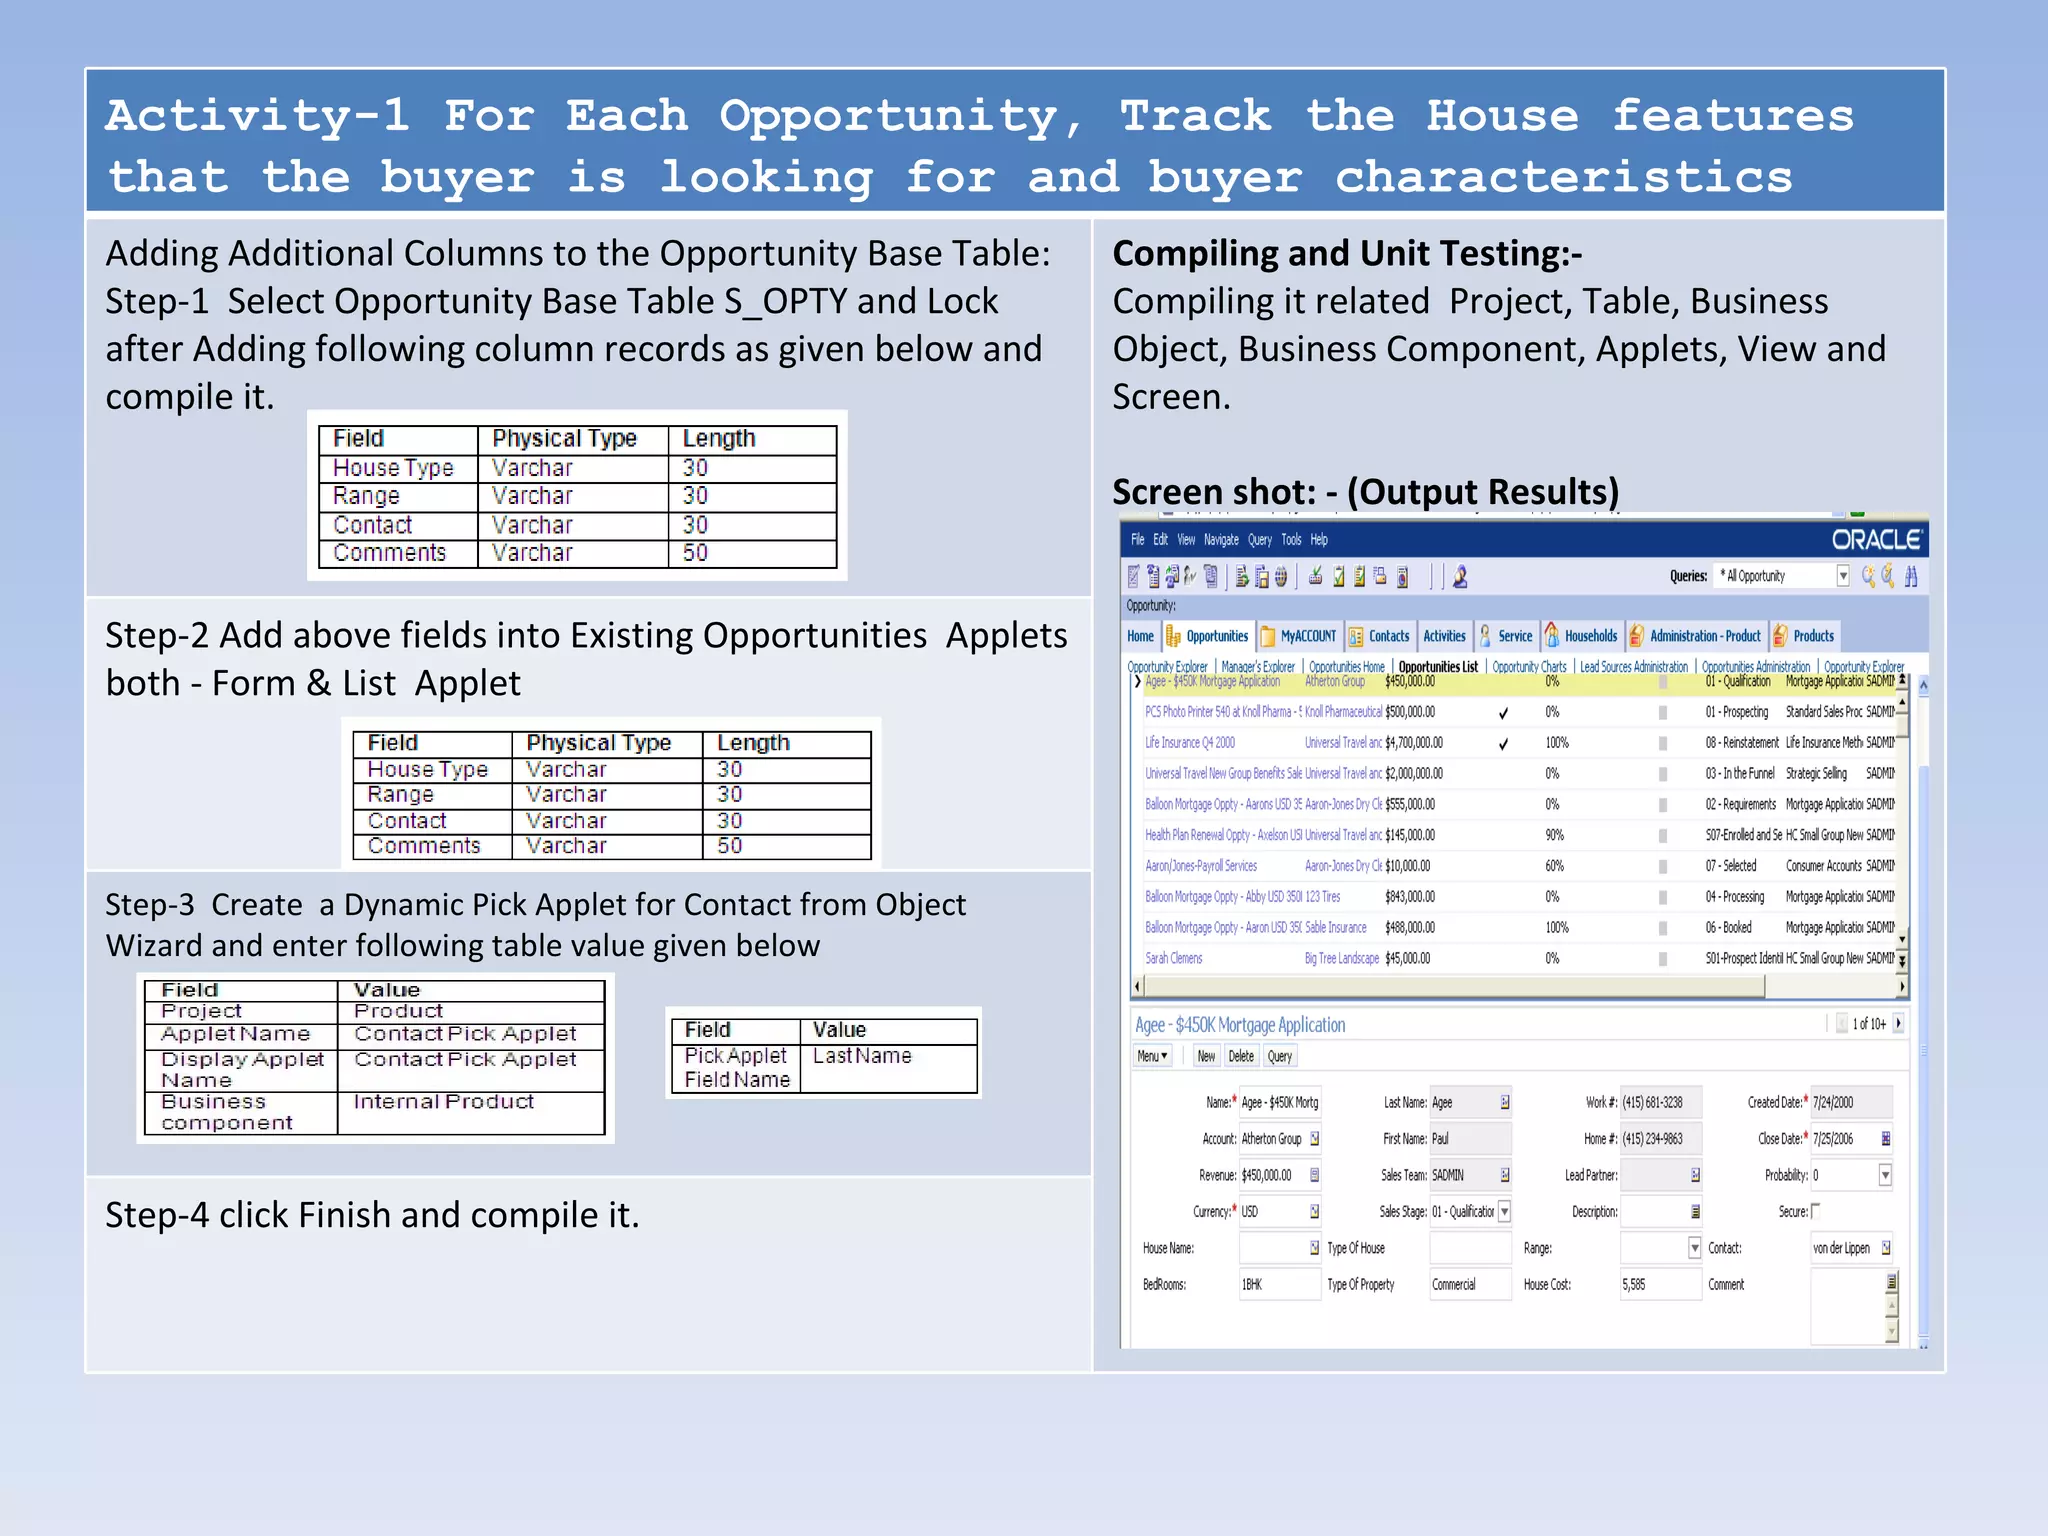
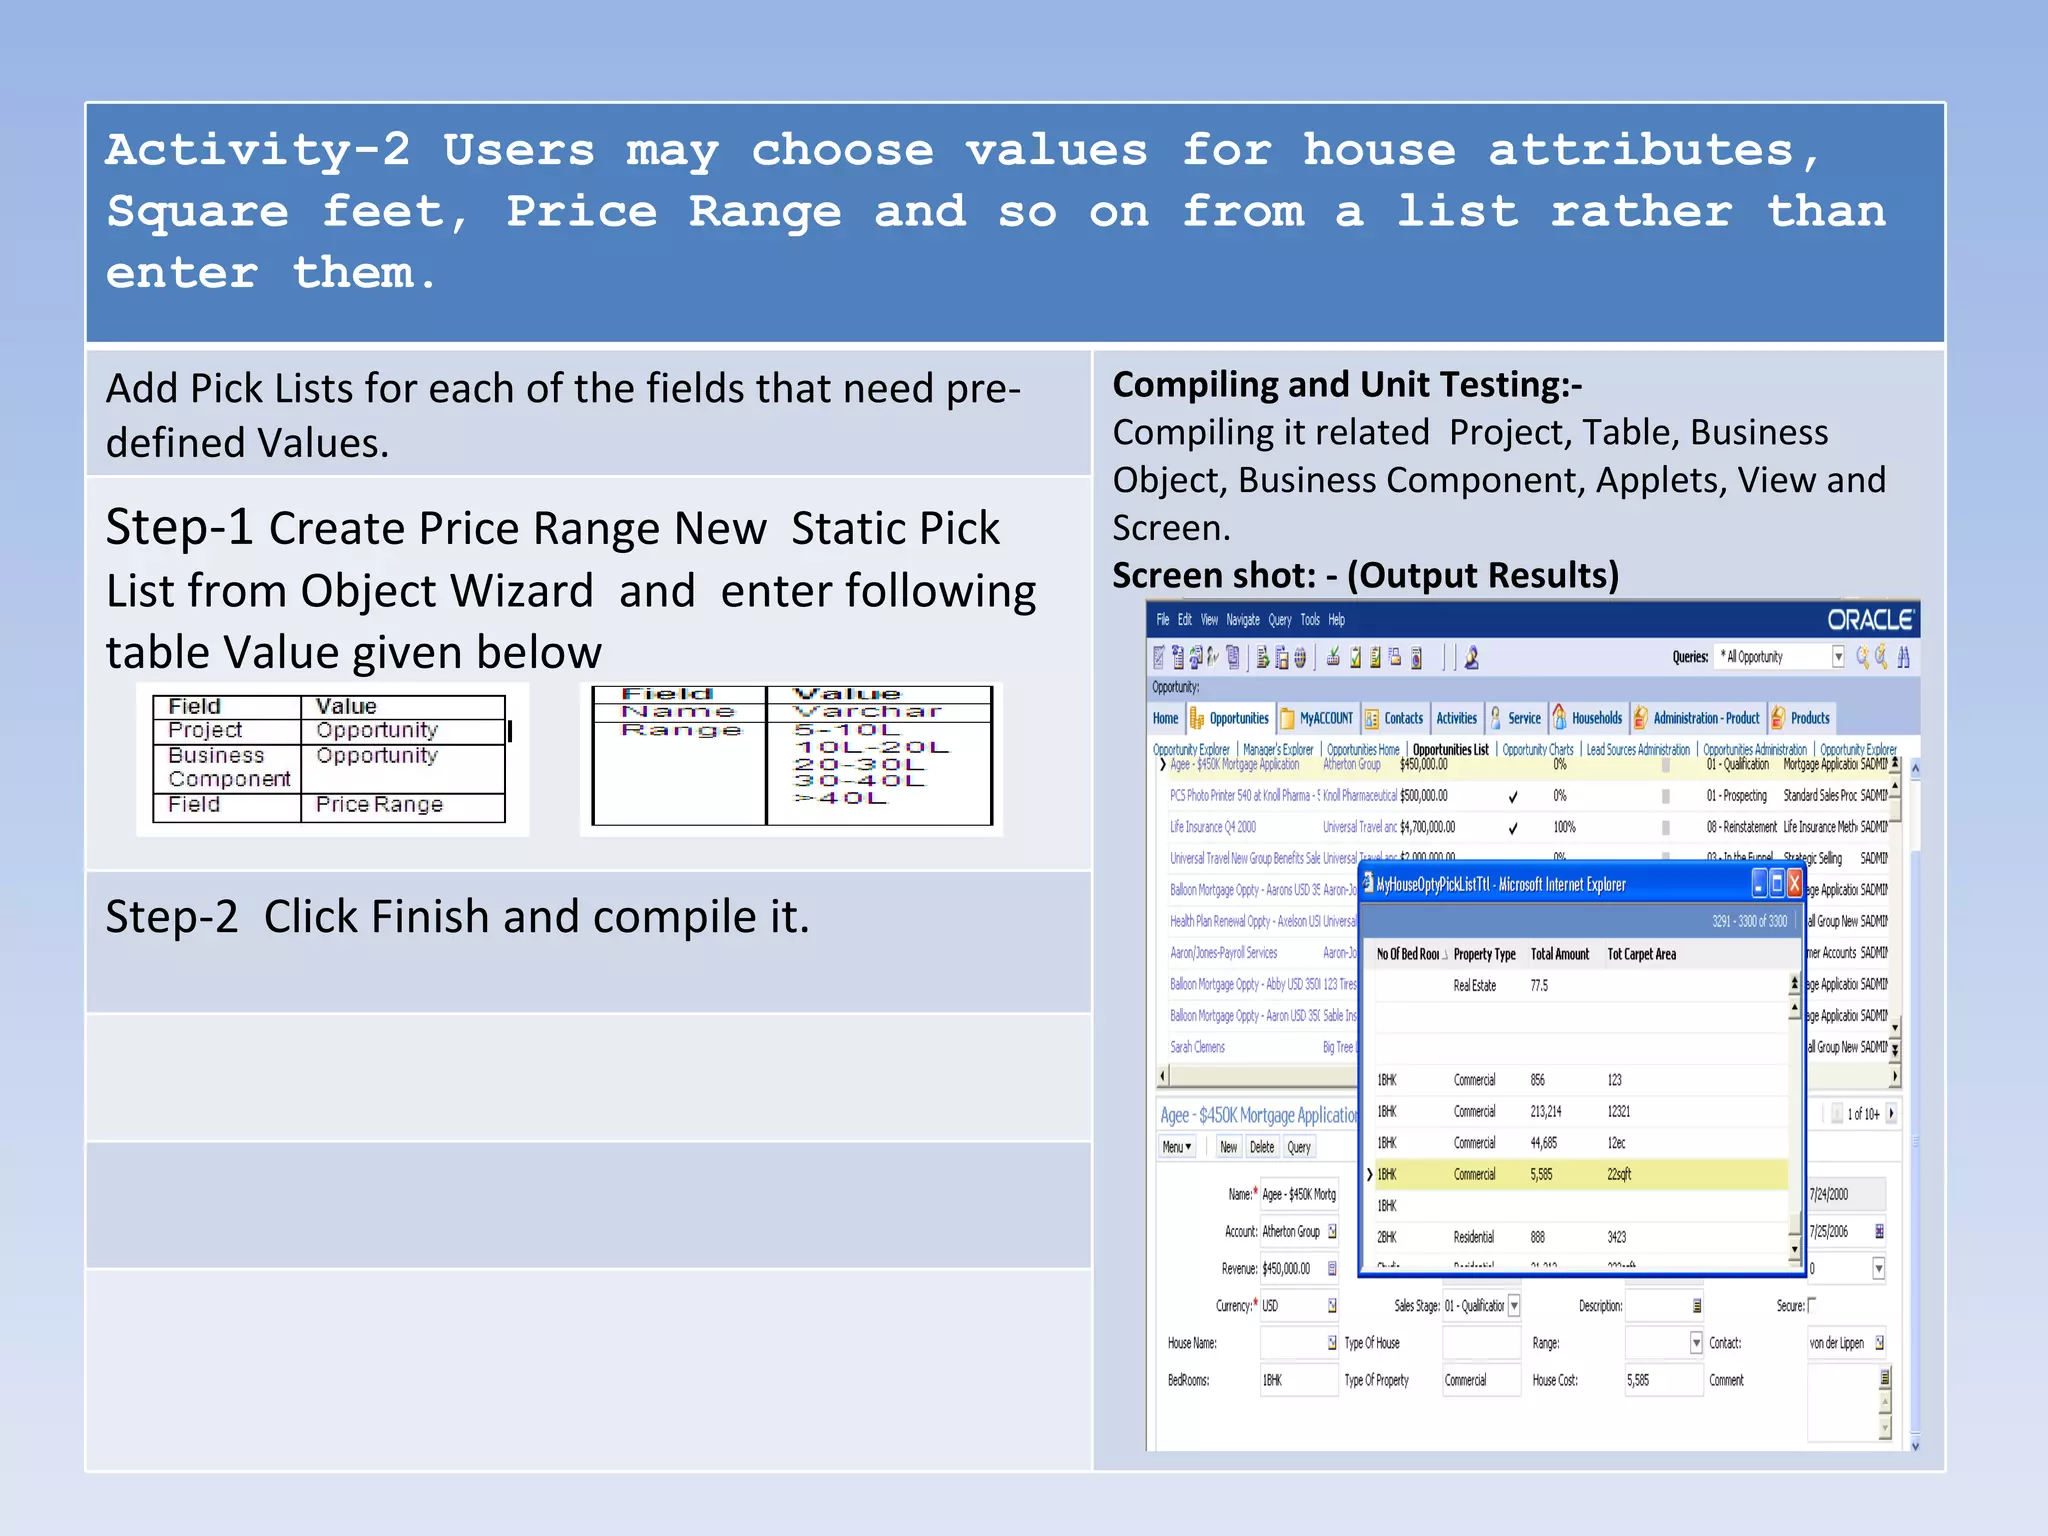
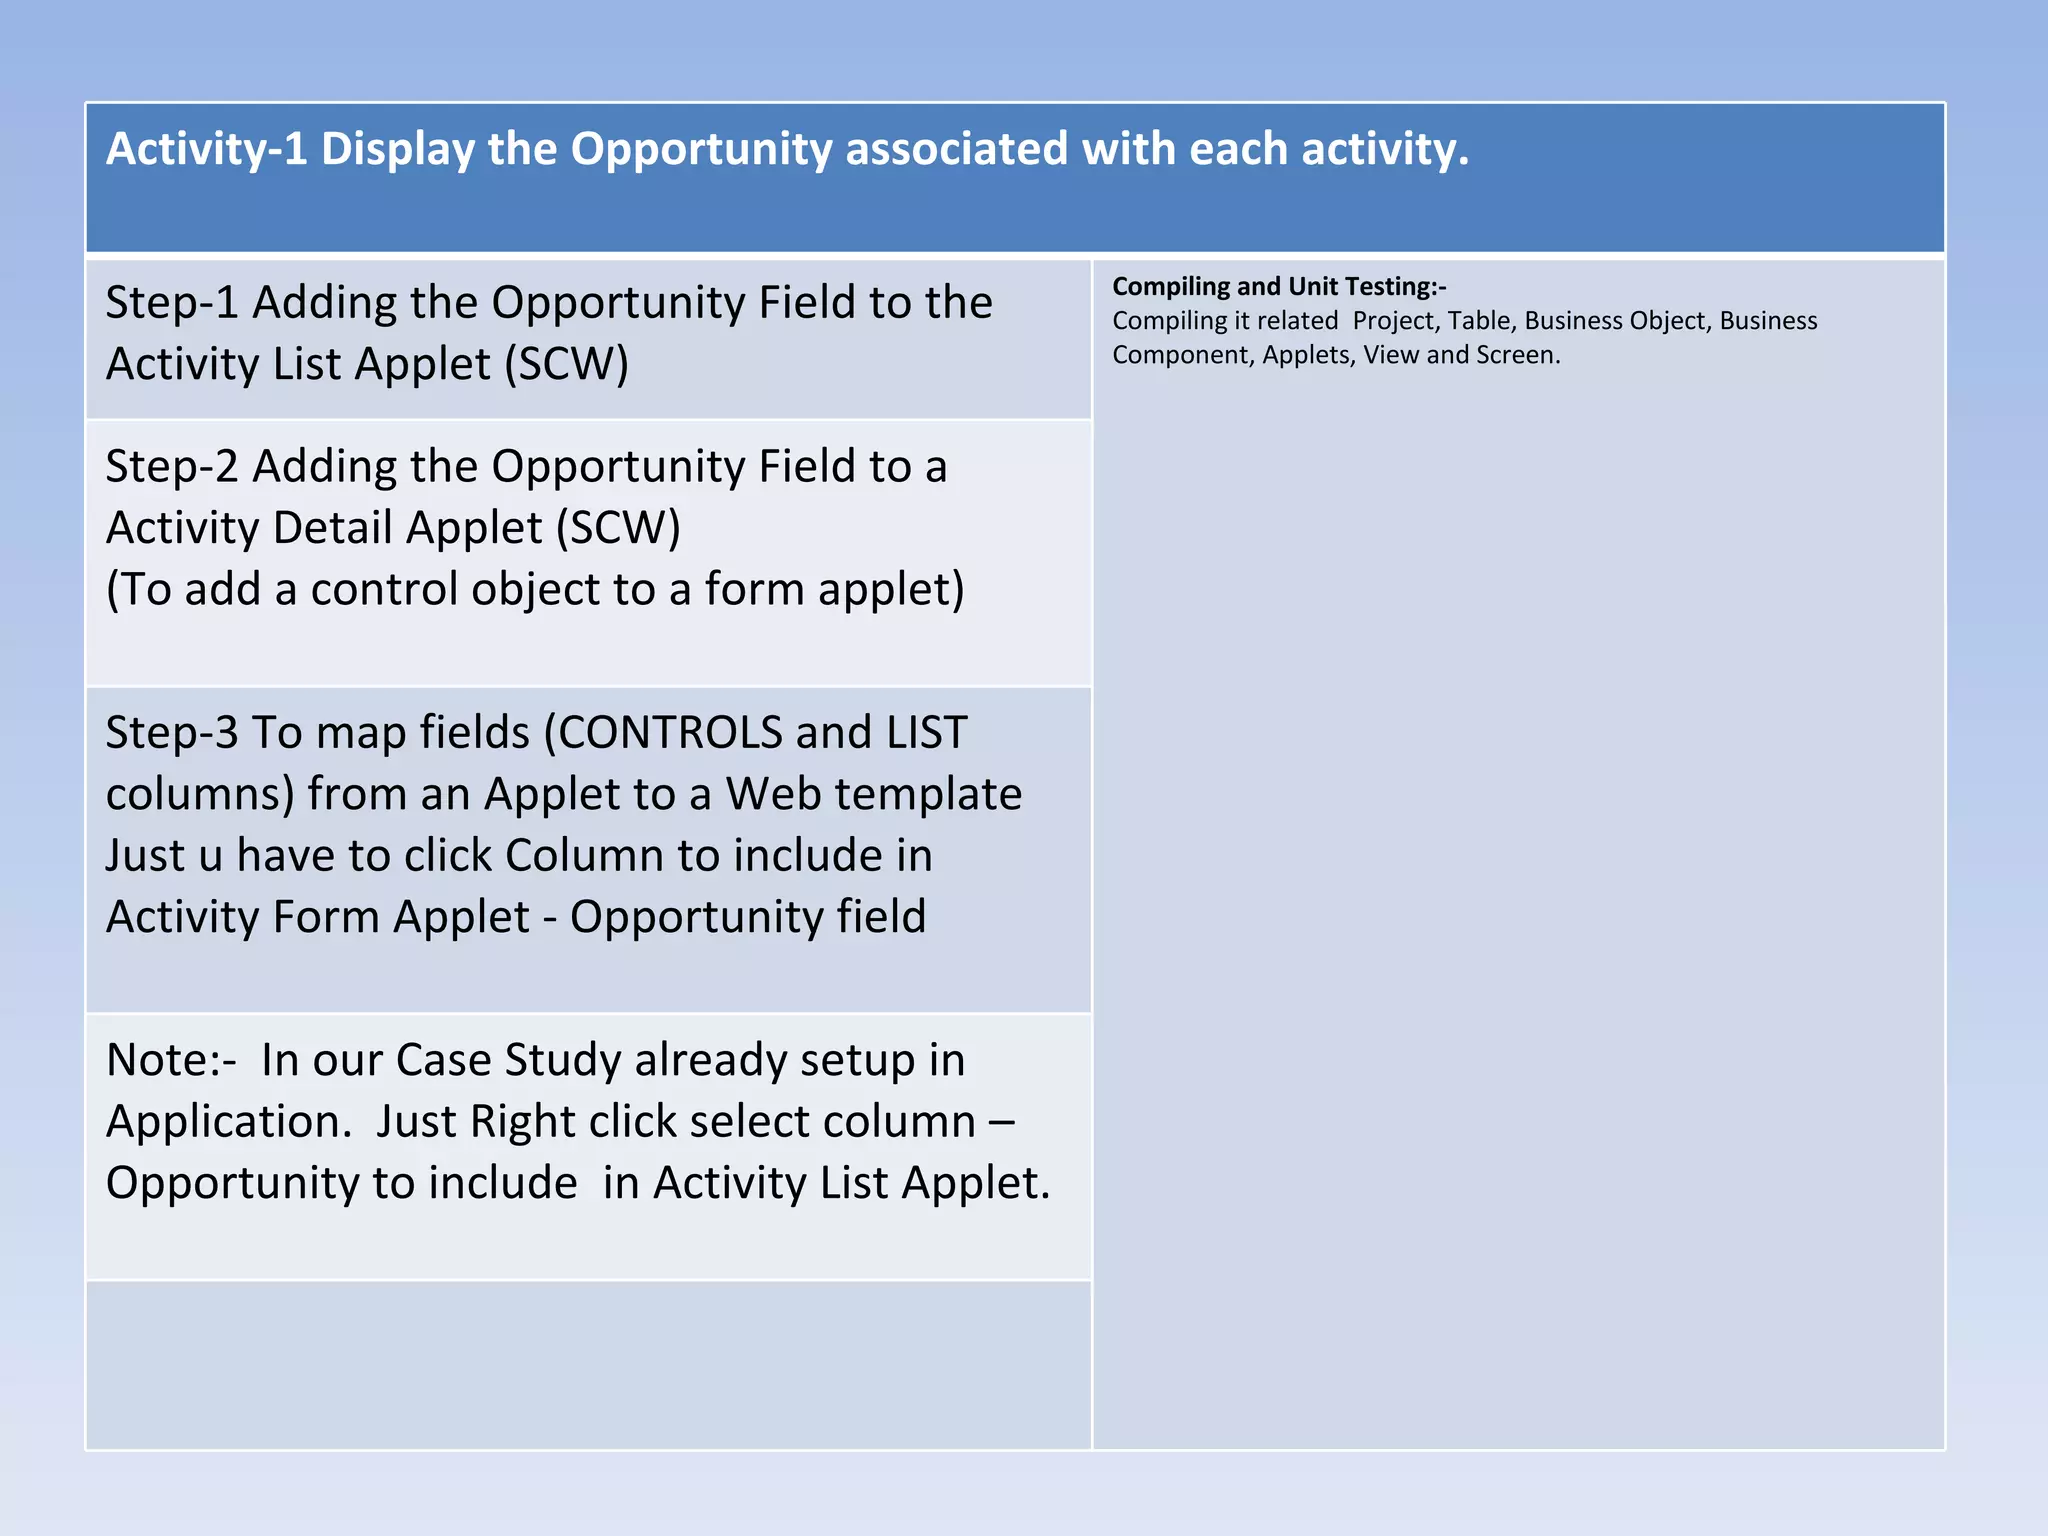
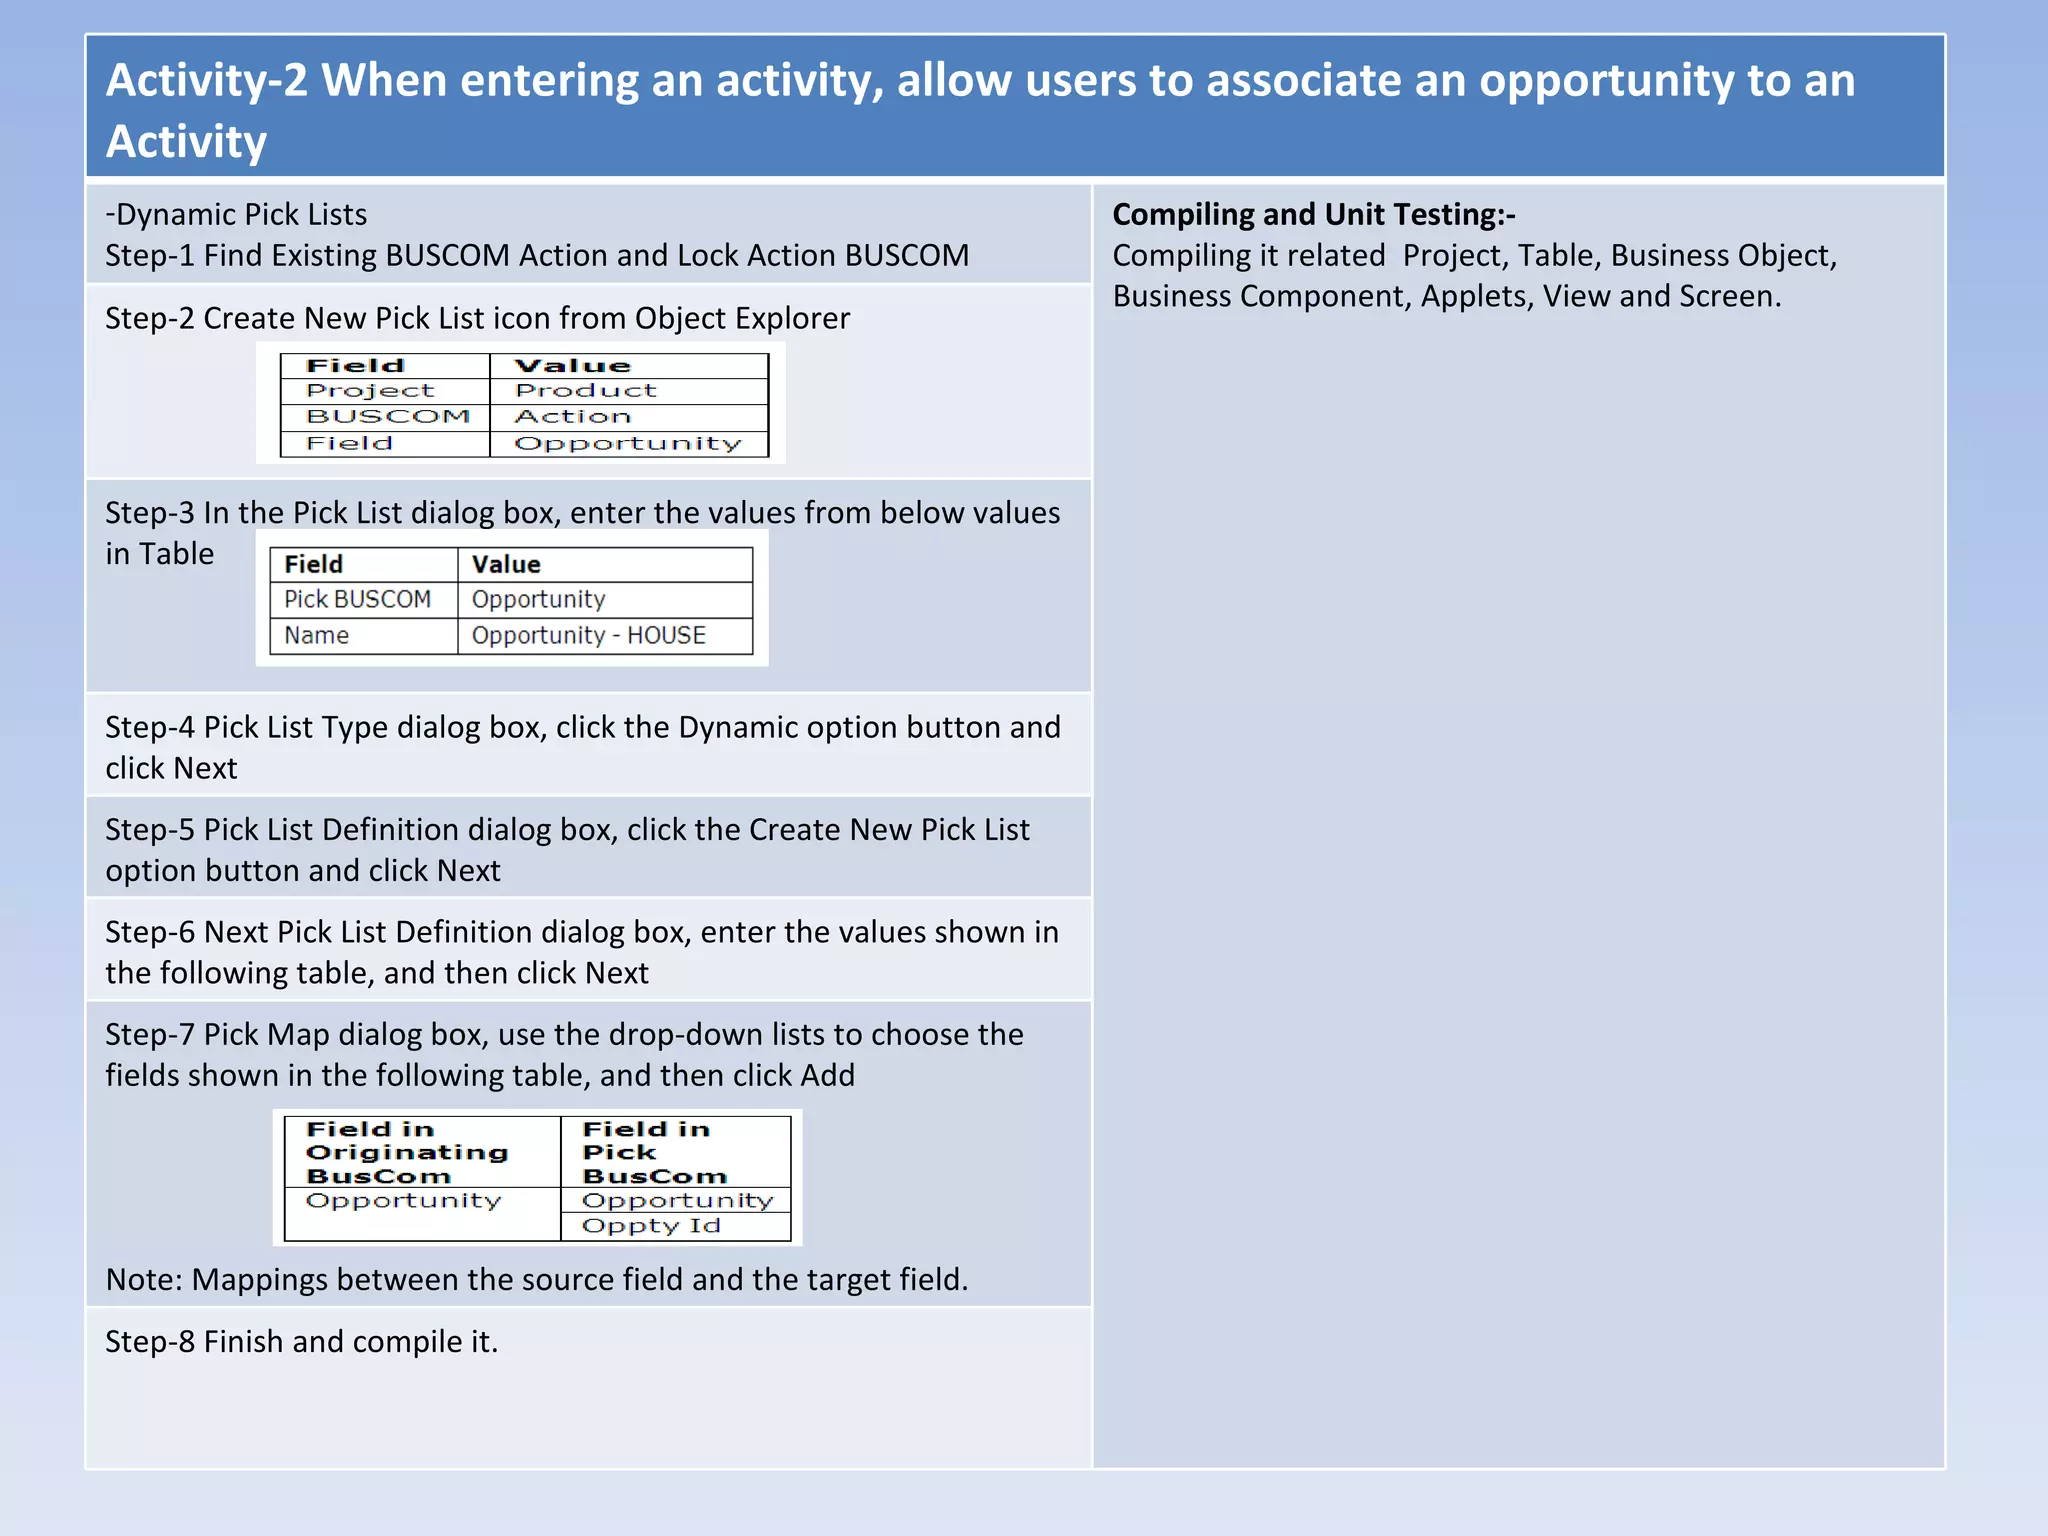
1. Configuring entities to track houses, opportunities, activities, and roles. This involves extending database tables, configuring business components, and modifying applets.
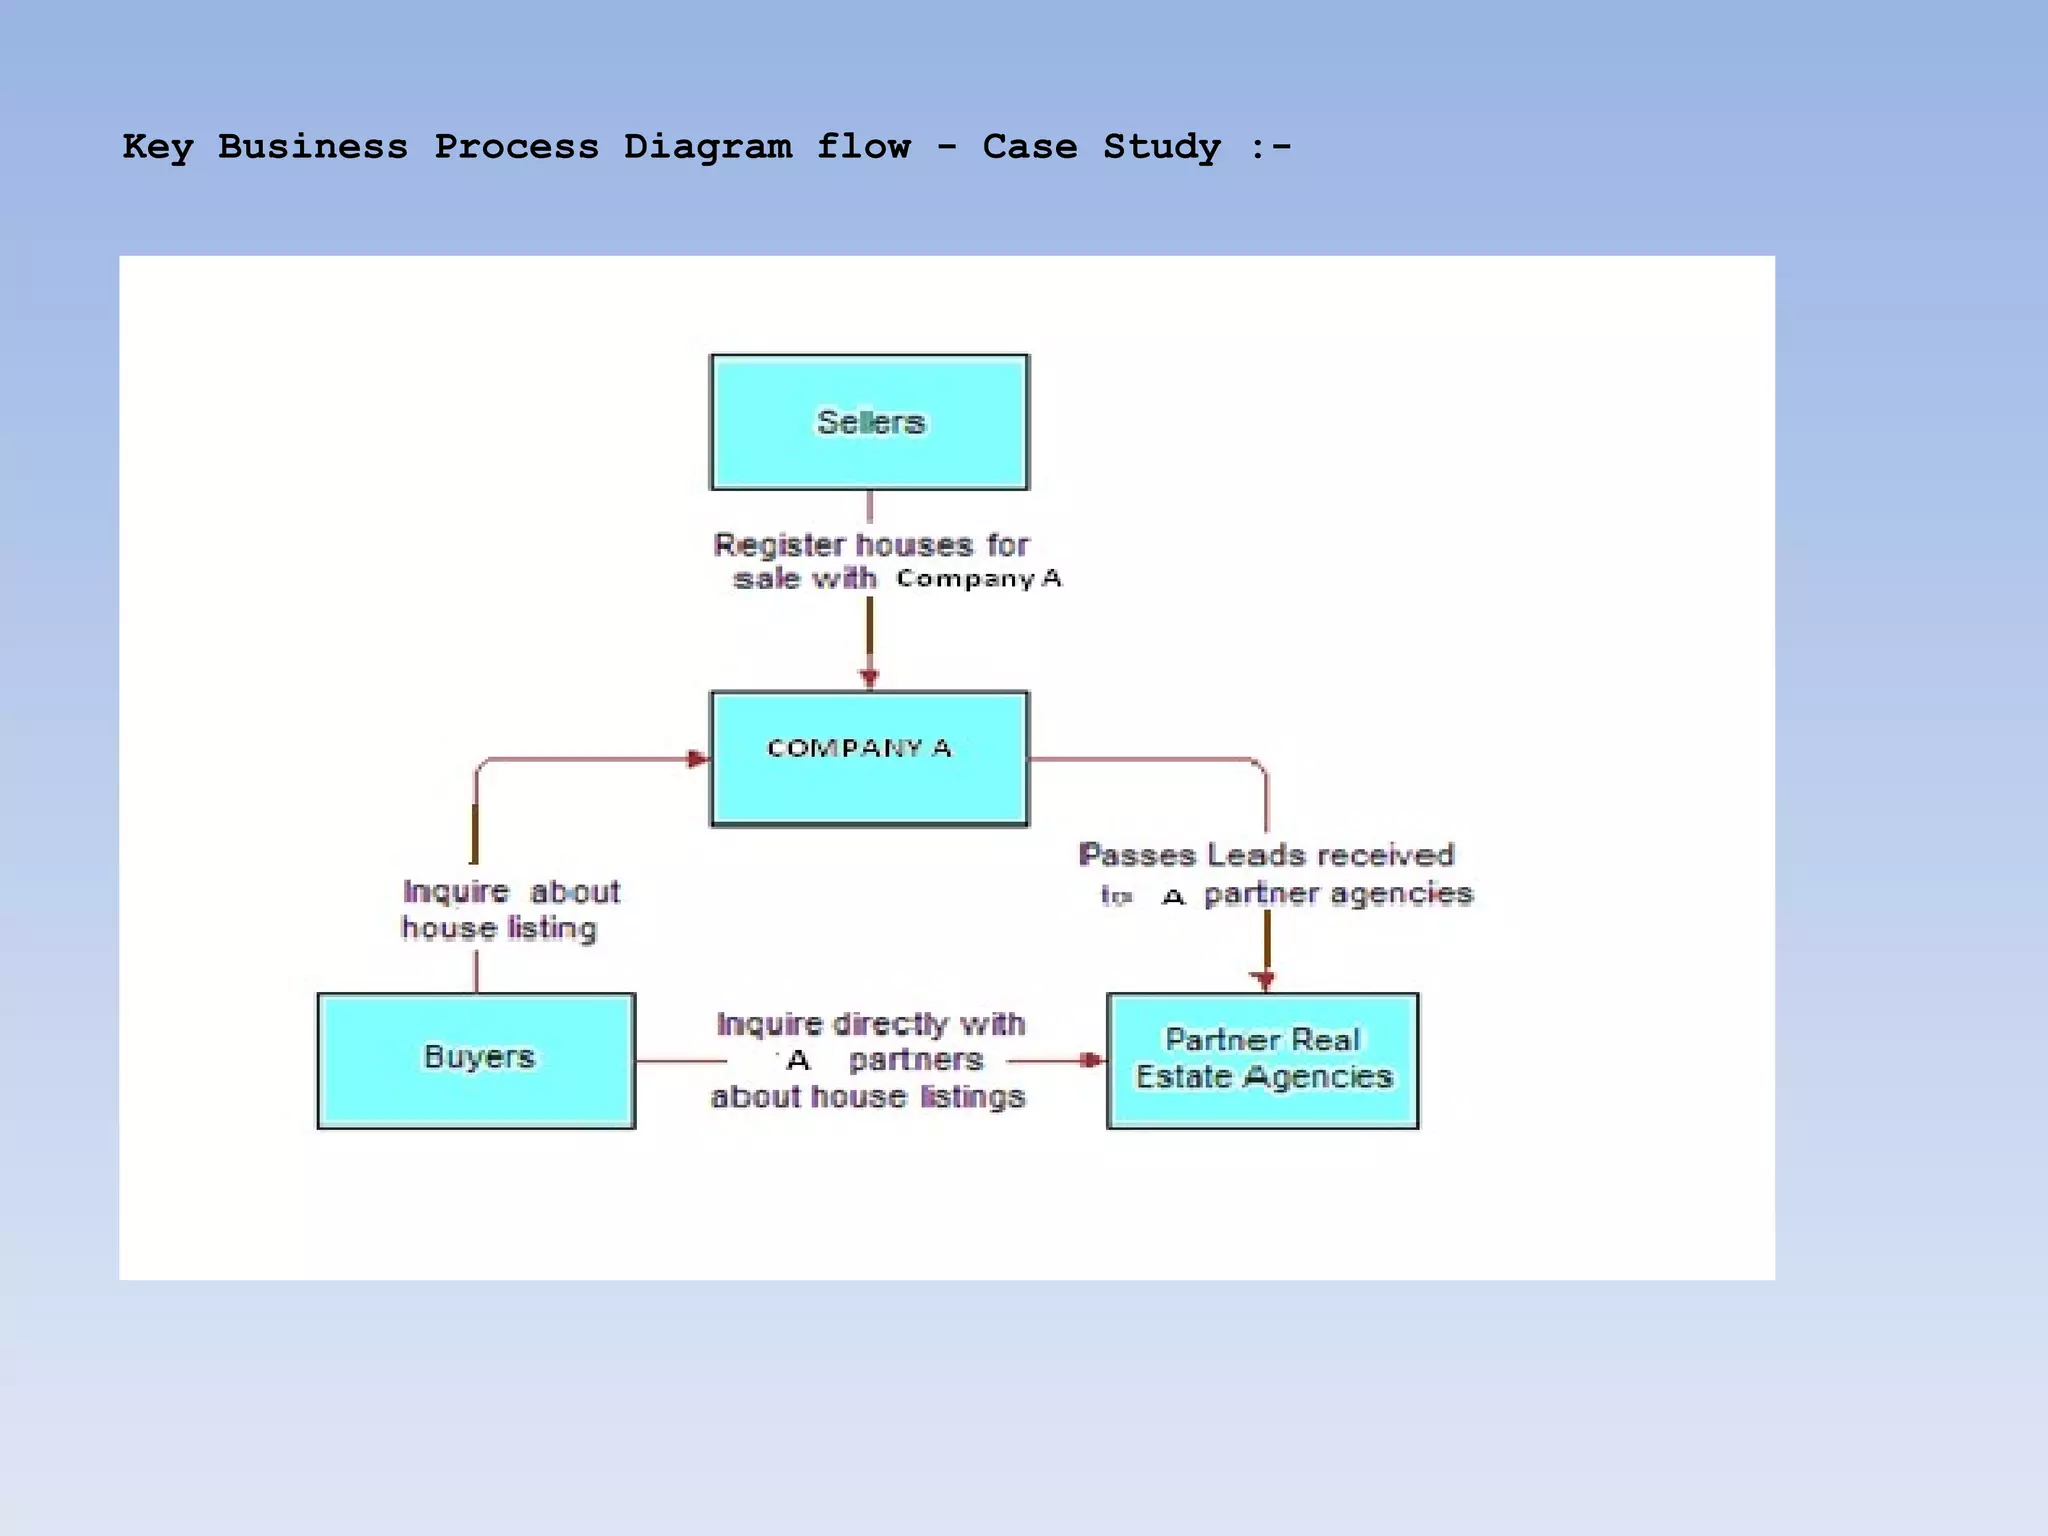
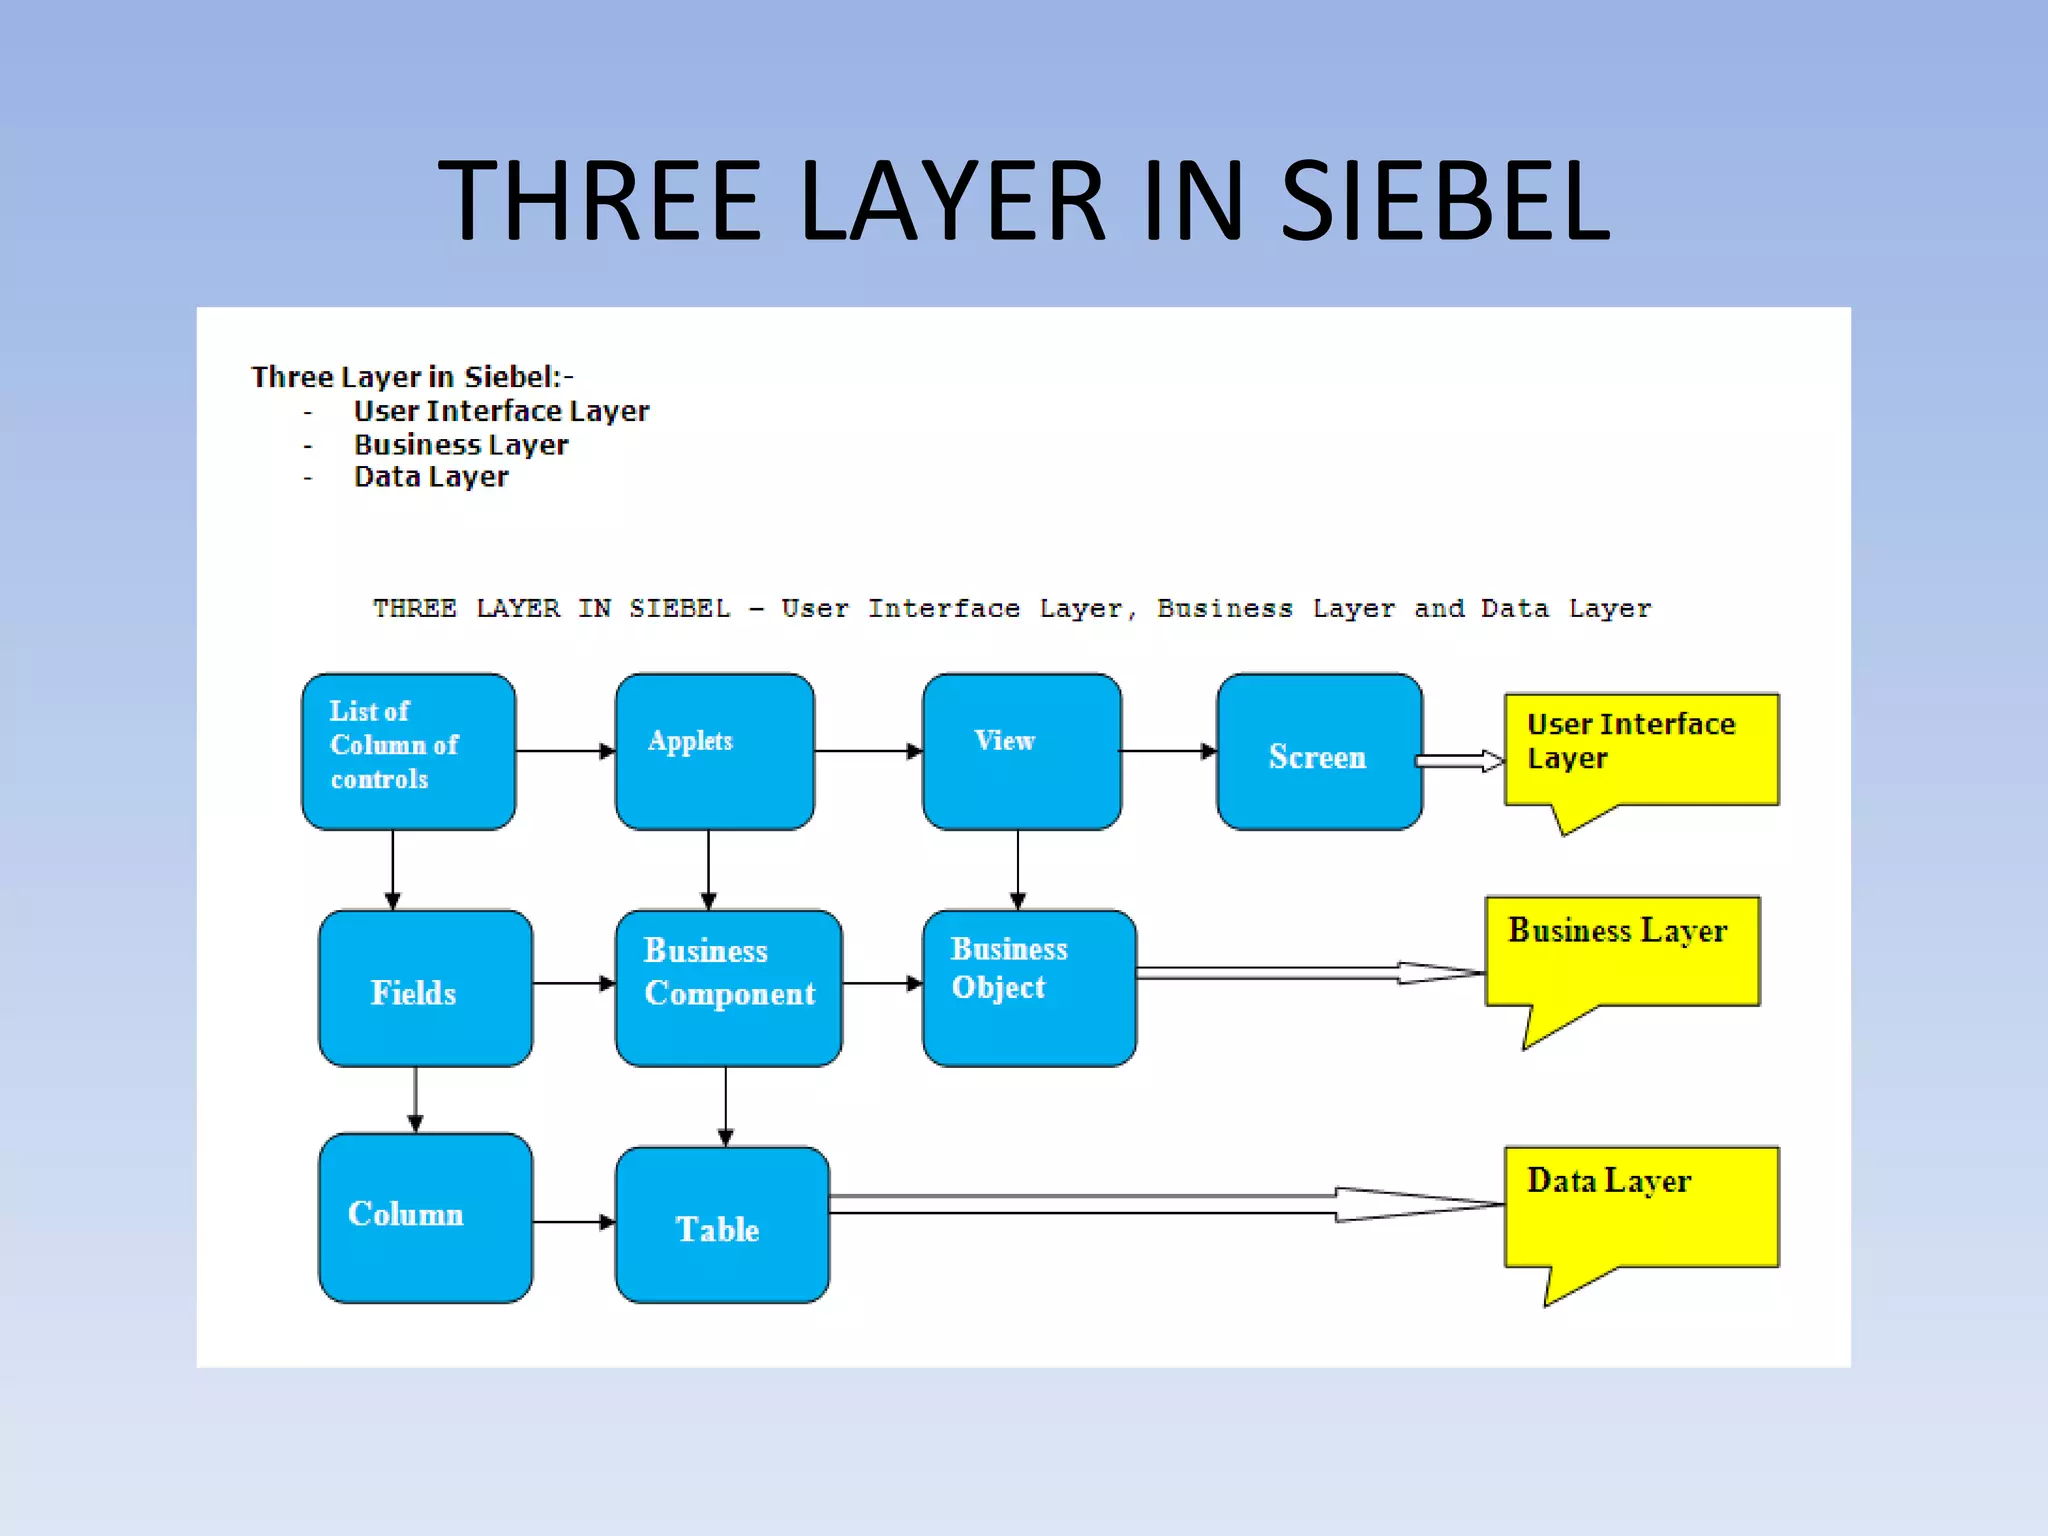
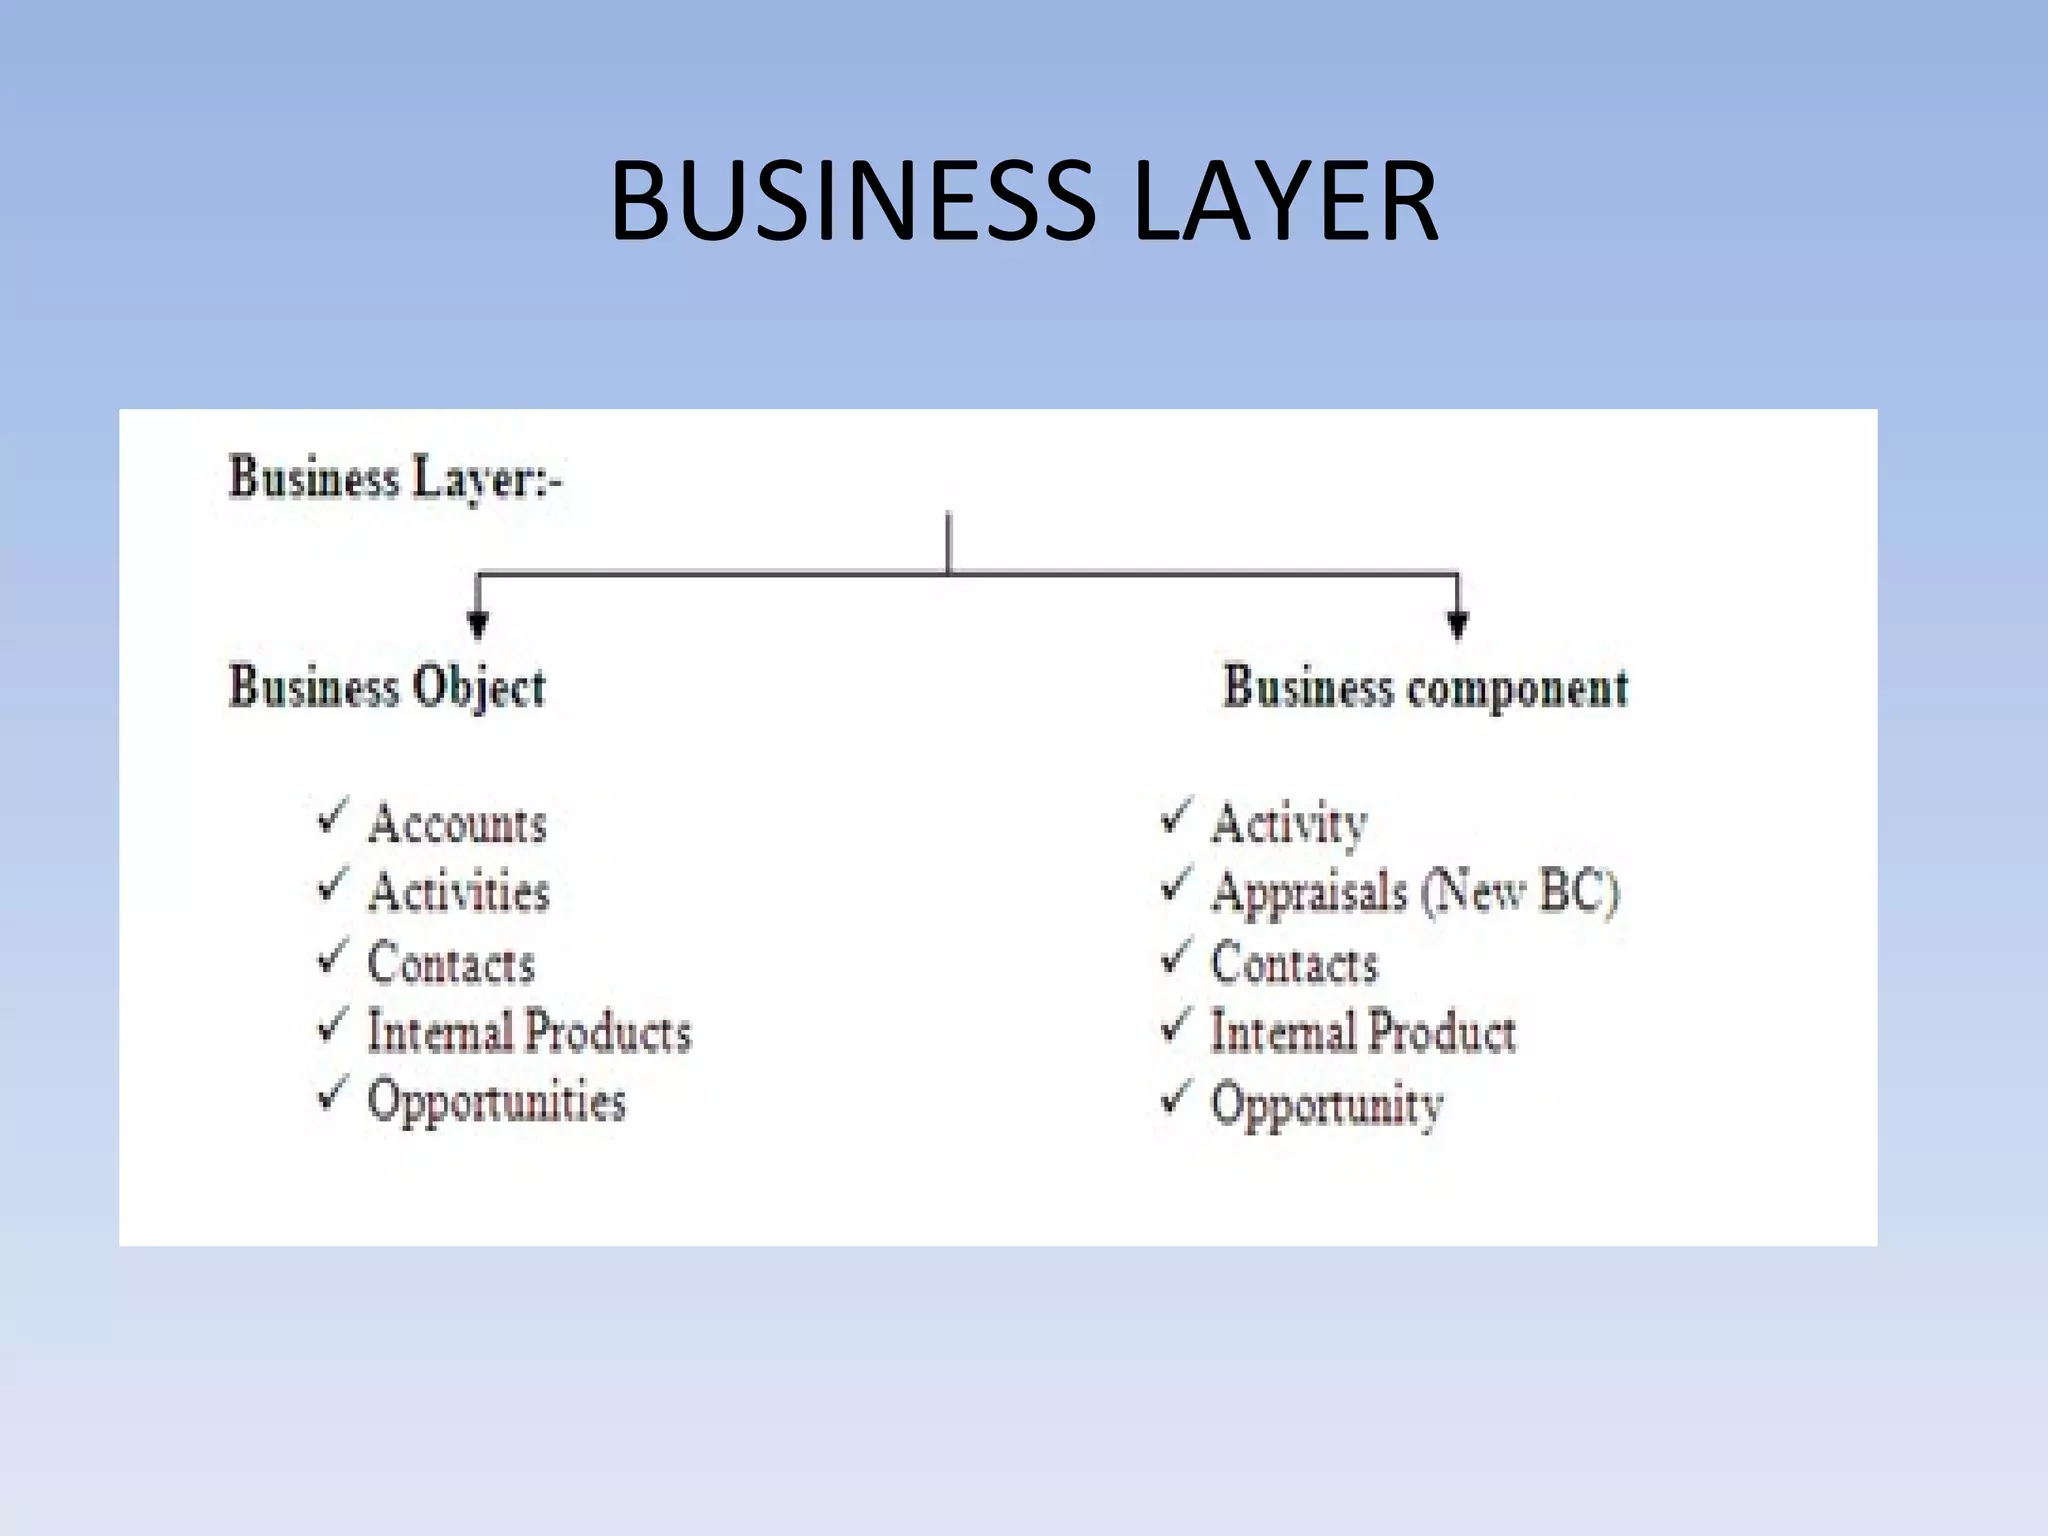
2. Mapping the key business processes and Siebel three-layer architecture to the case study.
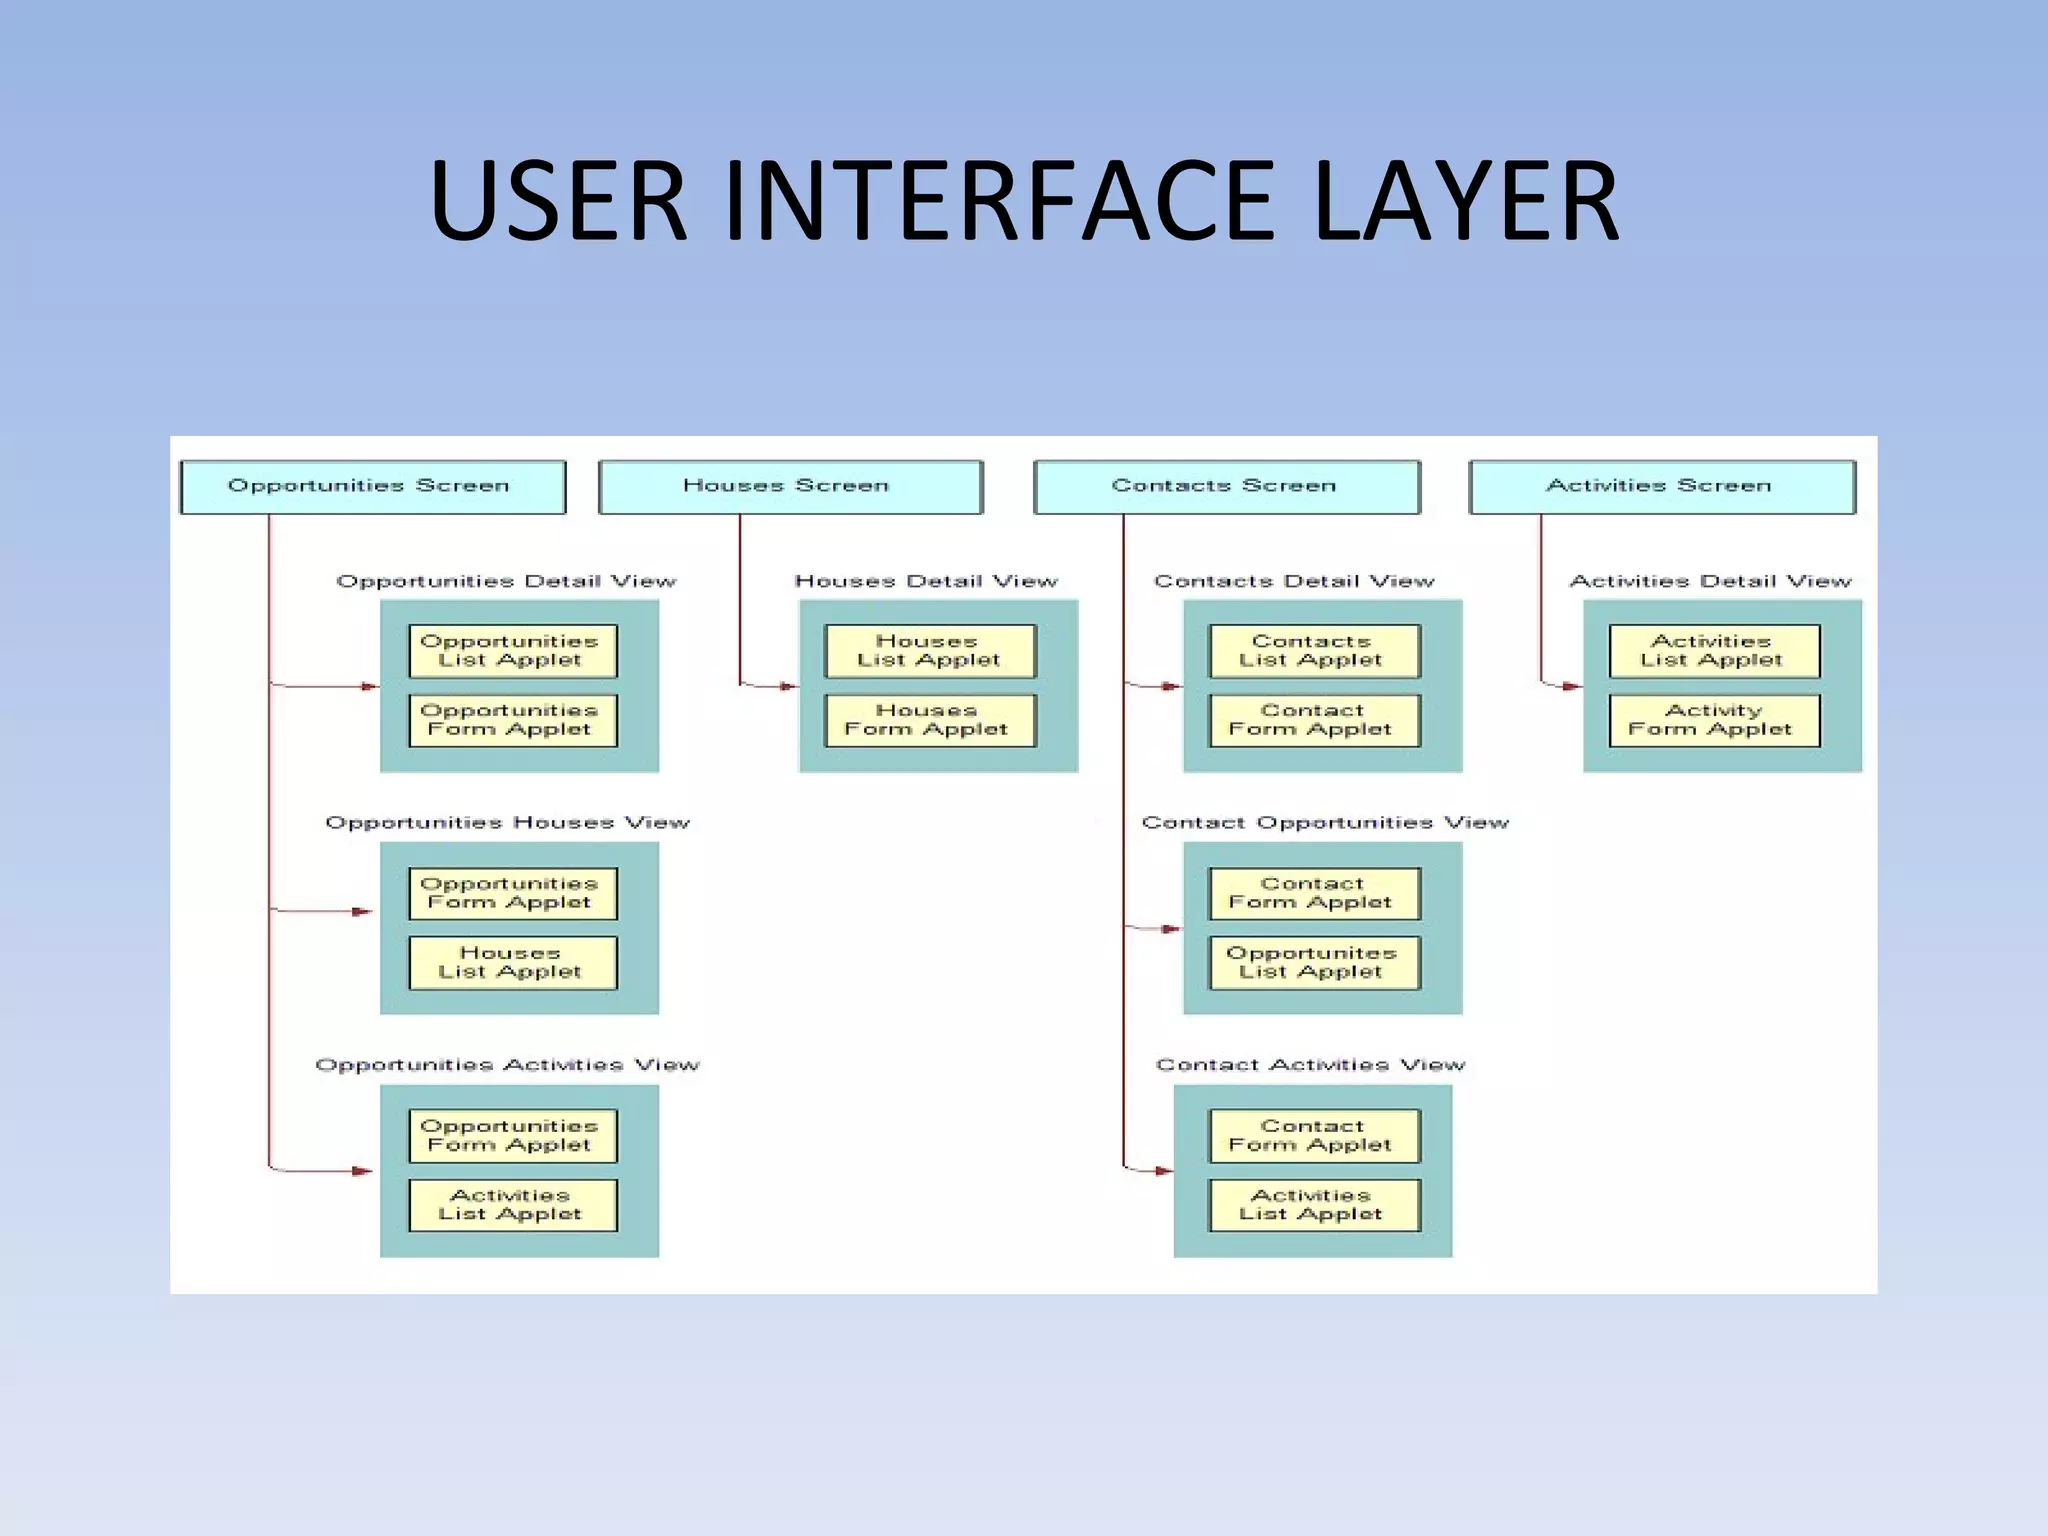
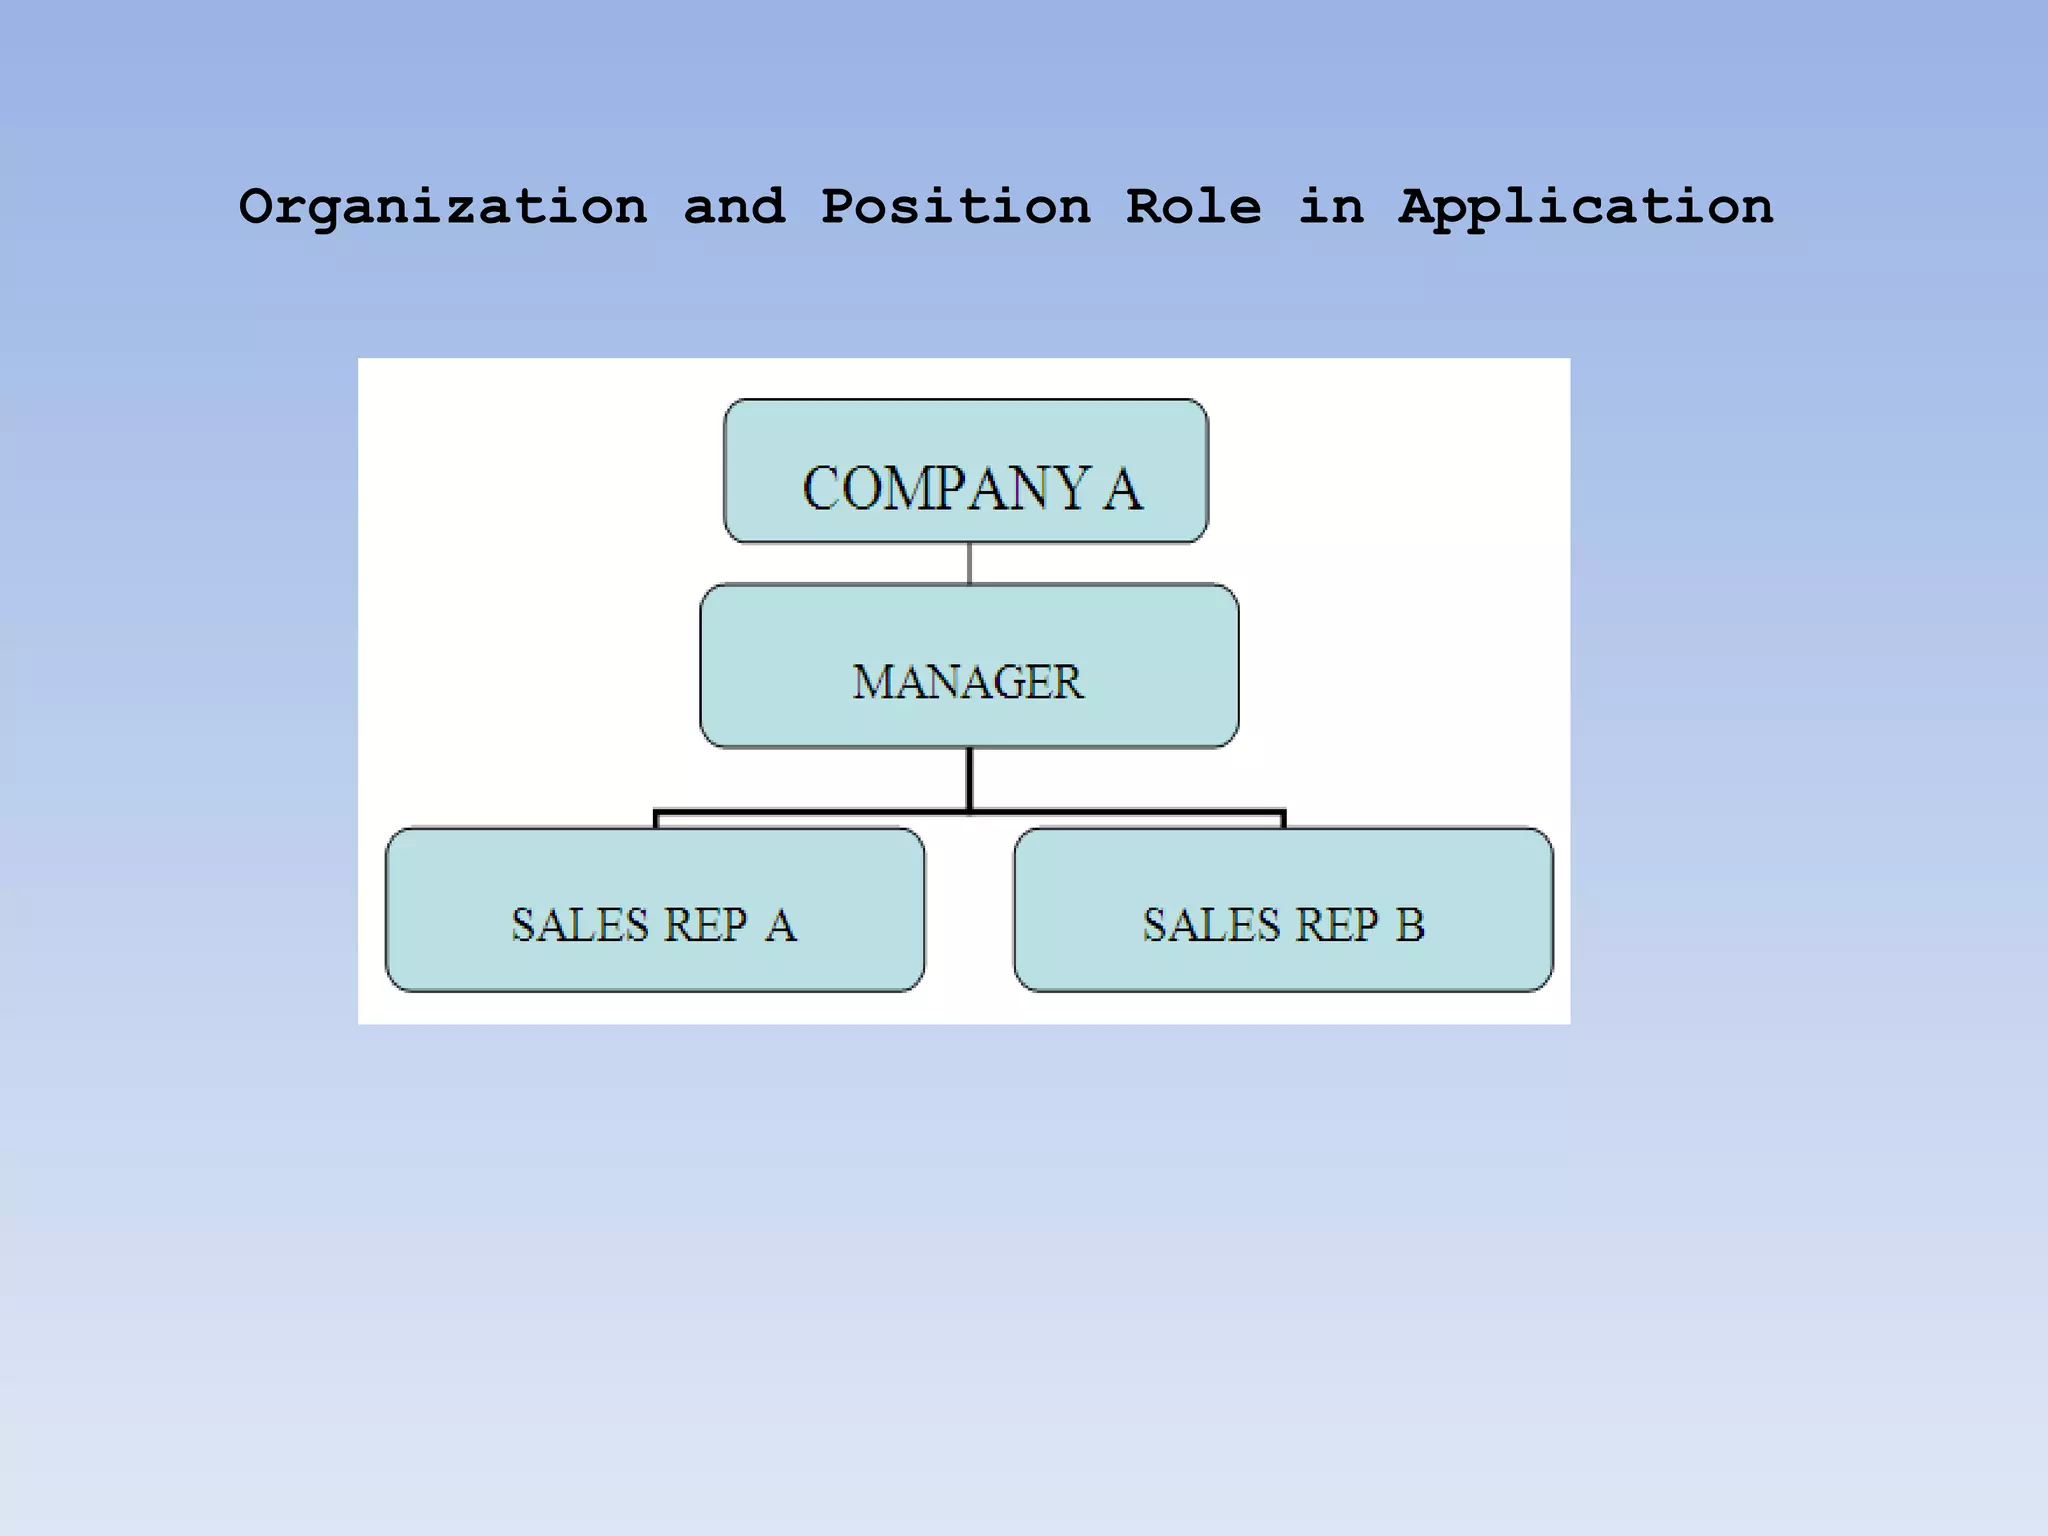
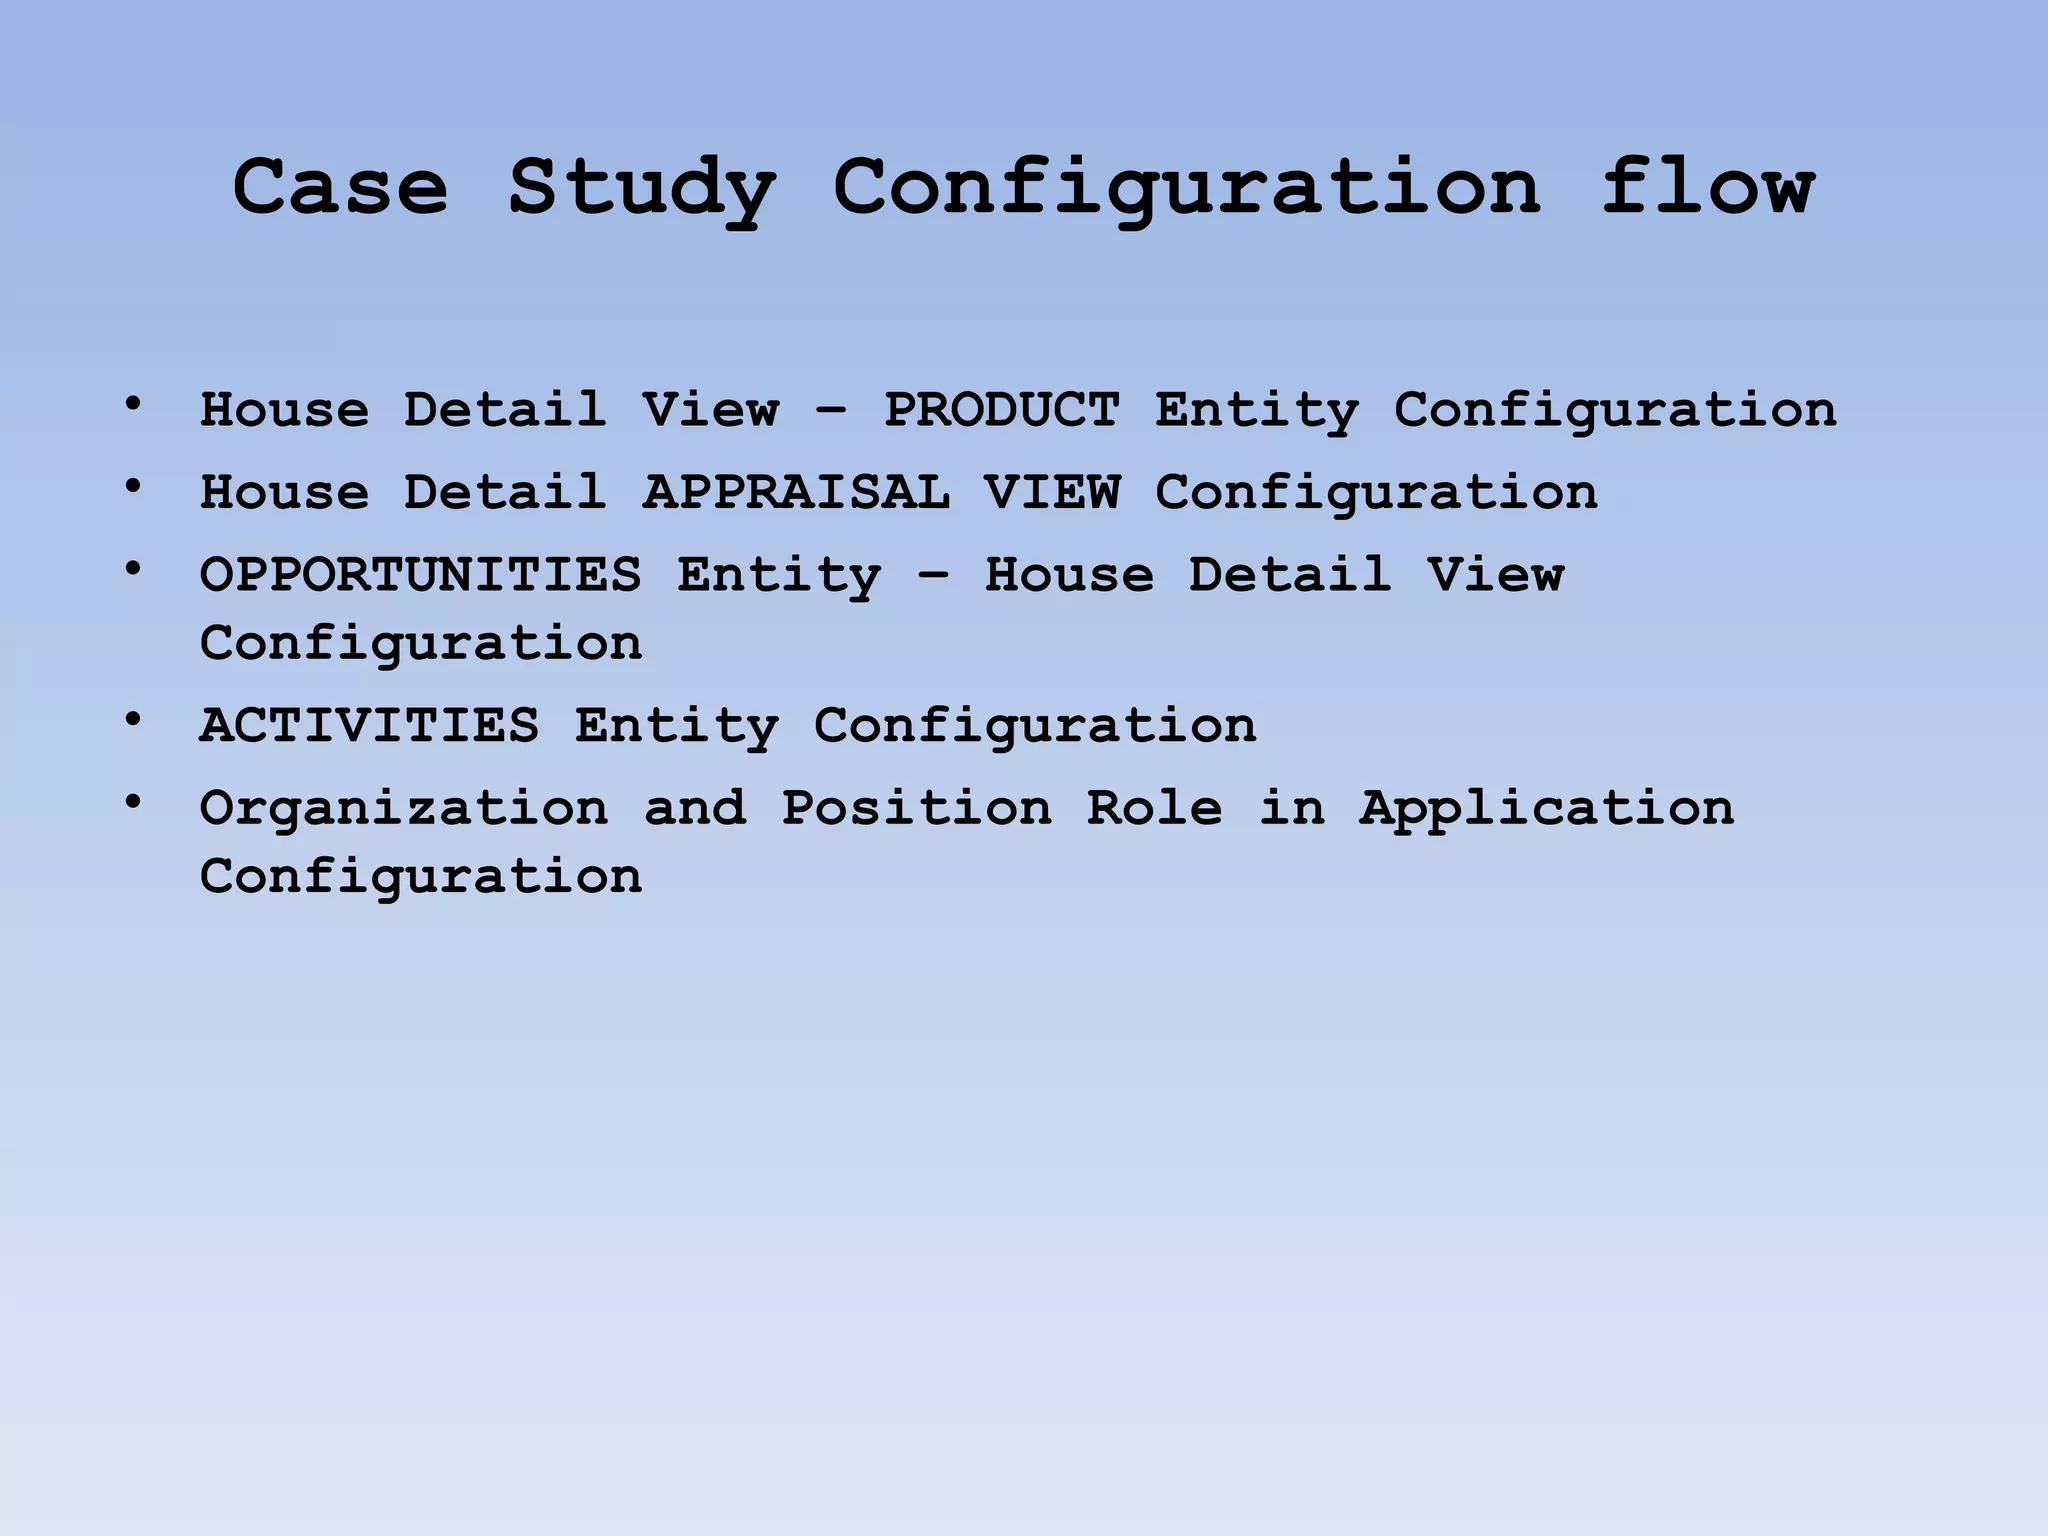
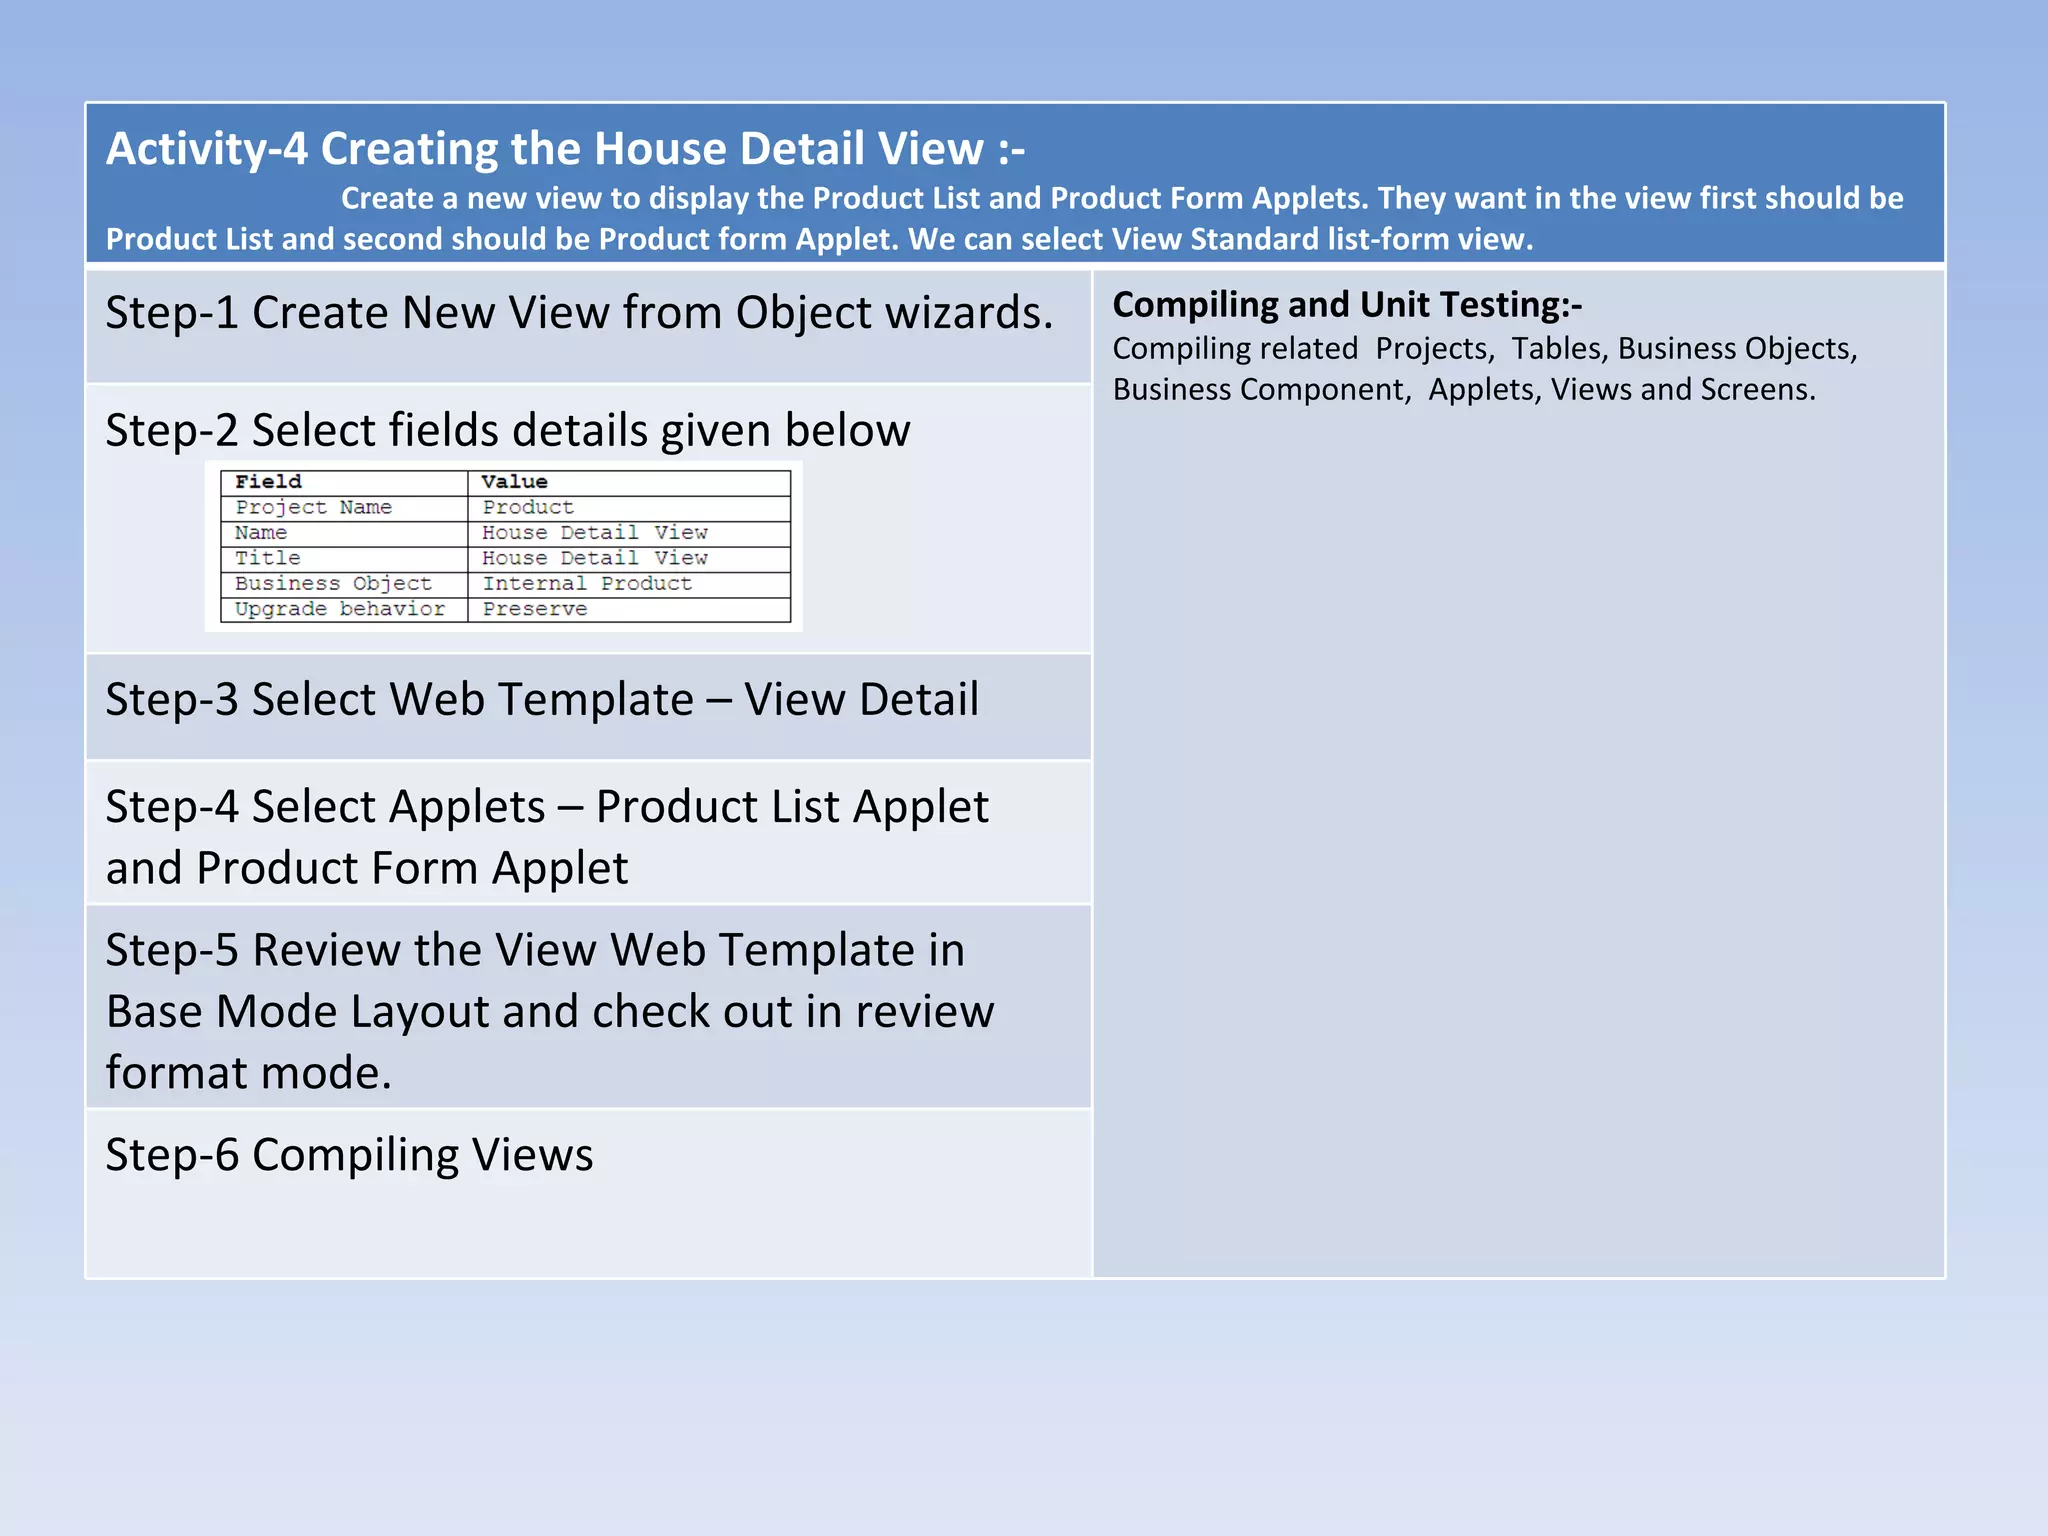
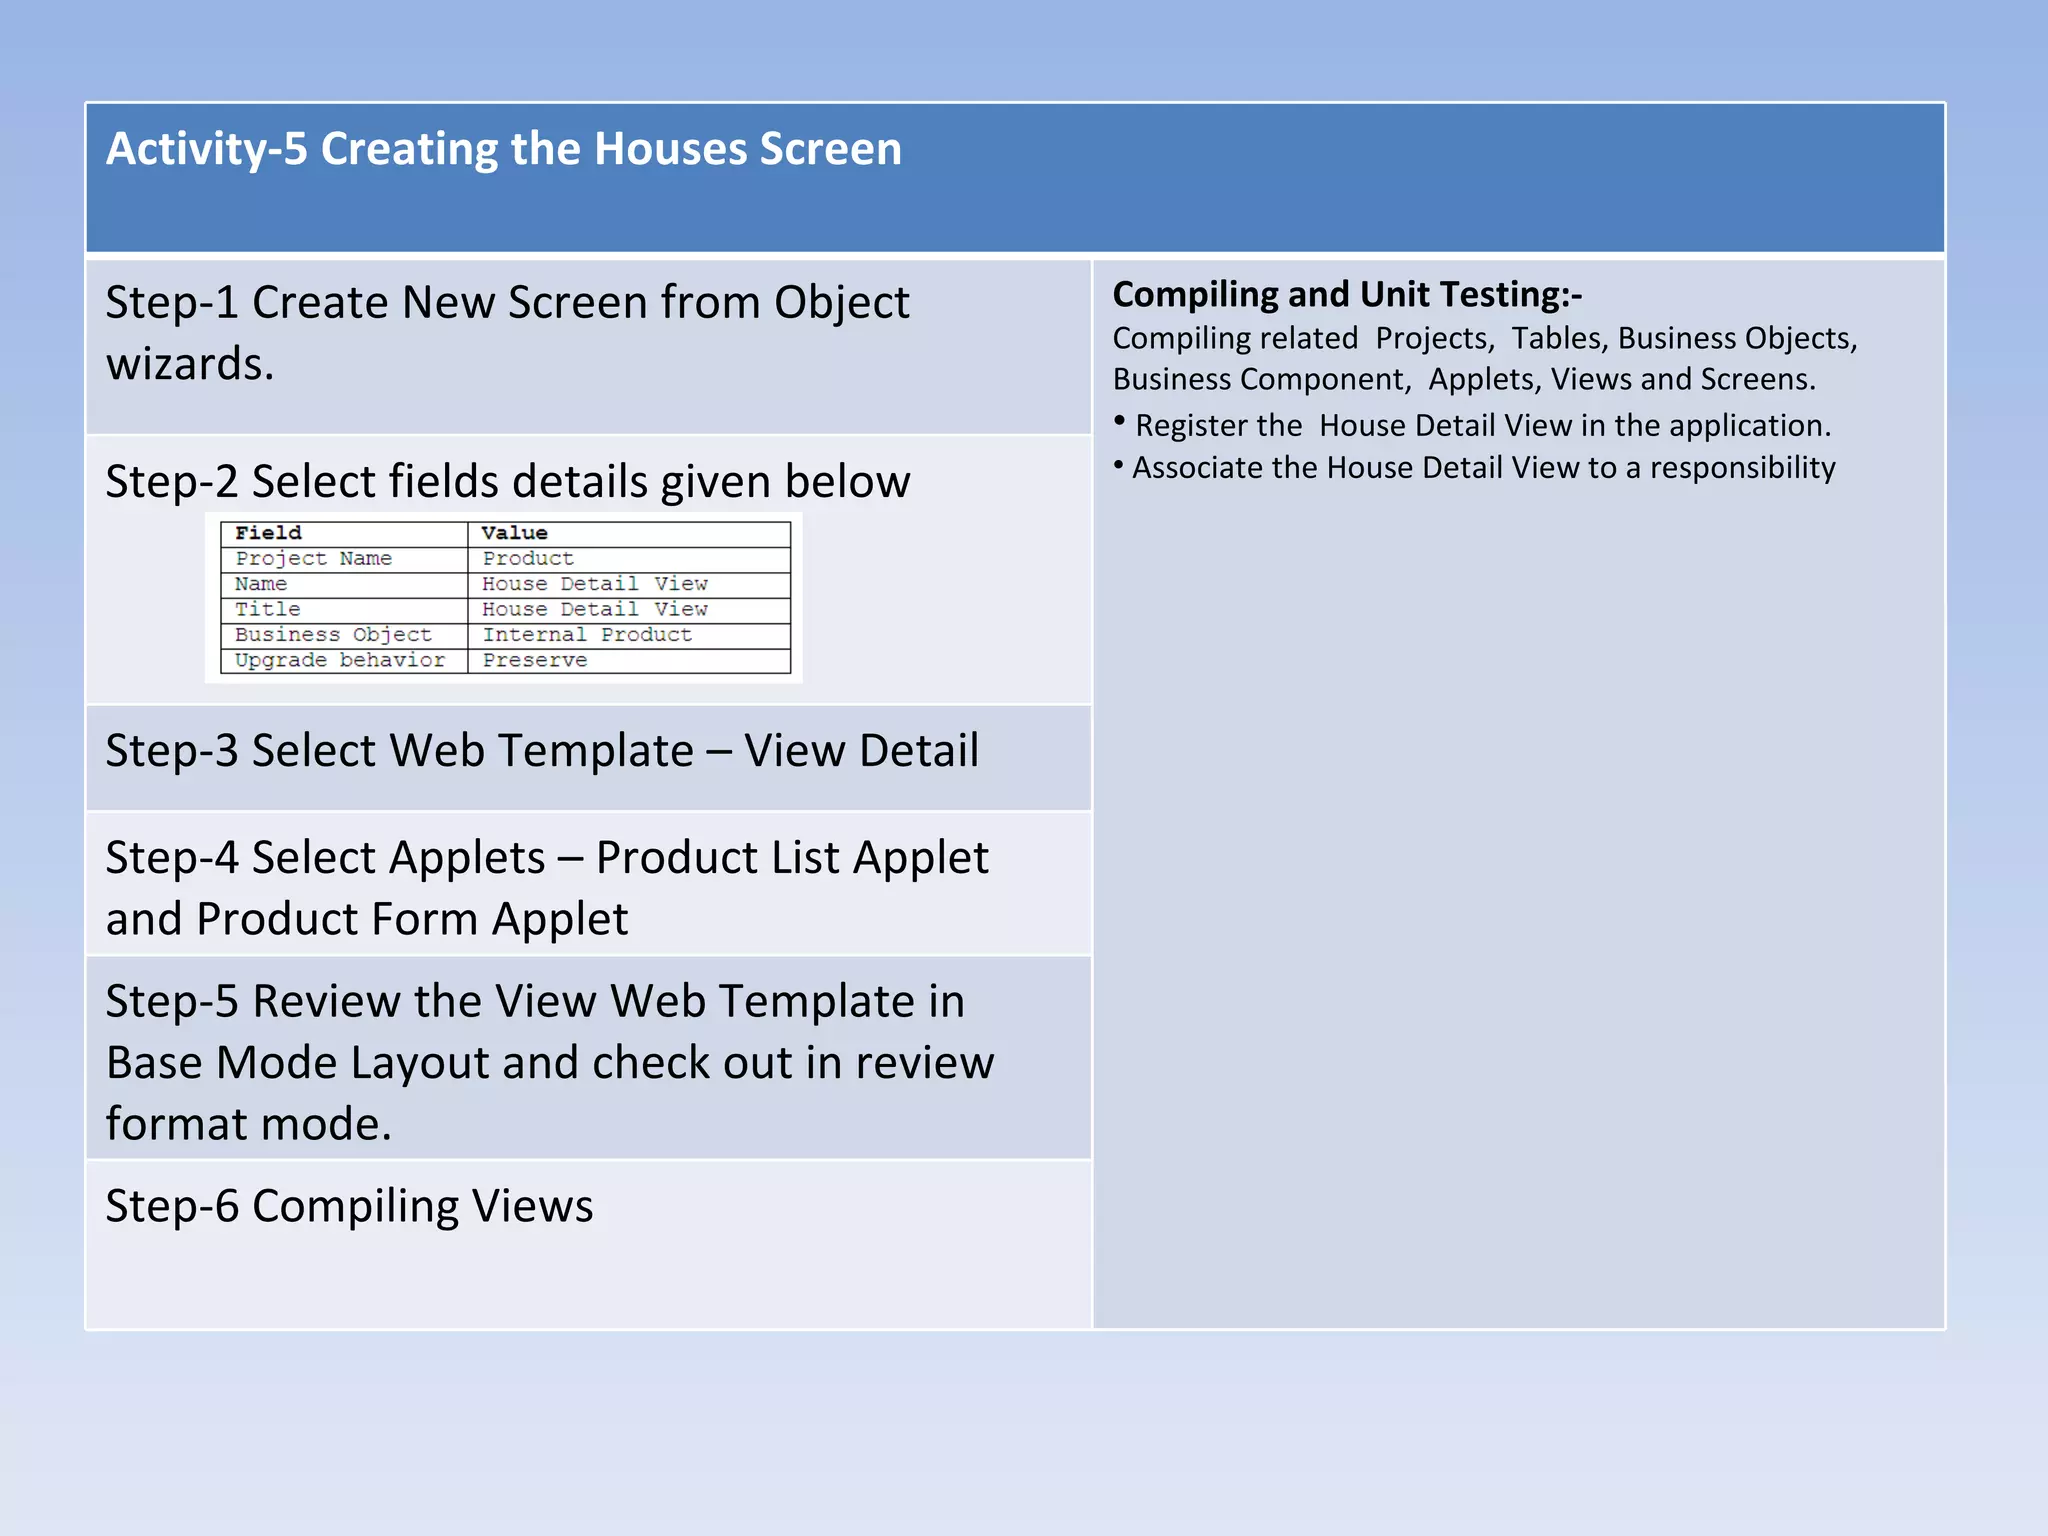
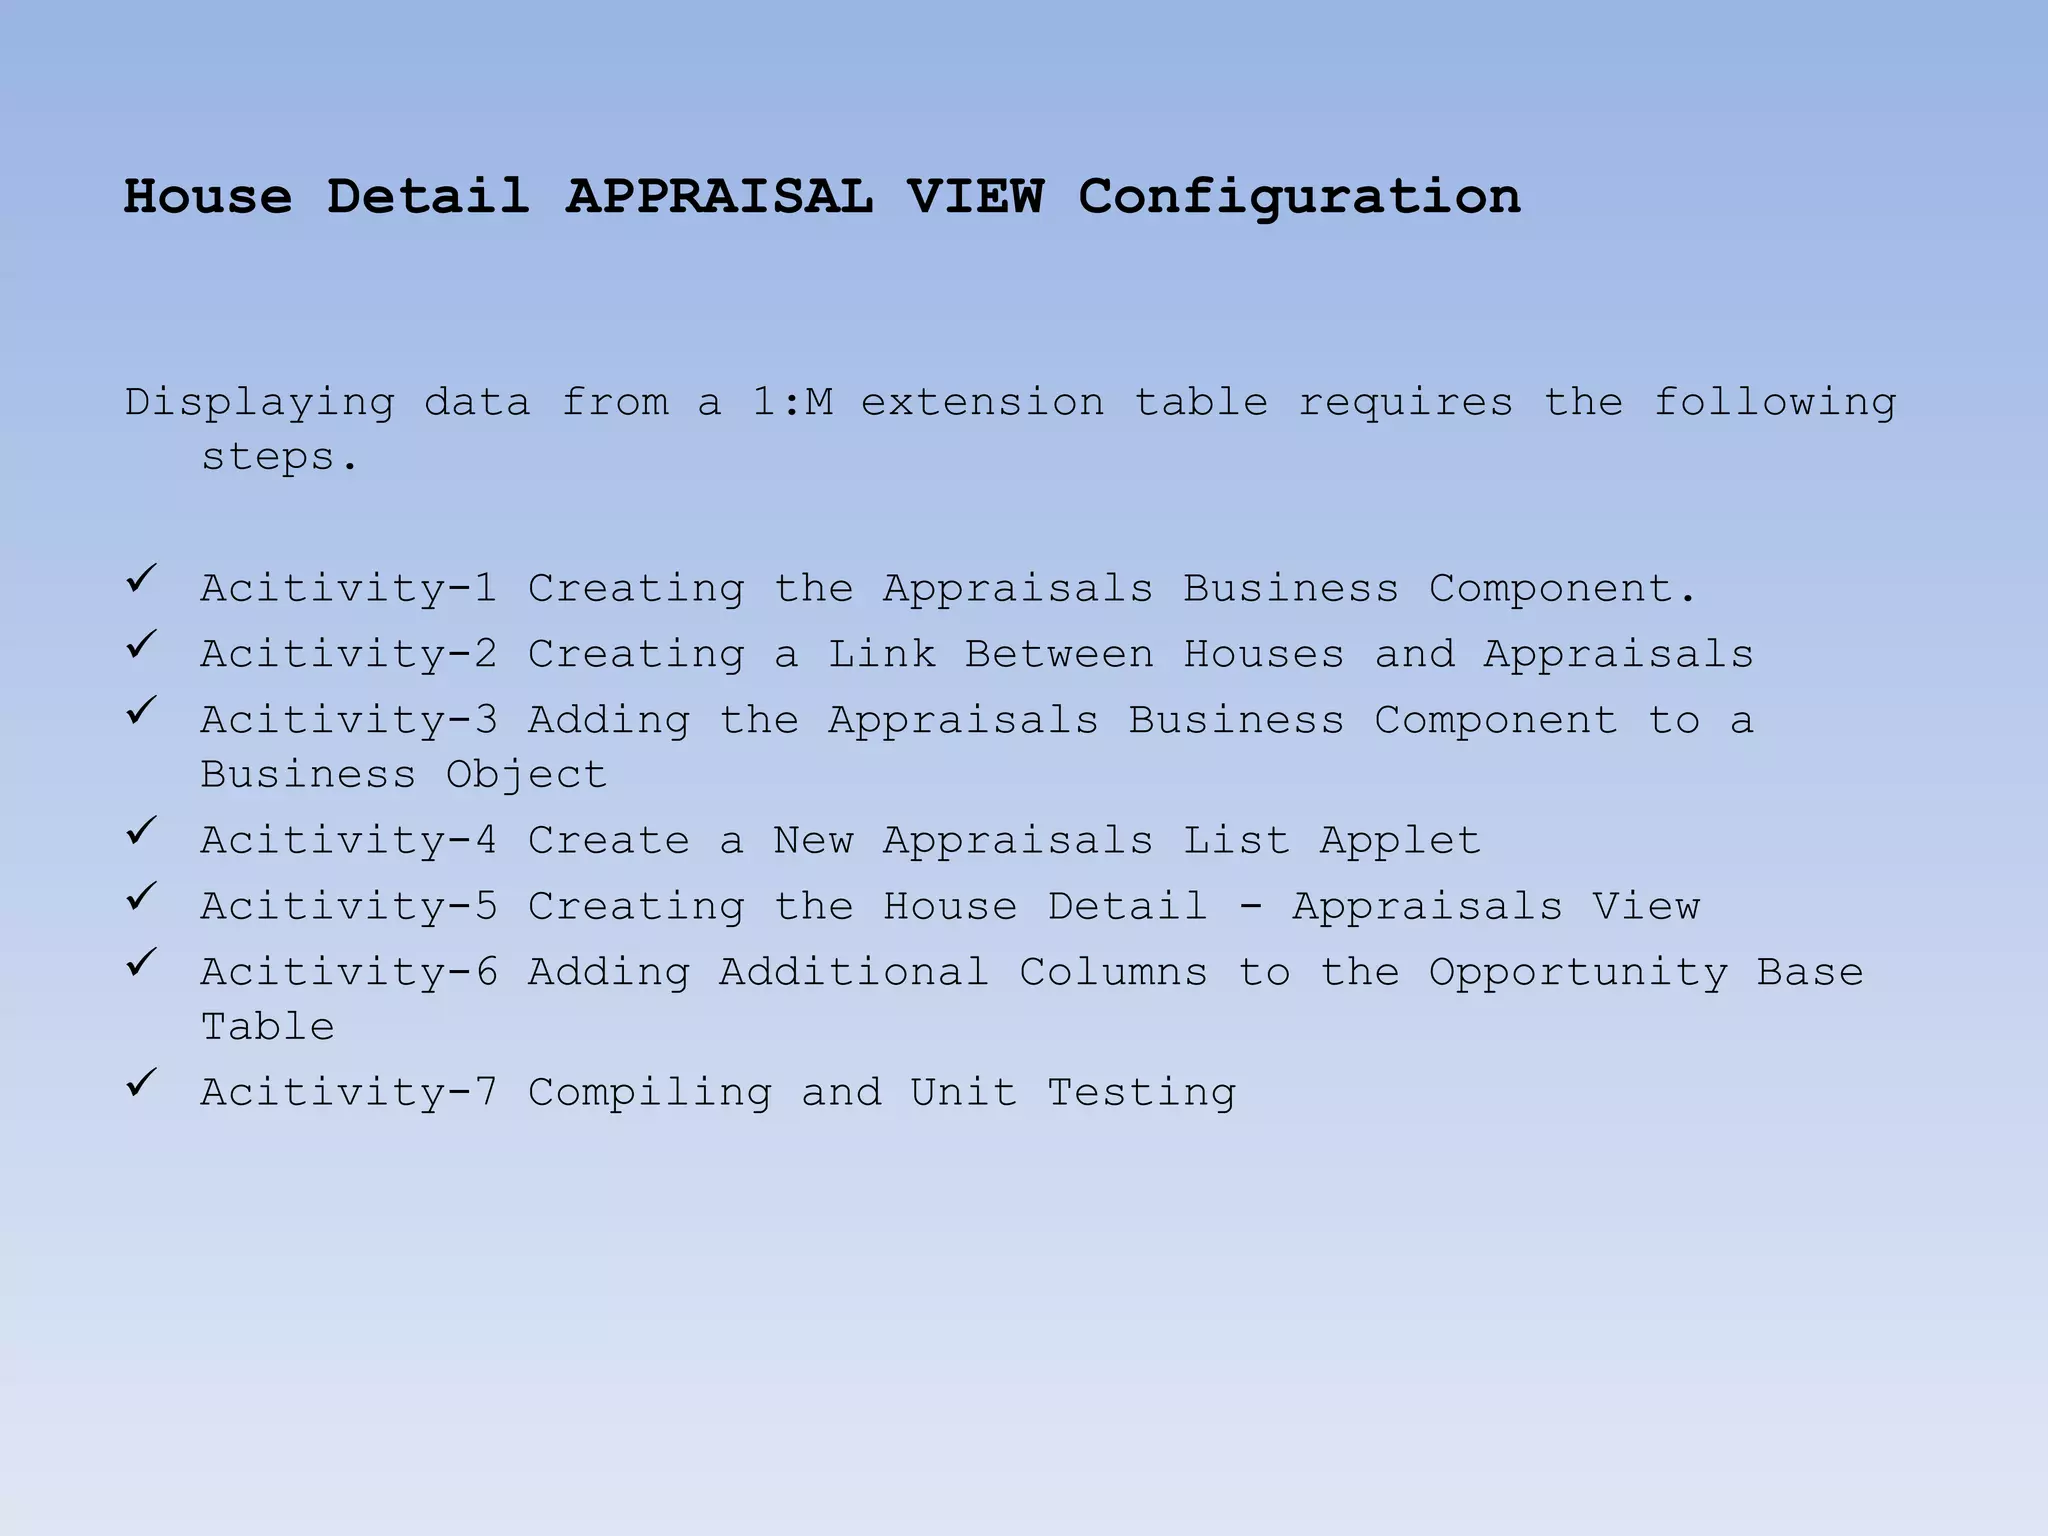
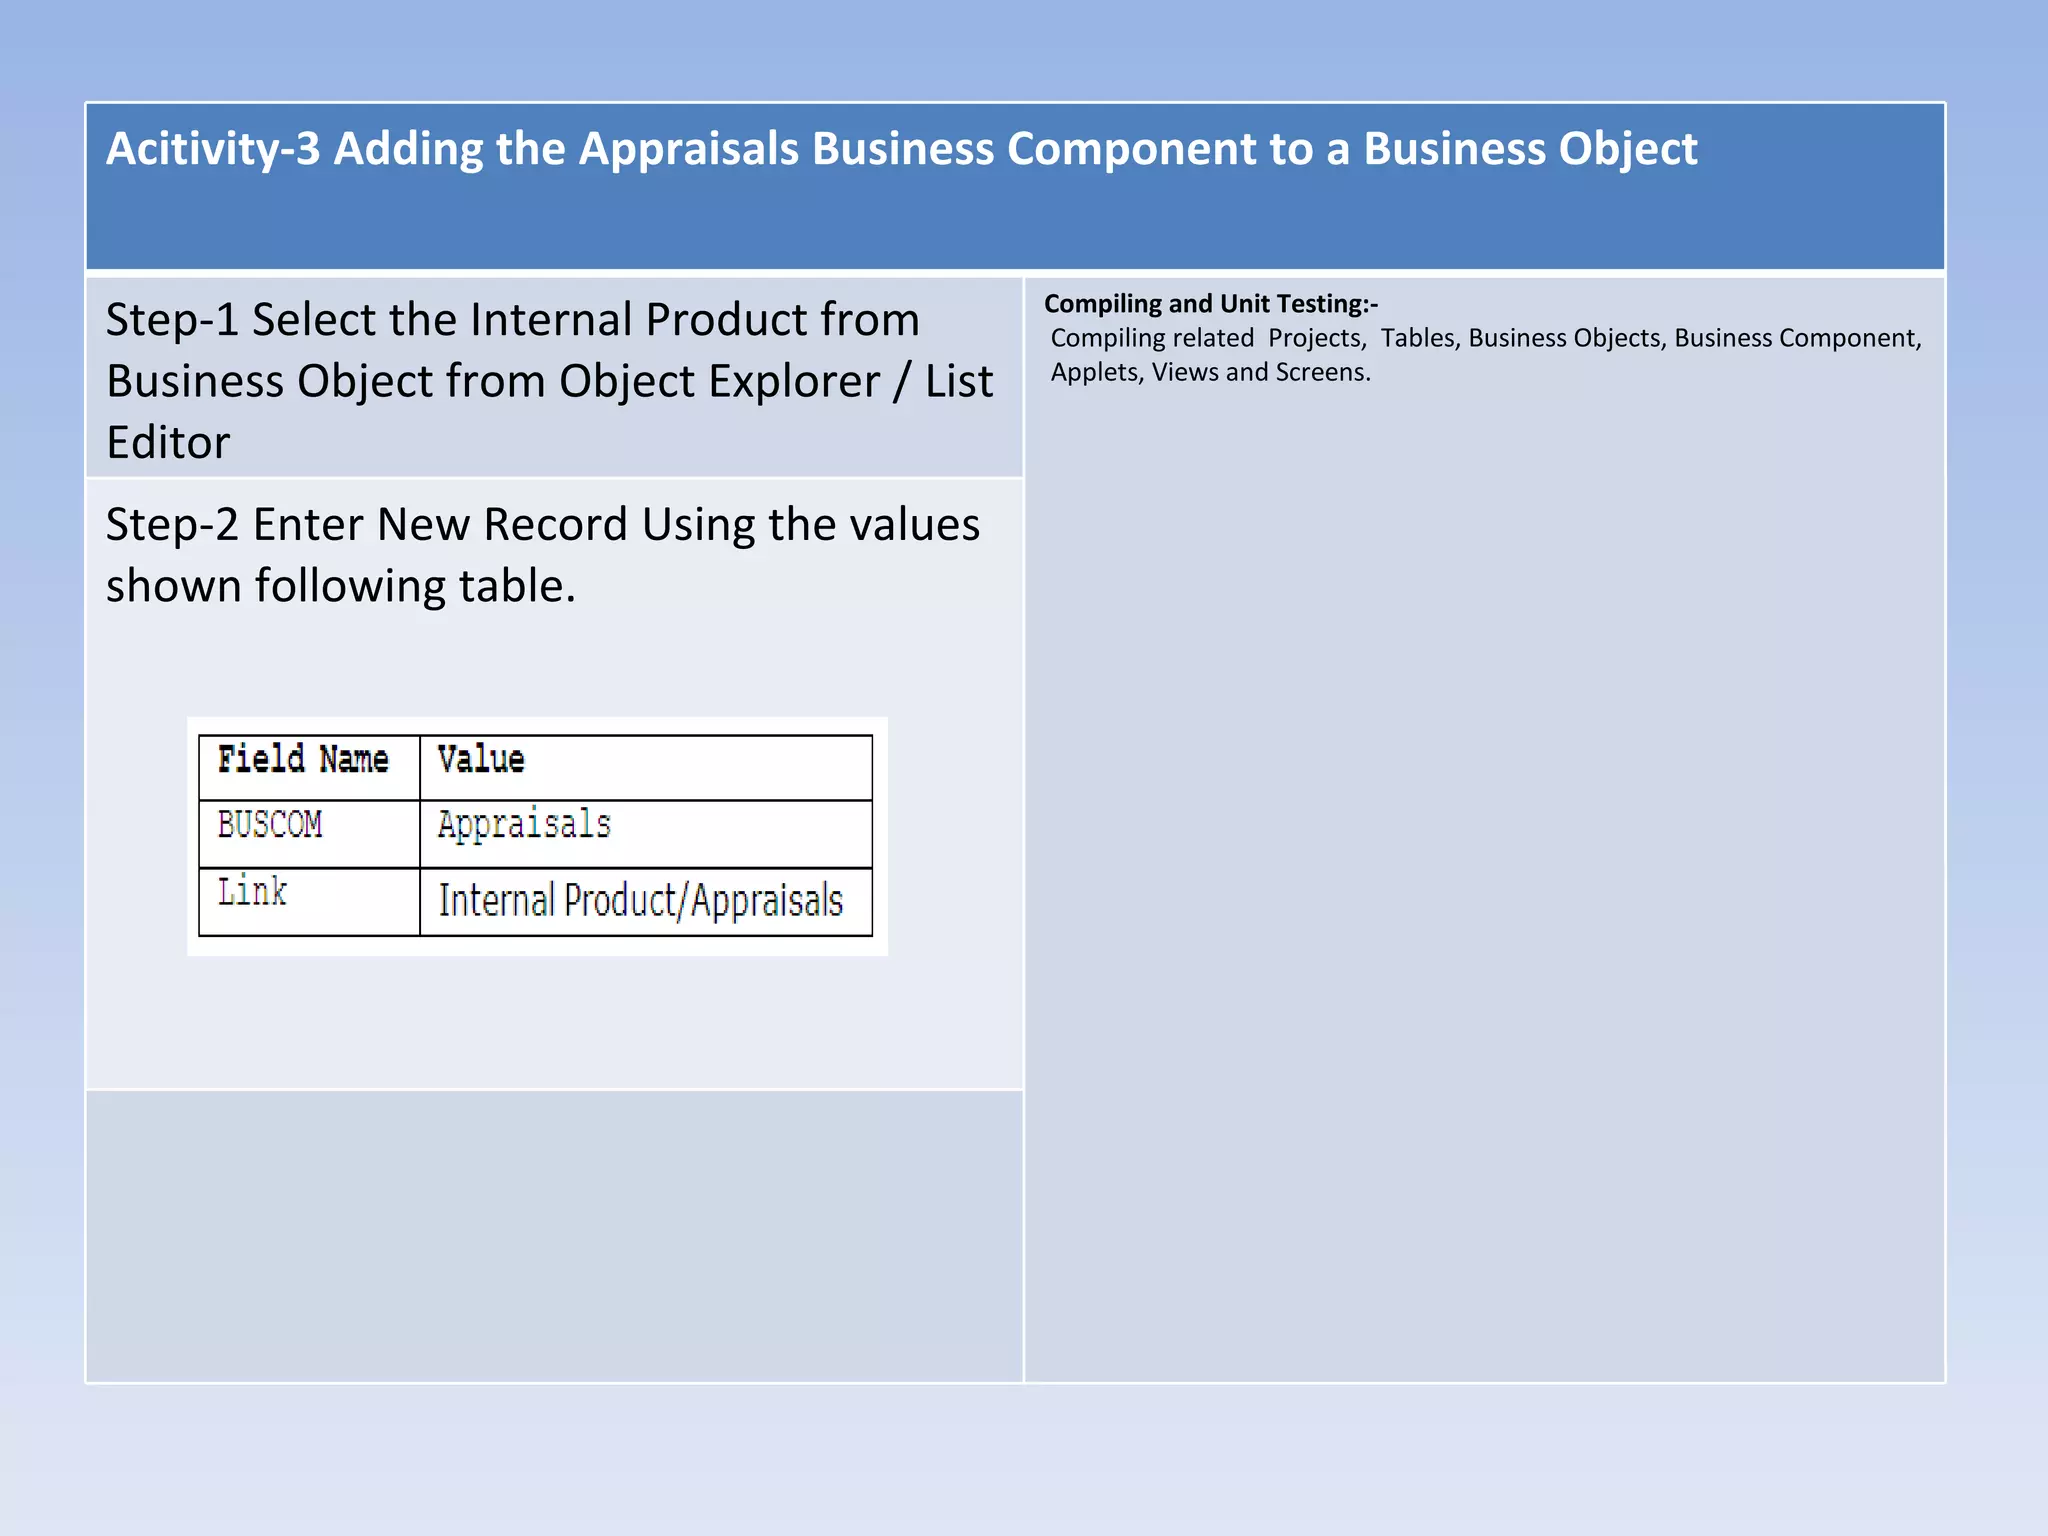
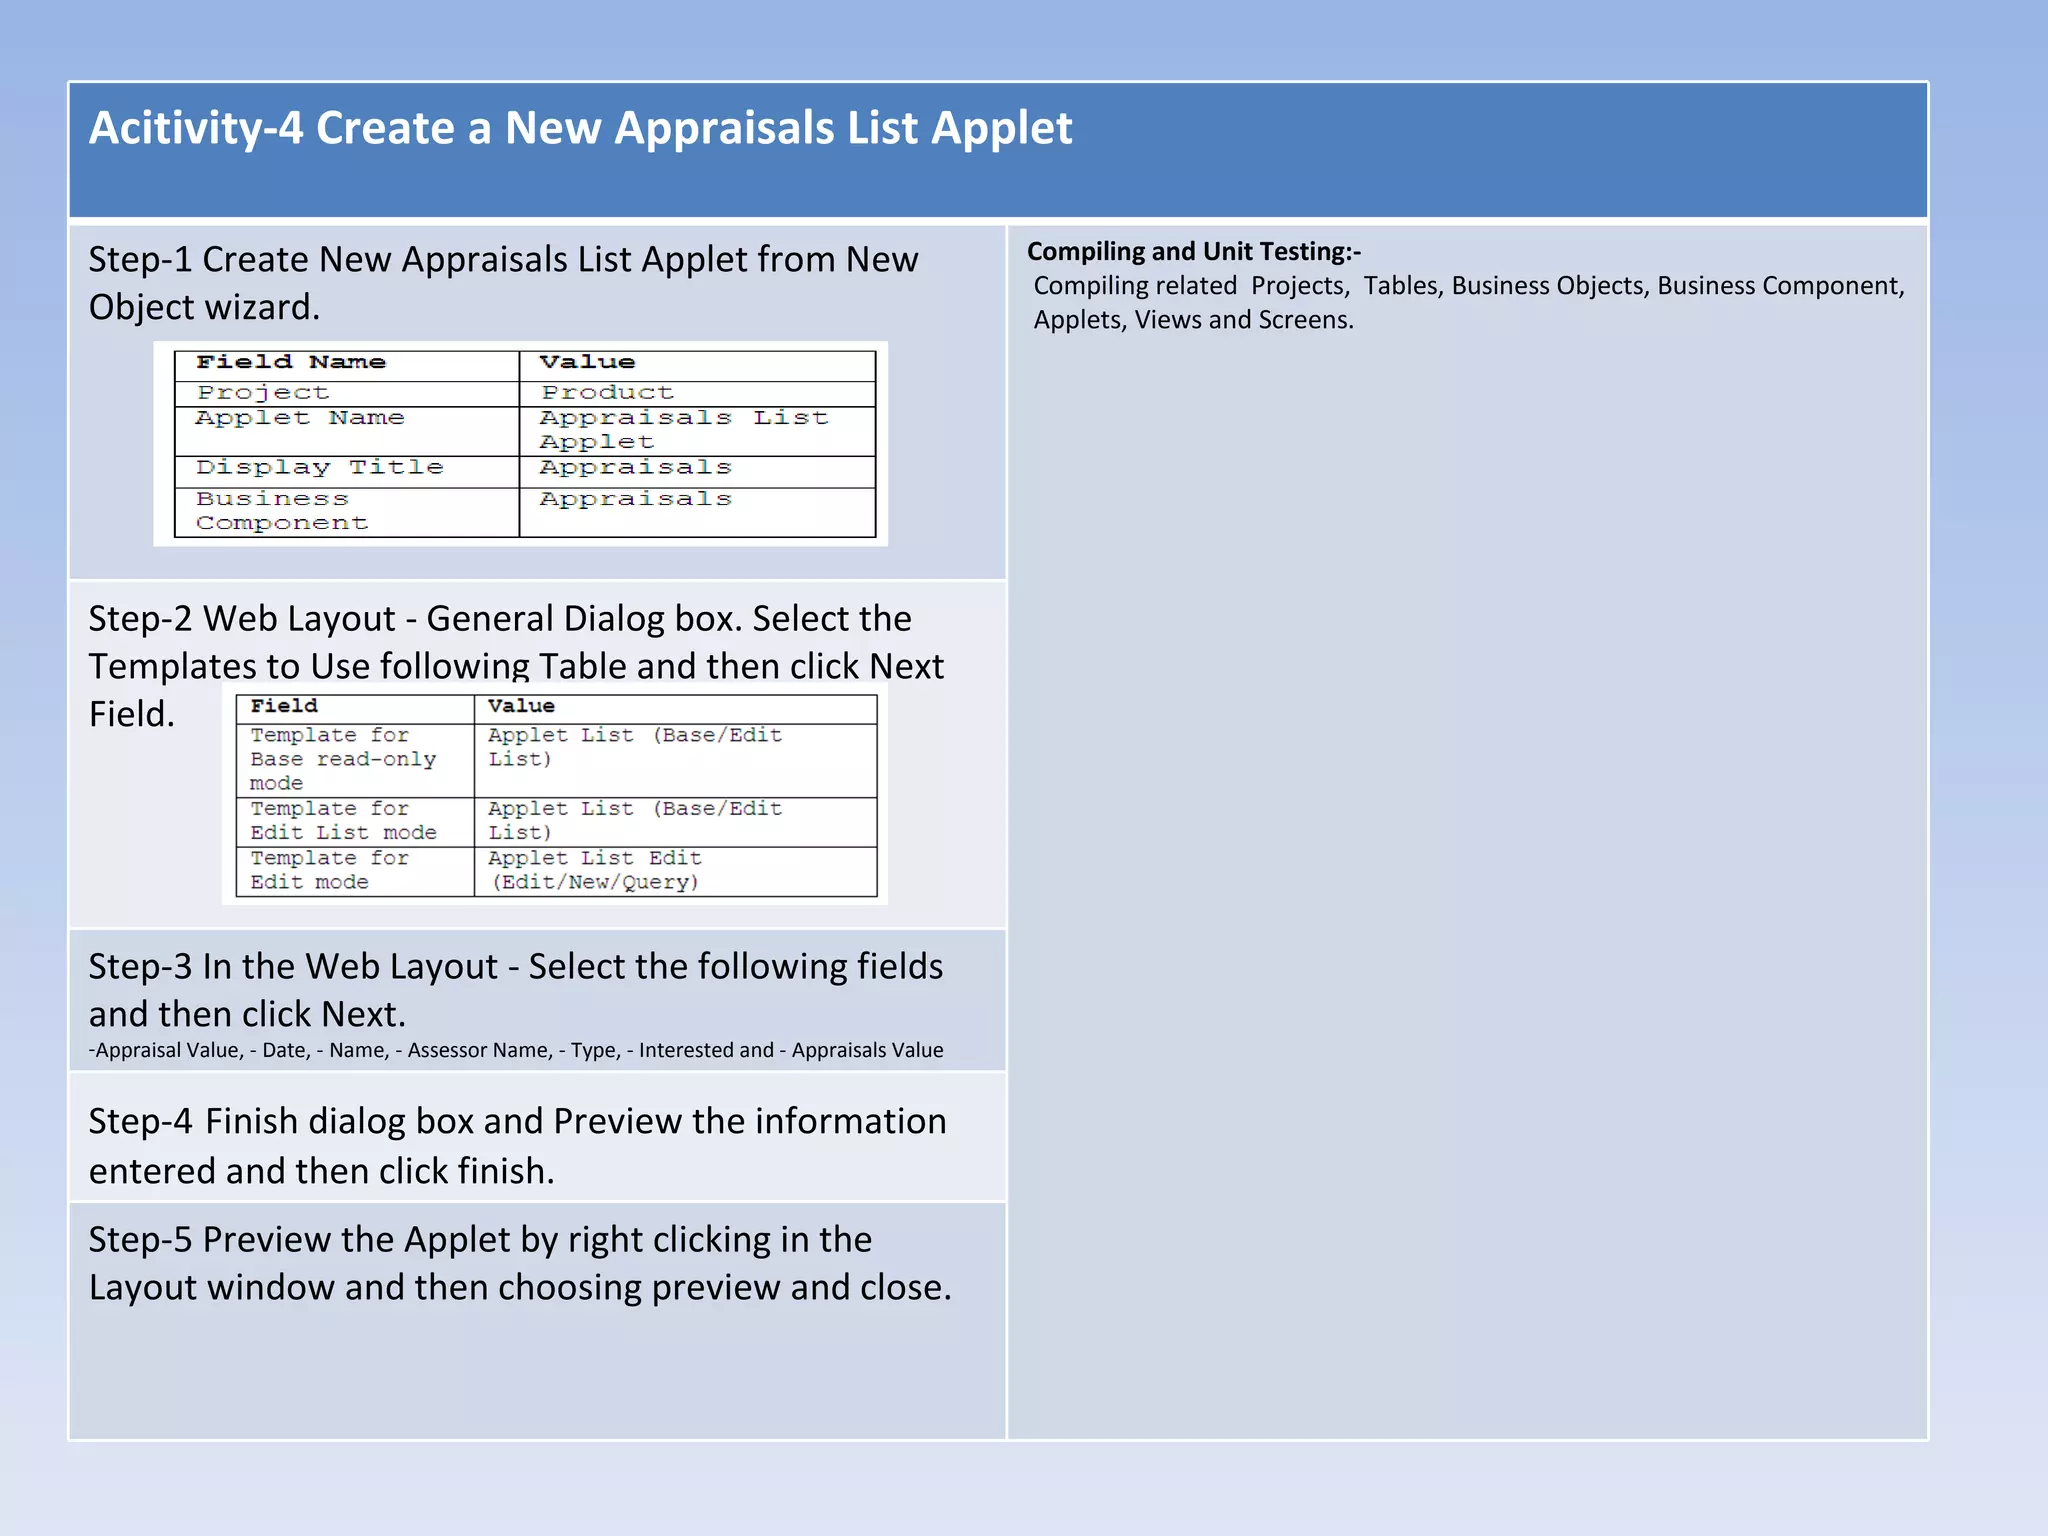
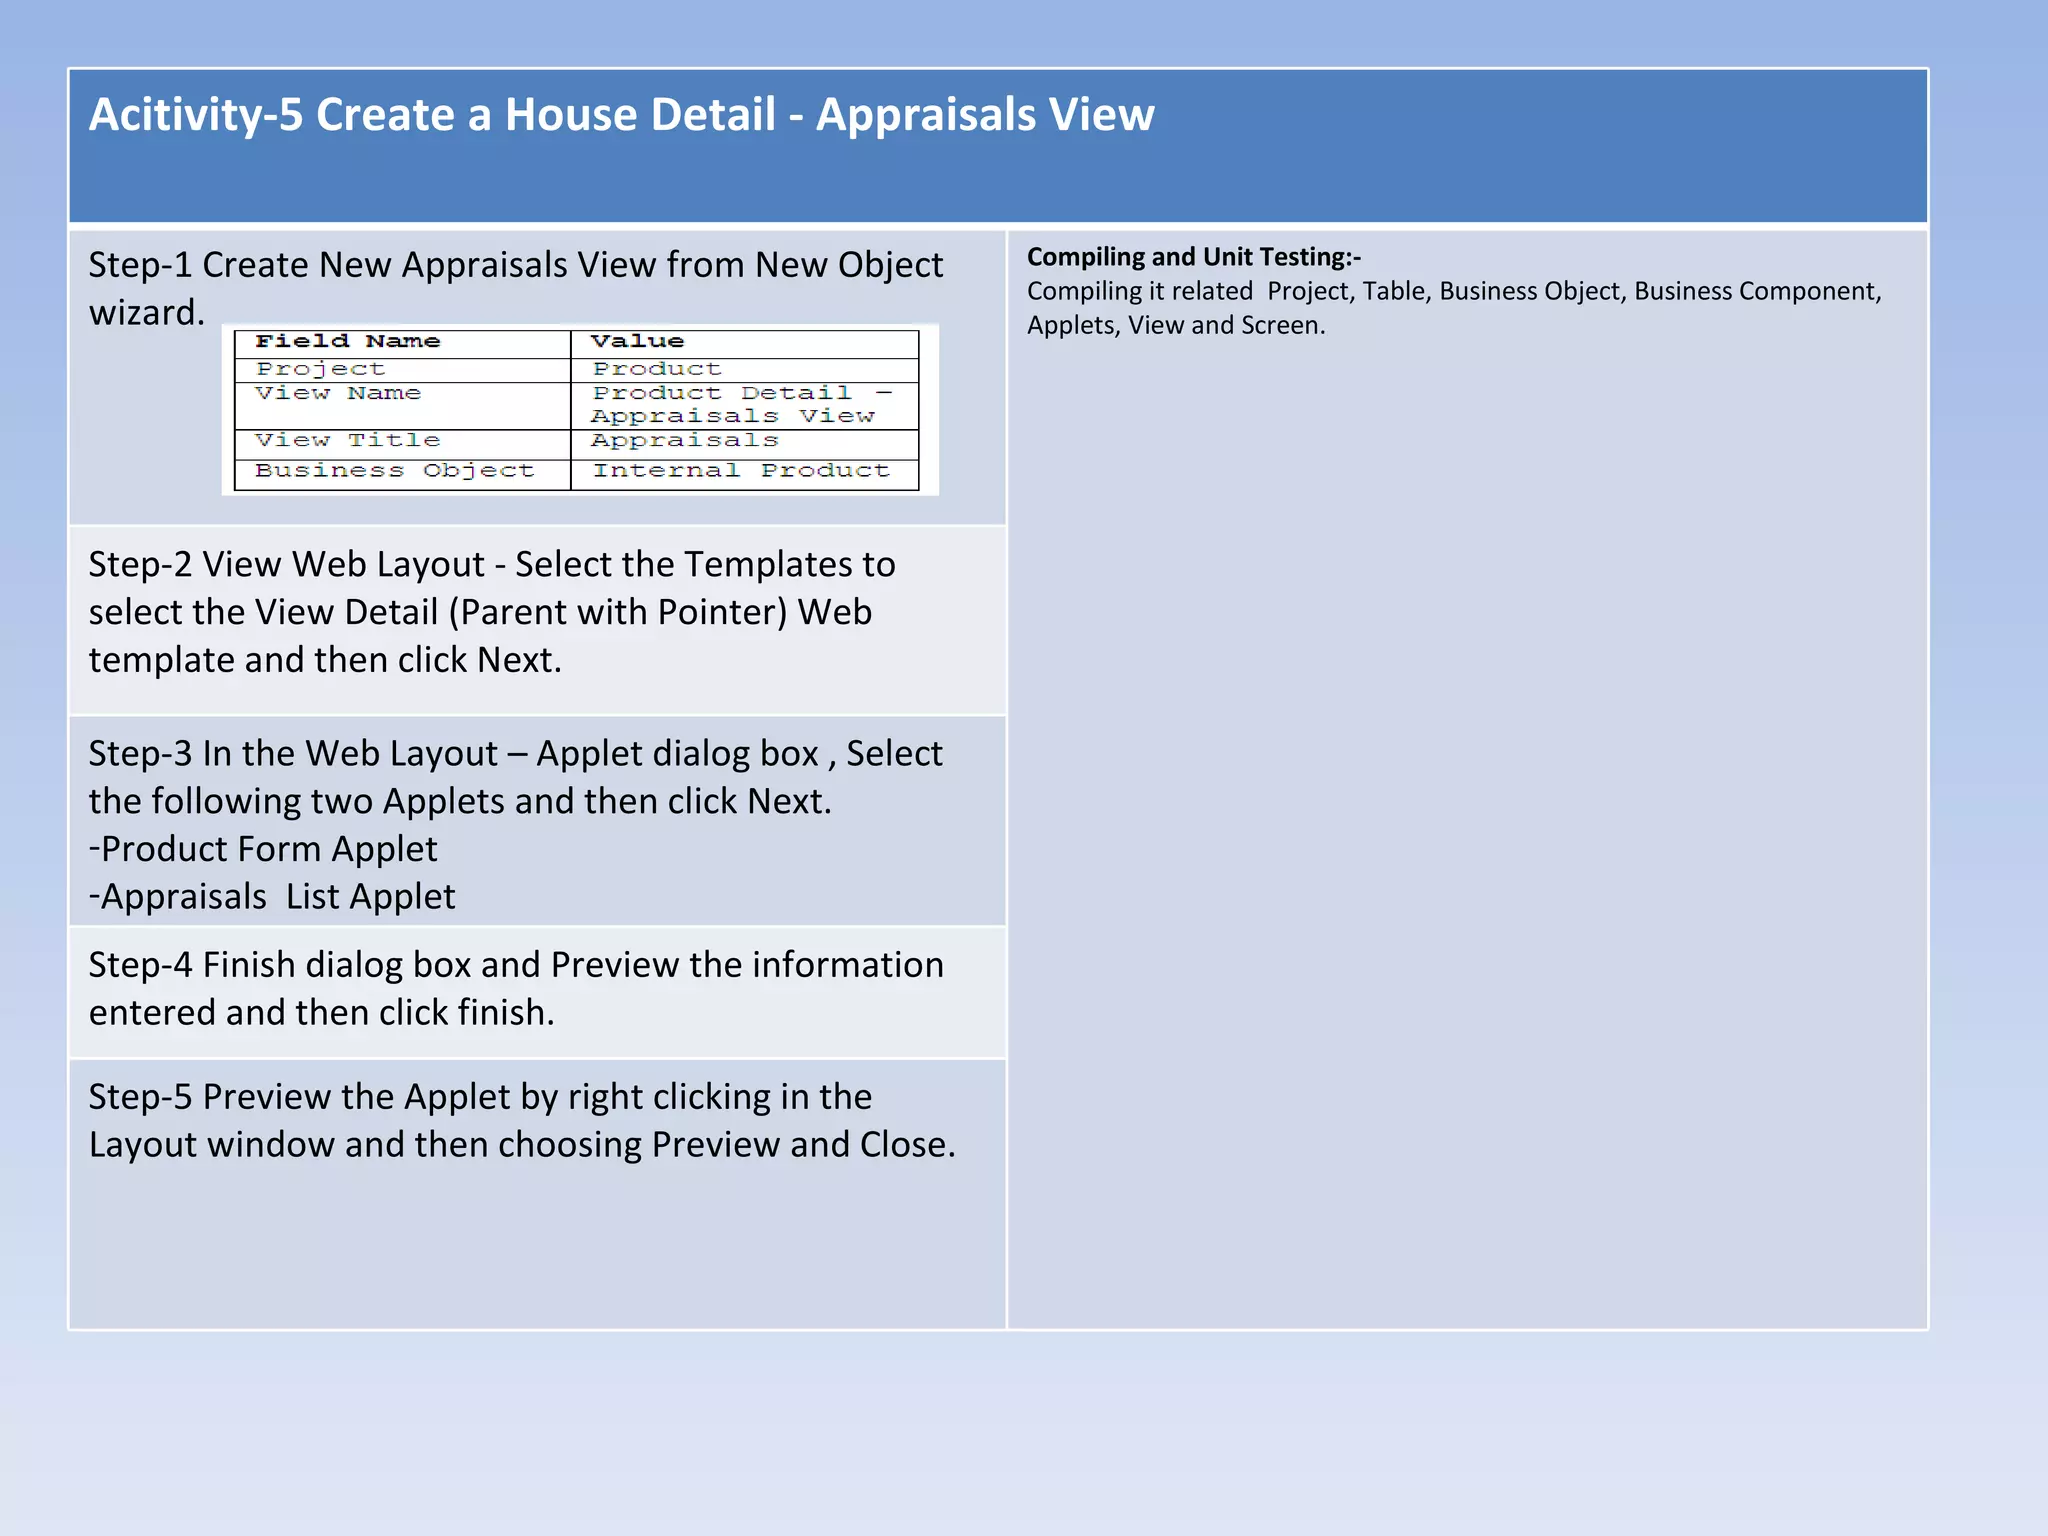
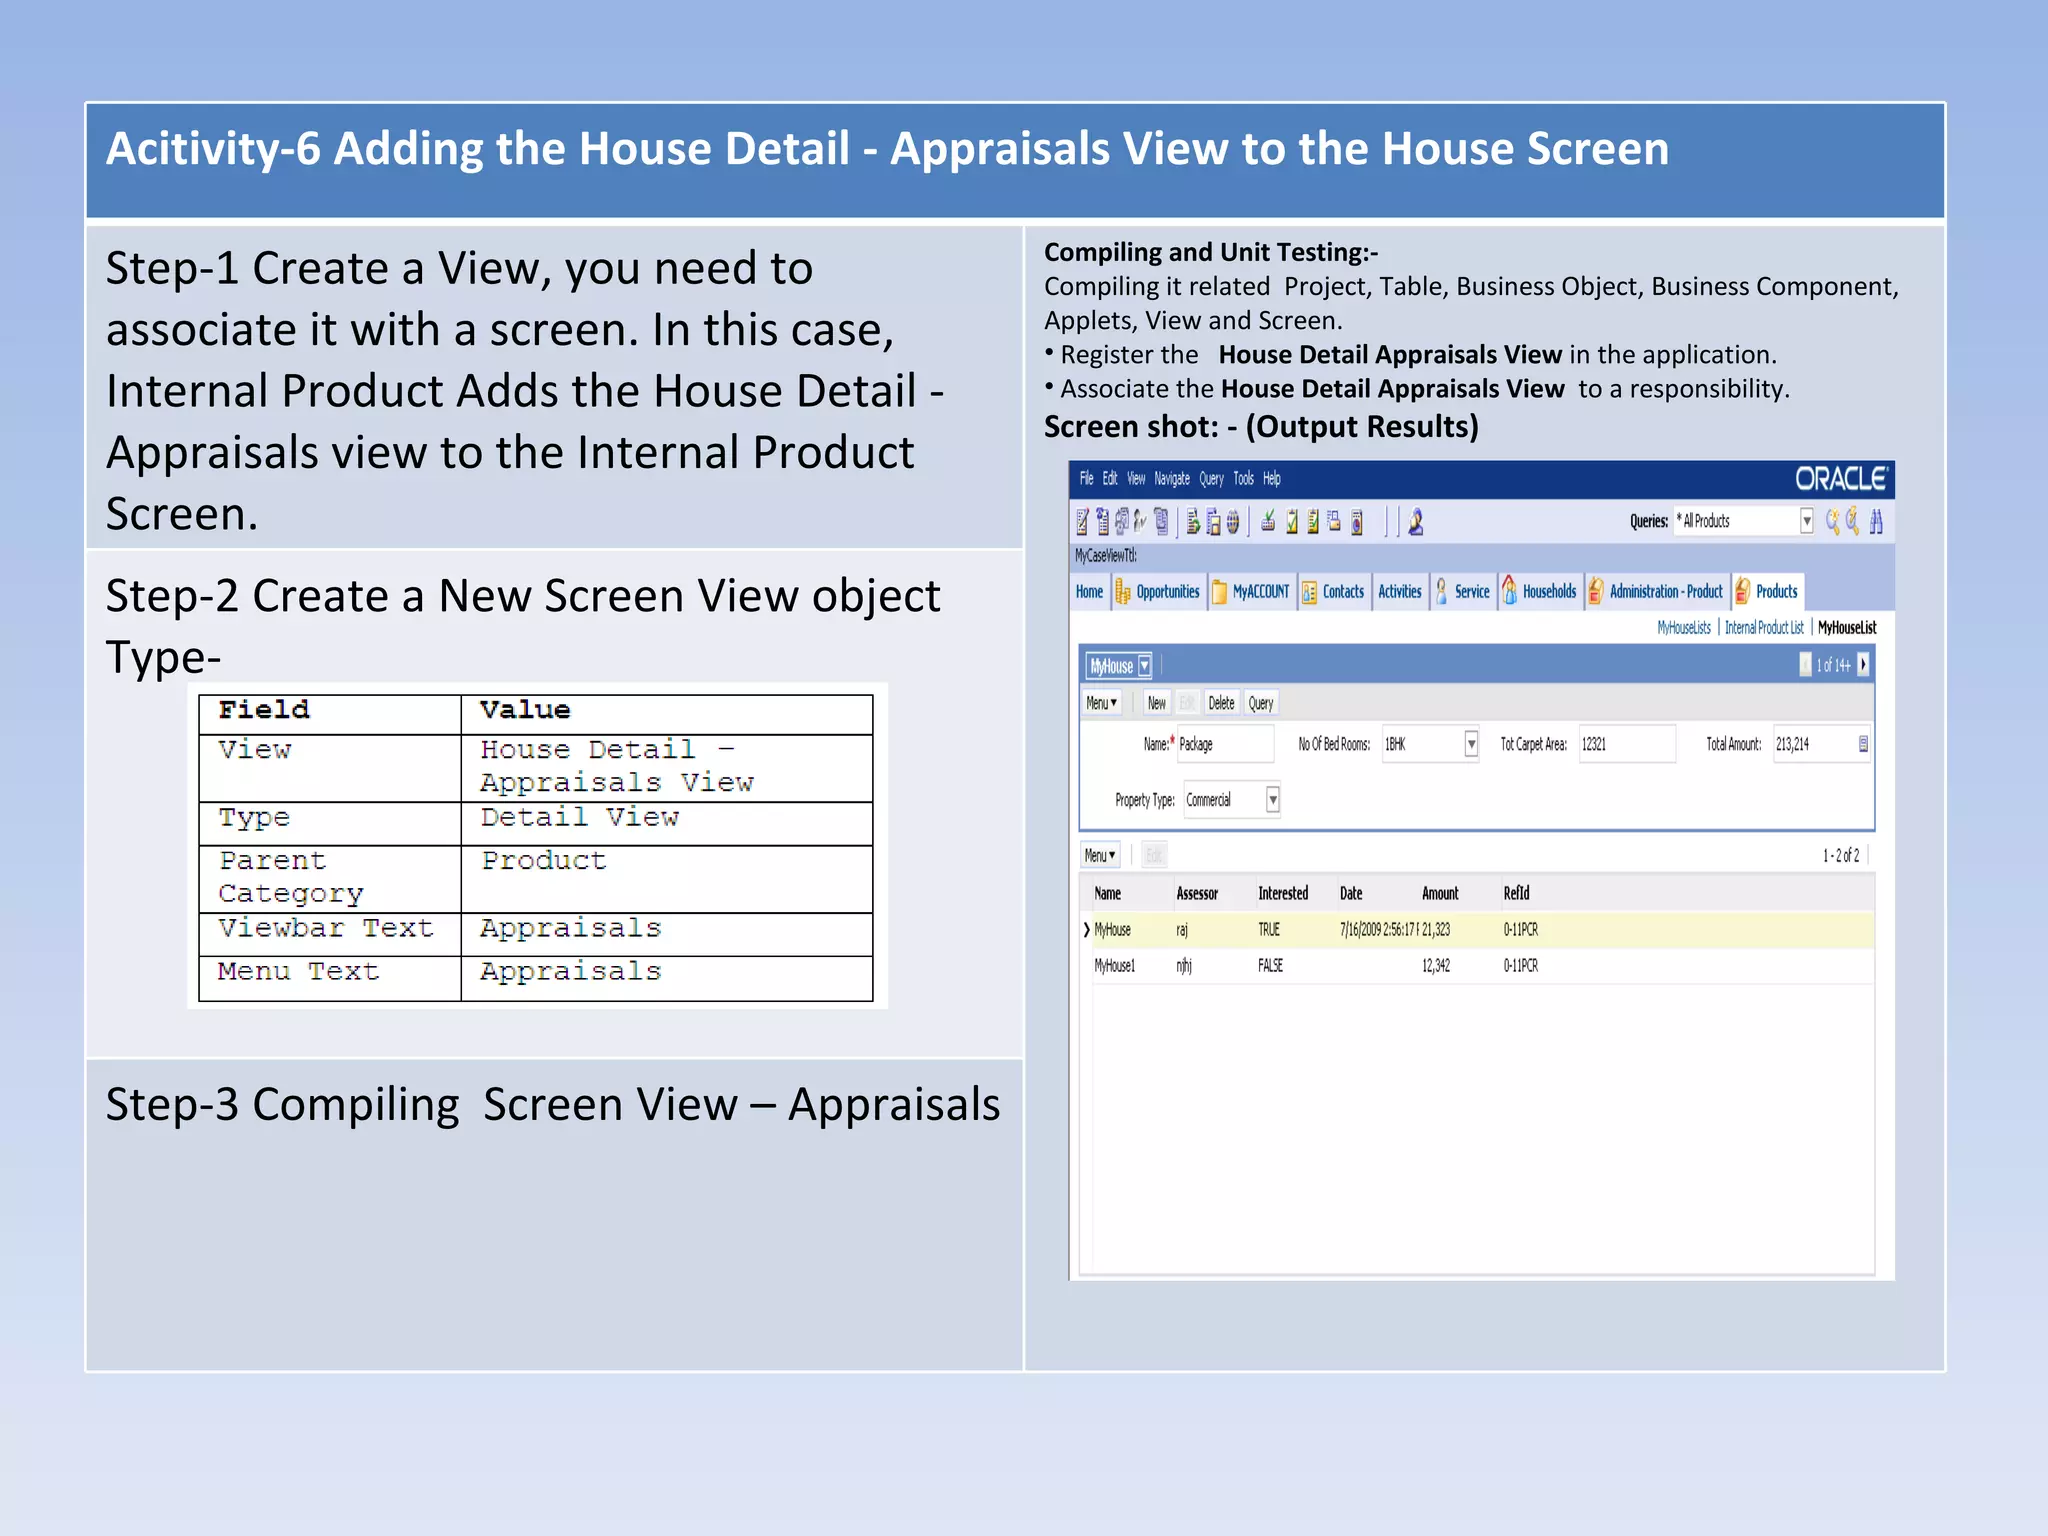
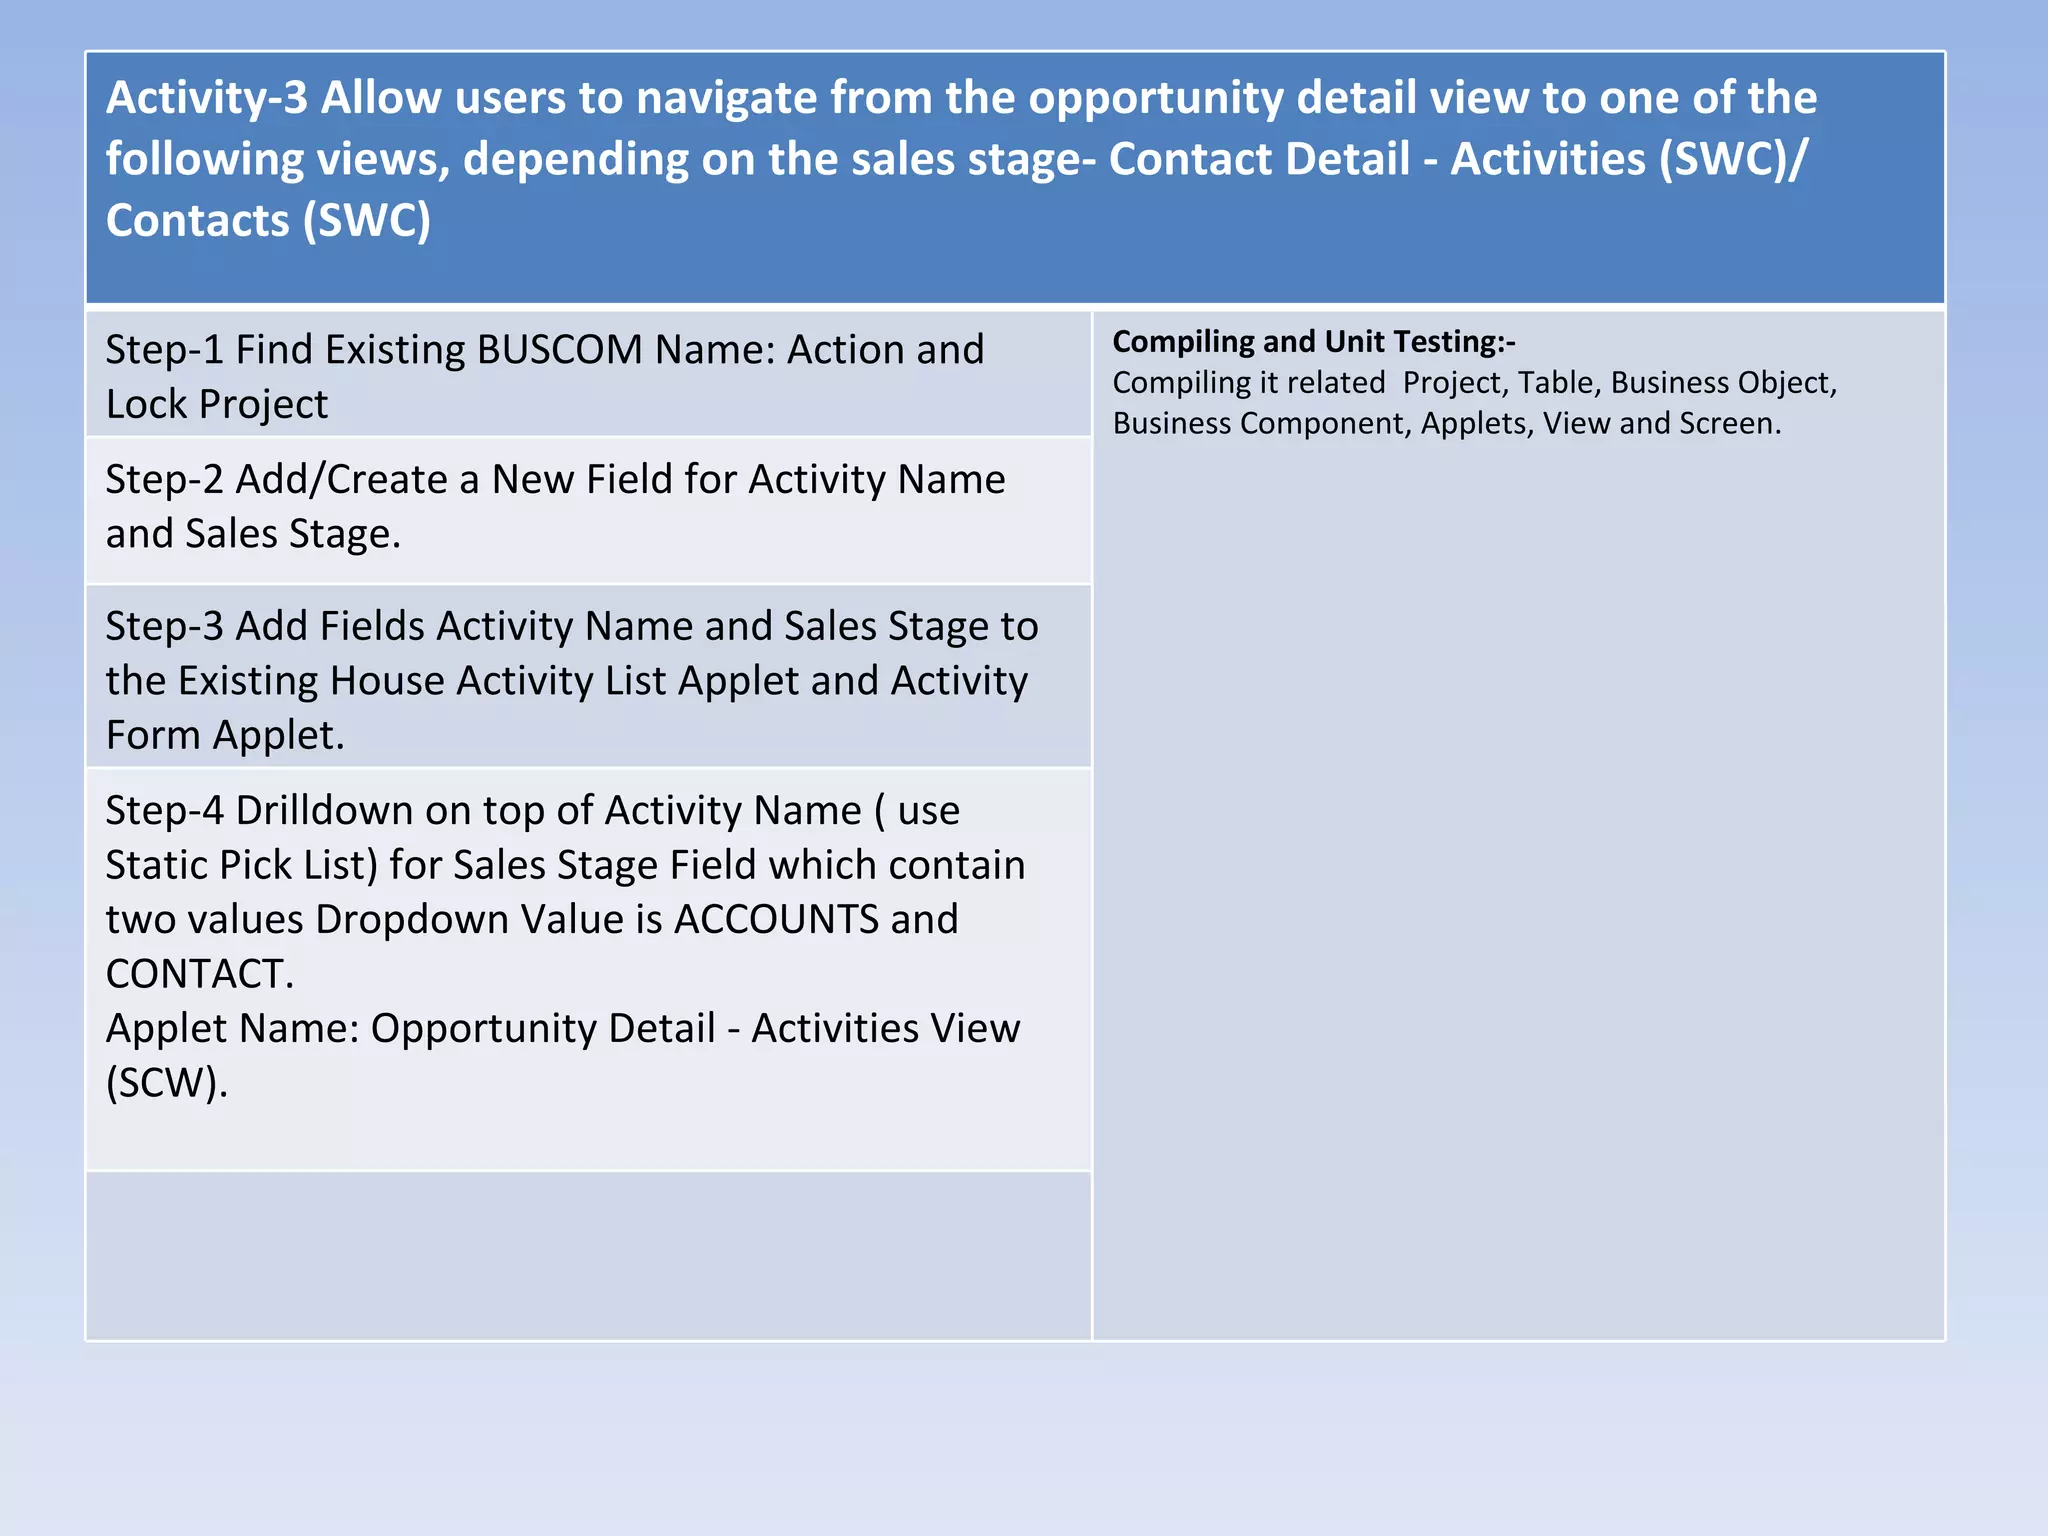
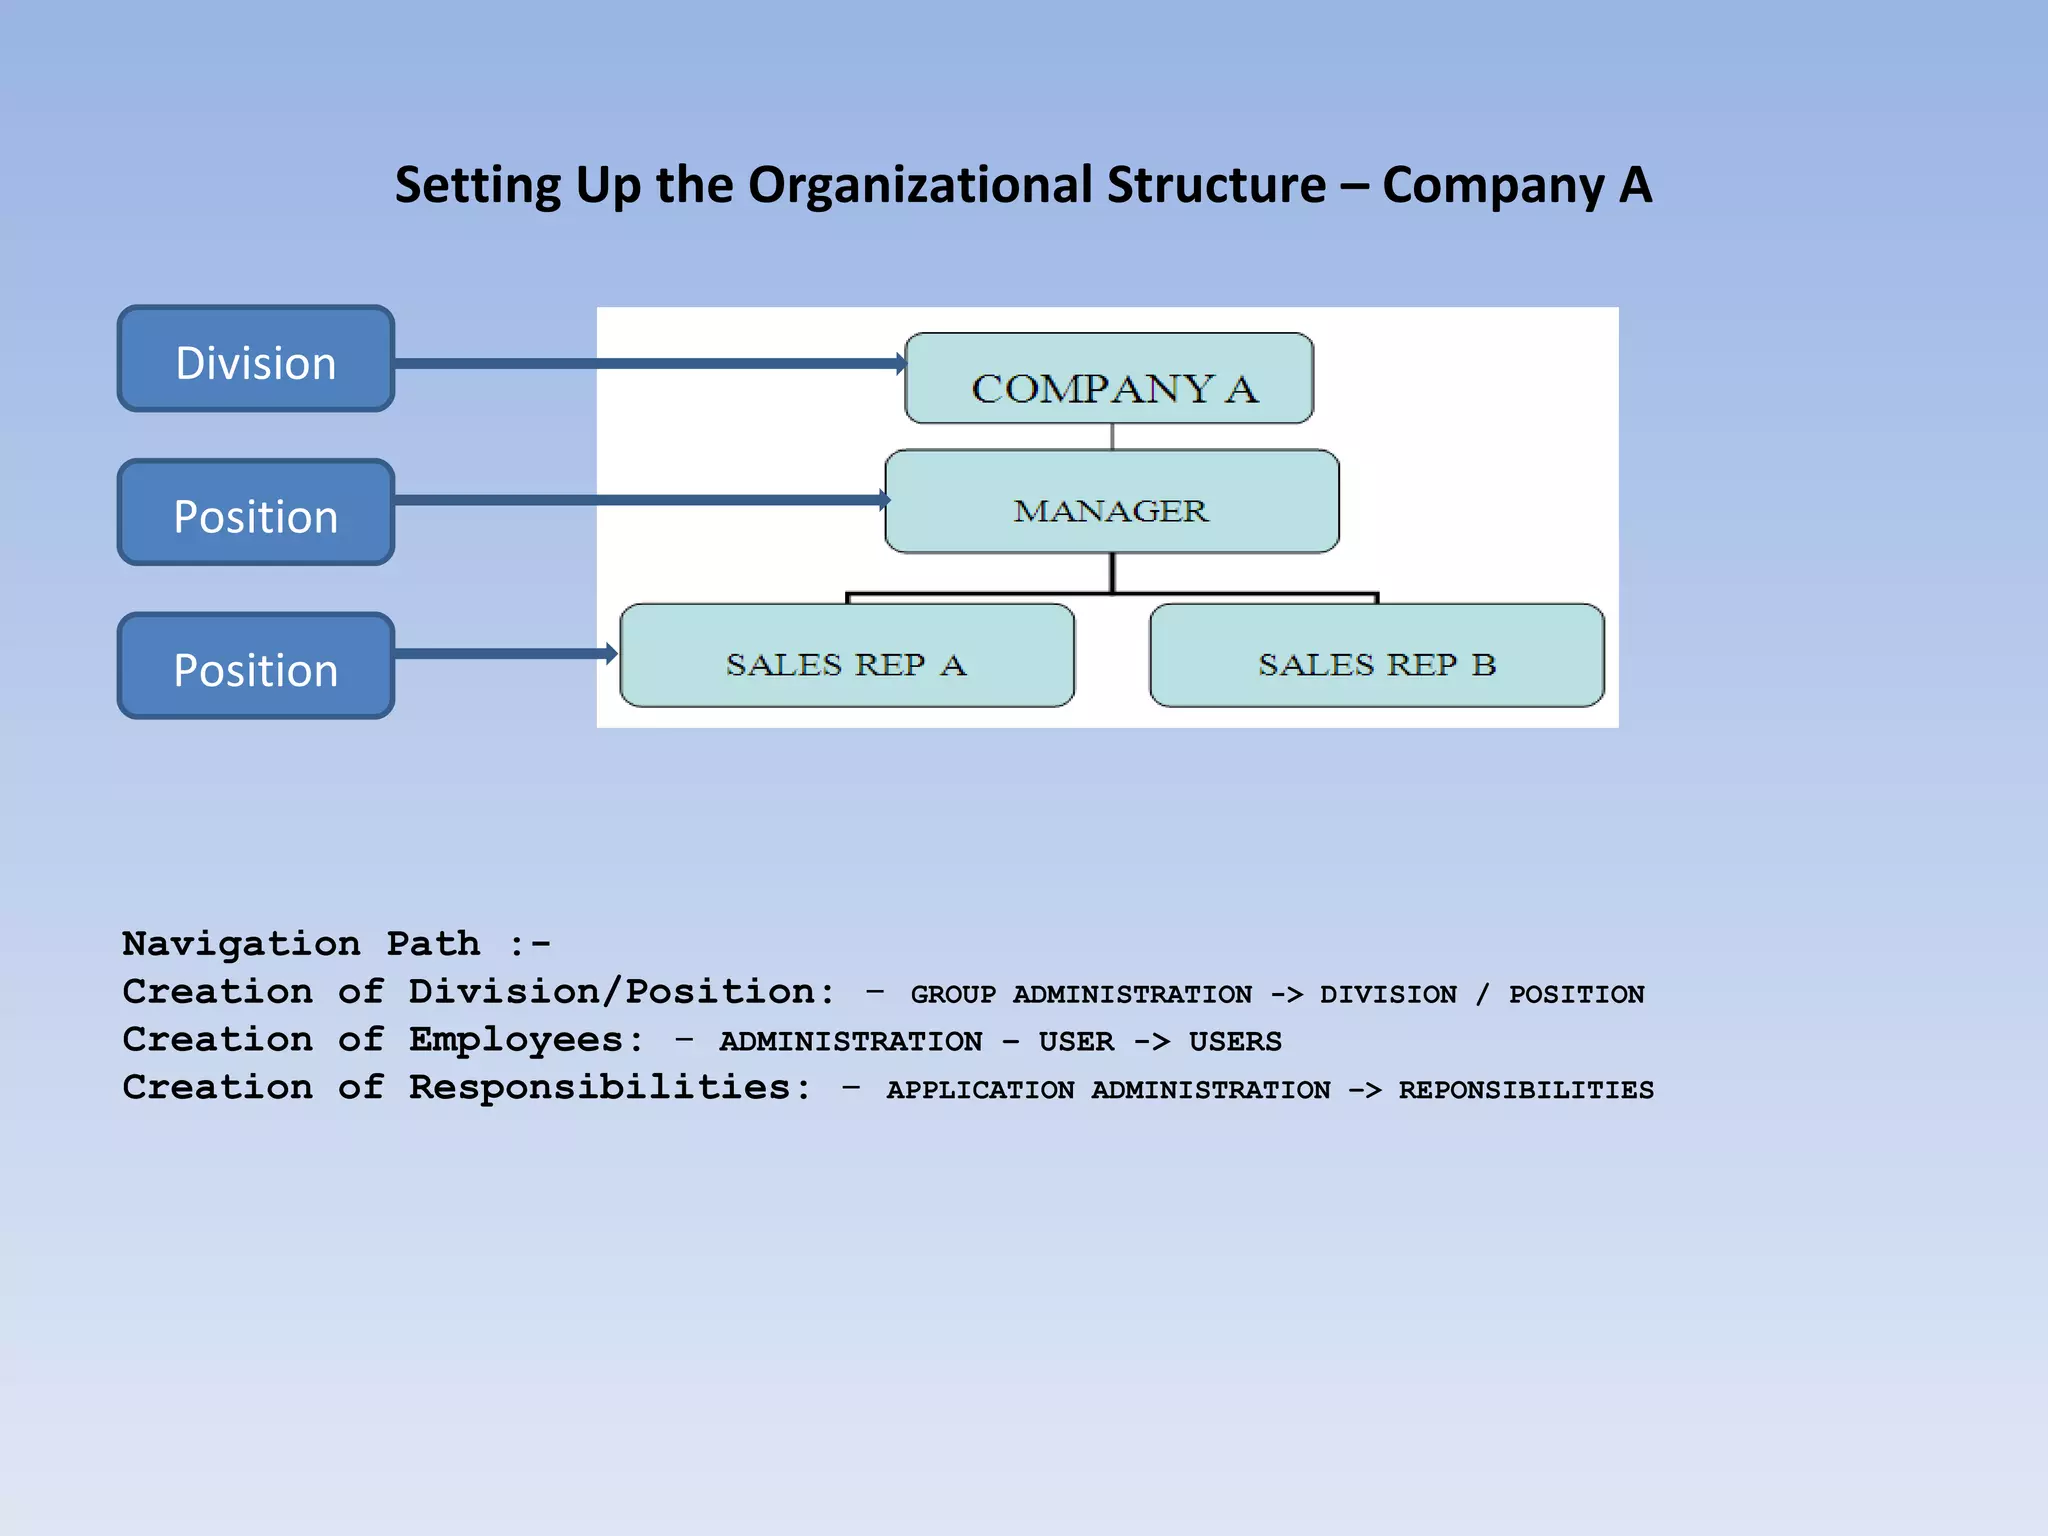
3. The configuration flow, including setting up views for house details, appraisals, opportunities, and activities. It also covers configuring roles.
4. Details requirements for each entity and diagrams of the business process flow and Siebel architecture.


![[DSBW Spring 2009] Unit 04: From Requirements to the UX Model](https://cdn.slidesharecdn.com/ss_thumbnails/unit04-starting-090328141241-phpapp02-thumbnail.jpg?width=640&height=640&fit=bounds)


