2. A few more students registered & added a coach @
Khan Academy yesterday. Thank you. Next week’s
topics posted on-line this weekend and on the board
Monday.
3. You can sign up for lunch or after school before the
end of class.
≈ 10 people took advantage of the extra credit
opportunity posted each Tuesday at the v6math site.
Well done to you folks.
4. More help available at the v6math site: This year’s first
volume of the Algebra Connections newsletter is out. It’s
only 2 pages and packed with the things you need to
know for the Unit we’re working on now. Great study
guide for Tuesday’s test.
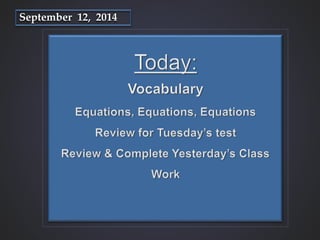
5. Vocabulary
1. Working with Negative Numbers:
The symbol for negative numbers ( - ), means
“The Opposite of”
All positive numbers could be written with a ‘+’ in front of
them, but the sign was left off as the number system
developed. So, numbers with a sign are the ‘opposite’ of
whatever number follows. - 4 - ( - 4)
10 – 4 is really 10 + the opposite of 4. All subtraction is the
addition of the opposite.
When you add any number and its opposite, you get…?
6. Warm-Up: Equations
Because solving equations is the most performed task in
algebra, the earlier you get comfortable with equations, the
easier the course will be for you.
Let’s start with a problem we can answer without algebra:
A. The sum of two consecutive numbers is nine. What
are the numbers?
4 + 5 = 9
Those not skilled in the way of the equation will want
to write: x + 1 = 9. Translated, this equation is 5 = 9
This was the common mistake from the writing
equation question from yesterday’s class work.
The correct translation, of course, is: x + (x + 1). The equation
now states that 4 + 4 + 1 = 9. Yes.
Values of all other unknowns in a problem are shown as the
relationship between the value and our assigned variable.
Four is our ‘x’. Five is written showing its relationship to 4.
When you have 5, you have 4.....plus 1.
7. Warm-Up: Formulas & Equations
1. Find the perimeter of the rectangle:
P = 180’
A = 84’
P = 40’
A = 68’
L =60’
14’
6’
W
=
4’
2. Find the area of the rectangle:
3. That was basic arithmetic. Now let’s use algebra to
solve this one: Write an equation to find the width of the
rectangle if the length is 60 ft. and the perimeter is 180 ft.
4. What if…, the area of the rectangle is 68 ft. and the
width is 4ft. What is the length?
8. Warm-Up: Writing Equations to Solve Problems
1. As the head pastry chef, you make $7.00/hr. So far you
have earned $42.00. Which of the following equations is
the algebraic model for this situation?
P = 4S
4(3x – 10) = 32
12x - 40 = 32
12x = 72
The length of
each side is 6
9. Warm-Up: Equations & Translating
1. Buck has $20 more than Roger. Together they have $60. How
much does each one have?
2. Peter has $6 more than Meg. Chris has $18 more than Peter.
They have $84 all together. How much does each one have?
3. The sum of 3 consecutive numbers is 87. What are the three
numbers?
4. Billy Bob worked 6 hours less than Sally May. Together they
worked 64 hours. How many hours did each work?
Key Concepts: Always Assign the variable to the smallest,
least, lightest, shortest, etc. Every other number is shown by its
relationship to the variable.
Editor's Notes
Embossed text
(Basic)
To reproduce the shape effects on this slide, do the following:
On the Home tab, in the Drawing group, click Shapes, and then under Rectangles, click Rectangle (first option from the left). On the slide, drag to draw a rectangle.
Select the rectangle. On the Home tab, in the Drawing group, click the arrow next to Shape Fill, and then under Theme Colors click Blue, Accent 1, Darker 25% (fifth row, fifth option from the left).
On the Home tab, in the Drawing group, click the arrow next to Shape Outline, and then click No Outline.
On the Home tab, in the Drawing group, click Shape Effects, point to Bevel, and then under Bevel click Cool Slant (first row, fourth option from the left).
On the Home tab, in the Drawing group, click Shapes, and then under Rectangles, click Rectangle (first option from the left). On the slide, drag to draw another rectangle, slightly larger than the first rectangle.
Select the second rectangle. On the Home tab, in the Drawing group, click the arrow next to Shape Fill, and then click No Fill.
On the Home tab, in the Drawing group, click the arrow next to Shape Outline, and then click Blue, Accent 1, Lighter 40% (fourth row, fifth option from the left).
On the Home tab, in the Drawing group, click the arrow next to Shape Outline, point to Dashes, and then click More Lines.
In the Format Shape dialog box, click Line Style in the left pane, and then do the following in the Line Style pane:
In the Width box, enter 1.25 pt.
Click the button next to Dash type, and then click Square Dot (third option from the top).
To reproduce the text effects on this slide, do the following:
On the Home tab, in the Slides group, click Layout, and then click Blank.
On the Insert tab, in the Text group, click Text Box, and then on the slide, drag to draw the text box.
Enter text in the text box, select the text, and then on the Home tab, in the Font group, select Copperplate Gothic Bold from the Font list, and then select 48 from the Font Size list.
On the Home tab, in the Paragraph group, click Center to center the text in the text box.
Select the text. Under Drawing Tools, on the Format tab, in the WordArt Styles group, click the arrow next to Text Fill, and then under Theme Colors click Blue, Accent 1, Darker 25% (fifth row, fifth option from the left).
Under Drawing Tools, on the Format tab, in the bottom right corner of the WordArt Styles group, click the Format Text Effects dialog box launcher. In the Format Text Effects dialog box, click 3-D Format in the left pane, and then do the following under Bevel in the 3-D Format pane:
Click the button next to Top, and then under Bevel click Circle (first row, first option from the left).
Next to Top, in the Width box, enter 2 pt.
Next to Top, in the Height box, enter 2 pt.
To reproduce the background on this slide, do the following:
Right-click the slide background area, and then click Format Background. In the Format Background dialog box, click Fill in the left pane, select Gradient fill in the Fill pane, and then do the following:
In the Type list, select Radial.
Click the button next to Direction, and then click From Center (third option from the left).
Under Gradient stops, click Add or Remove until two stops appear in the drop-down list.
Also under Gradient stops, customize the gradient stops that you added as follows:
Select Stop 1 from the list, and then do the following:
In the Stop position box, enter 0%.
Click the button next to Color, click More Colors, and then in the Colors dialog box, on the Custom tab, enter values for Red: 65, Green: 68, Blue: 97.
Select Stop 2 from the list, and then do the following:
In the Stop position box, enter 99%.
Click the button next to Color, and then under Theme Colors click Black, Text 1, Lighter 15% (fifth row, second option from the left).