Download to read offline


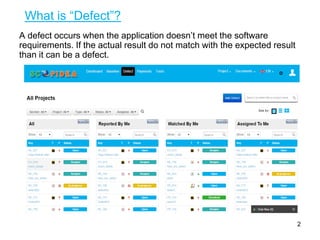
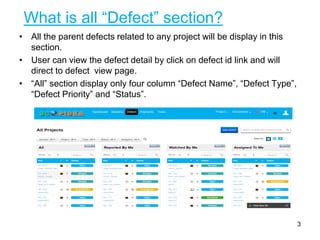
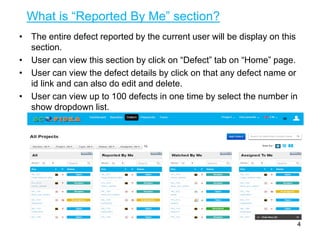
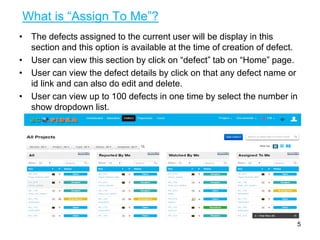
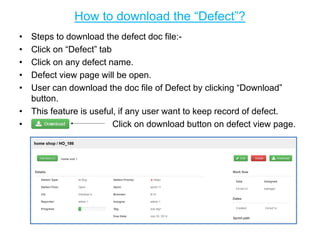

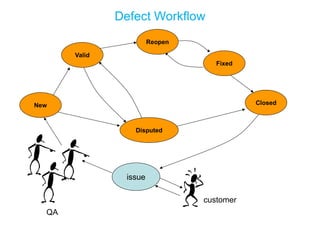

This document defines various sections and functions for managing software defects in Scopidea project management software. It describes what is shown in the "All", "Reported By Me", "Assign To Me", and "Watch By Me" defect sections. It provides steps for creating, editing, adding subtasks to, downloading, and deleting defects. It also includes an overview of the defect workflow states.


