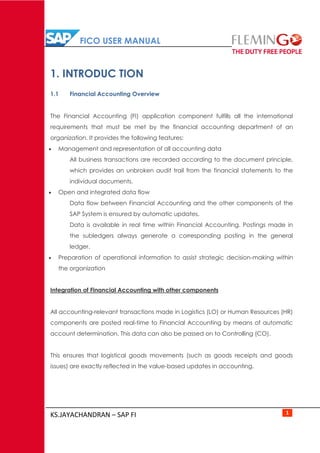
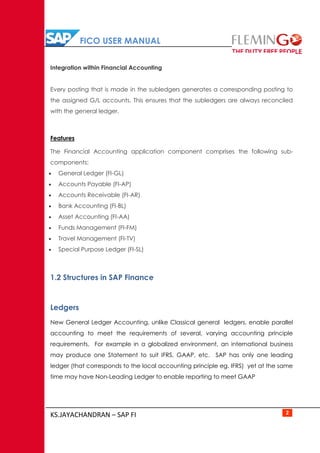
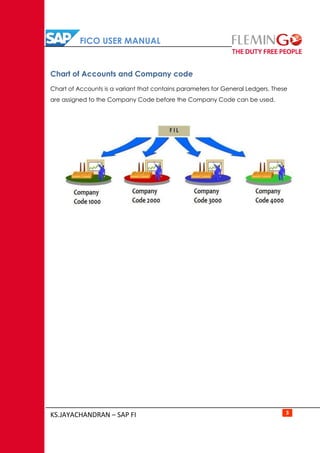
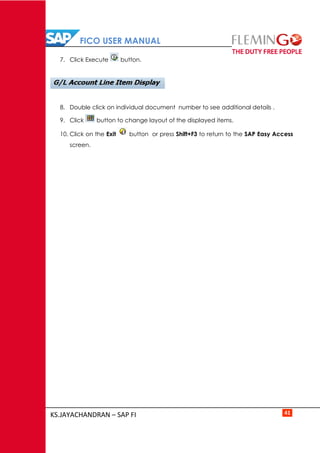
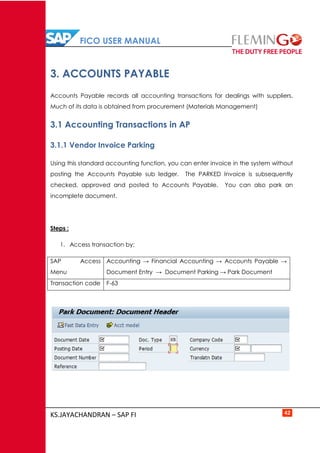
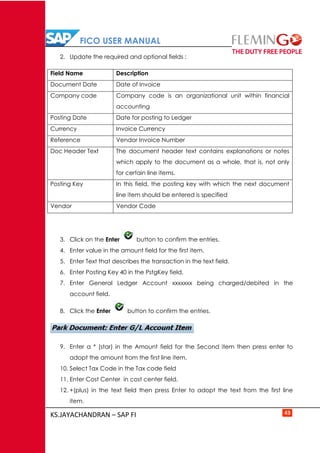
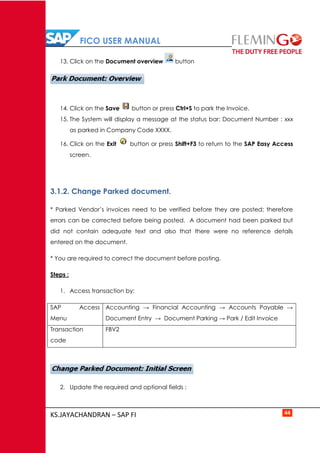
Strictly for Internal Circulation for Flemingo International Limited
SAP FICO
USER GUIDE
Prepared By:
Jayachandran.KS
MBA (Fin), SAP FI
FICO USER MANUAL
KS.JAYACHANDRAN – SAP FI
Contents
1. INTRODUCTION
1.1 Financial Accounts Overview………………………………………………………………………………………1
1.2 Structures in SAP Finance……………………………………………………………………………………………2
2. GENERAL LEDGER
2.1 Finance Organisational Structures & Master Data General Ledger Accounting…………..4
2.2 Accounting Transactions in General Ledger
2.2.1 Park Document…………………………………………………………………………………………… 6
2.2.2 Post parked Document………………………………………………………………………………… 7
2.2.3 Enter General Ledger Account Document…………………………………………………… 9
2.2.4 Change General Ledger Accounting Document……………………………………..…… 11
2.2.5 Display General Ledger Document…………………………………………………………..… 12
2.2.6 General Ledger Document Reversal ………………………………………………………….. 14
2.2.7 Clear General Ledger Account………………………………………………………………..…… 16
2.2.8 Post with Clearing……………………………………………………………………………………..… 18
2.3 GL Period End Closing
2.3.1 Create Recurring Entry Document………………………………………………………………… 21
2.3.2 Change Recurring Document…………………………………………………………………………23
2.3.3 Create Posting from Recurring Documents………………………………..………………… 25
2.3.4 Delete Recurring Document ………………………………………………………………………….27
2.3.5 Enter Accrual / Deferral Document ……………………………………………………………. 29
2.3.6 Reversing Posting for Accruals / Deferred Documents…………………………………. 31
2.3.7 Foreign Currency Valuation ………………………………………………………………………….33
2.4 General Ledger Reporting
2.4.1 Execute Financial Statements………………………………………………………………………. 37
2.4.2 Display G/L Balances……………………………………………………………………………………..38
2.4.3 GL Account Line Item Display………………………………………………………..……………… 39
3. ACCOUNTS PAYABLE
3.1 Accounting Transactions in AP
3.1.1 Vendor Invoice Parking………………………………………………………………………………….42
3.1.2 Change Parked document……………………………………………………………………………..44
3.1.3 Display Parked Document……………………………………………………………………………..45
3.1.4 Posting / Delete Parked Document ……………………………………………………………….46
3.1.5 Vendor Invoice………………………………………………………………………………………………47
3.1.6 Park / Edit Credit Memo………………………………………………………………………………..49
3.1.7 Post Credit Memo…………………………………………………………………………………..……. 51
3.1.8 Post Outgoing payment…………………………………………………………………………………53
3.1.9 Display Accounting document……………………………………………………………………….56
FICO USER MANUAL
KS.JAYACHANDRAN – SAP FI
3.1.10 Clear Vendor Account……………………………………………………………………………………58
3.1.11 Reset Cleared items………………………………………………………………………………………60
3.1.12 Document Reversal ………………………………………………………………………………………62
3.2 Advance Payments in Accounts Payable
3.2.1 Down Payment Request………………………………………………………………………………. 64
3.2.2 Post Vendor down payment………………………………………………………………………….65
3.2.3 Clear Vendor down payment…………………………………………………………………………67
3.3 Automatic outgoing Payment process & Check voiding
3.3.1 Automatic payment Run Process…………………………………………………………………..70
3.3.2 Voiding of Unused Checks……………………………………………………………………………. 75
3.3.3 Void Issued checks ………………………………………………………………………………………76
3.3.4 Cancel Check payment…………………………………………………………………………………. 77
3.3.5 Display the Check Register…………………………………………………………………………….78
3.4 Correspondences & Foreign Currency Revaluation
3.4.1 Vendor Correspondence Request………………………………………………………………….80
3.4.2 Maintain Correspondence……………………………………………………………………………. 81
3.4.3 Foreign Currency Revaluation………………………………………………………………………. 82
3.5 Vendor Report
3.5.1 Display Vendor Balance………………………………………………………………………………… 85
3.5.2 Vendor Line Item Display……………………………………………………………………………… 87
3.5.3 Vendor payment History with IO Sorted List………………………………………………… 90
4. ACCOUNTS RECEIVABLE
4.1 Accounting Transactions in Accounts Receivable
4.1.1 Park Customer Invoice…………………………………………………………………………………..92
4.1.2 Post Customer Invoice…………………………………………………………………………………..93
4.1.3 Post Customer Credit Memo………………………………………………………………………… 95
4.1.4 Change Parked Document……………………………………………………………………………. 96
4.1.5 Display Accounting Document……………………………………………………………………… 97
4.1.6 Post Incoming Payments……………………………………………………………………………… 99
4.1.7 Reset Cleared Items……………………………………………………………………………………… 101
4.1.8 Document Reversal ………………………………………………………………………………………103
4.1.9 Clear Customer Account………………………………………………………………………………. 104
4.2 Customer Account Reports
4.2.1 Customer Balance Display……………………………………………………………………………..107
4.2.2 Customer Account Analysis ………………………………………………………………………….109
4.2.3 Display / Change Line Items ………………………………………………………………………….110
5. BANK AND CASH TRANSACTIONS
5.1 Cash Journal (Petty Cash Transactions)
5.1.1 Recording a Cash Receipt……………………………………………………………………………… 113
5.1.2 Enter an Expense Transaction……………………………………………………………………… 115
5.1.3 Reverse Cash Journal……………………………………………………………………………………. 117
FICO USER MANUAL
KS.JAYACHANDRAN – SAP FI
6. ASSET MANAGEMENT
6.1 Overview of Acquire To Retire process……………………………………………………………………… 119
6.2 Asset Master Maintenance
6.2.1 Creating Fixed Asset Master Data………………………………………………………………….121
6.2.2 Change Asset Master……………………………………………………………………………………. 122
6.2.3 Display Asset Master……………………………………………………………………………………..123
6.2.4 Lock Fixed Asset…………………………………………………………………………………………….124
6.3 Asset Accounting – Business Transactions
6.3.1 Asset Acquisition…………………………………………………………………………………………..125
6.3.2 View Asset Values………………………………………………………………………………………… 127
FICO USER MANUAL
KS.JAYACHANDRAN – SAP FI 1
1. INTRODUC TION
1.1 Financial Accounting Overview
The Financial Accounting (FI) application component fulfills all the international
requirements that must be met by the financial accounting department of an
organization. It provides the following features:
 Management and representation of all accounting data
All business transactions are recorded according to the document principle,
which provides an unbroken audit trail from the financial statements to the
individual documents.
 Open and integrated data flow
Data flow between Financial Accounting and the other components of the
SAP System is ensured by automatic updates.
Data is available in real time within Financial Accounting. Postings made in
the subledgers always generate a corresponding posting in the general
ledger.
 Preparation of operational information to assist strategic decision-making within
the organization
Integration of Financial Accounting with other components
All accounting-relevant transactions made in Logistics (LO) or Human Resources (HR)
components are posted real-time to Financial Accounting by means of automatic
account determination. This data can also be passed on to Controlling (CO).
This ensures that logistical goods movements (such as goods receipts and goods
issues) are exactly reflected in the value-based updates in accounting.
FICO USER MANUAL
KS.JAYACHANDRAN – SAP FI 2
Integration within Financial Accounting
Every posting that is made in the subledgers generates a corresponding posting to
the assigned G/L accounts. This ensures that the subledgers are always reconciled
with the general ledger.
Features
The Financial Accounting application component comprises the following sub-
components:
 General Ledger (FI-GL)
 Accounts Payable (FI-AP)
 Accounts Receivable (FI-AR)
 Bank Accounting (FI-BL)
 Asset Accounting (FI-AA)
 Funds Management (FI-FM)
 Travel Management (FI-TV)
 Special Purpose Ledger (FI-SL)
1.2 Structures in SAP Finance
Ledgers
New General Ledger Accounting, unlike Classical general ledgers, enable parallel
accounting to meet the requirements of several, varying accounting principle
requirements. For example in a globalized environment, an international business
may produce one Statement to suit IFRS, GAAP, etc. SAP has only one leading
ledger (that corresponds to the local accounting principle eg. IFRS) yet at the same
time may have Non-Leading Ledger to enable reporting to meet GAAP
FICO USER MANUAL
KS.JAYACHANDRAN – SAP FI 3
Chart of Accounts and Company code
Chart of Accounts is a variant that contains parameters for General Ledgers. These
are assigned to the Company Code before the Company Code can be used.
FICO USER MANUAL
KS.JAYACHANDRAN – SAP FI 4
2. GENERAL LEDGER
2.1 Finance Organizational Structures & Master Data General Ledger
Accounting
General ledger accounts are master data that is used in day to day transaction
processing in various modules of the SAP ERP system.
Each general ledger is set up according to a chart of accounts. The chart of
accounts contains the definitions of all G/L accounts in an ordered form. The
definitions consist mainly of the account number, account name, and the type of
G/L account, that is, whether the account is a P&L type account of a balance
sheet type account. The general ledger contains a record of all relevant
accounting transactions from a business point of view in the G/L accounts. In order
to keep a clear overview, the general ledger often only contains collective postings.
In such cases, the information posted is displayed in more detail in the subsidiary
ledgers, which provide their information to the general ledger in summarized form.
There are various methods of creating the general ledger master record but before
its creation there are requirements that need to be fulfilled first:
Master data must be maintained centrally to ensure data integrity
FICO USER MANUAL
KS.JAYACHANDRAN – SAP FI 5
2.2. Accounting Transactions in General Ledger
Transaction processing in General Ledger will relate to processing of General Ledger
journals and performing account enquiries in the General Ledger.
You can comfortably create and post a G/L account document using a one-screen
transaction. The entry screen is divided into the following areas:
 Header data (here, the data for the document header is compiled) Line item
information (here, the line items for the document are entered)
 Information area (here, the debit and credit totals are displayed) Apart from
the single screen general ledger accounting transactional processing SAP
also offer the general parking and posting methods and it is necessary to
have a good command of how it operates.
In the initial screen, you enter the data for the document header. Additionally, you
enter the posting key and the account for the first line item. The posting key
provides the system with information regarding the account type (G/L account,
customer, vendor, asset, material) and determines the layout of the entry screen for
the line item.
With this information, the entry screen for the first line item is set up. You enter the
data for the first line item and access the next screen by entering the posting key
and account for the next line item.
In the next screen, you enter the information for the second line item and continue
to the next line item(s) as needed in the same manner.
Journals can also be processed in foreign currency in the general ledger.
FICO USER MANUAL
KS.JAYACHANDRAN – SAP FI 6
2.2.1 Park Document – FV50
Journals that have been parked need to be checked before they are posted
(approved) in the system. The system allows you to change parked document in the
event that it contains some errors.
Steps:
1. Access transaction by:
SAP Access Menu Accounting → Financial Accounting → General Ledger
→ Posting → Edit / Park GL document
Transaction code FV50
1. Update the following required and optional fields
Field Name Description
Doc. Date Date of the document
Currency Document currency
Posting Date Date of entry
Reference Document description
Document Header
Text
Journal Description
G/L acct GL Account Number
D/C Code identifying whether line item is a debit or a credit
Amount doc.curr. Amount to be posted for the line item
2. Click on the Enter button
FICO USER MANUAL
KS.JAYACHANDRAN – SAP FI 7
3. Click on Save as Completed button to record you
changes.
4. A message will appear on the status bar: Document xxxxxxx was parked
5. Click on the Back button to go back to SAP Easy Access screen.
2.2.2. Post Parked Document – FBV0
Posting is similar to signing a document and is a supervisory function therefore you
are also required to subject the parked journal to scrutiny before approving by
posting.
After parking journals are checked, and if they are correct they will be posted.
Steps :
1. Access transaction by:
SAP Access
Menu
Accounting → Financial Accounting → General Ledger →
Documents → Parked Documents → Post/Deletet
Transaction code FBV0
Edit Parked G/L Account Document
FICO USER MANUAL
KS.JAYACHANDRAN – SAP FI 8
2. Update the following required and optional fields:
Field Name Description
Company code Company code for which the parked document has
been created
Document Number The parked document number
Fiscal year The fiscal year in which the parked document
3. Click on the Enter button:
4. Click on Simulate button to simulate the posting
5. Click on the Back button
6. Click on the Post button
7. A message will appear informing you that a document number was posted in
company XXXX.
Note : you can post other journals from this screen without exiting to the post
document initial screen.
FICO USER MANUAL
KS.JAYACHANDRAN – SAP FI 9
8. Click on the button
9. Click on the arrow
10. Select the Parked document to be posted by double clicking on it.
11. Click on the Post button
12. A message will appear informing you that a document beginning with
number XXX was posted in Company code XXXX
13. Click on the Enter button
14. Click on the Exit button or press Shift-F3 until the SAP Easy Access screen is
displayed
2.2.3. Enter General Ledger Account Document – FB50
The SAP System allows you to carry out postings direct into the General Ledger
accounts without going through the parking functionality please note that this
depends on the roles assigned to you.
Steps :
1. Access transaction by :
SAP Access Menu Accounting → Financial Accounting → General
Ledger → Posting → Enter GL Account Document
Transaction code FB50
FICO USER MANUAL
KS.JAYACHANDRAN – SAP FI 10
2. Update the following required and optional fields:
Field Name Description
Doc. Date Date of the document
Currency Document currency
Reference Document description
Document Header Text Journal Description
G/L acct GL Account Number
D/C Code identifying whether line item is a debit or a
credit
Amount doc.curr. Amount to be posted for the line item
3. You can simulate document before posting. To do so, click Simulate
button. Simulation enables the user to review the journal as if it
had been posted including any system generated postings. The system also
validates the posting data.
4. Click Back button
5. To Post the document, click Save button.
6. The system will generate a document number please take note of that
number.
7. Click on the Exit button or press Shift+F3 to return to the SAP Easy Access
screen.
FICO USER MANUAL
KS.JAYACHANDRAN – SAP FI 11
2.2.4. Change General Ledger Accounting Document-FB02
Transaction fed in by other modules especially from logistics, lack certain
information.
You are required to add more information to the automatically created financial
documents, e.g. Text field, via document change. SAP system allows you to change
certain fields these are text, assignment, document header text and reference fields.
However, amount and account fields cannot be changed.
Steps :
1. Access transaction by :
SAP Access
Menu
Accounting → Financial Accounting → General Ledger →
Document → Change
Transaction
code
FB02
2. Enter the document number xx0000xxx
3. Enter the Company Code XXXX
4. Enter the Fiscal Year XXXX or leave field blank
5. Click on the Enter button to proceed.
6. Double click on the first line item to make changes.
7. You can change the contents of the following fields:
Field Name Description
Assignment The Assignment number is an additional information reference
Text Additional document description
FICO USER MANUAL
KS.JAYACHANDRAN – SAP FI 12
8. Click on the Document header button or press F5
9. You can change the contents of the following fields:
Field Name Description
Document header text Explanation or note that applies to the whole
document
Reference Explanation or note that applies to the document
10. Click on the Continue button or press Enter
11. Click on the Save button or press Ctrl+S
12. A message will appear on the status bar informing you of what has
happened to the document you changed.
13. Click on the Exit button or press Shift+F3 to return to the SAP Easy Access
Screen.
2.2.5. Display General Ledger Document – FB03
Journals can be displayed by authorized users at any time by using display GL
Journal transaction. Users can search for the specific journal using a number of
search criteria including document number, journal date, type, user and generally
any other information on the original journal.
This function aids users in executing general ledger document queries and users can
display single journal or journal lists.
FICO USER MANUAL
KS.JAYACHANDRAN – SAP FI 13
Display a journal document.
Steps:
1. Access transaction by:
SAP Access
Menu
Accounting → Financial Accounting → General Ledger →
Document → Display
Transaction
code
FB03
2. Enter the Document Number xx000000xx
3. Enter the Company Code XXXX
4. Enter the Fiscal Year XXXX or leave field blank.
5. Click on the Enter button to proceed.
6. Click on the button to change you screen view.
Note : the system will show you more fields not shown under entry view
7. Click on the Document header button
8. Analyze it and Click on the Enter Continue / Confirm button to leave
the displayed document header sub screen.
9. Click on the Back button to the display document initial screen.
Use document search function : when you don’t know the document
number.
FICO USER MANUAL
KS.JAYACHANDRAN – SAP FI 14
10. Click on the button.
11. Enter the Company Code XXXX
12. Enter the Fiscal Year XXXXX
13. Enter in the dd.mm.yyyy to dd.mm.yyyy posting date field.
14. Click in the check box
15. Click on the Execute button to proceed and a list of the documents
that you processed will be displayed
16. Double click on the Document number to view other details
17. To exit this transaction, click on the Exit button or press Shift-F3 until the
SAP Easy Access screen is displayed.
2.2.6. General Ledger Document Reversal – FB08
The General ledger journal you posted earlier was posted to the wrong accounts.
Reverse the journal and re park and post to the correct accounts. The reversal
document posts ‘opposite’ entries to the ledger.
The system offers various ways of reversing journals the “automatic reversal” process
or the manual reversal process. The manual process involves (credit memo) parking,
checking and posting with complete opposite posting keys to the original
document.
FICO USER MANUAL
KS.JAYACHANDRAN – SAP FI 15
Steps :
1. Access transaction by:
SAP Access Menu Accounting → Financial Accounting → General Ledger →
Document → Reverse → Individual Reversal
Transaction code FB08
2. Update the required and optional fields by capturing the necessary data:
Field Name Description
Company
code
Company code for which the parked document has been created
Document
Number
The parked document number
Fiscal year The fiscal year in which the parked document
FICO USER MANUAL
KS.JAYACHANDRAN – SAP FI 16
3. Click the Enter button to confirm the entries.
4. Click the button to have an overview of the document
you about to reverse.
5. Click on the Back button
6. Click on the Save button or press Ctrl+S to post the reversal.
7. A message will appear on the status bar: Document XXXX was posted in
Company Code XXXX
8. Click on the Exit button or press Shift + F3 to return to the SAP Easy Access
screen.
2.2.7. Clear General Ledger Account – F-03
Some GL Accounts are managed as Open Item accounts. The system provided a
clearing function that allows assigning and ‘clearing’ of debits to credits based on
legitimate assignment reasons. Unmatched items therefore remain on the account
as OPEN and represent the balance of the account to be reconciled. The clearing
can be made at the time of the second posting, or alternatively later on after the
debit and credit have been posted to the account.
Note: For the general ledger account to be cleared OPEN item management must
be active. Refresh memory g/l master data creation
There are some postings in G/L (General Ledger) that have not been cleared. You
want to clear these posting.
FICO USER MANUAL
KS.JAYACHANDRAN – SAP FI 17
Steps :
1. Access transaction by:
SAP Access
Menu
Accounting → Financial Accounting → General Ledger →
Account → F-03 Clear
Transaction code F-03
2. Update the following required and optional fields:
Note :- This function differs from posting with a clearing transaction or posting with a
payment in the following ways: You do not need to enter a document header. You
can only clear open items from one general ledger account.
Field Name Description
Account Code identifying the General Ledger account
Company
Code
Code identifying a separate legal entity
Currency Code identifying the type of currency used in a transaction or for all
transaction pertaining to a specific account
3. Click on the button or press Shift+F4. The system will display
open items that fulfill previously entered criteria:
FICO USER MANUAL
KS.JAYACHANDRAN – SAP FI 18
4. Choose and select the items you want to clear. Double click on each of the
items. The system will highlight these items in blue. When the value in the field
“Not assigned” is equal to “0”, you can clear open items. If the value is not
zero, the difference in the amount must be treated as partial or residual items.
5. Check your document before posting. Select Document → Simulate.
6. Click on Save button or press Ctrl + S
7. A message will appear on the status bar that document XXXX was posted in
company Code XXXX
8. Click on the Back button or press F3
9. Click on the Exit button or press Shift+F3 to return to the SAP Easy Access
screen
2.2.8. Post with Clearing – F-04
The SAP system allows you to post a transaction and at the same time clear the
account(s) that are involved.
Steps :
1. Access transaction by:
SAP Access
Menu
Accounting → Financial Accounting → General Ledger →
Posting → Post with Clearing
Transaction code F-04
FICO USER MANUAL
KS.JAYACHANDRAN – SAP FI 19
2. Update the following required fields :
Field Name Description
Doc.date Date of the document
Currency Document currency
Company Code Company Code
Reference Document description
Document
Header Text
Payment of ……
3. Click on the Radio button
4. Click on the Continue button or press Enter
5. Enter amount xxxxxx in the amount field.
6. Enter appropriate profit Centre.
7. Click on the button
8. Enter General Ledger account xxxx in the account field
9. Click on the button
FICO USER MANUAL
KS.JAYACHANDRAN – SAP FI 20
10. All open items are selected by default. To deselect the items first click the
Select All button.
11. Then click Deactivate items button. All the open items are now
deactivated (they are no longer highlighted in blue)
12. Now you need to choose and select the items you want to clear. Double
click on the Gross field for each of those items to be cleared.
13. You will need to select one or more documents to balance this clearing Scroll
through the remaining documents and select this document.
Note : The system will highlight these items in blue. When the value of the field
not assigned is equal ‘0’ and you can clear open items. See scree below
14. To check your document before posting. Select Document → Simulate.
15. Click the Save button.
16. The message bar displays: “Document xxxxxxx was posted in company code
XXXX”
17. Click on the Exit button or press Shift+F3 to return to the SAP Easy Access
screen.
Post with Clearing Process open items
FICO USER MANUAL
KS.JAYACHANDRAN – SAP FI 21
2.3 GL Period End Closing
The closing of a period is performed in three sets of steps: pre-closing, managerial
closing and financial closing.
 Pre-Close activities ensure that all necessary entries have been posted in the
General Ledger (G/L), including entries from feeder systems/sub ledgers and
accruals and recurring entries posted directly to the G/L. Pre-close activities
occur in both the old and new months.
 Managerial Close activities involve the re-assignment of costs throughout the
entire organization, using the allocation and settlement functionality provided
within Controling (CO).
 Financial Close activities include final adjustments to valuations and balances
prior to the final close and preparation of reports. Adjustments from the cost
flows recorded in the managerial closing activities are updated to FI through
the reconciliation ledger posting.
2.3.1. Create Recurring Entry Document – FBD1
The recurring entry document function automates postings of transactions that
repeat every month (same amount, same account) such as payments for rent or
interest, legal fees, and property taxes,. It is not a ‘real’ accounting document and
therefore does not affect the account balance.
The system uses the recurring entry original document that you create as a
reference when you execute the recurring postings at period end. It will
automatically generate the accounting documents and postings.
FICO USER MANUAL
KS.JAYACHANDRAN – SAP FI 22
Steps :
1. Access transaction by:
SAP Access
Menu
Accounting → Financial Accounting → General Ledger →
Posting → Reference Documents → Recurring Document →
Create
Transaction
code
FBD1
2. Update the following required fields :
Field Name Description
Company Code Code identifying a separate legal entity
First run on Date from which the first recurring entry will be carried out
Last run on Date to which the final recurring entry is to be carried out.
Interval in
Months
Intervals, in months, between each run of the recurring entry
Document Type The document type classified accounting documents. It is noted
in the document header.
Reference The reference document number can contain the document
number of the customer/vendor. However it may contain a
different value
Document
Header text
The document header text contains explanations or notes which
apply to the document as a whole, that is, not only for certain line
items
FICO USER MANUAL
KS.JAYACHANDRAN – SAP FI 23
3. Call up fast entry screen by clicking on Fast Data Entry button.
Field Name Description
PK DR/CR indicator
Account GL account
Amount Amount of Line item
PK DR/CR indicator
Account GL account
Amount Amount of Line item
4. Click the Post button.
Note : A message will appear on the status bar informing you that document
xx0000xx was stored in Company Code XXXX
5. Click on the Exit button or press Shift+F3 to return to the SAP Easy Access
screen.
2.3.2. Change Recurring Document – FBD2
The recurring entry document function automates postings of transactions that
repeat every month (same amount, same account) e.g. Accruals / Deferrals
postings. It is not a ‘real’ accounting document and therefore does not affect the
account balance.
FICO USER MANUAL
KS.JAYACHANDRAN – SAP FI 24
Steps :
1. Access transaction by:
SAP Access Menu Accounting → Financial Accounting → General Ledger →
Document → Reference Documents → Recurring
Document → CFDB2 - Change
Transaction code FBD2
2. Update the following required fields :
Field Name Description
Company
Code
Code identifying a separate legal entity
Document
number
Recurring document number
Fiscal Year Description of the Fiscal year
3. Click on the Continue button or press Enter
FICO USER MANUAL
KS.JAYACHANDRAN – SAP FI 25
4. Double click on the one of the document line items.
5. Click on the Document Header button.
6. Make the modification in the document header field
7. Click the Save button. A message will appear on the status bar informing
you that document xxxx has been changed
8. Click on the Exit button or press Shift+F3 to return to the SAP Easy Access
screen.
2.3.3. Create Postings from Recurring Documents – F.14
Recurring Journals are reference documents that have been created. They contain
posting information that will be used by the recurring document posting program.
Steps :
1. Access transaction by:
SAP Access Menu Accounting → Financial Accounting → General Ledger →
Periodic Processing → Recurring Entries → Execute
Transaction code F.14
FICO USER MANUAL
KS.JAYACHANDRAN – SAP FI 26
2. Update the following required fields :
Field Name Description
Company Code Code identifying a separate legal entity
Document number Enter a number of the document you want to change
Fiscal Year Number of the Fiscal year
Settlement Period Accounting dates for selection of due Recurring documents
3. Press Execute button the system will generate a message “Session
SAPF120” has been created.
4. Click on the menu – System→ Services → Batch Input → Sessions
5. Update the following required and optional fields:
Field Name Description
Created by User ID who created Batch Session
Note : Processing Options
Process Foreground: the system will immediately generate the documents online.
You will have to confirm every entry screen generated. Only recommended if you
have a law volume of transactions and screens (see # of screens above) and you
wish to verify the same of the transaction details directly.
Display Errors only: the system will process the transactions without displaying them
online. However if there are any errors or problems (e.g. GL account does not exist)
the system will display this for corrective action.
Background: the system processes the transactions in background mode. This is
generally the normal action and a “low priority processing” option. The system will
process the data during times of ‘low’ system activity/priority. The system processes
FICO USER MANUAL
KS.JAYACHANDRAN – SAP FI 27
the job. Users have to check the job status and job log to verify that processing has
been completed and without errors.
6. If there are several batches under your user select the one you want to
process by clicking on it once.
7. Click on the button.
8. Select the Radio button
9. Click on the button to commence processing.
10. Press Enter for each screen until you reach the final screen where the
system generates the message Batch input has been completed.
The system generates the transactions and screens based on the original
recurring document.
11. Click on the button to return to the SAP Easy Access screen.
2.3.4. Delete Recurring Document – F.56
The recurring entry document function automates postings of transactions that
repeat every month (same amount, same account) e.g. Accruals / Deferrals
postings. It is not a ‘real’ accounting document and therefore does not affect the
account balance.
A recurring document is no longer required. You will now delete the recurring
document. Note:- Before performing this, go to FBD2 (Change) give the recurring
entry document number that you want to delete then click view select Recurring
Entry Data and set the deletion indicator and save it.
Realize Recurring Entry : Header Data
FICO USER MANUAL
KS.JAYACHANDRAN – SAP FI 28
Steps :
1. Access transaction by:
SAP Access Menu Accounting → Financial Accounting → General Ledger →
Document → Reference Documents → Recurring Document
→ Delete
Transaction code F.56
2. Update the following required and optional fields:
Field Name Description
Company Code Code identifying a separate legal entity
Document Number Recurring document number
Fiscal year Description of Fiscal Year
Test run This will display the documents but not delete them
3. Click on the Execute button
Note : The screen lists the Recurring Documents with deletion indicators selected will
be displayed.
4. Click the Back button
5. Deselect the Test Run indicator
FICO USER MANUAL
KS.JAYACHANDRAN – SAP FI 29
6. Click on the Execute button
7. A message will appear that this is a production run. Press enter to accept.
8. Click on the Execute button to check whether your deletion was
successful.
9. Click on the Exit button or press Shift+F3 to return to the SAP Easy Access
screen.
2.3.5 Enter Accrual/Deferral Document – FBS1
This function allows you to automatically post accruals and deferrals:
Accruals – an accrual is any expenditure before the closing key date, which
represents an expense for any period after this date.
Deferrals – Deferred income is any receipts before the closing key date that
represent revenue for any period after this date.
Accrual/deferral documents are created and have a ‘reversal date’. The accruals
can be reversed automatically.
Steps :
1. Access transaction by:
SAP Access Menu Accounting → Financial Accounting → General Ledger →
Periodic Processing → Closing → Valuate → Enter Accrual /
Deferral Doc
Transaction code FBS1
FICO USER MANUAL
KS.JAYACHANDRAN – SAP FI 30
2. Update the following required and optional fields:
Field Name Description
Document date Date the transaction occurred
Type Document type code
Posting date Date that the business transaction occurred
Period Number identifying a fiscal month
Reversal reason Code of reversal reason
Reversal date Date on which the reverse posting is to be made. Normally
the 1st day of next month
Posting key In this field, the posting key which the next document line
item should be entered is specified
Account Code identifying the General Ledger, Vendor, or General
Ledger Account
3. Click on the Enter button to confirm your entries.
4. Update the following required and optional fields:
Field Name Description
Amount Amount of the line item
Cost center Code identifying an organizational unit to which costs or
asses are assigned
Posting Key In this field, the posting key which the next document line
item should be entered is specified
Account Code identifying the General Ledger, Vendor, or General
Ledger account
Enter Accrual/Deferral Doc. Correct G/L account item
FICO USER MANUAL
KS.JAYACHANDRAN – SAP FI 31
5. Click on the Enter button or press Enter to confirm your entries.
Field Name Description Values
Amount Amount of the line item
Cost center Code identifying an organizational
unit to which costs or assets are
assigned
Example : Only required for
posting to P/L accounts
6. Select form the menu Document → Simulate
7. Click on the Save button or press Ctrl + S
8. A message will appear on the status bar: document XXXXXX was posted in
Company Code XXXX
9. Click on the Exit button or press Shift+F3 to return to the SAP Easy Access
screen.
2.3.6 Reversing Posting for Accruals / Deferred Documents – F.81
This function allows you to reverse previously posted accrual / deferral. The system
posts a reversal by entering an identical amount to the opposite side of the
account, thereby offsetting the original amount.
Enter Accrual/Deferral Doc. Display Overview
FICO USER MANUAL
KS.JAYACHANDRAN – SAP FI 32
Steps :
1. Access transaction by:
SAP Access Menu Accounting → Financial Accounting → Periodic
Processing → Closing → Valuate → EF.81 → Accrual /
Deferral Document
Transaction code F.81
2. Update the following required and optional fields:
Field Name Description
Company code Enter required company code
Document number Number of the SAP Accrual document
3. Click in the check box.
4. Click Execute button. The system will display a list of documents that are
to be reversed.
5. Click on the Back button or press F3
6. Deselect check box
Reverse Posting of Selection Documents : Log Test run
FICO USER MANUAL
KS.JAYACHANDRAN – SAP FI 33
7. Click Execute button
8. A list will be displayed showing the original documents together with their
reversal documents.
Note : a message will appear on the status bar: “ All documents were
reversed”.
9. Click on the Exit button or press Shift+F3 to return to the SAP Easy Access
screen.
2.3.7. Foreign Currency Valuation – FAGL_FC_VAL
You carry out the foreign currency valuation before you can create the financial
statements.
The valuation includes the following accounts and items:
Foreign currency balance sheet accounts, that is, G/L accounts that you run in
foreign currency (the balances of the G/L accounts in foreign currency are
valuated) Open items (customers, vendors, G/L accounts) posted in foreign
currency (the line items are valuated)
Reverse Posting of Selection Documents : Log Test run
FICO USER MANUAL
KS.JAYACHANDRAN – SAP FI 34
Steps :
1. Access transaction by:
SAP Access Menu Accounting → Financial Accounting → Accounts Payable →
Periodic Processing → Closing → Valuate → Foreign
Currency Valuation of open items New)
Transaction code FAGL_FC_VAL
2. Update the following required and optional fields:
Field Name Description
Company code Company code
Evaluation Key Date Key date for the foreign currency valuation
Valuation method A unique key for determining a foreign currency
valuation method. This key can be valid for cross-
chart of accounts.
Create Posting Check the checkbox to select
Batch input session Name Code identifying the batch session that is Created
Posting date Date that the business transaction occurred
Posting period Fiscal month when the transaction posts to the
General Ledger
Reversal posting date Date when you want to post a reverse. Normally the
1st day of next month
Reverse posting period Posting period for reversal
FICO USER MANUAL
KS.JAYACHANDRAN – SAP FI 35
3. Click on the tab
4. Select by clicking in the check box.
5. Select by clicking in the check box, if so required.
You can select only particular General Ledger / General Ledger accounts to be
valuated. If you leave the selection fields empty (like in our example), all the
accounts will be selected for valuation.
6. Click on the Execute button to perform valuation.
Note: The system does not create the postings immediately but creates a batch
input session instead.
7. Click on the Back button or press F3
8. To post the valuation, you need to process the Batch Input Session that
you’ve just created. You can open another SAP session. From the main menu
choose System → Services→ Batch input → Sessions
9. Select the session you want to process. (Select the row that contains your
Batch input session, , e.g FAGL_FC_VAL
10. Click on the button
11. Click in the Radio button
12. Click on the button to begin the posting of documents
13. Once the session is processed, you need to check the results. To analys your
batch input session, follow the menu path:
14. From the main menu choose System → Services → Batch input → Sessions
15. Select the row that contains your Batch Input Session FAGL_FC_VAL
16. The analysis button the system will display the details regarding the
session that was processed
17. Click on the Back button or press F3
FICO USER MANUAL
KS.JAYACHANDRAN – SAP FI 36
18. As a result of valuation some accounting documents were posted. To display
them record one document number and use the transaction FB03
(Document Display):
19. Update the following required and optional fields:
Field Name Description
Document number Number of the document
Company code Enter here company code number
Fiscal year Fiscal year number.
20. Click on the Enter button or press Enter to confirm your entries
21. In order to display your document in local currency, click on the
button
22. Click on the Enter button
23. Click on the Exit button or press Shift+F3 to return to the SAP Easy Access
screen
FICO USER MANUAL
KS.JAYACHANDRAN – SAP FI 37
2.4. General Ledger Reporting
A general ledger is kept in order to provide the information needed to create a
balance sheet and a profit and loss statement.
2.4.1. Execute Financial Statements
Steps :
1. Access transaction by:
SAP Access
Menu
Accounting → Financial Accounting → General Ledger →
Information systems → General Ledger Reports (New) →
General → Actual Comparisons → Financial Statement
Transaction code S_ALR_87012284 / F.01
2. Enter 8888 in the chart of accounts field.
3. Enter one or range XXXXXX to XXXXXX in the company code field.
4. Select the currency (blank for default)
5. Select the financial statement version field.
6. Enter XXXX in the Reporting year field.
7. Enter 1 to 12 in the Reporting period fields.
FICO USER MANUAL
KS.JAYACHANDRAN – SAP FI 38
8. Enter XXXXX in the Comparison year field
9. Enter 1 to 12 in the Comparison year fields.
10. Click Execute button
11. Click on the Exit button or press Shift+F3 to return to the SAP Easy Access
screen.
2.4.2. Display G/L Balances – FAGLB03
The SAP system offers a functionality which enables you to have a quick view of the
General Ledger accounts balances; you have been tasked analyse and report on
the balances in one of the accounts under your department
Steps :
1. Access transaction by:
SAP Access Menu Accounting → Financial Accounting → General Ledger →
Account → Display Balances (new)
Transaction code FAGLB03
2. Enter xxxxxxxx to xxxxxxxx in account number fields
3. Enter XXXX in Company code field
4. Enter YYYY in Fiscal year field.
5. Click Execute button.
FICO USER MANUAL
KS.JAYACHANDRAN – SAP FI 39
6. Click on the button.
7. A pop up screen will be displayed within the main screen and will contain a
listing of the General ledger accounts. To view balances in a single G/L
account double Click the G/L account number within the below screen.
8. A listing of General Ledger line items will be displayed.
9. Click button to change layout of the displayed items.
10. Select Column content you want to remove or add.
11. Click on the hide selected fields button or Click on the show selected
fields button
12. Click on the button
13. Your report will be adjusted to incorporate the changes you have made
14. Click on the Exit button or press Shift+F3 to return to the SAP Easy Access
screen.
2.4.3. GL Account Line Item Display – FBL3N
FBL 3N enables users to gather and display information on GL Account Line items.
Users can view information on all items, or narrow the transaction to include open or
cleared ones only. Further, screen option allows you to establish vairnats to use
regularly and select specific criteria for this display.
Steps :
1. Access transaction by:
SAP Access Menu Accounting → Financial Accounting → General Ledger →
Account → Display / Change Line items
Transaction code FBL3N
FICO USER MANUAL
KS.JAYACHANDRAN – SAP FI 40
2. Enter xxxxxxxx to xxxxxxxx in account number fields
3. Enter XXXX in Company code field
4. Select the Line Item Selection Radio Button
5. Select the check box for Normal / Noted / Parked items
6. The Dynamic Selection Criteria allows you to narrow the parameters of
the selection even further.
FICO USER MANUAL
KS.JAYACHANDRAN – SAP FI 41
7. Click Execute button.
8. Double click on individual document number to see additional details .
9. Click button to change layout of the displayed items.
10. Click on the Exit button or press Shift+F3 to return to the SAP Easy Access
screen.
FICO USER MANUAL
KS.JAYACHANDRAN – SAP FI 42
3. ACCOUNTS PAYABLE
Accounts Payable records all accounting transactions for dealings with suppliers.
Much of its data is obtained from procurement (Materials Management)
3.1 Accounting Transactions in AP
3.1.1 Vendor Invoice Parking
Using this standard accounting function, you can enter invoice in the system without
posting the Accounts Payable sub ledger. The PARKED Invoice is subsequently
checked, approved and posted to Accounts Payable. You can also park an
incomplete document.
Steps :
1. Access transaction by:
SAP Access
Menu
Accounting → Financial Accounting → Accounts Payable →
Document Entry → Document Parking → Park Document
Transaction code F-63
FICO USER MANUAL
KS.JAYACHANDRAN – SAP FI 43
2. Update the required and optional fields :
Field Name Description
Document Date Date of Invoice
Company code Company code is an organizational unit within financial
accounting
Posting Date Date for posting to Ledger
Currency Invoice Currency
Reference Vendor Invoice Number
Doc Header Text The document header text contains explanations or notes
which apply to the document as a whole, that is, not only
for certain line items.
Posting Key In this field, the posting key with which the next document
line item should be entered is specified
Vendor Vendor Code
3. Click on the Enter button to confirm the entries.
4. Enter value in the amount field for the first item.
5. Enter Text that describes the transaction in the text field.
6. Enter Posting Key 40 in the PstgKey field.
7. Enter General Ledger Account xxxxxxx being charged/debited in the
account field.
8. Click the Enter button to confirm the entries.
9. Enter a * (star) in the Amount field for the Second item then press enter to
adopt the amount from the first line item.
10. Select Tax Code in the Tax code field
11. Enter Cost Center in cost center field.
12. +(plus) in the text field then press Enter to adopt the text from the first line
item.
FICO USER MANUAL
KS.JAYACHANDRAN – SAP FI 44
13. Click on the Document overview button
14. Click on the Save button or press Ctrl+S to park the Invoice.
15. The System will display a message at the status bar: Document Number : xxx
as parked in Company Code XXXX.
16. Click on the Exit button or press Shift+F3 to return to the SAP Easy Access
screen.
3.1.2. Change Parked document.
* Parked Vendor’s invoices need to be verified before they are posted; therefore
errors can be corrected before being posted. A document had been parked but
did not contain adequate text and also that there were no reference details
entered on the document.
* You are required to correct the document before posting.
Steps :
1. Access transaction by:
SAP Access
Menu
Accounting → Financial Accounting → Accounts Payable →
Document Entry → Document Parking → Park / Edit Invoice
Transaction
code
FBV2
2. Update the required and optional fields :
FICO USER MANUAL
KS.JAYACHANDRAN – SAP FI 45
Field Name Description
Company code Company code is an organizational unit within financial
accounting
Fiscal Year The fiscal year in which the parked document
3. Click on the Enter button
4. Enter Reference in the Reference field (in the Edit Parked Document Screen)
5. Change data in the text field
6. Click on the Save button to record you changes.
7. A message will appear on the status bar; a preliminary posted document
XXXXXX has been changed
8. Click on the Exit button or press Shift+F3 until the SAP Easy Access screen is
displayed.
3.1.3. Display parked Document
A parked document is subject to a verification process before it can be posted, the
SAP system allows for the display of such documents so that this process can be
fulfilled.
Steps :
1. Access transaction by:
SAP Access
Menu
Accounting → Financial Accounting → Accounts Payable →
Document Entry → Document Parking → Park / Edit Invoice
Transaction
code
FBV3
FICO USER MANUAL
KS.JAYACHANDRAN – SAP FI 46
2. Update the required and optional fields :
Field Name Description
Company code Company code is an organizational unit within financial
accounting
Document
Number
The parked document number
Fiscal Year The fiscal year in which the parked document
3. Click on the Enter button.
4. Click on the each tab button to display
data.
5. To exit this transaction, click on the Exit button or press Shift+F3 until the
SAP Easy Access screen is displayed
3.1.4 Posting / Delete Parked Document (FB60) / (F-43)
A vendors’ Invoice was parked twice for the same service however it was picked
before it was posted. In the SAP system a parked document can be deleted but
once a document is posted it can not be deleted. It will only be regularized by
entering a reversal document.
You can choose to post the parked document in this environment or choose to
delete it.
Delete the parked document
FICO USER MANUAL
KS.JAYACHANDRAN – SAP FI 47
Steps :
1. Access transaction by:
SAP Access Menu Accounting → Financial Accounting → Accounts Payable →
Document → Parked Document → Post/Delete
Transaction code FBV0
2. You can choose from the menu Document → Select parked document
3. Update the required and optional fields :
Field Name Description
Company code Company code is an organizational unit within financial
accounting
Document Number The parked document number
Fiscal Year The fiscal year in which the parked document
4. Click on the Enter button.
5. Select from menu Document → Delete parked document
6. A message will appear on the status bar: Parked document xxxxxxx deleted..
7. To exit this transaction, click on the Exit button or press Shift+F3 until the
SAP Easy Access screen is displayed.
3.1.5 Vendor Invoice
This transaction allows you to enter vendor invoices. It creates postings in Accounts
Payable Sub Ledger and updates also the relevant GL Accounts (e.g. reconciliation
account). You can use this transaction to post the invoices that do not pass through
Purchasing Department, Instances of when a vendor invoice will be posted by AP
will be payments for electricity bills, telephone charges etc.
FICO USER MANUAL
KS.JAYACHANDRAN – SAP FI 48
Steps :
1. Access transaction by:
SAP Access Menu Accounting → Financial Accounting → Accounts
Payable → Document Entry → Invoice
Transaction code FB60
2. Click on the button and Enter company code
3. Update the required and optional fields :
Field Name Description
Vendor Code identifying the vendor account
Invoice date Invoice date
Reference Additional document description
Amount Invoice Amount
Text Description of line item
G/L Account The account being charged or debited
D/C Code identifying whether line item is a debit or credit
Amount in doc Curr Amount to be posted for the line item
Text Description of line item
Cost Center Cost Center
4. Click on the tab.
5. Enter new Payment terms
6. Enter Payment method
7. Click on the button to replicate an overview of a document before
posting.
8. Click on the Save button or press Ctrl+S to post the Invoice.
FICO USER MANUAL
KS.JAYACHANDRAN – SAP FI 49
9. The system will display the number of the document generated by this
Invoice.
Document Number : xxxxxxx was posted in Company Code
10. Click on the Exit button or press Shift+F3 to return to the SAP Easy
Access Screen.
3.1.6 Park / Edit Credit Memo – F-66
Using the standard accounting function, you can enter a credit memo in the system
without posting the Accounts Payable sub ledger. The Parked credit memo is
subsequently checked, approved and posted to Accounts Payable.
Credit memos have the effect have reducing our liabilities under the vendor’s
accounts. Vendors normally issues credit notes when we return purchased goods or
if we had overpaid them.
Steps :
1. Access transaction by:
SAP Access
Menu
Accounting → Financial Accounting → Accounts Payable →
Document Entry → Document Parking → Credit Memo parking
Transaction
code
F-66
FICO USER MANUAL
KS.JAYACHANDRAN – SAP FI 50
2. Update the required and optional fields :
Field Name Description
Document Date Date of Invoice
Company code Company code is an organizational unit within financial
accounting
Posting Date Date for posting to Ledger
Currency Invoice Currency
Reference Vendor Invoice Number
Doc Header Text The document header text contains explanations or notes which
apply to the document as a whole, that is, not only for certain
line items.
Posting Key In this field, the posting key with which the next document line
item should be entered is specified
Vendor Vendor Code
3. Click the Enter button to confirm the entries.
4. Enter value in the amount field.
5. Enter Text that describes the transaction in the text field.
6. Enter Posting key 50 in the PstgKey field
7. Enter General Ledger Account xxxxx being charged / debited in the account
field.
8. Click the Enter button to confirm the entries.
9. Enter * a start in the Amount field.
10. Enter Cost Center in cost center field.
FICO USER MANUAL
KS.JAYACHANDRAN – SAP FI 51
11. Click on the Document overview button.
12. Click on the Save button or press Ctrl+S to park the invoice
13. The system will display the number of the document generated by this
Invoice.
Document Number xxxxxxx was parked in the Company Code xxxx
14. Click on the Exit button or press Shift+F3 to return to the SAP Easy Access
screen.
3.1.7 Post Credit Memo – FB65
The vendor invoiced for an excess amount and vendor issued a credit memo to
correct this mistake. So here we need to post the received vendor credit memo.
Steps :
1. Access transaction by:
SAP Access
Menu
Accounting → Financial Accounting → Accounts Payable →
Document Entry → Credit Memo
Transaction code FB65
2. Click on the button and Enter Company code xxxx in the
field.
FICO USER MANUAL
KS.JAYACHANDRAN – SAP FI 52
3. On the main screen Update the following required and optional fields :
Field Name Description
Vendor Code identifying the vendor account
Document date Credit note date
Posting Date Date that the business transaction occurred
Reference Vendor Invoice Number
Amount Amount to be posted to
Calculate Tax Indicator whether tax is to be calculated
Tax Code Represent the tax chargeable
G/L Account The Account being charged or debited
D/C Code identifying whether line item is a debit or credit
Amount doc.
Curr.
Document currency. By default system proposes the Company
code currency, but a user can change it.
Text Description of line item
Cost Center Cost Center
4. Click on the Enter button to confirm the entries.
5. Click on the Tab
6. Update the following required and optional fields:
Field Name Description
Inv. Ref (Invoice) Enter the Document Number which refers to a original
invoice. Entering the original invoice will copy the invoice
details from the original invoice. Imp Note: This will facilitate
in clearing the vendor account at a later point in time.
Inv. Ref (Fiscal Year) The fiscal year the invoice was created in
FICO USER MANUAL
KS.JAYACHANDRAN – SAP FI 53
7. Click on the Enter button to confirm the entries.
8. A message will appear on the status bar that Data was copied.
9. Click on the button to replicate an overview of a document
before posting.
10. Click on the Save button or press Ctrl+S to post the invoice
11. The System will display the number of the document generated by this
Invoice.
Document Number : xxxxx was posted in Company Code
12. Click on the Exit button or press Shift+F3 to return to the SAP Easy Access
screen.
3.1.8 : Post Outgoing Payment F-53
This functionality is used to process outgoing vendor payment but can only process
single vendor accounts at any time.
A request has been made for the processing of an urgent payment which cannot
wait for the normal payment run process. Invoices have been parked checked and
approved (posted) process the payment
Steps :
1. Access transaction by:
SAP Access
Menu
Accounting → Financial Accounting → Accounts Payable →
Document Entry → Other → Outgoing Payment → Post
Transaction
code
F-53
FICO USER MANUAL
KS.JAYACHANDRAN – SAP FI 54
2. Update the following required and optional fields :
Field Name Description
Document date Date of the invoice
Company Code The company code is an organizational unit within financial
accounting.
Posting Date Date for posting to Ledger
Reference Vendor Invoice Number
Doc Header Text The document header text contains explanations or notes which
apply to the document as a whole, that is, not only for certain
line items.
Clearing Text This text is copied into all clearing entries which are created
within the current processing
3. Update the following fields under bank data box
Field Name Description
Amount Amount to be paid in total
Value Date The value date is used in bank account and bank sub-accounts. This
is a date at which the payments will be honored by the bank
4. Update the following required and optional fields under
box.
Field Name Description
Account Vendor Account to be cleared
Account
Type
The account type determines whether the general ledger or one of
the sub ledger issued
FICO USER MANUAL
KS.JAYACHANDRAN – SAP FI 55
5. Click on the button
6. All open items are selected by default. To deselect the items first click the
Select All button.
7. Then click on Deactivate Items button. All the open items are now
deactivated (they are no longer highlighted in blue).
8. Now you need to choose and select the items youwant to clear. Double
click on the Gross Group field for each of those items to be cleared.
9. You will need to select one or more documents to balance this clearing.
Scroll through the remaining documents and select this document.
Note : The system will highlight these items in blue. When the value of the field not
assigned is equal 0 and you can clear open items. See Screen below
10. You can check your document before postings. Select Document →
Simulate.
11. To post your entries, click the Save button.
12. The message bar displays : “Document XXXX was posted in company code “
13. Click on the Exit button or press Shift+F3 to return to the SAP Easy Access
Screen.
FICO USER MANUAL
KS.JAYACHANDRAN – SAP FI 56
3.1.9 Display Accounting Document – FB03
Documents entered in the system can be viewed as and when they are required.
You are required to display a Vendors’ document. This function will you allow to
quickly address queries pertaining to individual invoices / documents.
Steps :
1. Access transaction by:
SAP Access Menu Accounting → Financial Accounting → Accounts Payable
→ Document → Display
Transaction code FB03
2. If you know the required document number, enter it in the field “document
number” . If you don’t , click Button to search for documents.
3. The system will display a screen where you can enter your search criteria:
4. Update the following required and optional fields
Field Name Description
Company Code The company code is an organizational unit within financial
accounting
Fiscal Year Fiscal year number
Document Type Code identifying the method that the system uses to process the
transaction
Posting date Date that the business transaction occurred
FICO USER MANUAL
KS.JAYACHANDRAN – SAP FI 57
5. Click Execute button to start searching
6. The system will display a list of documents that fulfill your criteria
7. To display your document, simply double click on it. The system will display a
take you to document overview:
Or from the initial screen display Vendor Document
8. Enter the Document number you have on hand.
9. Enter the Company code XXXX
10. Enter the Fiscal Year XXXXXX or leave field blank,.
11. Click on the Enter button to proceed
12. Click on the button to change you screen view
Note : the system will show you more fields not shown under entry and you
can be able to and a change your document from this document display
screen.
13. Click on the menu Document → Display → Change
14. Click on the Document Header button if you want to change header
details
15. Identify fields that can be changed and change header text
16. Analys it and Click on the Enter continue / Confirm button to leave the
displayed document header sub screen
17. To store your changes in the document, click Save button
18. To exit this transaction, click on the Exit button or press Shift-F3 until the
SAP Easy Access screen is displayed.
FICO USER MANUAL
KS.JAYACHANDRAN – SAP FI 58
3.1.10 Clear Vendor Account F-44
The function allows you to clear open items on Vendor account. You have to
identify open items that can be matched in terms of debits and credits.
Steps :
1. Access transaction by:
SAP Access
Menu
Accounting → Financial Accounting → Accounts Payable →
Account → Clear
Transaction code F-44
2. Update the following required and optional fields
Field Name Description
Account Code identifying the Vendor account
Clearing date Date when you want the transaction to be cleared. It is used
later in a header of a clearing document
Company code Number of the company code that the vendor belogs to
Currency Currency code
Note : you can clear also the transactions posted in different currencies. The
system will automatically calculate and post exchange rate differences.
FICO USER MANUAL
KS.JAYACHANDRAN – SAP FI 59
3. Click the Enter button. The system will display open items that fulfill
previously entered criteria :
4. All open items are selected by default . To deselect the items first click the
Select all button.
5. Then click Deactivate items button. All the open items are now
deactivated (they are no longer highlighted in blue).
6. Now you need to choose and select the items you want to clear. Double
click on the Gross field for each of those items to be cleared.
7. You will need to select one more document to balance this clearing. Scroll
through the remaining documents and select this document.
Note : The system will highlight these items in blue. When the value of the field not
assigned is equal 0 and you can clear open items. See screen below
8. You can check your document before postings. Select Document → Simulate
9. To post your entries, click the Save button. No “real” posting took place,
but the system stored a clearing document.
10. The message bar displays: “Document xxxxxx was posted in company code
xxxx”
11. Click on the Exit button or press Shift+F3 to return to the SAP Easy Access
screen.
FICO USER MANUAL
KS.JAYACHANDRAN – SAP FI 60
3.1.11. Reset Cleared Items – FBRA
A Posting with clearing had been made to a wrong Vendor account due to
similarities in name therefore the outgoing payment document has to be reversed to
enable the correct transaction to take place.
Note : An Accounting Document that contains line items have cleared been cannot
be reversed it requires that the cleared items be reset first.
Display the clearing document and its line items, and then reset the cleared
document.
Steps :
1. Access transaction by:
SAP Access
Menu
Accounting → Financial Accounting → Accounts Payable →
Document → Reset Cleared Items
Transaction code FBRA
2. Update the following required and optional fields
Field Name Description
Clearing
document
Number of the document to be reset
Company
code
Code identifying a separate legal entity
Fiscal Year Fiscal year number
FICO USER MANUAL
KS.JAYACHANDRAN – SAP FI 61
3. Click the Accounts button. The system will display all the accounts
involved in clearing operation:
4. Click the Continue button to continue
5. Click the Items button to display documents cleared by the clearing
operation
6. Click on the Save button or press Ctrl+S to post the resetting
7. A screen reversal of clearing document will be displayed with 2(two) options
to select from.
- Only Resetting will remove the clearing from the document that was
cleared and changes the documents’ status from cleared item to open
item
- The clearing document also changes status to an open item and this has
effect on the overall Vendor Account
- Resetting and reversing will reset the cleared line items and also reverses
the clearing document.
8. Click on Only Resetting button
Note : Only resetting will remove the clearing document from the cleared
document and restore it to its pre-clearing state i.e. open item stage. The
clearing document will also be found under the open items of the Vendor
Account and must be removed from this environment by the reversal process.
A message will appear on the status bar clearing document xxxxxxxxx reset.
9. Click on the Exit button or press Shift+F3
FICO USER MANUAL
KS.JAYACHANDRAN – SAP FI 62
Note : if you choose the later button the system will reset and reverse the clearing
document in one transaction. For you to carry out a transaction where you are
going to select on resetting and reversing you have to start with a new document.
Otherwise the above resetting transaction is complete.
If you choose to Click on Resetting and Reversing button you will proceed as follows
10. Enter 01 in the Reversal Reason field.
11. A message clearing reset will appear
12. Click the continue button
13. A message will appear that document XXXXX was posted in Company code
XXXX
14. Click on the Exit button or press Shift+F3 to return to the SAP Easy Access
screen
3.1.12. Document Reversal (Individual Reversal) document – FB08
Sometimes posted document contains incorrect information. This function allows
you to reverse an incorrect document. A document to be reversed cannot include
already cleared items. If you want to reverse document that was already cleared,
you need to reset all cleared items before posting a reversal.
This is also a function that allows mass document reversal (Transaction code), unlike
resetting clearing documents which only allow resetting one clearing document at a
time.
Steps :
1. Access transaction by:
SAP Access Menu Accounting → Financial Accounting → Accounts Receivable
→ Document → Reverse → Individual Reversal
Transaction code FB08
FICO USER MANUAL
KS.JAYACHANDRAN – SAP FI 63
2. Update the following required and optional fields
Field Name Description
Document no The document that is to be reversed
Reversal Reason The reason the document will be reversed
3. Click the Display document before reversal button or
press F5
4. Click the Back button or F3
5. Click on the Save button or press Ctrl + S
6. The system will post a reversal document and a message will appear on the
status bar “Document xxxxxx was posted in Company Code xxxx”
7. Click on the Exit button or press Shift+F3 to return to the SAP Easy Access
screen
FICO USER MANUAL
KS.JAYACHANDRAN – SAP FI 64
3.2 Advance Payments in Accounts Payable
3.2.1 Down Payment Request F-47
Down payment request function does not create posting but only stores information
in the systems that can be used later to post a “normal” down payment manually or
using the automatic payment program.
Steps :
1. Access transaction by:
SAP Access Menu Accounting → Financial Accounting → Accounts
Receivable → Document → Entry → Down Payment →
Request
Transaction code F-47
2. Update the following required and optional fields
Field Name Description
Document date Date the transaction occurred
Type Document type
Company code Code identifying a separate legal entity
Posting date Date that the business transaction occurred
Currency / date Code identifying the currency used in the transaction
Reference Doc. Description
Account Code identifying the vendor account
Trg. Sp. G/L ind. Special GL transaction code. You determine the special
G/L indicator for a down payment request in this field with
which the corresponding down payment is to be posted
later
FICO USER MANUAL
KS.JAYACHANDRAN – SAP FI 65
3. Click the New item button to enter Down Payment line item.
4. Update the following required and optional fields
Field Name Description
Amount Amount of the line item
Calculate Tax The system calculates the taxes automatically
Due on Date when the down payment is due
5. Click the Enter button to confirm your entries
6. Click the Overview button to display a document before posting
7. Click the Save button to post the down payment request
8. A message will appear on the status bar informing you that “Document XXXX
was posted in company code XXXXX”
9. Click on the Exit button or press Shift+F3 to return to the SAP Easy Access
screen
3.2.2. Post Vendor down payment F-48
A down payment is an advance payment for a service or goods and down
payment is a function that allows you to post the document to an alternative GL
account instead of “normal” vendor’s reconciliation account.
Steps :
1. Access transaction by:
SAP Access
Menu
Accounting → Financial Accounting → Accounts Payable →
Document Entry → Down Payment → F-48 down payment
Transaction
code
F-48
FICO USER MANUAL
KS.JAYACHANDRAN – SAP FI 66
2. Update the required and optional fields
Field Name Description
Document date Date the transaction occurred
Type Document type
Company code Code identifying a separate legal entity
Posting date Date that the business transaction occurred
Currency / date Code identifying the currency used in the transaction
Reference Doc. Description
Account Code identifying the vendor account
Special G/L ind Enter the required special GL transaction code
Account Bank account number
Amount Amount of the line item
3. You can use an existing down payment request to post the down payment.
Click the Request button.
4. Select the Down payment request number, by selecting the row containing
the document number like XXXXX by clicking anywhere on that row.
5. Click on the button. The system will display a
document overview
6. Click on the Save button to post the down payment
7. The message bar displays “Document XXXX was posted in company code
XXXX”
Post Vendor Down Payment Display Overview
FICO USER MANUAL
KS.JAYACHANDRAN – SAP FI 67
Note : Before proceeding to clear down payment you are required to post
vendor invoice (FB60) so that invoice and down payment can clear. In case if
the invoice amount is more than down payment then rest of the balance will be
paid through normal payment and the clearing will automatically take place for
the balance
8. Click on the Exit button or press Shift+F3 to return to the SAP Easy Access
screen.
3.2.3 Clear Vendor down payment F-54
This function allows you to post a clearing document manually. You can use it e.g.
to clear a down payment (posted with special GL transaction) with another vendor
document (e.g. vendor invoice)
Steps :
1. Access transaction by:
SAP Access
Menu
Accounting → Financial Accounting → Accounts Payable →
Document Entry → Down Payment → Down Payment Clearing
Transaction
code
F-54
FICO USER MANUAL
KS.JAYACHANDRAN – SAP FI 68
2. Update the following required and optional fields
Field Name Description
Document date Date the transaction occurred
Type Document type
Company code Code identifying a separate legal entity
Posting date Date that the business transaction occurred
Currency / date Code identifying the currency used in the transaction
Reference Doc. Description
Account Code identifying the vendor account
Invoice Enter here an invoice number you want to clear a down
payment with
Line item Enter here the line item number you want to clear a down
payment with
Fiscal year Fiscal year number
Note : If you don’t know the vendor invoice number, you can open another SAP
session (Press Create New Session button) and display the vendor open items –
transaction code FBL1N
3. Click on the button to process down payments.
4. Select the Down payment request number, by selecting the row containing
the document number like XXXXX and by clicking anywhere on that row.
5. Click the Enter button to confirm your entries. The system will enter the
amount in the field Transfer posting. (Side scroll to the right to see this entry)
6. Click the Save button to post a clearing document.
Clear Vendor Down Payment Display Overview
FICO USER MANUAL
KS.JAYACHANDRAN – SAP FI 69
7. Line item 002 is highlighted in blue. Some additional data must be entered.
Double click on this line.
8. Enter Text describing the down payment.
9. Click the Enter button to confirm your entries.
10. Click the Save button. (Please confirm the information message that
appears on the status bar with enter)
11. The message bar displays “Document XXXX was posted in company code
XXXX”
This transaction clears only down payment posting and stores information in the
system which amount of the invoice was cleared.
12. To display / Change Vendor Open Items execute Transaction FBL1N. As you
can see, the newly posted clearing document is still outstanding and you
need to clear it with the invoice using the account clearing process
(Transaction F-44).
13. Click on the Exit button or press Shift+F3 to return to the SAP Easy Access
screen.
FICO USER MANUAL
KS.JAYACHANDRAN – SAP FI 70
3.3 Automatic outgoing payment process &
Check Voiding
3.3.1. Automatic Payment Run Process – F110
This SAP functionality allows for the clearing of Vendors’ Account line items that are
due for payment. The process involves posting to relevant sub ledgers and the
general ledger but this happens through an automated process which involves
selection of Vendors with open items that are due, reviewing and editing payment
proposal and execution of the actual payment run.
Steps :
1. Access transaction by:
SAP Access Menu Accounting → Financial Accounting → Accounts
Payable → Periodic processing → Payments
Transaction code F110
2. Update the following required and optional fields
Field Name Description
Run date The run date is used for identifying the parameters
Identification Freely definable the identification to distinguish between
several runs with the same run date
3. Click on the tab.
Automatic Payment Transactions : Parameters
FICO USER MANUAL
KS.JAYACHANDRAN – SAP FI 71
4. Update the following required and optional fields:
Field Name Description
Posting date Date which is used when entering the document in
Financial Accounting
Docs entered upto This specified the date upto which open items are taken
into account during processing
Company Code Company Code Number
Payment Methods List of payment methods that should be used in the
payment run
Next P/Date The date when the next payment run is scheduled.
Vendor Vendor account to paid
5. Click on the tab.
6. Click in the check box.
7. Click in the Check box
8. Click in the check box
9. Click on the data medium tab.
10. Enter FIL_PAY1 in the variant field against program
11. Click on the Save button.
12. A message will appear on the
status bar
13. Click on the Back button.
Automatic Payment Transactions : Additional Log
Automatic Payment Transactions: Printout and DME
Automatic Payment Transactions : Status
FICO USER MANUAL
KS.JAYACHANDRAN – SAP FI 72
14. A message will appear in the status box: Parameters have been entered
15. Click on the button
16. Click in the check box to schedule your proposal.
17. Click on the Schedule button.
18. A message will appear in the status box: Proposal is ready to be started.
19. Click on the Status button repeatedly the prior message will be
updated and now reads Payment proposal has been created.
20. Click on the Display button to view the proposal list
21. The green traffic light on the “Indicator: Payment / Exception” field indicates
that there are no errors.
22. Double click on the record for a breakdown of the component documents
23. Click on the Back button twice to return to the status tab
24. To display the proposal log Go to Edit→ Proposal→Display log, a detailed log
will be displayed.
Job Log Entries for F110-xxxx /xxxx
25. Click the Back button to return to the Status tab
26. Click on the button to schedule the payment run. A pop up
screen will be displayed.
27. Click on the check box to schedule your payment run.
Then select the Schedule button.
28. You will be returned to the status tab. Click on the button
repeatedly until the message “Payment run has been carried out” and
“Posting orders: XXX generated, XXX completed”
Display Payment Proposal : Payments
FICO USER MANUAL
KS.JAYACHANDRAN – SAP FI 73
29. Click on the Payments button to view log. Then double click on
your job name within a pop screen that comes up i.e. “F110
xxxxxxxxPayment run”
30. This screen indicates that the payment program ran successfully and Financial
Accounting documents created in Company code XXXX
Job Log Entries for F110-XXXXXX/ XXXX
31. The screen will list the accounts cleared, the clearing documents and the
related amounts.
32. Click the Back button to return to the Status tab.
33. Click the Schedule Print button. Select the ‘Start Immediately’
option on the Schedule print popup box. Replace the (Question mark)? With
F1 or any character you prefer.
34. Click the Enter icon. The payment media will now be created. SAP will
return you to the status screen.
35. A message will appear on the status bar
Print Job xxxxxx has been scheduled
To view the job Log proceed as follows :
36. Select from the menu System → Own Jobs:
37. The job will appear with the status finished in green imples that the job has
been correctly executed
38. Click in the Check box against your job log then click button
for details of the job execution.
39. The system will display the below screen showing you the details of your job.
40. Click on the Back button.
Job Overview
FICO USER MANUAL
KS.JAYACHANDRAN – SAP FI 74
41. Click on the button.
42. Click in the box against your spool for checks
43. Click on the Display Contents button.
44. Individual Checks together with the remittances will be displayed it’s always
advisable to have a print preview before executing the printing function.
45. Click the Back button.
46. Click on the Print immediately button to start your actual printing.
Note : Before you command the printing make sure that your checks are properly
aligned and the correct leaf of the pre-numbered check is at the beginning
47. Click on the Exit button or press Shift+F3 to return to the SAP Easy Access
screen.
Job Overview
Output Controller : List of Spool Requests
Print Preview of LP01 Page 0001 of 0002
Output Controller : List of Spool Requests
FICO USER MANUAL
KS.JAYACHANDRAN – SAP FI 75
3.3.2 Voiding of Unused checks – FCH3
Checks can be cancelled before they are printed due to various reasons: Soiled,
stolen, destroyed etc. These reasons warrant the cancellation in order to maintain
the correct sequence of pre-numbered checks in the check lot.
Steps :
1. Access transaction by:
Field Name T-code
Transaction code FCH3
2. Enter Company code in the paying company code field.
3. Enter bank key in the House Bank field.
4. Enter Account ID field
5. Enter XXXX the Check(s) to be cancelled in the Check number field from – to
fields.
6. Enter the void reason code.
7. Click on the Enter button to confirm your entries.
8. Click on the button.
9. A message will appear on the status bar: checks XXXx to XXXX have been
voided.
10. Click on the Exit button or press Shift+F3 to return to the SAP Easy Access
screen.
FICO USER MANUAL
KS.JAYACHANDRAN – SAP FI 76
3.3.3. Void Issued Checks – FCH9
This function allows you to cancel a Check that was issued to a vendor and was not
presented to the bank until it went stale.
Steps :
1. Access transaction by:
SAP Access Menu Accounting → Financial Accounting → Accounts
Payable → Environment → Payments → Check
information → Void → Issued Checks
Transaction code FCH9
2. Enter Company Code in the Paying company code field.
3. Enter bank key in the House Bank field
4. Enter Account ID field
5. Enter the Check number field
6. Enter the Void reason code
7. Click on the Enter button to confirm your entries
8. Click on the button to display the check you are about to cancel.
9. The details of the check you about to cancel will be displayed. Check and
please satisfy yourself that it is the correct check to be voided / cancelled.
10. Click on the button.
FICO USER MANUAL
KS.JAYACHANDRAN – SAP FI 77
11. The Check line items will be displayed
12. Click on the Back button twice.
1. Click on the button
2. A message will appear on the status bar : Checks 000xxxxx voided – Payment
document not reversed.
3. Click on the Exit button or press Shift+F3 to return to the SAP Easy Access
screen.
3.3.4 Cancel Check Payment – FCBH8
Checks can be cancelled before they are printed due to various reasons: Soiled,
stolen destroyed and these reasons warrant the cancellation in order to maintain
the correct sequence of pre-numbered checks in the check lot. This functionality
allows for the cancellation of the Check and at the same time reversing the clearing
document.
Steps :
1. Access transaction by:
SAP Access
Menu
Accounting → Financial Accounting → Accounts Payable →
Environment → Check information → Void → Cancel payment
Transaction
code
FCH8
Check line items
Void Issued Checks
FICO USER MANUAL
KS.JAYACHANDRAN – SAP FI 78
1. Enter Company code in the Paying company code field
2. Enter Bank key in the House Bank field
3. Enter the Account ID field.
4. Enter the Check to be cancelled in the Check number field.
5. Enter the void reason code Field.
6. Enter 01 in the Reversal Reason Field.
7. Click on the Enter to confirm your entries.
8. Click on the button.
9. A message will appear on the status bar: Payment for check XXXXX was
cancelled, reverse document XXXX
10. Click on the Exit button or press Shift+F3 to return to the SAP Easy Access
screen.
3.3.5 Display the check Register – FCHN
You can use this transaction to view a list of checks. It lists those that were cashed,
voided (cancelled), yet to be presented to the bank for payment and those that
have just been printed.
Steps :
1. Access transaction by:
SAP Access
Menu
Accounting → Financial Accounting → Accounts Payable →
Environment → Check information → Display → Check Register
Transaction
code
FCHN
FICO USER MANUAL
KS.JAYACHANDRAN – SAP FI 79
2. Enter the Paying company code field
3. Enter Bank key in the House Bank Field
4. Enter the Account ID (Account Identification)
5. Select Radio button if you want to view a check listing only
or Select Radio button if you want to view a check listing
which includes the list of documents that make up the payment
6. Click on the Execute button
7. Click on the Exit button or press Shift+F3 to return to the SAP Easy Access
screen.
FICO USER MANUAL
KS.JAYACHANDRAN – SAP FI 80
3.4 Correspondences & Foreign
Currency Revaluation
3.4.1 Vendor correspondence request – FB12
Correspondence are business documents such as Vendor account statements,
Payment notice with line items, Payment notice to accounting department,
Payment notice to legal department
These documents can be requested and be printed any time but are usually printed
at the end of the month.
Steps :
1. Access transaction by:
SAP Access Menu Accounting → Financial Accounting → Accounts
Payable → Account → Correspondence → Request
Transaction code FB12
2. Enter Company code field
3. Click the Enter button
4. Double Click on SAP06 Account Statement
5. Update the following required and optional fields.
Field Name Description
Vendor Account for Vendor
Postings from Start Date to your Selection
Postings to End date to your selection
FICO USER MANUAL
KS.JAYACHANDRAN – SAP FI 81
6. Click on the button.
7. A message will appear on the status bar: Account Statement was requested
8. Click on the Exit button or press Shift+F3 to return to the SAP Easy Access
screen.
3.4.2 Maintain Correspondence F-61
Correspondence are business documents such as Vendor account statements,
Payment notice with line items, Payment notice to accounting department,
Payment notice to legal department
These documents can be requested and be printed any time, print the
correspondences.
Steps :
1. Access transaction by:
SAP Access Menu Accounting → Financial Accounting → Accounts Payable
→ Account → Periodic Processing → print
Correspondence → s per Request
Transaction code F.61
2. Enter ‘FILC’ in Correspondence Field.
3. Enter the company code field.
4. Click on the Execute button to continue
Trigger for Correspondence
FICO USER MANUAL
KS.JAYACHANDRAN – SAP FI 82
5. A message will appear within a pop up screen : A correspondence was
issued would you like to issue a request ?
6. Click on the button to proceed
7. Enter printer name LP01 in the output device field.
8. Click on the button
9. A log will be issued for triggered correspondences
10. Select from the menu System → Services → Output Controller
11. Click on display contents – Press F6
12. Press F3 to exit the display view screen
13. Click the on Print directly button Press Ctrl + Shift + F8 to send to the printer
14. Click on the Exit button or press Shift+F3 to return to the SAP Easy Access
screen.
3.4.3 Foreign currency Revaluation procedure – FAGL_FC_VAL
You carry out the foreign currency valuation before you create the financial
statements. The valuation includes the following accounts and items.
Foreign currency balance sheet accounts, that is, G/L accounts that you run in
foreign currency (the balances of the G/L accounts in foreign currency are
valuated) Open Items (customers, vendors, G/L accounts) posted in foreign
currency (the line items are valuated)
Yes
Continue
Trigger for Correspondence
Output Controller : Spool Request Selection screen
Print Preview of LP01 Page 0001 of 0002
FICO USER MANUAL
KS.JAYACHANDRAN – SAP FI 83
Steps :
1. Access transaction by:
SAP Access Menu Accounting → Financial Accounting → Accounts
Payable → Periodic processing → Closing → Valuate
→ Foreign Currency Valuation of open items (New)
Transaction code FAGL_FC_VAL
2. Update the following required and optional fields
Field Name Description
Company code Company code
Evaluation Key Date Key date for the foreign currency valuation
Valuation method A unique key for determining a foreign currency
valuation method. This key can be valid for cross-chart
of accounts
Batch input session Code identifying the batch session that is Created
Document date Date the transaction occurred
Posting date Date that the business transaction occurred
Posting period Fiscal month when the transaction posts to the General
Ledger
Reversal Posting date Date when you want to post a reverse . Normally the 1st
day of next month
Reverse posting period Posting period for reversal
3. Click the Open items tab
4. Select by clicking in the check box
5. Select by clicking in the check box, if required so
FICO USER MANUAL
KS.JAYACHANDRAN – SAP FI 84
You can select only a particular General Ledger / General Ledger accounts to
be evaluated. If you leave the selection fields empty (like in our example), all the
accounts will be selected for valuation.
6. Click on the Execute button to perform valuation.
Note : The system does not create the postings immediately but creates a
batch input session instead
7. Click on the Back button or press F3
8. To post the valuation, you need to process the Batch Input session that
you’ve just created.
You can open another SAP session. From the main menu choose System →
Services → Batch input → Sessions
9. Select the session you want to process. (Select the row that contains your
Batch input session , e.g. FAGL_FC_VAL
10. Click on the button
11. Click on the Radio button
12. Select the button to begin the posting of documents
13. Once the session is processed, you need to check the results. To analys your
batch input session, follow the menu path:
14. From the main menu choose Sytem→Services→ Batch input → Sessions
15. Select the row that contains your Batch Input Session FAGL_FC_VAL
16. Click the Analysis button. The system will display the details
regarding the session that was processed.
17. Click on the Exit button or press Shift+F3 to return to the SAP Easy Access
screen.
FICO USER MANUAL
KS.JAYACHANDRAN – SAP FI 85
3.5 Vendor Reports
3.5.1 Display Vendor Balances – FK10N
This function allows you to display vendor balances (both per month and
cumulative). You can also display balances for more than one vendor account
cross-company code in a list.
Steps :
1. Access transaction by:
SAP Access Menu Accounting → Financial Accounting → Accounts
Payable → Account → Display Balances
Transaction code FK10N
2. Update the following required and optional fields
Field Name Description
Vendor Code identifying the vendor account
Company code Code identifying a separate legal entity
Fiscal year Fiscal year number
3. Click the Execute button to display a report.
4. You can display the line items or even particular document directly from this
report. For instances, to display all the documents for period 4 mark this row
on the report screen (it will be highlighted in yellow) and click the Call up line
item report button. You can now see all the documents posted in Period 4.
FICO USER MANUAL
KS.JAYACHANDRAN – SAP FI 86
5. To display the details of a particular line item simply double-click on any listed
document the system will display this line item.
6. Click the Back button to return
Or
7. If you there is need, you can change some of the fields. Click the Display →
Change button. The fields that can be changed are highlighted in red or
they will be white. For instance you can add the description of the field
“Text”
8. Update the following required and optional fields of the invoice.
Field Name Description
Text Additional document description
9. Click the Save button to update this document
10. You can also export the account balance to a local file. Select from the
menu path: List → Export → Local file….
11. Select the radio button and click the Continue button
to continue
12. Click on the Match Code button to select the location to save thefile
Select the Desktop as the location and update the following required field
Field Name Description Values
Directory Enter the path where you would
like to save the file
C:Docuemnts and
Settings......
File name Enter here the name of your file Example : Vendor Balance.xls
Vendor Line Item Display
FICO USER MANUAL
KS.JAYACHANDRAN – SAP FI 87
13. Click on the button to begin export…
14. The message bar displays “xxx Bytes transferred”.
15. Click on the Exit button or press shift +F3 to return to the SAP Easy Access
screen.
16. Go to the desktop environment of your look for the file Vendors Balances you
exported from SAP.
17. Double click on it; you can format this file the way you like.
3.5.2 Vendor Line Item Display – FBL1N
This function allows you to display Open / Closed vendor items. Selection criteria
include vendor, company and many of the data sets on the vendor master record.
Drill-down capability into actual vendor document is available, as are various list
formatting options. You can also display balances for more than one vendor
account cross-company code in a list.
Steps :
1. Access transaction by:
SAP Access Menu Accounting → Financial Accounting → Accounts
Payable → Account → Display / Change Line Items
Transaction code FBL1N
2. Enter the Vendor Code and Company code.
3. Enter the Company Code
FICO USER MANUAL
KS.JAYACHANDRAN – SAP FI 88
4. Select the Line Item Selection
5. Select the Account Type Check box
6. Click the Execute button to display a report.
7. To display the details of a particular line item simply double-click on any listed
document the system will display this line item.
8. Click the Back button to return
Or
9. If you there is need, you can change some of the fields. Click the Display →
Change button. The fields that can be changed are highlighted in red or
FICO USER MANUAL
KS.JAYACHANDRAN – SAP FI 89
they will be white. For instance you can add the description of the field
“Text”
10. Update the following required and optional fields of the invoice.
Field Name Description
Text Additional document description
11. Click the Save button to update this document
12. You can also export the account balance to a local file. Select from the
menu path: List → Export → Local file….
13. Select the radio button and click the Continue button
to continue
14. Click on the Match Code button to select the location to save thefile
Select the Desktop as the location and update the following required field
Field Name Description Values
Directory Enter the path where you would like
to save the file
C:Docuemnts and
Settings......
File name Enter here the name of your file Example : Vendor
Balance.xls
15. Click on the button to begin export…
16. The message bar displays “xxx Bytes transferred”.
17. Click on the Exit button or press shift +F3 to return to the SAP Easy Access
screen.
18. Go to the desktop environment of your look for the file Vendors Balances you
exported from SAP.
Double click on it; you can format this file the way you like.
FICO USER MANUAL
KS.JAYACHANDRAN – SAP FI 90
3.5.3. Vendor Payment History with 0I (Open items) Sorted list
This evaluation is used for determining, as accurately as possible, the current
payment status for vendors requiring special attention. As criteria for this evaluation,
you can use current data from the master database such as Balances on an open
item basis or special G/L balances.
In addition to the payment status analysis, the program carries out an analysis of the
vendor open items for the report.
Steps :
1. Access transaction by:
SAP Access Menu Accounting → Financial Accounting → Accounts
Payable → Reporting → Information System → Reports
for Accounts Payable Accounting → Vendor Items →
Vendor Payment History with OI (Open items) sorted List
Transaction code S_ALR_87012085
2. Update the following required and optional fields
Field Name Description
Vendor Vendors Account Number
Company Code Code identifying a separate legal entity
Fiscal Year The year you want to report on
Open items at key
date
The up to date
FICO USER MANUAL
KS.JAYACHANDRAN – SAP FI 91
3. Click the Execute button to display a report
4. The report can be send to anyone on the SAP System. Click on the menu
System → List → Send
5. Type in your message to the person(s) you want to mail that document to.
6. Type in the Receivers name (XXXX) under Receipient field and place an *at
the end.
7. Click on the Continue button.
8. Click on the Send button press Shift+F8
9. The document has been sent to the chosen recipients.
10. Click on the Exit button or press Shift+F3 to return to the SAP Easy Access
Screen
Create Document and Send
Vendor Appraisal with OI Sorted List
FICO USER MANUAL
KS.JAYACHANDRAN – SAP FI 92
4 ACCOUNTS RECEIVABLE
In Accounts Receivable, much of its data is obtained from Sales and Distribution to
be available in the second phase.
Master data must be maintained centrally to ensure data integrity.
4.1 Accounting transactions in Accounts Receivable
4.1.1 Park Customer Invoice – FV70
Using this standard accounting function you can enter Invoice in the system without
posting to the Accounts Receivable sub ledger. The PARKED invoice is subsequently
subjected to checking, approval and posting to Accounts Receivable.
Steps :
1. Access transaction by:
SAP Access Menu Accounting → Financial Accounting → Accounts
Receivable → Document entry → Document Parking →
Edit / Park AR Invoice
Transaction code FV70
FICO USER MANUAL
KS.JAYACHANDRAN – SAP FI 93
2. Update the following required and optional fields:
Field Name Description
Customer Customer #
Invoice date Date of invoice
Reference Customer Invoice number
Posting date Date for posting to Ledger
Currency Invoice Currencdy
Amount Invoice amount
G/L Acct GL Account number
D/C Code identifying whether line item is a debit or a credit
Amount doc. Curr. Amount to be posted for the line item
Text Description of line item
3. Click on the Enter button
4. Simulate invoice before posting. To do so, click Simulate button.
Simulation button enables the user to review the Invoice as if it had been
posted including any system generated postings. The system also validates
the posting data.
5. Click on the Back button
6. To park the Invoice, click Save Parked Invoice button.
7. The message at the status bar informs you that “Invoice number xxxx was
PARKED”
4.1.2 Post Customer Invoice – FB70
This transaction creates postings in Accounts Receivable Sub Ledger and updates
also the relevant GL Accounts (e.g reconciliation account)
Steps :
1. Access transaction by:
FICO USER MANUAL
KS.JAYACHANDRAN – SAP FI 94
SAP Access Menu Accounting → Financial Accounting → Accounts
Receivable → Document entry → Invoice
Transaction code FB70
2. Update the following required and optional fields for 1st line item by clicking
tab button:
Field Name Description
Customer Customer #
Invoice date Date of invoice
Reference Additonal document description
Posting date Date for posting to Ledger
Amount Invoice amount
3. Update the following required and Optional Fields for 2nd line item
Field Name Description
L Account Code of the account this is being charged or debited
D/C Code identifying whether line item is a debit or a credit
Amount Amount to be posted for the line item
Text Description of line item
4. Click the Simulate button to replicate an overview of the
document before posting. The system will display the document overview.
5. Click on the Save button or press Ctrl+S to post the invoice
6. The system will display the number of the document generated by this
Invoice.
7. Click on the Exit button or press Shift+F3 to return to the SAP Easy Access
screen
FICO USER MANUAL
KS.JAYACHANDRAN – SAP FI 95
4.1.3 Post Customer Credit Memo – FB75
The SAP ERP system allows you to post a document with a complete opposite entries
to the original customer invoice. This function can be used when a customer returns
goods sold
Note : An account that was once debited will be credited and the other once
credited will be debited.
Steps :
1. Access transaction by:
SAP Access Menu Accounting → Financial Accounting → Accounts
Receivable → Document entry → Credit memo
Transaction code FB75
2. Update the following required and optional fields:
Field Name Description
Customer Customer #
document date Credit note date
Posting date Date for posting to Ledger
Reference Credit note number
Amount Invoice amount
G/L acct Account to which posting is related
Amount doc. Curr. Document currency. By default system proposes the
Company code currency, but user can change it
FICO USER MANUAL
KS.JAYACHANDRAN – SAP FI 96
3. Click the Enter button to confirm the entries
4. Click the Payment tab and update the following field.
Field Name Description
Inv. Ref (Invoice) Number / description which refers to a original invoice.
Entering the original invoice will copy the invoice details
from the original invoice. Imp Note. This will facilitate in
clearing the customer account at a later point in time
Inv. Ref (Fiscal Year) The fiscal year the invoice was created in
5. Click the Enter button to confirm the entries
6. Click the Simulate button to simulate the posting. The system will
display document overview
7. Click on the Save button or press Ctrl+S to post the document.
Note : The message bar displays “Document XXXX was posted in company
code xxxx”
8. The system will display the number of the document generated by this
Invoice.
9. Click on Exit button or press Shift+F3 to return to the SAP Easy Access
screen.
4.1.4 Change Parked Document – FV70
The SAP ERP system allows users to change parked Customer documents since
invoices need to be verified for correctness before they are posted; therefore errors
on documents can be corrected before being posted.
Steps :
1. Access transaction by:
FICO USER MANUAL
KS.JAYACHANDRAN – SAP FI 97
SAP Access Menu Accounting → Financial Accounting → Accounts
Receivable → Document Entry → Document Parking →
Edit / Park
Transaction code FB70
2. Click on the button and the tree will be displayed
3. Click on the button
4. A listing of parked documents will be displayed, double click on the
document you want to change / edit. The details of the parked document
will be populated in the relevant field: Add extra text.
5. Enter any detail in the Reference field.
6. Click on the Save button to record you changes
7. A message will appear on the status bar informing you what has happened
to the document you changed.
8. To exit this transaction, click on the Exit button or press Shift+F3 until the
SAP Easy Access Screen is displayed
4.1.5 Display Accounting Document – FB03
Documents entered in the system can be viewed as and when they are required
and you are also able to make changes to the document. Please note that your
changes will be limited to certain fields.
FICO USER MANUAL
KS.JAYACHANDRAN – SAP FI 98
The system offers you a function which allows you to search for a document number
in case you don’t know the number of the document you want to display.
Steps :
1. Access transaction by:
SAP Access Menu Accounting → Financial Accounting → Customer →
Document → Documents → Display
Transaction code FB03
2. If you don’t know the document number, click button to
search for documents.
3. The system will display a screen where you can enter your search criteria:
4. Update the following required and optional fields.
Field Name Description
Fiscal year Fiscal year number
Document type Code identifying the method that the system uses to
process the transaction
Posting date Date that business transaction occurred
5. Click Execute button to start searching
6. The system will display a list of documents that fulfill your criteria:
7. To display your document, simply double click on it. The system will display
the document.
8. Click on the Exit button or press Shift+F3
FICO USER MANUAL
KS.JAYACHANDRAN – SAP FI 99
9. if you know the document number you can display the accounting
document the following way
10. Enter the Document Number you have on hand
11. Enter the company Code
12. Enter the Fiscal Year XXXx or leave field blank.
13. Click on the Enter button to proceed
14. Click on the button to change you screen view
Note : the system will show you more fields not shown under entry view
15. Click on the menu Document → Display → Change
16. Click on the Document header button
17. Identify fields that can be changed and change header text
18. To store your changes in the document, click Save button.
19. Analyse it and click on the Enter Continue / Confirm button to leave
the displayed document header sub screen
20. To exit this transaction, click on the Exit button or press Shift-F3 until the
SAP Easy Access screen is displayed.
4.1.6 Post Incoming payments F-28
The SAP ERP system allows to process customer payment and will match the two
documents i.e. the invoice and the incoming payment documents and at the same
time perform the (reconciling) clearing procedures. Processing of incoming
payment can also be done by normal parking and posting then executing a
separate manual clearing function at a later stage.
FICO USER MANUAL
KS.JAYACHANDRAN – SAP FI 100
To process the incoming payment successfully using this transaction there must be
an invoice(s) on the customer’s account. However the post incoming payment will
take care of Process the incoming payment.
Steps :
1. Access transaction by:
SAP Access Menu Accounting → Financial Accounting → Accounts
Receivable → Document Entry→ Post Incoming
Payments
Transaction code F-28
2. Update the following required and optional fields.
Field Name Description
Document Date The document date is the date on which the original
document was issued
Company Code Company code that the customer belongs to
Currency Currency code
Reference The document number of the customer
Account Bank Account number
Amount Incoming payment amount
Account Customer A number that identified the Customer in the system
3. Click on the button
4. All open items are selected by default. To deselect the items first click the
Select All button.
Post Incoming Payments Process Open Items
FICO USER MANUAL
KS.JAYACHANDRAN – SAP FI 101
5. Then click Deactivate items button. All the open items are now
deactivated (they are no longer highlighted in blue)
6. Now you need to choose and select the items you want to clear. Double
click on the Gross field for each of those items to be cleared.
7. You will need to select one more document to balance this clearing. Scroll
through the remaining documents and select this document.
Note : The system will highlight these items in blue. When the value of the field not
assigned is equal 0 and you can clear open items. See scree below
8. You can check your document before postings. Select Document →
Simulate
9. To post your entries, click the Save button.
10. The message bar displays: “Document XXXx was posted in company code
xxxxxx”
11. Click on the Exit button or press Shift+F3 to return to the SAP Easy Access
Screen.
4.1.7 Reset Cleared Items – FBRA
A posting with clearing had been made to a wrong customer account due to
similarities in names therefore the incoming payment document has to be reversed
to enable the correct transaction to take place.
Note : An accounting document that contains line items have cleared been cannot
be reversed it requires that the cleared items be reset first.
FICO USER MANUAL
KS.JAYACHANDRAN – SAP FI 102
Steps :
1. Access transaction by:
SAP Access Menu Accounting → Financial Accounting → Accounts
Receivable → Document → Reset Cleared Items
Transaction code FBRA
2. Update the following required and optional fields.
Field Name Description
Clearing Document Number of the document to be reset
Company Code Code identifying a separate legal entiry
Fiscal Year Fiscal year number
3. Click the Accounts button. The system will display all the accounts
involved in clearing operation.
4. Click the Continue button to continue
5. Click the Items button to display documents cleared by the clearing
operation
6. Click on the Save button or press Ctrl+S to post the resetting
7. A screen reversal of clearing document will be displayed with 2(two) options
to select from.
- Only Resetting will remove the clearing from the document that was
cleared and changes the documents’ status from cleared item to open
item
- The clearing document also changes status to an open item and this has
effect on the overall Customer Account.
FICO USER MANUAL
KS.JAYACHANDRAN – SAP FI 103
- Resetting and reversing will reset the cleared line items and also reverses
the clearing document.
8. Click on Only Resetting button.
9. A message will appear on the status bar Clearing xxxxxxx reset.
Note : If you choose Resetting and Reversal a popup screen will appear
requiring completion (For you to complete this option you have to process
another post with clearing transaction)
10. Click on the Resetting and Reversal
11. Enter 01 in the Reversal Reason field, and date
12. A message clearing xxxxxxxx reset will appear
13. Click the Continue button to continue
14. A message will appear that document xxxxx was posted in Company Code
xxxx
15. Click on the Exit button or press Shift+F3 to return to the SAP Easy Access
screen.
4.1.8 Document Reversal (Individual Reversal) – FB08
Sometimes posted document contains incorrect information. This function allows
you to reverse an incorrect document. A document to be reversed cannot include
already cleared items. If you want to reverse document that was already cleared,
you need to reset all cleared items before posting a reversal.
FICO USER MANUAL
KS.JAYACHANDRAN – SAP FI 104
Steps :
1. Access transaction by:
SAP Access Menu Accounting → Financial Accounting → Accounts
Receivable → Document Reverse → Individual Reversal
Transaction code FB08
2. Update the required and optional fields by capturing the necessary data:
Field Name Description
Document Number The parked document number
Fiscal year The fiscal year in which the parked document
3. Click the Display document before reversal button or
press F5 to have an overview of the document you about to reverse.
4. Click on the Back button or F3
5. Click on the Save button or press Ctrl+S to post the reversal.
6. The system will post a reversal document and a message will appear on the
status bar “Document XXXX was posted in Company Code XXXX
7. Click on the Exit button or press Shift + F3 to return to the SAP Easy Access
screen.
4.1.9 Clear Customer Account – F-32
Authorized Users can access Open Item Customer Accounts and assign and clear
debits and credits. The user will use the Account Clear Transaction; select the items
to be assigned to each other and then post. The system will record the clearing
information (document numbers, date) on the original document.
FICO USER MANUAL
KS.JAYACHANDRAN – SAP FI 105
This function allows you to clear matching open items on Customer account.
Steps :
1. Access transaction by:
SAP Access Menu Accounting → Financial Accounting → Accounts
Receivable → Account → Clear
Transaction code F-32
2. Update the required and optional fields by capturing the necessary data:
Field Name Description
Account Code identifying the Customer account
Clearing date Date when you want the transaction to be cleared.
Company Code Number of the Company code that the Customer belongs
to
Currency Currency code
Note : You can clear also the transactions posted in different currencies. The system
will automatically calculate and post exchange rate differences
3. Click the Enter button. The system will display open items that fulfill
previously entered criteria:
4. All open items are selected by default. To deselect the items first click the
Select All button.
5. Then click Deactivate Items button button. All the open items are
now deactivated (they are no longer highlighted in blue).
6. Now you need to choose and select the items you want to clear. Double
click on the Gross field for each of those items to be cleared.
7. You will need to select one more document to balance this clearing. Scroll
through the remaining documents and select this document.
FICO USER MANUAL
KS.JAYACHANDRAN – SAP FI 106
Note : The system will highlight these items in blue. When the value of the field
not assigned is equal 0 and you can clear open items. See screen below
8. You can check your document before postings. Select Document → Simulate
9. To post your entries, click the Save button. No “real” posting took place,
but the system stores a clearing document.
10. The message bar displays : “Document xxxxxx was posted in Company code
xxxxx”.
11. Click on the Exit button or press Shift + F3 to return to the SAP Easy Access
screen.
FICO USER MANUAL
KS.JAYACHANDRAN – SAP FI 107
4.2 Customer Account Reports
Authorised Users can view the Customer Account details (line items posted) using
the Customer Account Line item display transaction, or by drilling down on the
account balance from the Display Customer Account balance transaction
Documents update Customer Balances when posted. Authorised users can view
Customer Account Balances online using the Account Balance enquiry and
entering the Customer account number.
4.2.1. Customer Balance Display – FD10N
The SAP system allows you to display the Account Balances of the customer at any
given time and this report also allows you to navigate backwards (drill down) to the
individual document line items that make up the total in any of the columns you wish
to analyse.
Run the balances report
Steps :
1. Access transaction by:
SAP Access Menu Accounting → Financial Accounting → Accounts
Receivable → Account → Display Balances
Transaction code FD10N
FICO USER MANUAL
KS.JAYACHANDRAN – SAP FI 108
2. Update the required and optional fields by capturing the necessary data:
Field Name Description
Customer Customer Number
Company Code Number of the Company code that the Customer belongs
to
Fiscal Year Fiscal Year number
3. Click Execute button
4. A report below be displayed
FICO USER MANUAL
KS.JAYACHANDRAN – SAP FI 109
5 Double click balance figure under credit column. This function will allow to
view individual documents line items.
6 Click on the Display Graphic button to display the graphic presentation
of the report. The report above can be printed sent by e-mail, downloaded to
various PC applications and can be displayed graphically.
7 Click on the Exit button or press shift+F3 to return to the SAP Easy Access
screen.
4.2.2 Customer Account Analysis – FD11
This transaction allows you to carry out an in depth Customer account analysis, such
as business volumes analysis, open items due date analysis.
Steps :
1. Access transaction by:
SAP Access Menu Accounting → Financial Accounting → Accounts
Receivable → Account → Account Analysis
Transaction Code FD11
2. Update the following required and optional fields.
Field Name Description
Customer The customer Number
Company Code Code identifying a separate legal entiry
Fiscal Year Fiscal year number
3. Click on the Enter button.
FICO USER MANUAL
KS.JAYACHANDRAN – SAP FI 110
4. Click on the Open Items net tab to view the open items analysis.
5. Double click on a figure under field line items which make up
all receivables will be displayed.
6. Click on the Exit button or press Shift+F3 or return to the SAP Easy Access
screen
4.2.3 Display / Change Line items – FBL5N
The display/change line item of Customer transactional report offers a different view
of customer documents, also allow you to view and analyse the status of each
customer documents.
Steps :
1. Access transaction by:
SAP Access Menu Accounting → Financial Accounting → Accounts
Receivable → Account → Display / Change line items
Transaction code FBL5N
Open items - Net Payment Due Date Account Analysis
All receivables
FICO USER MANUAL
KS.JAYACHANDRAN – SAP FI 111
2. Update the following required and optional fields.
Field Name Description
Customer The Customer Number
Company Code Code identifying a separate legal entiry
3. Click on the Radio button
4. Click on the Normal Items Check box
5. Click on the Execute button to start the process. And the below report will
be displayed.
FICO USER MANUAL
KS.JAYACHANDRAN – SAP FI 112
6. Double click on any one line item and see where it will take you.
7. Each document is categorized depending on its current status;
8. Customer documents are also updated with Net due date symbols and these
are derived from payment terms entered on the document during capturing.
The report displayed above can be printed sent by e-mail, downloaded to various
PC applications
Cleared / Open Items Symbol
Open Items : The item was posted by the key date
It was either cleared after the key date or has not been cleared
Cleared items : The item had been posted and cleared by the
Key data
Parked items
Net Due Date Symbol
The symbol indicates the due date for the net payment for the
items open on the key date
Item is overdue : The due date for net payment has been exceeded
on the key date. The payment is in arrears
item is due: The item is due for payment without deductions on
the key date
Item is not due: The due date for net payment is after the key
date
FICO USER MANUAL
KS.JAYACHANDRAN – SAP FI 113
5. BANK AND CASH TRANSACTIONS
5.1 Cash Journal (Petty Cash Transactions)
SAP Provides a standard function for the management of petty cash referred to as
the ‘Cash Journal’ Posting the journal will update the general ledger. The journal
will be available for subsequent display for future reference or audit purposes.
 Cash journals are company code specific
The petty cash journal will take care of such small expenses for example postage
expenses etc.
5.1.1 Recording a Cash Receipt – FBCJ
Cash journal allows you to post cash documents (like expenses, cash inflows etc.) in
a simple way. Instead of typical accounting transactions for posting (E.g. FB50) you
can use pre-defined business transactions. This function also allows you to print
typical cash journal documents and cash report for a specified period.
For every company code there can be defined different cash journals.
Steps :
1. Access transaction by:
SAP Access Menu Accounting → Financial Accounting → General Ledger
→ Posting → FBCJ – Cash Journal
Transaction code FBCJ
2. When you double click FBCJ – Cash Journal (if you are accessing it for the first
time the system will prompt a small window, you need to enter company
code and your relevant code of cash journal Type)
FICO USER MANUAL
KS.JAYACHANDRAN – SAP FI 114
3. Click on the button to select the correct journal type for
this posting.
4. Update the following required and optional fields:
Field Name Description
Company Code Code identifying a separate legal entity
Cash Journal Required cash Journal ID
5. Click the Enter button to confirm your entries and continue
6. Click on the tab
7. Update the following required and optional fields
Field Name Description
Business Transaction Transaction number
Amount Amount to be reimbursed
Reference The cash request voucher reference details
Profit Center Relevant profit Center
Line item Text Description of Transaction
8. Click on the Save button. The balance is now updated in the cash
management sub-ledger but no postings have been made to Financial
Accounting.
9. Click on the Post icon. Financial Accounting will be updated
10. The Financial Accounting document can be displayed via selection of the
button.
11. A sub screen like the one below will be displayed double click on Document
number XXXX
FICO USER MANUAL
KS.JAYACHANDRAN – SAP FI 115
12. The accounting document will be displayed
13. Click on the Cancel button.
14. Click on the Exit button or press Shift+F3 to return to the SAP Easy Access
5.1.2 Enter an Expense Transaction – FBCJ
For Every company code, cash journal transactions have been pre-defined:
Before performing this, make sure that cashier cash enough balance in the cash
journal to incur expense.
Steps :
1. Access transaction by:
SAP Access Menu Accounting → Financial Accounting → General Ledger
→ Posting → FBCJ – Cash Journal
Transaction code FBCJ
FICO USER MANUAL
KS.JAYACHANDRAN – SAP FI 116
2. Click on the Change Cash Journal button.
3. Update the following required and optional fields:
Field Name Description
Company Code Code identifying a separate legal entity
Cash Journal Required cash Journal ID
4. Click on the tab.
5. Click the Enter button to confirm the entries
6. Update the following required and optional fields.
Field Name Description
Business Transaction Office Expense ……
Amount Amount
G/L Account This is the GL Account to which the expense will be
coded
Cost Center Cost center number
Line item text Description of Transaction
7. Click on the Save button. The balance is now updated in the cash
management sub-ledger but no postings have been made to Financial
Accounting.
8. Click on the Post button. The financial Accounting document can be
displayed via selection of the Follow-on document button.
9. Click on the Cancel button.
10. Click on the Exit button or press Shift+F3 to return to the SAP Easy Access
FICO USER MANUAL
KS.JAYACHANDRAN – SAP FI 117
5.1.3 Reverse Cash Journal – FBCJ
The cash journals documents you’ve entered can be posted directly or only saved in
the database (and you can post them later).
The saved documents can be deleted from the database. The posted documents
can also be deleted, but in such case the system posts automatically a reversal
document.
Steps :
1. Access transaction by:
SAP Access Menu Accounting → Financial Accounting → General Ledger
→ Posting → FBCJ – Cash Journal
Transaction code FBCJ
2. Click on the Change Cash Journal button.
3. Enter Company code
4. Enter Cash Journal number or search for the cash journal number
5. Select the line item to be reversed
6. Click Delete Row button.
7. Click on the button
8. Update the following required and optional fields:
Field Name Description
Reversal
Reason
Enter the reversal code for the transaction, this is the reason why
and during which period the document is being reversed
9. Click on the Enter (continue) button.
Note : An additional line item is displayed for the reversal with the document status
symbol, the original document also has this status.
Yes
FICO USER MANUAL
KS.JAYACHANDRAN – SAP FI 118
10. Click Follow-on doc or double click on the line item you
want to view.
11. Double click on the Accounting Document
12. The accounting document will be displayed.
13. Click on the Back button.
14. Click on the Cancel button
15. Click on the Exit button or press Shift+F3 to return to the SAP Easy Access
FICO USER MANUAL
KS.JAYACHANDRAN – SAP FI 119
6. ASSET MANAGEMENT
6.1 Overview of Acquire To Retire process
Asset accounting is a subsidiary ledger of the general ledger and is used to manage
and document in detail fixed asset transactions. In fixed Asset accounting, you can
update depreciation and changes to asset balance sheet values in asset
accounting.
You can also make various account assignments to cost accounting for these
transaction types. As a result of the integration in the SAP AG System, Asset
Accounting (FI-AA) transfers data directly to and from other SAP AG components.
For example, you can post from the retirements fiscal year data a component
directly to FI-AA. Locking, reversal and scrapping including updating changes,
company codes and asset number information with or without vendors.
Business Process in Asset Accounting are :
No. Title Description
1 Asset master Record
Creation
This process covers the creation of single and
multiple asset master records. It also covers
assigning newly created assets to project
settlement rules.
2 Asset Master Record
Maintenance
This process covers asset master record
changes. Where there is a change in location
E.g Between regions or cost centres, the master
data can be changed accordingly. Where
there is a change between asset classes, a
transfer should be performed.
3 Locking an Asset This process covers the asset Lock functionality
in SAP. Locked asset cannot receive any
FICO USER MANUAL
KS.JAYACHANDRAN – SAP FI 120
financial postings.
4 Asset Master Record
Deletion
This process covers asset that must be deleted.
This can only be performed on assets with NO
transactional data. Where this is not the case,
the asset must first be retired and after one
year in the system it can be deleted.
5 Asset Acquisition This process covers the capitalization of costs to
Fixed Assets. Capitalization using asset under
construction as well as direct capitalization
processes are covered.
6 Asset Retirement This process covers the removal of an asset or
part of an asset from the asset portfolio. This
removal of an asset (or part of an asset) is
posted from a bookkeeping perspective as an
asset retirement.
7 Transfer This process covers the transfer of assets
between classes or areas. Either when the
incorrect asset class was used or if the asset
was capitalized to unclassified assets and later
transferred to classified assets. It is also used to
transfer assets between company codes,
regions or areas
8 Depreciation This process covers the calculation and
execution of asset depreciation based on the
remaining asset useful life and depreciation
method. i.e. Straight line. The depreciation
costs are posted to the assigned assets’ cost
centre on a monthly basis
9 Manual value
Correction
This process will cover the value correction
using standard transactions provided by SAP
10 Asset Document
Reversal
Incorrect posted transactions can be reversed
in SAP. Audit trail of reversal is maintained in
FICO USER MANUAL
KS.JAYACHANDRAN – SAP FI 121
the System
11 Year End Closing This process covers the opening and closing of
asset fiscal year. This process checks that all
depreciation in a given period has been
posted. It also checks if there are errors or
incomplete entries for any assets
6.2 Asset Master Maintenance
6.2.1 Creating Fixed Asset Master Data
If we acquire a new fixed asset for the business which has no master data existing in
the system, you need to create the master data for the asset in the system before
you can create any transactions against this asset.
Steps :
1. Access transaction by:
SAP Access Menu Accounting → Financial Accounting → Fixed Assets →
Asset → Create → Asset
Transaction code AS01
2. fill in the Required and optional fields
Field Name Description R/O/C Comments
Asset Class Classification of the asset R Use drill-down to
locate the asset
class
Company code Enter Company Code R
Number of similar
assets
Number of similar asset you
want to create in the system
O This allows to
create multiple
FICO USER MANUAL
KS.JAYACHANDRAN – SAP FI 122
when you save similar assets in one
master transaction
Reference The reference asset that you
are copying from
O Check the data
before you copy
3. Press Enter to open the asset master screen
4. Navigate through the tabs and complete the required and optional fields
5. Save when completed
6. A message bar will show as message like:
“Asset xxxxxxx x is created”
Asset creation process is completed
6.2.2 Change Asset Master – AS02
Steps :
1. Access transaction by:
SAP Access Menu Accounting → Financial Accounting → Fixed Assets
→ Asset → Change → Asset
Transaction code AS02
2. On screen “Change Asset: Initial Screen”, enter information in the fields as
specified in the table below:
Field Name Description R/O/C Comments
Asset The asset main
number to be
Changed
R Enter the asset number
FICO USER MANUAL
KS.JAYACHANDRAN – SAP FI 123
Sub-number The asset sub-number
to be changed
O No need to enter any
number in this field. The
system will default zero.
Company code Enter company code R Use the icon on the side
for help
3. Enter data in the required fields displayed
4. Press <Enter> or click on the icon on required tab.
5. Change the required data by overwriting it or adding to it when in the tab
labels above.
6.2.3 Display Asset Master AS03
Steps :
1. Access transaction by:
SAP Access Menu Accounting → Financial Accounting → Fixed Assets →
Asset → Display → Asset
Transaction code AS03
2. On screen “Display Asset: Initial Screen”, enter information in the fields as
specified in the table below:
FICO USER MANUAL
KS.JAYACHANDRAN – SAP FI 124
Field Name Description R/O/C Comments
Asset The asset main number to be
displayed
R A number can be
chosen by using
drop down
Function
Sub-number The asset sub-number to be
displayed
O Default value Zero
Company code Enter company code R
3. Press <Enter> or click on the icon Then
4. The following screen will be displayed
6.2.4 Lock Fixed Asset : AS05
This transaction is used to blocking an asset for further acquisitions may be useful if
the asset will be retired, e.g. in a few weeks, or if an AUC (Asset Under Construction)
should be closed. This option may be utilized for the VQ’s whole room concept for
main asset number (sub-assets would not be blocked)
FICO USER MANUAL
KS.JAYACHANDRAN – SAP FI 125
6.3 Asset Accounting – Business Transactions F-90
6.3.1 Asset Acquisition
To acquire or the Asset acquisition with vendor use the Transaction code F-90 or use
the following menu path:
Steps :
1. Access transaction by:
SAP Access Menu Accounting → Financial Accounting → Fixed Assets →
Posting → Acquisition → External Acquisition → With Vendor
Transaction code F-90
2. On screen “Acquisition from purchase with Vendor screen”, enter information
in the fields as specified in the table below:
Field Name Description R/O/C Comments
Header Information
Doc. Date Source document date R Enter a document
date
Document Type The default document type
for this screen is KR . do not
change it
R
Company code Enter Company Code R
Posting date Date for posting a
document to financial
accounting. This will
FICO USER MANUAL
KS.JAYACHANDRAN – SAP FI 126
determine which fiscal
period (also known as
posting period) the
transaction is recognized
Reference One of the key fields that
can be used to search for
documents at a later
retrieval date.
R
Line item information
Posting Key Posting key represent Debit
or Creit entry of any
account type
R
Account Enter the Vendor account
Number
R
3. Press <Enter> or click on the icon you will be prompted with the following
screen
FICO USER MANUAL
KS.JAYACHANDRAN – SAP FI 127
4. Enter the debit or credit amount and other necessary data like business area,
cost center (for items), tax code (if the item is subjected to GST) , item text,
etc.
5. Go to the next line item
Field Name Description R/O/C Comments
Posting Key Enter the Posting key to debit
Asset
R Enter the
Posting key (70)
Account Enter Asset Number R
Transaction Type The transaction Type in Asset
Accounting classified the
business transaction. The
transaction type control
various system activities when
business transactions are
posted
R Enter
Transaction
Type (100)
5. To verify the entry press the Save icon button. Following message will be
appeared at the bottom of your screen
“Document XXXXXXx was posted in company code XXXX”
6.3.2 View Asset Values
Steps :
1. Access transaction by:
SAP Access Menu Accounting → Financial Accounting → Fixed Assets →
Asset Display Asset Explorer
Transaction Code AW01N
FICO USER MANUAL
KS.JAYACHANDRAN – SAP FI 128
The screen below is displayed. Take note of the following values:
Planned values:
Posted Values :
Note : If the asset has areas defined the following message and screen will be
displayed
SAP_FICO_USER_GUIDE.pdf

SAP_FICO_USER_GUIDE.pdf

  • 2.
    Strictly for InternalCirculation for Flemingo International Limited SAP FICO USER GUIDE Prepared By: Jayachandran.KS MBA (Fin), SAP FI
  • 3.
    FICO USER MANUAL KS.JAYACHANDRAN– SAP FI Contents 1. INTRODUCTION 1.1 Financial Accounts Overview………………………………………………………………………………………1 1.2 Structures in SAP Finance……………………………………………………………………………………………2 2. GENERAL LEDGER 2.1 Finance Organisational Structures & Master Data General Ledger Accounting…………..4 2.2 Accounting Transactions in General Ledger 2.2.1 Park Document…………………………………………………………………………………………… 6 2.2.2 Post parked Document………………………………………………………………………………… 7 2.2.3 Enter General Ledger Account Document…………………………………………………… 9 2.2.4 Change General Ledger Accounting Document……………………………………..…… 11 2.2.5 Display General Ledger Document…………………………………………………………..… 12 2.2.6 General Ledger Document Reversal ………………………………………………………….. 14 2.2.7 Clear General Ledger Account………………………………………………………………..…… 16 2.2.8 Post with Clearing……………………………………………………………………………………..… 18 2.3 GL Period End Closing 2.3.1 Create Recurring Entry Document………………………………………………………………… 21 2.3.2 Change Recurring Document…………………………………………………………………………23 2.3.3 Create Posting from Recurring Documents………………………………..………………… 25 2.3.4 Delete Recurring Document ………………………………………………………………………….27 2.3.5 Enter Accrual / Deferral Document ……………………………………………………………. 29 2.3.6 Reversing Posting for Accruals / Deferred Documents…………………………………. 31 2.3.7 Foreign Currency Valuation ………………………………………………………………………….33 2.4 General Ledger Reporting 2.4.1 Execute Financial Statements………………………………………………………………………. 37 2.4.2 Display G/L Balances……………………………………………………………………………………..38 2.4.3 GL Account Line Item Display………………………………………………………..……………… 39 3. ACCOUNTS PAYABLE 3.1 Accounting Transactions in AP 3.1.1 Vendor Invoice Parking………………………………………………………………………………….42 3.1.2 Change Parked document……………………………………………………………………………..44 3.1.3 Display Parked Document……………………………………………………………………………..45 3.1.4 Posting / Delete Parked Document ……………………………………………………………….46 3.1.5 Vendor Invoice………………………………………………………………………………………………47 3.1.6 Park / Edit Credit Memo………………………………………………………………………………..49 3.1.7 Post Credit Memo…………………………………………………………………………………..……. 51 3.1.8 Post Outgoing payment…………………………………………………………………………………53 3.1.9 Display Accounting document……………………………………………………………………….56
  • 4.
    FICO USER MANUAL KS.JAYACHANDRAN– SAP FI 3.1.10 Clear Vendor Account……………………………………………………………………………………58 3.1.11 Reset Cleared items………………………………………………………………………………………60 3.1.12 Document Reversal ………………………………………………………………………………………62 3.2 Advance Payments in Accounts Payable 3.2.1 Down Payment Request………………………………………………………………………………. 64 3.2.2 Post Vendor down payment………………………………………………………………………….65 3.2.3 Clear Vendor down payment…………………………………………………………………………67 3.3 Automatic outgoing Payment process & Check voiding 3.3.1 Automatic payment Run Process…………………………………………………………………..70 3.3.2 Voiding of Unused Checks……………………………………………………………………………. 75 3.3.3 Void Issued checks ………………………………………………………………………………………76 3.3.4 Cancel Check payment…………………………………………………………………………………. 77 3.3.5 Display the Check Register…………………………………………………………………………….78 3.4 Correspondences & Foreign Currency Revaluation 3.4.1 Vendor Correspondence Request………………………………………………………………….80 3.4.2 Maintain Correspondence……………………………………………………………………………. 81 3.4.3 Foreign Currency Revaluation………………………………………………………………………. 82 3.5 Vendor Report 3.5.1 Display Vendor Balance………………………………………………………………………………… 85 3.5.2 Vendor Line Item Display……………………………………………………………………………… 87 3.5.3 Vendor payment History with IO Sorted List………………………………………………… 90 4. ACCOUNTS RECEIVABLE 4.1 Accounting Transactions in Accounts Receivable 4.1.1 Park Customer Invoice…………………………………………………………………………………..92 4.1.2 Post Customer Invoice…………………………………………………………………………………..93 4.1.3 Post Customer Credit Memo………………………………………………………………………… 95 4.1.4 Change Parked Document……………………………………………………………………………. 96 4.1.5 Display Accounting Document……………………………………………………………………… 97 4.1.6 Post Incoming Payments……………………………………………………………………………… 99 4.1.7 Reset Cleared Items……………………………………………………………………………………… 101 4.1.8 Document Reversal ………………………………………………………………………………………103 4.1.9 Clear Customer Account………………………………………………………………………………. 104 4.2 Customer Account Reports 4.2.1 Customer Balance Display……………………………………………………………………………..107 4.2.2 Customer Account Analysis ………………………………………………………………………….109 4.2.3 Display / Change Line Items ………………………………………………………………………….110 5. BANK AND CASH TRANSACTIONS 5.1 Cash Journal (Petty Cash Transactions) 5.1.1 Recording a Cash Receipt……………………………………………………………………………… 113 5.1.2 Enter an Expense Transaction……………………………………………………………………… 115 5.1.3 Reverse Cash Journal……………………………………………………………………………………. 117
  • 5.
    FICO USER MANUAL KS.JAYACHANDRAN– SAP FI 6. ASSET MANAGEMENT 6.1 Overview of Acquire To Retire process……………………………………………………………………… 119 6.2 Asset Master Maintenance 6.2.1 Creating Fixed Asset Master Data………………………………………………………………….121 6.2.2 Change Asset Master……………………………………………………………………………………. 122 6.2.3 Display Asset Master……………………………………………………………………………………..123 6.2.4 Lock Fixed Asset…………………………………………………………………………………………….124 6.3 Asset Accounting – Business Transactions 6.3.1 Asset Acquisition…………………………………………………………………………………………..125 6.3.2 View Asset Values………………………………………………………………………………………… 127
  • 6.
    FICO USER MANUAL KS.JAYACHANDRAN– SAP FI 1 1. INTRODUC TION 1.1 Financial Accounting Overview The Financial Accounting (FI) application component fulfills all the international requirements that must be met by the financial accounting department of an organization. It provides the following features:  Management and representation of all accounting data All business transactions are recorded according to the document principle, which provides an unbroken audit trail from the financial statements to the individual documents.  Open and integrated data flow Data flow between Financial Accounting and the other components of the SAP System is ensured by automatic updates. Data is available in real time within Financial Accounting. Postings made in the subledgers always generate a corresponding posting in the general ledger.  Preparation of operational information to assist strategic decision-making within the organization Integration of Financial Accounting with other components All accounting-relevant transactions made in Logistics (LO) or Human Resources (HR) components are posted real-time to Financial Accounting by means of automatic account determination. This data can also be passed on to Controlling (CO). This ensures that logistical goods movements (such as goods receipts and goods issues) are exactly reflected in the value-based updates in accounting.
  • 7.
    FICO USER MANUAL KS.JAYACHANDRAN– SAP FI 2 Integration within Financial Accounting Every posting that is made in the subledgers generates a corresponding posting to the assigned G/L accounts. This ensures that the subledgers are always reconciled with the general ledger. Features The Financial Accounting application component comprises the following sub- components:  General Ledger (FI-GL)  Accounts Payable (FI-AP)  Accounts Receivable (FI-AR)  Bank Accounting (FI-BL)  Asset Accounting (FI-AA)  Funds Management (FI-FM)  Travel Management (FI-TV)  Special Purpose Ledger (FI-SL) 1.2 Structures in SAP Finance Ledgers New General Ledger Accounting, unlike Classical general ledgers, enable parallel accounting to meet the requirements of several, varying accounting principle requirements. For example in a globalized environment, an international business may produce one Statement to suit IFRS, GAAP, etc. SAP has only one leading ledger (that corresponds to the local accounting principle eg. IFRS) yet at the same time may have Non-Leading Ledger to enable reporting to meet GAAP
  • 8.
    FICO USER MANUAL KS.JAYACHANDRAN– SAP FI 3 Chart of Accounts and Company code Chart of Accounts is a variant that contains parameters for General Ledgers. These are assigned to the Company Code before the Company Code can be used.
  • 9.
    FICO USER MANUAL KS.JAYACHANDRAN– SAP FI 4 2. GENERAL LEDGER 2.1 Finance Organizational Structures & Master Data General Ledger Accounting General ledger accounts are master data that is used in day to day transaction processing in various modules of the SAP ERP system. Each general ledger is set up according to a chart of accounts. The chart of accounts contains the definitions of all G/L accounts in an ordered form. The definitions consist mainly of the account number, account name, and the type of G/L account, that is, whether the account is a P&L type account of a balance sheet type account. The general ledger contains a record of all relevant accounting transactions from a business point of view in the G/L accounts. In order to keep a clear overview, the general ledger often only contains collective postings. In such cases, the information posted is displayed in more detail in the subsidiary ledgers, which provide their information to the general ledger in summarized form. There are various methods of creating the general ledger master record but before its creation there are requirements that need to be fulfilled first: Master data must be maintained centrally to ensure data integrity
  • 10.
    FICO USER MANUAL KS.JAYACHANDRAN– SAP FI 5 2.2. Accounting Transactions in General Ledger Transaction processing in General Ledger will relate to processing of General Ledger journals and performing account enquiries in the General Ledger. You can comfortably create and post a G/L account document using a one-screen transaction. The entry screen is divided into the following areas:  Header data (here, the data for the document header is compiled) Line item information (here, the line items for the document are entered)  Information area (here, the debit and credit totals are displayed) Apart from the single screen general ledger accounting transactional processing SAP also offer the general parking and posting methods and it is necessary to have a good command of how it operates. In the initial screen, you enter the data for the document header. Additionally, you enter the posting key and the account for the first line item. The posting key provides the system with information regarding the account type (G/L account, customer, vendor, asset, material) and determines the layout of the entry screen for the line item. With this information, the entry screen for the first line item is set up. You enter the data for the first line item and access the next screen by entering the posting key and account for the next line item. In the next screen, you enter the information for the second line item and continue to the next line item(s) as needed in the same manner. Journals can also be processed in foreign currency in the general ledger.
  • 11.
    FICO USER MANUAL KS.JAYACHANDRAN– SAP FI 6 2.2.1 Park Document – FV50 Journals that have been parked need to be checked before they are posted (approved) in the system. The system allows you to change parked document in the event that it contains some errors. Steps: 1. Access transaction by: SAP Access Menu Accounting → Financial Accounting → General Ledger → Posting → Edit / Park GL document Transaction code FV50 1. Update the following required and optional fields Field Name Description Doc. Date Date of the document Currency Document currency Posting Date Date of entry Reference Document description Document Header Text Journal Description G/L acct GL Account Number D/C Code identifying whether line item is a debit or a credit Amount doc.curr. Amount to be posted for the line item 2. Click on the Enter button
  • 12.
    FICO USER MANUAL KS.JAYACHANDRAN– SAP FI 7 3. Click on Save as Completed button to record you changes. 4. A message will appear on the status bar: Document xxxxxxx was parked 5. Click on the Back button to go back to SAP Easy Access screen. 2.2.2. Post Parked Document – FBV0 Posting is similar to signing a document and is a supervisory function therefore you are also required to subject the parked journal to scrutiny before approving by posting. After parking journals are checked, and if they are correct they will be posted. Steps : 1. Access transaction by: SAP Access Menu Accounting → Financial Accounting → General Ledger → Documents → Parked Documents → Post/Deletet Transaction code FBV0 Edit Parked G/L Account Document
  • 13.
    FICO USER MANUAL KS.JAYACHANDRAN– SAP FI 8 2. Update the following required and optional fields: Field Name Description Company code Company code for which the parked document has been created Document Number The parked document number Fiscal year The fiscal year in which the parked document 3. Click on the Enter button: 4. Click on Simulate button to simulate the posting 5. Click on the Back button 6. Click on the Post button 7. A message will appear informing you that a document number was posted in company XXXX. Note : you can post other journals from this screen without exiting to the post document initial screen.
  • 14.
    FICO USER MANUAL KS.JAYACHANDRAN– SAP FI 9 8. Click on the button 9. Click on the arrow 10. Select the Parked document to be posted by double clicking on it. 11. Click on the Post button 12. A message will appear informing you that a document beginning with number XXX was posted in Company code XXXX 13. Click on the Enter button 14. Click on the Exit button or press Shift-F3 until the SAP Easy Access screen is displayed 2.2.3. Enter General Ledger Account Document – FB50 The SAP System allows you to carry out postings direct into the General Ledger accounts without going through the parking functionality please note that this depends on the roles assigned to you. Steps : 1. Access transaction by : SAP Access Menu Accounting → Financial Accounting → General Ledger → Posting → Enter GL Account Document Transaction code FB50
  • 15.
    FICO USER MANUAL KS.JAYACHANDRAN– SAP FI 10 2. Update the following required and optional fields: Field Name Description Doc. Date Date of the document Currency Document currency Reference Document description Document Header Text Journal Description G/L acct GL Account Number D/C Code identifying whether line item is a debit or a credit Amount doc.curr. Amount to be posted for the line item 3. You can simulate document before posting. To do so, click Simulate button. Simulation enables the user to review the journal as if it had been posted including any system generated postings. The system also validates the posting data. 4. Click Back button 5. To Post the document, click Save button. 6. The system will generate a document number please take note of that number. 7. Click on the Exit button or press Shift+F3 to return to the SAP Easy Access screen.
  • 16.
    FICO USER MANUAL KS.JAYACHANDRAN– SAP FI 11 2.2.4. Change General Ledger Accounting Document-FB02 Transaction fed in by other modules especially from logistics, lack certain information. You are required to add more information to the automatically created financial documents, e.g. Text field, via document change. SAP system allows you to change certain fields these are text, assignment, document header text and reference fields. However, amount and account fields cannot be changed. Steps : 1. Access transaction by : SAP Access Menu Accounting → Financial Accounting → General Ledger → Document → Change Transaction code FB02 2. Enter the document number xx0000xxx 3. Enter the Company Code XXXX 4. Enter the Fiscal Year XXXX or leave field blank 5. Click on the Enter button to proceed. 6. Double click on the first line item to make changes. 7. You can change the contents of the following fields: Field Name Description Assignment The Assignment number is an additional information reference Text Additional document description
  • 17.
    FICO USER MANUAL KS.JAYACHANDRAN– SAP FI 12 8. Click on the Document header button or press F5 9. You can change the contents of the following fields: Field Name Description Document header text Explanation or note that applies to the whole document Reference Explanation or note that applies to the document 10. Click on the Continue button or press Enter 11. Click on the Save button or press Ctrl+S 12. A message will appear on the status bar informing you of what has happened to the document you changed. 13. Click on the Exit button or press Shift+F3 to return to the SAP Easy Access Screen. 2.2.5. Display General Ledger Document – FB03 Journals can be displayed by authorized users at any time by using display GL Journal transaction. Users can search for the specific journal using a number of search criteria including document number, journal date, type, user and generally any other information on the original journal. This function aids users in executing general ledger document queries and users can display single journal or journal lists.
  • 18.
    FICO USER MANUAL KS.JAYACHANDRAN– SAP FI 13 Display a journal document. Steps: 1. Access transaction by: SAP Access Menu Accounting → Financial Accounting → General Ledger → Document → Display Transaction code FB03 2. Enter the Document Number xx000000xx 3. Enter the Company Code XXXX 4. Enter the Fiscal Year XXXX or leave field blank. 5. Click on the Enter button to proceed. 6. Click on the button to change you screen view. Note : the system will show you more fields not shown under entry view 7. Click on the Document header button 8. Analyze it and Click on the Enter Continue / Confirm button to leave the displayed document header sub screen. 9. Click on the Back button to the display document initial screen. Use document search function : when you don’t know the document number.
  • 19.
    FICO USER MANUAL KS.JAYACHANDRAN– SAP FI 14 10. Click on the button. 11. Enter the Company Code XXXX 12. Enter the Fiscal Year XXXXX 13. Enter in the dd.mm.yyyy to dd.mm.yyyy posting date field. 14. Click in the check box 15. Click on the Execute button to proceed and a list of the documents that you processed will be displayed 16. Double click on the Document number to view other details 17. To exit this transaction, click on the Exit button or press Shift-F3 until the SAP Easy Access screen is displayed. 2.2.6. General Ledger Document Reversal – FB08 The General ledger journal you posted earlier was posted to the wrong accounts. Reverse the journal and re park and post to the correct accounts. The reversal document posts ‘opposite’ entries to the ledger. The system offers various ways of reversing journals the “automatic reversal” process or the manual reversal process. The manual process involves (credit memo) parking, checking and posting with complete opposite posting keys to the original document.
  • 20.
    FICO USER MANUAL KS.JAYACHANDRAN– SAP FI 15 Steps : 1. Access transaction by: SAP Access Menu Accounting → Financial Accounting → General Ledger → Document → Reverse → Individual Reversal Transaction code FB08 2. Update the required and optional fields by capturing the necessary data: Field Name Description Company code Company code for which the parked document has been created Document Number The parked document number Fiscal year The fiscal year in which the parked document
  • 21.
    FICO USER MANUAL KS.JAYACHANDRAN– SAP FI 16 3. Click the Enter button to confirm the entries. 4. Click the button to have an overview of the document you about to reverse. 5. Click on the Back button 6. Click on the Save button or press Ctrl+S to post the reversal. 7. A message will appear on the status bar: Document XXXX was posted in Company Code XXXX 8. Click on the Exit button or press Shift + F3 to return to the SAP Easy Access screen. 2.2.7. Clear General Ledger Account – F-03 Some GL Accounts are managed as Open Item accounts. The system provided a clearing function that allows assigning and ‘clearing’ of debits to credits based on legitimate assignment reasons. Unmatched items therefore remain on the account as OPEN and represent the balance of the account to be reconciled. The clearing can be made at the time of the second posting, or alternatively later on after the debit and credit have been posted to the account. Note: For the general ledger account to be cleared OPEN item management must be active. Refresh memory g/l master data creation There are some postings in G/L (General Ledger) that have not been cleared. You want to clear these posting.
  • 22.
    FICO USER MANUAL KS.JAYACHANDRAN– SAP FI 17 Steps : 1. Access transaction by: SAP Access Menu Accounting → Financial Accounting → General Ledger → Account → F-03 Clear Transaction code F-03 2. Update the following required and optional fields: Note :- This function differs from posting with a clearing transaction or posting with a payment in the following ways: You do not need to enter a document header. You can only clear open items from one general ledger account. Field Name Description Account Code identifying the General Ledger account Company Code Code identifying a separate legal entity Currency Code identifying the type of currency used in a transaction or for all transaction pertaining to a specific account 3. Click on the button or press Shift+F4. The system will display open items that fulfill previously entered criteria:
  • 23.
    FICO USER MANUAL KS.JAYACHANDRAN– SAP FI 18 4. Choose and select the items you want to clear. Double click on each of the items. The system will highlight these items in blue. When the value in the field “Not assigned” is equal to “0”, you can clear open items. If the value is not zero, the difference in the amount must be treated as partial or residual items. 5. Check your document before posting. Select Document → Simulate. 6. Click on Save button or press Ctrl + S 7. A message will appear on the status bar that document XXXX was posted in company Code XXXX 8. Click on the Back button or press F3 9. Click on the Exit button or press Shift+F3 to return to the SAP Easy Access screen 2.2.8. Post with Clearing – F-04 The SAP system allows you to post a transaction and at the same time clear the account(s) that are involved. Steps : 1. Access transaction by: SAP Access Menu Accounting → Financial Accounting → General Ledger → Posting → Post with Clearing Transaction code F-04
  • 24.
    FICO USER MANUAL KS.JAYACHANDRAN– SAP FI 19 2. Update the following required fields : Field Name Description Doc.date Date of the document Currency Document currency Company Code Company Code Reference Document description Document Header Text Payment of …… 3. Click on the Radio button 4. Click on the Continue button or press Enter 5. Enter amount xxxxxx in the amount field. 6. Enter appropriate profit Centre. 7. Click on the button 8. Enter General Ledger account xxxx in the account field 9. Click on the button
  • 25.
    FICO USER MANUAL KS.JAYACHANDRAN– SAP FI 20 10. All open items are selected by default. To deselect the items first click the Select All button. 11. Then click Deactivate items button. All the open items are now deactivated (they are no longer highlighted in blue) 12. Now you need to choose and select the items you want to clear. Double click on the Gross field for each of those items to be cleared. 13. You will need to select one or more documents to balance this clearing Scroll through the remaining documents and select this document. Note : The system will highlight these items in blue. When the value of the field not assigned is equal ‘0’ and you can clear open items. See scree below 14. To check your document before posting. Select Document → Simulate. 15. Click the Save button. 16. The message bar displays: “Document xxxxxxx was posted in company code XXXX” 17. Click on the Exit button or press Shift+F3 to return to the SAP Easy Access screen. Post with Clearing Process open items
  • 26.
    FICO USER MANUAL KS.JAYACHANDRAN– SAP FI 21 2.3 GL Period End Closing The closing of a period is performed in three sets of steps: pre-closing, managerial closing and financial closing.  Pre-Close activities ensure that all necessary entries have been posted in the General Ledger (G/L), including entries from feeder systems/sub ledgers and accruals and recurring entries posted directly to the G/L. Pre-close activities occur in both the old and new months.  Managerial Close activities involve the re-assignment of costs throughout the entire organization, using the allocation and settlement functionality provided within Controling (CO).  Financial Close activities include final adjustments to valuations and balances prior to the final close and preparation of reports. Adjustments from the cost flows recorded in the managerial closing activities are updated to FI through the reconciliation ledger posting. 2.3.1. Create Recurring Entry Document – FBD1 The recurring entry document function automates postings of transactions that repeat every month (same amount, same account) such as payments for rent or interest, legal fees, and property taxes,. It is not a ‘real’ accounting document and therefore does not affect the account balance. The system uses the recurring entry original document that you create as a reference when you execute the recurring postings at period end. It will automatically generate the accounting documents and postings.
  • 27.
    FICO USER MANUAL KS.JAYACHANDRAN– SAP FI 22 Steps : 1. Access transaction by: SAP Access Menu Accounting → Financial Accounting → General Ledger → Posting → Reference Documents → Recurring Document → Create Transaction code FBD1 2. Update the following required fields : Field Name Description Company Code Code identifying a separate legal entity First run on Date from which the first recurring entry will be carried out Last run on Date to which the final recurring entry is to be carried out. Interval in Months Intervals, in months, between each run of the recurring entry Document Type The document type classified accounting documents. It is noted in the document header. Reference The reference document number can contain the document number of the customer/vendor. However it may contain a different value Document Header text The document header text contains explanations or notes which apply to the document as a whole, that is, not only for certain line items
  • 28.
    FICO USER MANUAL KS.JAYACHANDRAN– SAP FI 23 3. Call up fast entry screen by clicking on Fast Data Entry button. Field Name Description PK DR/CR indicator Account GL account Amount Amount of Line item PK DR/CR indicator Account GL account Amount Amount of Line item 4. Click the Post button. Note : A message will appear on the status bar informing you that document xx0000xx was stored in Company Code XXXX 5. Click on the Exit button or press Shift+F3 to return to the SAP Easy Access screen. 2.3.2. Change Recurring Document – FBD2 The recurring entry document function automates postings of transactions that repeat every month (same amount, same account) e.g. Accruals / Deferrals postings. It is not a ‘real’ accounting document and therefore does not affect the account balance.
  • 29.
    FICO USER MANUAL KS.JAYACHANDRAN– SAP FI 24 Steps : 1. Access transaction by: SAP Access Menu Accounting → Financial Accounting → General Ledger → Document → Reference Documents → Recurring Document → CFDB2 - Change Transaction code FBD2 2. Update the following required fields : Field Name Description Company Code Code identifying a separate legal entity Document number Recurring document number Fiscal Year Description of the Fiscal year 3. Click on the Continue button or press Enter
  • 30.
    FICO USER MANUAL KS.JAYACHANDRAN– SAP FI 25 4. Double click on the one of the document line items. 5. Click on the Document Header button. 6. Make the modification in the document header field 7. Click the Save button. A message will appear on the status bar informing you that document xxxx has been changed 8. Click on the Exit button or press Shift+F3 to return to the SAP Easy Access screen. 2.3.3. Create Postings from Recurring Documents – F.14 Recurring Journals are reference documents that have been created. They contain posting information that will be used by the recurring document posting program. Steps : 1. Access transaction by: SAP Access Menu Accounting → Financial Accounting → General Ledger → Periodic Processing → Recurring Entries → Execute Transaction code F.14
  • 31.
    FICO USER MANUAL KS.JAYACHANDRAN– SAP FI 26 2. Update the following required fields : Field Name Description Company Code Code identifying a separate legal entity Document number Enter a number of the document you want to change Fiscal Year Number of the Fiscal year Settlement Period Accounting dates for selection of due Recurring documents 3. Press Execute button the system will generate a message “Session SAPF120” has been created. 4. Click on the menu – System→ Services → Batch Input → Sessions 5. Update the following required and optional fields: Field Name Description Created by User ID who created Batch Session Note : Processing Options Process Foreground: the system will immediately generate the documents online. You will have to confirm every entry screen generated. Only recommended if you have a law volume of transactions and screens (see # of screens above) and you wish to verify the same of the transaction details directly. Display Errors only: the system will process the transactions without displaying them online. However if there are any errors or problems (e.g. GL account does not exist) the system will display this for corrective action. Background: the system processes the transactions in background mode. This is generally the normal action and a “low priority processing” option. The system will process the data during times of ‘low’ system activity/priority. The system processes
  • 32.
    FICO USER MANUAL KS.JAYACHANDRAN– SAP FI 27 the job. Users have to check the job status and job log to verify that processing has been completed and without errors. 6. If there are several batches under your user select the one you want to process by clicking on it once. 7. Click on the button. 8. Select the Radio button 9. Click on the button to commence processing. 10. Press Enter for each screen until you reach the final screen where the system generates the message Batch input has been completed. The system generates the transactions and screens based on the original recurring document. 11. Click on the button to return to the SAP Easy Access screen. 2.3.4. Delete Recurring Document – F.56 The recurring entry document function automates postings of transactions that repeat every month (same amount, same account) e.g. Accruals / Deferrals postings. It is not a ‘real’ accounting document and therefore does not affect the account balance. A recurring document is no longer required. You will now delete the recurring document. Note:- Before performing this, go to FBD2 (Change) give the recurring entry document number that you want to delete then click view select Recurring Entry Data and set the deletion indicator and save it. Realize Recurring Entry : Header Data
  • 33.
    FICO USER MANUAL KS.JAYACHANDRAN– SAP FI 28 Steps : 1. Access transaction by: SAP Access Menu Accounting → Financial Accounting → General Ledger → Document → Reference Documents → Recurring Document → Delete Transaction code F.56 2. Update the following required and optional fields: Field Name Description Company Code Code identifying a separate legal entity Document Number Recurring document number Fiscal year Description of Fiscal Year Test run This will display the documents but not delete them 3. Click on the Execute button Note : The screen lists the Recurring Documents with deletion indicators selected will be displayed. 4. Click the Back button 5. Deselect the Test Run indicator
  • 34.
    FICO USER MANUAL KS.JAYACHANDRAN– SAP FI 29 6. Click on the Execute button 7. A message will appear that this is a production run. Press enter to accept. 8. Click on the Execute button to check whether your deletion was successful. 9. Click on the Exit button or press Shift+F3 to return to the SAP Easy Access screen. 2.3.5 Enter Accrual/Deferral Document – FBS1 This function allows you to automatically post accruals and deferrals: Accruals – an accrual is any expenditure before the closing key date, which represents an expense for any period after this date. Deferrals – Deferred income is any receipts before the closing key date that represent revenue for any period after this date. Accrual/deferral documents are created and have a ‘reversal date’. The accruals can be reversed automatically. Steps : 1. Access transaction by: SAP Access Menu Accounting → Financial Accounting → General Ledger → Periodic Processing → Closing → Valuate → Enter Accrual / Deferral Doc Transaction code FBS1
  • 35.
    FICO USER MANUAL KS.JAYACHANDRAN– SAP FI 30 2. Update the following required and optional fields: Field Name Description Document date Date the transaction occurred Type Document type code Posting date Date that the business transaction occurred Period Number identifying a fiscal month Reversal reason Code of reversal reason Reversal date Date on which the reverse posting is to be made. Normally the 1st day of next month Posting key In this field, the posting key which the next document line item should be entered is specified Account Code identifying the General Ledger, Vendor, or General Ledger Account 3. Click on the Enter button to confirm your entries. 4. Update the following required and optional fields: Field Name Description Amount Amount of the line item Cost center Code identifying an organizational unit to which costs or asses are assigned Posting Key In this field, the posting key which the next document line item should be entered is specified Account Code identifying the General Ledger, Vendor, or General Ledger account Enter Accrual/Deferral Doc. Correct G/L account item
  • 36.
    FICO USER MANUAL KS.JAYACHANDRAN– SAP FI 31 5. Click on the Enter button or press Enter to confirm your entries. Field Name Description Values Amount Amount of the line item Cost center Code identifying an organizational unit to which costs or assets are assigned Example : Only required for posting to P/L accounts 6. Select form the menu Document → Simulate 7. Click on the Save button or press Ctrl + S 8. A message will appear on the status bar: document XXXXXX was posted in Company Code XXXX 9. Click on the Exit button or press Shift+F3 to return to the SAP Easy Access screen. 2.3.6 Reversing Posting for Accruals / Deferred Documents – F.81 This function allows you to reverse previously posted accrual / deferral. The system posts a reversal by entering an identical amount to the opposite side of the account, thereby offsetting the original amount. Enter Accrual/Deferral Doc. Display Overview
  • 37.
    FICO USER MANUAL KS.JAYACHANDRAN– SAP FI 32 Steps : 1. Access transaction by: SAP Access Menu Accounting → Financial Accounting → Periodic Processing → Closing → Valuate → EF.81 → Accrual / Deferral Document Transaction code F.81 2. Update the following required and optional fields: Field Name Description Company code Enter required company code Document number Number of the SAP Accrual document 3. Click in the check box. 4. Click Execute button. The system will display a list of documents that are to be reversed. 5. Click on the Back button or press F3 6. Deselect check box Reverse Posting of Selection Documents : Log Test run
  • 38.
    FICO USER MANUAL KS.JAYACHANDRAN– SAP FI 33 7. Click Execute button 8. A list will be displayed showing the original documents together with their reversal documents. Note : a message will appear on the status bar: “ All documents were reversed”. 9. Click on the Exit button or press Shift+F3 to return to the SAP Easy Access screen. 2.3.7. Foreign Currency Valuation – FAGL_FC_VAL You carry out the foreign currency valuation before you can create the financial statements. The valuation includes the following accounts and items: Foreign currency balance sheet accounts, that is, G/L accounts that you run in foreign currency (the balances of the G/L accounts in foreign currency are valuated) Open items (customers, vendors, G/L accounts) posted in foreign currency (the line items are valuated) Reverse Posting of Selection Documents : Log Test run
  • 39.
    FICO USER MANUAL KS.JAYACHANDRAN– SAP FI 34 Steps : 1. Access transaction by: SAP Access Menu Accounting → Financial Accounting → Accounts Payable → Periodic Processing → Closing → Valuate → Foreign Currency Valuation of open items New) Transaction code FAGL_FC_VAL 2. Update the following required and optional fields: Field Name Description Company code Company code Evaluation Key Date Key date for the foreign currency valuation Valuation method A unique key for determining a foreign currency valuation method. This key can be valid for cross- chart of accounts. Create Posting Check the checkbox to select Batch input session Name Code identifying the batch session that is Created Posting date Date that the business transaction occurred Posting period Fiscal month when the transaction posts to the General Ledger Reversal posting date Date when you want to post a reverse. Normally the 1st day of next month Reverse posting period Posting period for reversal
  • 40.
    FICO USER MANUAL KS.JAYACHANDRAN– SAP FI 35 3. Click on the tab 4. Select by clicking in the check box. 5. Select by clicking in the check box, if so required. You can select only particular General Ledger / General Ledger accounts to be valuated. If you leave the selection fields empty (like in our example), all the accounts will be selected for valuation. 6. Click on the Execute button to perform valuation. Note: The system does not create the postings immediately but creates a batch input session instead. 7. Click on the Back button or press F3 8. To post the valuation, you need to process the Batch Input Session that you’ve just created. You can open another SAP session. From the main menu choose System → Services→ Batch input → Sessions 9. Select the session you want to process. (Select the row that contains your Batch input session, , e.g FAGL_FC_VAL 10. Click on the button 11. Click in the Radio button 12. Click on the button to begin the posting of documents 13. Once the session is processed, you need to check the results. To analys your batch input session, follow the menu path: 14. From the main menu choose System → Services → Batch input → Sessions 15. Select the row that contains your Batch Input Session FAGL_FC_VAL 16. The analysis button the system will display the details regarding the session that was processed 17. Click on the Back button or press F3
  • 41.
    FICO USER MANUAL KS.JAYACHANDRAN– SAP FI 36 18. As a result of valuation some accounting documents were posted. To display them record one document number and use the transaction FB03 (Document Display): 19. Update the following required and optional fields: Field Name Description Document number Number of the document Company code Enter here company code number Fiscal year Fiscal year number. 20. Click on the Enter button or press Enter to confirm your entries 21. In order to display your document in local currency, click on the button 22. Click on the Enter button 23. Click on the Exit button or press Shift+F3 to return to the SAP Easy Access screen
  • 42.
    FICO USER MANUAL KS.JAYACHANDRAN– SAP FI 37 2.4. General Ledger Reporting A general ledger is kept in order to provide the information needed to create a balance sheet and a profit and loss statement. 2.4.1. Execute Financial Statements Steps : 1. Access transaction by: SAP Access Menu Accounting → Financial Accounting → General Ledger → Information systems → General Ledger Reports (New) → General → Actual Comparisons → Financial Statement Transaction code S_ALR_87012284 / F.01 2. Enter 8888 in the chart of accounts field. 3. Enter one or range XXXXXX to XXXXXX in the company code field. 4. Select the currency (blank for default) 5. Select the financial statement version field. 6. Enter XXXX in the Reporting year field. 7. Enter 1 to 12 in the Reporting period fields.
  • 43.
    FICO USER MANUAL KS.JAYACHANDRAN– SAP FI 38 8. Enter XXXXX in the Comparison year field 9. Enter 1 to 12 in the Comparison year fields. 10. Click Execute button 11. Click on the Exit button or press Shift+F3 to return to the SAP Easy Access screen. 2.4.2. Display G/L Balances – FAGLB03 The SAP system offers a functionality which enables you to have a quick view of the General Ledger accounts balances; you have been tasked analyse and report on the balances in one of the accounts under your department Steps : 1. Access transaction by: SAP Access Menu Accounting → Financial Accounting → General Ledger → Account → Display Balances (new) Transaction code FAGLB03 2. Enter xxxxxxxx to xxxxxxxx in account number fields 3. Enter XXXX in Company code field 4. Enter YYYY in Fiscal year field. 5. Click Execute button.
  • 44.
    FICO USER MANUAL KS.JAYACHANDRAN– SAP FI 39 6. Click on the button. 7. A pop up screen will be displayed within the main screen and will contain a listing of the General ledger accounts. To view balances in a single G/L account double Click the G/L account number within the below screen. 8. A listing of General Ledger line items will be displayed. 9. Click button to change layout of the displayed items. 10. Select Column content you want to remove or add. 11. Click on the hide selected fields button or Click on the show selected fields button 12. Click on the button 13. Your report will be adjusted to incorporate the changes you have made 14. Click on the Exit button or press Shift+F3 to return to the SAP Easy Access screen. 2.4.3. GL Account Line Item Display – FBL3N FBL 3N enables users to gather and display information on GL Account Line items. Users can view information on all items, or narrow the transaction to include open or cleared ones only. Further, screen option allows you to establish vairnats to use regularly and select specific criteria for this display. Steps : 1. Access transaction by: SAP Access Menu Accounting → Financial Accounting → General Ledger → Account → Display / Change Line items Transaction code FBL3N
  • 45.
    FICO USER MANUAL KS.JAYACHANDRAN– SAP FI 40 2. Enter xxxxxxxx to xxxxxxxx in account number fields 3. Enter XXXX in Company code field 4. Select the Line Item Selection Radio Button 5. Select the check box for Normal / Noted / Parked items 6. The Dynamic Selection Criteria allows you to narrow the parameters of the selection even further.
  • 46.
    FICO USER MANUAL KS.JAYACHANDRAN– SAP FI 41 7. Click Execute button. 8. Double click on individual document number to see additional details . 9. Click button to change layout of the displayed items. 10. Click on the Exit button or press Shift+F3 to return to the SAP Easy Access screen.
  • 47.
    FICO USER MANUAL KS.JAYACHANDRAN– SAP FI 42 3. ACCOUNTS PAYABLE Accounts Payable records all accounting transactions for dealings with suppliers. Much of its data is obtained from procurement (Materials Management) 3.1 Accounting Transactions in AP 3.1.1 Vendor Invoice Parking Using this standard accounting function, you can enter invoice in the system without posting the Accounts Payable sub ledger. The PARKED Invoice is subsequently checked, approved and posted to Accounts Payable. You can also park an incomplete document. Steps : 1. Access transaction by: SAP Access Menu Accounting → Financial Accounting → Accounts Payable → Document Entry → Document Parking → Park Document Transaction code F-63
  • 48.
    FICO USER MANUAL KS.JAYACHANDRAN– SAP FI 43 2. Update the required and optional fields : Field Name Description Document Date Date of Invoice Company code Company code is an organizational unit within financial accounting Posting Date Date for posting to Ledger Currency Invoice Currency Reference Vendor Invoice Number Doc Header Text The document header text contains explanations or notes which apply to the document as a whole, that is, not only for certain line items. Posting Key In this field, the posting key with which the next document line item should be entered is specified Vendor Vendor Code 3. Click on the Enter button to confirm the entries. 4. Enter value in the amount field for the first item. 5. Enter Text that describes the transaction in the text field. 6. Enter Posting Key 40 in the PstgKey field. 7. Enter General Ledger Account xxxxxxx being charged/debited in the account field. 8. Click the Enter button to confirm the entries. 9. Enter a * (star) in the Amount field for the Second item then press enter to adopt the amount from the first line item. 10. Select Tax Code in the Tax code field 11. Enter Cost Center in cost center field. 12. +(plus) in the text field then press Enter to adopt the text from the first line item.
  • 49.
    FICO USER MANUAL KS.JAYACHANDRAN– SAP FI 44 13. Click on the Document overview button 14. Click on the Save button or press Ctrl+S to park the Invoice. 15. The System will display a message at the status bar: Document Number : xxx as parked in Company Code XXXX. 16. Click on the Exit button or press Shift+F3 to return to the SAP Easy Access screen. 3.1.2. Change Parked document. * Parked Vendor’s invoices need to be verified before they are posted; therefore errors can be corrected before being posted. A document had been parked but did not contain adequate text and also that there were no reference details entered on the document. * You are required to correct the document before posting. Steps : 1. Access transaction by: SAP Access Menu Accounting → Financial Accounting → Accounts Payable → Document Entry → Document Parking → Park / Edit Invoice Transaction code FBV2 2. Update the required and optional fields :
  • 50.
    FICO USER MANUAL KS.JAYACHANDRAN– SAP FI 45 Field Name Description Company code Company code is an organizational unit within financial accounting Fiscal Year The fiscal year in which the parked document 3. Click on the Enter button 4. Enter Reference in the Reference field (in the Edit Parked Document Screen) 5. Change data in the text field 6. Click on the Save button to record you changes. 7. A message will appear on the status bar; a preliminary posted document XXXXXX has been changed 8. Click on the Exit button or press Shift+F3 until the SAP Easy Access screen is displayed. 3.1.3. Display parked Document A parked document is subject to a verification process before it can be posted, the SAP system allows for the display of such documents so that this process can be fulfilled. Steps : 1. Access transaction by: SAP Access Menu Accounting → Financial Accounting → Accounts Payable → Document Entry → Document Parking → Park / Edit Invoice Transaction code FBV3
  • 51.
    FICO USER MANUAL KS.JAYACHANDRAN– SAP FI 46 2. Update the required and optional fields : Field Name Description Company code Company code is an organizational unit within financial accounting Document Number The parked document number Fiscal Year The fiscal year in which the parked document 3. Click on the Enter button. 4. Click on the each tab button to display data. 5. To exit this transaction, click on the Exit button or press Shift+F3 until the SAP Easy Access screen is displayed 3.1.4 Posting / Delete Parked Document (FB60) / (F-43) A vendors’ Invoice was parked twice for the same service however it was picked before it was posted. In the SAP system a parked document can be deleted but once a document is posted it can not be deleted. It will only be regularized by entering a reversal document. You can choose to post the parked document in this environment or choose to delete it. Delete the parked document
  • 52.
    FICO USER MANUAL KS.JAYACHANDRAN– SAP FI 47 Steps : 1. Access transaction by: SAP Access Menu Accounting → Financial Accounting → Accounts Payable → Document → Parked Document → Post/Delete Transaction code FBV0 2. You can choose from the menu Document → Select parked document 3. Update the required and optional fields : Field Name Description Company code Company code is an organizational unit within financial accounting Document Number The parked document number Fiscal Year The fiscal year in which the parked document 4. Click on the Enter button. 5. Select from menu Document → Delete parked document 6. A message will appear on the status bar: Parked document xxxxxxx deleted.. 7. To exit this transaction, click on the Exit button or press Shift+F3 until the SAP Easy Access screen is displayed. 3.1.5 Vendor Invoice This transaction allows you to enter vendor invoices. It creates postings in Accounts Payable Sub Ledger and updates also the relevant GL Accounts (e.g. reconciliation account). You can use this transaction to post the invoices that do not pass through Purchasing Department, Instances of when a vendor invoice will be posted by AP will be payments for electricity bills, telephone charges etc.
  • 53.
    FICO USER MANUAL KS.JAYACHANDRAN– SAP FI 48 Steps : 1. Access transaction by: SAP Access Menu Accounting → Financial Accounting → Accounts Payable → Document Entry → Invoice Transaction code FB60 2. Click on the button and Enter company code 3. Update the required and optional fields : Field Name Description Vendor Code identifying the vendor account Invoice date Invoice date Reference Additional document description Amount Invoice Amount Text Description of line item G/L Account The account being charged or debited D/C Code identifying whether line item is a debit or credit Amount in doc Curr Amount to be posted for the line item Text Description of line item Cost Center Cost Center 4. Click on the tab. 5. Enter new Payment terms 6. Enter Payment method 7. Click on the button to replicate an overview of a document before posting. 8. Click on the Save button or press Ctrl+S to post the Invoice.
  • 54.
    FICO USER MANUAL KS.JAYACHANDRAN– SAP FI 49 9. The system will display the number of the document generated by this Invoice. Document Number : xxxxxxx was posted in Company Code 10. Click on the Exit button or press Shift+F3 to return to the SAP Easy Access Screen. 3.1.6 Park / Edit Credit Memo – F-66 Using the standard accounting function, you can enter a credit memo in the system without posting the Accounts Payable sub ledger. The Parked credit memo is subsequently checked, approved and posted to Accounts Payable. Credit memos have the effect have reducing our liabilities under the vendor’s accounts. Vendors normally issues credit notes when we return purchased goods or if we had overpaid them. Steps : 1. Access transaction by: SAP Access Menu Accounting → Financial Accounting → Accounts Payable → Document Entry → Document Parking → Credit Memo parking Transaction code F-66
  • 55.
    FICO USER MANUAL KS.JAYACHANDRAN– SAP FI 50 2. Update the required and optional fields : Field Name Description Document Date Date of Invoice Company code Company code is an organizational unit within financial accounting Posting Date Date for posting to Ledger Currency Invoice Currency Reference Vendor Invoice Number Doc Header Text The document header text contains explanations or notes which apply to the document as a whole, that is, not only for certain line items. Posting Key In this field, the posting key with which the next document line item should be entered is specified Vendor Vendor Code 3. Click the Enter button to confirm the entries. 4. Enter value in the amount field. 5. Enter Text that describes the transaction in the text field. 6. Enter Posting key 50 in the PstgKey field 7. Enter General Ledger Account xxxxx being charged / debited in the account field. 8. Click the Enter button to confirm the entries. 9. Enter * a start in the Amount field. 10. Enter Cost Center in cost center field.
  • 56.
    FICO USER MANUAL KS.JAYACHANDRAN– SAP FI 51 11. Click on the Document overview button. 12. Click on the Save button or press Ctrl+S to park the invoice 13. The system will display the number of the document generated by this Invoice. Document Number xxxxxxx was parked in the Company Code xxxx 14. Click on the Exit button or press Shift+F3 to return to the SAP Easy Access screen. 3.1.7 Post Credit Memo – FB65 The vendor invoiced for an excess amount and vendor issued a credit memo to correct this mistake. So here we need to post the received vendor credit memo. Steps : 1. Access transaction by: SAP Access Menu Accounting → Financial Accounting → Accounts Payable → Document Entry → Credit Memo Transaction code FB65 2. Click on the button and Enter Company code xxxx in the field.
  • 57.
    FICO USER MANUAL KS.JAYACHANDRAN– SAP FI 52 3. On the main screen Update the following required and optional fields : Field Name Description Vendor Code identifying the vendor account Document date Credit note date Posting Date Date that the business transaction occurred Reference Vendor Invoice Number Amount Amount to be posted to Calculate Tax Indicator whether tax is to be calculated Tax Code Represent the tax chargeable G/L Account The Account being charged or debited D/C Code identifying whether line item is a debit or credit Amount doc. Curr. Document currency. By default system proposes the Company code currency, but a user can change it. Text Description of line item Cost Center Cost Center 4. Click on the Enter button to confirm the entries. 5. Click on the Tab 6. Update the following required and optional fields: Field Name Description Inv. Ref (Invoice) Enter the Document Number which refers to a original invoice. Entering the original invoice will copy the invoice details from the original invoice. Imp Note: This will facilitate in clearing the vendor account at a later point in time. Inv. Ref (Fiscal Year) The fiscal year the invoice was created in
  • 58.
    FICO USER MANUAL KS.JAYACHANDRAN– SAP FI 53 7. Click on the Enter button to confirm the entries. 8. A message will appear on the status bar that Data was copied. 9. Click on the button to replicate an overview of a document before posting. 10. Click on the Save button or press Ctrl+S to post the invoice 11. The System will display the number of the document generated by this Invoice. Document Number : xxxxx was posted in Company Code 12. Click on the Exit button or press Shift+F3 to return to the SAP Easy Access screen. 3.1.8 : Post Outgoing Payment F-53 This functionality is used to process outgoing vendor payment but can only process single vendor accounts at any time. A request has been made for the processing of an urgent payment which cannot wait for the normal payment run process. Invoices have been parked checked and approved (posted) process the payment Steps : 1. Access transaction by: SAP Access Menu Accounting → Financial Accounting → Accounts Payable → Document Entry → Other → Outgoing Payment → Post Transaction code F-53
  • 59.
    FICO USER MANUAL KS.JAYACHANDRAN– SAP FI 54 2. Update the following required and optional fields : Field Name Description Document date Date of the invoice Company Code The company code is an organizational unit within financial accounting. Posting Date Date for posting to Ledger Reference Vendor Invoice Number Doc Header Text The document header text contains explanations or notes which apply to the document as a whole, that is, not only for certain line items. Clearing Text This text is copied into all clearing entries which are created within the current processing 3. Update the following fields under bank data box Field Name Description Amount Amount to be paid in total Value Date The value date is used in bank account and bank sub-accounts. This is a date at which the payments will be honored by the bank 4. Update the following required and optional fields under box. Field Name Description Account Vendor Account to be cleared Account Type The account type determines whether the general ledger or one of the sub ledger issued
  • 60.
    FICO USER MANUAL KS.JAYACHANDRAN– SAP FI 55 5. Click on the button 6. All open items are selected by default. To deselect the items first click the Select All button. 7. Then click on Deactivate Items button. All the open items are now deactivated (they are no longer highlighted in blue). 8. Now you need to choose and select the items youwant to clear. Double click on the Gross Group field for each of those items to be cleared. 9. You will need to select one or more documents to balance this clearing. Scroll through the remaining documents and select this document. Note : The system will highlight these items in blue. When the value of the field not assigned is equal 0 and you can clear open items. See Screen below 10. You can check your document before postings. Select Document → Simulate. 11. To post your entries, click the Save button. 12. The message bar displays : “Document XXXX was posted in company code “ 13. Click on the Exit button or press Shift+F3 to return to the SAP Easy Access Screen.
  • 61.
    FICO USER MANUAL KS.JAYACHANDRAN– SAP FI 56 3.1.9 Display Accounting Document – FB03 Documents entered in the system can be viewed as and when they are required. You are required to display a Vendors’ document. This function will you allow to quickly address queries pertaining to individual invoices / documents. Steps : 1. Access transaction by: SAP Access Menu Accounting → Financial Accounting → Accounts Payable → Document → Display Transaction code FB03 2. If you know the required document number, enter it in the field “document number” . If you don’t , click Button to search for documents. 3. The system will display a screen where you can enter your search criteria: 4. Update the following required and optional fields Field Name Description Company Code The company code is an organizational unit within financial accounting Fiscal Year Fiscal year number Document Type Code identifying the method that the system uses to process the transaction Posting date Date that the business transaction occurred
  • 62.
    FICO USER MANUAL KS.JAYACHANDRAN– SAP FI 57 5. Click Execute button to start searching 6. The system will display a list of documents that fulfill your criteria 7. To display your document, simply double click on it. The system will display a take you to document overview: Or from the initial screen display Vendor Document 8. Enter the Document number you have on hand. 9. Enter the Company code XXXX 10. Enter the Fiscal Year XXXXXX or leave field blank,. 11. Click on the Enter button to proceed 12. Click on the button to change you screen view Note : the system will show you more fields not shown under entry and you can be able to and a change your document from this document display screen. 13. Click on the menu Document → Display → Change 14. Click on the Document Header button if you want to change header details 15. Identify fields that can be changed and change header text 16. Analys it and Click on the Enter continue / Confirm button to leave the displayed document header sub screen 17. To store your changes in the document, click Save button 18. To exit this transaction, click on the Exit button or press Shift-F3 until the SAP Easy Access screen is displayed.
  • 63.
    FICO USER MANUAL KS.JAYACHANDRAN– SAP FI 58 3.1.10 Clear Vendor Account F-44 The function allows you to clear open items on Vendor account. You have to identify open items that can be matched in terms of debits and credits. Steps : 1. Access transaction by: SAP Access Menu Accounting → Financial Accounting → Accounts Payable → Account → Clear Transaction code F-44 2. Update the following required and optional fields Field Name Description Account Code identifying the Vendor account Clearing date Date when you want the transaction to be cleared. It is used later in a header of a clearing document Company code Number of the company code that the vendor belogs to Currency Currency code Note : you can clear also the transactions posted in different currencies. The system will automatically calculate and post exchange rate differences.
  • 64.
    FICO USER MANUAL KS.JAYACHANDRAN– SAP FI 59 3. Click the Enter button. The system will display open items that fulfill previously entered criteria : 4. All open items are selected by default . To deselect the items first click the Select all button. 5. Then click Deactivate items button. All the open items are now deactivated (they are no longer highlighted in blue). 6. Now you need to choose and select the items you want to clear. Double click on the Gross field for each of those items to be cleared. 7. You will need to select one more document to balance this clearing. Scroll through the remaining documents and select this document. Note : The system will highlight these items in blue. When the value of the field not assigned is equal 0 and you can clear open items. See screen below 8. You can check your document before postings. Select Document → Simulate 9. To post your entries, click the Save button. No “real” posting took place, but the system stored a clearing document. 10. The message bar displays: “Document xxxxxx was posted in company code xxxx” 11. Click on the Exit button or press Shift+F3 to return to the SAP Easy Access screen.
  • 65.
    FICO USER MANUAL KS.JAYACHANDRAN– SAP FI 60 3.1.11. Reset Cleared Items – FBRA A Posting with clearing had been made to a wrong Vendor account due to similarities in name therefore the outgoing payment document has to be reversed to enable the correct transaction to take place. Note : An Accounting Document that contains line items have cleared been cannot be reversed it requires that the cleared items be reset first. Display the clearing document and its line items, and then reset the cleared document. Steps : 1. Access transaction by: SAP Access Menu Accounting → Financial Accounting → Accounts Payable → Document → Reset Cleared Items Transaction code FBRA 2. Update the following required and optional fields Field Name Description Clearing document Number of the document to be reset Company code Code identifying a separate legal entity Fiscal Year Fiscal year number
  • 66.
    FICO USER MANUAL KS.JAYACHANDRAN– SAP FI 61 3. Click the Accounts button. The system will display all the accounts involved in clearing operation: 4. Click the Continue button to continue 5. Click the Items button to display documents cleared by the clearing operation 6. Click on the Save button or press Ctrl+S to post the resetting 7. A screen reversal of clearing document will be displayed with 2(two) options to select from. - Only Resetting will remove the clearing from the document that was cleared and changes the documents’ status from cleared item to open item - The clearing document also changes status to an open item and this has effect on the overall Vendor Account - Resetting and reversing will reset the cleared line items and also reverses the clearing document. 8. Click on Only Resetting button Note : Only resetting will remove the clearing document from the cleared document and restore it to its pre-clearing state i.e. open item stage. The clearing document will also be found under the open items of the Vendor Account and must be removed from this environment by the reversal process. A message will appear on the status bar clearing document xxxxxxxxx reset. 9. Click on the Exit button or press Shift+F3
  • 67.
    FICO USER MANUAL KS.JAYACHANDRAN– SAP FI 62 Note : if you choose the later button the system will reset and reverse the clearing document in one transaction. For you to carry out a transaction where you are going to select on resetting and reversing you have to start with a new document. Otherwise the above resetting transaction is complete. If you choose to Click on Resetting and Reversing button you will proceed as follows 10. Enter 01 in the Reversal Reason field. 11. A message clearing reset will appear 12. Click the continue button 13. A message will appear that document XXXXX was posted in Company code XXXX 14. Click on the Exit button or press Shift+F3 to return to the SAP Easy Access screen 3.1.12. Document Reversal (Individual Reversal) document – FB08 Sometimes posted document contains incorrect information. This function allows you to reverse an incorrect document. A document to be reversed cannot include already cleared items. If you want to reverse document that was already cleared, you need to reset all cleared items before posting a reversal. This is also a function that allows mass document reversal (Transaction code), unlike resetting clearing documents which only allow resetting one clearing document at a time. Steps : 1. Access transaction by: SAP Access Menu Accounting → Financial Accounting → Accounts Receivable → Document → Reverse → Individual Reversal Transaction code FB08
  • 68.
    FICO USER MANUAL KS.JAYACHANDRAN– SAP FI 63 2. Update the following required and optional fields Field Name Description Document no The document that is to be reversed Reversal Reason The reason the document will be reversed 3. Click the Display document before reversal button or press F5 4. Click the Back button or F3 5. Click on the Save button or press Ctrl + S 6. The system will post a reversal document and a message will appear on the status bar “Document xxxxxx was posted in Company Code xxxx” 7. Click on the Exit button or press Shift+F3 to return to the SAP Easy Access screen
  • 69.
    FICO USER MANUAL KS.JAYACHANDRAN– SAP FI 64 3.2 Advance Payments in Accounts Payable 3.2.1 Down Payment Request F-47 Down payment request function does not create posting but only stores information in the systems that can be used later to post a “normal” down payment manually or using the automatic payment program. Steps : 1. Access transaction by: SAP Access Menu Accounting → Financial Accounting → Accounts Receivable → Document → Entry → Down Payment → Request Transaction code F-47 2. Update the following required and optional fields Field Name Description Document date Date the transaction occurred Type Document type Company code Code identifying a separate legal entity Posting date Date that the business transaction occurred Currency / date Code identifying the currency used in the transaction Reference Doc. Description Account Code identifying the vendor account Trg. Sp. G/L ind. Special GL transaction code. You determine the special G/L indicator for a down payment request in this field with which the corresponding down payment is to be posted later
  • 70.
    FICO USER MANUAL KS.JAYACHANDRAN– SAP FI 65 3. Click the New item button to enter Down Payment line item. 4. Update the following required and optional fields Field Name Description Amount Amount of the line item Calculate Tax The system calculates the taxes automatically Due on Date when the down payment is due 5. Click the Enter button to confirm your entries 6. Click the Overview button to display a document before posting 7. Click the Save button to post the down payment request 8. A message will appear on the status bar informing you that “Document XXXX was posted in company code XXXXX” 9. Click on the Exit button or press Shift+F3 to return to the SAP Easy Access screen 3.2.2. Post Vendor down payment F-48 A down payment is an advance payment for a service or goods and down payment is a function that allows you to post the document to an alternative GL account instead of “normal” vendor’s reconciliation account. Steps : 1. Access transaction by: SAP Access Menu Accounting → Financial Accounting → Accounts Payable → Document Entry → Down Payment → F-48 down payment Transaction code F-48
  • 71.
    FICO USER MANUAL KS.JAYACHANDRAN– SAP FI 66 2. Update the required and optional fields Field Name Description Document date Date the transaction occurred Type Document type Company code Code identifying a separate legal entity Posting date Date that the business transaction occurred Currency / date Code identifying the currency used in the transaction Reference Doc. Description Account Code identifying the vendor account Special G/L ind Enter the required special GL transaction code Account Bank account number Amount Amount of the line item 3. You can use an existing down payment request to post the down payment. Click the Request button. 4. Select the Down payment request number, by selecting the row containing the document number like XXXXX by clicking anywhere on that row. 5. Click on the button. The system will display a document overview 6. Click on the Save button to post the down payment 7. The message bar displays “Document XXXX was posted in company code XXXX” Post Vendor Down Payment Display Overview
  • 72.
    FICO USER MANUAL KS.JAYACHANDRAN– SAP FI 67 Note : Before proceeding to clear down payment you are required to post vendor invoice (FB60) so that invoice and down payment can clear. In case if the invoice amount is more than down payment then rest of the balance will be paid through normal payment and the clearing will automatically take place for the balance 8. Click on the Exit button or press Shift+F3 to return to the SAP Easy Access screen. 3.2.3 Clear Vendor down payment F-54 This function allows you to post a clearing document manually. You can use it e.g. to clear a down payment (posted with special GL transaction) with another vendor document (e.g. vendor invoice) Steps : 1. Access transaction by: SAP Access Menu Accounting → Financial Accounting → Accounts Payable → Document Entry → Down Payment → Down Payment Clearing Transaction code F-54
  • 73.
    FICO USER MANUAL KS.JAYACHANDRAN– SAP FI 68 2. Update the following required and optional fields Field Name Description Document date Date the transaction occurred Type Document type Company code Code identifying a separate legal entity Posting date Date that the business transaction occurred Currency / date Code identifying the currency used in the transaction Reference Doc. Description Account Code identifying the vendor account Invoice Enter here an invoice number you want to clear a down payment with Line item Enter here the line item number you want to clear a down payment with Fiscal year Fiscal year number Note : If you don’t know the vendor invoice number, you can open another SAP session (Press Create New Session button) and display the vendor open items – transaction code FBL1N 3. Click on the button to process down payments. 4. Select the Down payment request number, by selecting the row containing the document number like XXXXX and by clicking anywhere on that row. 5. Click the Enter button to confirm your entries. The system will enter the amount in the field Transfer posting. (Side scroll to the right to see this entry) 6. Click the Save button to post a clearing document. Clear Vendor Down Payment Display Overview
  • 74.
    FICO USER MANUAL KS.JAYACHANDRAN– SAP FI 69 7. Line item 002 is highlighted in blue. Some additional data must be entered. Double click on this line. 8. Enter Text describing the down payment. 9. Click the Enter button to confirm your entries. 10. Click the Save button. (Please confirm the information message that appears on the status bar with enter) 11. The message bar displays “Document XXXX was posted in company code XXXX” This transaction clears only down payment posting and stores information in the system which amount of the invoice was cleared. 12. To display / Change Vendor Open Items execute Transaction FBL1N. As you can see, the newly posted clearing document is still outstanding and you need to clear it with the invoice using the account clearing process (Transaction F-44). 13. Click on the Exit button or press Shift+F3 to return to the SAP Easy Access screen.
  • 75.
    FICO USER MANUAL KS.JAYACHANDRAN– SAP FI 70 3.3 Automatic outgoing payment process & Check Voiding 3.3.1. Automatic Payment Run Process – F110 This SAP functionality allows for the clearing of Vendors’ Account line items that are due for payment. The process involves posting to relevant sub ledgers and the general ledger but this happens through an automated process which involves selection of Vendors with open items that are due, reviewing and editing payment proposal and execution of the actual payment run. Steps : 1. Access transaction by: SAP Access Menu Accounting → Financial Accounting → Accounts Payable → Periodic processing → Payments Transaction code F110 2. Update the following required and optional fields Field Name Description Run date The run date is used for identifying the parameters Identification Freely definable the identification to distinguish between several runs with the same run date 3. Click on the tab. Automatic Payment Transactions : Parameters
  • 76.
    FICO USER MANUAL KS.JAYACHANDRAN– SAP FI 71 4. Update the following required and optional fields: Field Name Description Posting date Date which is used when entering the document in Financial Accounting Docs entered upto This specified the date upto which open items are taken into account during processing Company Code Company Code Number Payment Methods List of payment methods that should be used in the payment run Next P/Date The date when the next payment run is scheduled. Vendor Vendor account to paid 5. Click on the tab. 6. Click in the check box. 7. Click in the Check box 8. Click in the check box 9. Click on the data medium tab. 10. Enter FIL_PAY1 in the variant field against program 11. Click on the Save button. 12. A message will appear on the status bar 13. Click on the Back button. Automatic Payment Transactions : Additional Log Automatic Payment Transactions: Printout and DME Automatic Payment Transactions : Status
  • 77.
    FICO USER MANUAL KS.JAYACHANDRAN– SAP FI 72 14. A message will appear in the status box: Parameters have been entered 15. Click on the button 16. Click in the check box to schedule your proposal. 17. Click on the Schedule button. 18. A message will appear in the status box: Proposal is ready to be started. 19. Click on the Status button repeatedly the prior message will be updated and now reads Payment proposal has been created. 20. Click on the Display button to view the proposal list 21. The green traffic light on the “Indicator: Payment / Exception” field indicates that there are no errors. 22. Double click on the record for a breakdown of the component documents 23. Click on the Back button twice to return to the status tab 24. To display the proposal log Go to Edit→ Proposal→Display log, a detailed log will be displayed. Job Log Entries for F110-xxxx /xxxx 25. Click the Back button to return to the Status tab 26. Click on the button to schedule the payment run. A pop up screen will be displayed. 27. Click on the check box to schedule your payment run. Then select the Schedule button. 28. You will be returned to the status tab. Click on the button repeatedly until the message “Payment run has been carried out” and “Posting orders: XXX generated, XXX completed” Display Payment Proposal : Payments
  • 78.
    FICO USER MANUAL KS.JAYACHANDRAN– SAP FI 73 29. Click on the Payments button to view log. Then double click on your job name within a pop screen that comes up i.e. “F110 xxxxxxxxPayment run” 30. This screen indicates that the payment program ran successfully and Financial Accounting documents created in Company code XXXX Job Log Entries for F110-XXXXXX/ XXXX 31. The screen will list the accounts cleared, the clearing documents and the related amounts. 32. Click the Back button to return to the Status tab. 33. Click the Schedule Print button. Select the ‘Start Immediately’ option on the Schedule print popup box. Replace the (Question mark)? With F1 or any character you prefer. 34. Click the Enter icon. The payment media will now be created. SAP will return you to the status screen. 35. A message will appear on the status bar Print Job xxxxxx has been scheduled To view the job Log proceed as follows : 36. Select from the menu System → Own Jobs: 37. The job will appear with the status finished in green imples that the job has been correctly executed 38. Click in the Check box against your job log then click button for details of the job execution. 39. The system will display the below screen showing you the details of your job. 40. Click on the Back button. Job Overview
  • 79.
    FICO USER MANUAL KS.JAYACHANDRAN– SAP FI 74 41. Click on the button. 42. Click in the box against your spool for checks 43. Click on the Display Contents button. 44. Individual Checks together with the remittances will be displayed it’s always advisable to have a print preview before executing the printing function. 45. Click the Back button. 46. Click on the Print immediately button to start your actual printing. Note : Before you command the printing make sure that your checks are properly aligned and the correct leaf of the pre-numbered check is at the beginning 47. Click on the Exit button or press Shift+F3 to return to the SAP Easy Access screen. Job Overview Output Controller : List of Spool Requests Print Preview of LP01 Page 0001 of 0002 Output Controller : List of Spool Requests
  • 80.
    FICO USER MANUAL KS.JAYACHANDRAN– SAP FI 75 3.3.2 Voiding of Unused checks – FCH3 Checks can be cancelled before they are printed due to various reasons: Soiled, stolen, destroyed etc. These reasons warrant the cancellation in order to maintain the correct sequence of pre-numbered checks in the check lot. Steps : 1. Access transaction by: Field Name T-code Transaction code FCH3 2. Enter Company code in the paying company code field. 3. Enter bank key in the House Bank field. 4. Enter Account ID field 5. Enter XXXX the Check(s) to be cancelled in the Check number field from – to fields. 6. Enter the void reason code. 7. Click on the Enter button to confirm your entries. 8. Click on the button. 9. A message will appear on the status bar: checks XXXx to XXXX have been voided. 10. Click on the Exit button or press Shift+F3 to return to the SAP Easy Access screen.
  • 81.
    FICO USER MANUAL KS.JAYACHANDRAN– SAP FI 76 3.3.3. Void Issued Checks – FCH9 This function allows you to cancel a Check that was issued to a vendor and was not presented to the bank until it went stale. Steps : 1. Access transaction by: SAP Access Menu Accounting → Financial Accounting → Accounts Payable → Environment → Payments → Check information → Void → Issued Checks Transaction code FCH9 2. Enter Company Code in the Paying company code field. 3. Enter bank key in the House Bank field 4. Enter Account ID field 5. Enter the Check number field 6. Enter the Void reason code 7. Click on the Enter button to confirm your entries 8. Click on the button to display the check you are about to cancel. 9. The details of the check you about to cancel will be displayed. Check and please satisfy yourself that it is the correct check to be voided / cancelled. 10. Click on the button.
  • 82.
    FICO USER MANUAL KS.JAYACHANDRAN– SAP FI 77 11. The Check line items will be displayed 12. Click on the Back button twice. 1. Click on the button 2. A message will appear on the status bar : Checks 000xxxxx voided – Payment document not reversed. 3. Click on the Exit button or press Shift+F3 to return to the SAP Easy Access screen. 3.3.4 Cancel Check Payment – FCBH8 Checks can be cancelled before they are printed due to various reasons: Soiled, stolen destroyed and these reasons warrant the cancellation in order to maintain the correct sequence of pre-numbered checks in the check lot. This functionality allows for the cancellation of the Check and at the same time reversing the clearing document. Steps : 1. Access transaction by: SAP Access Menu Accounting → Financial Accounting → Accounts Payable → Environment → Check information → Void → Cancel payment Transaction code FCH8 Check line items Void Issued Checks
  • 83.
    FICO USER MANUAL KS.JAYACHANDRAN– SAP FI 78 1. Enter Company code in the Paying company code field 2. Enter Bank key in the House Bank field 3. Enter the Account ID field. 4. Enter the Check to be cancelled in the Check number field. 5. Enter the void reason code Field. 6. Enter 01 in the Reversal Reason Field. 7. Click on the Enter to confirm your entries. 8. Click on the button. 9. A message will appear on the status bar: Payment for check XXXXX was cancelled, reverse document XXXX 10. Click on the Exit button or press Shift+F3 to return to the SAP Easy Access screen. 3.3.5 Display the check Register – FCHN You can use this transaction to view a list of checks. It lists those that were cashed, voided (cancelled), yet to be presented to the bank for payment and those that have just been printed. Steps : 1. Access transaction by: SAP Access Menu Accounting → Financial Accounting → Accounts Payable → Environment → Check information → Display → Check Register Transaction code FCHN
  • 84.
    FICO USER MANUAL KS.JAYACHANDRAN– SAP FI 79 2. Enter the Paying company code field 3. Enter Bank key in the House Bank Field 4. Enter the Account ID (Account Identification) 5. Select Radio button if you want to view a check listing only or Select Radio button if you want to view a check listing which includes the list of documents that make up the payment 6. Click on the Execute button 7. Click on the Exit button or press Shift+F3 to return to the SAP Easy Access screen.
  • 85.
    FICO USER MANUAL KS.JAYACHANDRAN– SAP FI 80 3.4 Correspondences & Foreign Currency Revaluation 3.4.1 Vendor correspondence request – FB12 Correspondence are business documents such as Vendor account statements, Payment notice with line items, Payment notice to accounting department, Payment notice to legal department These documents can be requested and be printed any time but are usually printed at the end of the month. Steps : 1. Access transaction by: SAP Access Menu Accounting → Financial Accounting → Accounts Payable → Account → Correspondence → Request Transaction code FB12 2. Enter Company code field 3. Click the Enter button 4. Double Click on SAP06 Account Statement 5. Update the following required and optional fields. Field Name Description Vendor Account for Vendor Postings from Start Date to your Selection Postings to End date to your selection
  • 86.
    FICO USER MANUAL KS.JAYACHANDRAN– SAP FI 81 6. Click on the button. 7. A message will appear on the status bar: Account Statement was requested 8. Click on the Exit button or press Shift+F3 to return to the SAP Easy Access screen. 3.4.2 Maintain Correspondence F-61 Correspondence are business documents such as Vendor account statements, Payment notice with line items, Payment notice to accounting department, Payment notice to legal department These documents can be requested and be printed any time, print the correspondences. Steps : 1. Access transaction by: SAP Access Menu Accounting → Financial Accounting → Accounts Payable → Account → Periodic Processing → print Correspondence → s per Request Transaction code F.61 2. Enter ‘FILC’ in Correspondence Field. 3. Enter the company code field. 4. Click on the Execute button to continue Trigger for Correspondence
  • 87.
    FICO USER MANUAL KS.JAYACHANDRAN– SAP FI 82 5. A message will appear within a pop up screen : A correspondence was issued would you like to issue a request ? 6. Click on the button to proceed 7. Enter printer name LP01 in the output device field. 8. Click on the button 9. A log will be issued for triggered correspondences 10. Select from the menu System → Services → Output Controller 11. Click on display contents – Press F6 12. Press F3 to exit the display view screen 13. Click the on Print directly button Press Ctrl + Shift + F8 to send to the printer 14. Click on the Exit button or press Shift+F3 to return to the SAP Easy Access screen. 3.4.3 Foreign currency Revaluation procedure – FAGL_FC_VAL You carry out the foreign currency valuation before you create the financial statements. The valuation includes the following accounts and items. Foreign currency balance sheet accounts, that is, G/L accounts that you run in foreign currency (the balances of the G/L accounts in foreign currency are valuated) Open Items (customers, vendors, G/L accounts) posted in foreign currency (the line items are valuated) Yes Continue Trigger for Correspondence Output Controller : Spool Request Selection screen Print Preview of LP01 Page 0001 of 0002
  • 88.
    FICO USER MANUAL KS.JAYACHANDRAN– SAP FI 83 Steps : 1. Access transaction by: SAP Access Menu Accounting → Financial Accounting → Accounts Payable → Periodic processing → Closing → Valuate → Foreign Currency Valuation of open items (New) Transaction code FAGL_FC_VAL 2. Update the following required and optional fields Field Name Description Company code Company code Evaluation Key Date Key date for the foreign currency valuation Valuation method A unique key for determining a foreign currency valuation method. This key can be valid for cross-chart of accounts Batch input session Code identifying the batch session that is Created Document date Date the transaction occurred Posting date Date that the business transaction occurred Posting period Fiscal month when the transaction posts to the General Ledger Reversal Posting date Date when you want to post a reverse . Normally the 1st day of next month Reverse posting period Posting period for reversal 3. Click the Open items tab 4. Select by clicking in the check box 5. Select by clicking in the check box, if required so
  • 89.
    FICO USER MANUAL KS.JAYACHANDRAN– SAP FI 84 You can select only a particular General Ledger / General Ledger accounts to be evaluated. If you leave the selection fields empty (like in our example), all the accounts will be selected for valuation. 6. Click on the Execute button to perform valuation. Note : The system does not create the postings immediately but creates a batch input session instead 7. Click on the Back button or press F3 8. To post the valuation, you need to process the Batch Input session that you’ve just created. You can open another SAP session. From the main menu choose System → Services → Batch input → Sessions 9. Select the session you want to process. (Select the row that contains your Batch input session , e.g. FAGL_FC_VAL 10. Click on the button 11. Click on the Radio button 12. Select the button to begin the posting of documents 13. Once the session is processed, you need to check the results. To analys your batch input session, follow the menu path: 14. From the main menu choose Sytem→Services→ Batch input → Sessions 15. Select the row that contains your Batch Input Session FAGL_FC_VAL 16. Click the Analysis button. The system will display the details regarding the session that was processed. 17. Click on the Exit button or press Shift+F3 to return to the SAP Easy Access screen.
  • 90.
    FICO USER MANUAL KS.JAYACHANDRAN– SAP FI 85 3.5 Vendor Reports 3.5.1 Display Vendor Balances – FK10N This function allows you to display vendor balances (both per month and cumulative). You can also display balances for more than one vendor account cross-company code in a list. Steps : 1. Access transaction by: SAP Access Menu Accounting → Financial Accounting → Accounts Payable → Account → Display Balances Transaction code FK10N 2. Update the following required and optional fields Field Name Description Vendor Code identifying the vendor account Company code Code identifying a separate legal entity Fiscal year Fiscal year number 3. Click the Execute button to display a report. 4. You can display the line items or even particular document directly from this report. For instances, to display all the documents for period 4 mark this row on the report screen (it will be highlighted in yellow) and click the Call up line item report button. You can now see all the documents posted in Period 4.
  • 91.
    FICO USER MANUAL KS.JAYACHANDRAN– SAP FI 86 5. To display the details of a particular line item simply double-click on any listed document the system will display this line item. 6. Click the Back button to return Or 7. If you there is need, you can change some of the fields. Click the Display → Change button. The fields that can be changed are highlighted in red or they will be white. For instance you can add the description of the field “Text” 8. Update the following required and optional fields of the invoice. Field Name Description Text Additional document description 9. Click the Save button to update this document 10. You can also export the account balance to a local file. Select from the menu path: List → Export → Local file…. 11. Select the radio button and click the Continue button to continue 12. Click on the Match Code button to select the location to save thefile Select the Desktop as the location and update the following required field Field Name Description Values Directory Enter the path where you would like to save the file C:Docuemnts and Settings...... File name Enter here the name of your file Example : Vendor Balance.xls Vendor Line Item Display
  • 92.
    FICO USER MANUAL KS.JAYACHANDRAN– SAP FI 87 13. Click on the button to begin export… 14. The message bar displays “xxx Bytes transferred”. 15. Click on the Exit button or press shift +F3 to return to the SAP Easy Access screen. 16. Go to the desktop environment of your look for the file Vendors Balances you exported from SAP. 17. Double click on it; you can format this file the way you like. 3.5.2 Vendor Line Item Display – FBL1N This function allows you to display Open / Closed vendor items. Selection criteria include vendor, company and many of the data sets on the vendor master record. Drill-down capability into actual vendor document is available, as are various list formatting options. You can also display balances for more than one vendor account cross-company code in a list. Steps : 1. Access transaction by: SAP Access Menu Accounting → Financial Accounting → Accounts Payable → Account → Display / Change Line Items Transaction code FBL1N 2. Enter the Vendor Code and Company code. 3. Enter the Company Code
  • 93.
    FICO USER MANUAL KS.JAYACHANDRAN– SAP FI 88 4. Select the Line Item Selection 5. Select the Account Type Check box 6. Click the Execute button to display a report. 7. To display the details of a particular line item simply double-click on any listed document the system will display this line item. 8. Click the Back button to return Or 9. If you there is need, you can change some of the fields. Click the Display → Change button. The fields that can be changed are highlighted in red or
  • 94.
    FICO USER MANUAL KS.JAYACHANDRAN– SAP FI 89 they will be white. For instance you can add the description of the field “Text” 10. Update the following required and optional fields of the invoice. Field Name Description Text Additional document description 11. Click the Save button to update this document 12. You can also export the account balance to a local file. Select from the menu path: List → Export → Local file…. 13. Select the radio button and click the Continue button to continue 14. Click on the Match Code button to select the location to save thefile Select the Desktop as the location and update the following required field Field Name Description Values Directory Enter the path where you would like to save the file C:Docuemnts and Settings...... File name Enter here the name of your file Example : Vendor Balance.xls 15. Click on the button to begin export… 16. The message bar displays “xxx Bytes transferred”. 17. Click on the Exit button or press shift +F3 to return to the SAP Easy Access screen. 18. Go to the desktop environment of your look for the file Vendors Balances you exported from SAP. Double click on it; you can format this file the way you like.
  • 95.
    FICO USER MANUAL KS.JAYACHANDRAN– SAP FI 90 3.5.3. Vendor Payment History with 0I (Open items) Sorted list This evaluation is used for determining, as accurately as possible, the current payment status for vendors requiring special attention. As criteria for this evaluation, you can use current data from the master database such as Balances on an open item basis or special G/L balances. In addition to the payment status analysis, the program carries out an analysis of the vendor open items for the report. Steps : 1. Access transaction by: SAP Access Menu Accounting → Financial Accounting → Accounts Payable → Reporting → Information System → Reports for Accounts Payable Accounting → Vendor Items → Vendor Payment History with OI (Open items) sorted List Transaction code S_ALR_87012085 2. Update the following required and optional fields Field Name Description Vendor Vendors Account Number Company Code Code identifying a separate legal entity Fiscal Year The year you want to report on Open items at key date The up to date
  • 96.
    FICO USER MANUAL KS.JAYACHANDRAN– SAP FI 91 3. Click the Execute button to display a report 4. The report can be send to anyone on the SAP System. Click on the menu System → List → Send 5. Type in your message to the person(s) you want to mail that document to. 6. Type in the Receivers name (XXXX) under Receipient field and place an *at the end. 7. Click on the Continue button. 8. Click on the Send button press Shift+F8 9. The document has been sent to the chosen recipients. 10. Click on the Exit button or press Shift+F3 to return to the SAP Easy Access Screen Create Document and Send Vendor Appraisal with OI Sorted List
  • 97.
    FICO USER MANUAL KS.JAYACHANDRAN– SAP FI 92 4 ACCOUNTS RECEIVABLE In Accounts Receivable, much of its data is obtained from Sales and Distribution to be available in the second phase. Master data must be maintained centrally to ensure data integrity. 4.1 Accounting transactions in Accounts Receivable 4.1.1 Park Customer Invoice – FV70 Using this standard accounting function you can enter Invoice in the system without posting to the Accounts Receivable sub ledger. The PARKED invoice is subsequently subjected to checking, approval and posting to Accounts Receivable. Steps : 1. Access transaction by: SAP Access Menu Accounting → Financial Accounting → Accounts Receivable → Document entry → Document Parking → Edit / Park AR Invoice Transaction code FV70
  • 98.
    FICO USER MANUAL KS.JAYACHANDRAN– SAP FI 93 2. Update the following required and optional fields: Field Name Description Customer Customer # Invoice date Date of invoice Reference Customer Invoice number Posting date Date for posting to Ledger Currency Invoice Currencdy Amount Invoice amount G/L Acct GL Account number D/C Code identifying whether line item is a debit or a credit Amount doc. Curr. Amount to be posted for the line item Text Description of line item 3. Click on the Enter button 4. Simulate invoice before posting. To do so, click Simulate button. Simulation button enables the user to review the Invoice as if it had been posted including any system generated postings. The system also validates the posting data. 5. Click on the Back button 6. To park the Invoice, click Save Parked Invoice button. 7. The message at the status bar informs you that “Invoice number xxxx was PARKED” 4.1.2 Post Customer Invoice – FB70 This transaction creates postings in Accounts Receivable Sub Ledger and updates also the relevant GL Accounts (e.g reconciliation account) Steps : 1. Access transaction by:
  • 99.
    FICO USER MANUAL KS.JAYACHANDRAN– SAP FI 94 SAP Access Menu Accounting → Financial Accounting → Accounts Receivable → Document entry → Invoice Transaction code FB70 2. Update the following required and optional fields for 1st line item by clicking tab button: Field Name Description Customer Customer # Invoice date Date of invoice Reference Additonal document description Posting date Date for posting to Ledger Amount Invoice amount 3. Update the following required and Optional Fields for 2nd line item Field Name Description L Account Code of the account this is being charged or debited D/C Code identifying whether line item is a debit or a credit Amount Amount to be posted for the line item Text Description of line item 4. Click the Simulate button to replicate an overview of the document before posting. The system will display the document overview. 5. Click on the Save button or press Ctrl+S to post the invoice 6. The system will display the number of the document generated by this Invoice. 7. Click on the Exit button or press Shift+F3 to return to the SAP Easy Access screen
  • 100.
    FICO USER MANUAL KS.JAYACHANDRAN– SAP FI 95 4.1.3 Post Customer Credit Memo – FB75 The SAP ERP system allows you to post a document with a complete opposite entries to the original customer invoice. This function can be used when a customer returns goods sold Note : An account that was once debited will be credited and the other once credited will be debited. Steps : 1. Access transaction by: SAP Access Menu Accounting → Financial Accounting → Accounts Receivable → Document entry → Credit memo Transaction code FB75 2. Update the following required and optional fields: Field Name Description Customer Customer # document date Credit note date Posting date Date for posting to Ledger Reference Credit note number Amount Invoice amount G/L acct Account to which posting is related Amount doc. Curr. Document currency. By default system proposes the Company code currency, but user can change it
  • 101.
    FICO USER MANUAL KS.JAYACHANDRAN– SAP FI 96 3. Click the Enter button to confirm the entries 4. Click the Payment tab and update the following field. Field Name Description Inv. Ref (Invoice) Number / description which refers to a original invoice. Entering the original invoice will copy the invoice details from the original invoice. Imp Note. This will facilitate in clearing the customer account at a later point in time Inv. Ref (Fiscal Year) The fiscal year the invoice was created in 5. Click the Enter button to confirm the entries 6. Click the Simulate button to simulate the posting. The system will display document overview 7. Click on the Save button or press Ctrl+S to post the document. Note : The message bar displays “Document XXXX was posted in company code xxxx” 8. The system will display the number of the document generated by this Invoice. 9. Click on Exit button or press Shift+F3 to return to the SAP Easy Access screen. 4.1.4 Change Parked Document – FV70 The SAP ERP system allows users to change parked Customer documents since invoices need to be verified for correctness before they are posted; therefore errors on documents can be corrected before being posted. Steps : 1. Access transaction by:
  • 102.
    FICO USER MANUAL KS.JAYACHANDRAN– SAP FI 97 SAP Access Menu Accounting → Financial Accounting → Accounts Receivable → Document Entry → Document Parking → Edit / Park Transaction code FB70 2. Click on the button and the tree will be displayed 3. Click on the button 4. A listing of parked documents will be displayed, double click on the document you want to change / edit. The details of the parked document will be populated in the relevant field: Add extra text. 5. Enter any detail in the Reference field. 6. Click on the Save button to record you changes 7. A message will appear on the status bar informing you what has happened to the document you changed. 8. To exit this transaction, click on the Exit button or press Shift+F3 until the SAP Easy Access Screen is displayed 4.1.5 Display Accounting Document – FB03 Documents entered in the system can be viewed as and when they are required and you are also able to make changes to the document. Please note that your changes will be limited to certain fields.
  • 103.
    FICO USER MANUAL KS.JAYACHANDRAN– SAP FI 98 The system offers you a function which allows you to search for a document number in case you don’t know the number of the document you want to display. Steps : 1. Access transaction by: SAP Access Menu Accounting → Financial Accounting → Customer → Document → Documents → Display Transaction code FB03 2. If you don’t know the document number, click button to search for documents. 3. The system will display a screen where you can enter your search criteria: 4. Update the following required and optional fields. Field Name Description Fiscal year Fiscal year number Document type Code identifying the method that the system uses to process the transaction Posting date Date that business transaction occurred 5. Click Execute button to start searching 6. The system will display a list of documents that fulfill your criteria: 7. To display your document, simply double click on it. The system will display the document. 8. Click on the Exit button or press Shift+F3
  • 104.
    FICO USER MANUAL KS.JAYACHANDRAN– SAP FI 99 9. if you know the document number you can display the accounting document the following way 10. Enter the Document Number you have on hand 11. Enter the company Code 12. Enter the Fiscal Year XXXx or leave field blank. 13. Click on the Enter button to proceed 14. Click on the button to change you screen view Note : the system will show you more fields not shown under entry view 15. Click on the menu Document → Display → Change 16. Click on the Document header button 17. Identify fields that can be changed and change header text 18. To store your changes in the document, click Save button. 19. Analyse it and click on the Enter Continue / Confirm button to leave the displayed document header sub screen 20. To exit this transaction, click on the Exit button or press Shift-F3 until the SAP Easy Access screen is displayed. 4.1.6 Post Incoming payments F-28 The SAP ERP system allows to process customer payment and will match the two documents i.e. the invoice and the incoming payment documents and at the same time perform the (reconciling) clearing procedures. Processing of incoming payment can also be done by normal parking and posting then executing a separate manual clearing function at a later stage.
  • 105.
    FICO USER MANUAL KS.JAYACHANDRAN– SAP FI 100 To process the incoming payment successfully using this transaction there must be an invoice(s) on the customer’s account. However the post incoming payment will take care of Process the incoming payment. Steps : 1. Access transaction by: SAP Access Menu Accounting → Financial Accounting → Accounts Receivable → Document Entry→ Post Incoming Payments Transaction code F-28 2. Update the following required and optional fields. Field Name Description Document Date The document date is the date on which the original document was issued Company Code Company code that the customer belongs to Currency Currency code Reference The document number of the customer Account Bank Account number Amount Incoming payment amount Account Customer A number that identified the Customer in the system 3. Click on the button 4. All open items are selected by default. To deselect the items first click the Select All button. Post Incoming Payments Process Open Items
  • 106.
    FICO USER MANUAL KS.JAYACHANDRAN– SAP FI 101 5. Then click Deactivate items button. All the open items are now deactivated (they are no longer highlighted in blue) 6. Now you need to choose and select the items you want to clear. Double click on the Gross field for each of those items to be cleared. 7. You will need to select one more document to balance this clearing. Scroll through the remaining documents and select this document. Note : The system will highlight these items in blue. When the value of the field not assigned is equal 0 and you can clear open items. See scree below 8. You can check your document before postings. Select Document → Simulate 9. To post your entries, click the Save button. 10. The message bar displays: “Document XXXx was posted in company code xxxxxx” 11. Click on the Exit button or press Shift+F3 to return to the SAP Easy Access Screen. 4.1.7 Reset Cleared Items – FBRA A posting with clearing had been made to a wrong customer account due to similarities in names therefore the incoming payment document has to be reversed to enable the correct transaction to take place. Note : An accounting document that contains line items have cleared been cannot be reversed it requires that the cleared items be reset first.
  • 107.
    FICO USER MANUAL KS.JAYACHANDRAN– SAP FI 102 Steps : 1. Access transaction by: SAP Access Menu Accounting → Financial Accounting → Accounts Receivable → Document → Reset Cleared Items Transaction code FBRA 2. Update the following required and optional fields. Field Name Description Clearing Document Number of the document to be reset Company Code Code identifying a separate legal entiry Fiscal Year Fiscal year number 3. Click the Accounts button. The system will display all the accounts involved in clearing operation. 4. Click the Continue button to continue 5. Click the Items button to display documents cleared by the clearing operation 6. Click on the Save button or press Ctrl+S to post the resetting 7. A screen reversal of clearing document will be displayed with 2(two) options to select from. - Only Resetting will remove the clearing from the document that was cleared and changes the documents’ status from cleared item to open item - The clearing document also changes status to an open item and this has effect on the overall Customer Account.
  • 108.
    FICO USER MANUAL KS.JAYACHANDRAN– SAP FI 103 - Resetting and reversing will reset the cleared line items and also reverses the clearing document. 8. Click on Only Resetting button. 9. A message will appear on the status bar Clearing xxxxxxx reset. Note : If you choose Resetting and Reversal a popup screen will appear requiring completion (For you to complete this option you have to process another post with clearing transaction) 10. Click on the Resetting and Reversal 11. Enter 01 in the Reversal Reason field, and date 12. A message clearing xxxxxxxx reset will appear 13. Click the Continue button to continue 14. A message will appear that document xxxxx was posted in Company Code xxxx 15. Click on the Exit button or press Shift+F3 to return to the SAP Easy Access screen. 4.1.8 Document Reversal (Individual Reversal) – FB08 Sometimes posted document contains incorrect information. This function allows you to reverse an incorrect document. A document to be reversed cannot include already cleared items. If you want to reverse document that was already cleared, you need to reset all cleared items before posting a reversal.
  • 109.
    FICO USER MANUAL KS.JAYACHANDRAN– SAP FI 104 Steps : 1. Access transaction by: SAP Access Menu Accounting → Financial Accounting → Accounts Receivable → Document Reverse → Individual Reversal Transaction code FB08 2. Update the required and optional fields by capturing the necessary data: Field Name Description Document Number The parked document number Fiscal year The fiscal year in which the parked document 3. Click the Display document before reversal button or press F5 to have an overview of the document you about to reverse. 4. Click on the Back button or F3 5. Click on the Save button or press Ctrl+S to post the reversal. 6. The system will post a reversal document and a message will appear on the status bar “Document XXXX was posted in Company Code XXXX 7. Click on the Exit button or press Shift + F3 to return to the SAP Easy Access screen. 4.1.9 Clear Customer Account – F-32 Authorized Users can access Open Item Customer Accounts and assign and clear debits and credits. The user will use the Account Clear Transaction; select the items to be assigned to each other and then post. The system will record the clearing information (document numbers, date) on the original document.
  • 110.
    FICO USER MANUAL KS.JAYACHANDRAN– SAP FI 105 This function allows you to clear matching open items on Customer account. Steps : 1. Access transaction by: SAP Access Menu Accounting → Financial Accounting → Accounts Receivable → Account → Clear Transaction code F-32 2. Update the required and optional fields by capturing the necessary data: Field Name Description Account Code identifying the Customer account Clearing date Date when you want the transaction to be cleared. Company Code Number of the Company code that the Customer belongs to Currency Currency code Note : You can clear also the transactions posted in different currencies. The system will automatically calculate and post exchange rate differences 3. Click the Enter button. The system will display open items that fulfill previously entered criteria: 4. All open items are selected by default. To deselect the items first click the Select All button. 5. Then click Deactivate Items button button. All the open items are now deactivated (they are no longer highlighted in blue). 6. Now you need to choose and select the items you want to clear. Double click on the Gross field for each of those items to be cleared. 7. You will need to select one more document to balance this clearing. Scroll through the remaining documents and select this document.
  • 111.
    FICO USER MANUAL KS.JAYACHANDRAN– SAP FI 106 Note : The system will highlight these items in blue. When the value of the field not assigned is equal 0 and you can clear open items. See screen below 8. You can check your document before postings. Select Document → Simulate 9. To post your entries, click the Save button. No “real” posting took place, but the system stores a clearing document. 10. The message bar displays : “Document xxxxxx was posted in Company code xxxxx”. 11. Click on the Exit button or press Shift + F3 to return to the SAP Easy Access screen.
  • 112.
    FICO USER MANUAL KS.JAYACHANDRAN– SAP FI 107 4.2 Customer Account Reports Authorised Users can view the Customer Account details (line items posted) using the Customer Account Line item display transaction, or by drilling down on the account balance from the Display Customer Account balance transaction Documents update Customer Balances when posted. Authorised users can view Customer Account Balances online using the Account Balance enquiry and entering the Customer account number. 4.2.1. Customer Balance Display – FD10N The SAP system allows you to display the Account Balances of the customer at any given time and this report also allows you to navigate backwards (drill down) to the individual document line items that make up the total in any of the columns you wish to analyse. Run the balances report Steps : 1. Access transaction by: SAP Access Menu Accounting → Financial Accounting → Accounts Receivable → Account → Display Balances Transaction code FD10N
  • 113.
    FICO USER MANUAL KS.JAYACHANDRAN– SAP FI 108 2. Update the required and optional fields by capturing the necessary data: Field Name Description Customer Customer Number Company Code Number of the Company code that the Customer belongs to Fiscal Year Fiscal Year number 3. Click Execute button 4. A report below be displayed
  • 114.
    FICO USER MANUAL KS.JAYACHANDRAN– SAP FI 109 5 Double click balance figure under credit column. This function will allow to view individual documents line items. 6 Click on the Display Graphic button to display the graphic presentation of the report. The report above can be printed sent by e-mail, downloaded to various PC applications and can be displayed graphically. 7 Click on the Exit button or press shift+F3 to return to the SAP Easy Access screen. 4.2.2 Customer Account Analysis – FD11 This transaction allows you to carry out an in depth Customer account analysis, such as business volumes analysis, open items due date analysis. Steps : 1. Access transaction by: SAP Access Menu Accounting → Financial Accounting → Accounts Receivable → Account → Account Analysis Transaction Code FD11 2. Update the following required and optional fields. Field Name Description Customer The customer Number Company Code Code identifying a separate legal entiry Fiscal Year Fiscal year number 3. Click on the Enter button.
  • 115.
    FICO USER MANUAL KS.JAYACHANDRAN– SAP FI 110 4. Click on the Open Items net tab to view the open items analysis. 5. Double click on a figure under field line items which make up all receivables will be displayed. 6. Click on the Exit button or press Shift+F3 or return to the SAP Easy Access screen 4.2.3 Display / Change Line items – FBL5N The display/change line item of Customer transactional report offers a different view of customer documents, also allow you to view and analyse the status of each customer documents. Steps : 1. Access transaction by: SAP Access Menu Accounting → Financial Accounting → Accounts Receivable → Account → Display / Change line items Transaction code FBL5N Open items - Net Payment Due Date Account Analysis All receivables
  • 116.
    FICO USER MANUAL KS.JAYACHANDRAN– SAP FI 111 2. Update the following required and optional fields. Field Name Description Customer The Customer Number Company Code Code identifying a separate legal entiry 3. Click on the Radio button 4. Click on the Normal Items Check box 5. Click on the Execute button to start the process. And the below report will be displayed.
  • 117.
    FICO USER MANUAL KS.JAYACHANDRAN– SAP FI 112 6. Double click on any one line item and see where it will take you. 7. Each document is categorized depending on its current status; 8. Customer documents are also updated with Net due date symbols and these are derived from payment terms entered on the document during capturing. The report displayed above can be printed sent by e-mail, downloaded to various PC applications Cleared / Open Items Symbol Open Items : The item was posted by the key date It was either cleared after the key date or has not been cleared Cleared items : The item had been posted and cleared by the Key data Parked items Net Due Date Symbol The symbol indicates the due date for the net payment for the items open on the key date Item is overdue : The due date for net payment has been exceeded on the key date. The payment is in arrears item is due: The item is due for payment without deductions on the key date Item is not due: The due date for net payment is after the key date
  • 118.
    FICO USER MANUAL KS.JAYACHANDRAN– SAP FI 113 5. BANK AND CASH TRANSACTIONS 5.1 Cash Journal (Petty Cash Transactions) SAP Provides a standard function for the management of petty cash referred to as the ‘Cash Journal’ Posting the journal will update the general ledger. The journal will be available for subsequent display for future reference or audit purposes.  Cash journals are company code specific The petty cash journal will take care of such small expenses for example postage expenses etc. 5.1.1 Recording a Cash Receipt – FBCJ Cash journal allows you to post cash documents (like expenses, cash inflows etc.) in a simple way. Instead of typical accounting transactions for posting (E.g. FB50) you can use pre-defined business transactions. This function also allows you to print typical cash journal documents and cash report for a specified period. For every company code there can be defined different cash journals. Steps : 1. Access transaction by: SAP Access Menu Accounting → Financial Accounting → General Ledger → Posting → FBCJ – Cash Journal Transaction code FBCJ 2. When you double click FBCJ – Cash Journal (if you are accessing it for the first time the system will prompt a small window, you need to enter company code and your relevant code of cash journal Type)
  • 119.
    FICO USER MANUAL KS.JAYACHANDRAN– SAP FI 114 3. Click on the button to select the correct journal type for this posting. 4. Update the following required and optional fields: Field Name Description Company Code Code identifying a separate legal entity Cash Journal Required cash Journal ID 5. Click the Enter button to confirm your entries and continue 6. Click on the tab 7. Update the following required and optional fields Field Name Description Business Transaction Transaction number Amount Amount to be reimbursed Reference The cash request voucher reference details Profit Center Relevant profit Center Line item Text Description of Transaction 8. Click on the Save button. The balance is now updated in the cash management sub-ledger but no postings have been made to Financial Accounting. 9. Click on the Post icon. Financial Accounting will be updated 10. The Financial Accounting document can be displayed via selection of the button. 11. A sub screen like the one below will be displayed double click on Document number XXXX
  • 120.
    FICO USER MANUAL KS.JAYACHANDRAN– SAP FI 115 12. The accounting document will be displayed 13. Click on the Cancel button. 14. Click on the Exit button or press Shift+F3 to return to the SAP Easy Access 5.1.2 Enter an Expense Transaction – FBCJ For Every company code, cash journal transactions have been pre-defined: Before performing this, make sure that cashier cash enough balance in the cash journal to incur expense. Steps : 1. Access transaction by: SAP Access Menu Accounting → Financial Accounting → General Ledger → Posting → FBCJ – Cash Journal Transaction code FBCJ
  • 121.
    FICO USER MANUAL KS.JAYACHANDRAN– SAP FI 116 2. Click on the Change Cash Journal button. 3. Update the following required and optional fields: Field Name Description Company Code Code identifying a separate legal entity Cash Journal Required cash Journal ID 4. Click on the tab. 5. Click the Enter button to confirm the entries 6. Update the following required and optional fields. Field Name Description Business Transaction Office Expense …… Amount Amount G/L Account This is the GL Account to which the expense will be coded Cost Center Cost center number Line item text Description of Transaction 7. Click on the Save button. The balance is now updated in the cash management sub-ledger but no postings have been made to Financial Accounting. 8. Click on the Post button. The financial Accounting document can be displayed via selection of the Follow-on document button. 9. Click on the Cancel button. 10. Click on the Exit button or press Shift+F3 to return to the SAP Easy Access
  • 122.
    FICO USER MANUAL KS.JAYACHANDRAN– SAP FI 117 5.1.3 Reverse Cash Journal – FBCJ The cash journals documents you’ve entered can be posted directly or only saved in the database (and you can post them later). The saved documents can be deleted from the database. The posted documents can also be deleted, but in such case the system posts automatically a reversal document. Steps : 1. Access transaction by: SAP Access Menu Accounting → Financial Accounting → General Ledger → Posting → FBCJ – Cash Journal Transaction code FBCJ 2. Click on the Change Cash Journal button. 3. Enter Company code 4. Enter Cash Journal number or search for the cash journal number 5. Select the line item to be reversed 6. Click Delete Row button. 7. Click on the button 8. Update the following required and optional fields: Field Name Description Reversal Reason Enter the reversal code for the transaction, this is the reason why and during which period the document is being reversed 9. Click on the Enter (continue) button. Note : An additional line item is displayed for the reversal with the document status symbol, the original document also has this status. Yes
  • 123.
    FICO USER MANUAL KS.JAYACHANDRAN– SAP FI 118 10. Click Follow-on doc or double click on the line item you want to view. 11. Double click on the Accounting Document 12. The accounting document will be displayed. 13. Click on the Back button. 14. Click on the Cancel button 15. Click on the Exit button or press Shift+F3 to return to the SAP Easy Access
  • 124.
    FICO USER MANUAL KS.JAYACHANDRAN– SAP FI 119 6. ASSET MANAGEMENT 6.1 Overview of Acquire To Retire process Asset accounting is a subsidiary ledger of the general ledger and is used to manage and document in detail fixed asset transactions. In fixed Asset accounting, you can update depreciation and changes to asset balance sheet values in asset accounting. You can also make various account assignments to cost accounting for these transaction types. As a result of the integration in the SAP AG System, Asset Accounting (FI-AA) transfers data directly to and from other SAP AG components. For example, you can post from the retirements fiscal year data a component directly to FI-AA. Locking, reversal and scrapping including updating changes, company codes and asset number information with or without vendors. Business Process in Asset Accounting are : No. Title Description 1 Asset master Record Creation This process covers the creation of single and multiple asset master records. It also covers assigning newly created assets to project settlement rules. 2 Asset Master Record Maintenance This process covers asset master record changes. Where there is a change in location E.g Between regions or cost centres, the master data can be changed accordingly. Where there is a change between asset classes, a transfer should be performed. 3 Locking an Asset This process covers the asset Lock functionality in SAP. Locked asset cannot receive any
  • 125.
    FICO USER MANUAL KS.JAYACHANDRAN– SAP FI 120 financial postings. 4 Asset Master Record Deletion This process covers asset that must be deleted. This can only be performed on assets with NO transactional data. Where this is not the case, the asset must first be retired and after one year in the system it can be deleted. 5 Asset Acquisition This process covers the capitalization of costs to Fixed Assets. Capitalization using asset under construction as well as direct capitalization processes are covered. 6 Asset Retirement This process covers the removal of an asset or part of an asset from the asset portfolio. This removal of an asset (or part of an asset) is posted from a bookkeeping perspective as an asset retirement. 7 Transfer This process covers the transfer of assets between classes or areas. Either when the incorrect asset class was used or if the asset was capitalized to unclassified assets and later transferred to classified assets. It is also used to transfer assets between company codes, regions or areas 8 Depreciation This process covers the calculation and execution of asset depreciation based on the remaining asset useful life and depreciation method. i.e. Straight line. The depreciation costs are posted to the assigned assets’ cost centre on a monthly basis 9 Manual value Correction This process will cover the value correction using standard transactions provided by SAP 10 Asset Document Reversal Incorrect posted transactions can be reversed in SAP. Audit trail of reversal is maintained in
  • 126.
    FICO USER MANUAL KS.JAYACHANDRAN– SAP FI 121 the System 11 Year End Closing This process covers the opening and closing of asset fiscal year. This process checks that all depreciation in a given period has been posted. It also checks if there are errors or incomplete entries for any assets 6.2 Asset Master Maintenance 6.2.1 Creating Fixed Asset Master Data If we acquire a new fixed asset for the business which has no master data existing in the system, you need to create the master data for the asset in the system before you can create any transactions against this asset. Steps : 1. Access transaction by: SAP Access Menu Accounting → Financial Accounting → Fixed Assets → Asset → Create → Asset Transaction code AS01 2. fill in the Required and optional fields Field Name Description R/O/C Comments Asset Class Classification of the asset R Use drill-down to locate the asset class Company code Enter Company Code R Number of similar assets Number of similar asset you want to create in the system O This allows to create multiple
  • 127.
    FICO USER MANUAL KS.JAYACHANDRAN– SAP FI 122 when you save similar assets in one master transaction Reference The reference asset that you are copying from O Check the data before you copy 3. Press Enter to open the asset master screen 4. Navigate through the tabs and complete the required and optional fields 5. Save when completed 6. A message bar will show as message like: “Asset xxxxxxx x is created” Asset creation process is completed 6.2.2 Change Asset Master – AS02 Steps : 1. Access transaction by: SAP Access Menu Accounting → Financial Accounting → Fixed Assets → Asset → Change → Asset Transaction code AS02 2. On screen “Change Asset: Initial Screen”, enter information in the fields as specified in the table below: Field Name Description R/O/C Comments Asset The asset main number to be Changed R Enter the asset number
  • 128.
    FICO USER MANUAL KS.JAYACHANDRAN– SAP FI 123 Sub-number The asset sub-number to be changed O No need to enter any number in this field. The system will default zero. Company code Enter company code R Use the icon on the side for help 3. Enter data in the required fields displayed 4. Press <Enter> or click on the icon on required tab. 5. Change the required data by overwriting it or adding to it when in the tab labels above. 6.2.3 Display Asset Master AS03 Steps : 1. Access transaction by: SAP Access Menu Accounting → Financial Accounting → Fixed Assets → Asset → Display → Asset Transaction code AS03 2. On screen “Display Asset: Initial Screen”, enter information in the fields as specified in the table below:
  • 129.
    FICO USER MANUAL KS.JAYACHANDRAN– SAP FI 124 Field Name Description R/O/C Comments Asset The asset main number to be displayed R A number can be chosen by using drop down Function Sub-number The asset sub-number to be displayed O Default value Zero Company code Enter company code R 3. Press <Enter> or click on the icon Then 4. The following screen will be displayed 6.2.4 Lock Fixed Asset : AS05 This transaction is used to blocking an asset for further acquisitions may be useful if the asset will be retired, e.g. in a few weeks, or if an AUC (Asset Under Construction) should be closed. This option may be utilized for the VQ’s whole room concept for main asset number (sub-assets would not be blocked)
  • 130.
    FICO USER MANUAL KS.JAYACHANDRAN– SAP FI 125 6.3 Asset Accounting – Business Transactions F-90 6.3.1 Asset Acquisition To acquire or the Asset acquisition with vendor use the Transaction code F-90 or use the following menu path: Steps : 1. Access transaction by: SAP Access Menu Accounting → Financial Accounting → Fixed Assets → Posting → Acquisition → External Acquisition → With Vendor Transaction code F-90 2. On screen “Acquisition from purchase with Vendor screen”, enter information in the fields as specified in the table below: Field Name Description R/O/C Comments Header Information Doc. Date Source document date R Enter a document date Document Type The default document type for this screen is KR . do not change it R Company code Enter Company Code R Posting date Date for posting a document to financial accounting. This will
  • 131.
    FICO USER MANUAL KS.JAYACHANDRAN– SAP FI 126 determine which fiscal period (also known as posting period) the transaction is recognized Reference One of the key fields that can be used to search for documents at a later retrieval date. R Line item information Posting Key Posting key represent Debit or Creit entry of any account type R Account Enter the Vendor account Number R 3. Press <Enter> or click on the icon you will be prompted with the following screen
  • 132.
    FICO USER MANUAL KS.JAYACHANDRAN– SAP FI 127 4. Enter the debit or credit amount and other necessary data like business area, cost center (for items), tax code (if the item is subjected to GST) , item text, etc. 5. Go to the next line item Field Name Description R/O/C Comments Posting Key Enter the Posting key to debit Asset R Enter the Posting key (70) Account Enter Asset Number R Transaction Type The transaction Type in Asset Accounting classified the business transaction. The transaction type control various system activities when business transactions are posted R Enter Transaction Type (100) 5. To verify the entry press the Save icon button. Following message will be appeared at the bottom of your screen “Document XXXXXXx was posted in company code XXXX” 6.3.2 View Asset Values Steps : 1. Access transaction by: SAP Access Menu Accounting → Financial Accounting → Fixed Assets → Asset Display Asset Explorer Transaction Code AW01N
  • 133.
    FICO USER MANUAL KS.JAYACHANDRAN– SAP FI 128 The screen below is displayed. Take note of the following values: Planned values: Posted Values : Note : If the asset has areas defined the following message and screen will be displayed