Download as PDF, PPTX
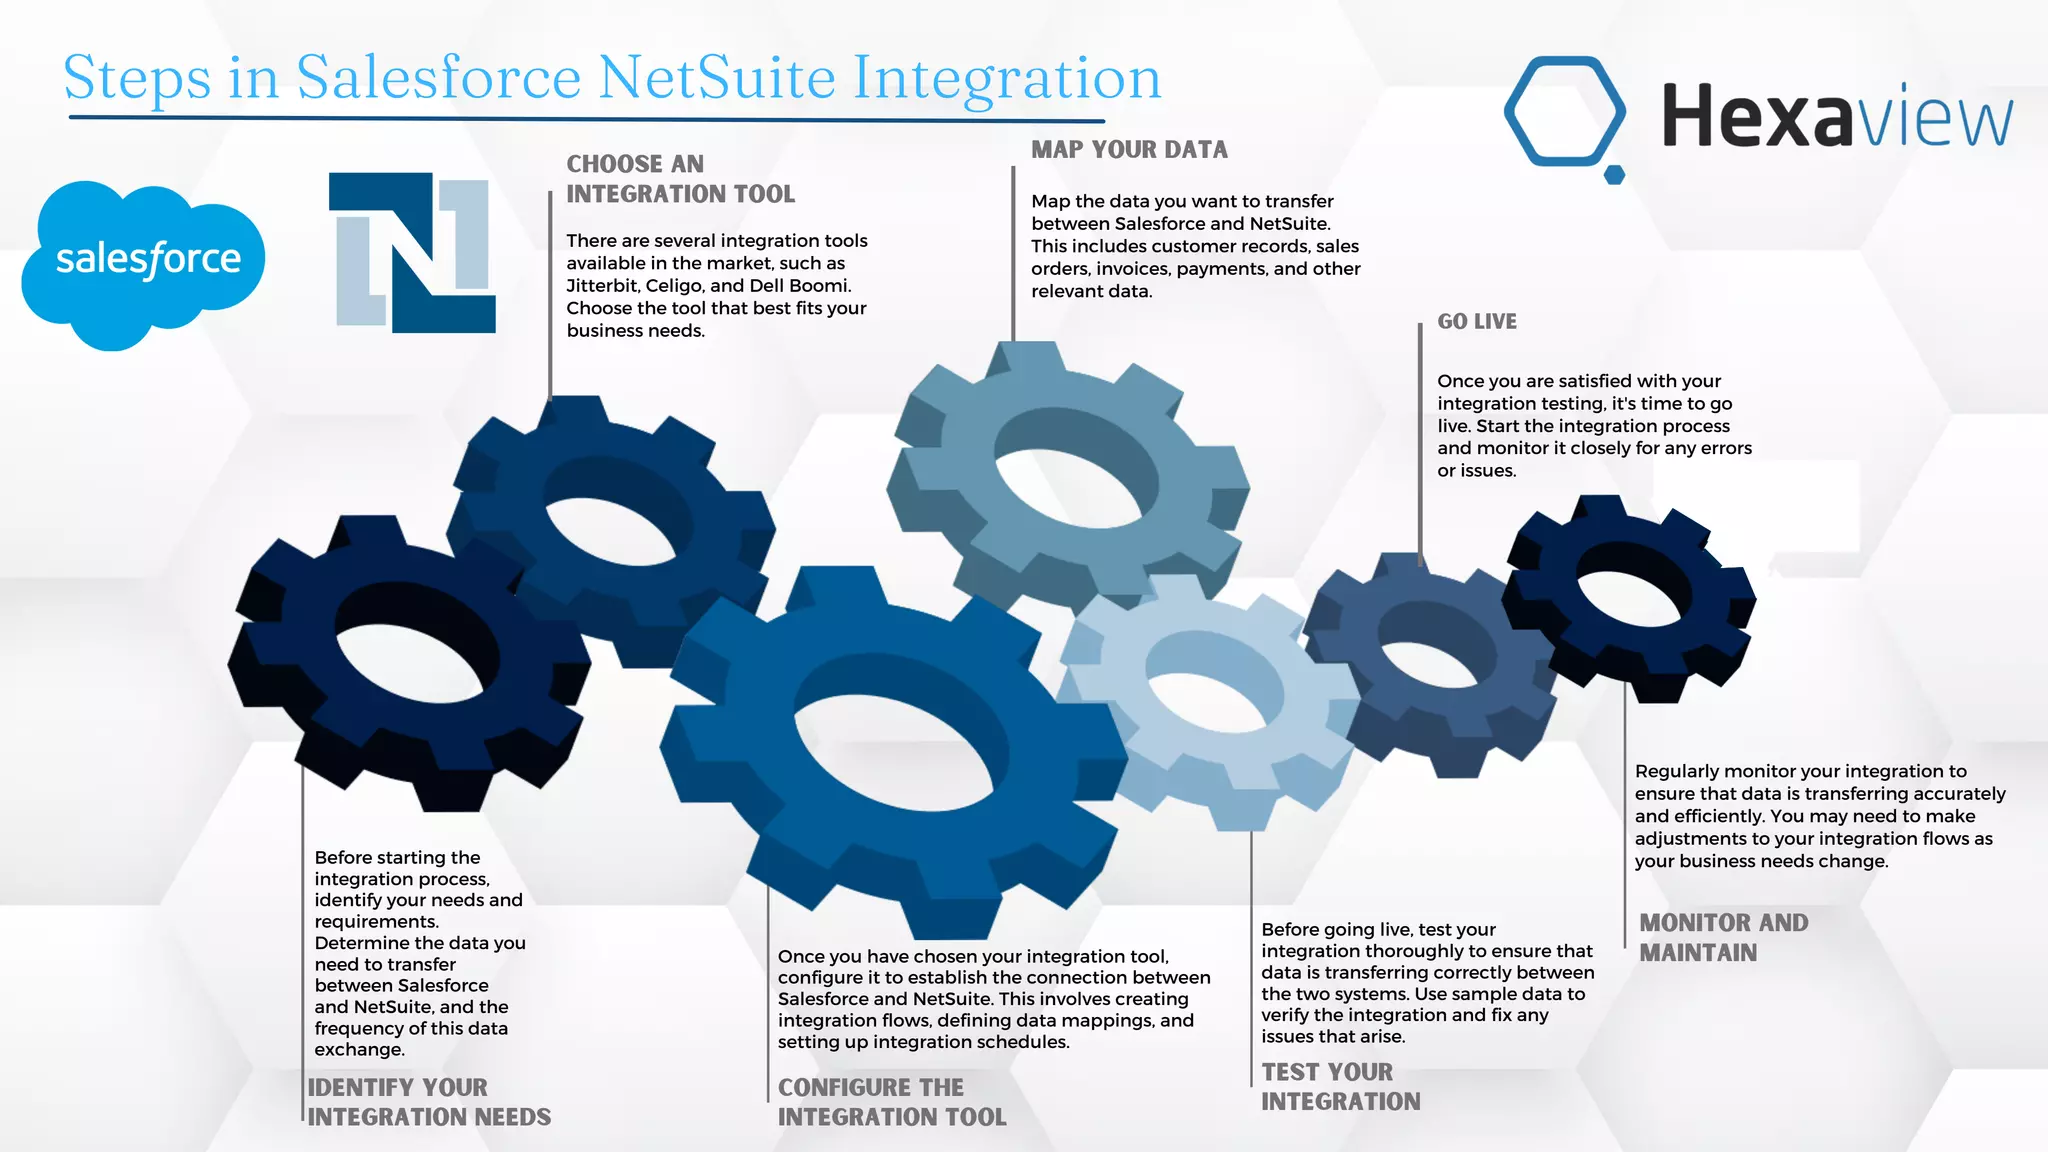

The document outlines the steps for successfully integrating Salesforce and NetSuite, including identifying integration needs, selecting an appropriate integration tool, and configuring it for data transfer. It emphasizes the importance of thorough testing and continuous monitoring of the integration process to ensure data accuracy and efficiency. Regular adjustments may be necessary as business needs evolve.