
Recommended
More Related Content
What's hot
What's hot (20)
Viewers also liked
Similar to Research Experience
Similar to Research Experience (20)
Research Experience
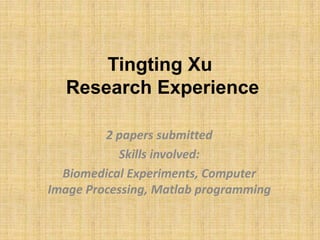
- 1. Tingting Xu Research Experience 2 papers submitted Skills involved: Biomedical Experiments, Computer Image Processing, Matlab programming
- 2. Project 1: Using Cellulose Acetate Membrance Electrophoresis to Separate Serum Proteins
- 3. • Introduction Before the summer holiday of my second year in university, I was selected as student leader for the biomedical experiment teaching assistant. In the summer vacation, we, the TAs did not have a holiday. Instead, we did basic teaching experiments that using cellulose acetate membrance electrophoresis to seperate serum proteins. After that, we taught the BME department students (150 people) how to conduct this experiment and marked their homework.
- 4. Instruments & Materials • Instruments: 220V DC electrical source, Electrophoresis tank
- 5. Acetate film, Glass capillary, Filter paper Reagent: Serum, electrophoretic buffer, dyeing liquor, rinsing water
- 6. Methods 1. Preparation work We first connect the DC electrical source and the Electrophoresis tank. After that, we cut the filter paper into double deck banded paper and Fill the tank with electrophoretic buffer.
- 7. 2. Point sample At this section, we use the glass capillary to absorb the serum and uniformly sample the serum on the Acetate film by the sheet glass.
- 8. 3. Electrophoresis After the investigation on the influence of several factors to the result of electrophoresis, we find the best condition for electrophoresis. 110 Voltage Direct Current, 1 Hour Electrophoresis
- 9. 4. Dye and Rinse Prepared dyeing liquor and rinsing water are applied in this section. After the rinsing is done, we can see the separated five components of serum protein.
- 10. Results
- 11. Conclusion From this experience I learned the importance of team cooperation. Without the hard working of all the members in our group, we can not make it such a success. What is more, I learned how to do academic research myself. Suitable design and planning is the prerequisite of a good experiment. This includes taking consideration of the variables, like the voltage magnitude, electrophoresis time and so on. All in all, the results demonstrate that we successfully separate the serum protein by using the Cellulose Acetate Membrance Electrophoresis.
- 12. Project2: Preparation and Transformation of E.coli Competence Purpose 1. Learn and acquire the steps to prepare the E.coli Competence 2. Understand the theory of how to transform E.coli into competence phase and combine it with plasmid DNA.
- 13. Theory for Preparation and transformation This figure shows the main steps for transform E.coli into intergrated E.coli and Plasmid DNA phase. Firstly, it is essential to prepare the E.coli inot competence E.coli phase by controlling temperature and mixture. Then, after the preparation, plasmid DNA and E.coli can be combined easily since the E.coli is in the competence phase.
- 14. Detailed Steps and Condition for transformation 1. Cultivation of the E.coli Take one pure colony from the E.coli into 2ml LB culture medium. Shake overnight at 37℃ until it comes into the exponential phase. 2. Prepare the competence phase E.coli Put the LB medium in a centrifugal tube on the ice for 10 minutes. Then centrifugate it under 4 ℃ at a speed of 3000 revolutions per minute. Use CaCl2 solution to increase the permeability of E.coli to make it a competence phase. 3. Transformation Mix the competence phase E.coli and PBS plasmid DNA solution in water bath for 90 seconds under 42℃ or 5 minutes under 37℃.
- 15. Reselts We have done several control experiments to see wether the E.coli have transformed and successfully combined the plasmid DNA by cultivating them with the ampicillin medium. This medium would kil the E.coli without PBS plasmid DNA, while the transformed E.coli can prosper.
- 16. These two figures are the well grown sample of E.coli (right one) and killed E.coli (left one) when put into ampicillin medium.
- 17. This is the table illustrates the result of our comparison experiments. We have made eight experiments group numbered. The variables are the E.coli, Amp condition and Plasmid DNA. + stands for adding this variable in the group, - stands for none. From the growing condition of the E.coli we can see the transformation condition and wether E.coli has inserted plasmid DNA into its own.
- 18. Teaching the students Since I have been the teaching assistant once, I am more familiar with the things that a TA should do. Our job not only contains preparing teaching for classes, but also the enhancement of the quality of teaching. We arrange some students to do the experiment earlier than others to guarantee a time difference to improve the efficiency for using the centrifuge. Being the TA, I can also feel the hard work of the teachers. We have to prepare early in the morning before the students arrived. This includes the reaction solution and equipment such as centrifuge and centrifuge tube. I want to thank Miss Jin Xiao for giving me this chance to be the Teaching Assistant. I leant to do academic experiments and to lead a group to work actively and creatively. Thank you for your attention!
- 19. Project3: Combination and property investigation of conA and nano fluorescent probe
- 20. I just illustrate the concept and outline of our project since the detailed preparing process is a little complicated and unimportant compared to the innovative idea. Purpose Preparation of conA-linked, high-performance quantum dot.
- 21. Methods • Because the conA can not be linked BS to quantum dots conA BS A BS directly, we used A A Bovine serum albumin (BSA) as a bridge to combine conA them together. BS BS • Firstly, we A A linked conA and BSA BS BSA as a whole, as A shown in the following figure.
- 22. Secondly, BSA and QD are linked up.
- 23. Detection of the conjuction of QD and conA • This section is mainly designed to test the conjunction of QD and conA, which also is my main job. • The method we utilized is sodium dodecyl sulfate polyacrylamide gel electrophoresis (SDS-PAGE).
- 24. • Here is the instrument for the electrophor esis.
- 25. Above is one of the results for the electrophoresis. The first one from the right is made of conA, the second one is conA and QD, the third one is conA linked QD by Glutaraldehyde, the last one is QD and Glutaraldehyde From the third one from the right we can see that QD and conA are successfully linked together. If they are separated, there would be a band in the down area like all the three other groups.
- 26. Project 4: A two dimensional visualization of the propagating speed of cortical spreading depression in rat cortex
- 27. Introduction Characterized by EEG depression, temporary disruption of ion homeostasis, DC potential shift and the change of optical intrinsic signals, CSD is a transient suppression of neuronal activity and spreads like a wave from a focal point toward the periphery at a speed of 2–5 mm/min. Previous studies have focused on the propagation speed of CSD by only manually choosing several points in the CSD- invaded cortex to estimate its average speed. We aim to visualize propagation speed of CSD with two dimensions over the imaged cortex.
- 28. Materials and Methods A. Origin site estimation of CSD Temporal clustering analysis (TCA) and least square estimation (LSE) are combined to determine the pixel location of the pinprick point according to our previous works. B. Coordinate transformation The coordinate (x1,y1) of Pixel 1 can be converted to polar coordinate (R,θ) as following equation:
- 29. Fig. 1: Coordinate transformation is illustrated in a raw optical image of the rat cortex.
- 30. C. Temporal lag Recognition Fig. 2: Using OISI signal to estimate the time lag for CSD propagation. (A) Normalized intensity of light signal for Pixel1 and Pixel2. The black squares are the points which have the highest intensity. (B) Using the correlation coeffient for time interval calculation. The red line shows the template part from Pixel1, stepping along the Pixel2, which is the target.
- 31. Results For one representative CSD imaging trial, we used our method for propagating speed calculation (Fig. 3). Fig. 3 Spatiotemporal evolution of a typical CSD wave.
- 32. Basing on this dataset, we obtained two images (120×160 pixels) represent the diffusion velocity of CSD at each pixel. The picture was visualized based on the propagation speed of CSD at every pixel in the image. It had been smoothed by using a sliding 3 by 3 window. Fig. 4 The two dimensional visualization of the spreading speed of CSD on the imaged cortex are presented. The left figure is obtained using the second method described above, while the right figure was calculated by applying the first approach.
- 33. From the time course of light reflectance variance in ROI 1, 2 and 3, we knew that CSD had the fastest speed in ROI 1 and the speed in ROI 3 was the slowest, which is consistent with the visualization level in these two figures (Fig. 4). Fig. 5: The normalized optical reflectance during the time course of Pixel1 and Pixel2 in ROI 1, ROI 2 and ROI 3 region. The right down figure is the raw picture of the imaged cortex with a scale of 0 to 4. The black box with white number shows the region it represents and two white dots are the Pixel1 and Pixel2. The white dot which is nearer to the pinprick is Pixel1 and the other is Pixel2.
- 34. DISCUSSION In conventional method, randomly chosen points in the areas of the cortex could only represent the velocity in limited region and neglect the heterogeneous pattern of the speed of CSD over the whole cortex. This two dimensional visualization of CSD propagating speed can help us map the abnormal regions and understand the propagation mechanism of CSD better.
- 35. Project 5:Image registration The purpose of this project is to investigate the principle and theory for communication between rat olfactory bulb and the brain. Two sourses of lights, the fluorescence and reflection light are used to illuminate the open brain. The two kinds of light resources may provide individual information about the physiological reacion.
- 36. • My job is to do image registration because there are difference between the two imaging camera, such as size and magnification times. This work is a little like image processing. I first did some simple tests like using magzines for image registration and the results turned well.
- 38. Then, I registered the images obtained in the experiment.