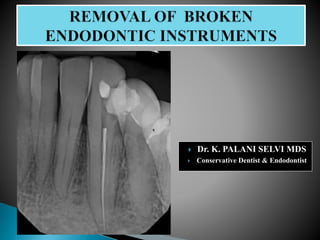
Removal of broken endodontic instruments
•Download as PPTX, PDF•
11 likes•5,312 views

One of the most dreaded nightmares of any clinician is broken instruments in the midst of an endodontic treatment. NiTi rotary instruments show a high incidence of instrument fracture despite their favourable qualities.

Recommended
Recommended
More Related Content
What's hot
What's hot (20)
Similar to Removal of broken endodontic instruments
Similar to Removal of broken endodontic instruments (20)
More from Palaniselvi Kamaraj
More from Palaniselvi Kamaraj (10)
Recently uploaded
Recently uploaded (20)
Removal of broken endodontic instruments
- 1. Dr. K. PALANI SELVI MDS Conservative Dentist & Endodontist
- 2. Separation of endodontic instruments is a PROCEDURAL MISHAP during endodontic treatment It is mainly attributed to two parameters:- 1. CYCLIC FATIGUE 2. TORSIONAL FATIGUE According to studies instrument seperation in SS files (0.25 – 6%) NiTi files (1.3 – 10%) Though there is great advent in the NiTi metallurgy, Instrument fracture is influenced by several contributing factors
- 4. Allowing the separated instrument to be RETAINED in the canal and treating the remaining portion of canal BYPASSING the separated fragment and treating the canal RETRIEVING the separated fragment and treating the canal SURGICAL APPROACH for retrieval of separated fragment followed by treatment accordingly
- 6. Diameter, length & position of obstruction Canal anatomy – Diameter, length & curvature of canal Thickness of dentin One third of obstruction is exposed Straight line position of instrument Positioning of fragment in canal Ss easier to remove NiTi can be fractured or pushed apically Cutting direction of fracture file
- 7. Chemical solvent Mini Forceps Broach Wire loops Hypodermic surgical needles Braiding of endodontic instruments Masserann kit Endo – Extractor system Cancellier extractor kit Instrument removal system Endo Rescue Canal finder system Endo pulse system Ultrasonics File removal system Softned gutta percha Laser irradiation Electrochemical process
- 8. EDTA Softening root canal wall dentin around separated instruments Facilitating the placement of files for the removal of the fragment Irritating the periapical tissue, they are no longer in use.
- 9. Steiglitz forceps Peet silver point forceps Endo Forceps Presence of sufficient space within the root canal system An instrument separated in a more coronal portion of the root canal can be grasped and removed by using forceps STEIGLITZ FORCEPS PEET’S FORCEPS ENDO FORCEPS
- 10. Separated fragment is a barbed broach and not tightly wedged in the root canal Another small barbed broach with a small piece of cotton roll twisted around it can be inserted inside the root canal to engage the fragment Then the whole assembly is withdrawn
- 11. This technique can be used to retrieve objects that are not tightly bound in the root canal By using a small mosquito hemostat The wire loop can be tightened around the upper free part of the fragment Then the whole assembly can be withdrawn from the root canal.
- 12. • Counterclockwise rotation may enhance removal of instruments with right-hand threads and vice versa • The groove (trough) around the fragment can also be prepared by using thin ultrasonic tips or trephine burs To remove the fragment, a cyanoacrylate glue or strong dental cement (eg, polycarboxylate) can be inserted into the hypodermic needle, and then (when set) the complex (needle-adhesive-fragment) can be pulled out delicately in a clockwise or counterclockwise rotational movement
- 13. Firstly, a #15 size H or K file can be inserted into the root canal to engage with the fragment Then insert 2 new H-files 25, and 30 Braiding of these files and a short outward pull resulted in the instrument being removed from the canal This method can be effective when the fragment is positioned deeply in the canal and not visible and the clinician is relying on tactile sense Natanasabapathy V, Sundar S, Koteeswaran V. Retrieval of fractured Ni-Ti rotary instrument using ultrasonics and file braiding technique under surgical operating microscope. Endodontology 2017;29:65-8
- 14. The Masserann kit consists of 14 hollow cutting-end trephine burs (sizes 11–24) ranging in diameter from 1.1–2.4 mm The trephines (burs) are used in a counterclockwise fashion to prepare a groove (trough) around the coronal portion of the fragment When inserted into the groove and tightening the screw, the free part of the fragment is locked between the plunger and the internal embossment
- 15. 2 extractors (tubes into which a plunger can be advanced) The relatively large diameters of extractors (1.2 and 1.5 mm) require removal of a considerable amount of dentin, which may weaken the root and lead to perforation or postoperative root fracture This largely restricts the use of Masserann instruments to anterior teeth However, by creating a wider space between the tube and plunger inside the tubular extractor, it can be used in the straight portion of canals of posterior teeth This also increases retention while gripping the firmly wedged separated instrument
- 16. (1) Modification of the extractor to ensure gripping by creating a wider space inside the tube (2) Combined use of the modified extractor with an ultrasonic device and a surgical operating microscope
- 17. It has 3 extractors of different sizes and colors (red 80, yellow 50, and white 30) Each extractor has its corresponding trephine bur that prepares a groove around the separated instrument
- 18. It contains 4 extractors with outside diameters of 0.50, 0.60, 0.70, and 0.80 mm
- 19. It contains 3 extractors The black extractor has an outside diameter of 1 mm and is used in the coronal one third of larger root canals The red and yellow extractors (0.80 and 0.60 mm respectively) are used in narrower canals
- 20. It consists mainly of a center drill called Pointier that excavates dentin coronal to the fragment and trephine burs that rotate in a counterclockwise direction to remove the fragment These instruments are available in 2 sizes, 090 (red) and 070 (yellow)
- 21. 1. Fractured instrument 2. Reshaping of access cavity 3. Create access to fragment 4. Down to fragment 5. Exposure of fragment surface by drilling around fragment 6. Fragment is surrounded and seized. Anticlockwise rotation. Removal of fragment which is firmly held in trepan bur by residues of dentin
- 22. It consist of a handpiece and specially designed files The system produces a vertical movement with maximum amplitude of 1–2 mm that decreases when the speed increases Bypassing a fragment Not to perforate the root or apically extrude the fragment, especially in curved root canals flutes of the file can mechanically engage with the separated fragment vertical vibration, the fragment can be loosened or even retrieved
- 23. In a clinical study that used the Canal Finder System as the primary retrieval technique, a 68% overall success rate was reported This system has been recently replaced by the EndoPuls system in which SS files are used in vertical reciprocation and a passive ¼ turn motion
- 24. Ultrasonic instruments have a contra-angled design with alloy tips of different lengths and sizes to enable use in different parts of the root canal Most ultrasonic instruments have an SS core coated entirely with diamond or zirconium nitride; therefore, the instrument abrades along its sides in addition to its tip Titanium-based tips have a smooth surface (uncoated) and can cut only at their tip Tips are flexible and can penetrate into curved root canals Blind trephining of dentin
- 25. A staging platform is prepared around the most coronal aspect of the fragment by using modified Gates Glidden burs (no. 2–4) or ultrasonic tips The Gates Glidden bur is modified by grinding the bur perpendicular to its long axis at its maximum cross sectional diameter The platform is kept centered to allow better visualization of the fragment and the surrounding dentin root-canal walls; therefore, equal amounts of dentin around the fragment are preserved, minimizing the risk of root perforation The ultrasonic tip is activated at lower power settings, so it trephines dentin in a counterclockwise motion around a fragment with right-hand threads and vice versa
- 26. With this trephining action and the vibration being transmitted to the fragment, the latter often begins to loosen and then ‘‘jumps’’ out of the root canal. Other root canal orifices in the tooth, when present, should be blocked with cotton pellets to prevent the entry of the loose fragment. If excessive pressure on the ultrasonic tip is applied, the vibration may push the fragment apically or the ultrasonic tip may fracture, leading to a more complicated scenario Also, to prevent separation of the ultrasonic tip, it is important to avoid unnecessary stress by only activating it when in contact with root tissue
- 27. K-type or Hedstrom files can be alternatives to ultrasonic tips The activated file should be of a tip size that enables trephination of dentin around the fragment However, files that are too small should not be used because they are themselves prone to separation Also, a spreader can be modified to a less tapered and smaller tip- sized instrument that can be activated to trephine deeply around a fragment
- 28. This system has been developed by Terauchi et al The amount of dentin removed is minimal It involves 3 sequential steps that use specially designed instruments In step 1 - two low-speed burs (28 mm long) are used The Cutting Bur A, with a diameter of 0.5 mm and a pilot tip, is used to enlarge the root canal The Cutting Bur B has a cylinder-shaped tip and a 0.45-mm diameter, so it removes dentin around the coronal part of the fragment Both burs are flexible, so they can be used in curved canals They can loosen or even remove the fragment because they are used in a counterclockwise motion If this fails; step 2 is attempted In step 2, an ultrasonic tip (30 0.2 mm) is used to prepare a groove around the separated fragment (at least 0.7 mm deep) This usually loosens the fragment or even removes it
- 29. • One part consists of a head connected to a disposable tube (0.45 mm in diameter), with a loop made of NiTi wire (0.08 mm) projecting from it. The second part is a brass body equipped with a sliding handle on the side that holds the wire of the head attachment. • When the handle is moved downward, it fastens the loop and vice versa . This system has been effective in laboratory studies and in some clinical cases of instruments separated in the apical part of the root canal when a relatively short retrieval time was reported . However, this system has not been introduced into the market yet In step 2 usually loosens the fragment or even removes it. Otherwise, step 3 is carried out In step 3, to mechanically engage the fragment and pull it out of the root canal, a file removal device of 2 sections is used
- 30. SS Hedstrom files #8, #10, and #15 are initially used to partially bypass the fragment and to check that it is loose Then, the apical 2–3 mm of a size 40, 0.04 taper GP point, or different size and taper according to the canal accommodating the fragment, is dipped in chloroform for approximately 30 seconds The softened GP is then inserted to the maximum extent into the canal and is allowed to harden for approximately 3 minutes The GP point and the H fragment can be then removed by using a delicate clockwise and counterclockwise pulling Action This conservative technique may assist in removal of loose fragments that are not easily accessible while using other removal techniques
- 31. Nd:YAG laser Minimum amounts of dentin are removed Reducing the risk of root fracture
- 32. Fragments can be removed in a relatively short time (less than 5 minutes) in 2 ways: The laser melts the dentin around the fragment and then H-files are used to bypass and then remove it, and The fragment is melted by the laser Heat generated within the root canal can carbonize or even burn dentin, which in turn may disturb the close contact or bond between the filling materials and root canal walls The probability of root perforation in curved root canals or thin roots
- 33. Ormiga et al Two electrodes are immersed in electrolyte; one acts as a cathode and the other as an anode The contact between the separated file and the anode as well as an adequate electrochemical potential difference between the anode and cathode electrodes results in the release of metallic ions to the solution, consequently causing progressive dissolution of the fragment inside the root canal
- 34. The tips of #20 K3 rotary files were exposed to sodium floride and sodium chloride solution for 8, 17, and 25 minutes and until the total consumption of the immersed portion (6 mm) Optical microscopy analysis revealed a progressive consumption of the immersed portion of the files with increasing polarization time Despite its limitations (long time required for complete fragment dissolution and the limited root canal space to accommodate the electrodes), results are promising and suggest the need for further studies to develop the technique before it is adopted clinically
- 35. Evidence of adverse impact of periapical lesions on root canal treatment outcome, a surgical approach can be considered as the optimum management choice Surgical management includes apical surgery, intentional replantation, root amputation, or hemisection When root-end resection is performed, a separated fragment located in the apical root section is removed as a part of the procedure Otherwise, if the fragment is located in the middle or coronal part of the root canal, the root-end cavity can be prepared and sealed with a root-end filling without fragment removal In both instances, elimination of bacteria and infected tissue as well as providing an excellent coronal and apical seal of the root canal system are essential
- 37. Each method vary in their effectiveness, cost and mechanism of action Heulsmann & schinkel 2015 stated that success rate of Masserann kit (48-55%) Canal finder system (68%) Alomairy in 2017 reported 60% success with Instrument Removal System Ultrasonics showed higher success rates 79% Nagai et al 91% Nehme et al 88% Fu et al 95% Cuje et al • MICROSONICS - innovative combination of DENTAL OPERATING MICROSCOPE with ULTRASONICS – improved success rates. (95% Cuje et al, 87% Suter et al) • Heulsmann and Schinkel advocated the use of MICROSCOPE as a prerequisite for instrument removal
- 38. Ledge Perforation Stripping Heat generation – PDL damage Breakage of the removal instruments Excessive loss of root dentin Apical extrusion of fragment
- 39. Avoid subjecting NiTi rotary instruments to excessive stress Use instruments that are less prone to fracture Follow an instrument use protocol Assess root canal curvatures radiographically and instrument them carefully Ensure that the endodontic access preparation is adequate Open orifices before negotiating canals Enlarge root canals with fine hand instruments Set rotational speed and torque at low levels Use the crown-down technique Irrigate and lubricate root canals during preparation Manipulate rotary instruments with a pecking or pumping motion If inexperienced, engage in preclinical training in the use of rotary instruments
- 40. Guidelines for management of intracanal separated instruments should be based on the highest level of clinical evidence; however, this has yet to be formulated. The decision on management should consider the following: constraints of the root canal accommodating the fragment, the stage of root canal instrumentation at which the instrument separated, the expertise of the clinician, armamentaria available, possible associated complications, the strategic importance of the tooth involved, and the presence/or absence of periapical pathosis. Clinical experience and understanding of these influencing factors as well as the ability to make a balanced decision are essential.