Downloaded 15 times


![Chapter 5. Trusted Storage Pools
A storage pool is a network of storage servers.
When the first server starts, the storage pool consists of that server alone. Adding additional storage
servers to the storage pool is achieved using the probe command from a running, trusted storage
server.
5.1. Adding Servers to the Trusted Storage Pool
The gluster peer probe [server] command is used to add servers to the trusted server pool.
Adding Three Servers to a Trusted Storage Pool
Create a trusted storage pool consisting of three storage servers, which comprise a volume.
Prerequisites
The glusterd service must be running on all storage servers requiring addition to the trusted
storage pool. See Chapter 4, The glusterd Service for service start and stop commands.
Server1, the trusted storage server, is started.
The host names of the target servers must be resolvable by DNS.
1. Run gluster peer probe [server] from Server 1 to add additional servers to the trusted
storage pool.
Note
Self-probing Server1 will result in an error because it is part of the trusted storage
pool by default.
# gluster peer probe server2
Probe successful
# gluster peer probe server3
Probe successful
# gluster peer probe server4
Probe successful
2. Verify the peer status from all servers using the following command:
# gluster peer status
Number of Peers: 3
Hostname: server2
Uuid: 5e987bda-16dd-43c2-835b-08b7d55e94e5
State: Peer in Cluster (Connected)
Red Hat St orage 3 Administ rat ion Guide
18](https://image.slidesharecdn.com/redhatstorage-3-administrationguide-en-us-150123085546-conversion-gate01/85/Red-hat-storage-3-administration_guide-en-us-22-320.jpg)
![Hostname: server3
Uuid: 1e0ca3aa-9ef7-4f66-8f15-cbc348f29ff7
State: Peer in Cluster (Connected)
Hostname: server4
Uuid: 3e0caba-9df7-4f66-8e5d-cbc348f29ff7
State: Peer in Cluster (Connected)
5.2. Removing Servers from the Trusted Storage Pool
Run gluster peer detach server to remove a server from the storage pool.
Removing One Server from the Trusted Storage Pool
Remove one server from the Trusted Storage Pool, and check the peer status of the storage pool.
Prerequisites
The glusterd service must be running on the server targeted for removal from the storage pool.
See Chapter 4, The glusterd Service for service start and stop commands.
The host names of the target servers must be resolvable by DNS.
1. Run gluster peer detach [server] to remove the server from the trusted storage pool.
# gluster peer detach server4
Detach successful
2. Verify the peer status from all servers using the following command:
# gluster peer status
Number of Peers: 2
Hostname: server2
Uuid: 5e987bda-16dd-43c2-835b-08b7d55e94e5
State: Peer in Cluster (Connected)
Hostname: server3
Uuid: 1e0ca3aa-9ef7-4f66-8f15-cbc348f29ff7
Chapt er 5. T rust ed St orage Pools
19](https://image.slidesharecdn.com/redhatstorage-3-administrationguide-en-us-150123085546-conversion-gate01/85/Red-hat-storage-3-administration_guide-en-us-23-320.jpg)


![Figure 6 .1. Illustration of a Distributed Volume
Warning
Distributed volumes can suffer significant data loss during a disk or server failure because
directory contents are spread randomly across the bricks in the volume.
Use distributed volumes where scalable storage and redundancy is either not important, or is
provided by other hardware or software layers.
Create a Distributed Volume
Use gluster volume create command to create different types of volumes, and gluster
volume info command to verify successful volume creation.
Pre-requisites
A trusted storage pool has been created, as described in Section 5.1, “Adding Servers to the
Trusted Storage Pool”.
Understand how to start and stop volumes, as described in Section 6.10, “Starting Volumes”.
1. Run the gluster volume create command to create the distributed volume.
The syntax is gluster volume create NEW-VOLNAME [transport tcp | rdma |
tcp,rdma] NEW-BRICK...
The default value for transport is tcp. Other options can be passed such as auth.allow or
auth.reject. See Section 8.1, “Configuring Volume Options” for a full list of parameters.
Chapt er 6. Red Hat St orage Volumes
25](https://image.slidesharecdn.com/redhatstorage-3-administrationguide-en-us-150123085546-conversion-gate01/85/Red-hat-storage-3-administration_guide-en-us-29-320.jpg)

![This type of volume creates copies of files across multiple bricks in the volume. Use replicated
volumes in environments where high-availability and high-reliability are critical.
Note
The number of bricks must be equal to the replica count for a replicated volume. To protect
against server and disk failures, it is recommended that the bricks of the volume are from
different servers.
Figure 6 .2. Illustration of a Replicated Volume
Create a Replicated Volume
Use gluster volume create to create different types of volumes, and gluster volume info
to verify successful volume creation.
Prerequisites
A trusted storage pool has been created, as described in Section 5.1, “Adding Servers to the
Trusted Storage Pool”.
Understand how to start and stop volumes, as described in Section 6.10, “Starting Volumes”.
1. Run the gluster volume create command to create the replicated volume.
The syntax is # gluster volume create NEW-VOLNAME [replica COUNT]
[transport tcp | rdma | tcp,rdma] NEW-BRICK...
The default value for transport is tcp. Other options can be passed such as auth.allow or
auth.reject. See Section 8.1, “Configuring Volume Options” for a full list of parameters.
Chapt er 6. Red Hat St orage Volumes
27](https://image.slidesharecdn.com/redhatstorage-3-administrationguide-en-us-150123085546-conversion-gate01/85/Red-hat-storage-3-administration_guide-en-us-31-320.jpg)

![Note
The number of bricks must be a multiple of the replica count for a distributed replicated
volume. Also, the order in which bricks are specified has a great effect on data protection.
Each replica_count consecutive bricks in the list you give will form a replica set, with all replica
sets combined into a distribute set. To ensure that replica-set members are not placed on the
same node, list the first brick on every server, then the second brick on every server in the
same order, and so on.
Figure 6 .3. Illustration of a Distributed Replicated Volume
Create a Distributed Replicated Volume
Use gluster volume create to create a distributed replicated volume, and gluster volume
info to verify successful volume creation.
Prerequisites
A trusted storage pool has been created, as described in Section 5.1, “Adding Servers to the
Trusted Storage Pool”.
Understand how to start and stop volumes, as described in Section 6.10, “Starting Volumes”.
1. Run the gluster volume create command to create the replicated volume.
The syntax is # gluster volume create NEW-VOLNAME [replica COUNT]
[transport tcp | rdma | tcp,rdma] NEW-BRICK...
Chapt er 6. Red Hat St orage Volumes
29](https://image.slidesharecdn.com/redhatstorage-3-administrationguide-en-us-150123085546-conversion-gate01/85/Red-hat-storage-3-administration_guide-en-us-33-320.jpg)

![Note
The number of bricks must be equal to the stripe count for a striped volume.
Figure 6 .4 . Illustration of a Striped Volume
Create a Striped Volume
Use gluster volume create to create a striped volume, and gluster volume info to verify
successful volume creation.
Pre-requisites
A trusted storage pool has been created, as described in Section 5.1, “Adding Servers to the
Trusted Storage Pool”.
Understand how to start and stop volumes, as described in Section 6.10, “Starting Volumes”.
1. Run the gluster volume create command to create the replicated volume.
The syntax is # gluster volume create NEW-VOLNAME [stripe COUNT]
[transport tcp | rdma | tcp,rdma] NEW-BRICK...
The default value for transport is tcp. Other options can be passed such as auth.allow or
auth.reject. See Section 8.1, “Configuring Volume Options” for a full list of parameters.
Example 6 .6 . Striped Volume Across Two Servers
Chapt er 6. Red Hat St orage Volumes
31](https://image.slidesharecdn.com/redhatstorage-3-administrationguide-en-us-150123085546-conversion-gate01/85/Red-hat-storage-3-administration_guide-en-us-35-320.jpg)

![Figure 6 .5. Illustration of a Distributed Striped Volume
Create a Distributed Striped Volume
Use gluster volume create to create a distributed striped volume, and gluster volume
info to verify successful volume creation.
Pre-requisites
A trusted storage pool has been created, as described in Section 5.1, “Adding Servers to the
Trusted Storage Pool”.
Understand how to start and stop volumes, as described in Section 6.10, “Starting Volumes”.
1. Run the gluster volume create command to create the replicated volume.
The syntax is # gluster volume create NEW-VOLNAME [stripe COUNT]
[transport tcp | rdma | tcp,rdma] NEW-BRICK...
The default value for transport is tcp. Other options can be passed such as auth.allow or
auth.reject. See Section 8.1, “Configuring Volume Options” for a full list of parameters.
Example 6 .7. Distributed Striped Volume Across Four Storage Servers
# gluster volume create test-volume stripe 2 transport tcp
server1:/exp1/brick server1:/exp2/brick server2:/exp3/brick
server2:/exp4/brick
Creation of test-volume has been successful
Please start the volume to access data.
Chapt er 6. Red Hat St orage Volumes
33](https://image.slidesharecdn.com/redhatstorage-3-administrationguide-en-us-150123085546-conversion-gate01/85/Red-hat-storage-3-administration_guide-en-us-37-320.jpg)

![Figure 6 .6 . Illustration of a Striped Replicated Volume
Create a Striped Replicated Volume
Use gluster volume create to create a striped replicated volume, and gluster volume info
to verify successful volume creation.
Pre-requisites
A trusted storage pool has been created, as described in Section 5.1, “Adding Servers to the
Trusted Storage Pool”.
Understand how to start and stop volumes, as described in Section 6.10, “Starting Volumes”.
1. Run the gluster volume create command to create the replicated volume.
The syntax is # gluster volume create NEW-VOLNAME [stripe COUNT] [replica
COUNT] [transport tcp | rdma | tcp,rdma] NEW-BRICK...
The default value for transport is tcp. Other options can be passed such as auth.allow or
auth.reject. See Section 8.1, “Configuring Volume Options” for a full list of parameters.
Example 6 .8. Striped Replicated Volume Across Four Servers
The order in which bricks are specified determines how bricks are mirrored with each other.
For example, first n bricks, where n is the replica count. In this scenario, the first two bricks
specified mirror each other. If more bricks were specified, the next two bricks in sequence
would mirror each other. .
Chapt er 6. Red Hat St orage Volumes
35](https://image.slidesharecdn.com/redhatstorage-3-administrationguide-en-us-150123085546-conversion-gate01/85/Red-hat-storage-3-administration_guide-en-us-39-320.jpg)

![Figure 6 .7. Illustration of a Distributed Striped Replicated Volume
Create a Distributed Striped Replicated Volume
Use gluster volume create to create a distributed striped replicated volume, and gluster
volume info to verify successful volume creation.
Prerequisites
A trusted storage pool has been created, as described in Section 5.1, “Adding Servers to the
Trusted Storage Pool”.
Understand how to start and stop volumes, as described in Section 6.10, “Starting Volumes”.
1. Run the gluster volume create command to create the replicated volume.
The syntax is # gluster volume create NEW-VOLNAME [stripe COUNT] [replica
COUNT] [transport tcp | rdma | tcp,rdma] NEW-BRICK...
The default value for transport is tcp. Other options can be passed such as auth.allow or
auth.reject. See Section 8.1, “Configuring Volume Options” for a full list of parameters.
Example 6 .10. Distributed Replicated Striped Volume Across Eight Servers
The order in which bricks are specified determines how bricks are mirrored with each other.
For example, first n bricks, where n is the replica count. In this scenario, the first two bricks
Chapt er 6. Red Hat St orage Volumes
37](https://image.slidesharecdn.com/redhatstorage-3-administrationguide-en-us-150123085546-conversion-gate01/85/Red-hat-storage-3-administration_guide-en-us-41-320.jpg)


![A:
Q:
A:
Start the rpcbind service by running the following command:
# service rpcbind start
The NFS server glusterfsd starts but the initialization fails with nfsrpc- service:
portmap registration of program failed error message in the log.
NFS start-up succeeds but the initialization of the NFS service can still fail preventing clients
from accessing the mount points. Such a situation can be confirmed from the following error
messages in the log file:
[2010-05-26 23:33:47] E
[rpcsvc.c:2598:rpcsvc_program_register_portmap] rpc-service: Could
notregister with portmap
[2010-05-26 23:33:47] E [rpcsvc.c:2682:rpcsvc_program_register] rpc-
service: portmap registration of program failed
[2010-05-26 23:33:47] E [rpcsvc.c:2695:rpcsvc_program_register] rpc-
service: Program registration failed: MOUNT3, Num: 100005, Ver: 3,
Port: 38465
[2010-05-26 23:33:47] E [nfs.c:125:nfs_init_versions] nfs: Program
init failed
[2010-05-26 23:33:47] C [nfs.c:531:notify] nfs: Failed to initialize
protocols
[2010-05-26 23:33:49] E
[rpcsvc.c:2614:rpcsvc_program_unregister_portmap] rpc-service: Could
not unregister with portmap
[2010-05-26 23:33:49] E [rpcsvc.c:2731:rpcsvc_program_unregister]
rpc-service: portmap unregistration of program failed
[2010-05-26 23:33:49] E [rpcsvc.c:2744:rpcsvc_program_unregister]
rpc-service: Program unregistration failed: MOUNT3, Num: 100005, Ver:
3, Port: 38465
1. Start the rpcbind service on the NFS server by running the following command:
# service rpcbind start
After starting rpcbind service, glusterFS NFS server needs to be restarted.
2. Stop another NFS server running on the same machine.
Such an error is also seen when there is another NFS server running on the same
machine but it is not the glusterFS NFS server. On Linux systems, this could be the
kernel NFS server. Resolution involves stopping the other NFS server or not running the
glusterFS NFS server on the machine. Before stopping the kernel NFS server, ensure
that no critical service depends on access to that NFS server's exports.
On Linux, kernel NFS servers can be stopped by using either of the following commands
depending on the distribution in use:
# service nfs-kernel-server stop
# service nfs stop
3. Restart glusterFS NFS server.
Red Hat St orage 3 Administ rat ion Guide
52](https://image.slidesharecdn.com/redhatstorage-3-administrationguide-en-us-150123085546-conversion-gate01/85/Red-hat-storage-3-administration_guide-en-us-56-320.jpg)
![Q:
A:
Q:
A:
The NFS server start-up fails with the message Port is already in use in the log file.
This error can arise in case there is already a glusterFS NFS server running on the same
machine. This situation can be confirmed from the log file, if the following error lines exist:
[2010-05-26 23:40:49] E [rpc-socket.c:126:rpcsvc_socket_listen] rpc-
socket: binding socket failed:Address already in use
[2010-05-26 23:40:49] E [rpc-socket.c:129:rpcsvc_socket_listen] rpc-
socket: Port is already in use
[2010-05-26 23:40:49] E [rpcsvc.c:2636:rpcsvc_stage_program_register]
rpc-service: could not create listening connection
[2010-05-26 23:40:49] E [rpcsvc.c:2675:rpcsvc_program_register] rpc-
service: stage registration of program failed
[2010-05-26 23:40:49] E [rpcsvc.c:2695:rpcsvc_program_register] rpc-
service: Program registration failed: MOUNT3, Num: 100005, Ver: 3,
Port: 38465
[2010-05-26 23:40:49] E [nfs.c:125:nfs_init_versions] nfs: Program
init failed
[2010-05-26 23:40:49] C [nfs.c:531:notify] nfs: Failed to initialize
protocols
In this release, the glusterFS NFS server does not support running multiple NFS servers on the
same machine. To resolve the issue, one of the glusterFS NFS servers must be shutdown.
The mount command fails with with NFS server failed error:
mount: mount to NFS server '10.1.10.11' failed: timed out (retrying).
Review and apply the suggested solutions to correct the issue.
Disable name lookup requests from NFS server to a DNS server.
The NFS server attempts to authenticate NFS clients by performing a reverse DNS lookup to
match host names in the volume file with the client IP addresses. There can be a situation
where the NFS server either is not able to connect to the DNS server or the DNS server is
taking too long to respond to DNS request. These delays can result in delayed replies from
the NFS server to the NFS client resulting in the timeout error.
NFS server provides a work-around that disables DNS requests, instead relying only on the
client IP addresses for authentication. The following option can be added for successful
mounting in such situations:
option nfs.addr.namelookup off
Chapt er 7. Accessing Dat a - Set t ing Up Client s
53](https://image.slidesharecdn.com/redhatstorage-3-administrationguide-en-us-150123085546-conversion-gate01/85/Red-hat-storage-3-administration_guide-en-us-57-320.jpg)

![Q:
A:
Q:
A:
Q:
A:
After the machine that is running NFS server is restarted the client fails to reclaim
the locks held earlier.
The Network Status Monitor (NSM) service daemon (rpc.statd) is started before gluster NFS
server. Therefore, NSM sends a notification to the client to reclaim the locks. When the clients
send the reclaim request, the NFS server does not respond as it is not started yet. Therefore the
client request fails.
Solution: To resolve the issue, prevent the NSM daemon from starting when the server starts.
Run chkconfig --list nfslock to check if NSM is configured during OS boot.
If any of the entries are on,run chkconfig nfslock off to disable NSM clients during
boot, which resolves the issue.
The rpc actor failed to complete successfully error is displayed in the
nfs.log, even after the volume is mounted successfully.
gluster NFS supports only NFS version 3. When nfs-utils mounts a client when the version is
not mentioned, it tries to negotiate using version 4 before falling back to version 3. This is the
cause of the messages in both the server log and the nfs.log file.
[2013-06-25 00:03:38.160547] W [rpcsvc.c:180:rpcsvc_program_actor] 0-
rpc-service: RPC program version not available (req 100003 4)
[2013-06-25 00:03:38.160669] E
[rpcsvc.c:448:rpcsvc_check_and_reply_error] 0-rpcsvc: rpc actor
failed to complete successfully
To resolve the issue, declare NFS version 3 and the noacl option in the mount command as
follows:
mount -t nfs -o vers=3,noacl server1:/test-volume /mnt/glusterfs
The mount command fails with No such file or directory.
This problem is encountered as the volume is not present.
7.3.3. NFS Ganesha
Chapt er 7. Accessing Dat a - Set t ing Up Client s
55](https://image.slidesharecdn.com/redhatstorage-3-administrationguide-en-us-150123085546-conversion-gate01/85/Red-hat-storage-3-administration_guide-en-us-59-320.jpg)


![Section 7.4.2.1, “Manually Mounting Volumes Using SMB on Red Hat Enterprise Linux and
Windows”
Section 7.4.2.2, “Automatically Mounting Volumes Using SMB on Red Hat Enterprise Linux and
Windows”
1. With elevated privileges, navigate to /var/lib/glusterd/hooks/1/start/post
2. Rename the S30samba-start.sh to K30samba-start.sh.
For more information about these scripts, see Section 16.2, “Prepackaged Scripts”.
3. Run # smbstatus -S on the client to display the status of the volume:
Service pid machine Connected at
------------------------------------------------------------------
-
gluster-<VOLNAME> 11967 __ffff_192.168.1.60 Mon Aug 6 02:23:25
2012
Note
To enable Samba to start on boot, run the following command:
#chkconfig smb on
Manually Exporting Red Hat Storage Volumes Through Samba
Use Samba to export Red Hat Storage volumes through the Server Message Block (SMB) protocol.
Prerequisites
Complete either one of the following tasks before continuing:
Section 7.4.2.1, “Manually Mounting Volumes Using SMB on Red Hat Enterprise Linux and
Windows”
Section 7.4.2.2, “Automatically Mounting Volumes Using SMB on Red Hat Enterprise Linux and
Windows”
Note
To be able mount from any server in the trusted storage pool, repeat these steps on each Red
Hat Storage node. For more advanced configurations, refer to the Samba documentation.
1. Open the /etc/samba/smb.conf file in a text editor and add the following lines for a simple
configuration:
[gluster-<VOLNAME>]
comment = For samba share of volume VOLNAME
Red Hat St orage 3 Administ rat ion Guide
68](https://image.slidesharecdn.com/redhatstorage-3-administrationguide-en-us-150123085546-conversion-gate01/85/Red-hat-storage-3-administration_guide-en-us-72-320.jpg)
![vfs objects = glusterfs
glusterfs:volume = VOLNAME
glusterfs:logfile = /var/log/samba/VOLNAME.log
glusterfs:loglevel = 7
path = /
read only = no
guest ok = yes
The configuration options are described in the following table:
Table 7.7. Configuration Options
Configuration
Options
Required? Default Value Description
Path Yes n/a It represents the path
that is relative to the
root of the gluster
volume that is being
shared. Hence /
represents the root of
the gluster volume.
Exporting a
subdirectory of a
volume is supported
and /subdir in path
exports only that
subdirectory of the
volume.
glusterfs:volum
e
Yes n/a The volume name
that is shared.
glusterfs:logfi
le
No NULL Path to the log file
that will be used by
the gluster modules
that are loaded by
the vfs plugin.
Standard Samba
variable
substitutions as
mentioned in
smb.conf are
supported.
glusterfs:logle
vel
No 7 This option is
equivalent to the
client-log-
level option of
gluster. 7 is the
default value and
corresponds to the
INFO level.
glusterfs:volfi
le_server
No localhost The gluster server to
be contacted to fetch
the volfile for the
volume.
2. Run service smb [re]start to start or restart the smb service.
Chapt er 7. Accessing Dat a - Set t ing Up Client s
69](https://image.slidesharecdn.com/redhatstorage-3-administrationguide-en-us-150123085546-conversion-gate01/85/Red-hat-storage-3-administration_guide-en-us-73-320.jpg)

![Run # mount -t cifs SAMBA_SERVER_IPgluster-VOLNAME /mnt/smb for
a Red Hat Storage volume exported through SMB, which uses the
/etc/samba/smb.conf file with the following configuration.
[gluster-<VOLNAME>]
comment = For samba share of volume VOLNAME
vfs objects = glusterfs
glusterfs:volume = VOLNAME
glusterfs:logfile = /var/log/samba/VOLNAME.log
glusterfs:loglevel = 7
path = /
read only = no
guest ok = yes
2. Run # smbstatus -S on the client to display the status of the volume:
Service pid machine Connected at
------------------------------------------------------------------
-
gluster-<VOLNAME> 11967 __ffff_192.168.1.60 Mon Aug 6 02:23:25
2012
Mounting a Volume Manually using SMB through Microsoft Windows Explorer
Mount a Red Hat Storage volume manually using Server Message Block (SMB) on Microsoft
Windows using Windows Explorer.
1. In Windows Explorer, click Tools → Map Network Drive…. to open the Map Network
Drive screen.
2. Choose the drive letter using the Drive drop-down list.
3. In the Folder text box, specify the path of the server and the shared resource in the following
format: SERVER_NAMEVOLNAME.
4. Click Finish to complete the process, and display the network drive in Windows Explorer.
5. Navigate to the network drive to verify it has mounted correctly.
Mounting a Volume Manually using SMB on Microsoft Windows Command-line.
Mount a Red Hat Storage volume manually using Server Message Block (SMB) on Microsoft
Windows using Windows Explorer.
1. Click Start → Run, and then type cmd.
2. Enter net use z: SERVER_NAMEVOLNAME, where z: is the drive letter to assign to the
shared volume.
For example, net use y: server1test-volume
3. Navigate to the network drive to verify it has mounted correctly.
7.4.2.2. Aut omat ically Mount ing Volumes Using SMB on Red Hat Ent erprise Linux
and Windows
Chapt er 7. Accessing Dat a - Set t ing Up Client s
71](https://image.slidesharecdn.com/redhatstorage-3-administrationguide-en-us-150123085546-conversion-gate01/85/Red-hat-storage-3-administration_guide-en-us-75-320.jpg)


![For example:
# gluster volume create ctdb replica 4
10.16.157.75:/rhs/brick1/ctdb/b1 10.16.157.78:/rhs/brick1/ctdb/b2
10.16.157.81:/rhs/brick1/ctdb/b3 10.16.157.84:/rhs/brick1/ctdb/b4
2. In the following files, replace all in the statement META=all to the newly created volume
name
/var/lib/glusterd/hooks/1/start/post/S29CTDBsetup.sh
/var/lib/glusterd/hooks/1/stop/pre/S29CTDB-teardown.sh.
For example:
META=all
to
META=ctdb
3. Start the volume.
The S29CTDBsetup.sh script runs on all Red Hat Storage servers and adds the following
lines to the [global] section of your Samba configuration file at /etc/samba/smb.conf.
clustering = yes
idmap backend = tdb2
The script stops Samba server, modifies Samba configuration, adds an entry in
/etc/fstab/ for the mount, and mounts the volume at /gluster/lock on all the nodes
with Samba server. It also enables automatic start of CTDB service on reboot.
Note
When you stop a volume, S29CTDB-teardown.sh script runs on all Red Hat Storage
servers and removes the following lines from [global] section of your Samba
configuration file at /etc/samba/smb.conf.
clustering = yes
idmap backend = tdb2
It also removes an entry in /etc/fstab/ for the mount and unmount the volume at
/gluster/lock.
4. Verify if the file /etc/sysconfig/ctdb exists on all the nodes that is used as Samba
server. This file contains Red Hat Storage recommended CTDB configurations.
5. Create /etc/ctdb/nodes file on all the nodes that is used as Samba servers and add the
IPs of these nodes to the file.
Red Hat St orage 3 Administ rat ion Guide
74](https://image.slidesharecdn.com/redhatstorage-3-administrationguide-en-us-150123085546-conversion-gate01/85/Red-hat-storage-3-administration_guide-en-us-78-320.jpg)


![run-time in secs
---- ------- ---- ---- ------ ----- -----
------
localhost 23 376Bytes 34 0 0 stopped
2.00
rhs1 0 0Bytes 88 0 0 stopped
2.00
rhs2 0 0Bytes 0 0 0 not
started 0.00
'remove-brick' process may be in the middle of a file migration.
The process will be fully stopped once the migration of the file is
complete.
Please check remove-brick process for completion before doing any further
brick related tasks on the volume.
8.4. Migrating Volumes
Data can be redistributed across bricks while the trusted storage pool is online and available.Before
replacing bricks on the new servers, ensure that the new servers are successfully added to the trusted
storage pool.
Note
Before performing a replace-brick operation, review the known issues related to replace-
brick operation in the Red Hat Storage 3.0 Release Notes.
8.4.1. Replacing a Subvolume on a Distribute or Distribute-replicate Volume
This procedure applies only when at least one brick from the subvolume to be replaced is online. In
case of a Distribute volume, the brick that must be replaced must be online. In case of a Distribute-
replicate, at least one brick from the subvolume from the replica set that must be replaced must be
online.
To replace the entire subvolume with new bricks on a Distribute-replicate volume, follow these steps:
1. Add the new bricks to the volume.
# gluster volume add-brick <VOLNAME> [<stripe|replica> <COUNT>]
NEW-BRICK
Example 8.1. Adding a Brick to a Distribute Volume
# gluster volume add-brick test-volume server5:/exp5
Add Brick successful
2. Verify the volume information using the command:
# gluster volume info
Volume Name: test-volume
Red Hat St orage 3 Administ rat ion Guide
96](https://image.slidesharecdn.com/redhatstorage-3-administrationguide-en-us-150123085546-conversion-gate01/85/Red-hat-storage-3-administration_guide-en-us-100-320.jpg)
![Type: Distribute
Status: Started
Number of Bricks: 5
Bricks:
Brick1: server1:/exp1
Brick2: server2:/exp2
Brick3: server3:/exp3
Brick4: server4:/exp4
Brick5: server5:/exp5
Note
In case of a Distribute-replicate or stripe volume, you must specify the replica or stripe
count in the add-brick command and provide the same number of bricks as the
replica or stripe count to the add-brick command.
3. Remove the bricks to be replaced from the subvolume.
a. Start the remove-brick operation using the command:
# gluster volume remove-brick <VOLNAME> [replica <COUNT>]
<BRICK> start
Example 8.2. Start a remove-brick operation on a distribute volume
#gluster volume remove-brick test-volume server2:/exp2
start
Remove Brick start successful
b. View the status of the remove-brick operation using the command:
# gluster volume remove-brick <VOLNAME> [replica <COUNT>]
BRICK status
Example 8.3. View the Status of remove-brick Operation
# gluster volume remove-brick test-volume server2:/exp2
status
Node Rebalanced-files size scanned failures
status
-----------------------------------------------------------
-------
server2 16 16777216 52 0 in
progress
Keep monitoring the remove-brick operation status by executing the above
command. When the value of the status field is set to complete in the output of
remove-brick status command, proceed further.
Chapt er 8. Managing Red Hat St orage Volumes
97](https://image.slidesharecdn.com/redhatstorage-3-administrationguide-en-us-150123085546-conversion-gate01/85/Red-hat-storage-3-administration_guide-en-us-101-320.jpg)
![c. Commit the remove-brick operation using the command:
#gluster volume remove-brick <VOLNAME> [replica <COUNT>]
<BRICK> commit
Example 8.4 . Commit the remove-brick Operation on a Distribute Volume
#gluster volume remove-brick test-volume server2:/exp2
commit
d. Verify the volume information using the command:
# gluster volume info
Volume Name: test-volume
Type: Distribute
Status: Started
Number of Bricks: 4
Bricks:
Brick1: server1:/exp1
Brick3: server3:/exp3
Brick4: server4:/exp4
Brick5: server5:/exp5
e. Verify the content on the brick after committing the remove-brick operation on the
volume. If there are any files leftover, copy it through FUSE or NFS mount.
a. Verify if there are any pending files on the bricks of the subvolume.
Along with files, all the application-specific extended attributes must be
copied. glusterFS also uses extended attributes to store its internal data. The
extended attributes used by glusterFS are of the form
trusted.glusterfs.*, trusted.afr.*, and trusted.gfid. Any
extended attributes other than ones listed above must also be copied.
To copy the application-specific extended attributes and to achieve a an effect
similar to the one that is described above, use the following shell script:
Syntax:
# copy.sh <glusterfs-mount-point> <brick>
Example 8.5. Code Snippet Usage
If the mount point is /mnt/glusterfs and brick path is
/export/brick1, then the script must be run as:
# copy.sh /mnt/glusterfs /export/brick
#!/bin/bash
MOUNT=$1
Red Hat St orage 3 Administ rat ion Guide
98](https://image.slidesharecdn.com/redhatstorage-3-administrationguide-en-us-150123085546-conversion-gate01/85/Red-hat-storage-3-administration_guide-en-us-102-320.jpg)


![To set the allocation strategy to inode64 when file system is being mounted, you need to use
-o inode64 option with the mkfs.xfs command as shown in the following Access Time
section.
6. Access Time
If the application does not require to update the access time on files, than file system must
always be mounted with noatime mount option. For example:
# mount -t xfs -o inode64,noatime <logical volume> <mount point>
This optimization improves performance of small-file reads by avoiding updates to the XFS
inodes when files are read.
/etc/fstab entry for option E + F
<logical volume> <mount point>xfs inode64,noatime 0 0
7. Performance tuning option in Red Hat Storage
Run the following command after creating the volume:
# tuned-adm profile default ; tuned-adm profile rhs-high-throughput
Switching to profile 'default'
Applying ktune sysctl settings:
/etc/ktune.d/tunedadm.conf: [ OK ]
Applying sysctl settings from /etc/sysctl.conf
Starting tuned: [ OK ]
Stopping tuned: [ OK ]
Switching to profile 'rhs-high-throughput'
This profile performs the following:
Increases read ahead to 64 MB
Changes I/O scheduler to deadline
Disables power-saving mode
8. Writeback caching
For small-file and random write performance, we strongly recommend writeback cache, that is,
non-volatile random-access memory (NVRAM) in your storage controller. For example,
normal Dell and HP storage controllers have it. Ensure that NVRAM is enabled, that is, the
battery is working. Refer your hardware documentation for details on enabling NVRAM.
Do not enable writeback caching in the disk drives, this is a policy where the disk drive
considers the write is complete before the write actually made it to the magnetic media
(platter). As a result, the disk write cache might lose its data during a power failure or even
loss of metadata leading to file system corruption.
9. Allocation groups
Red Hat St orage 3 Administ rat ion Guide
122](https://image.slidesharecdn.com/redhatstorage-3-administrationguide-en-us-150123085546-conversion-gate01/85/Red-hat-storage-3-administration_guide-en-us-126-320.jpg)


![# gluster system:: execute gsec_create
2. Create the geo-replication session using the following command. The push-pem option is
needed to perform the necessary pem-file setup on the slave nodes.
# gluster volume geo-replication MASTER_VOL SLAVE_HOST::SLAVE_VOL
create push-pem [force]
For example:
# gluster volume geo-replication master-vol example.com::slave-vol
create push-pem
Note
There must be password-less SSH access between the node from which this command
is run, and the slave host specified in the above command. This command performs
the slave verification, which includes checking for a valid slave URL, valid slave
volume, and available space on the slave. If the verification fails, you can use the
force option which will ignore the failed verification and create a geo-replication
session.
3. Verify the status of the created session by running the following command:
# gluster volume geo-replication MASTER_VOL SLAVE_HOST::SLAVE_VOL
status
10.3.5. Setting Up your Environment for a Secure Geo-replication Slave
Geo-replication supports access to Red Hat Storage slaves through SSH using an unprivileged
account (user account with non-zero UID). This method is recommended as it is more secure and it
reduces the master's capabilities over slave to the minimum. This feature relies on mountbroker, an
internal service of glusterd which manages the mounts for unprivileged slave accounts. You must
perform additional steps to configure glusterd with the appropriate mountbroker's access control
directives. The following example demonstrates this process:
Perform the following steps on all the Slave nodes to setup an auxiliary glusterFS
mount for the unprivileged account:
1. Create a new group. For example, geogroup.
2. Create a unprivileged account. For example, geoaccount. Add geoaccount as a member
of geogroup group.
3. As a root, create a new directory with permissions 0711. Ensure that the location where this
directory is created is writeable only by root but geoaccount is able to access it. For
example, create a mountbroker-root directory at /var/mountbroker-root.
4. Add the following options to the glusterd.vol file, assuming the name of the slave Red Hat
Storage volume as slavevol:
Red Hat St orage 3 Administ rat ion Guide
128](https://image.slidesharecdn.com/redhatstorage-3-administrationguide-en-us-150123085546-conversion-gate01/85/Red-hat-storage-3-administration_guide-en-us-132-320.jpg)


![Important
There will be a mismatch between the outputs of the df command (including -h and -k)
and inode of the master and slave volumes when the data is in full sync. This is due to the
extra inode and size consumption by the changelog journaling data, which keeps track
of the changes done on the file system on the master volume. Instead of running the df
command to verify the status of synchronization, use # gluster volume geo-
replication MASTER_VOL SLAVE_HOST::SLAVE_VOL status detail instead.
The status of a session can be one of the following:
Initializing: This is the initial phase of the Geo-replication session; it remains in this state for
a minute in order to make sure no abnormalities are present.
Not Started: The geo-replication session is created, but not started.
Active: The gsync daemon in this node is active and syncing the data.
Passive: A replica pair of the active node. The data synchronization is handled by active
node. Hence, this node does not sync any data.
Faulty: The geo-replication session has experienced a problem, and the issue needs to be
investigated further. For more information, see Section 10.10, “Troubleshooting Geo-
replication” section.
Stopped: The geo-replication session has stopped, but has not been deleted.
Crawl Status
Changelog Crawl: The changelog translator has produced the changelog and that is
being consumed by gsyncd daemon to sync data.
Hybrid Crawl: The gsyncd daemon is crawling the glusterFS file system and generating
pseudo changelog to sync data.
Checkpoint Status: Displays the status of the checkpoint, if set. Otherwise, it displays as
N/A.
10.4.4. Configuring a Geo-replication Session
To configure a geo-replication session, use the following command:
# gluster volume geo-replication MASTER_VOL SLAVE_HOST::SLAVE_VOL
config [options]
For example, to view the list of all option/value pairs:
# gluster volume geo-replication Volume1 example.com::slave-vol config
To delete a setting for a geo-replication config option, prefix the option with ! (exclamation mark).
For example, to reset log-level to the default value:
# gluster volume geo-replication Volume1 example.com::slave-vol config
'!log-level'
Chapt er 10. Managing Geo- replicat ion
133](https://image.slidesharecdn.com/redhatstorage-3-administrationguide-en-us-150123085546-conversion-gate01/85/Red-hat-storage-3-administration_guide-en-us-137-320.jpg)
![Configurable Options
The following table provides an overview of the configurable options for a geo-replication setting:
Option Description
gluster-log-file LOGFILE The path to the geo-replication glusterfs log file.
gluster-log-level LOGFILELEVEL The log level for glusterfs processes.
log-file LOGFILE The path to the geo-replication log file.
log-level LOGFILELEVEL The log level for geo-replication.
ssh-command COMMAND The SSH command to connect to the remote
machine (the default is SSH).
rsync-command COMMAND The rsync command to use for synchronizing
the files (the default is rsync).
use-tarssh true The use-tarssh command allows tar over Secure
Shell protocol. Use this option to handle
workloads of files that have not undergone
edits.
volume_id=UID The command to delete the existing master UID
for the intermediate/slave node.
timeout SECONDS The timeout period in seconds.
sync-jobs N The number of simultaneous files/directories that
can be synchronized.
ignore-deletes If this option is set to 1, a file deleted on the
master will not trigger a delete operation on the
slave. As a result, the slave will remain as a
superset of the master and can be used to
recover the master in the event of a crash and/or
accidental delete.
checkpoint [LABEL|now] Sets a checkpoint with the given option LABEL. If
the option is set as now, then the current time
will be used as the label.
10.4.4.1. Geo-replicat ion Checkpoint s
10.4 .4 .1.1. About Geo-replication Checkpoints
Geo-replication data synchronization is an asynchronous process, so changes made on the master
may take time to be replicated to the slaves. Data replication to a slave may also be interrupted by
various issues, such network outages.
Red Hat Storage provides the ability to set geo-replication checkpoints. By setting a checkpoint,
synchronization information is available on whether the data that was on the master at that point in
time has been replicated to the slaves.
10.4 .4 .1.2. Configuring and Viewing Geo-replication Checkpoint Information
To set a checkpoint on a geo-replication session, use the following command:
# gluster volume geo-replication MASTER_VOL SLAVE_HOST::SLAVE_VOL
config checkpoint [now|LABEL]
For example, to set checkpoint between Volume1 and example.com:/data/remote_dir:
Red Hat St orage 3 Administ rat ion Guide
134](https://image.slidesharecdn.com/redhatstorage-3-administrationguide-en-us-150123085546-conversion-gate01/85/Red-hat-storage-3-administration_guide-en-us-138-320.jpg)
![# gluster volume geo-replication Volume1 example.com::slave-vol config
checkpoint now
geo-replication config updated successfully
The label for a checkpoint can be set as the current time using now, or a particular label can be
specified, as shown below:
# gluster volume geo-replication Volume1 example.com::slave-vol config
checkpoint NEW_ACCOUNTS_CREATED
geo-replication config updated successfully.
To display the status of a checkpoint for a geo-replication session, use the following command:
# gluster volume geo-replication MASTER_VOL SLAVE_HOST::SLAVE_VOL
status
To delete checkpoints for a geo-replication session, use the following command:
# gluster volume geo-replication MASTER_VOL SLAVE_HOST::SLAVE_VOL
config '!checkpoint'
For example, to delete the checkpoint set between Volume1 and example.com::slave-vol:
# gluster volume geo-replication Volume1 example.com::slave-vol config
'!checkpoint'
geo-replication config updated successfully
To view the history of checkpoints for a geo-replication session (including set, delete, and
completion events), use the following command:
# gluster volume geo-replication MASTER_VOL SLAVE_HOST::SLAVE_VOL
config log-file | xargs grep checkpoint
For example, to display the checkpoint history between Volume1 and example.com::slave-
vol:
# gluster volume geo-replication Volume1 example.com::slave-vol config
log-file | xargs grep checkpoint
[2013-11-12 12:40:03.436563] I [gsyncd(conf):359:main_i] <top>:
checkpoint as of 2012-06-04 12:40:02 set
[2013-11-15 12:41:03.617508] I master:448:checkpt_service] _GMaster:
checkpoint as of 2013-11-12 12:40:02 completed
[2013-11-12 03:01:17.488917] I [gsyncd(conf):359:main_i] <top>:
checkpoint as of 2013-06-22 03:01:12 set
[2013-11-15 03:02:29.10240] I master:448:checkpt_service] _GMaster:
checkpoint as of 2013-06-22 03:01:12 completed
10.4.5. Stopping a Geo-replication Session
To stop a geo-replication session, use one of the following commands:
To stop a geo-replication session between the hosts:
Chapt er 10. Managing Geo- replicat ion
135](https://image.slidesharecdn.com/redhatstorage-3-administrationguide-en-us-150123085546-conversion-gate01/85/Red-hat-storage-3-administration_guide-en-us-139-320.jpg)


![This section describes the most common troubleshooting scenarios related to geo-replication.
10.10.1. T uning Geo-replication performance with Change Log
There are options for the change log that can be configured to give better performance in a geo-
replication environment.
The rollover-time option sets the rate at which the change log is consumed. The default rollover
time is 60 seconds, but it can be configured to a faster rate. A recommended rollover-time for geo-
replication is 10-15 seconds. To change the rollover-time option, use following the command:
# gluster volume set VOLNAME rollover-time 15
The fsync-interval option determines the frequency that updates to the change log are written to
disk. The default interval is 0, which means that updates to the change log are written synchronously
as they occur, and this may negatively impact performance in a geo-replication environment.
Configuring fsync-interval to a non-zero value will write updates to disk asynchronously at the
specified interval. To change the fsync-interval option, use following the command:
# gluster volume set VOLNAME fsync-interval 3
10.10.2. Synchronization Is Not Complete
Situation
The geo-replication status is displayed as Stable, but the data has not been completely
synchronized.
Solution
A full synchronization of the data can be performed by erasing the index and restarting geo-
replication. After restarting geo-replication, it will begin a synchronization of the data using
checksums. This may be a long and resource intensive process on large data sets. If the issue
persists, contact Red Hat Support.
For more information about erasing the index, see Section 8.1, “Configuring Volume Options”.
10.10.3. Issues with File Synchronization
Situation
The geo-replication status is displayed as Stable, but only directories and symlinks are
synchronized. Error messages similar to the following are in the logs:
[2011-05-02 13:42:13.467644] E [master:288:regjob] GMaster: failed to sync
./some_file`
Solution
Geo-replication requires rsync v3.0.0 or higher on the host and the remote machines. Verify if you
have installed the required version of rsync.
10.10.4. Geo-replication Status is Often Faulty
Red Hat St orage 3 Administ rat ion Guide
14 4](https://image.slidesharecdn.com/redhatstorage-3-administrationguide-en-us-150123085546-conversion-gate01/85/Red-hat-storage-3-administration_guide-en-us-148-320.jpg)
![Situation
The geo-replication status is often displayed as Faulty, with a backtrace similar to the following:
012-09-28 14:06:18.378859] E [syncdutils:131:log_raise_exception] <top>:
FAIL: Traceback (most recent call last): File
"/usr/local/libexec/glusterfs/python/syncdaemon/syncdutils.py", line 152,
in twraptf(*aa) File
"/usr/local/libexec/glusterfs/python/syncdaemon/repce.py", line 118, in
listen rid, exc, res = recv(self.inf) File
"/usr/local/libexec/glusterfs/python/syncdaemon/repce.py", line 42, in
recv return pickle.load(inf) EOFError
Solution
This usually indicates that RPC communication between the master gsyncd module and slave
gsyncd module is broken. Make sure that the following pre-requisites are met:
Password-less SSH is set up properly between the host and remote machines.
FUSE is installed on the machines. The geo-replication module mounts Red Hat Storage volumes
using FUSE to sync data.
10.10.5. Intermediate Master is in a Faulty State
Situation
In a cascading environment, the intermediate master is in a faulty state, and messages similar to the
following are in the log:
raise RuntimeError ("aborting on uuid change from %s to %s" %
RuntimeError: aborting on uuid change from af07e07c-427f-4586-ab9f-
4bf7d299be81 to de6b5040-8f4e-4575-8831-c4f55bd41154
Solution
In a cascading configuration, an intermediate master is loyal to its original primary master. The
above log message indicates that the geo-replication module has detected that the primary master
has changed. If this change was deliberate, delete the volume-id configuration option in the
session that was initiated from the intermediate master.
10.10.6. Remote gsyncd Not Found
Situation
The master is in a faulty state, and messages similar to the following are in the log:
[2012-04-04 03:41:40.324496] E [resource:169:errfail] Popen: ssh> bash:
/usr/local/libexec/glusterfs/gsyncd: No such file or directory
Solution
The steps to configure a SSH connection for geo-replication have been updated. Use the steps as
described in Section 10.3.4, “Setting Up your Environment for Geo-replication Session”
Chapt er 10. Managing Geo- replicat ion
14 5](https://image.slidesharecdn.com/redhatstorage-3-administrationguide-en-us-150123085546-conversion-gate01/85/Red-hat-storage-3-administration_guide-en-us-149-320.jpg)


![12.2. Snapshot Commands
The various commands that are available with the snapshot feature are described in the following
section:
Creating Snapshot
Before creating a snapshot ensure that the following prerequisites are met:
Red Hat Storage volume has to be present and the volume has to be in the Started state.
All the bricks of the volume have to be on an independent thin logical volume(LV).
Snapshot names must be unique in the cluster.
All the bricks of the volume should be up and running, unless it is a n-way replication where n
>= 3. In such case quorum must be met. For more information see Chapter 12, Managing
Snapshots
No other volume operation, like rebalance, add-brick, etc, should be running on the
volume.
Total number of snapshots in the volume should not be equal to Effective snap-max-hard-limit.
For more information see Configuring Snapshot Behavior.
If you have a geo-replication setup, then pause the geo-replication session if it is running, by
executing the following command:
# gluster volume geo-replication MASTER_VOL SLAVE_HOST::SLAVE_VOL
pause
For example,
# gluster volume geo-replication master-vol example.com::slave-vol
pause
Pausing geo-replication session between master-vol
example.com::slave-vol has been successful
Ensure that you take the snapshot of the master volume and then take snapshot of the slave
volume.
If you have a Hadoop enabled Red Hat Storage volume, you must ensure to stop all the
Hadoop Services in Ambari.
To create a snapshot of the volume, run the following command:
# gluster snapshot create <snapname> <volname(s)> [description
<description>] [force]
where,
snapname - Name of the snapshot that will be created. It should be a unique name in the entire
cluster.
volname(s) - Name of the volume for which the snapshot will be created. We only support
creating snapshot of single volume.
Red Hat St orage 3 Administ rat ion Guide
156](https://image.slidesharecdn.com/redhatstorage-3-administrationguide-en-us-150123085546-conversion-gate01/85/Red-hat-storage-3-administration_guide-en-us-160-320.jpg)
![description - This is an optional field that can be used to provide a description of the snap that
will be saved along with the snap.
force - Snapshot creation will fail if any brick is down. In a n-way replicated Red Hat Storage
volume where n >= 3 snapshot is allowed even if some of the bricks are down. In such case
quorum is checked. Quorum is checked only when the force option is provided, else by-
default the snapshot create will fail if any brick is down. Refer the Overview section for more
details on quorum.
For Example:
# gluster snapshot create snap1 vol1
snapshot create: success: Snap snap1 created successfully
Snapshot of a Red Hat Storage volume creates a read-only Red Hat Storage volume. This volume
will have identical configuration as of the original / parent volume. Bricks of this newly created
snapshot is mounted as /var/run/gluster/snaps/<snap-volume-
name>/brick<bricknumber>.
For example, a snapshot with snap volume name 0888649a92ea45db8c00a615dfc5ea35
and having two bricks will have the following two mount points:
/var/run/gluster/snaps/0888649a92ea45db8c00a615dfc5ea35/brick1
/var/run/gluster/snaps/0888649a92ea45db8c00a615dfc5ea35/brick2
These mounts can also be viewed using the df or mount command.
Note
If you have a geo-replication setup, after creating the snapshot, resume the geo-replication
session by running the following command:
# gluster volume geo-replication MASTER_VOL SLAVE_HOST::SLAVE_VOL
resume
For example,
# gluster volume geo-replication master-vol example.com::slave-
vol resume
Resuming geo-replication session between master-vol
example.com::slave-vol has been successful
Listing of Available Snapshots
To list all the snapshots that are taken for a specific volume, run the following command:
# gluster snapshot list [volname]
where,
volname - This is an optional field and if provided lists the snapshot names of all snapshots
present in the volume.
Chapt er 12. Managing Snapshot s
157](https://image.slidesharecdn.com/redhatstorage-3-administrationguide-en-us-150123085546-conversion-gate01/85/Red-hat-storage-3-administration_guide-en-us-161-320.jpg)
![For Example:
# gluster snapshot list
snap3
# gluster snapshot list test_vol
No snapshots present
Getting Information of all the Available Snapshots
The following command provides the basic information of all the snapshots taken. By default the
information of all the snapshots in the cluster is displayed:
# gluster snapshot info [(<snapname> | volume <volname>)]
where,
snapname - This is an optional field. If the snapname is provided then the information about the
specified snap is displayed.
volname - This is an optional field. If the volname is provided the information about all the
snaps in the specified volume is displayed.
For Example:
# gluster snapshot info snap3
Snapshot : snap3
Snap UUID : b2a391ce-f511-478f-83b7-1f6ae80612c8
Created : 2014-06-13 09:40:57
Snap Volumes:
Snap Volume Name : e4a8f4b70a0b44e6a8bff5da7df48a4d
Origin Volume name : test_vol1
Snaps taken for test_vol1 : 1
Snaps available for test_vol1 : 255
Status : Started
Getting the Status of Available Snapshots
This command displays the running status of the snapshot. By default the status of all the
snapshots in the cluster is displayed. To check the status of all the snapshots that are taken for a
particular volume, specify a volname:
# gluster snapshot status [(<snapname> | volume <volname>)]
where,
snapname - This is an optional field. If the snapname is provided then the status about the
specified snap is displayed.
volname - This is an optional field. If the volname is provided the status about all the snaps in
the specified volume is displayed.
For Example:
# gluster snapshot status snap3
Red Hat St orage 3 Administ rat ion Guide
158](https://image.slidesharecdn.com/redhatstorage-3-administrationguide-en-us-150123085546-conversion-gate01/85/Red-hat-storage-3-administration_guide-en-us-162-320.jpg)

![# gluster snapshot config [volname]
where:
volname: This is an optional field. The name of the volume for which the configuration
values are to be displayed.
If the volume name is not provided then the configuration values of all the volume is displayed.
System configuration details are displayed irrespective of whether the volume name is
specified or not.
For Example:
# gluster snapshot config
Snapshot System Configuration:
snap-max-hard-limit : 256
snap-max-soft-limit : 90%
auto-delete : disable
Snapshot Volume Configuration:
Volume : test_vol
snap-max-hard-limit : 256
Effective snap-max-hard-limit : 256
Effective snap-max-soft-limit : 230 (90%)
Volume : test_vol1
snap-max-hard-limit : 256
Effective snap-max-hard-limit : 256
Effective snap-max-soft-limit : 230 (90%)
Changing the Configuration Values
To change the existing configuration values, run the following command:
# gluster snapshot config [volname] ([snap-max-hard-limit <count>]
[snap-max-soft-limit <percent>]) | ([auto-delete <enable|disable>])
where:
volname: This is an optional field. The name of the volume for which the configuration
values are to be changed. If the volume name is not provided, then running the command
will set or change the system limit.
snap-max-hard-limit: Maximum hard limit for the system or the specified volume.
snap-max-soft-limit: Soft limit mark for the system.
auto-delete: This will enable or disable auto-delete feature. By default auto-delete is
disabled.
For Example:
# gluster snapshot config test_vol snap-max-hard-limit 100
Changing snapshot-max-hard-limit will lead to deletion of snapshots
Red Hat St orage 3 Administ rat ion Guide
160](https://image.slidesharecdn.com/redhatstorage-3-administrationguide-en-us-150123085546-conversion-gate01/85/Red-hat-storage-3-administration_guide-en-us-164-320.jpg)
![if
they exceed the new limit.
Do you want to continue? (y/n) y
snapshot config: snap-max-hard-limit for test_vol set successfully
Activating and Deactivating a Snapshot
Only activated snapshots are accessible. Check the Accessing Snapshot section for more details.
By default all the snapshots are activated. Since each snapshot is a Red Hat Storage volume it
consumes some resources therefore if the snapshots are not needed it would be good to
deactivate them and activate them when required. To activate a snapshot run the following
command:
# gluster snapshot activate <snapname> [force]
By default the snapshot status will be in the active state.
where:
snapname: Name of the snap to be activated.
force: If some of the bricks of the snapshot volume are down then use the force command to
start them.
For Example:
# gluster snapshot activate snap1
To deactivate a snapshot, run the following command:
# gluster snapshot deactivate <snapname>
where:
snapname: Name of the snap to be deactivated.
For example:
# gluster snapshot deactivate snap1
Deleting Snapshot
Before deleting a snapshot ensure that the following prerequisites are met:
Snapshot with the specified name should be present.
Red Hat Storage nodes should be in quorum.
No volume operation (e.g. add-brick, rebalance, etc) should be running on the original /
parent volume of the snapshot.
To delete a snapshot run the following command:
# gluster snapshot delete <snapname>
where,
Chapt er 12. Managing Snapshot s
161](https://image.slidesharecdn.com/redhatstorage-3-administrationguide-en-us-150123085546-conversion-gate01/85/Red-hat-storage-3-administration_guide-en-us-165-320.jpg)


![Auto-Discovery is a python script to configure Nagios Server to monitor Red Hat Storage Trusted
Storage Pool. It automatically discovers all the nodes and volumes in the cluster and creates Nagios
configuration to monitor all of them. By default, it runs once in 24 hours to synchronize the Nagios
configuration from Red Hat Storage Trusted Storage Pool configuration.
For more information on Nagios Configuration files, see Chapter 23, Nagios Configuration Files
1. To run auto discovery for the first time, execute the discovery.py script on the Nagios
server using the following command:
# /usr/lib64/nagios/plugins/gluster/discovery.py -c cluster-name -
H HostName-or-IP-address
For -c, provide a cluster name (a logical name for the cluster) and for -H, provide the host
name or ip address of a node in the Red Hat Storage trusted storage pool.
2. Perform the steps given below when discovery.py script runs:
a. Confirm the configuration when prompted.
b. Enter the current Nagios server host name or IP address to be configured all the
nodes.
c. Confirm restarting Nagios server when prompted.
# /usr/lib64/nagios/plugins/gluster/discovery.py -c demo-
cluster -H HostName-or-IP-address
Cluster configurations changed
Changes :
Hostgroup demo-cluster - ADD
Host demo-cluster - ADD
Service - Volume Utilization - vol-1 -ADD
Service - Volume Self-Heal - vol-1 -ADD
Service - Volume Status - vol-1 -ADD
Service - Volume Utilization - vol-2 -ADD
Service - Volume Status - vol-2 -ADD
Service - Cluster Utilization -ADD
Service - Cluster - Quorum -ADD
Service - Cluster Auto Config -ADD
Host Host_Name - ADD
Service - Brick Utilization - /bricks/vol-1-5 -ADD
Service - Brick - /bricks/vol-1-5 -ADD
Service - Brick Utilization - /bricks/vol-1-6 -ADD
Service - Brick - /bricks/vol-1-6 -ADD
Service - Brick Utilization - /bricks/vol-2-3 -ADD
Service - Brick - /bricks/vol-2-3 -ADD
Are you sure, you want to commit the changes? (Yes, No) [Yes]:
Enter Nagios server address [Nagios_Server_Address]:
Cluster configurations synced successfully from host ip-
address
Do you want to restart Nagios to start monitoring newly
discovered entities? (Yes, No) [Yes]:
Nagios re-started successfully
All the hosts, volumes and bricks are added and displayed.
3. Login to the Nagios server GUI using the following URL.
Chapt er 13. Monit oring Red Hat St orage
175](https://image.slidesharecdn.com/redhatstorage-3-administrationguide-en-us-150123085546-conversion-gate01/85/Red-hat-storage-3-administration_guide-en-us-179-320.jpg)


![Note
In the left pane of Nagios Server GUI, click Availability and Trends under the Reports
field to view the Host and Services Availability and Trends.
Host Services
1. Click Hosts in the left pane. The list of hosts are displayed.
2. Click corresponding to the host name to view the host details.
3. Click on the service name to view the Service State Information. You can view the utilization of
the following services:
Memory
Swap
CPU
Network
Brick
Disk
The Performance data for services is displayed in the following format:
value[UnitOfMeasurement];warningthreshold;criticalthreshold;min;max. The min and max values
are optional.
The Disk Utilization Performance data has two sets of information for every mount point
which are disk detail and inode detail of a disk. For example, Performance Data = disk1-
data disk1-inode-data ... diskN-data diskN-inode-data.
4. To view the utilization graph, click corresponding to the service name. The utilization
graph is displayed.
Red Hat St orage 3 Administ rat ion Guide
180](https://image.slidesharecdn.com/redhatstorage-3-administrationguide-en-us-150123085546-conversion-gate01/85/Red-hat-storage-3-administration_guide-en-us-184-320.jpg)


![service_description Brick -
brick-path
host_name host-name
# Host name given in host definition
use gluster-brick-status-service
_VOL_NAME Volume-Name
notes Volume :
Volume-Name
_BRICK_DIR brick-path
}
4. Add host configurations and service configurations for all nodes in the cluster as shown in
Step 3.
Configuring Red Hat Storage node
1. In /etc/nagios directory of each Red Hat Storage node, edit nagios_server.conf file
by setting the configurations as shown below:
# NAGIOS SERVER
# The nagios server IP address or FQDN to which the NSCA command
# needs to be sent
[NAGIOS-SERVER]
nagios_server=NagiosServerIPAddress
# CLUSTER NAME
# The host name of the logical cluster configured in Nagios under
which
# the gluster volume services reside
[NAGIOS-DEFINTIONS]
cluster_name=cluster_auto
# LOCAL HOST NAME
# Host name given in the nagios server
[HOST-NAME]
hostname_in_nagios=NameOfTheHostInNagios
# LOCAL HOST CONFIGURATION
# Process monitoring sleeping intevel
[HOST-CONF]
proc-mon-sleep-time=TimeInSeconds
The nagios_server.conf file is used by glusterpmd service to get server name, host
name, and the process monitoring interval time.
2. Start the glusterpmd service using the following command:
# service glusterpmd start
Changing Nagios Monitoring time interval
Red Hat St orage 3 Administ rat ion Guide
202](https://image.slidesharecdn.com/redhatstorage-3-administrationguide-en-us-150123085546-conversion-gate01/85/Red-hat-storage-3-administration_guide-en-us-206-320.jpg)

![Troubleshooting NSCA Configuration Issues
Check Firewall and Port Settings in Nagios Server
If port 5667 is not open on the server host's firewall, a timeout error is displayed. Ensure that port
5667 is open.
To get the list of current iptables rules, run the following command on the Red Hat Storage
node as root:
# iptables -L
The output is displayed as shown below:
ACCEPT tcp -- anywhere anywhere tcp
dpt:5667
If the port is not open, add an iptables rule for it by adding the following lines in
/etc/sysconfig/iptables
-A INPUT -m state --state NEW -m tcp -p tcp --dport 5667 -j
ACCEPT
Restart the iptables service using the following command:
# service iptables restart
Restart NSCA service using the following command:
# service nsca restart
Check the Configuration File on Red Hat Storage Node
Message can not be sent to the NSCA server, if Nagios server IP or FQDN, cluster name and
hostname (as configured in Nagios server) are not configured correctly.
To verify that the correct configurations are set, open the Nagios server configuration file
/etc/nagios/nagios_server.conf and ensure that the configurations are set as shown below:
# NAGIOS SERVER
# The nagios server IP address or FQDN to which the NSCA command
# needs to be sent
[NAGIOS-SERVER]
nagios_server=NagiosServerIPAddress
# CLUSTER NAME
# The host name of the logical cluster configured in Nagios under
which
# the gluster volume services reside
[NAGIOS-DEFINTIONS]
cluster_name=cluster_auto
Red Hat St orage 3 Administ rat ion Guide
204](https://image.slidesharecdn.com/redhatstorage-3-administrationguide-en-us-150123085546-conversion-gate01/85/Red-hat-storage-3-administration_guide-en-us-208-320.jpg)
![# LOCAL HOST NAME
# Host name given in the nagios server
[HOST-NAME]
hostname_in_nagios=NagiosServerHostName
If Host name is updated, restart NSCA service using the following command:
# service nsca restart
Troubleshooting NRPE Configuration Issues
CHECK_NRPE: Error - Could Not Complete SSL Handshake
This error occurs if the IP address of the Nagios server is not defined in the nrpe.cfg file of the Red
Hat Storage node. To fix this issue, follow the steps given below:
Add the Nagios server IP address in /etc/nagios/nrpe.cfg file in the
allowed_hosts line as shown below:
allowed_hosts=127.0.0.1, NagiosServerIP
The allowed_hosts is the list of IP addresses which can execute NRPE commands.
Save the nrpe.cfg file and restart NRPE service using the following command:
# service nrpe restart
CHECK_NRPE: Socket Timeout After n Seconds
To resolve this issue perform the steps given below:
On Nagios Server:
The default timeout value for the NRPE calls is 10 seconds and if the server does not respond
within 10 seconds, Nagios Server GUI displays an error that the NRPE call timed out in 10
seconds. To fix this issue, change the timeout value for NRPE calls by modifying the command
definition configuration files.
Changing the NRPE timeout for services which directly invoke check_nrpe.
For the services which directly invoke check_nrpe (check_disk_and_inode,
check_cpu_multicore, and check_memory), modify the command definition configuration
file /etc/nagios/gluster/gluster-commands.cfg by adding -t Time in Seconds as
shown below:
define command {
command_name check_disk_and_inode
command_line $USER1$/check_nrpe -H $HOSTADDRESS$ -c
check_disk_and_inode -t TimeInSeconds
}
Changing the NRPE timeout for the services in nagios-server-addons package which
invoke NRPE call through code.
The services which invoke
/usr/lib64/nagios/plugins/gluster/check_vol_server.py
Chapt er 13. Monit oring Red Hat St orage
205](https://image.slidesharecdn.com/redhatstorage-3-administrationguide-en-us-150123085546-conversion-gate01/85/Red-hat-storage-3-administration_guide-en-us-209-320.jpg)


![Checking Port 56 6 6 From the Nagios Server with Telnet
Use telnet to verify the Red Hat Storage node's ports. To verify the ports of the Red Hat Storage
node, perform the steps given below:
Log in as root on Nagios server.
Test the connection on port 5666 from the Nagios server to the Red Hat Storage node
using the following command:
# telnet RedHatStorageNodeIP 5666
The output displayed is similar to:
telnet 10.70.36.49 5666
Trying 10.70.36.49...
Connected to 10.70.36.49.
Escape character is '^]'.
Connection Refused By Host
This error is due to port/firewall issues or incorrectly configured allowed_hosts directives. See the
sections CHECK_NRPE: Error - Could Not Complete SSL Handshake and CHECK_NRPE: Socket
Timeout After n Seconds for troubleshooting steps.
13.7.2. T roubleshooting General Issues
This section describes the troubleshooting procedures for general issues related to Nagios.
All cluster services are in warning state and status information is displayed as (null).
Set SELinux to permissive and restart the Nagios server.
Red Hat St orage 3 Administ rat ion Guide
208](https://image.slidesharecdn.com/redhatstorage-3-administrationguide-en-us-150123085546-conversion-gate01/85/Red-hat-storage-3-administration_guide-en-us-212-320.jpg)


![2.55 301.39 us 52.00 us 75922.00 us 968
STAT
2.85 326.18 us 88.00 us 66184.00 us 1000
TRUNCATE
4.47 511.89 us 60.00 us 101282.00 us 1000
FLUSH
5.02 3907.40 us 1723.00 us 19508.00 us 147
READDIRP
25.41 2878.07 us 101.00 us 843209.00 us 1011
LOOKUP
55.53 3179.16 us 124.00 us 121158.00 us 2000
WRITE
Duration: 330 seconds
Data Read: 0 bytes
Data Written: 102400000 bytes
14.1.3. Stop Profiling
To stop profiling on a volume, use the following command:
# gluster volume profile VOLNAME stop
For example, to stop profiling on test-volume:
# gluster volume profile test-volume stop
Profiling stopped on test-volume
14.2. Running the Volume Top Command
The volume top command allows you to view the glusterFS bricks’ performance metrics, including
read, write, file open calls, file read calls, file write calls, directory open calls, and directory real calls.
The volume top command displays up to 100 results.
This section describes how to use the volume top command.
14.2.1. Viewing Open File Descriptor Count and Maximum File Descriptor
Count
You can view the current open file descriptor count and the list of files that are currently being
accessed on the brick with the volume top command. The volume top command also displays
the maximum open file descriptor count of files that are currently open, and the maximum number of
files opened at any given point of time since the servers are up and running. If the brick name is not
specified, then the open file descriptor metrics of all the bricks belonging to the volume displays.
To view the open file descriptor count and the maximum file descriptor count, use the following
command:
# gluster volume top VOLNAME open [nfs | brick BRICK-NAME] [list-cnt cnt]
For example, to view the open file descriptor count and the maximum file descriptor count on brick
server:/export on test-volume, and list the top 10 open calls:
# gluster volume top test-volume open brick server:/export list-cnt 10
Red Hat St orage 3 Administ rat ion Guide
212](https://image.slidesharecdn.com/redhatstorage-3-administrationguide-en-us-150123085546-conversion-gate01/85/Red-hat-storage-3-administration_guide-en-us-216-320.jpg)
![Brick: server:/export/dir1
Current open fd's: 34 Max open fd's: 209
==========Open file stats========
open file name
call count
2 /clients/client0/~dmtmp/PARADOX/
COURSES.DB
11 /clients/client0/~dmtmp/PARADOX/
ENROLL.DB
11 /clients/client0/~dmtmp/PARADOX/
STUDENTS.DB
10 /clients/client0/~dmtmp/PWRPNT/
TIPS.PPT
10 /clients/client0/~dmtmp/PWRPNT/
PCBENCHM.PPT
9 /clients/client7/~dmtmp/PARADOX/
STUDENTS.DB
9 /clients/client1/~dmtmp/PARADOX/
STUDENTS.DB
9 /clients/client2/~dmtmp/PARADOX/
STUDENTS.DB
9 /clients/client0/~dmtmp/PARADOX/
STUDENTS.DB
9 /clients/client8/~dmtmp/PARADOX/
STUDENTS.DB
14.2.2. Viewing Highest File Read Calls
You can view a list of files with the highest file read calls on each brick with the volume top
command. If the brick name is not specified, a list of 100 files are displayed by default.
To view the highest read() calls, use the following command:
# gluster volume top VOLNAME read [nfs | brick BRICK-NAME] [list-cnt cnt]
For example, to view the highest read calls on brick server:/export of test-volume:
# gluster volume top test-volume read brick server:/export list-cnt 10
Brick: server:/export/dir1
==========Read file stats========
read filename
call count
116 /clients/client0/~dmtmp/SEED/LARGE.FIL
Chapt er 14. Monit oring Red Hat St orage Workload
213](https://image.slidesharecdn.com/redhatstorage-3-administrationguide-en-us-150123085546-conversion-gate01/85/Red-hat-storage-3-administration_guide-en-us-217-320.jpg)
![64 /clients/client0/~dmtmp/SEED/MEDIUM.FIL
54 /clients/client2/~dmtmp/SEED/LARGE.FIL
54 /clients/client6/~dmtmp/SEED/LARGE.FIL
54 /clients/client5/~dmtmp/SEED/LARGE.FIL
54 /clients/client0/~dmtmp/SEED/LARGE.FIL
54 /clients/client3/~dmtmp/SEED/LARGE.FIL
54 /clients/client4/~dmtmp/SEED/LARGE.FIL
54 /clients/client9/~dmtmp/SEED/LARGE.FIL
54 /clients/client8/~dmtmp/SEED/LARGE.FIL
14.2.3. Viewing Highest File Write Calls
You can view a list of files with the highest file write calls on each brick with the volume top
command. If the brick name is not specified, a list of 100 files displays by default.
To view the highest write() calls, use the following command:
# gluster volume top VOLNAME write [nfs | brick BRICK-NAME] [list-cnt cnt]
For example, to view the highest write calls on brick server:/export of test-volume:
# gluster volume top test-volume write brick server:/export/ list-cnt 10
Brick: server:/export/dir1
==========Write file stats========
write call count filename
83 /clients/client0/~dmtmp/SEED/LARGE.FIL
59 /clients/client7/~dmtmp/SEED/LARGE.FIL
59 /clients/client1/~dmtmp/SEED/LARGE.FIL
59 /clients/client2/~dmtmp/SEED/LARGE.FIL
59 /clients/client0/~dmtmp/SEED/LARGE.FIL
59 /clients/client8/~dmtmp/SEED/LARGE.FIL
59 /clients/client5/~dmtmp/SEED/LARGE.FIL
59 /clients/client4/~dmtmp/SEED/LARGE.FIL
59 /clients/client6/~dmtmp/SEED/LARGE.FIL
59 /clients/client3/~dmtmp/SEED/LARGE.FIL
Red Hat St orage 3 Administ rat ion Guide
214](https://image.slidesharecdn.com/redhatstorage-3-administrationguide-en-us-150123085546-conversion-gate01/85/Red-hat-storage-3-administration_guide-en-us-218-320.jpg)
![14.2.4. Viewing Highest Open Calls on a Directory
You can view a list of files with the highest open calls on the directories of each brick with the
volume top command. If the brick name is not specified, the metrics of all bricks belonging to that
volume displays.
To view the highest open() calls on each directory, use the following command:
# gluster volume top VOLNAME opendir [brick BRICK-NAME] [list-cnt cnt]
For example, to view the highest open calls on brick server:/export/ of test-volume:
# gluster volume top test-volume opendir brick server:/export/ list-cnt
10
Brick: server:/export/dir1
==========Directory open stats========
Opendir count directory name
1001 /clients/client0/~dmtmp
454 /clients/client8/~dmtmp
454 /clients/client2/~dmtmp
454 /clients/client6/~dmtmp
454 /clients/client5/~dmtmp
454 /clients/client9/~dmtmp
443 /clients/client0/~dmtmp/PARADOX
408 /clients/client1/~dmtmp
408 /clients/client7/~dmtmp
402 /clients/client4/~dmtmp
14.2.5. Viewing Highest Read Calls on a Directory
You can view a list of files with the highest directory read calls on each brick with the volume top
command. If the brick name is not specified, the metrics of all bricks belonging to that volume
displays.
To view the highest directory read() calls on each brick, use the following command:
# gluster volume top VOLNAME readdir [nfs | brick BRICK-NAME] [list-cnt
cnt]
For example, to view the highest directory read calls on brick server:/export/ of test-volume:
# gluster volume top test-volume readdir brick server:/export/ list-cnt
10
Brick: server:/export/dir1
==========Directory readdirp stats========
Chapt er 14. Monit oring Red Hat St orage Workload
215](https://image.slidesharecdn.com/redhatstorage-3-administrationguide-en-us-150123085546-conversion-gate01/85/Red-hat-storage-3-administration_guide-en-us-219-320.jpg)
![readdirp count directory name
1996 /clients/client0/~dmtmp
1083 /clients/client0/~dmtmp/PARADOX
904 /clients/client8/~dmtmp
904 /clients/client2/~dmtmp
904 /clients/client6/~dmtmp
904 /clients/client5/~dmtmp
904 /clients/client9/~dmtmp
812 /clients/client1/~dmtmp
812 /clients/client7/~dmtmp
800 /clients/client4/~dmtmp
14.2.6. Viewing Read Performance
You can view the read throughput of files on each brick with the volume top command. If the brick
name is not specified, the metrics of all the bricks belonging to that volume is displayed. The output
is the read throughput.
This command initiates a read() call for the specified count and block size and measures the
corresponding throughput directly on the back-end export, bypassing glusterFS processes.
To view the read performance on each brick, use the command, specifying options as needed:
# gluster volume top VOLNAME read-perf [bs blk-size count count] [nfs |
brick BRICK-NAME] [list-cnt cnt]
For example, to view the read performance on brick server:/export/ of test-volume, specifying a
256 block size, and list the top 10 results:
# gluster volume top test-volume read-perf bs 256 count 1 brick
server:/export/ list-cnt 10
Brick: server:/export/dir1 256 bytes (256 B) copied, Throughput: 4.1 MB/s
==========Read throughput file stats========
read filename Time
through
put(MBp
s)
2912.00 /clients/client0/~dmtmp/PWRPNT/ -2012-05-09
TRIDOTS.POT 15:38:36.896486
2570.00 /clients/client0/~dmtmp/PWRPNT/ -2012-05-09
PCBENCHM.PPT 15:38:39.815310
Red Hat St orage 3 Administ rat ion Guide
216](https://image.slidesharecdn.com/redhatstorage-3-administrationguide-en-us-150123085546-conversion-gate01/85/Red-hat-storage-3-administration_guide-en-us-220-320.jpg)
![2383.00 /clients/client2/~dmtmp/SEED/ -2012-05-09
MEDIUM.FIL 15:52:53.631499
2340.00 /clients/client0/~dmtmp/SEED/ -2012-05-09
MEDIUM.FIL 15:38:36.926198
2299.00 /clients/client0/~dmtmp/SEED/ -2012-05-09
LARGE.FIL 15:38:36.930445
2259.00 /clients/client0/~dmtmp/PARADOX/ -2012-05-09
COURSES.X04 15:38:40.549919
2221.00 /clients/client9/~dmtmp/PARADOX/ -2012-05-09
STUDENTS.VAL 15:52:53.298766
2221.00 /clients/client8/~dmtmp/PARADOX/ -2012-05-09
COURSES.DB 15:39:11.776780
2184.00 /clients/client3/~dmtmp/SEED/ -2012-05-09
MEDIUM.FIL 15:39:10.251764
2184.00 /clients/client5/~dmtmp/WORD/ -2012-05-09
BASEMACH.DOC 15:39:09.336572
14.2.7. Viewing Write Performance
You can view the write throughput of files on each brick or NFS server with the volume top
command. If brick name is not specified, then the metrics of all the bricks belonging to that volume
will be displayed. The output will be the write throughput.
This command initiates a write operation for the specified count and block size and measures the
corresponding throughput directly on back-end export, bypassing glusterFS processes.
To view the write performance on each brick, use the following command, specifying options as
needed:
# gluster volume top VOLNAME write-perf [bs blk-size count count] [nfs |
brick BRICK-NAME] [list-cnt cnt]
For example, to view the write performance on brick server:/export/ of test-volume, specifying a
256 block size, and list the top 10 results:
# gluster volume top test-volume write-perf bs 256 count 1 brick
server:/export/ list-cnt 10
Brick: server:/export/dir1 256 bytes (256 B) copied, Throughput: 2.8 MB/s
==========Write throughput file stats========
write filename Time
throughput
(MBps)
1170.00 /clients/client0/~dmtmp/SEED/ -2012-05-09
SMALL.FIL 15:39:09.171494
1008.00 /clients/client6/~dmtmp/SEED/ -2012-05-09
LARGE.FIL 15:39:09.73189
Chapt er 14. Monit oring Red Hat St orage Workload
217](https://image.slidesharecdn.com/redhatstorage-3-administrationguide-en-us-150123085546-conversion-gate01/85/Red-hat-storage-3-administration_guide-en-us-221-320.jpg)
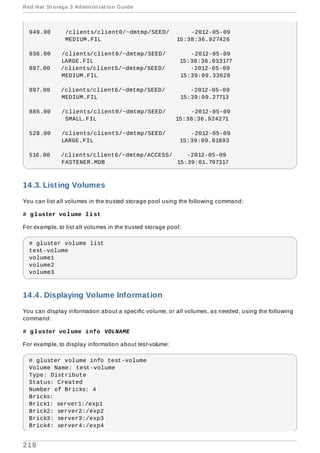
![14.5. Performing Statedump on a Volume
Statedump is a mechanism through which you can get details of all internal variables and state of
the glusterFS process at the time of issuing the command. You can perform statedumps of the brick
processes and NFS server process of a volume using the statedump command. You can use the
following options to determine what information is to be dumped:
mem - Dumps the memory usage and memory pool details of the bricks.
iobuf - Dumps iobuf details of the bricks.
priv - Dumps private information of loaded translators.
callpool - Dumps the pending calls of the volume.
fd - Dumps the open file descriptor tables of the volume.
inode - Dumps the inode tables of the volume.
history - Dumps the event history of the volume
To perform a statedump of a volume or NFS server, use the following command, specifying options
as needed:
# gluster volume statedump VOLNAME [nfs]
[all|mem|iobuf|callpool|priv|fd|inode|history]
For example, to perform a statedump of test-volume:
# gluster volume statedump test-volume
Volume statedump successful
The statedump files are created on the brick servers in the /var/run/gluster/ directory or in the
directory set using server.statedump-path volume option. The naming convention of the dump
file is brick-path.brick-pid.dump.
You can change the directory of the statedump file using the following command:
# gluster volume set VOLNAME server.statedump-path path
For example, to change the location of the statedump file of test-volume:
# gluster volume set test-volume server.statedump-path
/usr/local/var/log/glusterfs/dumps/
Set volume successful
You can view the changed path of the statedump file using the following command:
# gluster volume info VOLNAME
To retrieve the statedump information for client processes:
kill -USR1 process_ID
For example, to retrieve the statedump information for the client process ID 4120:
kill -USR1 4120
Chapt er 14. Monit oring Red Hat St orage Workload
219](https://image.slidesharecdn.com/redhatstorage-3-administrationguide-en-us-150123085546-conversion-gate01/85/Red-hat-storage-3-administration_guide-en-us-223-320.jpg)
![14.6. Displaying Volume Status
You can display the status information about a specific volume, brick, or all volumes, as needed.
Status information can be used to understand the current status of the brick, NFS processes, self-
heal daemon and overall file system. Status information can also be used to monitor and debug the
volume information. You can view status of the volume along with the details:
detail - Displays additional information about the bricks.
clients - Displays the list of clients connected to the volume.
mem - Displays the memory usage and memory pool details of the bricks.
inode - Displays the inode tables of the volume.
fd - Displays the open file descriptor tables of the volume.
callpool - Displays the pending calls of the volume.
Display information about a specific volume using the following command:
# gluster volume status [all|VOLNAME [nfs | shd | BRICKNAME]] [detail
|clients | mem | inode | fd |callpool]
For example, to display information about test-volume:
# gluster volume status test-volume
Status of volume: test-volume
Gluster process Port Online Pid
------------------------------------------------------------
Brick arch:/export/rep1 24010 Y 18474
Brick arch:/export/rep2 24011 Y 18479
NFS Server on localhost 38467 Y 18486
Self-heal Daemon on localhost N/A Y 18491
The self-heal daemon status will be displayed only for replicated volumes.
Display information about all volumes using the command:
# gluster volume status all
# gluster volume status all
Status of volume: test
Gluster process Port Online Pid
-----------------------------------------------------------
Brick 192.168.56.1:/export/test 24009 Y 29197
NFS Server on localhost 38467 Y 18486
Status of volume: test-volume
Gluster process Port Online Pid
------------------------------------------------------------
Brick arch:/export/rep1 24010 Y 18474
Brick arch:/export/rep2 24011 Y 18479
NFS Server on localhost 38467 Y 18486
Self-heal Daemon on localhost N/A Y 18491
Red Hat St orage 3 Administ rat ion Guide
220](https://image.slidesharecdn.com/redhatstorage-3-administrationguide-en-us-150123085546-conversion-gate01/85/Red-hat-storage-3-administration_guide-en-us-224-320.jpg)


![1. Create self-signed cert for SSL using the following commands:
# cd /etc/swift
# openssl req -new -x509 -nodes -out cert.crt -keyout cert.key
2. Add the following lines to /etc/swift/proxy-server.conf under [DEFAULT]
bind_port = 443
cert_file = /etc/swift/cert.crt
key_file = /etc/swift/cert.key
Enabling Distributed Caching with Memcached
When Object Storage is deployed on two or more machines, not all nodes in your trusted
storage pool are used. Installing a load balancer enables you to utilize all the nodes in your
trusted storage pool by distributing the proxy server requests equally to all storage nodes.
Memcached allows nodes' states to be shared across multiple proxy servers. Edit the
memcache_servers configuration option in the proxy-server.conf and list all
memcached servers.
Following is an example listing the memcached servers in the proxy-server.conf file.
[filter:cache]
use = egg:swift#memcache
memcache_servers =
192.168.1.20:11211,192.168.1.21:11211,192.168.1.22:11211
The port number on which the memcached server is listening is 11211. You must ensure to use
the same sequence for all configuration files.
20.6.2. Configuring the Authentication Service
This section provides information on configuring Keystone, GSwauth, and TempAuth
authentication services.
20.6.2.1. Int egrat ing wit h t he Keyst one Aut hent icat ion Service
To configure Keystone, add authtoken and keystoneauth to /etc/swift/proxy-
server.conf pipeline as shown below:
[pipeline:main]
pipeline = catch_errors healthcheck proxy-logging cache authtoken
keystoneauth proxy-logging proxy-server
Add the following sections to /etc/swift/proxy-server.conf file by referencing the example
below as a guideline. You must substitute the values according to your setup:
[filter:authtoken]
paste.filter_factory =
keystoneclient.middleware.auth_token:filter_factory
Chapt er 20. Managing Object St ore
253](https://image.slidesharecdn.com/redhatstorage-3-administrationguide-en-us-150123085546-conversion-gate01/85/Red-hat-storage-3-administration_guide-en-us-257-320.jpg)
![signing_dir = /etc/swift
auth_host = keystone.server.com
auth_port = 35357
auth_protocol = http
auth_uri = http://keystone.server.com:5000
# if its defined
admin_tenant_name = services
admin_user = swift
admin_password = adminpassword
delay_auth_decision = 1
[filter:keystoneauth]
use = egg:swift#keystoneauth
operator_roles = admin, SwiftOperator
is_admin = true
cache = swift.cache
Verify the Integrated Setup
Verify that the Red Hat Storage Object Store has been configured successfully by running the
following command:
$ swift -V 2 -A http://keystone.server.com:5000/v2.0 -U
tenant_name:user -K password stat
20.6.2.2. Int egrat ing wit h t he GSwaut h Aut hent icat ion Service
Integrating GSwauth
Perform the following steps to integrate GSwauth:
1. Create and start a Red Hat Storage volume to store metadata.
# gluster volume create NEW-VOLNAME NEW-BRICK
# gluster volume start NEW-VOLNAME
For example:
# gluster volume create gsmetadata server1:/exp1
# gluster volume start gsmetadata
2. Run gluster-swift-gen-builders tool with all the volumes to be accessed using the
Swift client including gsmetadata volume:
# gluster-swift-gen-builders gsmetadata other volumes
3. Edit the /etc/swift/proxy-server.conf pipeline as shown below:
[pipeline:main]
pipeline = catch_errors cache gswauth proxy-server
4. Add the following section to /etc/swift/proxy-server.conf file by referencing the
example below as a guideline. You must substitute the values according to your setup.
Red Hat St orage 3 Administ rat ion Guide
254](https://image.slidesharecdn.com/redhatstorage-3-administrationguide-en-us-150123085546-conversion-gate01/85/Red-hat-storage-3-administration_guide-en-us-258-320.jpg)
![[filter:gswauth]
use = egg:gluster_swift#gswauth
set log_name = gswauth
super_admin_key = gswauthkey
metadata_volume = gsmetadata
auth_type = sha1
auth_type_salt = swauthsalt
Important
You must ensure to secure the proxy-server.conf file and the super_admin_key
option to prevent unprivileged access.
5. Restart the proxy server by running the following command:
# swift-init proxy restart
Advanced Options:
You can set the following advanced options for GSwauth WSGI filter:
default-swift-cluster: The default storage-URL for the newly created accounts. When you attempt to
authenticate for the first time, the access token and the storage-URL where data for the given
account is stored will be returned.
token_life: The set default token life. The default value is 86400 (24 hours).
max_token_life: The maximum token life. You can set a token lifetime when requesting a new token
with header x-auth-token-lifetime. If the passed in value is greater than the
max_token_life, then the max_token_life value will be used.
GSwauth Common Options of CLI Tools
GSwauth provides CLI tools to facilitate managing accounts and users. All tools have some options
in common:
-A, --admin-url: The URL to the auth. The default URL is http://127.0.0.1:8080/auth/.
-U, --admin-user: The user with administrator rights to perform action. The default user role is
.super_admin.
-K, --admin-key: The key for the user with administrator rights to perform the action. There is no
default value.
Preparing Red Hat Storage Volumes to Save Metadata
Prepare the Red Hat Storage volume for gswauth to save its metadata by running the following
command:
# gswauth-prep [option]
For example:
# gswauth-prep -A http://10.20.30.40:8080/auth/ -K gswauthkey
Chapt er 20. Managing Object St ore
255](https://image.slidesharecdn.com/redhatstorage-3-administrationguide-en-us-150123085546-conversion-gate01/85/Red-hat-storage-3-administration_guide-en-us-259-320.jpg)
![20.6 .2.2.1. Managing Account Services in GSwauth
Creating Accounts
Create an account for GSwauth. This account is mapped to a Red Hat Storage volume.
# gswauth-add-account [option] <account_name>
For example:
# gswauth-add-account -K gswauthkey <account_name>
Deleting an Account
You must ensure that all users pertaining to this account must be deleted before deleting the account.
To delete an account:
# gswauth-delete-account [option] <account_name>
For example:
# gswauth-delete-account -K gswauthkey test
Setting the Account Service
Sets a service URL for an account. User with reseller admin role only can set the service URL.
This command can be used to change the default storage URL for a given account. All accounts will
have the same storage-URL as default value, which is set using default-swift-cluster option.
# gswauth-set-account-service [options] <account> <service> <name>
<value>
For example:
# gswauth-set-account-service -K gswauthkey test storage local
http://newhost:8080/v1/AUTH_test
20.6 .2.2.2. Managing User Services in GSwauth
User Roles
The following user roles are supported in GSwauth:
A regular user has no rights. Users must be given both read and write privileges using Swift ACLs.
The admin user is a super-user at the account level. This user can create and delete users for
that account. These members will have both write and read privileges to all stored objects in that
account.
The reseller admin user is a super-user at the cluster level. This user can create and delete
accounts and users and has read and write privileges to all accounts under that cluster.
GSwauth maintains its own swift account to store all of its metadata on accounts and users. The
Red Hat St orage 3 Administ rat ion Guide
256](https://image.slidesharecdn.com/redhatstorage-3-administrationguide-en-us-150123085546-conversion-gate01/85/Red-hat-storage-3-administration_guide-en-us-260-320.jpg)
![.super_admin role provides access to GSwauth own swift account and has all privileges to act
on any other account or user.
User Access Matrix
The following table provides user access right information.
Table 20.1. User Access Matrix
Role/G
roup
get list
of
accou
nts
get
Accco
unt
Details
Create
Accou
nt
Delete
Accou
nt
Get
User
Details
Create
admin
user
Create
reselle
r_admi
n user
Create
regula
r user
Delete
admin
user
.super_
admin
(userna
me)
X X X X X X X X X
.reseller
_admin
(group)
X X X X X X X X
.admin
(group)
X X X X X
regular
user
(type)
Creating Users
You can create an user for an account that does not exist. The account will be created before
creating the user.
You must add -r flag to create a reseller admin user and -a flag to create an admin user. To
change the password or role of the user, you can run the same command with the new option.
# gswauth-add-user [option] <account_name> <user> <password>
For example
# gswauth-add-user -K gswauthkey -a test ana anapwd
Deleting a User
Delete a user by running the following command:
gswauth-delete-user [option] <account_name> <user>
For example
gwauth-delete-user -K gswauthkey test ana
Authenticating a User with the Swift Client
There are two methods to access data using the Swift client. The first and simple method is by
providing the user name and password everytime. The swift client will acquire the token from
Chapt er 20. Managing Object St ore
257](https://image.slidesharecdn.com/redhatstorage-3-administrationguide-en-us-150123085546-conversion-gate01/85/Red-hat-storage-3-administration_guide-en-us-261-320.jpg)
![gswauth.
For example:
$ swift -A http://127.0.0.1:8080/auth/v1.0 -U test:ana -K anapwd upload
container1 README.md
The second method is a two-step process, first you must authenticate with a username and password
to obtain a token and the storage URL. Then, you can make the object requests to the storage URL
with the given token.
It is important to remember that tokens expires, so the authentication process needs to be repeated
very often.
Authenticate a user with the cURL command:
curl -v -H 'X-Storage-User: test:ana' -H 'X-Storage-Pass: anapwd' -k
http://localhost:8080/auth/v1.0
...
< X-Auth-Token: AUTH_tk7e68ef4698f14c7f95af07ab7b298610
< X-Storage-Url: http://127.0.0.1:8080/v1/AUTH_test
...
Now, you use the given token and storage URL to access the object-storage using the Swift client:
$ swift --os-auth-token=AUTH_tk7e68ef4698f14c7f95af07ab7b298610 --os-
storage-url=http://127.0.0.1:8080/v1/AUTH_test upload container1
README.md
README.md
bash-4.2$
bash-4.2$ swift --os-auth-token=AUTH_tk7e68ef4698f14c7f95af07ab7b298610 --
os-storage-url=http://127.0.0.1:8080/v1/AUTH_test list container1
README.md
Important
Reseller admins must always use the second method to acquire a token to get access to
other accounts other than his own. The first method of using the username and password will
give them access only to their own accounts.
20.6 .2.2.3. Managing Accounts and Users Information
Obtaining Accounts and User Information
You can obtain the accounts and users information including stored password.
# gswauth-list [options] [account] [user]
For example:
# gswauth-list -K gswauthkey test ana
+----------+
Red Hat St orage 3 Administ rat ion Guide
258](https://image.slidesharecdn.com/redhatstorage-3-administrationguide-en-us-150123085546-conversion-gate01/85/Red-hat-storage-3-administration_guide-en-us-262-320.jpg)
![| Groups |
+----------+
| test:ana |
| test |
| .admin |
+----------+
If [account] and [user] are omitted, all the accounts will be listed.
If [account] is included but not [user], a list of users within that account will be listed.
If [account] and [user] are included, a list of groups that the user belongs to will be listed.
If the [user] is .groups, the active groups for that account will be listed.
The default output format is in tabular format. Adding -p option provides the output in plain text
format, -j provides the output in JSON format.
Changing User Password
You can change the password of the user, account administrator, and reseller_admin roles.
Change the password of a regular user by running the following command:
# gswauth-add-user -U account1:user1 -K old_passwd account1 user1
new_passwd
Change the password of an account administrator by running the following command:
# gswauth-add-user -U account1:admin -K old_passwd -a account1 admin
new_passwd
Change the password of the reseller_admin by running the following command:
# gswauth-add-user -U account1:radmin -K old_passwd -r account1 radmin
new_passwd
Cleaning Up Expired Tokens
Users with .super_admin role can delete the expired tokens.
You also have the option to provide the expected life of tokens, delete all tokens or delete all tokens
for a given account.
# gswauth-cleanup-tokens [options]
For example
# gswauth-cleanup-tokens -K gswauthkey --purge test
The tokens will be deleted on the disk but it would still persist in memcached.
You can add the following options while cleaning up the tokens:
-t, --token-life: The expected life of tokens. The token objects modified before the give number of
seconds will be checked for expiration (default: 86400).
Chapt er 20. Managing Object St ore
259](https://image.slidesharecdn.com/redhatstorage-3-administrationguide-en-us-150123085546-conversion-gate01/85/Red-hat-storage-3-administration_guide-en-us-263-320.jpg)
![--purge: Purges all the tokens for a given account whether the tokens have expired or not.
--purge-all: Purges all the tokens for all the accounts and users whether the tokens have expired
or not.
20.6.2.3. Int egrat ing wit h t he TempAut h Aut hent icat ion Service
Warning
TempAuth authentication service must only be used in test deployments and not for
production.
TempAuth is automatically installed when you install Red Hat Storage. TempAuth stores user and
password information as cleartext in a single proxy-server.conf file. In your
/etc/swift/proxy-server.conf file, enable TempAuth in pipeline and add user information in
TempAuth section by referencing the below example.
[pipeline:main]
pipeline = catch_errors healthcheck proxy-logging cache tempauth proxy-
logging proxy-server
[filter:tempauth]
use = egg:swift#tempauth
user_admin_admin = admin.admin.reseller_admin
user_test_tester = testing .admin
user_test_tester2 = testing2
You can add users to the account in the following format:
user_accountname_username = password [.admin]
Here the accountname is the Red Hat Storage volume used to store objects.
You must restart the Object Store services for the configuration changes to take effect. For
information on restarting the services, see Section 20.6.8, “Starting and Stopping Server”.
20.6.3. Configuring an Object Server
Create a new configuration file /etc/swift/object.server.conf by referencing the template file
available at /etc/swift/object-server.conf-gluster.
20.6.4. Configuring a Container Server
Create a new configuration file /etc/swift/container-server.conf by referencing the template
file available at /etc/swift/container-server.conf-gluster.
20.6.5. Configuring an Account Server
Create a new configuration file /etc/swift/account-server.conf by referencing the template file
available at /etc/swift/account-server.conf-gluster.
20.6.6. Configuring Swift Object and Container Constrains
Red Hat St orage 3 Administ rat ion Guide
260](https://image.slidesharecdn.com/redhatstorage-3-administrationguide-en-us-150123085546-conversion-gate01/85/Red-hat-storage-3-administration_guide-en-us-264-320.jpg)
![Create a new configuration file /etc/swift/swift.conf by referencing the template file available
at /etc/swift/swift.conf-gluster.
20.6.7. Exporting the Red Hat Storage Volumes
After creating configuration files, you must now add configuration details for the system to identify the
Red Hat Storage volumes to be accessible as Object Store. These configuration details are added to
the ring files. The ring files provide the list of Red Hat Storage volumes to be accessible using the
object storage interface to the Gluster for Swift component.
Create the ring files for the current configurations by running the following command:
# cd /etc/swift
# gluster-swift-gen-builders VOLUME [VOLUME...]
For example,
# cd /etc/swift
# gluster-swift-gen-builders testvol1 testvol2 testvol3
Here testvol1, testvol2, and testvol3 are the Red Hat Storage volumes which will be mounted locally
under the directory mentioned in the object, container, and account configuration files (default value
is /mnt/gluster-object).
Note that all the volumes required to be accessed using the Swift interface must be passed to the
gluster-swift-gen-builders tool even if it was previously added. The gluster-swift-gen-
builders tool creates new ring files every time it runs successfully.
Important
The name of the mount point and the name of the Red Hat Storage volume must be the same.
To remove a VOLUME, run gluster-swift-gen-builders only with the volumes which are
required to be accessed using the Swift interface.
For example, to remove the testvol2 volume, run the following command:
# gluster-swift-gen-builders testvol1 testvol3
You must restart the Object Store services after creating the new ring files.
20.6.8. Starting and Stopping Server
You must start the server manually whenever you update or modify the configuration files.
To start the server, enter the following command:
# swift-init main start
To stop the server, enter the following command:
# swift-init main stop
Chapt er 20. Managing Object St ore
261](https://image.slidesharecdn.com/redhatstorage-3-administrationguide-en-us-150123085546-conversion-gate01/85/Red-hat-storage-3-administration_guide-en-us-265-320.jpg)


![Note
The very first Red Hat Storage volume that is configured for using with Hadoop is the Default
Volume. This is usually the volume name you specified when you went through the Installation
Guide. The Default Volume is the only volume that does not require a full URI to be specified
and is allowed to use a relative path. Thus, assuming your default volume is called
HadoopVol, both glusterfs://HadoopVol/input/myinput.txt and
/input/myinput.txt are processed the same when providing input to a Hadoop Job or
using the Hadoop CLI.
21.5. Scaling Up and Scaling Down
The supported volume configuration for Hadoop is Distributed Replicated volume with replica count
2. Hence, you must add or remove servers from the trusted storage pool in multiples of 2. Red Hat
recommends you to not have more than one brick that belongs to the same volume, on the same
server. Adding additional servers to a Red Hat Storage volume increases both the storage and the
compute capacity for that trusted storage pool as the bricks on those servers add to the storage
capacity of the volume, and the CPUs increase the amount of Hadoop Tasks that the Hadoop Cluster
on the volume can run.
21.5.1. Scaling Up
The following is the procedure to add 2 new servers to an existing Hadoop on Red Hat Storage
trusted storage pool.
1. Ensure that the new servers meet all the prerequisites and have the appropriate channels and
components installed. For information on prerequisites, see section Prerequisites in the
chapter Deploying the Hortonworks Data Platform on Red Hat Storage of Red Hat Storage 3.0
Installation Guide. For information on adding servers to the trusted storage pool, see
Chapter 5, Trusted Storage Pools
2. In the Ambari Console, click Stop All in the Services navigation panel. You must wait
until all the services are completely stopped.
3. Open the terminal window of the server designated to be the Ambari Management Server and
navigate to the /usr/share/rhs-hadoop-install/ directory.
4. Run the following command by replacing the examples with the necessary values. This
command below assumes the LVM partitions on the server are /dev/vg1/lv1 and you wish
them to be mounted as /mnt/brick1:
# ./setup_cluster.sh --yarn-master <the-existing-yarn-master-node>
[--hadoop-mgmt-node <the-existing-mgmt-node>] new-
node1.hdp:/mnt/brick1:/dev/vg1/lv1 new-node2.hdp
5. Open the terminal of any Red Hat Storage server in the trusted storage pool and run the
following command. This command assumes that you want to add the servers to a volume
called HadoopVol:
# gluster volume add-brick HadoopVol replica 2 new-
node1:/mnt/brick1/HadoopVol new-node2:/mnt/brick1/HadoopVol
For more information on expanding volumes, see Section 8.2, “Expanding Volumes”.
Red Hat St orage 3 Administ rat ion Guide
268](https://image.slidesharecdn.com/redhatstorage-3-administrationguide-en-us-150123085546-conversion-gate01/85/Red-hat-storage-3-administration_guide-en-us-272-320.jpg)
![6. Open the terminal of any Red Hat Storage Server in the cluster and rebalance the volume
using the following command:
# gluster volume rebalance HadoopVol start
Rebalancing the volume will distribute the data on the volume among the servers. To view the
status of the rebalancing operation, run # gluster volume rebalance HadoopVol
status command. The rebalance status will be shown as completed when the rebalance is
complete. For more information on rebalancing a volume, see Section 8.6, “Rebalancing
Volumes”.
7. Open the terminal of both of the new storage nodes and navigate to the /usr/share/rhs-
hadoop-install/ directory and run the command given below:
# ./setup_container_executor.sh
8. Access the Ambari Management Interface via the browser (http://ambari-server-hostname:8080)
and add the new nodes by selecting the HOSTS tab and selecting add new host. Select the
services you wish to install on the new host and deploy the service to the hosts.
9. Follow the instructions in Configuring the Linux Container Executor section in the Red Hat Storage
3.0 Installation Guide.
21.5.2. Scaling Down
If you remove servers from a Red Hat Storage trusted storage pool it is recommended that you
rebalance the data in the trusted storage pool. The following is the process to remove 2 servers from
an existing Hadoop on Red Hat Storage Cluster:
1. In the Ambari Console, click Stop All in the Services navigation panel. You must wait until
all the services are completely stopped.
2. Open the terminal of any Red Hat Storage server in the trusted storage pool and run the
following command. This procedure assumes that you want to remove 2 servers, that is old-
node1 and old-node2 from a volume called HadoopVol:
# gluster volume remove-brick HadoopVol [replica count] old-
node1:/mnt/brick2/HadoopVol old-node2:/mnt/brick2/HadoopVol start
To view the status of the remove brick operation, run # gluster volume remove-brick
HadoopVol old-node1:/mnt/brick2/HadoopVol old-
node2:/mnt/brick2/HadoopVol status command.
3. When the data migration shown in the status command is Complete, run the following
command to commit the brick removal:
# gluster volume remove-brick HadoopVol old-
node1:/mnt/brick2/HadoopVol old-node2:/mnt/brick2/HadoopVol commit
After the bricks removal, you can check the volume information using # gluster volume
info HadoopVol command. For detailed information on removing volumes, see
Section 8.3, “Shrinking Volumes”
4. Open the terminal of any Red Hat Storage server in the trusted storage pool and run the
following command to detach the removed server:
Chapt er 21. Administ ering t he Hort onworks Dat a Plat form on Red Hat St orage
269](https://image.slidesharecdn.com/redhatstorage-3-administrationguide-en-us-150123085546-conversion-gate01/85/Red-hat-storage-3-administration_guide-en-us-273-320.jpg)


![Chapter 22. Troubleshooting
You can use the statedump command to list the locks held on files. The statedump output also
provides information on each lock with its range, basename, and PID of the application holding the
lock, and so on. You can analyze the output to find the locks whose owner/application is no longer
running or interested in that lock. After ensuring that no application is using the file, you can clear
the lock using the following clear-locks command:
# gluster volume clear-locks VOLNAME path kind {blocked | granted | all}
{inode range | entry basename | posix range}
For more information on performing statedump, see Section 14.5, “Performing Statedump on a
Volume”
To identify locked file and clear locks
1. Perform statedump on the volume to view the files that are locked using the following
command:
# gluster volume statedump VOLNAME
For example, to display statedump of test-volume:
# gluster volume statedump test-volume
Volume statedump successful
The statedump files are created on the brick servers in the /tmp directory or in the directory
set using the server.statedump-path volume option. The naming convention of the dump
file is brick-path.brick-pid.dump.
2. Clear the entry lock using the following command:
# gluster volume clear-locks VOLNAME path kind granted entry basename
The following are the sample contents of the statedump file indicating entry lock (entrylk).
Ensure that those are stale locks and no resources own them.
[xlator.features.locks.vol-locks.inode]
path=/
mandatory=0
entrylk-count=1
lock-dump.domain.domain=vol-replicate-0
xlator.feature.locks.lock-dump.domain.entrylk.entrylk[0]
(ACTIVE)=type=ENTRYLK_WRLCK on basename=file1, pid = 714782904,
owner=ffffff2a3c7f0000, transport=0x20e0670, , granted at Mon Feb 27
16:01:01 2012
conn.2.bound_xl./gfs/brick1.hashsize=14057
conn.2.bound_xl./gfs/brick1.name=/gfs/brick1/inode
conn.2.bound_xl./gfs/brick1.lru_limit=16384
conn.2.bound_xl./gfs/brick1.active_size=2
conn.2.bound_xl./gfs/brick1.lru_size=0
conn.2.bound_xl./gfs/brick1.purge_size=0
For example, to clear the entry lock on file1 of test-volume:
Chapt er 22. T roubleshoot ing
273](https://image.slidesharecdn.com/redhatstorage-3-administrationguide-en-us-150123085546-conversion-gate01/85/Red-hat-storage-3-administration_guide-en-us-277-320.jpg)
![# gluster volume clear-locks test-volume / kind granted entry file1
Volume clear-locks successful
test-volume-locks: entry blocked locks=0 granted locks=1
3. Clear the inode lock using the following command:
# gluster volume clear-locks VOLNAME path kind granted inode range
The following are the sample contents of the statedump file indicating there is an inode lock
(inodelk). Ensure that those are stale locks and no resources own them.
[conn.2.bound_xl./gfs/brick1.active.1]
gfid=538a3d4a-01b0-4d03-9dc9-843cd8704d07
nlookup=1
ref=2
ia_type=1
[xlator.features.locks.vol-locks.inode]
path=/file1
mandatory=0
inodelk-count=1
lock-dump.domain.domain=vol-replicate-0
inodelk.inodelk[0](ACTIVE)=type=WRITE, whence=0, start=0, len=0,
pid = 714787072, owner=00ffff2a3c7f0000, transport=0x20e0670, ,
granted at Mon Feb 27 16:01:01 2012
For example, to clear the inode lock on file1 of test-volume:
# gluster volume clear-locks test-volume /file1 kind granted inode
0,0-0
Volume clear-locks successful
test-volume-locks: inode blocked locks=0 granted locks=1
4. Clear the granted POSIX lock using the following command:
# gluster volume clear-locks VOLNAME path kind granted posix range
The following are the sample contents of the statedump file indicating there is a granted
POSIX lock. Ensure that those are stale locks and no resources own them.
xlator.features.locks.vol1-locks.inode]
path=/file1
mandatory=0
posixlk-count=15
posixlk.posixlk[0](ACTIVE)=type=WRITE, whence=0, start=8, len=1,
pid = 23848, owner=d824f04c60c3c73c, transport=0x120b370, , blocked
at Mon Feb 27 16:01:01 2012
, granted at Mon Feb 27 16:01:01 2012
posixlk.posixlk[1](ACTIVE)=type=WRITE, whence=0, start=7, len=1, pid
= 1, owner=30404152462d436c-69656e7431, transport=0x11eb4f0, ,
granted at Mon Feb 27 16:01:01 2012
posixlk.posixlk[2](BLOCKED)=type=WRITE, whence=0, start=8, len=1,
pid = 1, owner=30404152462d436c-69656e7431, transport=0x11eb4f0, ,
blocked at Mon Feb 27 16:01:01 2012
Red Hat St orage 3 Administ rat ion Guide
274](https://image.slidesharecdn.com/redhatstorage-3-administrationguide-en-us-150123085546-conversion-gate01/85/Red-hat-storage-3-administration_guide-en-us-278-320.jpg)
=type=WRITE, whence=0, start=6, len=1,
pid = 12776, owner=a36bb0aea0258969, transport=0x120a4e0, , granted
at Mon Feb 27 16:01:01 2012
...
For example, to clear the granted POSIX lock on file1 of test-volume:
# gluster volume clear-locks test-volume /file1 kind granted posix
0,8-1
Volume clear-locks successful
test-volume-locks: posix blocked locks=0 granted locks=1
test-volume-locks: posix blocked locks=0 granted locks=1
test-volume-locks: posix blocked locks=0 granted locks=1
5. Clear the blocked POSIX lock using the following command:
# gluster volume clear-locks VOLNAME path kind blocked posix range
The following are the sample contents of the statedump file indicating there is a blocked
POSIX lock. Ensure that those are stale locks and no resources own them.
[xlator.features.locks.vol1-locks.inode]
path=/file1
mandatory=0
posixlk-count=30
posixlk.posixlk[0](ACTIVE)=type=WRITE, whence=0, start=0, len=1,
pid = 23848, owner=d824f04c60c3c73c, transport=0x120b370, , blocked
at Mon Feb 27 16:01:01 2012
, granted at Mon Feb 27 16:01:01
posixlk.posixlk[1](BLOCKED)=type=WRITE, whence=0, start=0, len=1,
pid = 1, owner=30404146522d436c-69656e7432, transport=0x1206980, ,
blocked at Mon Feb 27 16:01:01 2012
posixlk.posixlk[2](BLOCKED)=type=WRITE, whence=0, start=0, len=1,
pid = 1, owner=30404146522d436c-69656e7432, transport=0x1206980, ,
blocked at Mon Feb 27 16:01:01 2012
posixlk.posixlk[3](BLOCKED)=type=WRITE, whence=0, start=0, len=1,
pid = 1, owner=30404146522d436c-69656e7432, transport=0x1206980, ,
blocked at Mon Feb 27 16:01:01 2012
posixlk.posixlk[4](BLOCKED)=type=WRITE, whence=0, start=0, len=1,
pid = 1, owner=30404146522d436c-69656e7432, transport=0x1206980, ,
blocked at Mon Feb 27 16:01:01 2012
...
For example, to clear the blocked POSIX lock on file1 of test-volume:
# gluster volume clear-locks test-volume /file1 kind blocked posix
0,0-1
Volume clear-locks successful
test-volume-locks: posix blocked locks=28 granted locks=0
Chapt er 22. T roubleshoot ing
275](https://image.slidesharecdn.com/redhatstorage-3-administrationguide-en-us-150123085546-conversion-gate01/85/Red-hat-storage-3-administration_guide-en-us-279-320.jpg)
![test-volume-locks: posix blocked locks=1 granted locks=0
No locks cleared.
6. Clear all POSIX locks using the following command:
# gluster volume clear-locks VOLNAME path kind all posix range
The following are the sample contents of the statedump file indicating that there are POSIX
locks. Ensure that those are stale locks and no resources own them.
[xlator.features.locks.vol1-locks.inode]
path=/file1
mandatory=0
posixlk-count=11
posixlk.posixlk[0](ACTIVE)=type=WRITE, whence=0, start=8, len=1,
pid = 12776, owner=a36bb0aea0258969, transport=0x120a4e0, , blocked
at Mon Feb 27 16:01:01 2012
, granted at Mon Feb 27 16:01:01 2012
posixlk.posixlk[1](ACTIVE)=type=WRITE, whence=0, start=0, len=1, pid
= 12776, owner=a36bb0aea0258969, transport=0x120a4e0, , granted at
Mon Feb 27 16:01:01 2012
posixlk.posixlk[2](ACTIVE)=type=WRITE, whence=0, start=7, len=1, pid
= 23848, owner=d824f04c60c3c73c, transport=0x120b370, , granted at
Mon Feb 27 16:01:01 2012
posixlk.posixlk[3](ACTIVE)=type=WRITE, whence=0, start=6, len=1,
pid = 1, owner=30404152462d436c-69656e7431, transport=0x11eb4f0, ,
granted at Mon Feb 27 16:01:01 2012
posixlk.posixlk[4](BLOCKED)=type=WRITE, whence=0, start=8, len=1,
pid = 23848, owner=d824f04c60c3c73c, transport=0x120b370, , blocked
at Mon Feb 27 16:01:01 2012
...
For example, to clear all POSIX locks on file1 of test-volume:
# gluster volume clear-locks test-volume /file1 kind all posix 0,0-1
Volume clear-locks successful
test-volume-locks: posix blocked locks=1 granted locks=0
No locks cleared.
test-volume-locks: posix blocked locks=4 granted locks=1
You can perform statedump on test-volume again to verify that all the above locks are cleared.
Red Hat St orage 3 Administ rat ion Guide
276](https://image.slidesharecdn.com/redhatstorage-3-administrationguide-en-us-150123085546-conversion-gate01/85/Red-hat-storage-3-administration_guide-en-us-280-320.jpg)


This document is the Red Hat Storage 3 Administration Guide. It describes how to configure and manage Red Hat Storage Server for on-premise and public cloud installations. The guide covers topics such as Red Hat Storage architecture, key features, managing storage pools and volumes, performance optimization, geo-replication, snapshots, monitoring and more. It provides administrators with information needed to setup and maintain Red Hat Storage environments.