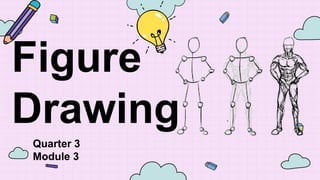
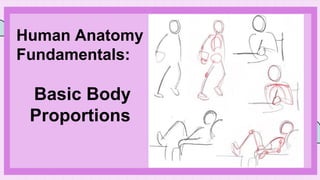
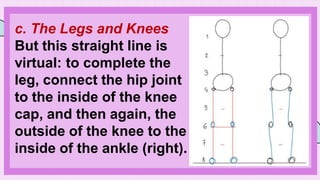
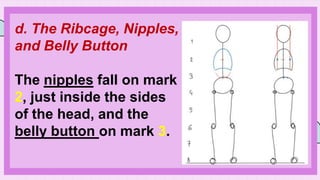
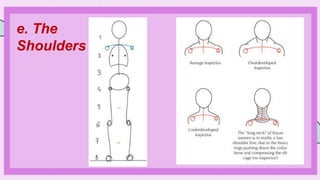
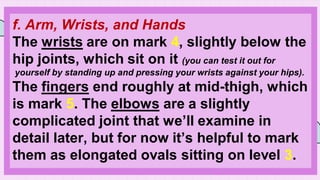
Figure drawing is the art of sketching the human figure, often done live with a nude model standing or seated in a posture that highlights the figure.
This method allows the artist to convey the essence of the muscles, form, and postures of the human body.
2. At the end of the lesson,
students should be able to:
1.Identify and explain Figure drawing
2.Illustrate simple figure drawing following
the basic body proportion of human.
3.Appreciate the basics of figure drawing in
developing your drawing style.
3. Figure drawing is the art of sketching
the human figure, often done live with a
nude model standing or seated in a
posture that highlights the figure.
This method allows the artist to convey
the essence of the muscles, form, and
postures of the human body.
5. The benefits of figure drawing.
Discover Foundational Shapes
Strengthen your knowledge of human
anatomy
Captures the movement, weight,
balance, and tension
Learn to see living things
7. a. The Figure Chart
A fundamental work on
proportion is a well-proportioned
figure regardless of gender
difference and characterized by
the arrangement of body joints.
9. b. The Pelvis
Add the pelvic bone next, simplified
as a flattened circle between marks
3 and 4, with the hip joints sitting on
4. Its width is roughly 1.5 to 2 head-
widths. You can now draw the spine
connecting the head to this most
important part of the body, its center
of gravity and stability.
10. c. The Legs and Knees
The knee joints sit on mark 6, as that
line corresponds to the bottom of
the kneecaps. When the leg is
stretched out, the knee joint is
placed on a straight line with the
hip and ankle (left)
11. c. The Legs and Knees
But this straight line is
virtual: to complete the
leg, connect the hip joint
to the inside of the knee
cap, and then again, the
outside of the knee to the
inside of the ankle (right).
12. d. The Ribcage, Nipples, and Belly Button
The ribcage-lungs group is the third
important volume of the body, after the
head and the pelvis. Simplified, it is an
oval that starts halfway between 1 and
2, down to mark 3; but it is best to chop
off the lower part of it as shown here to
imitate the actual rib cage
13. d. The Ribcage, Nipples,
and Belly Button
The nipples fall on mark
2, just inside the sides
of the head, and the
belly button on mark 3.
14. e. The Shoulders
The shoulder line is about halfway between
marks 1 and 2, with the shoulder width 2 to
3 head-widths. It’s slightly curved down, but
in tension the shoulders tense up and the
curve can itself turn up and look higher.
The trapezius muscle, which from the front
appears to connect the shoulder with the
neck
16. f. Arm, Wrists, and Hands
The wrists are on mark 4, slightly below the
hip joints, which sit on it (you can test it out for
yourself by standing up and pressing your wrists against your hips).
The fingers end roughly at mid-thigh, which
is mark 5. The elbows are a slightly
complicated joint that we’ll examine in
detail later, but for now it’s helpful to mark
them as elongated ovals sitting on level 3.