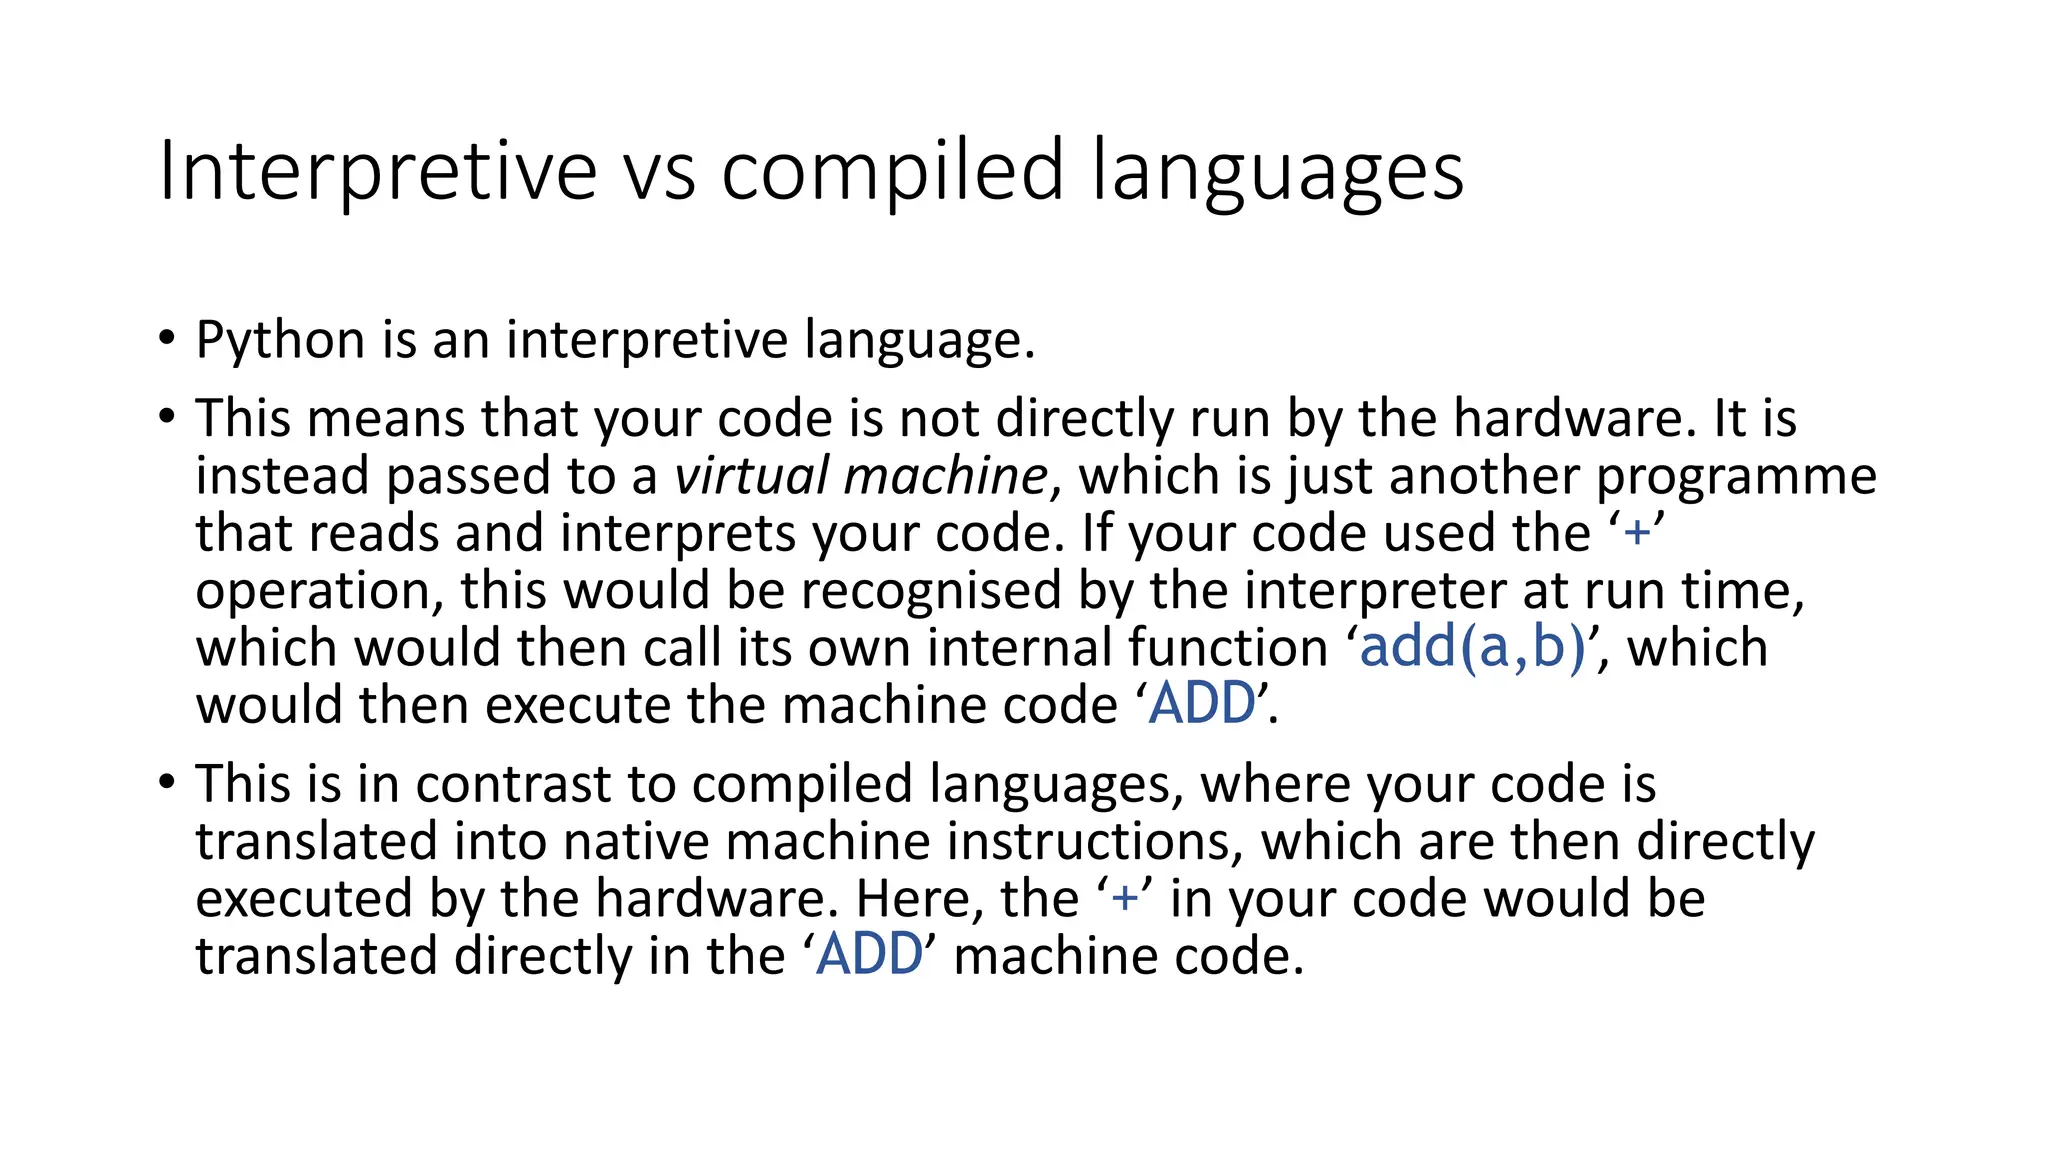
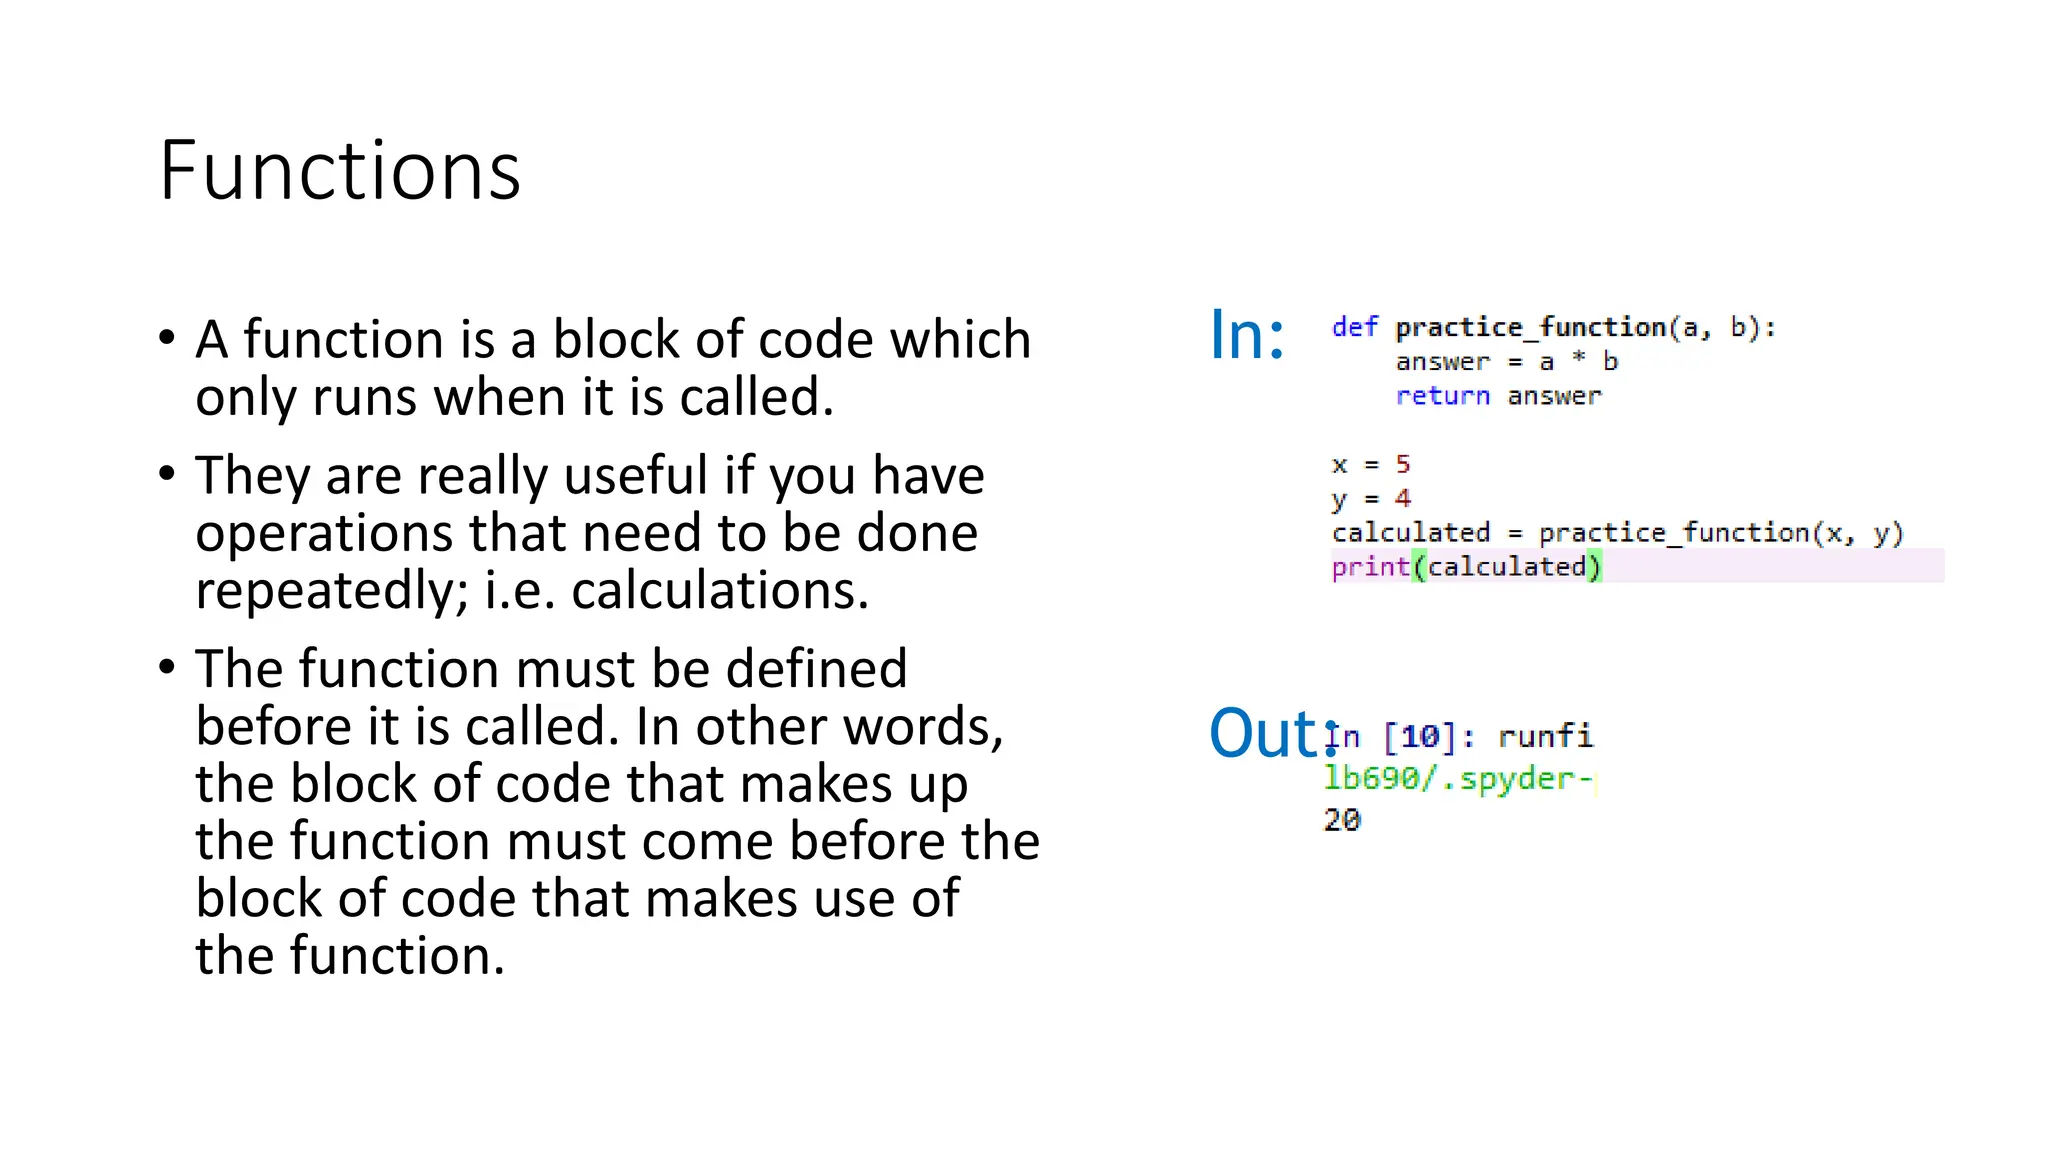
This document provides an introduction to Python programming. It discusses that Python is an interpreted language and contrasts this with compiled languages. The document then covers Python basics like variables, data types, operators, conditional statements, loops and lists. It introduces key concepts like for loops, while loops, the range() function, break and continue statements. The goal is to provide a practical overview of common Python aspects for new programmers.

![Variable types
• Integer (int)
• Float (float)
• String (str)
• Boolean (bool)
• Complex (complex)
• […]
• User defined (classes)
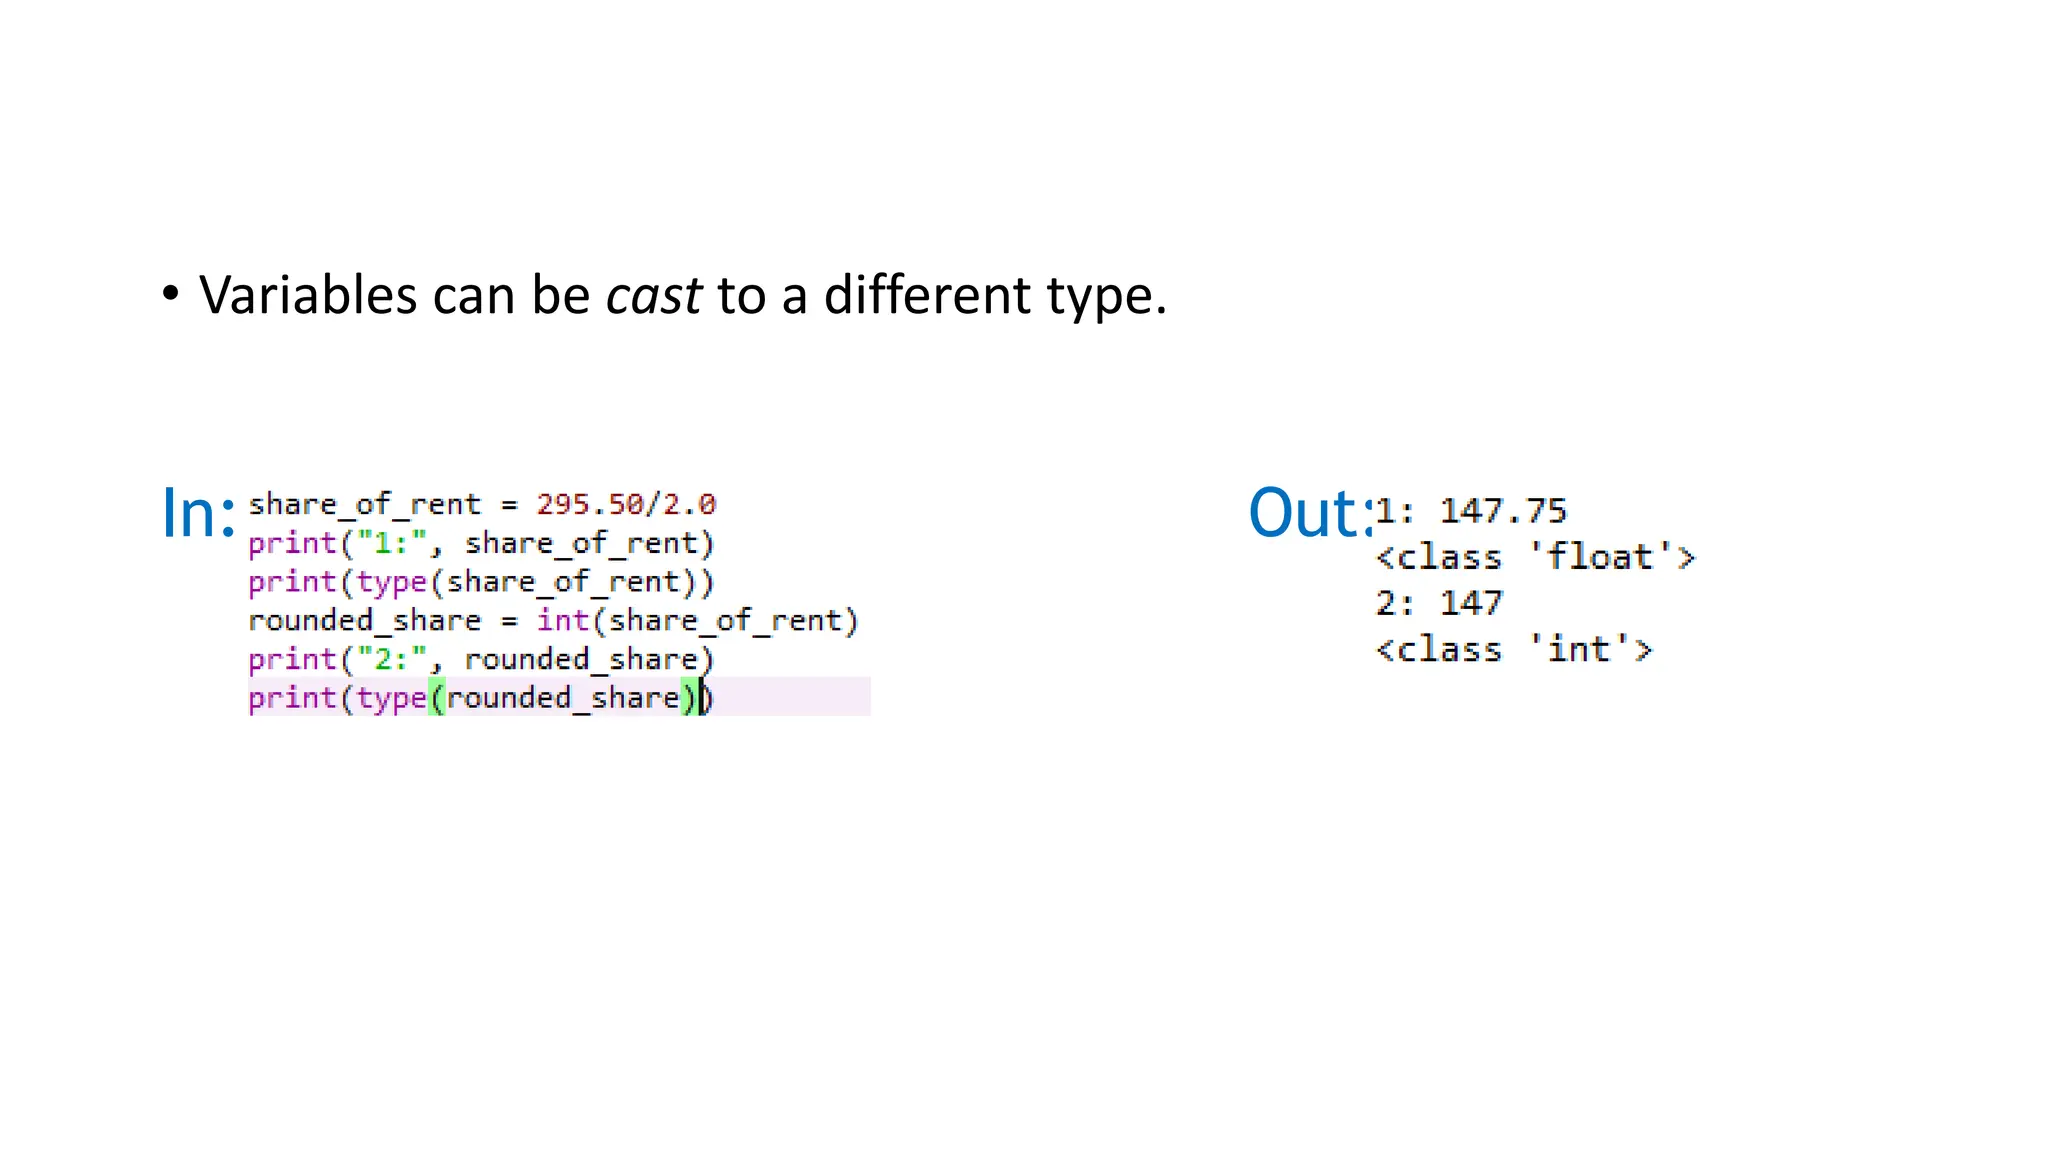
• A variable is assigned using the = operator;
i.e:
In: Out
:
• Create an integer, float, and string variable.
• Print these to the screen.
• Play around using different variable names,
etc.
• The print() function is used to print
something to the screen.](https://image.slidesharecdn.com/q-stepws02102019practicalintroductiontopython-240313130130-ed2d230b/75/Q-SPractical_introduction_to_Python-pptx-12-2048.jpg)

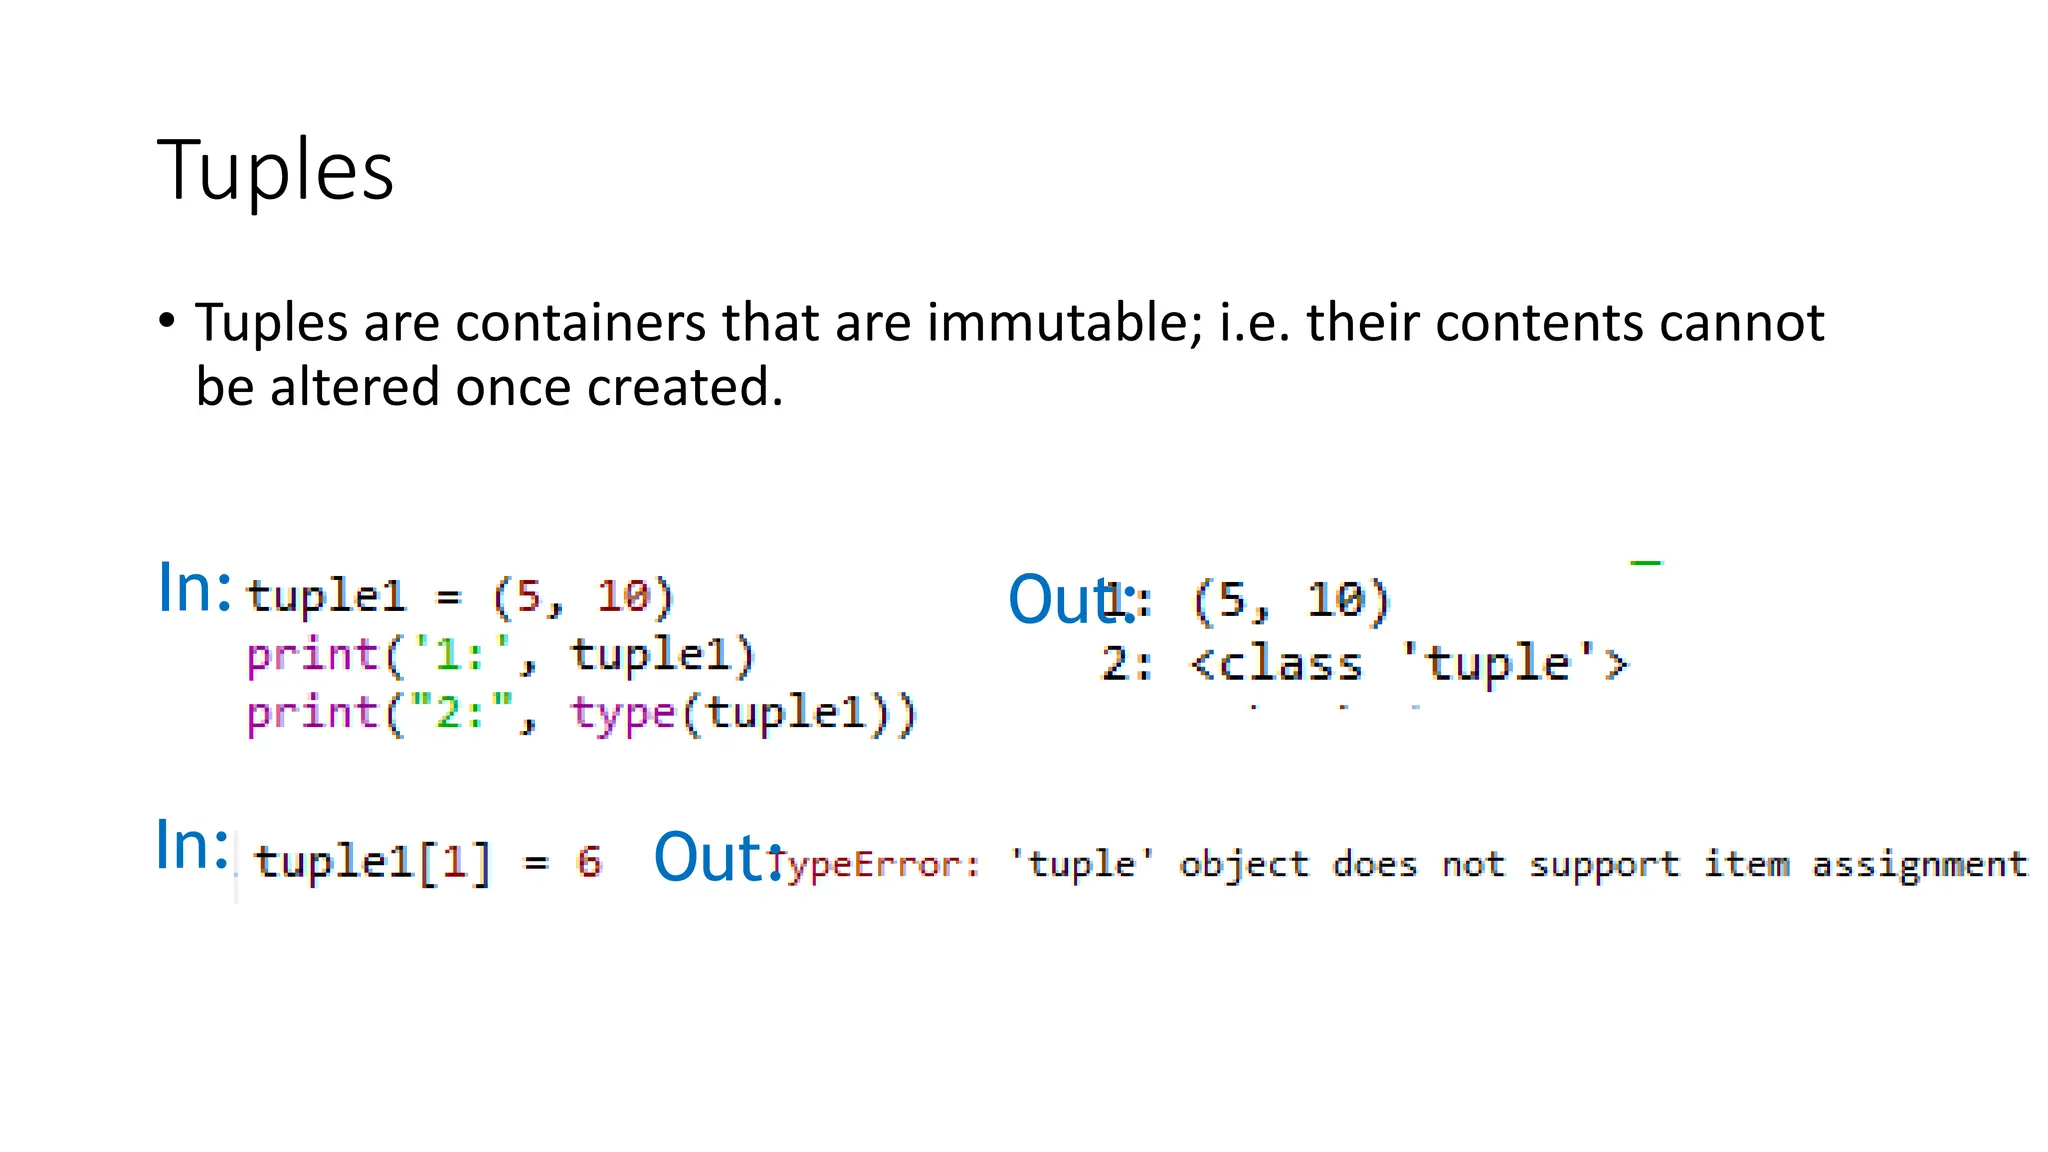
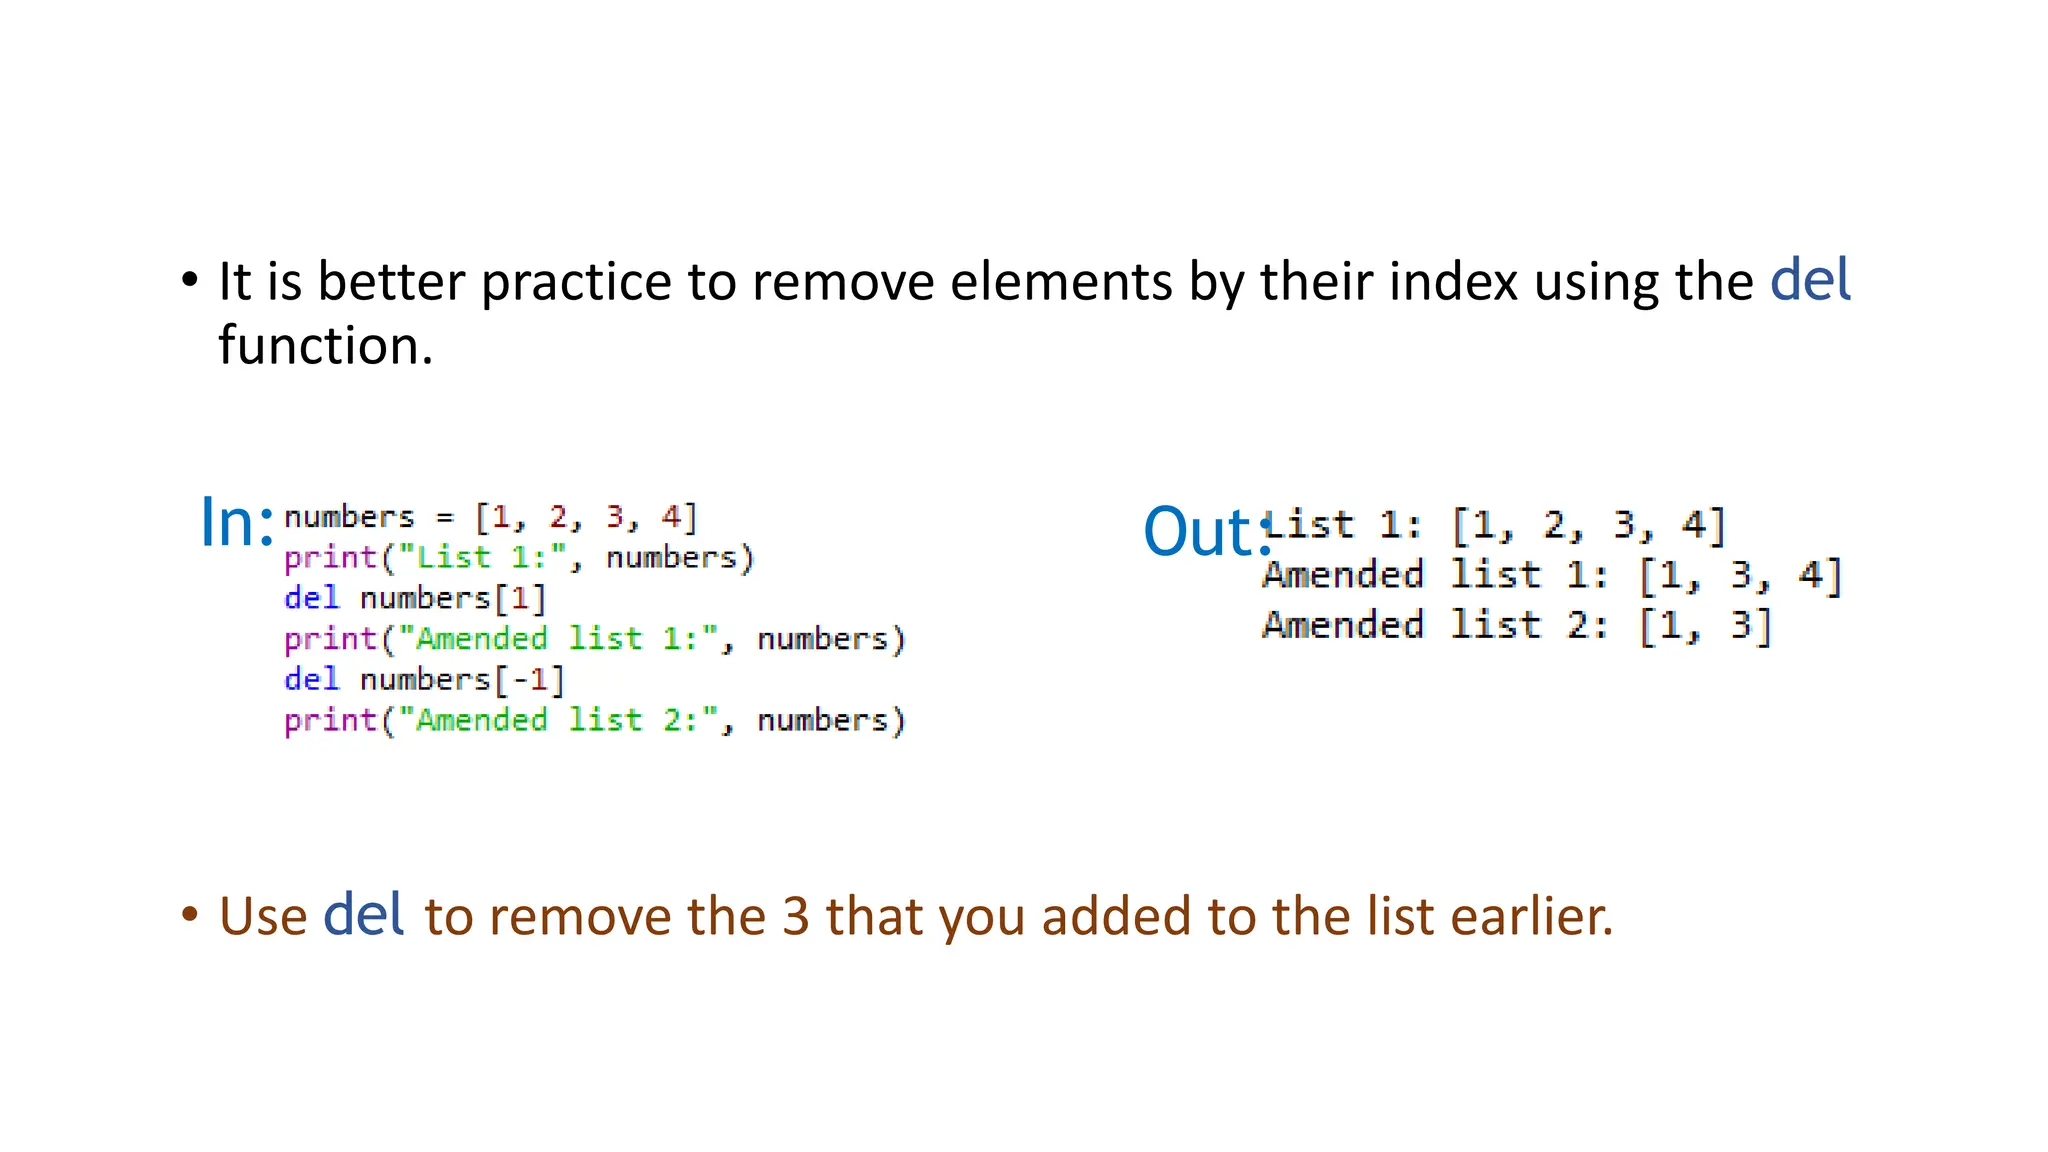
![Lists
• Lists are essentially containers
of arbitrary type.
• They are probably the container
that you will use most
frequently.
• The elements of a list can be of
different types.
• The difference between tuples
and lists is in performance; it is
much faster to ‘grab’ an
element stored in a tuple, but
lists are much more versatile.
• Note that lists are denoted by []
and not the () used by tuples.
In:
Out:
• Create a list and populate it with
some elements.](https://image.slidesharecdn.com/q-stepws02102019practicalintroductiontopython-240313130130-ed2d230b/75/Q-SPractical_introduction_to_Python-pptx-24-2048.jpg)


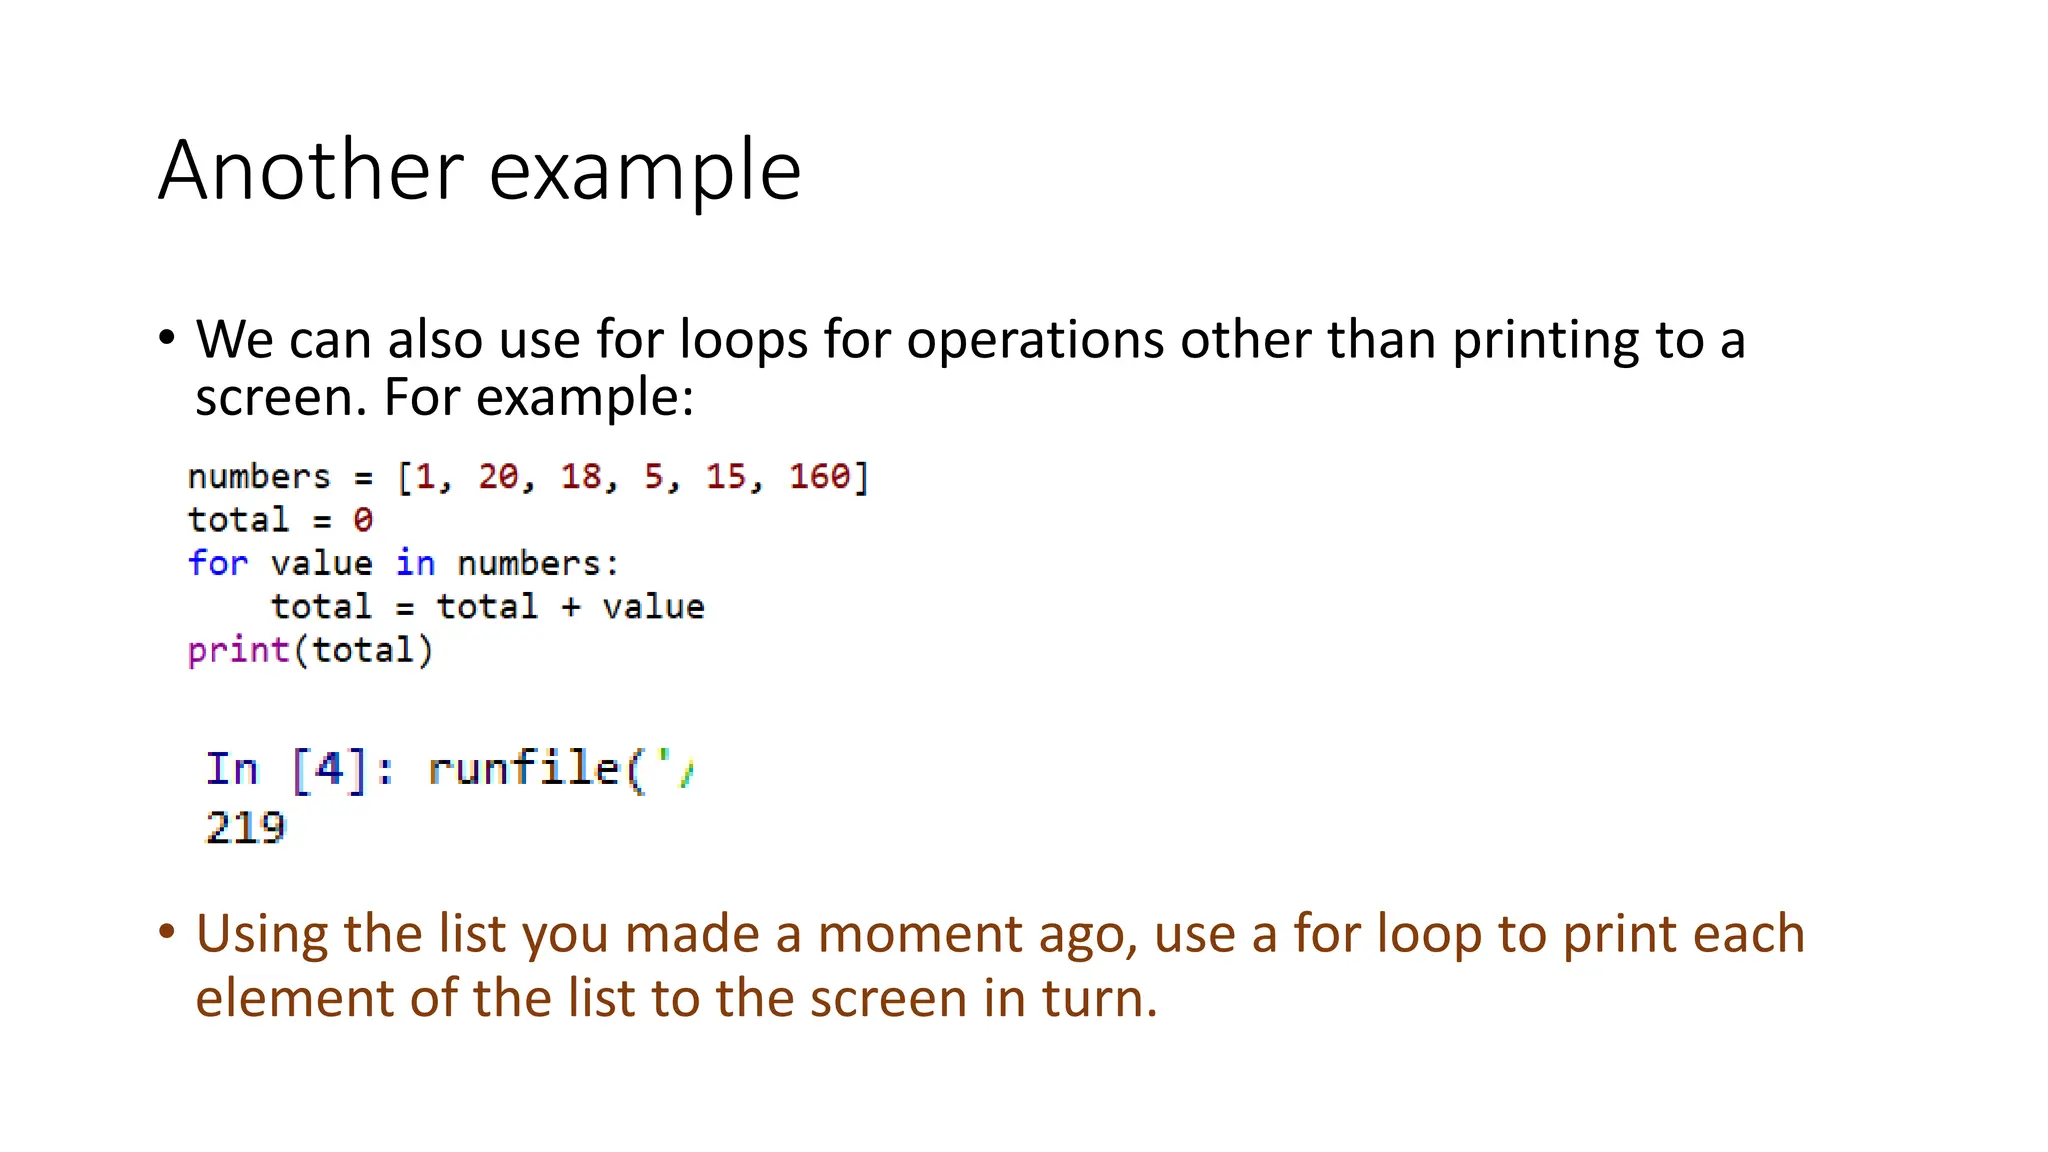
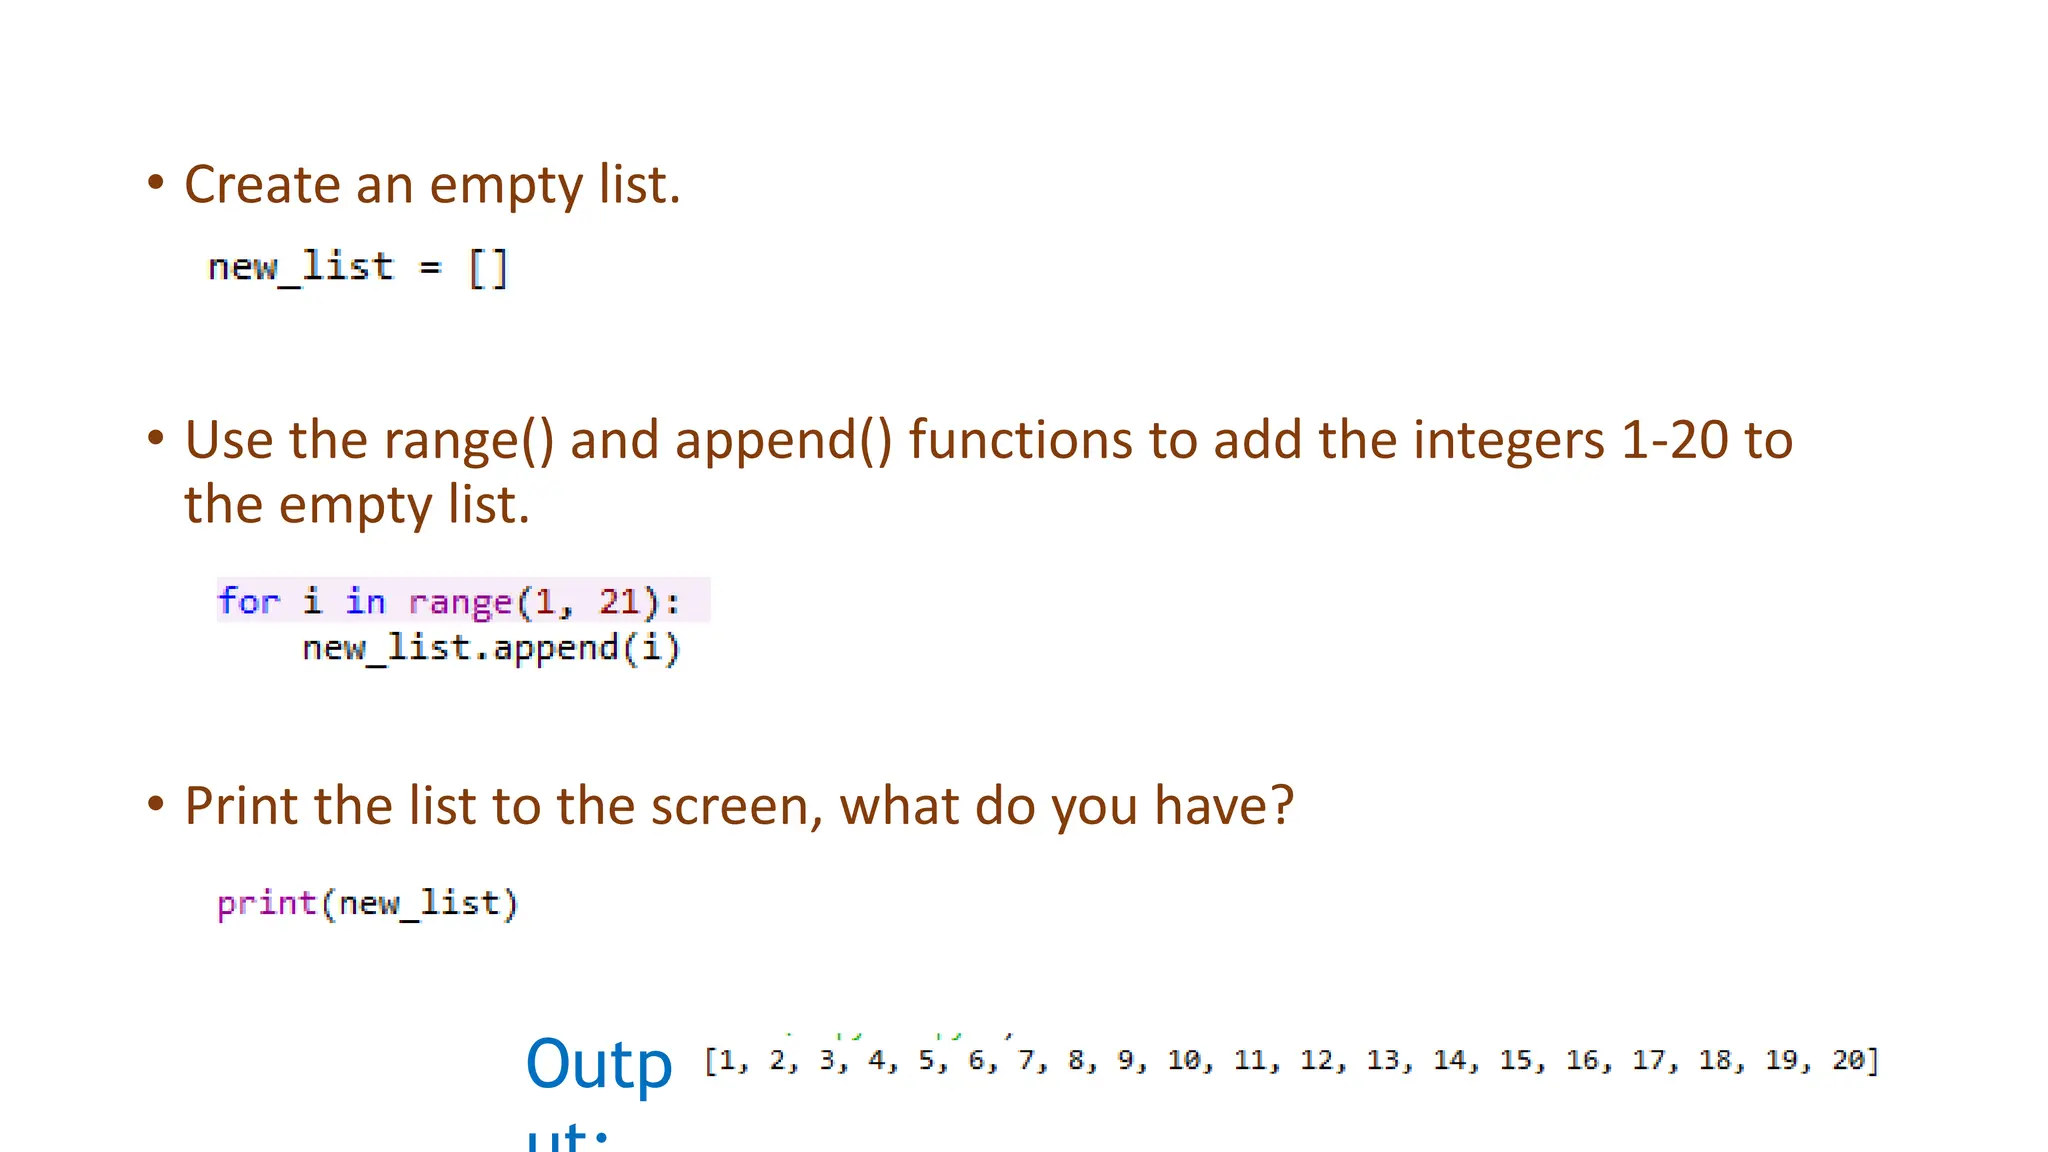
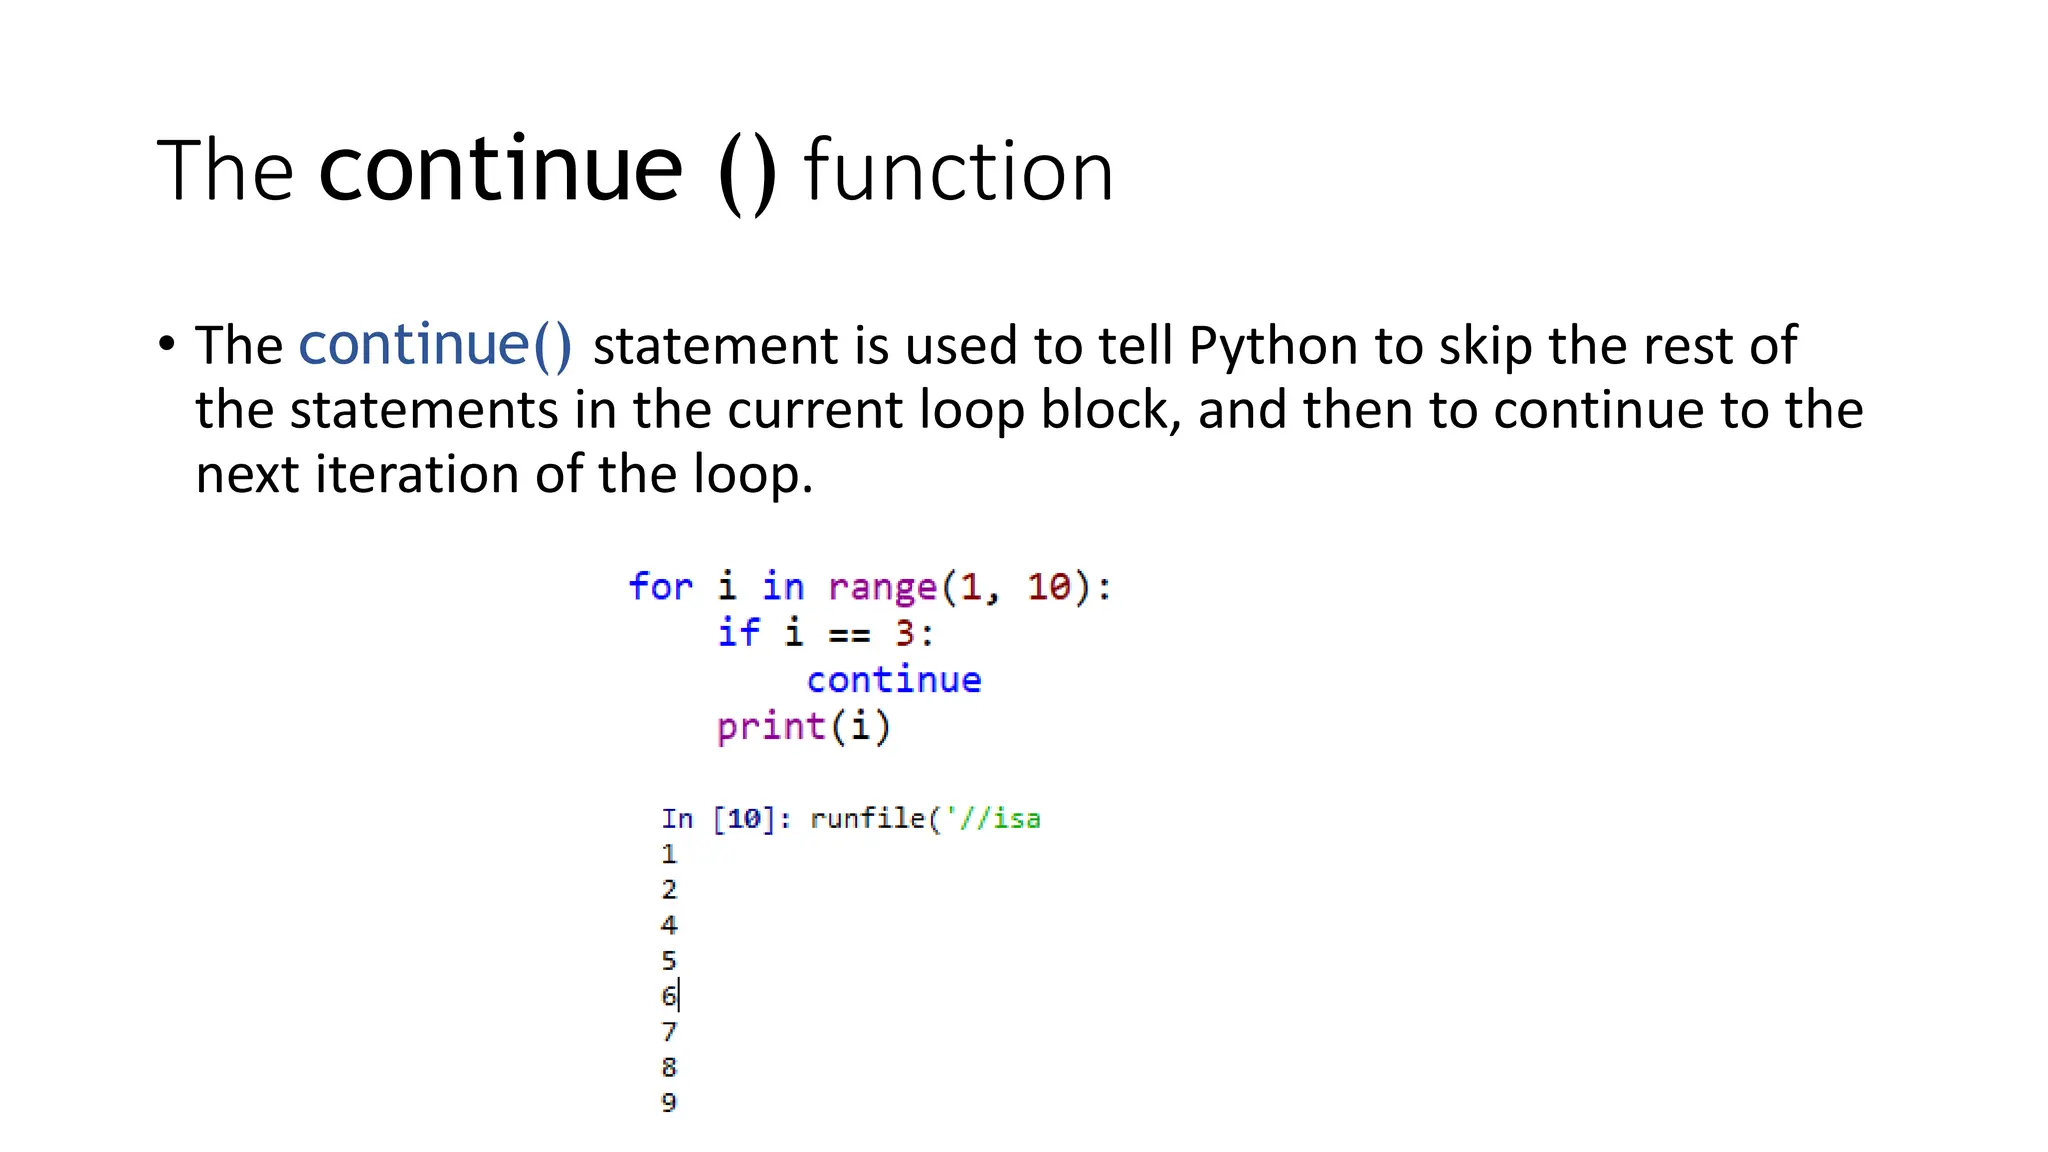
![The range() function
• The range() function generates a list of numbers, which is generally used to iterate
over within for loops.
• The range() function has two sets of parameters to follow:
range(stop)
stop: Number of integers
(whole numbers) to generate,
starting from zero. i.e:
range([start], stop[, step])
start: Starting number of the sequence.
stop: Generate numbers up to, but not including this number.
step: Difference between each number in the sequence
i.e.:
Note:
• All parameters must be integers.
• Parameters can be positive or negative.
• The range() function (and Python in general) is 0-index based, meaning list indexes start at 0, not 1. eg. The syntax to
access the first element of a list is mylist[0]. Therefore the last integer generated by range() is up to, but not
including, stop.](https://image.slidesharecdn.com/q-stepws02102019practicalintroductiontopython-240313130130-ed2d230b/75/Q-SPractical_introduction_to_Python-pptx-33-2048.jpg)


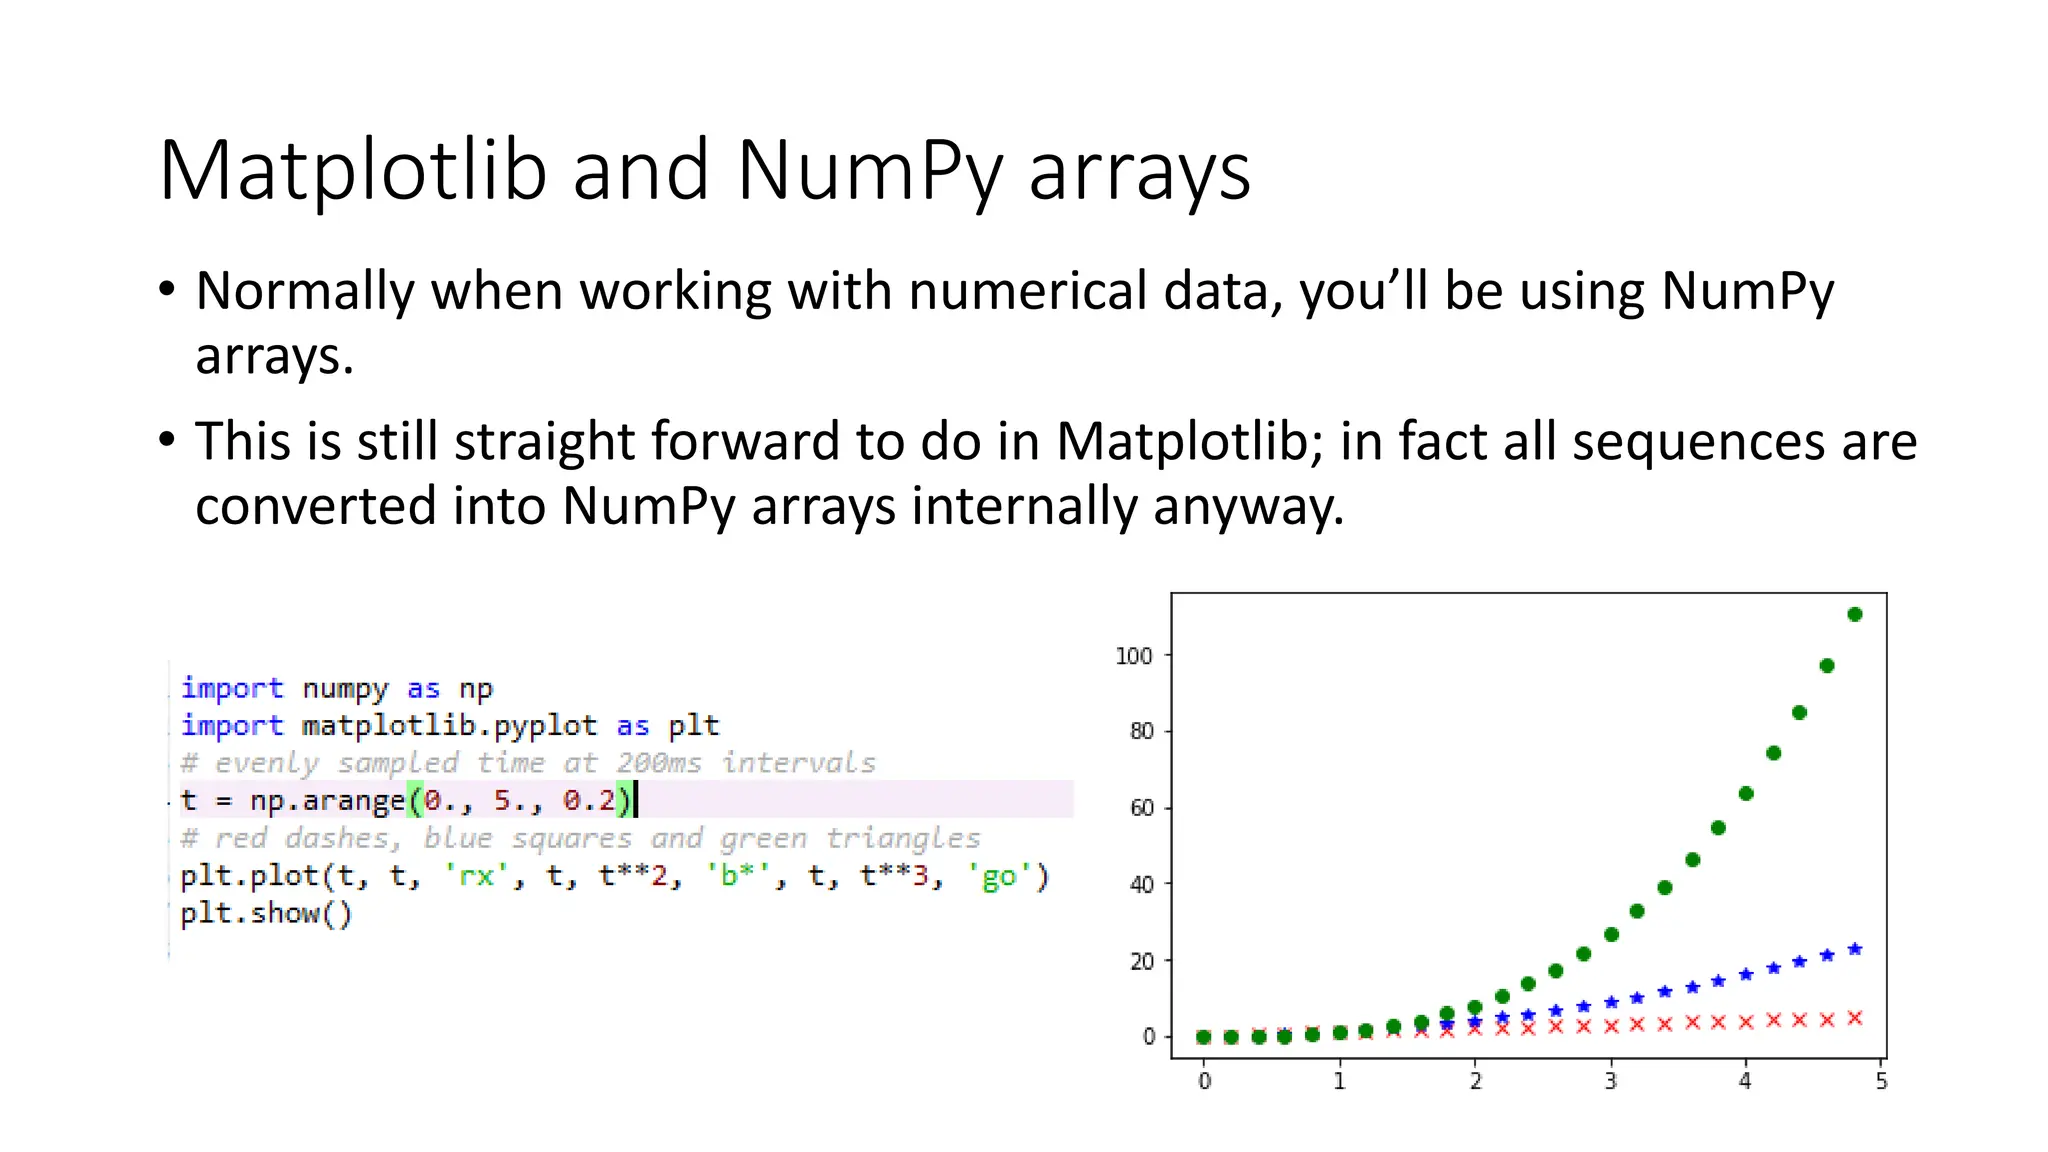
![Our first plot
• You may be wondering why the x-axis ranges from
0-3 and the y-axis from 1-4.
• If you provide a single list or array to the plot()
command, Matplotlib assumes it is a sequence of
y values, and automatically generates the x values
for you.
• Since python ranges start with 0, the default x
vector has the same length as y but starts with 0.
• Hence the x data are [0,1,2,3].](https://image.slidesharecdn.com/q-stepws02102019practicalintroductiontopython-240313130130-ed2d230b/75/Q-SPractical_introduction_to_Python-pptx-62-2048.jpg)


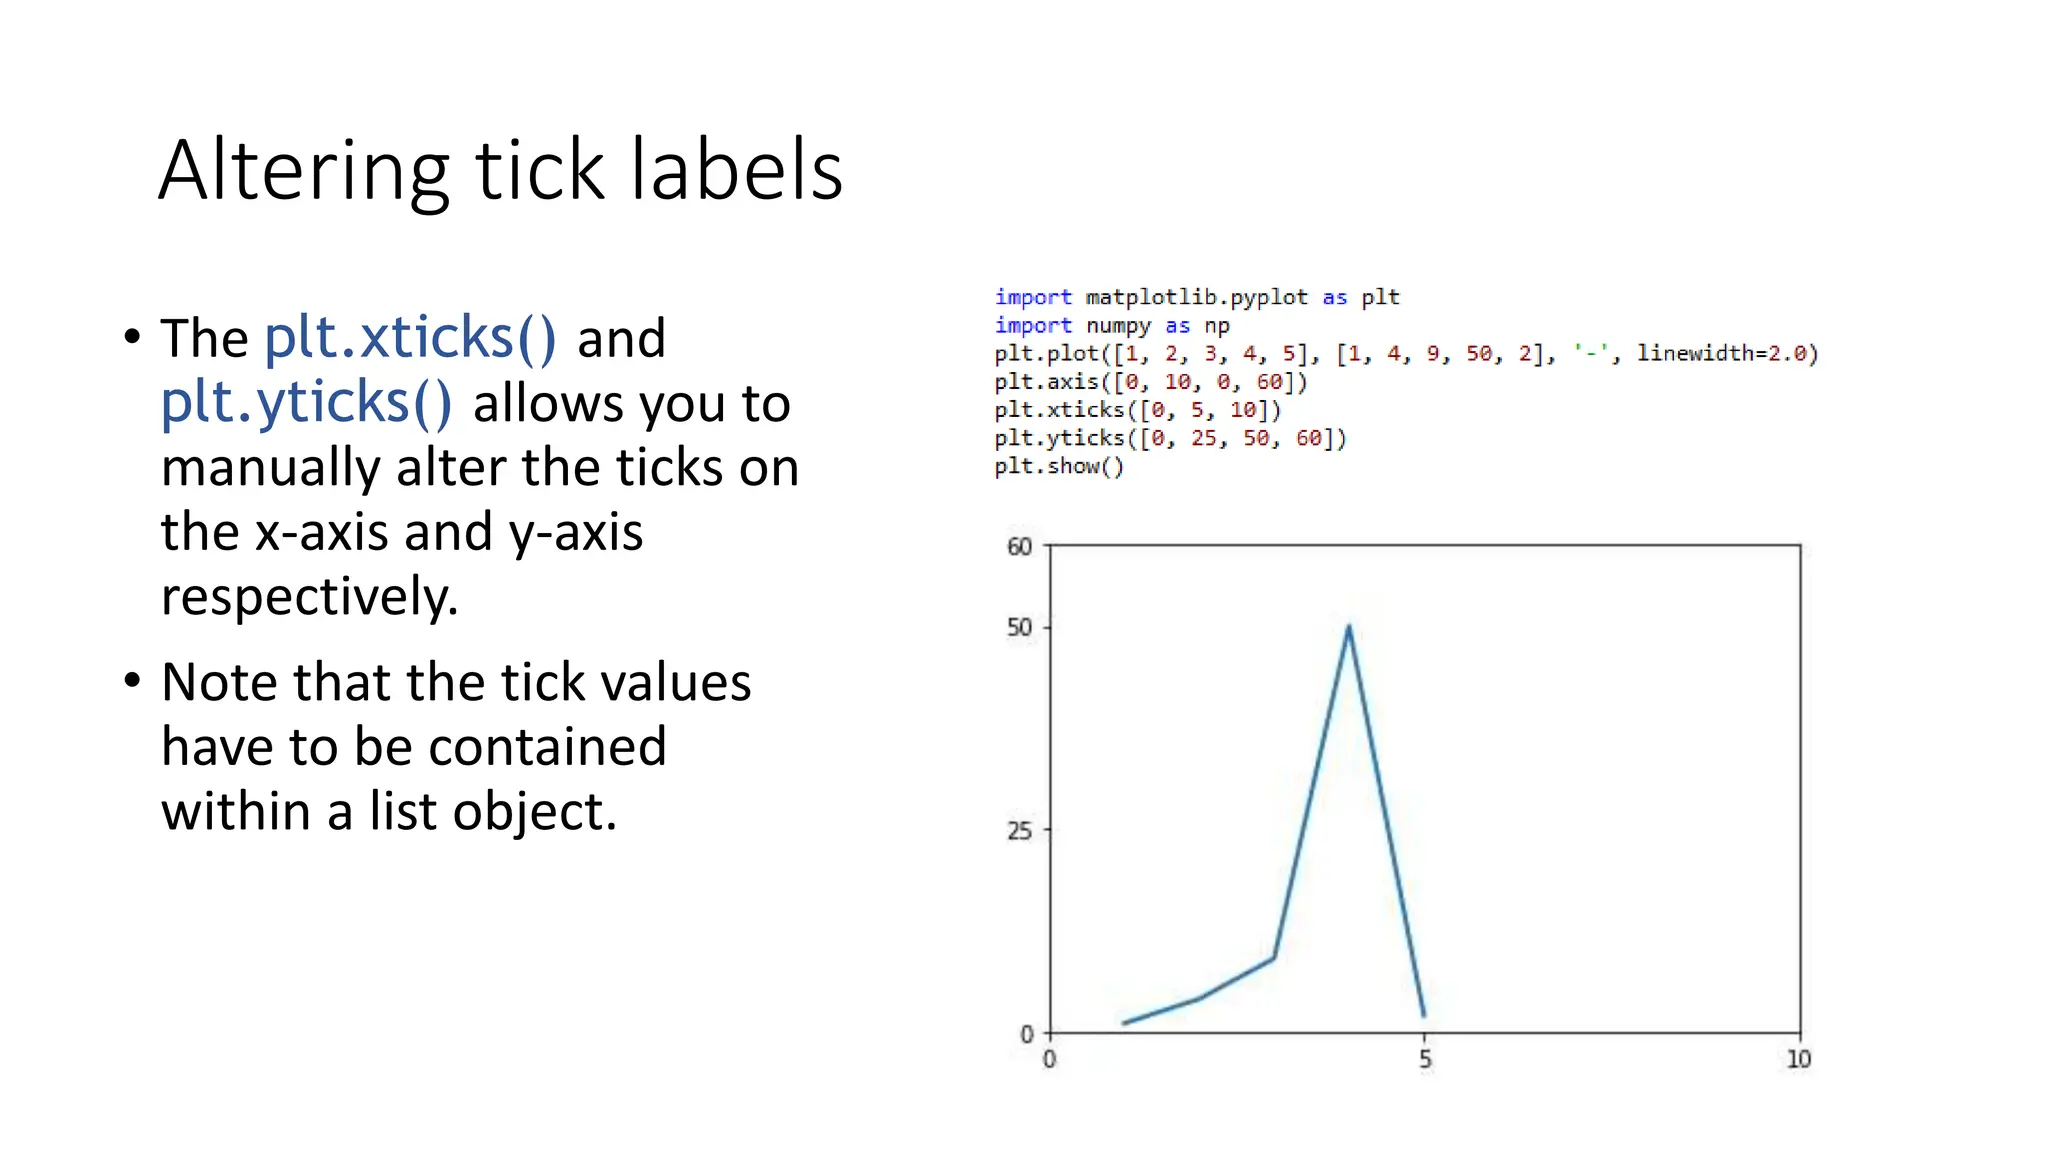

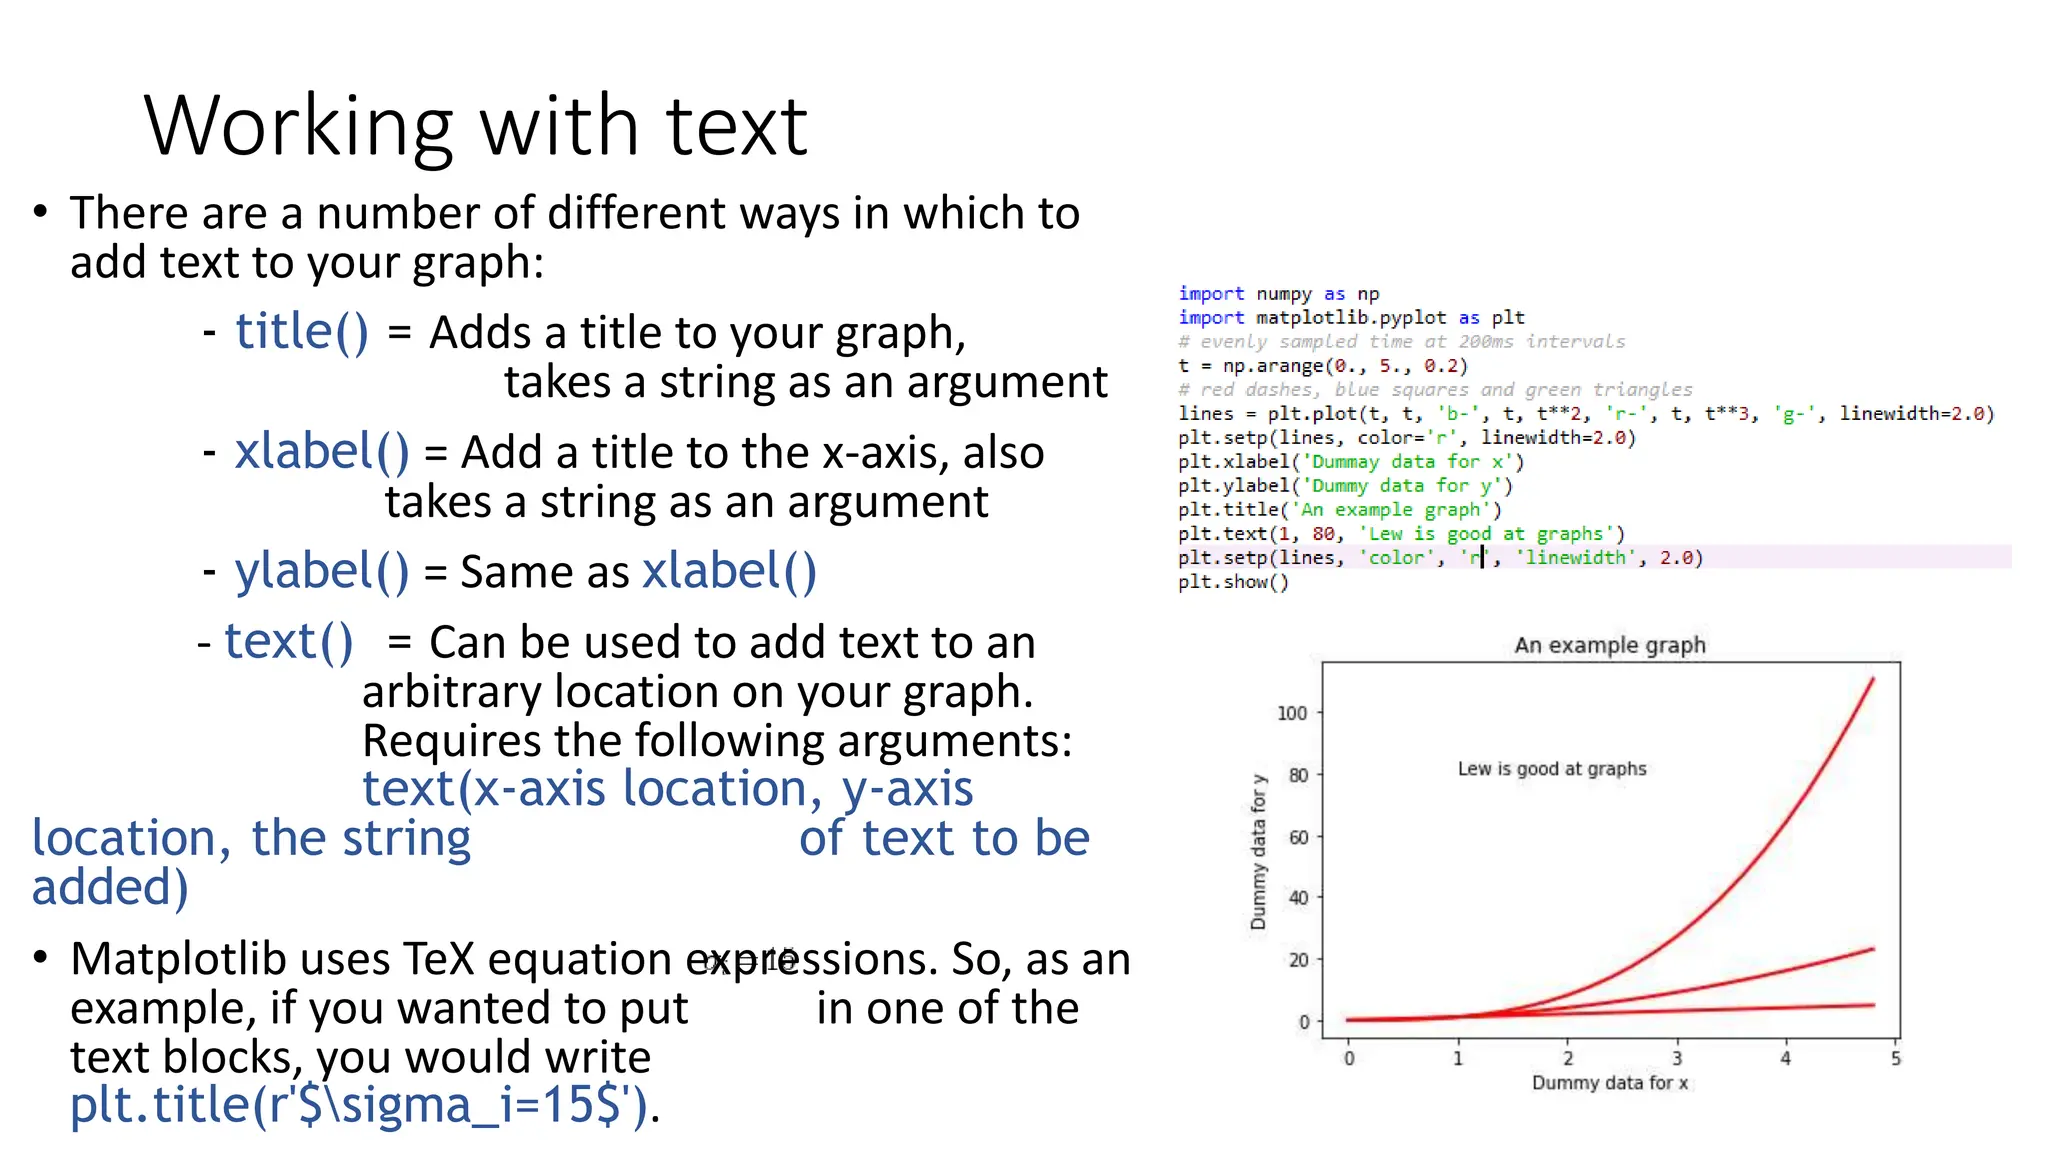
![The axis() function
• The axis() function allows us to specify the range of the axis.
• It requires a list that contains the following:
[The min x-axis value, the max x-axis value, the min y-axis, the max
y-axis value]](https://image.slidesharecdn.com/q-stepws02102019practicalintroductiontopython-240313130130-ed2d230b/75/Q-SPractical_introduction_to_Python-pptx-69-2048.jpg)