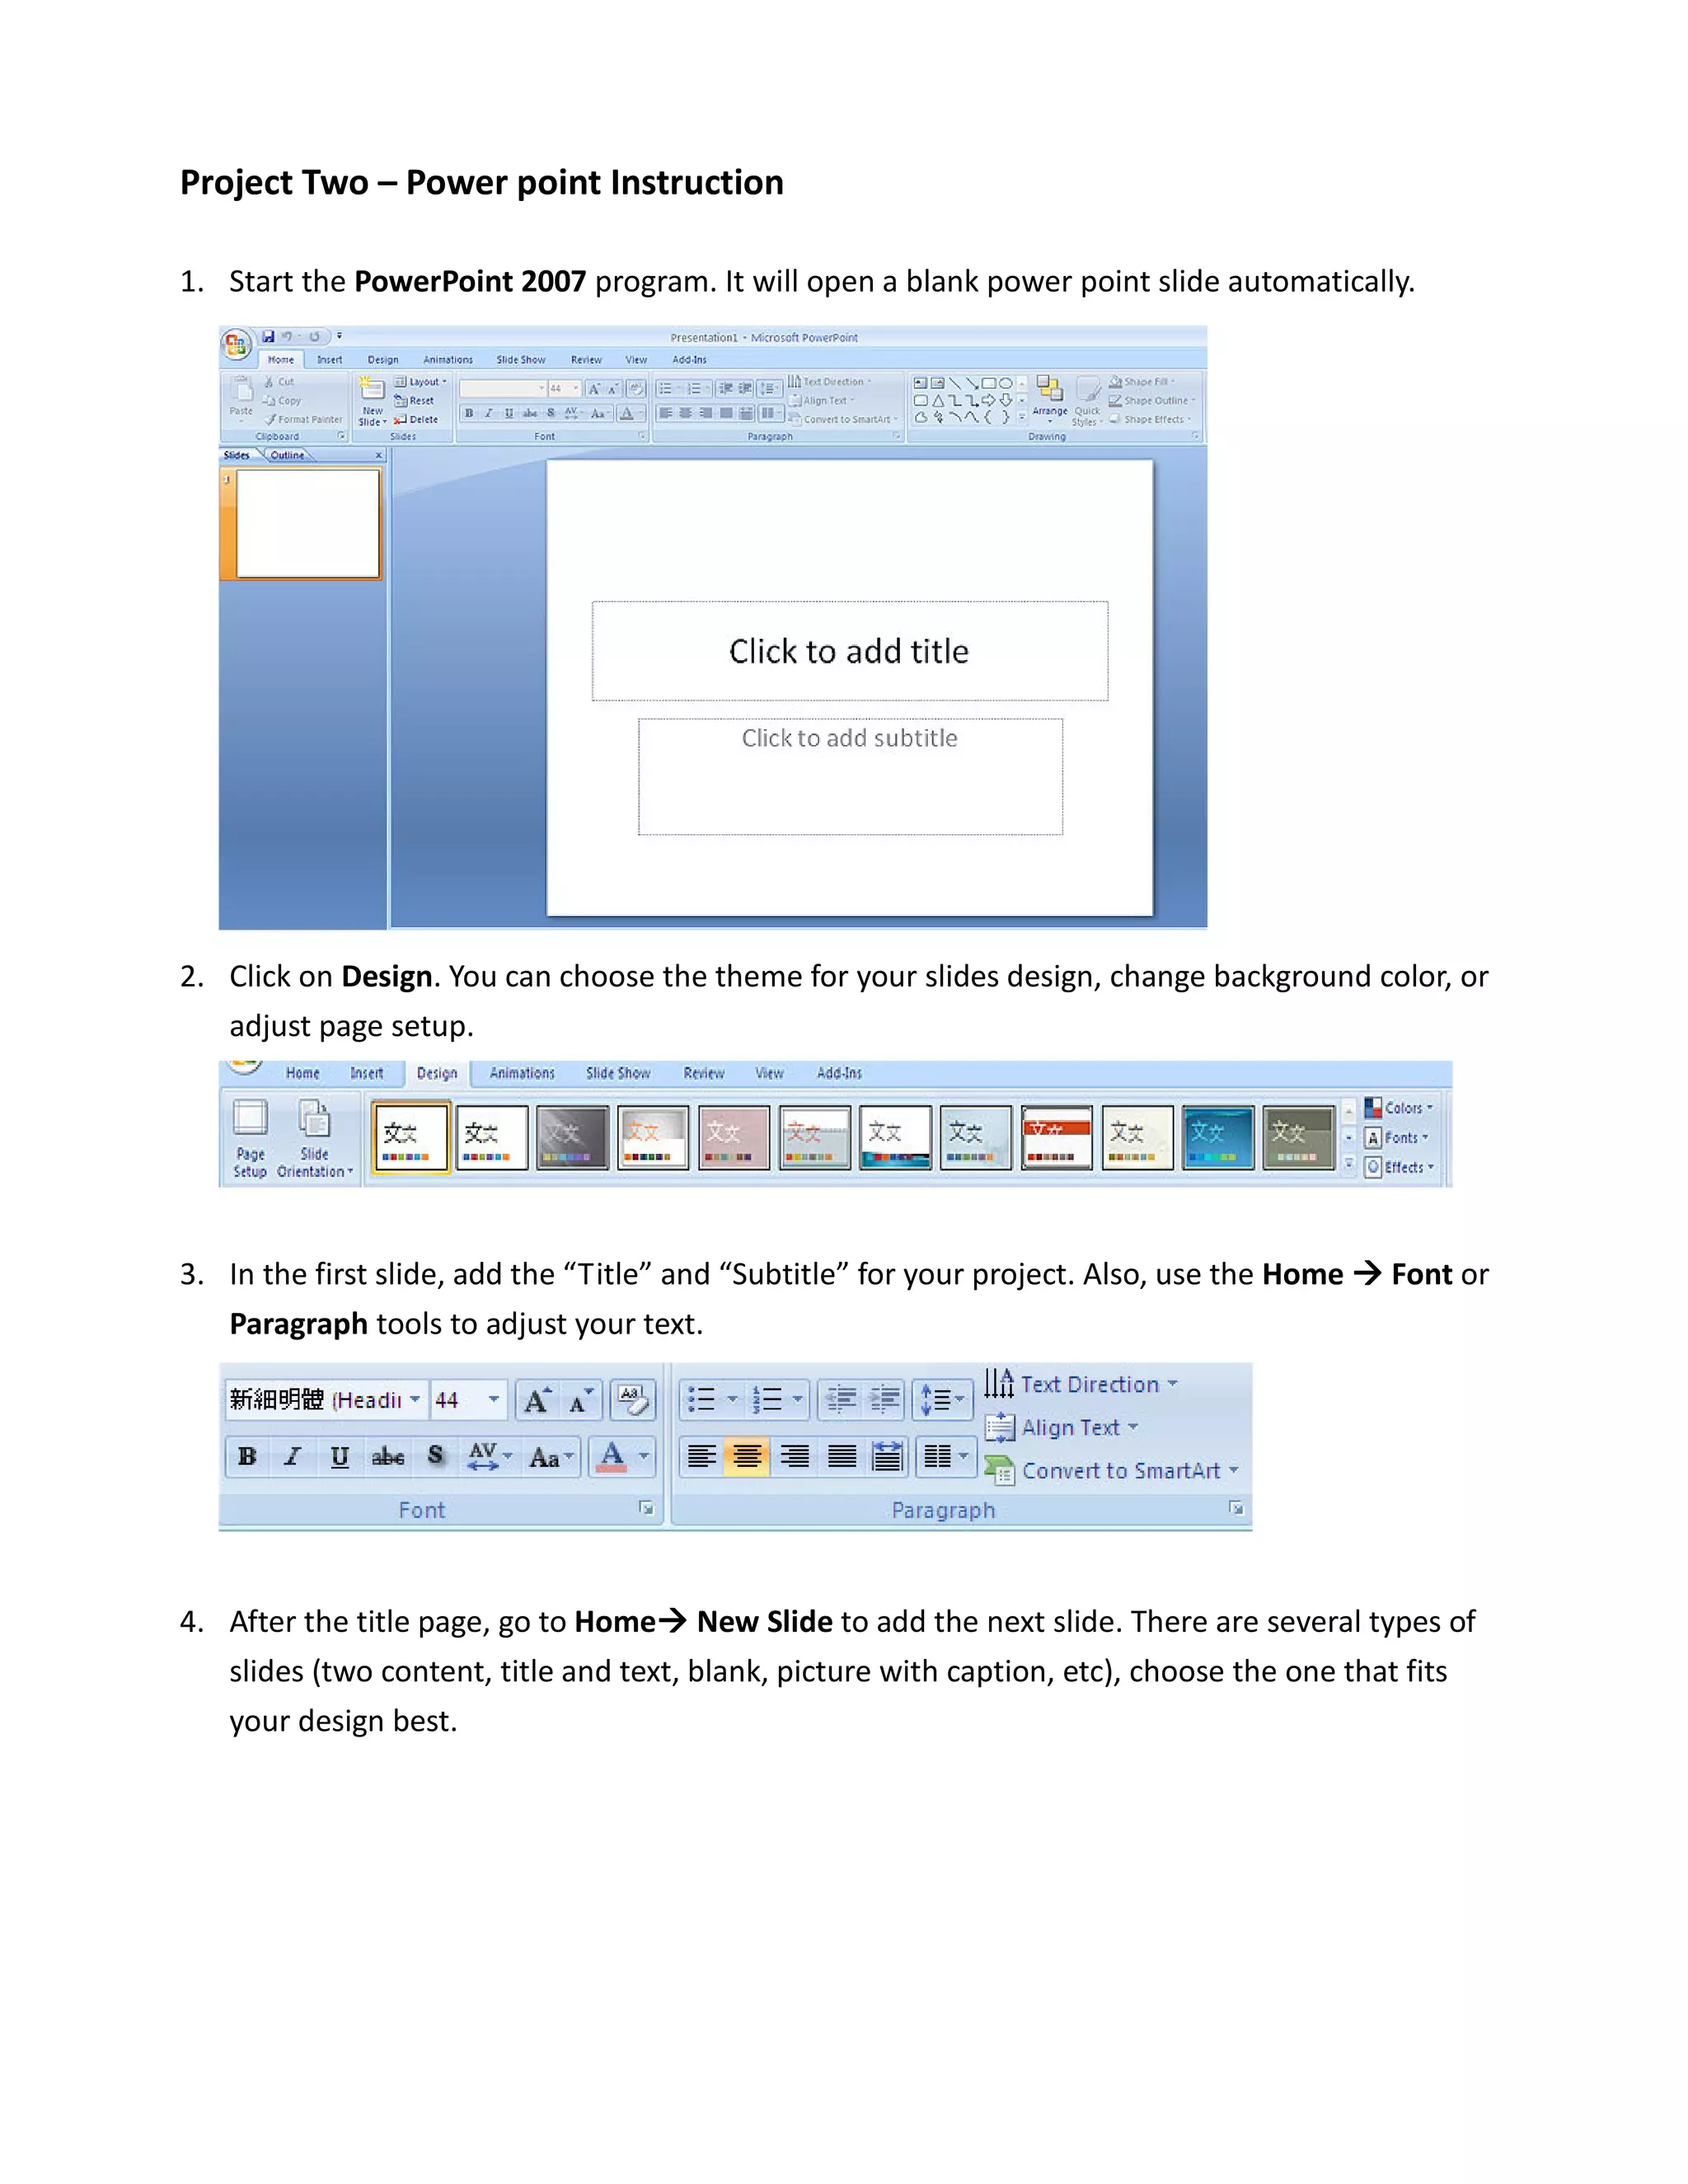
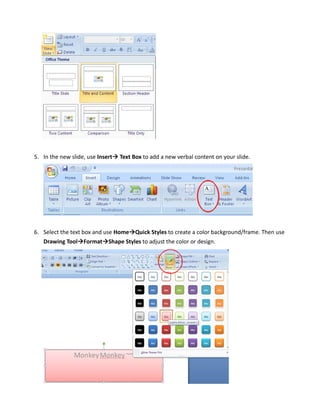
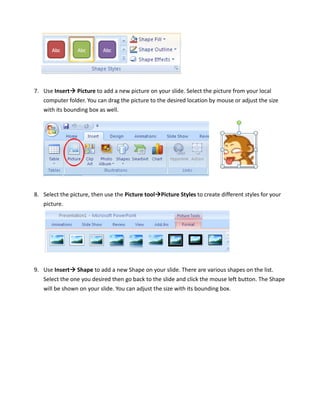
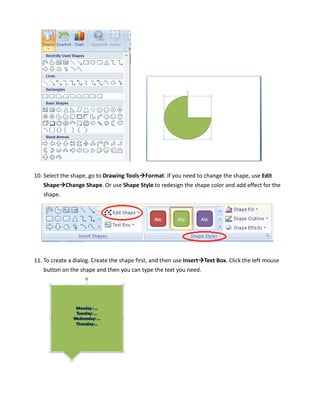
Project Two – Power point Instruction

1. Start the PowerPoint 2007 program. It will open a blank power point slide automatically.


2. Click on Design. You can choose the theme for your slides design, change background color, or
   adjust page setup.


3. In the first slide, add the “Title” and “Subtitle” for your project. Also, use the Home   Font or
   Paragraph tools to adjust your text.


4. After the title page, go to Home New Slide to add the next slide. There are several types of
   slides (two content, title and text, blank, picture with caption, etc), choose the one that fits
   your design best.
5. In the new slide, use Insert   Text Box to add a new verbal content on your slide.


6. Select the text box and use Home Quick Styles to create a color background/frame. Then use
   Drawing Tool Format Shape Styles to adjust the color or design.
7. Use Insert Picture to add a new picture on your slide. Select the picture from your local
   computer folder. You can drag the picture to the desired location by mouse or adjust the size
   with its bounding box as well.


8. Select the picture, then use the Picture tool Picture Styles to create different styles for your
   picture.


9. Use Insert Shape to add a new Shape on your slide. There are various shapes on the list.
   Select the one you desired then go back to the slide and click the mouse left button. The Shape
   will be shown on your slide. You can adjust the size with its bounding box.
10. Select the shape, go to Drawing Tools Format. If you need to change the shape, use Edit
    Shape Change Shape. Or use Shape Style to redesign the shape color and add effect for the
    shape.


11. To create a dialog. Create the shape first, and then use Insert Text Box. Click the left mouse
    button on the shape and then you can type the text you need.
12. To change the text inside the textbox, you can go to Home Font for adjusting size, color or
    font of the text. Or you can use Drawing Tools Format WordArt Styles for further adjusting.


13. Create Hyperlinks. Select the text or image you want to create a hyperlink for and then go to
    Insert Hyperlinks. In the Address section, type in the website address. For instance,
   http://www.unco.edu.
For Project 2 you will be creating a PowerPoint project that includes the following:


   Work with your group members                                           Please be courteous and contributive
                                                                          to your group members
   Topic of your group choice, although it must be instructional
   10-15 slides
   Do not use bullet lists
   Include at least four web-links to supporting resources
   Include use of the drawing tools                                       Circles, Arrows, Lines, Callouts, Etc.
   Include as many visuals as you can to support your instruction
   All text must be in narrative (complete sentences) format
   Link your project to appropriate Colorado State K-12 Content           (indicate which standard(s) fit your
   Standards                                                              instruction)
   Include follow-up activities for your students


Tasks:


   Week of 3/24              Determine topic with your group members
   Week of 3/31              Instructions will be posted on importing graphics, using drawing tools, and
                             adding hyperlinks
   Week of 4/7               Examples of projects will be posted.
   Week of 4/14, 4/21        Work on your group projects.
   Week of 4/28              Due date

Rubric:


   10-15 slides                                          5 points
   Graphics and drawing tools used                       3 points
   Hyperlinks used                                       2 points
   Narrative style text                                  3 points
   Links to Colorado Standards                           2 points
   Instruction is well designed                          3 points
   Follow-up activities                                  2 points
   Total                                                 20 points

Project two powerpoint

  • 1.
    Project Two –Power point Instruction 1. Start the PowerPoint 2007 program. It will open a blank power point slide automatically. 2. Click on Design. You can choose the theme for your slides design, change background color, or adjust page setup. 3. In the first slide, add the “Title” and “Subtitle” for your project. Also, use the Home Font or Paragraph tools to adjust your text. 4. After the title page, go to Home New Slide to add the next slide. There are several types of slides (two content, title and text, blank, picture with caption, etc), choose the one that fits your design best.
  • 2.
    5. In thenew slide, use Insert Text Box to add a new verbal content on your slide. 6. Select the text box and use Home Quick Styles to create a color background/frame. Then use Drawing Tool Format Shape Styles to adjust the color or design.
  • 3.
    7. Use InsertPicture to add a new picture on your slide. Select the picture from your local computer folder. You can drag the picture to the desired location by mouse or adjust the size with its bounding box as well. 8. Select the picture, then use the Picture tool Picture Styles to create different styles for your picture. 9. Use Insert Shape to add a new Shape on your slide. There are various shapes on the list. Select the one you desired then go back to the slide and click the mouse left button. The Shape will be shown on your slide. You can adjust the size with its bounding box.
  • 4.
    10. Select theshape, go to Drawing Tools Format. If you need to change the shape, use Edit Shape Change Shape. Or use Shape Style to redesign the shape color and add effect for the shape. 11. To create a dialog. Create the shape first, and then use Insert Text Box. Click the left mouse button on the shape and then you can type the text you need.
  • 5.
    12. To changethe text inside the textbox, you can go to Home Font for adjusting size, color or font of the text. Or you can use Drawing Tools Format WordArt Styles for further adjusting. 13. Create Hyperlinks. Select the text or image you want to create a hyperlink for and then go to Insert Hyperlinks. In the Address section, type in the website address. For instance, http://www.unco.edu.
  • 6.
    For Project 2you will be creating a PowerPoint project that includes the following: Work with your group members Please be courteous and contributive to your group members Topic of your group choice, although it must be instructional 10-15 slides Do not use bullet lists Include at least four web-links to supporting resources Include use of the drawing tools Circles, Arrows, Lines, Callouts, Etc. Include as many visuals as you can to support your instruction All text must be in narrative (complete sentences) format Link your project to appropriate Colorado State K-12 Content (indicate which standard(s) fit your Standards instruction) Include follow-up activities for your students Tasks: Week of 3/24 Determine topic with your group members Week of 3/31 Instructions will be posted on importing graphics, using drawing tools, and adding hyperlinks Week of 4/7 Examples of projects will be posted. Week of 4/14, 4/21 Work on your group projects. Week of 4/28 Due date Rubric: 10-15 slides 5 points Graphics and drawing tools used 3 points Hyperlinks used 2 points Narrative style text 3 points Links to Colorado Standards 2 points Instruction is well designed 3 points Follow-up activities 2 points Total 20 points