Creating the Hickstead Statue
•
1 like•1,730 views

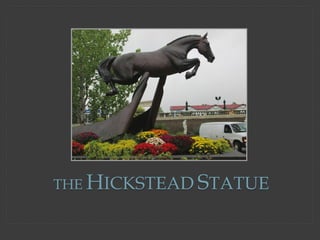
The Hickstead Statue was commissioned by Spruce Meadows and Eric Lamaze to honor Hickstead, the greatest showjumper of our time. With Lamaze, Hickstead jumped to individual gold and team silver at the 2008 Olympic Games in Hong Kong, individual bronze at the 2010 Alltech FEI World Equestrian Games (Ky.), where Hickstead was named Best Horse, and second place individually at the 2011 Rolex FEI World Cup Final. They won grand prixs all over the world, including in Rome, Aachen and La Baule. Together, they claimed the prestigious CN International at Spruce Meadows in 2007 and 2011.

Recommended
More Related Content
Viewers also liked
Viewers also liked (17)
Similar to Creating the Hickstead Statue
Similar to Creating the Hickstead Statue (20)
Recently uploaded
Recently uploaded (20)
Creating the Hickstead Statue
- 2. THE GREAT HICKSTEAD Photos: Keara McMurdo Commissioned by Spruce Meadows & Eric Lamaze to pay homage to Hickstead
- 3. DESIGN ELEMENTS The measurements were converted to 1/5th life-size for creating the initial model and converted from 1/5th to life-size parameters for 3D scanning and enlargement to life-size form in foam. Hickstead was the number one Show Jumper in the world, so it only seemed fitting to design a statue of Hickstead that reflected him soaring through the air. Without the ability to take measurements of Hickstead in person, I used calipers to take measurements from a profile image of Hickstead to determine the proportions of his body.
- 4. ARMATURE The armature is the frame around which the plasteline, an oil based clay is applied to create the1/5 life-size model. The wire is formed to reflect the movement of the horse that is ultimately reflected in the bronze sculpture. It’s very important at this stage that the proportions are correct from the beginning. Making a change later, once the clay has been applied can be very difficult.
- 5. CREATING THE MODEL The clay is applied to the armature wire and sculpted to form the horse. I typically start with the barrel of the horse and move outwards. The larger sections of the body are formed before moving on to the limbs, head and tail. During the process of creating the model, I check proportions of the anatomy using the measurements taken with calipers.
- 6. 3D SCANNING The original 1/5 life-size model is scanned and the size converted from the smaller model to life-size dimensions. Prior to scanning the clay model, it is critical that the model is perfectly sculpted. Small imperfections in the 1/5 life-size model will be magnified once the image is routed in foam to create the life-size form in foam. This increases the time needed to correct imperfections, further sculpt the enlarged foam sections.
- 7. ROUTING 3D IMAGE IN FOAM A 3D computer software model representing the 1/5 life sculpture is imported into Computer Aided Manufacturing Software. The software is then used to create complex multi-axis "tool paths," paths by which the cutting head of the 7 axis robotic milling system will move and mill away material from a block of dense foam to create the sculpture in sections of foam. The block of foam is placed on a turntable, and as the turntable rotates, the robotic arm mills the foam revealing more of the horse with each rotation.
- 8. SCULPTING THE FOAM After the 3D image was routed in sections of foam and transported to my studio, the main body was glued together and a plumbing pipe was used to support the foam sculpture. Level of detail before & after further sculpting.My farrier Mauro Reis created the shoes Sculpture tools, wrasps and an electric sander were used to sculpt the foam. The foam is quite dense and allows for detailed work, however, it is also toxic so proper breathing apparatus must be worn. The legs, ears were attached temporarily with armature wire to fit pieces together for further sculpting.
- 9. CLAY APPLICATION Once the foam has been sculpted, a thin layer of clay is applied to the urethane foam and the life- size sculpture is now sculpted to create the final form & texture before the mold is made. This process was started in my studio in Pipersville Pennsylvania and continued after shipping the sculpture to Artworks Foundry in Berkeley California. Studio, Pipersville PA
- 10. CLAY APPLICATION ARTWORKS FOUNDRY The timeline for creating the Hickstead statue was exceptionally short. Roman Lapaev assisted me with applying clay and again in the wax stage with chasing the wax. I am so grateful for the long hours he worked to help me complete this project.
- 12. MOLD MAKING The metamorphosis of a sculpture from the original clay model into bronze begins with a rubber mold. For the Hickstead statue, the main body was divided into 4 sections, with the head, legs, and tail being molded separately. Aluminum shims are used to creating dividing lines before spraying on several layers of Silicon rubber.
- 13. MOLD MAKING Several layers of Silicon rubber are sprayed on and later reinforced with sheets of fiberglass fabric before making a mother mold. (image on right) A protective and rock hard "mother mold" made of reinforced plaster is built around the pliable rubber. When the mother mold is complete, the mold is opened and the original sculpture removed from within. For the head, legs and tail the two halves of mold will be joined together for creating wax positives.
- 14. POURING THE WAX POSITIVE Wax is heated to 210 degrees and brushed into the molds. As the wax cools slightly, additional layers are added, taking care not to melt the previous layer. The thickness of the bronze will be the same as the wax, approx. 3/16” Penpa TseringRicardo Mariscal Strips of wood are positioned within the hollow of the wax to support the shape while it is being chased and during the investment process. Red=Wax Green=Rubber mold White=mother mold
- 15. WAX POSITIVE The armature is the frame around which the plasteline, an oil based clay is applied to create the1/5 life-size model. The wire is formed to reflect the movement of the horse that is ultimately reflected in the bronze sculpture. It’s very important at this stage that the proportions are correct from the beginning. Making a change later, once the clay has been applied can be difficult.
- 16. CHASING THE WAX "Wax chasing" is the delicate process of joining the wax pieces, removing seams and repairing imperfections with heated customized soldering irons or tools - dental tools are ideal. After the wax was cast, I traveled to the foundry in California to check the integrity of the wax and to chase it myself. With the tight schedule for creating the statue, it was also an opportunity to make refinements that could not be made in the initial clay model. After the wax was chased and approved, the wax pieces advanced to "Spruing” and "Gating." The gates and sprues are also made of wax. They form the channels through which the melted bronze will travel to the artwork.
- 17. SPRUES & GATES Sprues and gates are attached to the wax sculpture, to provide channels for bronze to flow into the cavity of the ceramic shell. Wood support structure helps maintain the shape of the thin layer of wax. Without support the shape of the wax could change, creating a problem with fitting pieces together once its cast in bronze. The thickness of the wax represents how thick the bronze will be. Front left ¼ of body Pouring cup & sprues on left Pouring cup, spruesWood support bars
- 18. INVESTING "Investment" is the process of building a rock-hard shell around the wax sculpture. Later, when the wax has been melted out, the investment will serve as a mold for the molten bronze. For most of history, an investment consisting of plaster, sand and water was used to accomplish this task. In the last 20 years, a new technology called ceramic shell has become the industry standard. Artworks Foundry converted to a 100% ceramic shell system in 1995. Prior to the invention of ceramic shell, solid plaster investment was used. To invest by the solid plaster method, tar paper is loosely wrapped around the wax reproduction in the shape of a cylinder. The enclosed space surrounding the wax is then filled with a wet plaster/sand mixture. When the plaster hardens, the tar paper is removed and a solid plaster investment is ready for "de-wax.” Whether ceramic shell or plaster is used to make the shell, the wax is a "positive" which must disappear in order to create a cavity or "negative" for the bronze to fill. Thus the phrase "lost wax casting" comes from the process of the wax being melted or "lost" from the shell. Ceramic built shells are "de-waxed" in a high pressure steam chamber known as an autoclave; plaster invested shells are de- waxed in a kiln.
- 19. CERAMIC SHELL The completed ceramic shell is fired in a large kiln at which time, the wax melts out leaving an empty shell (mold) for pouring the bronze into. Images reflect the ceramic shell process using a smaller sculpture The ceramic shell technique begins by dipping the gated wax into vats of slurry followed immediately by a bath of sand. This process builds a very thin wall of silica around the wax. When repeated approximately 9 times, allowing for dry times in between dips, a hard shell about ½" thick forms around the wax. David Muela & Juan Carlos Calva
- 20. THE BEAUTY OF BRONZE The alloy cast at Artworks is known as Silicon Bronze. The metal is made up of the following elements: Copper 94.0%, Manganese 1.1%, Silicon 3.9%, trace elements 1.0%. Silicon is an additive which helps the "flowability" of the bronze. It achieved widespread use during World War II when lead and tin were in short supply.
- 21. THE POUR A huge graphite crucible, fired by a furnace, is filled with bronze ingots that are melted. The metal begins to melt at 1700°F. Bronze "seizes" (stops flowing) when confronted with cold, which might occur if molten bronze was poured into a room temperature shell; therefore at the same time the bronze is being blasted by a natural gas furnace, the ceramic shell is heated in a kiln to approximately 1100°F. When the "Dance of the Pour" begins, the crucible is lifted by a crane out of the gas furnace. At the same time, the glowing ceramic shells are brought out of the kiln to the pour area. Two artisans operate the crane which holds the crucible in a "jacket." The artisan with the controls is the "lead pour," the artisan maintaining the crucible balance is known as the "deadman." A third member of the pour team pushes away dross and slag on the surface of the molten bronze. The entire pour is very fast and very precise; one crucible of bronze holds 400 lbs. and can fill one or two large shells or ten or more small shells. The first pieces poured are those with thin walls and intricate details; requiring hot, fluid bronze to move throughout the channel system. Luke Heimbigner & Nick DePhilipo
- 22. DEVESTING CERAMIC SHELL Above is the bronze from the Hickstead Trophy. Wilfredo Virella-Resto "Devesting" is the process during which the investment is removed from the bronze. Approximately one hour after the pour, the piece is cool enough to handle. Skill and strength are combined with hammers and power chisels to knock the investment off the freshly solidified metal. The gates and sprues must also be removed with a high intensity electric arc that can cut through the bronze like butter. The final step is to sandblast the fine investment from the bronze. When clean, the sculpture advances to the metal shop.
- 23. METAL FABRICATION, CHASING & FINISHING Like wax chasing, bronze must also be chased or cleaned to address the slight imperfections that may result from the casting or shell building process. On larger sculptures, where assembly of cast sections is required, chasing is essential to take down weld lines formed by the joining of two planes. Metal chasing usually starts with large electric or pneumatic grinders to remove the bulk of the unwanted metal. Then, more refined and smaller tools such as die and pencil grinders are used to re-create the artist’s subtle surface texture. Much as a house needs a wood frame to stand, many monumental bronzes require a stainless steel internal structure to support the bronze "skin." Most larger than life-size bronzes are analyzed by a structural engineer who recommends a support structure that can withstand earthquakes and high winds.
- 25. Left, the four sections of body have been welded together. The seams will be carefully removed with pneumatic grinders and the texture recreated where the weld seams were. Once the bronze was cast, I traveled to the foundry to inspect each piece of metal. Where necessary, I further defined the anatomical details in bronze. The artisans at the foundry are very good but unless you know horses, there are subtleties in the anatomy that can easily go unnoticed by a person unfamiliar with horses. Example shows me chasing the Hickstead Trophy
- 26. FABRICATING Initially, the head, legs, ears are only attached with a couple of weld points. A metal bar is welded to side of the body as a level marker to ensure the angle of the sculpture is correct as it is assembled and prepared for the support arms.
- 27. STRUCTURAL SUPPORT Creating a support structure to support more than 1,000 pounds of bronze in a way that portrays forward movement proved to be challenging in many ways. The support structure consists of two support arms that tie into an internal armature that was fabricated within the body of the bronze of Hickstead. The support arms tie into a subsurface steel frame. 3D Structural Analysis & Design Engineering Software (STAAD) was used by the structural engineer to determine the dimensions of the support arms with strict adherence to safety requirements for a public installation. Dynamic analysis for wind loads was conducted on the sculpture size, weight, subsurface steel frame weight, cantilevered angle & weight of support arms and applied to STAAD to determine the correct strength and deflection criteria for the support structure.
- 28. INTERNAL ARMATURE Two windows were created within the bronze body of the statue to allow access for fabricating the internal armature. The two support arms that hold the massive weight of the bronze sculpture in the air was intriquitly welded into the internal armature.
- 29. BUILDING SUPPORT STRUCTURE Before integrating the support arms & stainless steel subsurface structure, the bronze was hoisted into the air and 5 steel support bars welded underneath the bronze for support. The stainless steel support arms were then welded in place.
- 32. SEAPORT TO BERKELEY Sculpture was loaded on a flatbed trailer and moved from Seaport to the main Artworks Foundry location in Berkeley. It was a rather strange sight for those traveling on I-80 that night!
- 33. METAL FINISHING The neck, tail, ears, legs were securely welded and the patch removed from the abdomen was modified to accommodate the support arms and welded in place. Weld lines are removed using pneumatic grinders & sanders and the texture of the surrounding area is recreated where the weld seams were.
- 34. SANDING & POLISHING After fabricating & finishing metal, the sculpture is sanded and polished using pneumatic tools. This removes dirt, metal fragments and gives it a more uniform appearance making it easier to detect any imperfections that may still exist.
- 35. RIBBON FABRICATION The ribbon was designed to symbolize a winner’s sash. The bronze sheet at the support arm was rolled using a rolling machine to create a tube. The tube was cut at required angles to meet the horse at the top and the angle of the ribbon flowing down and behind the sculpture. The support arms were designed to be implemented at an angle to convey the feeling of forward motion.
- 36. SAND BLASTING The entire statue is sandblasting prior to applying the patina. This cleans the surface of the bronze and evens out the tone.
- 37. PATINA Above: Blow torch was used to heat the bronze. 1- Sulphureted potash applied to entire sculpture 2- Sculpture is cooled with water 3-5. Scouring pads are used to rub back the black potash to define the highs & lows and areas that will be warmer in tone. 1. 2. 3. 4. 5 Patineur Aiya Jordan Patination is the enhancement of bronze by the chemical application of color. Three water soluble compounds form the basis for most patinas: Ferric Nitrate produces reds and browns, Cupric Nitrate creates the greens and blues and Sulphureted Potash produces black.
- 38. TRANSFORMATION OF COLOR & TONE
- 39. PATINA To achieve the warmer brown tones, Aiya used ferric nitrate and for darker areas a small amount of lamp black to even out the tone. For white socks, blaze and chin, bismuth nitrate, stannic oxide and titanium dioxide was used. Prior to starting the patina, I used a pencil grinder to draw in metal, the white areas; socks, blaze and white on lower part of the muzzle.
- 40. APPLYING WAX To protect the patina, Johnson’s clear paste wax was applied while the sculpture was still warm from using the blowtorch. Normally the sculpture is buffed after it cools however, with the sculpture being shipped to Spruce Meadows early the following morning, I buffed the sculpture on site at Spruce Meadows prior to the unveiling.
- 41. SHIPPING THE SCULPTURE Wrapped with blankets and stretch plastic, the sculpture was loaded on a flatbed trailer using a forklift and transported to Spruce Meadows in Calgary Canada.
- 42. BUFFING THE STATUE After arriving at Spruce Meadows for the unveiling, I finished buffing the statue. It was also a time to take in the stunning surroundings of Spruce Meadows and relax a bit after several months of continuous long hours, preparing the Hickstead statue for the unveiling.
- 43. UNVEILING THE STATUE During an emotional tribute to Hickstead, the statue was unveiled by Eric Lamaze & John Fleischhacker prior to the CN International during the Master’s Tournament at Spruce Meadows. Photos: Keara McMurdo
- 44. HICKSTEAD STATUE UNVEILED Beautiful photo by Ashley Roehmer
- 45. FOR THE LOVE OF HORSES Since I was a child, I’ve had a passion for horses which has been my source of inspiration for creating art. The story of Eric Lamaze and Hickstead, how they came together and the challenges they faced, fueled the adrenalin I needed to complete this complex project in time for the special tribute to Hickstead during the Master’s Tournament at Spruce Meadows. Mary Sand, her horses Ami & Machu Picchu I feel immense gratitude for the opportunity to create the Hickstead Statue. A heartfelt Thank You to Spruce Meadows, Eric Lamaze & the Fleischhacker family. As an equine artist, there is nothing more rewarding than to create a sculpture of a horse that is loved by so many and that has accomplished as much as Hickstead has in his showjumping career. ~ Mary Sand