
Recommended
More Related Content
Similar to Power point of needle chest compressions
Similar to Power point of needle chest compressions (20)
More from MelakuSintayhu
More from MelakuSintayhu (20)
Recently uploaded
Recently uploaded (20)
Power point of needle chest compressions
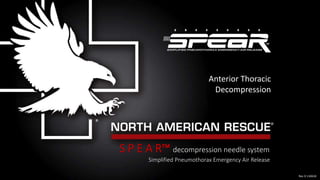
- 1. S P E A R™ decompression needle system Simplified Pneumothorax Emergency Air Release Anterior Thoracic Decompression Rev D 110618
- 2. Warranty: The SPEAR™ decompression needle system is a medical device, the use of which requires specific education and training. North American Rescue, LLC. warrants the SPEAR™ as merchantable expressly for the indication detailed. North American Rescue disclaims all other implied warranties relating to this product, to include use beyond this product’s identified purpose, and utilization by untrained personnel or legally unauthorized parties. Caution: Federal Law restricts the SPEAR™ to sale by, or on the order of, a licensed physician. 2 The following materials were developed for the purpose of SPEAR™ decompression needle system orientation and training
- 3. 3 Key Term: Tension Pneumothorax. A known life-threatening medical emergency which, if left untreated, may result in death. Indication: For relief of tension pneumothorax in the adult patient. Contraindications: Not intended for treatment of simple pneumothorax or hemothorax. The efficacy of this device has not been established in pediatric patients. Warning: Failure to utilize this device properly may result in injury to cardiac, pulmonary, or vascular structures. The following materials were developed for the purpose of SPEAR™ decompression needle system orientation and training
- 4. At the conclusion of didactic and hands-on training, you should be able to: 1. Identify components and function 2. List indications, contraindications, and expected therapeutic benefits of thoracic decompression 3. Identify (right and left) lateral landmarks for thoracic decompression 4. Identify (right and left) anterior landmarks for thoracic decompression 5. List indications of successful thoracic decompression 6. Define potential complications of improperly performed thoracic decompression procedure 7. Discuss current scientific evidence as it relates to thoracic decompression 4 Objectives covered in lateral insertion program
- 5. decompression needle system Simplified Pneumothorax Emergency Air Release SEVEN (7) key system features 5 Objective 1: components and function Spin-Lock
- 6. 6 1 2 3 in protective case (sterile) sterile seal broken (twist off) case cap removed (exposing proximal needle set) Objective 1: components and function (removal from protective case)
- 7. 7 4 removed from case (pictured on sterile field) Objective 1: components and function (removal from protective case)
- 8. 8 catheter threads into position (while holding needle stationary) Objective 1: components and function catheter disconnects from needle by releasing spin-lock (with ¼ turn)
- 9. 9 Objective 1: components and function remove entire needle (after catheter has been threaded into position) note catheter flexibility
- 10. 10 Objective 1: components and function disconnect one-way valve from needle hub (safely secure needle in bio-hazard sharps container)
- 11. 11 Objective 1: components and function attach one-way valve to catheter hub (auditory signal may be heard)
- 12. 12 tension pneumothorax: a life-threatening emergency, which if left untreated, may result in death anterior illustration of left sided tension pneumothorax (left) Objective 4: anterior insertion site
- 13. 13 indications: consider treatment of tension pneumothorax when one or more of the following are present: • severe or progressive respiratory distress • severe or progressive tachypnea • absent or markedly decreased breath sounds • oxygen saturation less than 90% • shock • traumatic cardiac arrest without obvious fatal wounds(consider immediate placement of bilateral SPEAR™ decompression needles and consider ALL other possible causes) Objective 2: indication
- 14. 14 Objective 2: contraindications contraindications: The S P E A R™ is not intended for treatment of simple pneumothorax or hemothorax efficacy of the S P E A R™ has not been established in pediatric patients
- 15. 15 thoracic decompression should improve one or more of the following: • respiratory distress • relief of restrictive pressure between the parietal and visceral pleura (secondary to injury or significant medical complication) • oxygen saturation (≥ 90% may be dependent on use of supplemental oxygen) • return of radial pulse or vital signs Objective 2: therapeutic benefits
- 16. 16 Objective 4: anterior insertion site 1 2 3 4 1 2 3 4 numbered Intercostal spaces numbered ribs 1 2 3 4 1 2 3 4 numbered Intercostal spaces numbered ribs midclavicular line midclavicular line insertion site insertion site illustration of key anatomical structures
- 17. 17 Objective 4: anterior insertion site Identify sternal notch
- 18. 18 Objective 4: anterior insertion site identify sternoclavicular joint space
- 19. 19 Objective 4: anterior insertion site identify acromioclavicular ligament (notch)
- 20. 20 Objective 4: anterior insertion site simultaneously identify sternoclavicular joint space and acromioclavicular ligament (notch)
- 21. 21 Objective 4: anterior insertion site note middle finger Identifying sternoclavicular joint space and thumb on acromioclavicular ligament (notch) identify middle of clavicle
- 22. 22 Objective 4: anterior insertion site Identify 2nd intercostal space midclavicular line
- 23. 23 Objective 4: anterior insertion site helpful tip: identify 2nd rib lateral to the angle of Louis (inferior aspect of the manubrium) creating lateral line from angle of Louis places finger in 2nd intercostal space when at the midclavicular line
- 24. 24 Objective 4: anterior insertion site helpful tip: creating lateral line from angle of Louis places finger on 2nd intercostal space site verification is critical do not insert decompression needle medial to midclavicular line
- 25. 25 Objective 4: anterior insertion site helpful tip: compress firmly to ensure identification of 3rd rib mid-clavicular line mark and cleanse area over 3rd rib mid-clavicular line
- 26. 26 Objective 4: anterior insertion site decompression needle set moving into position 3rd rib on mid-clavicular line re-identified site verification with framing
- 27. 27 Objective 4: anterior insertion site needle set lined up to penetrate skin and identify 3rd rib SPEAR™ in position and perpendicular to chest wall
- 28. 28 Objective 4: anterior insertion site mid-clavicular line Perpendicular to chest wall needle set stabilized between thumb and middle finger needle set penetrating skin and identifying 3rd rib
- 29. 29 Objective 4: anterior insertion needle set stabilization with finger tip depth control insertion site is superior to targeted rib
- 30. 30 Objective 4: anterior insertion site note needle stabilization and finger tip depth control with insertion ≤ 3 cm DO NOT “BURY” OR “HUB” NEEDLE SET
- 31. 31 insert superiorly over targeted rib insert ≤ 3 cm into pleura cavity KEY POINT: stabilization and control target rib and precisely penetrate chest wall to prevent further injury Objective 4: anterior insertion site
- 32. 32 Objective 4: anterior insertion site release spin-lock and advance catheter needle should remain stationary release spin-lock ¼ turn direct catheter toward middle of clavicle
- 33. 33 thread catheter needle should remain stationary Objective 4: anterior insertion site thread catheter toward middle of clavicle
- 34. 34 Objective 4: anterior insertion site completely thread catheter into pleural cavity needle should remain stationary
- 35. 35 Objective 4: anterior insertion site place one-way valve on proximal end of catheter as indicated remove one-way valve from proximal end of needle hub secure needle in bio-hazard sharps container
- 36. 36 Objective 4: anterior insertion site place one-way valve on proximal end of catheter as indicated catheter and one-way valve assemble may be attached to low pressure suction as needed secure catheter according to local protocol and standards
- 37. 37 catheter and one-way valve assemble may be attached to low pressure suction as needed Objective 4: anterior insertion site
- 38. 38 successful thoracic decompression may have occurred if one or more of the following is observed: • improvement of respiratory distress • relief of air from catheter or one-way valve (valve may produce auditory signal) • improvement of oxygen saturation (≥ 90% may be dependent on use of supplemental oxygen) • return of radial pulse or vital signs Objective 5: indications of successful thoracic decompression
- 39. 39 following thoracic decompression procedure, continually assess patient for complications: • Hemodynamic instability • Respiratory distress • Unilateral chest expansion • Decreased oxygen saturation • Bleeding • Catheter occlusion • Hematoma if two needle decompression attempts fail to relieve condition consider other causes and potential treatments IS THIS A CIRCULATORY PROBLEM? Objective 6: complications
- 40. 40 potential adverse complications: of improper thoracic decompression • Death secondary to cardiac penetration • Lung injury • Vascular injury • Nerve damage • Pain • Numbness • Paralysis of intercostal muscle • Infection Objective 6: complications
- 41. 41 Objective 7: scientific evidence The S P E A R™ decompression needle system, and this presentation, were developed utilizing the latest published evidence, independent research, and the support of dedicated Military and Civilian medical professionals in Emergency Medicine, Trauma Surgery, Pulmonology, Radiology, and Pathology. Clinical providers, regardless of their position, must dedicate themselves to the unrelenting truth that critical care is an evolution on behalf of those in need. Butler F, Holcomb J, Shackelford S, et al. Management of the Suspected Tension Pneumothorax in Tactical Combat Care, TCCC Guidelines Change 17-02. J Spe Op Med. 2018; 18: 19-35. *The aforementioned publication references ninety-six additional papers worthy of careful review.
- 42. 42 Butler F, Holcomb J, Shackelford S, et al. Management of the Suspected Tension Pneumothorax in Tactical Combat Care, TCCC Guidelines Change 17-02. J Spe Op Med. 2018; 18: 19-35. Nine Key Facets of Tactical Combat Care Guidelines Change 17-02 1. Continuation of aggressive approach to suspecting and treating tension pneumothorax 2. Emphasis of bilateral decompression in traumatic arrest 3. Addition of 10 Gauge catheter (length indicated in current guidelines differs from the S P E A R™) 4. Designates either Lateral or Anterior sites as acceptable for thoracic decompression 5. Addition of procedural elements (critical procedural differences are included within this material) 6. Defines successful thoracic decompression 7. Recommends ONLY two needle decompressions be attempted before moving on to circulation 8. Addition of materials that recommend consideration of tension pneumothorax in presentations of shock 9. Addition of finger thoracostomy (if presentation warrants - following two unsuccessful needle decompression attempts - and provider is trained) Objective 7: scientific evidence
- 43. S P E A R™ decompression needle system Simplified Pneumothorax Emergency Air Release For additional information about the email: info@NARescue.com Tel: 864.675.9800 Mail: 35 Tedwall Court Greer, SC 29650-4791 Fax: 864.675.9880
Editor's Notes
- The following program was created specifically for the SPEAR™ decompression needle system orientation and training. For questions, concerns or additional information please contact: North American Rescue®, LLC email: info@NARescue.com Tel: 864.675.9800 Mail: 35 Tedwall Court Greer, SC 29650-4791 Fax: 864.675.9880
- As with most modern medical devices, the SPEAR™ (Simplified Pneumothorax Emergency Air Release) decompression needle system meets rigid safety standards, governmental mandates, and the demanding expectation of clinicians worldwide. The SPEAR™ decompression needle system was developed with attention to the latest presented and published scientific evidence, as well as guidance from today’s leading experts in the fields of Emergency Medicine, Trauma Surgery, Pulmonology, Critical Care, Combat Care, and Pre-Hospital Emergency Medicine. The SPEAR™ Warranty and Advisory should be read and understood as a component of this program.
- The Key Term, Indication and Contraindications are further reinforced within this program. WARNING: As with all invasive medical devices, usage is predicated on proper orientation and training, careful consideration of the indications, patient condition, review of potential contraindications, and a specific RISK versus BENEFIT analysis. Failure to utilize this device according to the directions for use, didactic materials provided, and NAR recommended hands-on training MAY CAUSE FURTHER INJURY.
- 4
- 5
- 6
- Continued from previous slide: The SPEAR™ decompression needle system is packaged in a proven robust hard-shell case with an assurance seal indicating sterility and Lot number. As with all medical devices, labeling provides additional information regarding device length and size as well as contact information for North American Rescue®, LLC. Instructions for use accompany EACH needle set and should be reviewed and utilized during training efforts. To open: Ensure integrity of safety seal “Twist off” red cap, breaking safety seal Remove red case cap, exposing SPEAR™ Remove SPEAR® and inspect device prior to usage
- The SPEAR™ decompression needle system has a purposefully designed Slip-Lock between the catheter and the needle hub. The novel Slip-Lock is designed to prevent premature separation during insertion (a documented insertion failure point). Once proper insertion depth has been achieved (≤ 3 cm or ≤ to 1.2 inches), and SPEAR™ has been oriented toward the mid-clavicle, separation of needle and catheter can be easily accomplished with a ¼ turn disconnect (“twist off”) and release. Catheter may then be threaded (guided) into position along parietal pleural wall for maximal therapeutic benefit.
- Note that SPEAR™ needle should be removed ONLY when the catheter has been threaded into position (an established failure point for needle decompression). Note that 10ga catheter has improved flexibility to promote continued relief of thoracic pressure during critical patient management.
- A one-way valve is attached to the SPEAR™ needle hub. The one-way valve is attached with a “slip-tip connection” and can simply be “pinched off” with one hand (in preparation for placement on the catheter’s proximal end).
- Attach one-way valve to the catheter’s proximal hub as indicated. Attachment can be achieved by standard medical connection. Secure catheter per protocol or standard. One-way valve may be attached to a low-pressure suction system as indicated.
- A tension pneumothorax is known to be a life-threatening emergency, which if left untreated, may result in death. NOTE: Illustration depicts an anterior/posterior thoracic view of patient WITH left sided tension pneumothorax.
- Indications: Treatment of a tension pneumothorax should be considered when one or more of the following are present: Severe or progressive respiratory distress. Severe or progressive tachypnea. Absent or markedly decreased breath sounds. oxygen saturation less than 90%. Shock. Traumatic cardiac arrest without obvious fatal wounds. (consider immediate placement of bilateral SPEAR™ decompression needles and consider ALL other possible causes).
- Contraindications: The S P E A R™ is not intended for treatment of simple pneumothorax or hemothorax. Efficacy of the S P E A R™ has not been established in pediatric patients.
- thoracic decompression should improve one or more of the following: respiratory distress. Relief of restrictive pressure between the parietal and visceral pleura (secondary to injury or significant medical complication). oxygen saturation (≥ 90% may be dependent on use of supplemental oxygen). Return of radial pulse or vital signs.
- Anterior land-marking for thoracic decompression is critical for patient safety. Note that thoracic decompression should be relieved at the 2nd intercostal space on the midclavicular line (consult your protocol or standards for specific verification). The illustration in this slide depicts a bilateral pneumothorax for clarity. Looking closely you will also note that the ribs, midclavicular lines, intercostal spaces, and insertions sites (left and right) are labeled. IMPORTANT POINT: This slide depicts intercostal spaces and ribs that are numbered for clinician clarification and discussion. Providers MUST ensure proper land-marking prior to SPEAR™ insertion. NOTE: Insertion site is superior to the rib that is initially targeted. THIS IS A CRITICAL STEP to ensure proper placement location, avoidance of neurovascular bundle beneath each rib, and represents a known, safe starting position, from which the provider can control precise placement and insertion depth.
- 17
- The insertion site commonly accepted for anterior decompression is the 2nd intercostal space, on the midclavicular line. Please confer with protocol or standards for verification). Steps to locating the anterior decompression site: identification of the sternal notch. 2. Identification of the sternoclavicular joint space.
- The insertion site commonly accepted for anterior decompression is the 2nd intercostal space, on the midclavicular line. Please confer with protocol or standards for verification). Steps to locating the anterior decompression site: identification of the sternal notch. Identification of the sternoclavicular joint space. identification of the acromioclavicular joint space.
- The insertion site commonly accepted for anterior decompression is the 2nd intercostal space, on the midclavicular line. Please confer with protocol or standards for verification). Steps to locating the anterior decompression site: identification of the sternal notch. Identification of the sternoclavicular joint space. identification of the acromioclavicular joint space. Identification of the clavicles mid-point (midclavicular line)
- The insertion site commonly accepted for anterior decompression is the 2nd intercostal space, on the midclavicular line. Please confer with protocol or standards for verification). Steps to locating the anterior decompression site: identification of the sternal notch. Identification of the sternoclavicular joint space. identification of the acromioclavicular joint space. Identification of the clavicles mid-point (midclavicular line)
- The insertion site commonly accepted for anterior decompression is the 2nd intercostal space, on the midclavicular line. Please confer with protocol or standards for verification). Steps to locating the anterior decompression site: identification of the sternal notch. Identification of the sternoclavicular joint space. identification of the acromioclavicular joint space. Identification of the clavicles mid-point (and midclavicular line) Identification of the 2nd intercostal space (above the third rib - midclavicular line)
- The insertion site commonly accepted for anterior decompression is the 2nd intercostal space, on the midclavicular line. Please confer with protocol or standards for verification). Steps to locating the anterior decompression site: identification of the sternal notch. Identification of the sternoclavicular joint space. identification of the acromioclavicular joint space. Identification of the clavicles mid-point (and midclavicular line) Identification of the 2nd intercostal space (above the third rib - midclavicular line) Helpful tip: Identify 2nd rib lateral to the angle of Louis
- The insertion site commonly accepted for anterior decompression is the 2nd intercostal space, on the midclavicular line. Please confer with protocol or standards for verification). Steps to locating the anterior decompression site: identification of the sternal notch. Identification of the sternoclavicular joint space. identification of the acromioclavicular joint space. Identification of the clavicles mid-point (and midclavicular line) Identification of the 2nd intercostal space (above the third rib – midclavicular line) Helpful tip: Identify 2nd rib lateral to the angle of Louis Identify the intersection between vertical midclavicular line and a horizontal line running laterally from the angle of Louis.
- The insertion site commonly accepted for anterior decompression is the 2nd intercostal space, on the midclavicular line. Please confer with protocol or standards for verification). Steps to locating the anterior decompression site: identification of the sternal notch. Identification of the sternoclavicular joint space. identification of the acromioclavicular joint space. Identification of the clavicles mid-point (and midclavicular line) Identification of the 2nd intercostal space (above the third rib – midclavicular line) Helpful tip: Identify 2nd rib lateral to the angel of Louis Identify the intersection between the vertical midclavicular line and a horizontal line running laterally from the angle of Louis. Confirm location by firmly palpating the 3rd rib on the midclavicular line. Cleanse site according to local protocol and standard.
- Once site has been properly cleansed, preparations for SPEAR™ insertion can be completed. Note site “framing” and “reverification” in the image provided. Framing tightens the skin to improve penetration. Site reverification (of the targeted rib) ensures that the SPEAR™ needle tip will FIRST be placed against the rib.
- Once the SPEAR™ has penetrated the skin and adipose tissue, it should be firmly placed against the rib (this is a critical identification step to ensure patient safety). When the SPEAR™ needle tip has been placed against the targeted rib, the provider should MARK and HOLD ≤ 3 centimeters above the skin. Depth marking is critical to the next phase of insertion (which is placement of the catheter within the pleural space). ENSURE that the SPEAR™ is positioned perpendicular to the chest wall. Note the sloped angle of the anterior thoracic wall.
- Once the SPEAR™ has penetrated the skin and adipose tissue, it should be firmly placed against the rib (this is a critical identification step to ensure patient safety). Once the SPEAR™ needle tip has been placed against the targeted rib, the provider should MARK and HOLD ≤ 3 centimeters above the skin. Depth marking is critical to the next phase of insertion (which is entry of the needle set within the pleural space). ENSURE that the SPEAR™ is positioned perpendicular to the chest wall. Note the sloped angle of the anterior thoracic wall.
- Illustration on this slide is for additional clarity of previous point. Once the SPEAR™ has penetrated the skin and adipose tissue, it should be firmly placed against the rib (this is a critical identification step to ensure patient safety). Once the SPEAR™ needle tip has been placed against the targeted rib, the provider should MARK and HOLD ≤ 3 centimeters above the skin. Depth marking is critical to the next phase of insertion (which is entry of the needle set within the pleural space).
- Once the SPEAR™ needle tip has been placed against the targeted rib, the provider should MARK and HOLD ≤ 3 centimeters above the skin. Proceed with insertion while ensuring that penetration is limited by fingertip control. Depth marking is critical to the next phase of insertion (which is placement of the catheter within the pleural space). ENSURE that the SPEAR™ is positioned perpendicular to the chest wall. Note the sloped angle of the anterior thoracic wall.
- 31
- Once SPEAR™ has been placed into thoracic cavity, DIRECT the assembly toward the middle of the clavicle. Release the needle from the catheter by rotating the slip-lock. Prepare to advance the catheter while keeping the needle stationary as a guide. *Air under pressure may release from the thoracic cavity at this point.
- Once catheter has been released from the needle, advance the catheter while keeping the needle stationary as a guide. *Air under pressure may release from the thoracic cavity at this point.
- Illustration on this slide is for additional clarity of previous point. Once catheter has been released from the needle, advance the catheter while keeping the needle stationary as a catheter guide. *Air under pressure may release from the thoracic cavity at this point.
- Remove one-way valve from proximal end of needle hub. The one-way valve is attached with a slip-tip and can simply be pinched off. Secure the needle in a bio-hazard sharps container. *Air under pressure may release from the thoracic cavity at this point.
- 36
- 37
- Successful thoracic decompression may have occurred if one or more of the following is observed: Improvement of respiratory distress. Relief of air from catheter or one-way valve (valve may produce auditory signal). Improvement of oxygen saturation (≥ 90% may be dependent on use of supplemental oxygen). Return of radial pulse or vital signs.
- A patient should be monitored following any medical procedure. Thoracic decompression (by definition) is a life-saving procedure that is NOT without risk. With continuous training, as well as safeguards and careful considerations, patient and provider risk can be mitigated. Following thoracic decompression, continually assess the patient for complications. These should include (but not be limited to): Hemodynamic instability Respiratory distress Unilateral chest expansion Decreased oxygen saturation Bleeding Catheter occlusion Hematoma If two needle decompression attempts fail to relieve the suspected problem consider other causes and potential treatments. IS THIS A CIRCULATORY PROBLEM?
- As with all invasive medical devices, potential adverse complications are a risk that MUST be considered. Most often, complications are the result of improperly performed interventions. Thoracic decompression is NOT WITHOUT RISK. The FIRST step to avoiding injury is a complete understanding of the indications and contraindications for SPEAR™ usage. Each of the listed complications SHOULD be discussed WITH specific mitigation strategies integrated into the training program. Complications are bolded in BLACK Mitigation strategies presented in GRAY Potential complications include (but are not limited to): Death secondary to cardiac penetration (clinician should control thoracic penetration and restrict depth of needle set insertion) Lung injury (insertion of needle set should be ≤ 3 cm past the parietal pleura) Vascular injury (1. insertion site restrictions to the specific locations identified in this training program. 2. maintain proper needle set angle during insertion. 3. avoidance of needle set over penetration. Nerve damage (ensure proper insertion site location “superior to targeted rib”) Pain (if time permits, consider local anesthetic per protocol or standard) Numbness (avoid insertion on the inferior aspect of the rib) Paralysis of intercostal muscle (avoid insertion below rib) Infection (use aseptic technique)
- 41
- There are nine Key Facets to thoracic decompression in the Tactical Combat Care Guidelines Change 17-02 that should be considered: Slide numbers correspond to Anterior Insertion Program Continuation of aggressive approach to suspecting and treating tension pneumothorax. There is discussion and some evidence that unwarranted needle decompressions have presented complications. While this is a valid concern, failure to recognize and treat tension pneumothorax remains a lethal reality. SPEAR™ training materials list documented indications for thoracic decompression. Emphasis of bilateral decompression in traumatic arrest. See slide #13. Failure to completely address ALL possible causes of traumatic arrest continues to present as a lethal concern. See slides # 13 & 39. Adds 10 Gauge. Length indicated in guidelines differs from the S P E A R™. Key points are found within the notes on slide #5 which offer details and specific clinical rationale for SPEAR™ length. Designates either Lateral or Anterior sites as acceptable for thoracic decompression. SPEAR™ training materials [slides, video, and NAR recommended hands-on skills training] comprehensively review [right and left] lateral and anterior thoracic decompression sites. Addition of procedural elements. SPEAR™ insertion differs significantly from that which is included within current TCCC guidelines and some institutions. See SPEAR™ procedural insertion techniques, for lateral and anterior sites, to obtain complete details and specific clinical rationale. Defines successful thoracic decompression. SPEAR™ training materials identify key components of successful thoracic decompression. See slides #15 & 38. Recommends ONLY two needle decompressions be attempted before moving on to circulation. See slide # 39. Addition of materials that recommend consideration of tension pneumothorax in presentations of shock. See slides #13 & 39. Addition of finger thoracostomy when presentation warrants. Provider has attempted two needle decompressions without success, and is authorized to perform procedure. See slide #39.
- Thank you for participating in the SPEAR™ decompression needle system orientation and training. If you have any questions, concerns or would like additional information please contact: North American Rescue®, LLC email: info@NARescue.com Tel: 864.675.9800 Mail: 35 Tedwall Court Greer, SC 29650-4791 Fax: 864.675.9880