Photo to Finished

10 Minute Lightning Talk for the Automattic Meetup at Seaside, September 2010 Automattic is the company I work for. The company is distributed worldwide and once a year we gather at a remote location and meet face-to-face. This year, all the employees are taking a little time during the meetup to compose and give at least one presentation for each other, talking about any subject we are passionate about. For this presentation I chose the subject of photography. Specifically, taking one photo from start to publish describing how I took the shot and the editing steps I chose. Like many bloggers—Automattic is also known as WordPress—I’m passionate about photography and I felt that many of the other people it the room might be interested in it also—our founder and CEO’s online handle is “photomatt.” I hope you enjoy this presentation! This was the second presentation I gave that day. I composed it just after I finished the first.

Recommended
More Related Content
Similar to Photo to Finished
Similar to Photo to Finished (18)
More from terry chay
More from terry chay (12)
Recently uploaded
Recently uploaded (20)
Photo to Finished
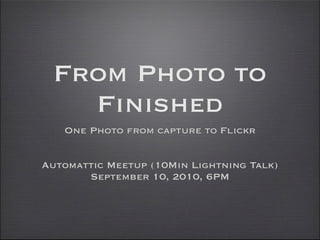
- 1. From Photo to Finished One Photo from capture to Flickr Automattic Meetup (10Min Lightning Talk) September 10, 2010, 6PM
- 4. Sunrise at Mt. Whitney •2.5 megapixel camera •“Turn of the century” sensor and optics •Tripod from my father’s attic http://wp.me/pGjq4-12I
- 5. Pigeon Point Near http://flic.kr/p/tJiFJ Sunset
- 6. Location, Location, Location
- 7. http://flic.kr/p/ 3StVzU
- 8. “Lands End”
- 9. “Lands End”
- 11. Sun/Moon -set/-rise Compass FocalWare (there are others)
- 12. Aperture Mode
- 13. Squinting
- 14. Diffraction
- 15. DoF Calculator
- 16. Composition: Find something in the foreground
- 17. Film Speed: Find your Base ISO
- 18. Bracketing Shot
- 19. Part 2. Post
- 20. The Select
- 21. DxO Optics Pro
- 22. High Dynamic Range (HDR)
- 24. Pre-Sharpening
- 27. Graduated ND
- 28. WE Have the Technology Digital Blending Multiple Exposures
- 29. WE Have the Technology Digital Blending Multiple Exposures
- 30. WE Have the Technology The Technology is Complex and Time Consuming
- 31. Nik Color Efex Grad ND
- 32. Final (Color)
- 33. Part 3. Print (Black & White)
- 34. Upper Yosemite and http://flic.kr/p/2Hddj Half Dome
- 35. Color Filters for B+W Colors map onto Tones Color Filter minimizes tones at that color and maximizes tones at the complement
- 36. No-Filter Trick: Exaggerate saturation for Landscapes. Desaturate skintones for Portraits
- 37. Nik Silver Efex pro
- 38. Nik Silver Efex pro
- 39. Zone System
- 40. Grain
Editor's Notes
- I want you to take this image in and hold it in your head. I’ll help you: Notice there are two subjects: the tree and the bridge. Notice where the light is coming from from the direction and depth of the shadows. You can also “see into” the shadows. See the tones in the sky and the contrast with the foreground. Also see the movement of the branches in the upper right. I’m going to explain the how and why of all of these. Fallen tree and bridge Land’s End Trail, San Francisco, CaliforniaNikon D3, Nikkor 14-24mm f/2.8G Aperture 2.0 (spot & patch) DxO Optics Pro, Photomatrix Pro (exposure fusion) nik Sharpener Pro, nik Color Efex Pro (graduated nd), nik Silver Efex Pro, Photoshop (heal), BorderFX 9 exposures @ f/18, iso200, 14mm http://www.flickr.com/photos/tychay/3820243397/
- Pro Tip: Put a photo assistant in your pocket: download the PDF of your camera manual and photography apps onto your iPhone.
- You don’t need fancy and expensive EQUIPMENT to take a good photo: 1) 2.5 megapixels per frame (7 exposures stitched) 2) Turn of century sensor and optics (1999 digital camera) 3) Tripod from my father’s attic (about $5 tripod) Reference: http://terrychay.com/article/sunrise-at-mt-whitney.shtml
- So was this photo (multiple exposures again). Source: http://terrychay.com/article/the-pocket-digicam.shtml
- A friend and her two roomies had a birthday party. The next day, they called to invite me to a picnic in some place I never heard of… Source: http://www.flickr.com/photos/tychay/1883986618/ Ref: http://www.flickr.com/photos/tychay/2038851016/ http://www.flickr.com/photos/tychay/1607631236/ http://www.flickr.com/photos/tychay/2608646942 / http://www.flickr.com/photos/tychay/185154364 8/ http://www.flickr.com/photos/tychay/181627509 6/in/photostream/ http://www.flickr.com/photos/ tychay/1850748831/ http://www.flickr.com/photos/ tychay/1443029269/
- It’s called Lan’s End and it’s a trail on West of Golden Gate Bridge.
- The area they picnic’d was slightly off trail and hidden. I remember thinking, “I should come back here with a camera.”
- In nature photography, you often can’t control the light in your studio, so you wait for the time the light is right. This is called the “magic hour” and there are actually two of them. They are the hour around sunset and the hour around sunrise. Why? Light direction and shadow.
- Back then I had to look the sunset up. But now, I just use an iPhone app. This is the one I use and you can see that the magic hour is starting at Seaside around right now! Source: http://www.flickr.com/photos/tychay/4980320060/
- For landscape photographs, I recommend shooting in aperture mode. Why?
- Well with aperture you can control what is in focus. Why do you squint if your glasses are off? The reason is you are making the aperture in your eyes small and that brings more stuff into focus. Smaller aperture = larger range in focus.
- But not too small. Remember light has both a particle and a wave nature. When the aperture gets too small, the wave nature of light dominates. The image to the right is the wave pattern from a square aperture. This is a function of sensor size. In SLRs it dominates by f/22. In most digital SLRs by about f/18. In a pocket camera, you it’s trash after about f/4. That’s why megapixels in a pocket camera of often a joke. This is a “full-frame” camera so I shot this photo at f/18 Source: http://en.wikipedia.org/wiki/Diffraction
- In those days I used to carry around a chart with computed levels of focusing, but now I just use an app on my iPhone. THe important thing is the “Hyperfocal distance.” If you focus at that distance then everything from the near limit to infinity will be in sharp focus. Remember to go into manual focus mode to do this. Source: http://www.flickr.com/photos/tychay/4979712997/
- With wide-angle lenses, compose something in the near in-focus distance to hold the foreground and provide a sense of scale. In this photo I used Calla Lillies near the barracks on Angel Island. In the case of our photo, I used the Fallen Tree (which also acted as a frame). [Now that you know the depth-of-field…] Source: http://www.flickr.com/photos/tychay/140749844
- Sources: http://www.flickr.com/photos/tychay/4402777601/in/photostream/ http://www.flickr.com/photos/tychay/4402777487/ http://www.fli ckr.com/photos/tychay/4403744418/ http://www.fl ickr.com/photos/tychay/4403744542/ http://www.fl ickr.com/photos/tychay/4403744772/ http://www.f lickr.com/photos/tychay/4403744876/ http://www.f lickr.com/photos/tychay/4403744980/ http://www. flickr.com/photos/tychay/4402980153/ http://www. flickr.com/photos/tychay/4402980267/
- For film speed, slower is better. But not too slow. By this I mean that your camera has a base ISO it is calibrated for and then all other ISOs are gained or attenuated electrically (NOT digitally) from that level. Since I have a tripod, I want to shoot at the base ISO and have the lowest noise levels and highest dynamic range and color fidelity.
- You are going to need a tripod. I set my camera into exposure bracketing and shot the entire range (9 photos in all). I got much more than I needed (as you can see from the histogram of the properly exposed photo on the left). That’s another reason to do Aperture priority. The bracketed shots have the same depth of field (basically the same image). Not true in Shutter or Program priority.
- Key Tip: Set your UI widgets and background to grey before working in photography.
- This is the properly exposed photo. Notice the color saturation is bland and haze has almost made the Golden Gate Bridge invisible. http://www.flickr.com/photos/tychay/3821052630
- I use automated RAW processing to solve those problems. I’m going to skip that step, but this the is the output. Still the sky is not blue. The sky should be blue. That’s among the many problems you can see in this photo. Source: http://www.flickr.com/photos/tychay/3821325536/in/set-72157621913689183/
- High Dynamic Range fixes the color saturation but. Also, we now see the blurring because exposure times for the shadows are long. The histogram is better, but the lighting is too orange and too flat. It lacks contrast. The big danger of HDR (and nature) is your photos end up looking like paintings. Just like paint has a very limited dynamic range, HDR photography compresses the dynamic range down to a much more limited palette. Source: http://www.flickr.com/photos/tychay/3820520483/in/set-72157621913689183/
- With a bit of tweaking with a good HDR tool (This setting of RGB mode turned out to be the best) you can get some semblence of reality. Notice how the sky is now blue and that the light is not orange but, depending on the angle varies between red and yellow (in the corners). Even though the histogram seems pretty even, it’s still showing far much too structure in the blue channel that we know shouldn’t be there. The sky and sea should be even “darker” to our eyes. Source: http://www.flickr.com/photos/tychay/3820521213/in/set-72157621913689183/
- Why sharpen? Basically sensors record the average value so edges lose contrast. Our vision system has the exact same problem and in the back of our brain, our visual cortex processes the image to recover this loss of edge contrast. We need to apply this. But are actually two types of sharpening you can do. The first is to remove the unsharp parts (unsharp masking) and the second is actually a function of output so we’ll save that step for last. Since the first doesn’t affect the image quality, let’s presharpen now.
- The left side is before, and the right is after. Can’t see the difference? That’s because the changes are performed at a level of less than a pixel. Source: http://www.flickr.com/photos/tychay/3820455211/
- When viewed at 100%, you can see it. Source: http://www.flickr.com/photos/tychay/3820453455
- A great nature phtography trick that Galen Rowell invented is the use of a Graduated Neutral Density filter to hold back the sky. Source: http://www.flickr.com/photos/awfulsara/51300446 Reference: http://terrychay.com/article/postprocessing-in- outdoor-photography.shtml
- We have the technology to do this digitally through bracketed exposures. So we can go from this… Source: http://terrychay.com/article/digital-blending-multiple-exposures.shtml
- … to this Source: http://terrychay.com/article/digital-blending-multiple-exposures.shtml
- The problem is the technology is complex and time consuming. You can do it like I did. Source: http://terrychay.com/article/digital-blending-multiple-exposures.shtml
- But for this photo, I use the µ-point (control point) technology to apply a mask and only do the ND affect for some areas. Your mask ends up looking like an acupuncture patient.
- And this is the result. That’s good enough to print.
- Key tip: The colors don’t have to be balanced to work in black and white.
- Ansel Adams used a color filter to create drama. This photo is an early attempt at post-processing with color filters to mimic that. Note, I wasn’t good at darkening the sky because my camera back then didn’t have the dynamic range needed (and I didn’t bracket the photo). Source: http://www.flickr.com/photos/tychay/19357170/
- The extreme tone curve and the green filter (violet is the complement) is designed to darken the sky and the sunlight (at the same time). Source: http://www.flickr.com/photos/tychay/3820515185
- This is before Source: http://www.flickr.com/photos/tychay/3820512319/
- After filter. (Filter + Sepia Toning the print) Source: http://www.flickr.com/photos/tychay/3820512755
- Zone 0: Black (no detail) (Yellow) Zone 10: Blue (no detail) Zone 5: midtones (very little: drama)
- In black and white, film grain is a substitute for post-sharpening. Use it, it creates a nice effect when your photos is viewed at 100%
- I hope you found SOMETHING in here useful to your photography. And if so, please pass it forward. Photography, like blogging, is a shared experience whose value only increases the more it is shared.
- I encourage you to go to the website and view the full sized version.