Open Document Format
•Download as PPTX, PDF•
1 like•840 views

An introductory presentation on ODF (OpenDocument Format)

Recommended
More Related Content
Similar to Open Document Format
Similar to Open Document Format (20)
More from Khan Mostafa
More from Khan Mostafa (14)
Recently uploaded
Recently uploaded (20)
Open Document Format
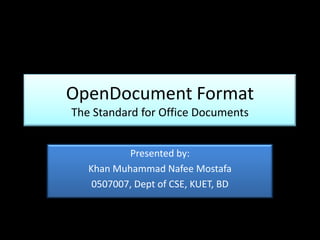
- 1. OpenDocument Format The Standard for Office Documents Presented by: Khan Muhammad Nafee Mostafa 0507007, Dept of CSE, KUET, BD
- 2. OpenDocument Format The Standard for Office DocumentsRon Weir, IBM Introduction Why ODF Document Format Technical Requirements History of ODF Application, Tool Support & Adoption Salient Technical Features ODF Futures 2 Khan M Nafee Mostafa ODF
- 3. ODF ODF is an XML based open standard file format for electronic documents like spreadsheet, presentation and text documents. 3 Khan M Nafee Mostafa ODF
- 4. Prelude to ODF PPAs(Personal productivity applications) are used for long but the issue of standard format is very recent! consider the technical, historical and economic contexts for the current importance and relevance of such standardization 4 Khan M Nafee Mostafa ODF
- 5. Beginning In the beginning: each vendor specified own exclusive file formats Lack of compatibility 5 Khan M Nafee Mostafa ODF
- 6. Convergence long period of evolution, PPA functionality has converged on a set of capabilities a word processor application a spreadsheet application a presentation graphics application Given this convergence in functionality within each application type, we can now describe their core commonalities in an open, standardized document format. 6 Khan M Nafee Mostafa ODF
- 7. Why ODF Recently document formats are hotly debated and many party pursue for standardization of PPA file format. The factors playing here are: Web success caused mass exchange of documents Economic impact of vendor lock-in (as user continue using a specific PPA s/he lose the ability to evaluate or migrate to other PPAs) Document based bureaucracy (use of a vendor specific PPA by the govt. makes the total nation use same PPA) Dependency on a single vendor’s proprietary formats is bad economics as well as bad policy. 7 Khan M Nafee Mostafa ODF
- 8. Document Format Technical Requirements A standard doc format must: Support varied type of documents (unstructured to strictly structured) Be suitable for varied type of users (novices to pros) Encourage modern practice and enable ad hoc use Deal with all features (modern complex and conventional lengthy lists) Adapt to internationalization Consider security (encryption, digital signature, ramifications of executable code) Support ‘Ease of Access’ Facilitate Easy navigation 8 Khan M Nafee Mostafa ODF
- 9. Document Format Technical Requirements Note that, not all document consumers are human users document format must be platform independent and adaptable A document format must accommodate all the places and ways in which we use documents 9 Khan M Nafee Mostafa ODF
- 11. OASIS formed the ODF TC in late 2002History of ODF 10 Khan M Nafee Mostafa ODF
- 12. ODF file format primer OASIS TC recommended that the file format needed to, 11 Khan M Nafee Mostafa ODF
- 13. ODF history 12 Khan M Nafee Mostafa ODF
- 14. Most leading word processors support ODF, either natively or via extensions or plug-ins Many governments are now adopting ODF and many orgs and vendors are opting at ODF wide variety of programming libraries are also available for manipulating ODF content via Java, Python, or C# Application, Tool Support & Adoption 13 Khan M Nafee Mostafa ODF
- 15. An ODF document is typically stored and distributed in a container file consisting of a .zip archive that includes four key embedded XML files Salient Technical Features 14 Khan M Nafee Mostafa ODF
- 16. manifest.xml (table of contents of all files keyed by MIME content type) meta.xml (document-level metadata) styles.xml (style definitions) content.xml (document’s structured content)
- 17. ODF Technical Features Examples ODF’s attribute vocabulary is based on that used in the W3C’s XLS Formatting Objects (XSL:FO) Mathematical equations in ODF are defined using the W3C’s MathML vocabulary More complicated constructs are possible, but the principles remain the same: ODF is application- and vendor-neutral and uses existing standards where practical. 16 Khan M Nafee Mostafa ODF
- 18. ODF Futures In mid 2009, we hope to get ODF 1.2 ODF TC has created an “ODF-Next” for future versions of ODF Although the initial versions of the ODF standard have focused on encoding the storage format for the three conventional PPA application types, ODF isn’t limited to these uses. 17 Khan M Nafee Mostafa ODF
- 19. Conclusion! ODF is about to evolve the electronic document trends in a direction that embrace enormous possibilities 18 Khan M Nafee Mostafa ODF
- 20. Thank YOu
Editor's Notes
- Custom animation effects: fly-in and shrink lines, stretch rectangles(Intermediate)To reproduce the first vertical line on this slide, do the following:On the Home tab, in the Slides group, click Layout, and then click Blank.On the Home tab, in the Drawing group, click Shapes, and then under Lines click Line. On the slide, press and hold SHIFT, and then drag to draw a straight, vertical line.UnderDrawing Tools, on the Format tab, in the Size group, in the Shape Width box, enter 4.5”.On the Home tab, in the bottom right corner of the Drawing group, click the Format Shape dialog box launcher. In the Format Shape dialog box, click Line Color in the left pane, select Gradient fill in the Line Color pane, and then do the following:In the Type list, select Linear.Click the button next to Direction, and then click Linear Right (first row, fourth option from the left).In the Angle box, enter 0°.Under Gradient stops, click Add or Remove until three stops appear in the drop-down list.Also under Gradient stops, customize the gradient stops that you added as follows:Select Stop 1 from the list, and then do the following:In the Stop position box, enter 0%.Click the button next to Color, select More Colors, and then in the Colors dialog box, on the Custom tab, enter values for Red: 148, Green: 172, and Blue: 208.In the Transparency box, enter 100%.Select Stop 2 from the list, and then do the following: In the Stop position box, enter 50%.Click the button next to Color, select More Colors, and then in the Colors dialog box, on the Custom tab, enter values for Red: 148, Green: 172, and Blue: 208.In the Transparency box, enter 0%.Select Stop 3 from the list, and then do the following:In the Stop position box, enter 99%.Click the button next to Color, select More Colors, and then in the Colors dialog box, on the Custom tab, enter values for Red: 148, Green: 172, and Blue: 208.In the Transparency box, enter 100%.Also in the Format Shape dialog box, click Line Style in the left pane. In the Line Style pane, in the Width box, enter 6 pt.To reproduce the first rectangle on this slide, do the following:On the Home tab, in the Drawing group, click Shapes, and then under Rectangles click Rectangle (first option from the left). On the slide, drag to draw a rectangle.Select the rectangle. Under DrawingTools, on the Format tab, in the Size group, do the following:In the ShapeHeight box, enter 2”.In the ShapeWidth box, enter 2”.Under Drawing Tools, on the Format tab, in the bottom right corner of the ShapeStyles group, click the FormatShape dialog box launcher. In the FormatShape dialog box, click Fill in the left pane, select Gradient fill in the Fill pane, and then do the following:In the Type list, select Linear.Click the button next to Direction, and then click Linear Up (second row, second option from the left).In the Angle box, enter 270°.Under Gradient stops, click Add or Remove until three stops appear in the drop-down list.Also under Gradient stops, customize the gradient stops that you added as follows:Select Stop 1 from the list, and then do the following:In the Stop position box, enter 0%.Click the button next to Color, click More Colors, and then in the Colors dialog box, on the Custom tab, enter values for Red: 44, Green: 93, and Blue: 152.In the Transparency box, enter 0%.Select Stop 2 from the list, and then do the following: In the Stop position box, enter 80%.Click the button next to Color, click More Colors, and then in the Colors dialog box, on the Custom tab, enter values for Red: 60, Green: 123, Blue: 199.In the Transparency box, enter 0%.Select Stop 3 from the list, and then do the following:In the Stop position box, enter 100%.Click the button next to Color, click More Colors, and then in the Colors dialog box, on the Custom tab, enter values for Red: 58, Green: 124, Blue: 203.In the Transparency box, enter 0%.Also in the Format Shape dialog box, click Line Color in the left pane. In the Line Color pane, select No line. Also in the Format Shape dialog box, click 3-D Format in the left pane, and in the 3-D Format pane, do the following:Under Bevel, click the button next to Top, and then under Bevel click Circle (first row, first option from the left). Next to Top, in the Width box, enter 5 pt, and in the Height box, enter 2 pt.Under Surface, in the Angle box, enter 20°.On the slide, right-click the rectangle and then click Edit Text.Enter text in the text box and select the text. On the Home tab, in the Font group, do the following:In the Font list, select Calibri.In the Font Size list, select 32.Click the button next to Font Color, and then under Theme Colors click White, Background 1 (first row, first option from the left).On the slide, press and hold CTRL, and then select the line and the rectangle.On the Home tab, in the Drawing group, click Arrange, point to Align, and then do the following:Click Align Selected Objects.Click Align Left.With the line and rectangle still selected, drag them to the left side of the slide. To reproduce the animation effects for the first vertical line and rectangle on this slide, do the following:On the Animations tab, in the Animations group, click CustomAnimation. On the slide, select the line. In the CustomAnimation task pane, do the following:Click AddEffect, point to Entrance, and then click MoreEffects. In the AddEntranceEffect dialog box, under Basic, click FlyIn.Select the first animation effect (fly-in effect for the line), and then under Modify: Fly In,do the following:In the Start list, select WithPrevious.In the Direction list, select FromTop.In the Speed list, select Fast.On the slide, select the line. In the CustomAnimation task pane, do the following:Click AddEffect, point to Emphasis, and then click MoreEffects. In the AddEmphasisEffect dialog box, under Basic, click Grow/Shrink.Select the second animation effect (grow/shrink effect for the line). Click the arrow to the right of the effect, and then click Effect Options. In the Grow/Shrink dialog box, do the following:On the Effect tab, do the following:In the Size list, select Tiny. Also in the Size list, select Vertical.On the Timing tab, do the following:In the Start list, select WithPrevious.In the Delay box, enter 0.5.In the Speed list, select 1 seconds (Fast).On the slide, select the rectangle. In the CustomAnimation task pane, do the following:Click AddEffect, point to Entrance, and then click MoreEffects. In the AddEntranceEffect dialog box, under Moderate, click Stretch.Select the third animation effect (stretch effect for the rectangle), and then under Modify: Stretch,do the following:In the Start list, select AfterPrevious.In the Direction list, select FromLeft.In the Speed list, select Fast.To reproduce the other shapes with animation effects on this slide, do the following:On the slide, press and hold CTRL, and then select the rectangle and the line. On the Home tab, in the Clipboard group, click the arrow under Paste, and then click Duplicate. On the slide, drag the second line and rectangle to the center of the slide. With the second line and rectangle still selected, on the Home tab, in the Clipboard group, click the arrow under Paste, and then click Duplicate. On the slide, drag the third line and rectangle to the right side of the slide. On the slide, press CTRL+A to select all the objects. On the Home tab, in the Drawing group, click Arrange, point to Align, and then do the following:Click Align to Slide.Click Align Middle. Click the text in each of the duplicate rectangles, and then edit the text.On the slide, select the second (middle) line. On the Home tab, in the bottom right corner of the Drawing group, click the Format Shape dialog box launcher. In the Format Shape dialog box, click Line Color in the left pane, select Gradient fill in the Line Color pane, and then do the following:In the Type list, select Linear.Click the button next to Direction, and then click Linear Right (first row, fourth option from the left).In the Angle box, enter 0°.Under Gradient stops, click Add or Remove until three stops appear in the drop-down list.Also under Gradient stops, customize the gradient stops that you added as follows:Select Stop 1 from the list, and then do the following:In the Stop position box, enter 0%.Click the button next to Color, select More Colors, and then in the Colors dialog box, on the Custom tab, enter values for Red: 154, Green: 181, Blue: 228.In the Transparency box, enter 100%.Select Stop 2 from the list, and then do the following: In the Stop position box, enter 50%.Click the button next to Color, and then under Theme Colors click White, Background 1, Darker 25% (fourth row, first option from the left).In the Transparency box, enter 0%.Select Stop 3 from the list, and then do the following:In the Stop position box, enter 99%.Click the button next to Color, and then under Theme Colors click White, Background 1, Darker 25% (fourth row, first option from the left).In the Transparency box, enter 100%.On the slide, select the second (middle) rectangle. On the Home tab, in the bottom right corner of the Drawing group, click the Format Shape dialog box launcher. In the Format Shape dialog box, click Fill in the left pane, select Gradient fill in the Fill pane, and then do the following:In the Type list, select Linear.Click the button next to Direction, and then click Linear Up (second row, second option from the left).In the Angle box, enter 270°.Under Gradient stops, click Add or Remove until three stops appear in the drop-down list.Also under Gradient stops, customize the gradient stops that you added as follows:Select Stop 1 from the list, and then do the following:In the Stop position box, enter 0%.Click the button next to Color, click More Colors, and then in the Colors dialog box, on the Custom tab, enter values for Red: 118, Green: 149, Blue: 53.Select Stop 2 from the list, and then do the following: In the Stop position box, enter 80%.Click the button next to Color, click More Colors, and then in the Colors dialog box, on the Custom tab, enter values for Red: 115, Green: 195, Blue: 72.Select Stop 3 from the list, and then do the following:In the Stop position box, enter 100%.Click the button next to Color, click More Colors, and then in the Colors dialog box, on the Custom tab, enter values for Red: 156, Green: 199, Blue: 70.On the slide, select the third (right) line. On the Home tab, in the bottom right corner of the Drawing group, click the Format Shape dialog box launcher. In the Format Shape dialog box, click Line Color in the left pane, select Gradient fill in the Line Color pane, and then do the following:In the Type list, select Linear.Click the button next to Direction, and then click Linear Right (first row, fourth option from the left).In the Angle box, enter 0°.Under Gradient stops, click Add or Remove until three stops appear in the drop-down list.Also under Gradient stops, customize the gradient stops that you added as follows:Select Stop 1 from the list, and then do the following:In the Stop position box, enter 0%.Click the button next to Color, and then underTheme Colorsclick Aqua, Accent 5, Lighter 40% (fourth row, ninth option from the left).In the Transparency box, enter 100%.Select Stop 2 from the list, and then do the following: In the Stop position box, enter 50%.Click the button next to Color, and then underTheme Colorsclick Aqua, Accent 5, Lighter 40% (fourth row, ninth option from the left).In the Transparency box, enter 0%.Select Stop 3 from the list, and then do the following:In the Stop position box, enter 99%.Click the button next to Color, and then underTheme Colorsclick Aqua, Accent 5, Lighter 40% (fourth row, ninth option from the left).In the Transparency box, enter 100%.On the slide, select the third (right) rectangle. On the Home tab, in the bottom right corner of the Drawing group, click the Format Shape dialog box launcher. In the Format Shape dialog box, click Fill in the left pane, select Gradient fill in the Fill pane, and then do the following:In the Type list, select Linear.Click the button next to Direction, and then click Linear Up (second row, second option from the left).In the Angle box, enter 270°.Under Gradient stops, click Add or Remove until three stops appear in the drop-down list.Also under Gradient stops, customize the gradient stops that you added as follows:Select Stop 1 from the list, and then do the following:In the Stop position box, enter 0%.Click the button next to Color, select More Colors, and then in the Colors dialog box, on the Custom tab, enter values for Red: 39, Green: 135, Blue: 160.Select Stop 2 from the list, and then do the following: In the Stop position box, enter 80%.Click the button next to Color, select More Colors, and then in the Colors dialog box, on the Custom tab, enter values for Red: 54, Green: 177, Blue: 210.Select Stop 3 from the list, and then do the following:In the Stop position box, enter 100%.Click the button next to Color, select More Colors, and then in the Colors dialog box, on the Custom tab, enter values for Red: 52, Green: 179, Blue: 214.To reproduce the background effects on this slide, do the following:Right-click the slide background area, and then click Format Background. In the Format Background dialog box, click Fill in the left pane, select Gradient fill in the Fill pane, and then do the following:In the Type list, select Radial.Click the button next to Direction, and then click From Center (third option from the left).Under Gradient stops, click Add or Remove until three stops appear in the drop-down list.Also under Gradient stops, customize the gradient stops that you added as follows:Select Stop 1 from the list, and then do the following:In the Stop position box, enter 33%.Click the button next to Color, and then under Theme Colors click White, Background 1 (first row, first option from the left).Select Stop 2 from the list, and then do the following: In the Stop position box, enter 67%.Click the button next to Color, select More Colors, and then in the Colors dialog box, on the Custom tab, enter values for Red: 228, Green: 233, Blue: 236.Select Stop 3 from the list, and then do the following: In the Stop position box, enter 100%.Click the button next to Color, select More Colors, and then in the Colors dialog box, on the Custom tab, enter values for Red: 178, Green: 186, Blue: 210.
- SmartArt custom animation effects: stretch and curve up(Intermediate)To reproduce the SmartArt effects on this slide, do the following:On the Home tab, in the Slides group, click Layout, and then click Blank.On the Insert tab, in the Illustrations group, click SmartArt. In the Choose a SmartArt Graphic dialog box, in the left pane, click List. In the List pane, click Vertical Block List (fourth row, third option from the left), and then click OK to insert the graphic into the slide.Select the graphic, and then click one of the arrows on the left border. In the Type your text here dialog box, enter text for each of the rectangles.Press and hold CTRL, and select each of the second-level rectangles on the slide. Drag the left sizing handle of one of the second-level rectangles to the left 0.5” to increase the width of the second-level rectangles. (Note: The first-level rectangles (rounded rectangles) will decrease in width at the same time.)Select the SmartArt graphic. Under SmartArtTools, on the Design tab, in the SmartArtStyles group, click SmartArtStyles, and under BestMatch for Document select IntenseEffect (fifth option from the left).Press and hold CTRL, and then select each of the first-level rectangles (rounded rectangles) in the SmartArt graphic.Under SmartArtTools, on the Format tab, in the WordArtStyles group, click the arrow to the right of TextFill, and under ThemeColors select White, Background 1, Darker 25%. (fourth row, first option from the left). Under SmartArtTools, on the Format tab, in the ShapeStyles group, click the arrow to the right of ShapeFill and under ThemeColors select White, Background 1 (first row, first option from the left). Select the top, second-level rectangle in the SmartArt graphic.Under SmartArtTools, on the Format tab, in the ShapeStyles group, click the arrow to the right of ShapeFill and under ThemeColors select Olive Green, Accent 3. (first row, seventh option from the left).Select the center, second-level rectangle in the SmartArt graphic.Under SmartArtTools, on the Format tab, in the ShapeStyles group, click the arrow to the right of ShapeFill and under ThemeColors select Olive Green, Accent 3, Lighter 40% (fourth row, seventh option from the left).Select bottom,second-level rectangle in the SmartArt graphic.Under SmartArtTools, on the Format tab, in the ShapeStyles group, click the arrow to the right of ShapeFill and under ThemeColors select Olive Green, Accent 3, Lighter 60% (third row, seventh option from the left).Press and hold CTRL, and select each of the second-level rectangles.On the Home tab, in the Font group, click Text Shadow, and then in the FontColor list, select White, Background 1 (first row, first option from the left). To reproduce the animation effects on this slide, do the following:On the Animation tab, in the Animation group, click CustomAnimation. Select the SmartArt graphic, and then in the CustomAnimation task pane, do the following:Click AddEffect, point to Entrance and select MoreEffects. In the AddEntranceEffect dialog box, under Exciting select Curve Up, and click OK. Click the arrow to the right of the curve up entrance effect (first effect) and select EffectOptions. In the CurveUp dialog box, do the following:On the Timing tab, in the Start list, select AfterPrevious.On the Timing tab, in the Speed list, select Fast.On the SmartArtAnimation tab, in the Groupgraphic list select One by one.Click the double arrow under the curve-up entrance effect (first effect) to expand the list of effects.Press and hold CTRL, and select the second, fourth, and sixth effects (curve-up entrance effects). Click Change, point to Entrance, and select MoreEffects. In the ChangeEntranceEffects dialog box, under Moderate, select Stretch.Press and hold CTRL, and select the second, fourth, and sixth effects. Under Modify: Stretch,do the following:In the Direction list, select FromTop.In the Speed list, select Fast. To reproduce the background effects on this slide, do the following:Right-click the slide background, and then click Format Background. In the Format Background dialog box, click Fill in the left pane, select Gradient fill in the Fill pane, and then do the following:In the Type list, select Radial.In the Direction list, click From Center (third option from the left).Under Gradient stops, click Add or Remove until two stops appear in the drop-down list.Also under Gradient stops, customize the gradient stops as follows:Select Stop 1 from the list, and then do the following:In the Stop position box, enter 33%.Click the button next to Color, and then under Theme Colors click White, Background 1 (first row, the first option from the left).Select Stop 2 from the list, and then do the following: In the Stop position box, enter 100%.Click the button next to Color, and then under Theme Colors click White, Background 1, Darker 15% (third row, first option from the left).
- SmartArt custom animation effects: trapezoid list(Basic)To reproduce the SmartArt effects on this slide, do the following:On the Home tab, in the Slides group, click Layout, and then clickBlank. On the Insert tab, in the Illustrations group, click SmartArt. In the Choose a SmartArt Graphic dialog box, in the left pane, click List. In the List pane, click Trapezoid List (fifth row, second option from the left), and then click OK to insert the graphic into the slide.To create a fourth shape in the graphic, select the third shape from the left, and then under SmartArtTools, on the Design tab, in the CreateGraphic group, click the arrow under AddShape and select AddShapeAfter.Select the graphic, and then click one of the arrows on the left border. In the Type your text here dialog box, enter text. (Note: To create a bulleted list below each heading, select the heading text box in the Type your text here dialog box, and then under SmartArtTools, on the Design tab, in the CreateGraphic group, click AddBullet. Enter text into the new bullet text box.)On the slide, select the graphic. Under SmartArtTools, on the Design tab, in the SmartArtStyles group, do the following:Click ChangeColors, and then under Accent 5 click Gradient Range - Accent 5 (third option from the left).Click More, and then under 3-D click Polished (first row, first option from the left).On the Home tab, in the Font group, select TwCen MT Condensed from the Font list, and then select 24 from the Font Size list. Select the text in one of the headings. On the Home tab, in the Font group, select 28 from the Font Size list. Repeat this process for the text in the other headings. Press and hold SHIFT, and then select all four of the quadrangles in the graphic. On the Home tab, in the bottom right corner of the Drawing group, click the Format Shape dialog box launcher. In the Format Shape dialog box, in the left pane, click Text Box. In the Text Box pane, under Text layout, in the Vertical alignment list, select Middle.Select the graphic. Under SmartArt Tools, on the Format tab, click Size, and then do the following:In the Height box, enter 3.74”.In the Width box, enter 6.67”.Under SmartArt Tools, on the Format tab, click Arrange, click Align, and then do the following:Click Align to Slide.Click Align Middle. Click Align Center. To reproduce the animation effects on this slide, do the following:On the Animations tab, in the Animations group, click CustomAnimation.On the slide, select the graphic. In the CustomAnimation task pane, do the following:Click Add Effect, point to Entrance, and then click MoreEffects. In the Add Entrance Effect dialog box, under Moderate, click Stretch. Under Modify: Stretch, in the Direction list, select From Right.Under Modify: Stretch, in the Speed list, select Fast.Also in the CustomAnimation task pane, click Add Effect, point to Motion Paths, and then click Right. On the slide, right-click the motion path effect, and then click ReversePathDirection.Press and hold CTRL, and then select both animation effects in the Custom Animation task pane. Click the arrow to the right of the secondanimation effect (right motion path), and then click EffectOptions. In the Motion Path dialog box, on the SmartArt Animation tab, in the Group graphic list, select One by one.Also in the Custom Animation task pane, click the double arrow under each of the animation effects to expand the contents of the list of effects.Press and hold CTRL, and then select the first, second, third, and fourth animation effects (stretch effects) in the Custom Animation task pane. Under Modify: Stretch, in the Start list, select After Previous.Press and hold CTRL, select the fifth, sixth, seventh, and eighth animation effects (right motion paths) in the Custom Animation task pane, and then do the following: Under Modify: Right, in the Start list, select With Previous.Under Modify: Right, in the Speed list, select Fast.Also in the Custom Animation task pane, do the following to reorder the list of effects:Drag the fifth animation effect (first right motion path) until it is second in the list of effects.Drag the sixth animation effect (second right motion path) until it is fourth in the list of effects.Drag the seventh animation effect (third right motion path) until it is sixth in the list of effects.To reproduce the background effects on this slide, do the following:Right-click the slide background area, and then click Format Background. In the Format Background dialog box, click Fill in the left pane, select Gradient fill in the Fill pane, and then do the following:In the Type list, select Radial.In the Direction list, click From Corner (fourth option from the left).Under Gradient stops, click Add or Remove until two stops appear in the drop-down list.Also under Gradient stops, customize the gradient stops that you added as follows:Select Stop 1 from the list, and then do the following:In the Stop position box, enter 0%.Click the button next to Color, and then under Theme Colors click White, Background 1 (first row, first option from the left).Select Stop 2 from the list, and then do the following: In the Stop position box, enter 100%.Click the button next to Color, and then under Theme Colors clickWhite, Background 1, Darker 35% (fifth row, first option from the left).
- Custom animation effects: curve up and grow(Intermediate)To reproduce the first rectangle on this slide, do the following:On the Home tab, in theSlides group, click Layout, and then click Blank.On the Home tab, in the Drawing group, click Shapes, and then under Rectangles click Rounded Diagonal Corner Rectangle (ninth option from the left). On the slide, drag to draw a rounded rectangle.Drag the yellow diamond adjustment handle to the left to reduce the size of the corner radius.Select the rounded rectangle. Under DrawingTools, on the Format tab, in the Size group, do the following:In the Shape Height box, enter 2.33”.In the Shape Width box, enter 2.32”.On the Home tab, in the Drawing group, click the arrow next to Shape Fill, and select No Fill.On the Home tab, in the Drawing group, click Shape Effects, point to Reflection, under Reflection Variations, select Tight Reflection, touching (first row, first option from the left).On the Home tab, in the bottom right corner of the Drawing group, click the Format Shape dialog box launcher. In the Format Shape dialog box, in the left pane click Line Color, and then in the Line Color pane select Solid Line. Click the button next to Color, click More Colors, and then in the Colors dialog box, on the Custom tab, enter values for Red: 137, Green: 227, Blue: 231.Also in the Format Shape dialog box, in the left pane, click Line Style. In the Line Style pane, do the following:In the Width box, enter 10 pt.In the Cap type list, select Round.Also in the Format Text Effects dialog box, in the left pane, click 3-D Format. In the 3-D Format pane, do the following:Under Bevel, click the button next to Top, and then under Bevel click Circle (first row, first option from the left). Next to Top, in the Width box, enter 10 pt, and in the Height box, enter 10 pt.Under Contour, click the button next to Color, and then under Theme Colors click Olive Green, Accent 3, Lighter 60% (third row, seventh option from the left).Under Surface, click the button next to Material, and then under Standard click Matte (first row, first option from the left). Click the button next to Lighting, and then under Neutral click Soft (first row, third option from the left). In the Angle box, enter 315°.Right-click the rounded rectangle, and then click Edit Text.Enter text in the text box, select the text, and then on the Home tab, in the Font group, select Gills Sans MT Condensed from the Font list, and select 28 from the Font Size list.On the Home tab, in the Paragraph group, click Center to center the text.To reproduce the animation effects for the first rectangle on this slide, do the following:On the Animations tab, in the Animations group, click Custom Animation. On the slide, select the round diagonal corner rectangle. In the Custom Animation task pane, do the following:Click Add Effect, point to Entrance, and then click More Effects. In the Add Entrance Effect dialog box, under Exciting, click Curve Up.Select the animation effect (curve-up effect for the rectangle), and under Modify Curve Up, do the following:In the Start list, select With Previous.In the Speed list, select Fast.On the slide, select the round diagonal corner rectangle. In the Custom Animation task pane, do the following:Click Add Effect, point to Emphasis, and then click More Effects. In the Add Emphasis Effect dialog box, under Basic, click Grow/Shrink.Select the second animation effect (grow/shrink effect for the rectangle). Click the arrow next to the selected effect, and then click Effect Options. In the Grow/Shrink dialog box, do the following:On the Effect tab, do the following:In the Size list, in the Custom box, enter 5, and then press ENTER. Also in the Size list, select Vertical. Select Auto-reverse.On the Timing tab, do the following:In the Start list, select With Previous.In the Speed list, select VeryFast.To reproduce the second and third rectangle on this slide with animation effects, do the following:On the slide, select the rounded rectangle.On the Home tab, in the Clipboard group, click the arrow under Paste, and then click Duplicate. Drag the second rounded rectangle next to the first rounded rectangle. Repeat this process one more time for a total of three rectangles.On the Animations tab, in the Animations group, click Custom Animation. In the Custom Animation task pane, do the following:Press and hold CTRL, and then select the third and fourth animation effects (curve up effect and grow/shrinkeffect for the second rectangle). Click the arrow next to one of the selected effects, and then click Timing. In the Effect Options dialog box, on the Timing tab, in the Delay box, enter 0.5.Press and hold CTRL, and then select the fifth and sixth animation effects (curve up effect and grow/shrink effect for the third rectangle). Click the arrow next to one of the selected effects, and then click Timing. In the Effect Options dialog box, on the Timing tab, in the Delay box, enter 1.To reproduce the background on this slide, do the following: On the Home tab, in the Drawing group, clickShapes, and then under Rectangles click Rectangle (first option from the left). On the slide, drag to draw a rectangle.Select the rectangle. Under Drawing Tools, on the Format tab, in the Size group, do the following:In the Shape Height box, enter 1.62”.In the Shape Width box, enter 10”.UnderDrawing Tools, on the Format tab, in the bottom right corner of the Shape Styles group, click the Format Shape dialog box launcher.In the Format Shape dialog box, click Fill in the left pane, select Solid fill in the Fill pane, and then do the following:Click the button next to Color, click More Colors, and then in the Colors dialog box, on the Custom tab, enter values for Red: 137, Green: 227, Blue: 231.In the Transparency box, enter 70%.Also in the Format Shape dialog box, in the left pane, click Line Color, and in the Line Color pane, select No line.Drag the rectangle into the middle of the slide.On the Home tab, in the Drawing group, clickShapes, and then under Rectangles click Round Diagonal Corner Rectangle (ninth option from the left). On the slide, drag to draw a rectangle.Select the round diagonal corner rectangle. Under Drawing Tools, on the Format tab, in the Size group, do the following:In the Shape Height box enter 0.44”.In the Shape Width box enter 0.44”.UnderDrawing Tools, on the Format tab, in the Shape Styles group, click the Format Shape dialog box launcher. In the Format Shape dialog box, click Fill in the left pane, select Solid fill in the Fill pane, and then do the following:Click the button next to Color, and then under Theme Colors click White, Background 1, Darker 5% (second row, first option from the left).In the Transparency box, enter 60%.Also in the Format Shape dialog box, in the left pane, click Line Color, and in the Line Color pane, select No line.Select the round diagonal corner rectangle. On the Home tab, in the Clipboard group, click the arrow under Paste, and then click Duplicate. Repeat this process until there is a total of seven round diagonal corner rectangles.On the slide, press and hold CTRL and select the seven round diagonal corner rectangles. On the Home tab, in the Drawing group, click Arrange, point to Align, and do the following:Click Align Selected Objects.Click Align Top.Click Distribute Horizontally.Right-click the slide background area, and then click Format Background. In the Format Background dialog box, click Fill in the left pane, select Gradient fill in the Fill pane, and then do the following:In the Type list, select Linear.Click the button next to Direction, and then click Linear Diagonal (second row, third option from the left).Under Gradient stops, click Add or Remove until two stops appear in the drop-down list.Also under Gradient stops, customize the gradient stops that you added as follows:Select Stop 1 from the list, and then do the following:In the Stop position box, enter 50%.Click the button next to Color, and then click White, Background 1 (first row, first option from the left).Select Stop 2 from the list, and then do the following: In the Stop position box, enter 100%.Click the button next to Color, and then click More Colors. In the Colors dialog box, on the Custom tab, enter values for Red: 204, Green: 244, Blue: 248.
- Custom animation effects: text rebound(Intermediate)To reproduce the text effects on this slide, do the following:On the Home tab, in theSlides group, click Layout, and then click Blank.On the Insert tab, in the Text group, click TextBox. Drag to draw a text box on the slide.In the text box, enter text and select it.On the Home tab, in the Font group, do the following:In the Font list, select Corbel.In the FontSize box, enter 50. Click Bold.On the Home tab, in the Paragraph group, click Center. Select the text box on the slide. Under DrawingTools, on the Format tab, in the WordArtStyles group, click MoreWordArt, and then under Appliesto All Text in Shape click Fill - Accent 1, Plastic Bevel, Reflection (first row, fifth option from the left).To reproduce the animation effects on this slide, do the following:On the View tab, in the Zoom group, click Zoom, and then in the Zoom dialog box, select 66%.On the Animations tab, in the Animations group, click CustomAnimation. On the slide, select the text box. In the CustomAnimation task pane, do the following:Click AddEffect, point to Entrance, and then click MoreEffects. In the AddEntranceEffects dialog box, under Subtle, click Fade.Select the animation effect (fade effect for the text box). Under Modify: Fade,do the following:In the Start list, select WithPrevious.In the Speed list, select Fast. ClickAddEffect, point to MotionPath, point to DrawCustomPath, and then click Freeform. Press and hold SHIFT, and then do the following to draw the freeform line on the slide:Click the first point in the center of the text box.Click the second point on the right edge of the text box.Double-click the third and final point 2” beyond the left edge of the slide.In the Custom Animation task pane, select the custom path effect. Under Modify: Custom Path,do the following:In the Start list, select WithPrevious.In the Speed list, select Medium. On the slide, right-click the motion path on the slide, and select ReversePathDirection.To reproduce the background effects on this slide, do the following:Right-click the slide background area, and then click Format Background. In the Format Background dialog box, click Fill in the left pane, select Gradient fill in the Fill pane, and then do the following:In the Type list, select Radial.Click the button next to Direction, and then click From Center (first row, second option from the left). Under Gradient stops, click Add or Remove until two stops appear in the drop-down list.Also under Gradient stops, customize the gradient stops that you added as follows:Select Stop 1 from the list, and then do the following:In the Stop position box, enter 0%.Click the button next to Color, and then under ThemeColors click White, Background 1 (first row, first option from the left). Select Stop 2 from the list, and then do the following: In the Stop position box, enter 100%.Click the button next to Color, click MoreColors, and then in the Colors dialog box, on the Custom tab, enter values for Red: 200, Green: 209, and Blue: 218.
- Custom animation effects: object spins on end(Advanced)To reproduce the background effects on this slide, do the following:On the Home tab, in theSlides group, click Layout, and then click Blank.Right-click the slide background area, and then click Format Background. In the Format Background dialog box, click Fill in the left pane, and then select Solid fill in the Fill pane. Click the button next to Color, and then under Theme Colors click White, Background 1 (first row, first option from the left).To reproduce the rectangle on this slide, do the following:On the Home tab, in the Drawing group, click Shapes, and then under Rectangles click Rounded Rectangle (second option from the left). On the slide, drag to draw a rounded rectangle.Select the rectangle. Drag the yellow diamond adjustment handle to the left to decrease the amount of rounding on the corners. With the rounded rectangle still selected, under Drawing Tools, on the Format tab, in the Size group, do the following:In the Shape Height box, enter 3.5”.In the Shape Width box, enter 0.25”.Under Drawing Tools, on the Format tab, in the bottom right corner of the Shape Styles group, click the Format Shape dialog box launcher. In the Format Shape dialog box, click Fill in the left pane. In the Fill pane, select Solid fill, click the button next to Color, and then under Theme Colors click White, Background 1, Darker 15% (third row, first option from the left).Also in the Format Shape dialog box, click Line Color in the left pane. In the Line Color pane, select No line. Also in the Format Shape dialog box, click Shadow in the left pane. In the Shadow pane, click the button next to Presets, under Outer select Offset Bottom (first row, second option from the left), and then do the following:In the Transparency box, enter 0%.In the Sizebox, enter 100%.In the Blur box, enter 8.5 pt.In the Angle box, enter 90°.In the Distance box, enter 1 pt.Also in the Format Shape dialog box, click 3-D Format in the left pane. In the 3-D Format pane, do the following:Under Bevel, click the button next to Top, and then under Bevel click Circle (first row, first option from the left). Next to Top, in the Width box, enter 5 pt, and in the Height box, enter 5 pt.Under Surface, click the button next to Material, and then under Standard clickMatte (first row, first option from the left).Click the button next to Lighting, and then under Neutral click Soft (first row, third option from the left).On the slide, select the rounded rectangle. On the Home tab, in the Clipboard group, click the arrow under Paste, and then click Duplicate.Select the duplicate rectangle. On the Home tab, in the Drawing group, do the following:Click the arrow next to Shape Fill, and then click No Fill.Click the arrow next to Shape Outline, and then click No Outline.Drag the second rectangle above the first rectangle until the lower edge overlays the top edge of the first rectangle. (Note: When the spinning animation effect is created later for these rectangles, the spin will center where the edges of the rectangles meet.)Press and hold CTRL, and then select both rectangles. On the Home tab, in the Drawing group, click Arrange, and do the following:Point to Align, and then click Align Selected Objects.Point to Align, and then click Align Center.Click Group. On the slide, drag the group until it is centered horizontally on the left edge of the slide (straddling the edge).On the Home tab, in the Drawing group, click Arrange, point to Align, and then do the following:Click Align to Slide.Click Align Middle.To reproduce the dashed arc on this slide, do the following:On the Home tab, in the Drawing group, click Shapes, and then under Basic Shapes click Arc (third row, 12th option from the left). On the slide, drag to draw an arc.Select the arc. Under Drawing Tools, on the Format tab, in the Size group, do the following:In the Shape Height box, enter 7.5”.In the Shape Width box, enter 7.5”.With the arc still selected, on the Home tab, in the Drawing group, click the arrow next to Shape Outline,and then do the following:Under Theme Colors, click White, Background 1, Darker 15% (third row, first option from the left).Point to Dashes, and then click Dash (fourth option from the top).On the slide, drag the yellow diamond adjustment handle on the right side of the arc to the bottom of the arc to create a half circle.Drag the arc until the yellow diamond adjustment handles are on the left edge of the slide.With the arc still selected, on the Home tab, in the Drawing group, click Arrange, point to Align, and then do the following:Click Align to Slide. Click Align Middle. To reproduce the half circle on this slide, do the following:On the slide, select the arc. On the Home tab, in the Clipboard group, click the arrow under Paste, and then click Duplicate.Select the duplicate arc. Under Drawing Tools, on the Format tab, in the Size group, do the following:In the Shape Height box, enter 3.33”.In the Shape Width box, enter 3.33”.With the second arc still selected, under Drawing Tools, on the Format tab, in the Shape Styles group, click the arrow next to Shape Fill, and then under Theme Colors click White, Background 1, Darker 5% (second row, first option from the left).Under Drawing Tools, on the Format tab, in the Shape Styles group, click the arrow next to Shape Outline,and then click No Outline.Under Drawing Tools, on the Format tab, in the Shape Styles group, click Shape Effects, point to Shadow, and then click ShadowOptions. In the Format Shape dialog box, click Shadow in the left pane. In the Shadow pane, click the button next to Presets, under Inner click Inside Right (second row, third option from the left), and then do the following:In the Transparency box, enter 86%.In the Blur box, enter 24 pt.In the Angle box, enter 315°.In the Distance box, enter 4 pt.On the slide, drag the second arc until the yellow diamond adjustment handles are on the left edge of the slide. On the Home tab, in the Drawing group, click Arrange, and then do the following:Point to Align, and then click Align to Slide. Point to Align, and then click Align Middle. Click Send to Back.To reproduce the button shapes on this slide, do the following:On the Home tab, in the Drawing group, click Shapes, and then under Basic Shapes click Oval (first row, second option from the left). On the slide, drag to draw an oval.Select the oval. Under Drawing Tools, on the Format tab, in the Size group, do the following:In the Shape Height box, enter 0.34”.In the Shape Width box, enter 0.34”.Under Drawing Tools, on the Format tab, in the Shape Styles group, click More, and then click Light 1 Outline, Colored Fill – Dark 1 (third row, first option from the left).Under Drawing Tools, on the Format tab, in the bottom right corner of the Shape Styles group, click the Format Shape dialog box launcher. In the Format Shape dialog box, click Fill in the left pane. In the Fill pane, select Solid Fill. Click the button next to Color, and then under Theme Colors click Olive Green, Accent 3, Lighter 80°(second row, seventh option from the left).Also in the Format Shape dialog box, click Line Color in the left pane. In the Line Color pane, select No line. Also in the Format Shape dialog box, click Shadow in the left pane. In the Shadow pane, click the button next to Presets, under Outer click Offset Bottom (first row, second option from the left), and then do the following:In the Transparency box, enter 0%.In the Size box, enter 100%.In the Blur box, enter 8.5 pt.In the Angle box, enter 90°.In the Distance box, enter 1 pt.Also in the Format Shape dialog box, click 3-D Format in the left pane, and then do the following in the 3-D Format pane:Under Bevel, click the button next to Top, and then under Bevel click Art Deco (third row, fourth option from the left). Next to Top, in the Width box, enter 5 pt, and in the Height box, enter 5 pt.UnderContour, click the button next to Color, and then under Theme Colors click White, Background 1 (first row, first option from the left). In the Size box, enter 3.5 pt.Under Surface, click the button next to Material, and then under Standard click Matte (first row, first option from the left). Click the button next to Lighting, and then under Neutral click Soft (first row, third option from the left).On the slide, select the oval. Under Drawing Tools, on the Format tab, in the bottom right corner of the Size group, click the Size and Position dialog box launcher. In the Size and Position dialog box, on the Position tab, do the following:In the Horizontal box, enter 2.98”.In the Vertical box, enter 1.5”.Select the oval. On the Home tab, in the Clipboard group, click the arrow under Paste, and then click Duplicate.Select the duplicate oval. Under Drawing Tools, on the Format tab, in the bottom right corner of the Size group, click the Size and Position dialog box launcher. In the Size and Position dialog box, on the Position tab, do the following:In the Horizontal box, enter 3.52”.In the Vertical box, enter 2.98”. Repeat step 9 two more times, for a total of four ovals. Under Drawing Tools, on the Format tab, in the bottom right corner of the Size group, click the Size and Position dialog box launcher. In the Size and Position dialog box, on the Position tab, do the following to position the third and fourth ovals:Select the third oval on the slide, and then enter 3.52” in theHorizontal box and 4.27” in the Vertical box.Select the fourth oval on the slide, and then enter 2.99” in theHorizontal box and 5.66” in the Vertical box.To reproduce the text on this slide, do the following:On the Insert tab, in the Text group, click Text Box, and then on the slide, drag to draw the text box. Enter text in the text box and select the text. On the Home tab, in the Font group, do the following: In the Font list, select Corbel.In the Font Size list, select 22.Click the arrow next to Font Color, and then under Theme Colors click White, Background 1, Darker 50% (sixth row, first option from the left).On the Home tab, in the Paragraph group, click Align Text Left to align the text left in the text box.On the slide, drag the text box to the right of the first oval.Select the text box. On the Home tab, in the Clipboard group, click the arrow under Paste, and then click Duplicate. Click in the text box and edit the text. Drag the second text box to the right of the second oval.Repeat steps 5-7 to create the third and fourth text boxes, dragging them to the right of the third and fourth ovals. To reproduce the animation effects on this slide, do the following:On the Animations tab, in the Animations group, click Custom Animation.On the Home tab, in the Editing group, click Select, and then click Selection Pane. In the Selection and Visibility pane, select the rectangle group. In the CustomAnimation task pane, do the following:Click AddEffect, point to Emphasis, and then click More Effects. In the Add Emphasis Effect dialog box, under Basic, click Spin. Select the animation effect (spin effect for the rectangle group). Under Modify: Spin, do the following:In theStart list, selectWith Previous. In the Amount list, in the Custom box, enter 123°,and then press ENTER. Also in the Amount list, clickCounterclockwise.In the Speedlist, select Fast. On the slide, select the first oval. In the CustomAnimation task pane, do the following:Click AddEffect, point to Emphasis, and then click More Effects. In the Add Emphasis Effect dialog box, under Basic, click Change Fill Color. Select the second animation effect (change fill color effect for the first oval). Under Modify: Change Fill Color, do the following:In the Startlist, select After Previous. In the Fill Color list, click More Colors. In the Colors dialog box, on the Custom tab, enter values for Red: 130, Green: 153, Blue: 117. In the Speedlist, select Very Fast.On the slide, select the first text box. In the CustomAnimation task pane, do the following:Click Add Effect, point to Entrance,and then click More Effects. In the Add Entrance Effect dialog box, under Subtle, clickFade. Select the third animation effect (fade effect for the first text box). Under Modify: Fade, do the following:In theStart list, selectWith Previous.In the Speed list, select Very Fast. In the Selection and Visibility pane, select the rectangle group. In the CustomAnimation task pane, do the following:Click AddEffect, point to Emphasis, and then click More Effects. In the Add Emphasis Effect dialog box, under Basic, click Spin. Select the fourth animation effect (spin effect for the rectangle group). Under Modify: Spin, do the following:In theStart list, selectOn Click. In the Amount list, in the Custom box, enter 22°, and then press ENTER. Also in the Amount list, click Clockwise.In the Speed list, select Very Fast.On the slide, select the second oval. In the CustomAnimation task pane, do the following:Click AddEffect, point to Emphasis, and then click More Effects. In the Add Emphasis Effect dialog box, under Basic, click Change Fill Color. Select the fifth animation effect (change fill color effect for the second oval). Under Modify: Change Fill Color, do the following:In the Startlist, select After Previous. In the Fill Color list, click More Colors. In the Colors dialog box, on the Custom tab, enter values for Red: 130, Green: 153, Blue: 117. In the Speedlist, select Very Fast.On the slide, select the second text box. In the CustomAnimation task pane, do the following:Click Add Effect, point to Entrance and then click More Effects. In the Add Entrance Effect dialog box, under Subtle, clickFade. Select the sixth animation effect (fade effect for the second text box). Under Modify: Fade, do the following:In theStart list, selectWith Previous.In the Speed list, select Very Fast. On the slide, select the third oval. In the CustomAnimation task pane, do the following:Click AddEffect, point to Emphasis, and then click More Effects. In the Add Emphasis Effect dialog box, under Basic, click Change Fill Color. Select the seventh animation effect (change fill color effect for the third oval). Under Modify: Change Fill Color, do the following:In the Startlist, select After Previous. In the Fill Color list, click More Colors. In the Colors dialog box, on the Custom tab, enter values for Red: 130, Green: 153, Blue: 117. In the Speedlist, select Very Fast.On the slide, select the third text box. In the CustomAnimation task pane, do the following:Click Add Effect, point to Entrance and then click More Effects. In the Add Entrance Effect dialog box, under Subtle, clickFade. Select the eighth animation effect (fade effect for the third text box). Under Modify: Fade, do the following:In theStart list, selectWith Previous.In the Speed list, select Very Fast. On the slide, select the fourth oval. In the CustomAnimation task pane, do the following:Click AddEffect, point to Emphasis, and then click More Effects. In the Add Emphasis Effect dialog box, under Basic, click Change Fill Color. Select the ninth animation effect (change fill color effect for the fourth oval). Under Modify: Change Fill Color, do the following:In the Startlist, select After Previous. In the Fill Color list, click More Colors. In the Colors dialog box, on the Custom tab, enter values for Red: 130, Green: 153, Blue: 117. In the Speedlist, select Very Fast.On the slide, select the fourth text box. In the CustomAnimation task pane, do the following:Click Add Effect, point to Entrance,and then click More Effects. In the Add Entrance Effect dialog box, under Subtle, clickFade. Select the 10th animation effect (fade effect for the fourth text box). Under Modify: Fade, do the following:In theStart list, selectWith Previous.In the Speed list, select Very Fast.
- Custom animation effects: spotlight text(Intermediate)To reproduce the text effects on this slide, do the following:On the Home tab, in theSlides group, click Layout, and then click Blank.On the Insert tab, in the Text group, click Text Box, and then on the slide, drag to draw the text box. Enter text in the text box and select the text. On the Home tab, in the Font group, do the following:In the Font list, select Arial Black.In the Font Size box, enter 50.Click Bold. On the Home tab, in the Paragraph group, click Center to center the text in the text box.Select the text box. Under Drawing Tools, on the Format tab, in bottom right corner of the WordArt Styles, click the Format Text Effects dialog box launcher. In the Format Text Effects dialog box,click Text Fill in the left pane, select Gradient fill in the Text Fill pane, and then do the following: In the Type list, select Linear.Click the button next to Direction, and then click Linear Down (first row, second option from the left).Under Gradient stops, click Add or Remove until two stops appear in the drop-down list.Also under Gradient stops, customize the gradient stops that you added as follows:Select Stop 1 from the list, and then do the following:In the Stop position box, enter 0%.Click the button next to Color, and then under Theme Colors click Black, Text 1, Lighter 35% (third row, second option from the left).Select Stop 2 from the list, and then do the following: In the Stop position box, enter 100%.Click the button next to Color, and then under Theme Colors click Black, Text 1 (first row, second option from the left).Also in the Format Text Effects dialog box,click 3-D Format in the left pane, and then do the following in the 3-D Format pane:Under Bevel, click the button next to Top, and then under Bevel click Circle (first row, first option from the left). Next to Top, in the Width box, enter 10 pt, and in the Height box, enter 2.5 pt.Under Depth, click the button next to Color, and then select Automatic. Under Contour, click the button next to Color, click More Colors, and then in the Colors dialog box, on the Custom tab, enter values for Red: 68,Green: 113,Blue: 166. In the Sizebox, enter 0.5 pt.Under Surface, click the button next to Material, and then under Standard clickMetal (fourth option from the left). Click the button next to Lighting, and then under Neutral click Contrasting (second row, second option from the left). In the Angle box, enter 75°.Under Drawing Tools, on the Format tab, in the WordArt Styles group, click Text Effects, point to Reflection, and then under Reflection Variations click Half Reflection, touching (first row, second option from the left).Drag the text box above the middle of the slide.On the Home tab, in the Drawing group, click Arrange, point to Align, and then do the following:Click Align to Slide.Click Align Center.To reproduce the background effects on this slide, do the following:Right-click the slide background area, and then click Format Background. In the Format Background dialog box, click Fill in the left pane, select Gradient fill in the Fill pane, and then do the following:In the Type list, select Radial.Click the button next to Direction, and then click From Center (third option from the left).Under Gradient stops, click Add or Remove until two stops appear in the drop-down list.Also under Gradient stops, customize the gradient stops that you added as follows:Select Stop 1 from the list, and then do the following:In the Stop position box, enter 0%.Click the button next to Color, and then under Theme Colors click White, Background 1, Darker 5% (second row, first option from the left).Select Stop 2 from the list, and then do the following: In the Stop position box, enter 100%.Click the button next to Color, and then under Theme Colors click Black, Text 1, Lighter 35% (third row, second option from the left). To reproduce the shape effects on this slide, do the following:On the Home tab, in the Drawing group, click Shapes, and then under Basic Shapes click Oval (first row, second option from the left). On the slide, drag to draw an oval.Select the oval. Under Drawing Tools, on the Format tab, in the Size group, do the following:In the Shape Height box, enter 1.1”. In the Shape Width box, enter 2.31”.With the oval still selected, on the Home tab, in the bottom right corner of the Drawing group, click the Format Shape dialog box launcher. In the Format Shape dialog box, click Fill in the left pane, select Gradient fill in the Fill pane, and then do the following:In the Type list, select Radial.Click the button next to Direction, and then click From Center (third option from the left).Under Gradient stops, click Add or Remove until three stops appear in the drop-down list.Also under Gradient stops, customize the gradient stops that you added as follows:Select Stop 1 from the list, and then do the following:In the Stop position box, enter 0%.Click the button next to Color, and then under Theme Colorsclick White, Background 1 (first row, first option from the left).In the Transparency box, enter 21%.Select Stop 2 from the list, and then do the following: In the Stop position box, enter 51%.Click the button next to Color, and then under Theme Colorsclick White, Background 1 (first row, first option from the left).In the Transparency box, enter 73%.Select Stop 3 from the list, and then do the following: In the Stop position box, enter 100%.Click the button next to Color, and then under Theme Colorsclick Black, Text 1 (first row, first option from the left).In the Transparency box, enter 100%.Under the Drawing Tools, on the Format tab, in the Shapes Styles group, do the following:Click the arrow next to Shape Outline, and then click No Outline.Click Shape Effects, point to Soft Edges,and then click 25 Point.On the slide, drag the oval until it is centered on the first letter in the text box.To reproduce the animation effects on this slide, do the following:On the Animations tab, in the Animations group, click Custom Animation.On the slide, select the oval. In the CustomAnimation task pane, do the following:Click AddEffect, point to Entrance, and then click More Effects. In the Add Entrance Effect dialog box, under Subtle, clickFade.Select the animation effect (fade entrance effect for the oval). Under Modify: Fade, do the following:In theStart box, selectWith Previous.In the Speed box, select Fast. On the slide, select the oval. In the CustomAnimation task pane, do the following:Click AddEffect, point to Exit, and then click More Effects. In the Add Exit Effect dialog box, under Subtle, clickFade.Select the second animation effect (fade exit effect for the oval). Click the arrow to the right of the animation effect, and then click Timing. In the Fade dialog box, on the Timing tab, do the following:In theStart list, selectWith Previous.In the Delay box, enter 4.In the Speed list, select 1 seconds (Fast). On the slide, select the oval. In the CustomAnimation task pane, do the following:Click AddEffect, point to Entrance, and then click More Effects. In the Add Entrance Effect dialog box, under Subtle, clickFade.Select the third animation effect (fade entrance effect for the oval). Click the arrow to the right of the animation effect, and then click Timing. In the Fade dialog box, on the Timing tab, do the following:In theStart list, selectWith Previous.In the Delay box, enter 5.In the Speed list, select 1 seconds (Fast). On the slide, select the oval. In the CustomAnimation task pane, do the following:Click AddEffect, point to Exit, and then click More Effects. In the Add Exit Effect dialog box, under Subtle, clickFade.Select the fourth animation effect (fade exit effect for the oval). Click the arrow to the right of the animation effect, and then click Timing. In the Fade dialog box, on the Timing tab, do the following:In theStart list, selectWith Previous.In the Delay box, enter 7.In the Speed list, select 1 seconds (Fast). On the slide, select the oval. In the CustomAnimation task pane, do the following:Click AddEffect, point to Motion Paths, and then click Right. Select the fifth animation effect (motion path for the oval). Click the arrow to the right of the animation effect, and then click Effect Options. In the Fade dialog box, do the following:On the Effect tab, under Path, select Auto-reverse.On the Timing tab, do the following:In theStart list, selectWith Previous.In the Delay box, enter 0.In the Speed list, select 2 seconds (Medium).In the Repeat list, select 2.On the slide, select the motion path. Point to the endpoint (red arrow) of the motion path until the cursor becomes a two-headed arrow, press and hold SHIFT, and then drag the endpoint to the center of the last letter in the text box.