
Recommended
Recommended
More Related Content
Similar to Novel Polymer Shelves (See Projects Section on Linkedin)
Similar to Novel Polymer Shelves (See Projects Section on Linkedin) (20)
Novel Polymer Shelves (See Projects Section on Linkedin)
- 1. PolymerWorks Team: Mick Blackwell, Ben Condro, Mark Dufresne, Brenton Lester, and Matt Lewis Advisor: Dr. Gipson and Dr. Prins Topic: Materials and Mechanics Project (SUDoKU Portfolio)
- 3. Page 2 of 38 Table of Contents I. INTRODUCTION………………………………………………………………………3 II. LITERATURE REVIEW………………………………………………………………3 III. PURPOSE AND OBJECTIVES………………………………………………………4 IV. MATERIAL SELECTION ANALYSIS…………………………………………….. 5 V. DESCRIPTION OF SHELVING UNITS…………………………………………….12 VI. MECHANICAL ANALYSIS………………………….……………………………..15 VII. SYNTHESIS OF ANALYSIS INTO DESIGN……………………………………..28 VIII. CONCLUSIONS AND RECCOMENDATIONS………………………………….30 IX. REFERENCES……..……………………………………………………………….. 30 X. APPENDIXES……………………………………………………………………..….32
- 4. Page 3 of 38 Introduction In order to properly design a product, mathematical analysis and analytical modeling for each component are necessary to obtain parameters and confirm feasibility of proposed designs. The following sections document four designs correlated to obtained customer needs in order design of a novel shelving system. Each design was modeled analytically using SolidWorks and mathematically analyzed using known mechanical methods. The mechanical analysis, ecological audits, and tabulated material properties were compared in order to choose the most appropriate material and design for fabrication of the product. Literature Review Research was conducted on common polymer-based product manufacturing methods due to project constraints requiring a polymer shelving unit, as well as known polymer benefits and disbenefits at large. An overview of the applicable research conducted will be explained and further information can be found in the references used. Polymers can be found in any department store or building around the globe. For instance, electrical outlets have a plastic face constructed from an electrically resistant polymer [8]. There are many methods of producing polymer products: thermoforming, extrusion, injection molding, blow molding, compression molding, plastic machining, and transfer molding [10]. However, some polymers are not feasible alternatives for select manufacturing processes. For example, polycarbonate is not normally shaped using the thermoforming process [10]. Moreover, blow molding is commonly used to produce thin walled products such as plastic bottles. Compression molding can only be used for a small subset of polymers and makes familiar items such as the previously mentioned wall outlet. Transfer molding is commonly used for molding of thermal sets, thus can only be used for a few select polymers [10]. For a shelving unit, a select set of polymers were chosen based off of needs discussed further in the document. Mentioned needs were established from surveys conducted within the target market. The surveys and results, in entirety, can be found in Appendix A3. As such, potential materials which passed screening were polycarbonate, high density polyethylene, and polypropylene. Materials such as polycarbonate and polypropylene are commonly molded using the process of injection molding. According to the Polymer Molding Handbook, “After over a century of world- wide production of all kinds of injection-molded products…the products can be processed successfully, yielding high quality, consistency, and profitability” [9]. Furthermore, note that different subsets of polymers will behave differently when molded by injection. For instance, polycarbonate (PC), if injection molded, would require special ventilation during cooling, since PC is hydroscopic material [9]. Therefore, designers must tradeoff between the only two viable methods remaining for a shelving unit: plastic machining and injection molding. Aspec Plastics states, “Molding theory states that you can purchase an expensive mold
- 5. Page 4 of 38 and produce inexpensive parts, or you can purchase an inexpensive mold and produce expensive parts” [11]. The general rule of thumb is as follows; when producing large amounts of products (100,000+) and low tolerances are acceptable, injection molding is considered the most cost efficient method [12]. Project constraints stated that the shelving unit would be produced in quantities larger than 100,000. Conversely, injection molding is heavy reliant on electricity for producing components. Approximately 90% of electricity consumed is used to operate the powerful machinery [13]. To better disperse the energy consumption into the actual components, multi-cavity molds should be utilized to increase component output per cycle [14, 15 (In particular, reference 15 offers many cost saving training videos correlated to injection molding)]. In conclusion, based off of conducted research and known product constraints, injection molding was the most feasible alternative for shelf production. A more detailed analysis of the project requirements and analysis is stated in the following sections. Purpose and Objectives The purpose of this project was to use the best aspects of a type of material to create a feasible and innovated shelving unit. The shelving unit should adhere to the four pillars of sustainability: technological, environmental, economic, and social. By using mechanical analysis, ecological audits, and found material properties, a designer can sufficiently validate the design decisions made during the process. The home market, described in the design restrictions, included college-aged 20-somethings. Furthermore, the material used for the fabrication of the shelving unit must consist mostly or entirely of plastics from the polymer class of materials. Objectives for the design process include the goals listed below: Satisfy all customer needs while balancing the four pillars of sustainability. Design a shelving unit most suited for the injection molding process (See the Literature Review section for the reasoning behind choosing injection molding). Minimize cycle time/material to minimize cost. Test all materials for coherence with known material property values. Rapid prototype the derived design for the shelving unit. Propose methods to increase incentives for the cradle-to-cradle life cycle. The previous objectives were shown to be satisfied at project completion and/or addressed in the recommendations section.
- 6. Page 5 of 38 Section I: Material Selection Analysis Section I.1 discusses the steps taken to choose feasible materials for the customer’s desires. Section I.2 shows all ecological audit findings and discusses the societal, economical, and technical sustainability factors for each material. Section I.1 Acquirement of customer needs began by formulating generalized survey questions pertaining to qualitative aspects of the storage unit. The survey questions used can be found in Appendix A3 along with pie charts depicting the numerical results. The results obtained from the surveys are shown below. 1. The storage unit should be stackable. Stackable was defined as the storage unit resting on a support structure. However, the unit should not be free standing, so the next best alternative was a wall mounted unit. 2. The storage unit must hold a minimum of 20 pounds. 3. The storage unit should cost between 0 to 100 USD. 4. The storage unit will most likely be used in a private room/study. Following the establishment of basic product requirements, CES was utilized to help screen out unqualified polymers [6]. The chart shown below represents the materials qualified after a selection line and limitations were established (See Table 1 below). Figure 1. Graph of Compressive Strength vs. Price for the CES class of polymers. The selection line maintained a slope of 1. Figure 1 shows only four polymers suitable for product development based off selection criteria and the selection line established. For all selection criteria, refer to the Selection Criteria section. Note the four materials: polyethylene, polycarbonate, polypropylene, and polystyrene. In order to further screen feasible material choices, research was conducted through CES to gather an understanding of all noted materials. Specifically, polystyrene was found to be unsuitable for storage needs due to the brittleness of the material (prone to chipping). Polystyrene is mostly used in small, rigid structures; such as pens, thus was not a feasible material choice for a shelf [6].
- 7. Page 6 of 38 The selection criteria for the three polymer choices can be seen in Table 1 below separated by general properties, processability, durability, and eco-properties. Shown below are the screening parameters utilized to choose the materials mentioned above. Table 1. All polymer selection criteria used for material selection. For general properties, price constraints for all polymers were limited to less than 5 U.S. dollars per kilogram. The limit ensures cost effective material choices can be purchased within the provided stipend of 100$. Processability was limited by two processes: moldability and machinability. The values were ranked on a numeric scale from one to five; a value of one indicated the material was not recommended for the given process whereas a value of five corresponded to a highly recommended process. Moldability was selected at maximum process values, because the prototype storage unit will be designed for mass production. Castability and weldability were neglected in the limit stage created for the selection criteria, because neither process was being considered for the product production. Machinability was ranged between values of 4 and 5, which related to the assembly process and means of fabricating such as lathing and milling. Slight machining such as drill holes could pertain to the product design, therefore, the limit was included. Durability was governed by three limits: Thermal tolerance, resistance to aqueous solutions, and resistance to acids. The thermal tolerance described was constrained to a minimum temperature of 0°C and a maximum temperature of 150°C. The polymers selected were deemed excellent in terms of withstanding aqueous solutions of water, water with salt, and wine. All solution criteria chosen were typical to household use, thus common household items have the potential to interact with the material. Also, the polymers selected were labeled excellent when in contact with acetic acid (10%), citric acid (10%), and phosphoric acid (10%). The listed acids were included in the limit parameters, because the acids were common in cleaning chemicals. Therefore, the product must be compliant and resilient to the acids listed. The final limit described was the labeled recyclable under eco-properties. Recyclability was an important factor relative to sustainability. A recyclable product helps to complete the cradle-to- cradle life cycle, thus, the final constraint limiting the polymer selection was if the material was able to be recycled.
- 8. Page 7 of 38 Applying the above selection criteria with the CES software produced the polymers: polyethylene, polycarbonate, polypropylene, and polystyrene. The four polymers listed met the specified constraints described in the selection limits. As previously discussed, polystyrene was not considered due to the known usage and properties of the material. Therefore, the selected materials for the storage unit were: polyethylene, polycarbonate, and polypropylene. Furthermore, after the materials were chosen, all known CES parameterized were tabulated and the results are shown in Appendix A2. Section I.2 The eco-audit was performed using the three chosen materials: polyethylene, polycarbonate, and polypropylene. When performing the eco-audit, CES asked for several criteria to ground the calculations. The criteria included the quantity of products, material used, mass of the product, end life, transport of the product, and the product use. The following section includes the values inserted for each criterion, explanations as to why each value was chosen, and presentation and explanation of the eco-audit. -Criteria The criteria set for the audit constraints were the material, manufacturing process, and end life for the product. The constraints included how many units of the product will be made, the material used, the manufacturing process, mass of each unit, and the end life goals for the product. Four concepts were developed using SolidWorks. Each concept included a shelf base and three supports. The supports can be made out the same material as the shelf base or out of a different material, such as a metal. For the eco-audit, the polymer concept designs 1 and 2 weighed approximately 16lb and were used as a baseline for comparison. A quantity of 500,000 units were chosen to be manufactured, as determined from the project guidelines. The three materials audited were the three materials chosen as mentioned above: polypropylene, polycarbonate, and polyethylene. The primary manufacturing process chosen was polymer extrusion, because the process is used mainly to make polymer sheets and most large polymer objects [6]. Polymer extrusion was most similar to injection molding, thus was a viable alternative for the analysis. Injection molding requires the purchase of plastic pellets, which are heated and forced into a mold. A more in-depth discussion of injection molding can be found in the Literature Review. The end of life chosen was for the product to be downcycled. Recycle fractions for polymers are very low compared to other materials, with PET being the highest at about 18%. Thus, recycling polymers is expensive and can cost more than what the material is actually worth. Appropriately, the method of downcycling the products was chosen, which is the most similar to recycling. The polymer will be used for other products such as car upholsteries, park benches, etc.
- 9. Page 8 of 38 The criterion of transport was completed using all values given within the project instructions. The transport type was given to be a 32 tonne truck and the distance traveled was 1,000 miles. The use of the product was filled out using a combination of given values and assumed values. First, the country electricity mix was chosen to be North American. The product life was agreed to be 4 years, because the average college student attends school for 4 years. The criteria of mobile mode and static mode were disregarded as specified in the directions. An example of the criteria that was inserted into CES is shown in Figure 2. In this example, polycarbonate was used as the material; the other two screens were the exact same, except polyethylene and polypropylene were used as the material. Figure 2. Polycarbonate criteria. -Results The results of each of the materials are summarized in Tables 2-4 where the energy in kcal, energy %, CO2 in lb, and CO2 % were displayed for each process. As discussed previously, the processes included material, manufacturing, transport, use, and disposal. Table 2. Polypropylene results.
- 10. Page 9 of 38 Table 3. Polycarbonate results. Table 4. Polyethylene results. The above results showed that the best selection for energy is polypropylene, because PP used the least total energy to manufacture, transport, and dispose. All of the EoL potentials for the materials were negative, meaning that there was energy available within the product at the end of products life. The more negative the value, the better the material was to downcycling. So, with respect to downcycling, polycarbonate is the best option. The carbon footprint in pounds of each material was also derived and the best option was polyethylene, because PE created the least amount of carbon when manufactured, transported, and used. With respect to EoL potential, the best material to choose would be polycarbonate, because PC does not create any carbon when it is downcycled. A better visual of the results for energy and carbon footprint are shown in Figures 3 and 4. Figure 3. Energy summary chart for all three materials.
- 11. Page 10 of 38 Figure 4. CO2 footprint summary chart for all three materials. To better compare the three materials with respect to total values and EoL potential, the results shown above were inserted into Excel and a new graph was created. The new graph was created by taking the total (for first life) values for each material and adding the first life totals to the EoL potential for each material. If the EoL potentials were negative, the values would decrease the total energy used or carbon created by the materials. The values and graph created are shown below in Figure 5. Figure 5. Table and chart created using overall energy and carbon footprint.
- 12. Page 11 of 38 From the chart in Figure 6, the best choice of material, with regards to an eco-audit, was polyethylene. This material used slightly more overall energy than polypropylene, but created significantly less carbon throughout the life of the material. Polycarbonate created very little carbon throughout the process, however the overall energy needed is significantly higher than the other two materials. In conclusion, the eco-audit showed that the best material to choose was polyethylene. Compared to polypropylene, PE used slightly more energy during the entire process, but created significantly less carbon compared to polypropylene. PC did not create significantly more carbon relative to polyethylene. Overall, considering the ranking for the eco-audit, the top choice was polyethylene. The true best choice should depend on consumer needs and minimize environmental impact. One may want a product that created the minimum amount of carbon during its lifetime and remain tough; the next best choice would be polycarbonate. If the user wanted a product that used the least amount of energy during the product life, then polypropylene would be the next best choice according to the audit. -Further Impacts Not only will the material selection have an effect on the environment, but the chosen material will affect the other three pillars of sustainability. With regards to the technical aspect, if the material selection were based just on the eco-audit, the chosen material may not be that the strongest material out of the considered materials. For instance, polyethylene was the most environmentally friendly, but with regards to strength; PE could support the least amount of weight. When the mechanical analysis was performed for each material, the analysis showed that polyethylene was the weakest. Therefore, there must be trade-offs when selecting the material to use. Depending on the desired trait, the product may be strong, but not environmentally friendly or vice versa. If polyethylene was chosen, the actual product would not last as long as intended. The targeted life time of the shelving unit was to be 4 years, because that was the average time a person stays at college. If polypropylene was chosen as the fabrication material, the product may not last 4 years. See the durability properties of all materials in Appendix A2. The user would, thus, either buy a new shelf or get frustrated with the lack of strength and not purchase another unit. With regards to social sustainability, customer dissatisfaction was not acceptable. A dissatisfied customer was considered a loss in potential profits. Conclusively, some of the four pillars may be positively affected by a certain design, while others may be negatively affected. Polycarbonate was chosen, because PC optimizes the strength vs. sustainability objectives proposed.
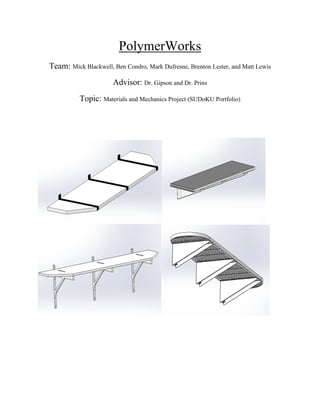
- 13. Page 12 of 38 Section II: Description of Shelving Units The four designs for each shelving unit were based off of known construction parameters. For instance, the studs in common households are placed between 16” and 24” apart center to center according to building code 5602.10.3 [1]. Given the shelf must be 45” wide, each support must also be placed 16” apart center to center, as the most common stud spacing was found to be 16” [16]. Appropriately, the following designs were produced with respect to the survey results obtained; the shelf should be wall mounted in a private study/room (Appendix A3). Shown below are the isometric 3D analytical shelving prototypes. Prototype 1 (also referred to as design 1 or concept 1) is shown below. Design 1 was based off of common household shelving systems. Figure 7. The full-polymer shelving unit. Notice the shelf was supported by 3 truss-like cantilever beams. A more involved representation of the model can be found in Appendix A1. Note design one failed to meet the thickness requirements for injection molding (less than 0.150”) [4 and 5]. Prototype 2 shown below incorporated metal supports in order to support the shelf. Prototype two could not be fabricated by injection molding, however, plastic machining was a viable alternative for this concept. Figure 8. The polymer-metal shelving unit. Note the shelf was supported by thin metal braces. Again, see A1 for a more detailed view. Note concept two was relatively simpler to machine, but required a material outside the polymer class.
- 14. Page 13 of 38 Prototype 3 shown below performed the highest when compared to all other shelving prototypes. However, concept 3 required a molding process that was unattainable. Figure 9. The full polymer shelving unit with a bored shelf and triangular supports. Note concept 3 could not be machined with any known fabrication methods except for plastic machining due to the internal bores. Prototype 4, the chosen alternative, appropriately follows all injection molding guidelines established in the upcoming shelving analysis sections. Figure 10. The full polymer shelving unit utilizing a ribbed shelving structure and the same supports as Figure 9. Note concept 4 was able to be injection molded accorded to the established injection molding guidelines found in literature. Therefore, concept 4 was optimized for manufacturing purposes. Furthermore, based off of the known max force values shown in Section II and design specifications shown in Appendix A1, the prototypes should be used to support objects less than 12” in length from the wall and objects with a total weight less than the specified values in Section 2. Note each prototype requires external components for mounting purposes. As such, screws for mounting the supports to wall studs will need to be included and parameterized appropriately. The most applicable fabrication process for the shelving unit was derived through research and using the CES software. For practical purposes, two potential fabrication methods for a
- 15. Page 14 of 38 polycarbonate (PC) shelving system will be determined. PC was chosen based off of mechanical analysis results conducted, those of which can be found in the mechanical analysis section. The constraints derived from supplied analytical models and known material properties are shown below. For reference, the figure of the shelving system being discussed will also be shown below. Notice the shelf and supports are separate components. Figure 10. The discussed PC shelvng system. Material – PC, Thermoplastic (Use Tree-Limit, Polycarbonate) Shape – 3D solid Weight – 0.42kg (Support) and 4.89kg(Shelf) Maximum Thickness – 0.15inch [2] Precision – "(0.4mm) (Based on available shelving limitations) Surface Finish– 0.5-2μm (Assuming quality relative to ordinary machined parts) Batch Size – 500,000 (Base off of known project guidelines) Primary Shaping Method Using CES Level 3 with the above limiting factors, the following primary shaping processes could be used [6]. Primary Shaping Short list: 1. Compression Molding. 2. Injection Molding (Thermoplastics). 3. Thermoplastic Composite Molding (Ignored, since the material used will not be a composite). Thus, for primary shaping, compression molding and injection molding are viable alternatives. Benefits and disbenefits of the end product for each method are discussed below. Compression Molding (CM): Advantages – Cheaper relative to IM. Disadvantages – High tooling costs, limited to simpler shapes, thermoplastics require heating and cooling cycles which reduce production rate.
- 16. Page 15 of 38 Injection Molding (IM): Advantages – High production rate, high quality, inserts and screw-threads are possible, small angles are possible. Disadvantages – Capital and tooling costs are very high, thick sections are not recommended, malfunctions during processing can be extremely dangerous. For consolidation purposes, CM should not be used for the production of the shelving unit. The CM production rate for thermoplastics was much slower relative to IM [6]. However, IM would require higher startup costs for machinery. Thus, larger batch sizes will be needed to cover the accumulation of costs. IM, appropriately, could cover large batch sizes due to IM having a high production rate and high quality. The IM complexity limits were of use due to the current design requiring screw holes. Even though thick sections are not recommended for IM, CES confirmed that a component with a thickness of 0.15” could be fabricated using IM. Note 0.15” was the maximum thickness in at any given section of the design. In conclusion, the largest impact to the end product of shelving unit would be the accompanying costs of using IM. The price of the shelving unit will need to be fixed to off-set the operating costs of using IM. Therefore, pricing of the shelving unit may be closer to the client based max price of 100 USD. Section III: Mechanical Analysis A summary of derived mechanical analysis results is shown below separated into two sections. For free body diagrams and the derivation of forces acting on each component, please see the figures below. Supporting documentation for support analysis can be found in the support analysis section. The full free body diagrams for all shelving systems can be found in Appendix A4. Intermediate values used in calculation can be found in Appendix A5. SHELVING ANALYSIS.1 (Designs 1 and 2 shown in Figures 7 and 8, respectively) The loading scenarios described in the attached free-body diagrams included the weight of the shelving unit, shown as a uniformly distributed load, as well as the maximum allowable point load(s) spanning the shelving unit supports. The free-body diagrams shown were split into two different orientations. The first orientation entailed modeling the ends of the shelving unit as supported cantilever panels; the area spanned between the supports was modeled as simply supported panels. Considering that the unit was symmetric, only one analysis was needed for each scenario. In order to determine the loading scenarios present at the shelving supports, the maximum allowable loading force at the supports needed to be calculated. The shelving unit was required to support various loading scenarios and therefore cannot yield under stated conditions. The
- 17. Page 16 of 38 maximum allowable loading conditions, with respect to yielding, were dependent on the maximum allowable deflection of the unit. Following standard practice, the maximum deflection was described to be less than 1/360 the total length of the section being examined. The max deflection value for the cantilever scenario was calculated as 0.0167 in. and the max deflection value for the simply supported beam scenario was calculated as 0.0417 in. Following the standard values, deflection calculations were used to solve for maximum allowable point loading conditions. The loading scenarios and their corresponding deflection scenarios were described below: The maximum deflection for the cantilever panel was described by a uniformly distributed load and an end point load (as shown in the free body diagrams attached). Utilizing the free-body diagram, deflection equations were incorporated to model the deflection scenario present in the modeled cantilever panel. The conditions described produce the deflection scenario of: , (Eq. 1) Where delta represented the total deflection at the end of the panel by the summation of an applied point load (at maximum deflection scenario located at the end of the panel) and a uniformly distributed load. P was the unknown point load, l was the length of the panel, w represented the weight of the panel, E was Young’s Modulus, and I was the second moment of inertia for the panel. Figure 11. Free-body Diagram of End Conditions for the Shelving Unit. Following the free-body diagram above, the deflection scenario to calculate the maximum force load to yield the panel was described by manipulating Equation 1, to solve for the unknown force load P: (Eq. 2) P
- 18. Page 17 of 38 Inputting the appropriate variables into Equation 2 resulted in the maximum force load the cantilever panel could withstand without yielding. The maximum deflection for shelving sections spanning between the supports were modeled as simply supported beams and can be described by a uniformly distributed load covering the entire section and a point load located in at the center of the panel as shown below. Utilizing the free- body diagram, deflection equations were incorporated to model the deflection scenario present in the modeled panel. The conditions described produce the deflection scenario of: , (Eq. 3) Where delta represented the total deflection across the panel by the summation of an applied point load (at the maximum deflection of a simply supported beam located at the center of the panel) and a uniformly distributed load. P was the unknown point load, l was the length of the panel, w represented the weight of the panel, E was Young’s Modulus, and I was the second moment of inertia for the panel. Figure 12. Free-body Diagram of Mid-panel Conditions for the Shelving Unit. Following the free-body diagram above, the deflection scenario to calculate the maximum force load to yield the panel was described by manipulating Equation 3, to solve for the unknown force load P: (Eq.4) Inputting the appropriate variables into Equation 4 resulted in the maximum force load the simply supported panel could withstand without yielding. Table 5 below shows the resulting values corresponding to the selected materials by solving Equations 2 & 3 for the maximum point loads with the respected scenarios mentioned above: P
- 19. Page 18 of 38 Table 5. Maximum Force Loads for Modeled Scenarios Note the full Excel sheet calculations can be found located in the Appendix A5. From Table 5 above, the resulting force values for variable P can be seen; that is, the forces shown were the maximum allowable loads that the shelf can be subjected to before yielding. These calculations were, as described earlier, based off of maximum conditions located at the shelving units’ most vulnerable points. Therefore, the shelf can withstand the described forces at the locations. However, to determine the total amount of force the shelf can withstand, a mechanics analysis was performed to determine the allowable forces provided by the shelving supports, shown below. Also note, the calculations described absolute max loading conditions without yielding; the values were calculated based off of modeling the ends of the shelving unit as panels—not the designed irregular shape. Therefore, the loading conditions should be considered to be less than that of allowable loading conditions. Also, because deflection was described with respect to Young’s modulus, the selected material should resemble the largest value for Young’s modulus, thus providing the largest magnitude of loading support. SUPPORT ANALYSIS.1 (Designs 1 and 2 shown in Figures 7 and 8, respectively) The supporting structures of the shelf forces must be parameterized appropriately in order to not fail. Shown below are the methods taken to determine the max allowed force for both types of supporting structures. -Metal Braces Following the same procedure to determine the maximum load applied for the modeled cantilever panel, the support forces can be found utilizing a similar method. Notice, that for concept two, the metal supports were designed as thin connected metal panels. Thus, the supports were modeled as two parallel plates and a cantilever beam under deflection. By solving for the maximum load at which the panel yields, the maximum load the supports can hold was calculated. The maximum deflection for the cantilever support beam was described by a uniformly distributed load and a point load, as shown in the free body diagrams below. Utilizing the free- body diagram, deflection equations were incorporated to model the deflection scenario present in the modeled cantilever support. The conditions described produce the relation shown below. , 3 (Eq. 5) Material Young's Modulus, E (psi) Moment of Inertia (I), Iyy (in^4) Max force, lbf (Cantilever) Max force, lbf (Panel) Polypropylene 177500 0.125 4.204 9.265 Polyethylene 110050 0.125 2.252 4.269 Polycarbonate 322000 0.125 8.385 19.969
- 20. Page 19 of 38 Where delta represented the total deflection across the support by the summation of an applied point load and a uniformly distributed load, P was the unknown point load, l was the length of the panel, a & x were the distance to the point load, w represented the weight of the panel, E was Young’s Modulus, and I was the second moment of inertia. Figure 13. Free-body Diagram of Metal Support. Following the free-body diagram directly above, the deflection scenario to calculate the maximum force load to yield the supports were described by manipulating Equation 5 to solve for the unknown force load P. (Eq. 6) Inputting the appropriate variables into Equation 6 resulted in the maximum force load the supports could withstand without yielding. Table 6 below shows the resulting values for the maximum point load allowable for the metal supports: Table 6. Maximum Force Loads for Metal Supports. Note the full Excel sheet calculations can be located in Appendix A6. As seen in Table 6, the maximum force the supports can maintain is roughly 300 lbf. Thus, the calculated loading scenario for the supports are greater than those loads provided at the middle and end sections of the shelving unit. Therefore, the metal supports can support the shelf with applied loads described in Tables 5 & 6 at their respected locations. Material Young's Modulus, E (psi) Moment of Inertia (I), Iyy (in^4) Max force, lbf (Cantilever) Cast Stainless Steel 27557170.16 0.0247 300.209 P
- 21. Page 20 of 38 -Polymer Truss-like Supports In order to calculate the maximum force that the polymer truss-like supports could support, the frame must first be analyzed. When analyzing the frame, the assumption was made that the joints of the support were rigid and, as such, the support would fail when one of the three highlighted areas, seen below, would fail. The support can be seen below in Figure 14. Figure 14. The free body diagram for the truss-like support. The three main areas of concern for the shelf to fail are the areas in red. It is assumed that these three boxes can be looked at as a cantilever beam, a simply supported beam, and as a vertical column respectively. The cantilever beam (box one in Figure 14) is displayed below in Figure 15 where P represented the load from the shelf and Po represented the density of the material the support is made from times the cross sectional area of the beam. Figure 15. The free body diagram of a cantilever beam in the truss-like support. The max allowable deflection of a beam, , was found using Equation 7. (Eq.7) Po P
- 22. Page 21 of 38 Where L was the length of the beam. Using this maximum allowable deflection, the maximum point load that the beam could handle, P, was found using Equation 8. ∗ 3 / (Eq.8) Where E was the modulus of elasticity for each material, I was the moment of inertia for the beam, and Po was the distributed load as described previously. The results of Equation 8 for each material, which described the maximum allowable point load as shown in Figure 15, can be seen below in Table 7. Table 7. Cantilever analysis on truss-like support. As seen from Table 7 polypropylene, polyethylene, and polycarbonate can support approximately 1.5 lbf, 1 lbf, and 3 lbf respectively. The simply supported beam (box two in Figure 14) is displayed below in Figure 16 where P represented the load from the shelf and Po represented the density of the material the support is made from times the cross sectional area of the beam. Figure 16. The free body diagram of the simply supported beam in the truss-like support The max allowable deflection of a beam, , was found using Equation 9. (Eq.9) Where L was the length of the beam. Po P
- 23. Page 22 of 38 Using this maximum allowable deflection, the maximum point load that the beam could handle, P, was found using Equation 10. ∗ 48 / (Eq.10) Where E was the modulus of elasticity for each material, I was the moment of inertia for the beam, and Po was the distributed load as described previously. The results of Equation 10 for each material, which described the maximum allowable point load as shown in Figure 15, can be seen below in Table 8. Table 8. Simply supported beam analysis on truss-like support. As seen from Table 8 polypropylene, polyethylene, and polycarbonate can support approximately 1650 lbf, 1000 lbf, and 3000 lbf respectively. The diagonal support (box three in Figure 14) was modeled as a vertical column and the critical load was modeled with Euler’s formula, as derived below. In order to determine the correct formula, the slenderness ratio must be compared to the column constant. The radius of gyration, r, was found using Equation 11. / (Eq.11) Where I was the moment of inertia and A was the cross-sectional area of the column. The slenderness ratio, S.R., was found using Equation 12. . . (Eq.12) Where K was the end condition constant for the column and L was the length of the column. The column constant, Cc, was found using Equation 13. (Eq.13) Where E was Young’s modulus of the material and σy was the yield strength of the material. Since for all three materials the slenderness ratio was larger than the column constant; the column was considered relatively long and was analyzed using the Euler formula seen below in Equation 14.
- 24. Page 23 of 38 (Eq.14) Where Pcr was the critical load on the column before it could fail. The maximum supported force of the shelf, Fs, by all three supports was written in terms of the critical load of an individual column according to the angle, θ, made between the connection of the support and horizontal beam as seen in Equation 15. 3 (Eq.15) The results of the above equations can be found below in Table 9. Table 9. Maximum Force Loads for Polymer Supports. As seen in Table 9, the polypropylene, polyethylene, and polycarbonate supports could support a maximum force of approximately 1375 lbf, 850 lbf, and 2500 lbf respectively. Through this analysis the truss-like support structure was limited due to the front cantilever section. This part of the support limited the design of the shelf so that it became the limiting factor of the entire shelving unit. SHELVING ANALYSIS.2 (Designs 3 and 4 shown in Figures 9 and 10, respectively) The previously proposed designs were unable to be fabricated with standard injection molding procedures. For instance the standard recommended thickness range for polycarbonate was 0.04” to 0.15” [2]. Injection molding has high start-up costs due to the initial cast-molds needed to begin processing. However, over time, the startup cost for injection molding has potential to be offset by the savings relative standard machining (milling and lathing being the only other feasible method to produce the shelving units) [3]. Thus, injection molding was determined to be the most cost efficient option to produce mass amounts of product. In general, injection molding has a lower tolerance and a rougher finish when compared to standard machining. Since Designs 3 and 4 both have no need for precision greater than 0.005”, injection molding was still a viable alternative. Injection molding requires a large amount of guidelines to be met in order to confirm successful product fabrication. Design criteria discussed below can be found by referring to the reference section [4 and 5]. In summary, drafts, fillets, radii, gussets, ribs, intersecting thicknesses, and overall product dimensions must be considered when designing a product for injection molding.
- 25. Page 24 of 38 The following diagrams show the cross sectional area for designs 3 and 4. Equations 1-6 were still valid for the panel force analysis, however, the moment of inertia differs from the previous designs. Figure 17. The bored shelving unit design. Figure 18. The ribbed shelving unit design. Note the height of the cross section in Figure 18 (concept 4) was optimized to minimize material while still meeting the needed 20lbf minimum support. The minimum moment of inertia for the ribbing structure must be 0.066 in order to support 20lbf according to the Excel equation solver. Thus, due to the design guidelines discussed below, only the height of the shelf could be optimized. The minimum height value to achieve the 20lbf was found to be approximately 0.625" by constructing iterations of the SolidWorks model. Concept 4 utilized a height 0.65" to ensure the minimum standard was achieved. The previous cross sections were used to determine the moment of inertia for each respective design. The following parameters were determined based off of known design guidelines for injection molding and were described sufficiently [4 and 5]. Design Guidelines Inner radii: 0.5*t, where t was the general thickness of the design and t equaled 0.15” for both designs. Outer radii: 1.5*t Rib Spacing (RS): RS>2*t, 0.5” or 0.68” depending on design characteristics. Rib Width (RW): 40-60% of t, bored shelving unit RW = 0.1”, ribbed shelving unit RW = 0.075”. Rib Height (RH): RH 3*t. RH = 0.45”.
- 26. Page 25 of 38 Gussets in Supports: Spacing = 0.5”, Length = 0.5”, width = 0.45”, gusset thickness = 0.075”, fillet radius = t*0.25, and spacing = 0.15”*2 (See Appendix A8 for an argument for gusset implementation). Draft: Between 1° and 2° for all components. For design 3, the following max force allowed is shown below with accompanying intermediate results. Note by this time in the design process, polycarbonate was chosen as the appropriate material, thus only the average polycarbonate Young’s modulus E was used [6]. Table 10. The intermediate values and max force for design 3. Panel Deflection Max, in Length, in Ixx, in^4 Eavg, psi Pmax, lbf 0.04 13.70 0.33 322000.00 75.83 Ends Deflection Max, in Length, in Pmax, lbf 0.01 5.35 31.08 For design 4, the following max force allowed is shown below with accompanying intermediate results. Table 11. The intermediate values and max force for design 4. Panel Deflection Max, in Length, in Ixx, in^4 Eavg, psi Pmax, lbf 0.03 11.88 0.06 322000.00 24.1 Ends Deflection Max, in Length, in Pmax, lbf 0.01 5 8.48 Thus, design 3 seemingly was the most appropriate choice based off of derived force values. However, design 3 had a major flaw in relation to draft required for injection mold extraction. Design 3 would require the draft to be placed along the large faces of the shelf, thus causing the main faces of the shelf to be non-uniform. The main faces for a shelf are necessarily flat, thus design 3 was disregarded. Design 4 is capable of being extracted perpendicular to the main face, thus the drafts were appropriately placed on the sides and the ribbing. For an example, see Figure 19 below. Figure 19. Displays the draft on the outside edge and inner ribbing.
- 27. Page 26 of 38 Following the shelf analysis, the support analysis was conducted for feasibility. Note the maximum load experienced by design 4 at any given time should not exceed 50lbf Thus, the supports should support at least 17 each (since there were 3 supports in this design). SUPPORT ANALYSIS.2 (Designs 3 and 4 shown in Figures 9 and 10, respectively) Again, the supporting structures shown in Figures 9 and 10 were designed with injection molding in mind. Each support has an inward draft with respect to extraction. The supports were modeled as a cantilever beam with a linearly varying depth with respect to cross sectional area. Common practice dictates the moment of inertia be taken at the distance to the centroid of the cantilever shape for a minimum bound of derived values [7]. For reference, a free body diagram of the support is shown below. For the lowest possible sustainable force, only one triangular cantilever section was modeled. Figure 20. The free body diagram for the support structure. The assumed moment of inertia (shape shown with the dashed line in Figure 18), thus, was that of a rectangular support of thickness 0.15”, length 11.15”, and depth of 1.33”. Table 12. The minimum sustainable force by one support. Max Deflection, in thickness, in depth, in I, in^4 length, in Pmin, lbf 0.031 0.15 1.33 0.023 11.15 20.64 Note, the design will succeed based on the estimations above, since each support could support, at a minimum, 20lbf (exceeding the 19lbf estimated above Table 5). Therefore, design 4, shown in Figure 10, will be the design pursued for final product fabrication.
- 28. Page 27 of 38 Mounting Analysis (Screw Selection) In order to properly mount the shelving unit to specified wall studs, the selection of screws was necessary. The screws were selected based on known standards discussed below and qualitative reasoning. The shelf will support, at maximum, a total of 60lbf. Each screw was specced to support the 60 lbf maximum load. Thus, the shear force in the screw member is also 60lbf. Using the Fastenal Handbook and NDS building codes, the following relations were derived. The actual shear stress in a screw member was as follows. 4 ∗ (Eq. 12) Where was the actual shear stress in a screw member of circular cross sectional area, was the circular cross section area for each screw [17]. The Fastenal Handbook stated the acceptable limit for screw shear stress could be approximated as follows. ∗ 0.6 (Eq. 13) Where was the acceptable shear stress and was the ultimate strength of low-carbon steel (material of commonly used screws, 50ksi) [18, 6]. Thus, = 30ksi. Now, the following relations was derived in order for a screw to be considered as a feasible alternative. (Eq. 14) The screws to be considered for selection were tabulated using the information available from Bolt Depot [19]. The results obtained were as follows. Table 13. The screw diameters (D), calculated shear stress, safety factor in relation to the acceptable shear stress, and the known diameters of available washers. Note Fender washers were chosen due to out diameter being larger relative to normal washers [19]. Screw Size D, in , ksi Safety Factor , in #2(Cannot use Fender washer) 0.086 13.77 2.18 Void #4(Cannot use Fender washer) 0.112 8.12 3.69 Void #5(Cannot use Fender washer) 0.125 6.52 4.60 Void #6 0.138 5.35 5.61 0.625 #8 0.164 3.79 7.92 0.75 #10 0.19 2.82 10.63 1 #12(Cannot use Fender washer) 0.216 2.18 13.74 Void
- 29. Page 28 of 38 Note the largest possible washer, in relation to screws sizes shown in Table 11 that was able to fit between the gussets of concept 4, was 1in in diameter. In order to maximize the amount of surface contact from the screw member, the largest diameter washer possible was chosen, which allowed screw alternatives to be screened. The maximum amount of surface contact at the washer to support interface was necessary in order to minimize the stress around the screw holes. However, the previous statement was made on a qualitative basis and optimization of the washer surface area should be conducted in further studies. Section IV: Synthesis of Analysis into Design In order to choose the best alternative for the shelving material, a reflection on obtained mechanical analysis results, ecological audit results, and known tabulated material properties was necessary. The following sections describe the screening of polycarbonate, polyethylene, and polypropylene in order to choose one material for further product development. Mechanical Analysis Polycarbonate, from the mechanical analyses, supported the largest applied loads, primarily due to Polycarbonate’s’ inherently large Young’s Modulus value. When calculating the applied force loads, the limiting factor for such calculations were dependent on Young’s modulus values. In turn, Polycarbonate had the largest of the three materials chosen. Therefore, it follows Polycarbonate was the material which could support the greatest loads. Polypropylene fell within the middle margin of the materials on the basis of the mechanical analyses. The values calculated for Polypropylene rested between Polycarbonate and polyethylene respectively. Therefore, Polypropylene remained relatively neutral with respect to the other material choices. Choosing polyethylene resulted in supporting the lowest applied load values, which was correlated to polyethylene having a lower Young’s Modulus value. Thus, polyethylene suffered in terms of supporting applied loads when compared to other materials chosen for the shelving unit. Ecological Audit Polycarbonate created the least amount of carbon throughout its lifetime and did not require significantly more energy than the other two materials. Polycarbonate used a large amount of energy to produce and use, but created small amounts of overall carbon during the product life cycle. Polypropylene was the opposite; PP does not require as much energy as polycarbonate, but created large amounts of carbon throughout its entire lifecycle. Throughout the lifecycle process, polypropylene required the least amount of energy, but produced the most amount of carbon. The overall calculations of carbon and energy required showed that polypropylene was not a viable choice regarding environmental sustainability.
- 30. Page 29 of 38 In regards to environmental sustainability, polyethylene was the top material to choose. PE required slightly more energy during the product lifetime, but created very little carbon during the overall lifecycle. The previous mentioned factors led PE to be the top choice in regards to the ecological audit. Material Properties (Refer to Appendix A2) PC had the highest maximum Young’s Modulus (E= 2.44 Gpa). Thus, PC could support the highest load with respect to the derivations produced in Section II. However, PC also cost the most per unit kg. Remember, in order to stay within the clients budget, the shelving system should cost less than 100 USD. Appropriately, the shelving unit was less than 20kg, causing the cost to be less than 100 USD. All PC shelving units were found to support over 40 Lbf (See Table 5), satisfying the customer need requirement of 20 . The max E for polypropylene was 1.55 Gpa. Thus, if the shelving unit was made from polypropylene, the shelving unit could not hold an appropriate amount of weight with respect client satisfaction (could only support 18.4 lbf, referring to Table 5). PE was not a feasible alternative due to the amount of weight supported when compared to PC and PP. PE had the lowest max E (0.896 Gpa). Thus, PE was found to only be able to support a max of approximately 10Lbf. Again, see Table 5 for all found shelving forces. Note each material above maintained similar material properties throughout screening (Refer to Section 3). Thus, when considering fabrication benefits between materials, all materials were machined similarly. SolidWorks fabrication analysis was used to test the fabrication capabilities of each component. According to SolidWorks, the polymer components were able to be milled and lathed and the steel component was made using sheet metal processing. The polymer and steel components were parameterized based off of known sheet thicknesses sold by manufactures. Injection molding was viable alternative relative to the design practices used in concept 4 (Figure 10). Injection molding was most viable when cycling time was minimized and product changes are unnecessary. As such, a design which can be molded in one molding instance would be the most cost and energy efficient option.
- 31. Page 30 of 38 Conclusions and Recommendations In conclusion, based on the above summaries for the three materials and when considering all aspects mentioned throughout the above documentation, polycarbonate will be the material chosen for further product development. PC was the only feasible alternative when considering acquired customer needs. Future work involves analyzing injection molded material samples in order to further verify material properties. Recommendations include optimizing the thicknesses parameterized for the injection molding process to use the least amount of material and still support the anticipated load. A design which can be easily molded in one molding instance should be considered, as the savings and negative impacts would be maximized and minimized, respectively. Incentives to increase recycling awareness should be displayed on packaging and made easily accessible. For instance, if the product was returned to the company after the useful life duration, a discount on the next model would be made available. Lastly, a scale model of concept four should be created to demonstrate feasibility. References (Number System: In-Text Citations) [1] N.p. Web. 30 Mar 2014. <http://www.mass.gov/eopss/docs/dps/780-cmr/780056b.pdf>. [2] "Basics of Injection Molding Design." Quickparts. 3DSystems, n.d. Web. 30 Mar 2014. <http://www.quickparts.com/LearningCenter/BasicsofInjectionMoldingDesign.aspx#wall thickness>. [3] Gerard, Katie. "Plastic Injection Molding vs. Plastic Machining: How to Decide." Craftech Industries INC. N.P., 06 Sep 2013. Web. 30 Mar 2014. <http://info.craftechind.com/blog/bid/333498/Plastic-Injection-Molding-vs-Plastic- Machining-How-to-Decide>. [4] "Injection Molding Design Guidelines." GE Plastics. General Electric Co. Web. 30 Mar 2014. <http://www.polymerhouse.com/datasheets/GE_Thermo Plastic DesignGuide_[1].pdf>. [5] "Injection Molding Design Guidelines."Solid Concepts Inc. Web. 30 Mar 2014. [6] "Granta's CES EduPack." Granta Material Intelligence. Granta Design Limited 2013. [7] Paglietti, A, and G Carta. "Remarks on the Current Theory of Shear Strength of Variable Depth Beams."Bentham Science. Department of Structural Engineering, University of Cagliari, Italy, 02 Jan 2009. Web. 30 Mar 2014. <http://www.benthamscience.com/open/tociej/articles/V003/28TOCIEJ.pdf>. [8] "History of Polymers and Plastics for Teachers." American Chemistry. American Chemistry Council, Inc., n.d. Web. 1 Apr 2014. <http://plastics.americanchemistry.com/Education- Resources/Hands-on-Plastics/Introduction-to-Plastics-Science-Teaching-
- 32. Page 31 of 38 Resources/History-of-Polymers-Plastics-for-Teachers.html>. [9] Rosato, Dominick V., Donald V. Rosato, and Marlene G. Rosato, eds. Injection molding handbook. Springer, 2000. [9] Rosato, Dominick V., Donald V. Rosato, and Marlene G. Rosato, eds. Injection molding handbook. Springer, 2000. [10] Kopeliovich, Dmitri. "Methods of Polymers Fabrication."Subs Tech. N.P., 27 Jul 2013. Web. 1 Apr 2014. <http://www.substech.com/dokuwiki/doku.php?id=methods_of_polymers_fabrication>. [11] "ASPEC Secondary Machining of Plastic Parts." ASPEC. N.p. Web. 1 Apr 2014. <http://www.aspecplastics.com/secondary-machining.html>. [12] Admin, . "EPP Corporation." Plastic Machining: Custom Plastic Components- Molding vs. Machining. EPP Corporation-Plastic Machining Experts, 29 Jun 2011. Web. 1 Apr 2014. <http://eppcorp.com/custom-plastic-components-molding-vs-machining-2/>. [13] "Energy Efficiency in Plastics Processing." Tangram. Tangram Technologies. Web. 1 Apr 2014. <http://www.tangram.co.uk/TI-Energy Worksheets (Plastics) - Tangram.PDF>. [14] "Injection Molding." 3D Systems. N.p. Web. 1 Apr 2014. <http://www.3dsystems.com/solutions/injection-molding>. [15] BPF Training. British Plastics Federation. Web. 1 Apr 2014. <http://www.bpftraining.com/library/energy_efficiency_in_injection_moulding>. [16] Stansley, Kit. "Three Ways to Find a Wall Stud." Bobvila. Bobvila, n.d. Web. 20 Apr. 2014. <http%3A%2F%2Fwww.bobvila.com%2Farticles%2Fhow-to-find-a-wall- stud%2F%23.U1QZTfldXCs>. [17] Wood Council, American. "National Design Specification." NDS for Wood Construction. AWC, 1 Jan. 2005. Web. 28 Apr. 2014. <http://www.awc.org/pdf/NDSCommentary2005.pdf>. [18] "Fastenal Industrial and Construction Supplies." Technical Reference Guide. Fastenal, 1 Jan. 2005. Web. 28 Apr. 2014. <http://www.fastenal.com/content/documents/FastenalTechnicalReferenceGuide.pdf>. [19] "Bolt Depot." Bolt Depot.com. Bolt Depot, 1 Jan. 2014. Web. 28 Apr. 2014. <http://www.boltdepot.com/Fender_washers_Stainless_steel_18-8.aspx>.
- 33. Page 32 of 38 Appendix A1 Please see labeled attachments for the CAD drawings of Figures 7, 8, 9, and 10. Attachment 1: Shows the support structure for Figure 7. Attachment 2: Shows the shelving structure for Figure 7. Attachment 3: Shows the support structure for Figure 8. Attachment 4: Shows the shelving structure for Figure 8. Attachment 5: Shows the shelving structure for Figure 9. Attachment 6: Shows the support structure for Figure 9 and Figure 10. Attachment 7: Shows the shelving structure for Figure 10. A2 All CES values for each material are shown below [6]. Polypropylene Values: General Properties Min Max Avg. Units Density 890 910 900 kg/M^3 Price 1.92 2.21 2.065 USD/kg Mechanical Properties Min Max Avg. Units Young's Modulus 0.896 1.55 1.223 Gpa Shear Modulus 0.316 0.548 0.432 Gpa Bulk Modulus 2.5 2.6 2.55 Gpa Poisson's Ratio 0.405 0.427 0.416 Gpa Yield Strength (elastic) 20.7 37.2 28.95 Mpa Tensile Strength 27.6 41.4 34.5 Gpa Compressive Strength 25.1 55.2 40.15 Gpa Elongation 100 600 350 % Hardness 6.2 11.2 8.7 HV Thermal Properties Min Max Avg. Units Max Service Temperature 100 115 107.5 °C Min Service Temperature ‐123 ‐73.2 ‐98.1 °C Thermal Conductivity 0.113 0.167 0.14 W/m.°C Specific Heat 1.87E+03 1.96E+03 1915 J/kg.°C
- 34. Page 33 of 38 Electrical Properties Min Max Avg. Units Conductor/Insulator Good Insulator Electrical Resistivity 2.1 2.3 2.2 μohm.cm Optical Min Max Avg. Units Transparency Translucent Refractive Index 1.48 1.5 1.49 ‐ Processability Min Max Avg. Units 1 = Low 5 = High Castability (1‐5) 1 2 1.5 ‐ Moldability 4 5 4.5 ‐ Machinability 3 4 3.5 ‐ Weldability 5 ‐ ‐ ‐ Eco Properties Min Max Avg. Units Embodies Energy 75.7 83.7 79.7 MJ/kg CO2 Footprint 2.96 3.27 3.115 kg/kg Recyclable (Yes/No) Yes ‐ ‐ ‐ Polyethylene Values: General Properties Min Max Avg. Units Density 939 960 949.5 kg/M^3 Price 1.176 1.94 1.558 USD/kg Mechanical Properties Min Max Avg. Units Young's Modulus 0.621 0.896 0.7585 Gpa Shear Modulus 0.218 0.314 0.266 Gpa Bulk Modulus 2.15 2.25 2.2 Gpa Poisson's Ratio 0.418 0.434 0.426 Gpa Yield Strength (elastic) 17.9 29 23.45 Mpa Tensile Strength 20.7 44.8 32.75 Gpa Compressive Strength 19.7 31.9 25.8 Gpa Elongation 200 800 500 % Hardness 5.4 8.7 7.05 HV Thermal Properties Min Max Avg. Units Max Service Temperature 90 110 100 °C Min Service Temperature ‐123 ‐73.2 ‐98.1 °C Thermal Conductivity 0.403 0.435 0.419 W/m.°C Specific Heat 1.81E+03 1.88E+03 1845 J/kg.°C
- 35. Page 34 of 38 Electrical Properties Min Max Avg. Units Conductor/Insulator Good Insulator Electrical Resistivity 3.30E+22 3.00E+24 1.52E+24 μohm.cm Optical Min Max Avg. Units Transparency Translucent Refractive Index 1.5 1.52 1.51 ‐ Processability Min Max Avg. Units 1 = Low 5 = High Castability 1 2 1.5 ‐ Moldability 4 5 4.5 ‐ Machinability 3 4 3.5 ‐ Weldability 5 ‐ ‐ ‐ Eco Properties Min Max Avg. Units Embodies Energy 77 85.1 81.05 MJ/kg CO2 Footprint 2.64 2.92 2.78 kg/kg Recyclable (Yes/No) yes ‐ ‐ Polycarbonate Values: General Properties Min Max Avg. Units Density 1.14E+03 1.21E+03 1175 kg/M^3 Price 4.1 4.51 4.305 USD/kg Mechanical Properties Min Max Avg. Units Young's Modulus 2 2.44 2.22 Gpa Shear Modulus 0.789 0.872 0.8305 Gpa Bulk Modulus 3.7 3.9 3.8 Gpa Poisson's Ratio 0.391 0.408 0.3995 Gpa Yield Strength (elastic) 59 70 64.5 Mpa Tensile Strength 60 72.4 66.2 Gpa Compressive Strength 69 86.9 77.95 Gpa Elongation 70 150 110 % Hardness 17.7 21.7 19.7 HV Thermal Properties Min Max Avg. Units Max Service Temperature 101 144 122.5 °C Min Service Temperature ‐123 ‐73.2 ‐98.1 °C Thermal Conductivity 0.189 0.218 0.2035 W/m.°C Specific Heat 1.53E+03 1.63E+03 1580 J/kg.°C
- 36. Page 35 of 38 Electrical Properties Min Max Avg. Units Conductor/Insulator Good Insulator Electrical Resistivity 1.00E+20 1.00E+21 5.5E+20 μohm.cm Optical Min Max Avg. Units Transparency Optical Qualtiy Refractive Index 1.54 1.59 1.565 ‐ Processability Min Max Avg. Units 1 = Low 5 = High Castability 1 2 1.5 ‐ Moldability 4 5 4.5 ‐ Machinability 3 4 3.5 ‐ Weldability 5 ‐ ‐ ‐ Eco Properties Min Max Avg. Units Embodies Energy 103 114 108.5 MJ/kg CO2 Footprint 5.74 6.35 6.045 kg/kg Recyclable (Yes/No) yes ‐ ‐ A3 The list of survey questions in entirety are shown below. Note survey questions were approved by engineering faculty available for consultation. 1. When storing items, what type of unit would you prefer? “unit(explanation/visual)” A. Free Standing (supported by itself) B. Wall Mounted C. Stackable (rests on support structure) D. Free Hanging (chandelier) 2. How much weight would you store on/in your preferred unit? “weight(approximation of object weight)” A. 0-10lb (a few tools) B. 10-15lb (bowling ball) C. 15-20lb (a few textbooks) D. 20-30lb (3 gallons of water) 3. How much would you be willing to pay for your desired unit? A. 0-50$ B. 50-100$ C. 100-150$ D. 150-200$ E. $ > 200$ 4. Where would you want your desired unit? A. Public Room B. Private Room C. Utility Room D. Outside E. Other:_______________________ 5. Please flip the survey over and write any other queries or/and expand your answer choice(s).
- 37. Page 36 of 38 The following figure depicts the results obtained from the surveys. Figure 21. Displays percent responses for the survey questions directly above. Figure 21 breaks down each survey question into percent pie charts for pictorial representation of the results. Notice in Question 1’s responses, A and C were split evenly with a majority of 40%. However, according to the given design guidelines, the storage unit should not be self-supported. Thus, a wall hanging unit was the chosen appropriate alternative. A4 The full free body diagram for both shelving systems. Figure 22. The full free body diagram for both shelving units.
- 38. Page 37 of 38 A5 The intermediate values used in determine allowable forces acting on the shelf. Figure 23. Intermediate calculations used as stated above. A6 The intermediate values for use in determining the max allowable load for the metal brace. Figure 24. Intermediate calculations used as stated above. A7 The attachments labeled 1-7 are shown directly after as referenced by A1. Attachments 1-7 corresponded to pages 39-45, respectively.
- 39. Page 38 of 38 A8 The qualitative benefits for implementing gussets into the chosen shelving supports are depicted below. Figure 25. Stress locations when a 50lbf horizontal load is applied horizontally. Figure 25 displaces the stress locations for when the supports undergo an unintended supporting scenario. The scenario depicted was most similar to a horizontal force being applied to the shelving supports, most likely by the swaying of the shelf. Note the model including the gussets was able to minimize the amount of stress near the wall-support interface. QED
- 40. 10.500 2.452 0.500 12.500 3.106.90 9.00 R0.25 R0.25 R1.00 0.895.46 5.32 1.50 4.38 R2.00 R2.00 7.00 7.54 8.00 0.250 0.500 0.500 10.000 10.500 2 X 0.250 0.500 0.500 10.000 10.000 10.500 2 X 0.250 0.250 2.45 4.10 7.64 8.000.50 0.500 12.000 12.500 5.50 9.50 Top Front Back +-0.005in Attachment 1 DO NOT SCALE DRAWING Support1 SHEET 1 OF 1 UNLESS OTHERWISE SPECIFIED: SCALE: 1:5 WEIGHT: REVDWG. NO. A SIZE TITLE: NAME DATE COMMENTS: Q.A. MFG APPR. ENG APPR. CHECKED DRAWN FINISH MATERIAL INTERPRET GEOMETRIC TOLERANCING PER: DIMENSIONS ARE IN INCHES TOLERANCES: FRACTIONAL ANGULAR: MACH BEND TWO PLACE DECIMAL THREE PLACE DECIMAL APPLICATION USED ONNEXT ASSY PROPRIETARY AND CONFIDENTIAL THE INFORMATION CONTAINED IN THIS DRAWING IS THE SOLE PROPERTY OF <INSERT COMPANY NAME HERE>. ANY REPRODUCTION IN PART OR AS A WHOLE WITHOUT THE WRITTEN PERMISSION OF <INSERT COMPANY NAME HERE> IS PROHIBITED. 5 4 3 2 1
- 41. 8.664 45.000 6.250 6.000 12.000 6.7522.25 22.75 38.25 45.00 2.60 R0.10Sym 45.000 0.500 +-0.005in Attachment 2 DO NOT SCALE DRAWING Shelf1 SHEET 1 OF 1 UNLESS OTHERWISE SPECIFIED: SCALE: 1:10 WEIGHT: REVDWG. NO. A SIZE TITLE: NAME DATE COMMENTS: Q.A. MFG APPR. ENG APPR. CHECKED DRAWN FINISH MATERIAL INTERPRET GEOMETRIC TOLERANCING PER: DIMENSIONS ARE IN INCHES TOLERANCES: FRACTIONAL ANGULAR: MACH BEND TWO PLACE DECIMAL THREE PLACE DECIMAL APPLICATION USED ONNEXT ASSY PROPRIETARY AND CONFIDENTIAL THE INFORMATION CONTAINED IN THIS DRAWING IS THE SOLE PROPERTY OF <INSERT COMPANY NAME HERE>. ANY REPRODUCTION IN PART OR AS A WHOLE WITHOUT THE WRITTEN PERMISSION OF <INSERT COMPANY NAME HERE> IS PROHIBITED. 5 4 3 2 1
- 42. 0.125 11.875 12.000 1.000 1.125 1.625 1.750 2.750 0.125 1.000 12.000 0.500 1.000 0.500 1.000 0.250Sym 0.500 1.000 0.500 1.125 1.625 2.250 2.750 2 X 0.250 +-0.005in Attachment 3 DO NOT SCALE DRAWING support 3 SHEET 1 OF 1 UNLESS OTHERWISE SPECIFIED: SCALE: 1:5 WEIGHT: REVDWG. NO. A SIZE TITLE: NAME DATE COMMENTS: Q.A. MFG APPR. ENG APPR. CHECKED DRAWN FINISH MATERIAL INTERPRET GEOMETRIC TOLERANCING PER: DIMENSIONS ARE IN INCHES TOLERANCES: FRACTIONAL ANGULAR: MACH BEND TWO PLACE DECIMAL THREE PLACE DECIMAL APPLICATION USED ONNEXT ASSY PROPRIETARY AND CONFIDENTIAL THE INFORMATION CONTAINED IN THIS DRAWING IS THE SOLE PROPERTY OF <INSERT COMPANY NAME HERE>. ANY REPRODUCTION IN PART OR AS A WHOLE WITHOUT THE WRITTEN PERMISSION OF <INSERT COMPANY NAME HERE> IS PROHIBITED. 5 4 3 2 1
- 43. 8.485sym 6.000sym 12.000 6.000sym 45.000 11.875Sym 6.000 7.000 22.000 23.000 38.000 39.000 45.000 0.125 0.625 0.750 +-0.005in Attachment 4 DO NOT SCALE DRAWING Shelf 3 SHEET 1 OF 1 UNLESS OTHERWISE SPECIFIED: SCALE: 1:10 WEIGHT: REVDWG. NO. A SIZE TITLE: NAME DATE COMMENTS: Q.A. MFG APPR. ENG APPR. CHECKED DRAWN FINISH MATERIAL INTERPRET GEOMETRIC TOLERANCING PER: DIMENSIONS ARE IN INCHES TOLERANCES: FRACTIONAL ANGULAR: MACH BEND TWO PLACE DECIMAL THREE PLACE DECIMAL APPLICATION USED ONNEXT ASSY PROPRIETARY AND CONFIDENTIAL THE INFORMATION CONTAINED IN THIS DRAWING IS THE SOLE PROPERTY OF <INSERT COMPANY NAME HERE>. ANY REPRODUCTION IN PART OR AS A WHOLE WITHOUT THE WRITTEN PERMISSION OF <INSERT COMPANY NAME HERE> IS PROHIBITED. 5 4 3 2 1
- 44. 45.00 11.50 0.1311.18 11.40 0.10 0.60 0.70 0.15Sym 0.60Sym 0.75Sym 11.50 R0.23Sym 0.75 0.38 45.00 +-0.005in Attachment 5 DO NOT SCALE DRAWING Shelf 2 SHEET 1 OF 1 UNLESS OTHERWISE SPECIFIED: SCALE: 1:10 WEIGHT: REVDWG. NO. A SIZE TITLE: NAME DATE COMMENTS: Q.A. MFG APPR. ENG APPR. CHECKED DRAWN FINISH MATERIAL INTERPRET GEOMETRIC TOLERANCING PER: DIMENSIONS ARE IN INCHES TOLERANCES: FRACTIONAL ANGULAR: MACH BEND TWO PLACE DECIMAL THREE PLACE DECIMAL APPLICATION USED ONNEXT ASSY PROPRIETARY AND CONFIDENTIAL THE INFORMATION CONTAINED IN THIS DRAWING IS THE SOLE PROPERTY OF <INSERT COMPANY NAME HERE>. ANY REPRODUCTION IN PART OR AS A WHOLE WITHOUT THE WRITTEN PERMISSION OF <INSERT COMPANY NAME HERE> IS PROHIBITED. 5 4 3 2 1
- 45. R0.075 R0.075 0.17 TRUE R0.08Sym R0.23 R0.23 R0.30 R0.30 1.57° 0.17 0.45 0.66 0.56 0.73 0.89 3.34 3.37 3.41 3.76 3.81 3.92 1.85 1.55 +-0.005" Inches Attachment 6 Drawing represents an example of pertinent parameters for injection molding process DO NOT SCALE DRAWING Support 2 SHEET 1 OF 1 UNLESS OTHERWISE SPECIFIED: SCALE: 1:5 WEIGHT: REVDWG. NO. A SIZE TITLE: NAME DATE COMMENTS: Q.A. MFG APPR. ENG APPR. CHECKED DRAWN FINISH MATERIAL INTERPRET GEOMETRIC TOLERANCING PER: DIMENSIONS ARE IN INCHES TOLERANCES: FRACTIONAL ANGULAR: MACH BEND TWO PLACE DECIMAL THREE PLACE DECIMAL APPLICATION USED ONNEXT ASSY PROPRIETARY AND CONFIDENTIAL THE INFORMATION CONTAINED IN THIS DRAWING IS THE SOLE PROPERTY OF <INSERT COMPANY NAME HERE>. ANY REPRODUCTION IN PART OR AS A WHOLE WITHOUT THE WRITTEN PERMISSION OF <INSERT COMPANY NAME HERE> IS PROHIBITED. 5 4 3 2 1
- 46. 35.00 11.50 11.50 0.60 11.46 11.41 11.33 4.20 4.288.00 36.70 Attachment 7 +-0.005" This design cannot be plastic machined, however an example of parameters are shown here. DO NOT SCALE DRAWING Shelf 4 SHEET 1 OF 1 UNLESS OTHERWISE SPECIFIED: SCALE: 1:10 WEIGHT: REVDWG. NO. A SIZE TITLE: NAME DATE COMMENTS: Q.A. MFG APPR. ENG APPR. CHECKED DRAWN FINISH MATERIAL INTERPRET GEOMETRIC TOLERANCING PER: DIMENSIONS ARE IN INCHES TOLERANCES: FRACTIONAL ANGULAR: MACH BEND TWO PLACE DECIMAL THREE PLACE DECIMAL APPLICATION USED ONNEXT ASSY PROPRIETARY AND CONFIDENTIAL THE INFORMATION CONTAINED IN THIS DRAWING IS THE SOLE PROPERTY OF <INSERT COMPANY NAME HERE>. ANY REPRODUCTION IN PART OR AS A WHOLE WITHOUT THE WRITTEN PERMISSION OF <INSERT COMPANY NAME HERE> IS PROHIBITED. 5 4 3 2 1
- 47. 3D Printed Conceptual Prototype Summary Team PolymerWorks Advisors: Dr. Gipson and Dr. Prins Team members: Mick Blackwell, Ben Condro, Mark Dufresne, Brenton Lester, and Matt Lewis
- 48. Page 2 of 3 Overview In order to demonstrate practicality for the proposed design (displayed below in Figure 1), a 3D prototype was fabricated using the MakerBot Replicator 2 (MR2). Figure 1. The selected design for shelving unit fabrication. For a complete description of parameters, refer to Attachment 6 and 7 within the SUCP documentation. Note the documentation and thought process to conceive the concept above is shown in the SUCP. Process The Makerbot Replicator 2 was made available through the in-house 3D Printing Lab. According to the Lab-Ops, the MR2 can print 3D components up to Length = 11”, Width = 6”, and Height = 6”. Material used for printing components was PLA (poly-lactic acid). Furthermore, the individual components of the shelf were printed in order to better replicate the actual system. Thus, a total of five components were printed including: four supports and one shelf. The scaling ratio was determine based on the largest parameter of the shelving system to ensure the largest model would be created. The largest parameter of the shelving system was the required shelf length of 45”. Simple math yields the maximum scaling ratio stated below. 0.244 0.24 (Eq. 1) Where was the length of the maker bot printing tray and was the length of the shelf. As shown in Eq. 1, a printing ratio of 0.24 was derived and used for all components to obtain appropriate interfacing during assembly. Each shelving support was printed at a rate of one support a session due to recommendations from Lab-Ops. Figure 2 below displays the shelf being printed.
- 49. Page 3 of 3 Figure 2. The shelf being 3D printed on the MR2. Note nearly the maximum length of the printing tray was utilized during printing as shown in Figure 2. Furthermore, the shelf was printed support face down in order for the print to not require any supporting material. Results The 3D printing techniques utilized allowed for an appropriate demonstration of shelf practicality. Figure 3 below displays the assembled shelving system. Figure 3. The shelving system used for demonstrative purposes. Note the shelving unit was attached to a metal brace only for display. Future work involves producing a 1:1 scale ratio shelving system to fully demonstrate feasibility.
- 50. Assembly Instructions Team PolymerWorks Advisors: Dr. Gipson and Dr. Prins Team members: Mick Blackwell, Ben Condro, Mark Dufresne, Brenton Lester, and Matt Lewis
- 51. Page 2 of 7 The following documentation provides a step-by-step tabulated and figurative assembly process. Assembly begins with acquiring needed tools. The consumer, before purchase, would need to read the packaging of the shelving unit to find the stud spacing requirement of 16”. If the consumer does not live in a home constructed using the 16” stud spacing convention, then the consumer cannot properly mount the 16” support-span shelving model. Hereafter, the actual assembly instruction template will begin (Text enlarged to portray actual assembly text). Congratulations on your purchase of the PolymerWorks Shelving System! We appreciate your business and we will guide you through the installation process in a timely fashion. In order to begin the assembly of your shelving unit, please acquire the following tools. 1. One Stud Finder 2. One Level 3. One Drill with Appropriate Drill Bit for a #10 Screw 4. One Tape Measure A general overview of the shelving process is shown below and figurative instructions follow.
- 52. Page 3 of 7 Step 1: Locate the wall studs using the required stud finder. Be sure the studs are located 16” apart as shown in the figure below. Step 2: Mark the stud located farthest left. This will be the stud used to mount the first support.
- 53. Page 4 of 7 Step 3: Drill two screw holes into the wall stud spaced 1.50” apart vertically using the required tape measure, drill, and standard drill bit for a #10 screw. Step 4: Drill two more screw holes (using the same drill bit as before) 16” to the right (horizontally) of the screw holes drilled in Step 3.
- 54. Page 5 of 7 Step 5: Drill two more screw holes (using the same drill bit as before) 16” to the right (horizontally) of the screw holes drilled in Step 4. Step 6: Insert the screw and washer combination included in the packaging into the supports as shown below. Screw the screws into the previously drilled holes until all three supports are mounted.
- 55. Page 6 of 7 Step 7: Lay the shelf onto the supports in the orientation shown below. Be shown supports rest in the slots on the Bottom-Side of the shelf. Final Step: Once the shelving unit has been assembled, use the required level to check that the shelf is level. If the shelf is level, then you have successfully assembled your new PolymerWorks Shelving System.
- 56. Page 7 of 7 Disclaimer: PolymerWorks is not responsible for any injuries or product malfunctions due to improper installation. PolymerWorks is also not responsible for any injuries acquired when using required equipment. PolymerWorks recommends professional installation when the consumer is unsure of how to assemble the shelving system. As stated on the packaging, the maximum weight supported by the shelving unit is 60 pounds. Product failure may occur if the weight exceeds the recommended maximum limit of 60 pounds. If bending can be seen while examining the shelf or supports, consider removing all supported objects and check the assembly to be sure the shelving system was properly assembled.
- 57. Bill of Materials Team PolymerWorks Advisors: Dr. Gipson and Dr. Prins Team members: Mick Blackwell, Ben Condro, Mark Dufresne, Brenton Lester, and Matt Lewis
- 58. Page 2 of 2 Overview In order to test different material properties, samples were bought through select manufactures. The team budget was 100USD and the samples were purchased through Mr. John Wild of the James Madison Engineering Department. Bill of Materials Materials were purchased through US Plastics and McMaster. The list of materials purchased was separated by manufacturer and is shown below in Table 1. US Plastics ROD Stock 3/8" Diameter Quantity Price, USD Total, USD PC (Clear) 2.25 USD/ft 8 18 29.72 HDPE 5.84 USD/ 8ft 1 5.84 PP 5.88 USD/ 8ft 1 5.88 McMaster ROD Stock 1/4" Diameter Quantity Price, USD Total, USD PC (Clear) 1.22 USD/ft 8 9.76 21.84 HDPE 0.67 USD/ ft 8 5.36 Sum PP 0.84 USD/ft 8 6.72 51.56 Thus, team PolymerWorks stayed within the 100USD budget during the project timeline.
- 60. 1.0 Introduction The materials polycarbonate and copper were mechanically tested in order to statistically prove that the two materials were different. The mechanical test performed was a three‐point bend test that required the use of an Instron machine. The flexural strength of each material was the property calculated in order to determine that the two materials were different. A total of 60 trials were performed during this test; 30 three‐point bend tests for copper and 30 three‐point bend tests for polycarbonate. This number was used in order to statistically prove with a 95% confidence that the two materials were different. 1.1 Scope These stated tests and calculations were performed in order to statistically prove that the two chosen materials are different. It is known that polycarbonate and copper are not the same material, but statistical analysis was needed in order to prove with 95% that the two materials belong in different families. By researching known flexural strengths values using CES ® software, each material tested was comparatively quantified according to standard and known flexural strength. This helped to prove that the procedure used and data obtained was accurate. The values obtained in this testing were entirely quantitative and included no qualitative observations. The experiment took place in a laboratory where an Instron machine is located. 1.2 Significance and Use The outcomes of these experiments can in be used in order to statistically show that polycarbonate and copper do not belong in the same material family. The three‐point bend tests can also be used to further investigate the flexural strength of both polycarbonate and copper. Although these tests have already been performed, the tests that were run can better indicate with statistical accuracy the flexural strength of each material. 1.3 Apparatus As mentioned, the apparatus used for the three‐point bend test was the Instron machine. This machine induces a point load on a specimen that sits atop two supports. The supports used for this test were 2 inches apart and the load was place directly in the middle of the two supports. Below, Figure 1.3.1 displays a schematic of the test performed.
- 63. Figure 3.1.1: Bar graph of average flexural strength for copper and polycarbonate along with error bars and display of the dmin value. From the above data, the following determinations can be drawn: 1) Copper has a higher flexural strength than polycarbonate 2) With 95% confidence it can be determined that copper and polycarbonate are statistically different. This can be stated because the average difference between the flexural strength of copper and polycarbonate is greater than the calculated dmin value. 3.2 Analysis of Test Data To calculate the flexural strength from the obtained data, the following equation was utilized: (3.2.1) where: Ff = max load applied to specimen during trial, L = span length (for these tests it was 2 inches), R = radius of test specimen. The average flexural strength was calculated using the following equation: ∑ (3.2.2) where: 53171 18443 0 10000 20000 30000 40000 50000 60000 Flexural Stress (psi) Copper Polycarbonate 95% 1318 psi
- 64. n = the number of trials performed. The critical t value (tcrit) was determined using the degrees of freedom (DF) and Student’s t‐value distribution table. The DF value was calculated using the equation below: 1 (3.2.3) where n is the same variable as in Equation 3.2.2. Next, the standard deviation was calculated using Equation 3.3.4 below: ∑ ̅ (3.2.4) where: = the flexural strength of that particular trial, ̅ = average flexural strength. The margin of error was calculated using the equation below: √ (3.2.5) In order to calculate the dmin value, an intermediate variable had to be calculated. This is the sp value which was calculated using Equation 3.2.6 below: (3.2.6) where: s1 = the standard deviation of the copper trials, s2 = the standard deviation of the polycarbonate trials. Last, dmin was calculated using the equation below: ∗ ∗ (3.2.7) 4.0 Summary Using ASTM D790 – Standard Test Methods for Flexural Properties of Unreinforced and Reinforced Plastics, it can be concluded with 95% confidence that polycarbonate and copper are statistically different in regards to flexural strength. After the 60 trials were performed (30 trials for polycarbonate and 30 trials for copper), the test results showed that the average difference between the two materials was 34,727 psi which is much greater than the calculated dmin value of 1,318 psi. This proves that the two materials tested are statistically different.
- 66. Mechanical Analysis of Polypropylene, Polycarbonate, and Polyethylene Submitted to: Dr. Kyle Gipson Prepared by: Mick Blackwell Ben Condro Mark Dufresne Brenton Lester Matthew Lewis
- 67. Page 2 of 6 1.0 Introduction The polymers polypropylene, polycarbonate, and polyethylene will be mechanically tested in order to compare experimental mechanical properties to mechanical values found using CES Edupack 2013 software (CES) as well as compare all three polymers to one another. The mechanical test to be performed is a three-point bend test that makes use of an Instron 5966 machine. 1.1 Scope The mechanical testing on the above polymers quantitatively describes mechanical properties of each polymer. The test method being performed is a three-point bend test. From this test the flexural strength of each polymer can be determined. Through finding the flexural strength experimentally, a comparison can be made between polymers and also against the accepted values found using CES Edupack 2013 software. The testing was performed on an Instron 5966 machine under laboratory settings. 1.2 Significance and Use The outcomes of this experiment can be used to compare the flexural strength of polypropylene, polycarbonate, and polyethylene. The values obtained can also be used to compare mechanical properties found through experimental analysis to those listed in CES as accepted values. The tests will better indicate as to what flexural strength the polymers can handle. 1.3 Apparatus The three-point bend test was performed using an Instron 5966 machine. This machine has an accessory which allows for three-point bend testing where a material sample rests across two supports. The Instron 5966 has a load arm which applies a force on the material at the mid-span of the supports. Below, a schematic of the setup can be seen in Figure 1.3.1. Figure 1.3.1--Schematic of three-point bend test As seen in Figure 1.3.1 the material sample sets atop the two supports. The load arm applies a force until the sample broke or ruptured on the outer surface. Material Sample
- 68. Page 3 of 6 2.0 Three-point Bend Testing 2.1 Test Specifications and Procedure The three-point bend testing performed was in accordance with ASTM D790, Standard Test Methods for Flexural Properties of Unreinforced and Reinforced Plastics, procedure A. This testing procedure includes using a support span of two inches as well as use supports and a load arm that has a cylindrical surface. Note that ASTM D790 allows for materials that have been cut from sheets, plates, or molded shapes, or may be molded to the desired finished dimensions. The procedure also indicates that a minimum of five trials must be run on each material. The procedure of testing on the Instron 5966 machine is as follows. The Instron 5966 machine was turned on in addition to the computer connected with it. On the computer, BlueHill software was initiated in order to use the testing apparatus. The polypropylene, polycarbonate, and polyethylene samples were measured and cut to a length of approximately (but no less than) two inches. These pieces were placed onto the center of the support spans. The load arm was lowered until first contact with the sample was made and then the load and extension of the Instron 5966 were both balanced. The “Start Test” button was pressed to initiate the machine where the load arm was lowered (applying a force to the sample) until the sample failed or ruptured on the outer surface. Once the test was complete, a new sample was cut and the above steps repeated. The BlueHill software recorded the applied load and the downward extension of the load arm. This data was saved and transferred to a personal computer so that it may analyzed further. For reference, a picture of the testing apparatus can be seen blow in Figure 2.1.1. Figure 2.1.1: Testing apparatus
- 69. Page 4 of 6 3.0 Tests Results 3.1 Flexural Strength The data obtained from testing was used to calculate the flexural strength of each sample. Five tests were performed on each type of polymer so that a total of fifteen tests took place. The data from all fifteen tests in addition to the average flexural strength for each polymer can be found below in Tables 3.1.1, 3.1.2, and 3.1.3. Note that the derivations of flexural strength can be found below in section 3.2. Table 3.1.1: Polypropylene flexural strength properties Polypropylene Specimen # Flexural Strength, psi 1 14947.8 2 14987.8 3 14915.9 4 14947.3 5 14799.2 Average: 14919.6 Table 3.1.2: Polycarbonate flexural strength properties Polycarbonate Specimen # Flexural Strength, psi 1 21972.1 2 21838.0 3 21915.7 4 21889.5 5 21777.0 Average: 21878.4 Table 3.1.3: Polyethylene flexural strength properties Polyethylene Specimen # Flexural Strength, psi 1 10989.7 2 11025.1 3 11023.5 4 10996.9 5 11042.0 Average: 11015.4
- 70. Page 5 of 6 The above tables summarize the flexural strength of each polymer from testing. In order to compare these values to the accepted ones in CES, Table 3.1.4 below shows both the average values from experimental testing and those found using CES. Note that CES does not list flexural strength, but flexural strength can be equated to the lower of tensile or compression strength and as such the values below represent the average of the range given for the lower of tensile or compression strength. Table 3.1.4: Summary of Flexural Strength Flexural Strength, Psi Material: Experimental CES Polypropylene 14919.6 5000 Polycarbonate 21878.4 9600 Polyethylene 11015.4 3745 The above table summarizes both the flexural strength from the experiment as well as the flexural strength obtained from CES. Using this information the following conclusions may be formed: 1) The experimental flexural strength values do not represent the accepted values from CES; however the hierarchy among the three polymers is the same. 2) Polycarbonate is shown to have a larger flexural strength than polypropylene and polyethylene. 3.2 Analysis of Test Data To calculate the flexural strength from the obtained data, the following equation was utilized: 𝐹𝑙𝑒𝑥𝑢𝑟𝑎𝑙 𝑆𝑡𝑟𝑎𝑖𝑛 = 𝜎𝑓𝑠 = 𝐹 𝑓 𝐿 𝜋𝑅3 (3.2.1) Where sigma represents the flexural stress in psi (lbf/in2 ), Ff is the force load (lbf) applied to the material, L is the gauge length or length of the testing specimen (in), and R is the radius of the polymer rod. Note that the flexural strength is the max flexural strain achieved while testing. 4.0 Summary Using ASTM D790, Standard Test Methods for Flexural Properties of Unreinforced and Reinforced Plastics, procedure A the flexural strength amongst different materials can be compared. It was found that polycarbonate has a higher flexural strength at 21878.4 psi than polypropylene or polyethylene at 14919.6 psi and 11015.4 psi respectively. These experimental values did not agree with the accepted values found using CES Edupack 2013 software. The experimental values were larger at 14919.6 psi, 21878.4 psi, and 11015.4 psi for polypropylene, polycarbonate, and polyethylene respectively while in CES values (respectively) were found to be 5000 psi, 9600 psi, and 3745 psi.
- 71. Page 6 of 6 5.0 References 1. ASTM Standard D790, 2002, “Standard Test Methods for Flexural Properties of Unreinforced and Reinforced Plastics,” ASMT International, West Conshohocken, PA, 2002, DOI: 10.1520/D0790-10, www.astm.org.
- 72. Chemical Resistance Testing in accordance with ATSM D543 Submitted to: Dr. Kyle Gipson Prepared by: Mark Dufresne Mick Blackwell Ben Condro Brenton Lester Matt Lewis