Download to read offline


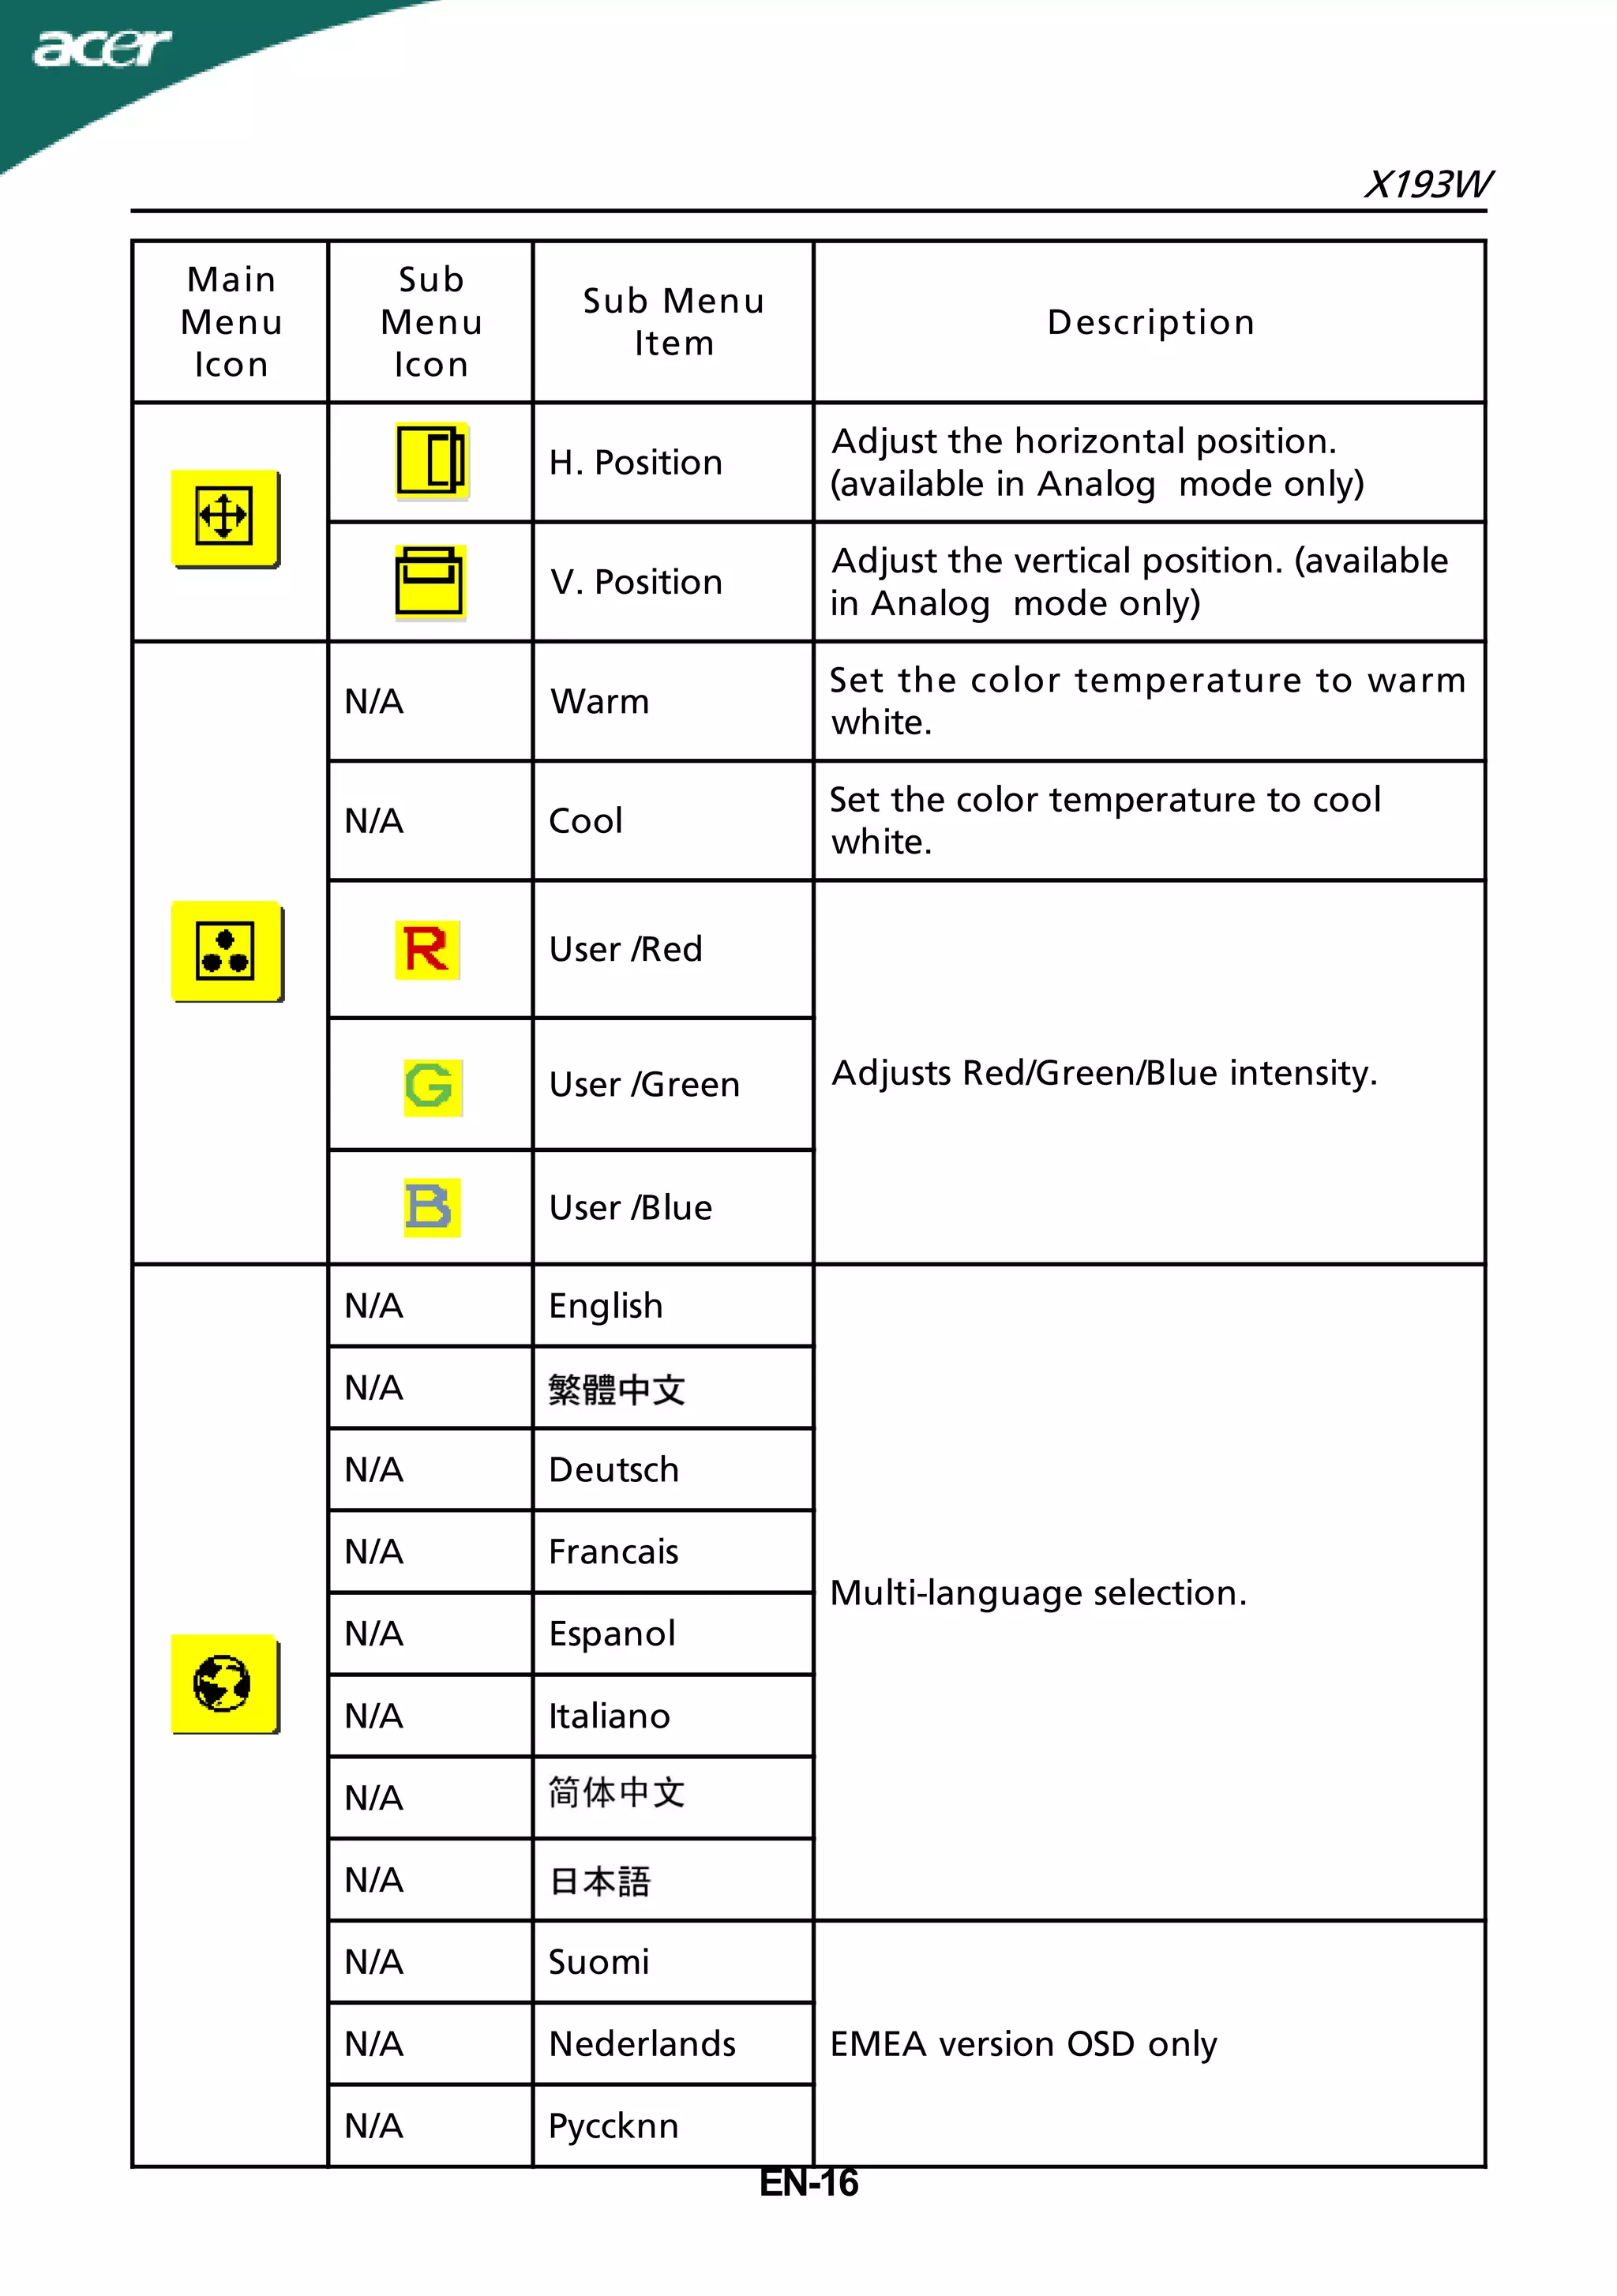

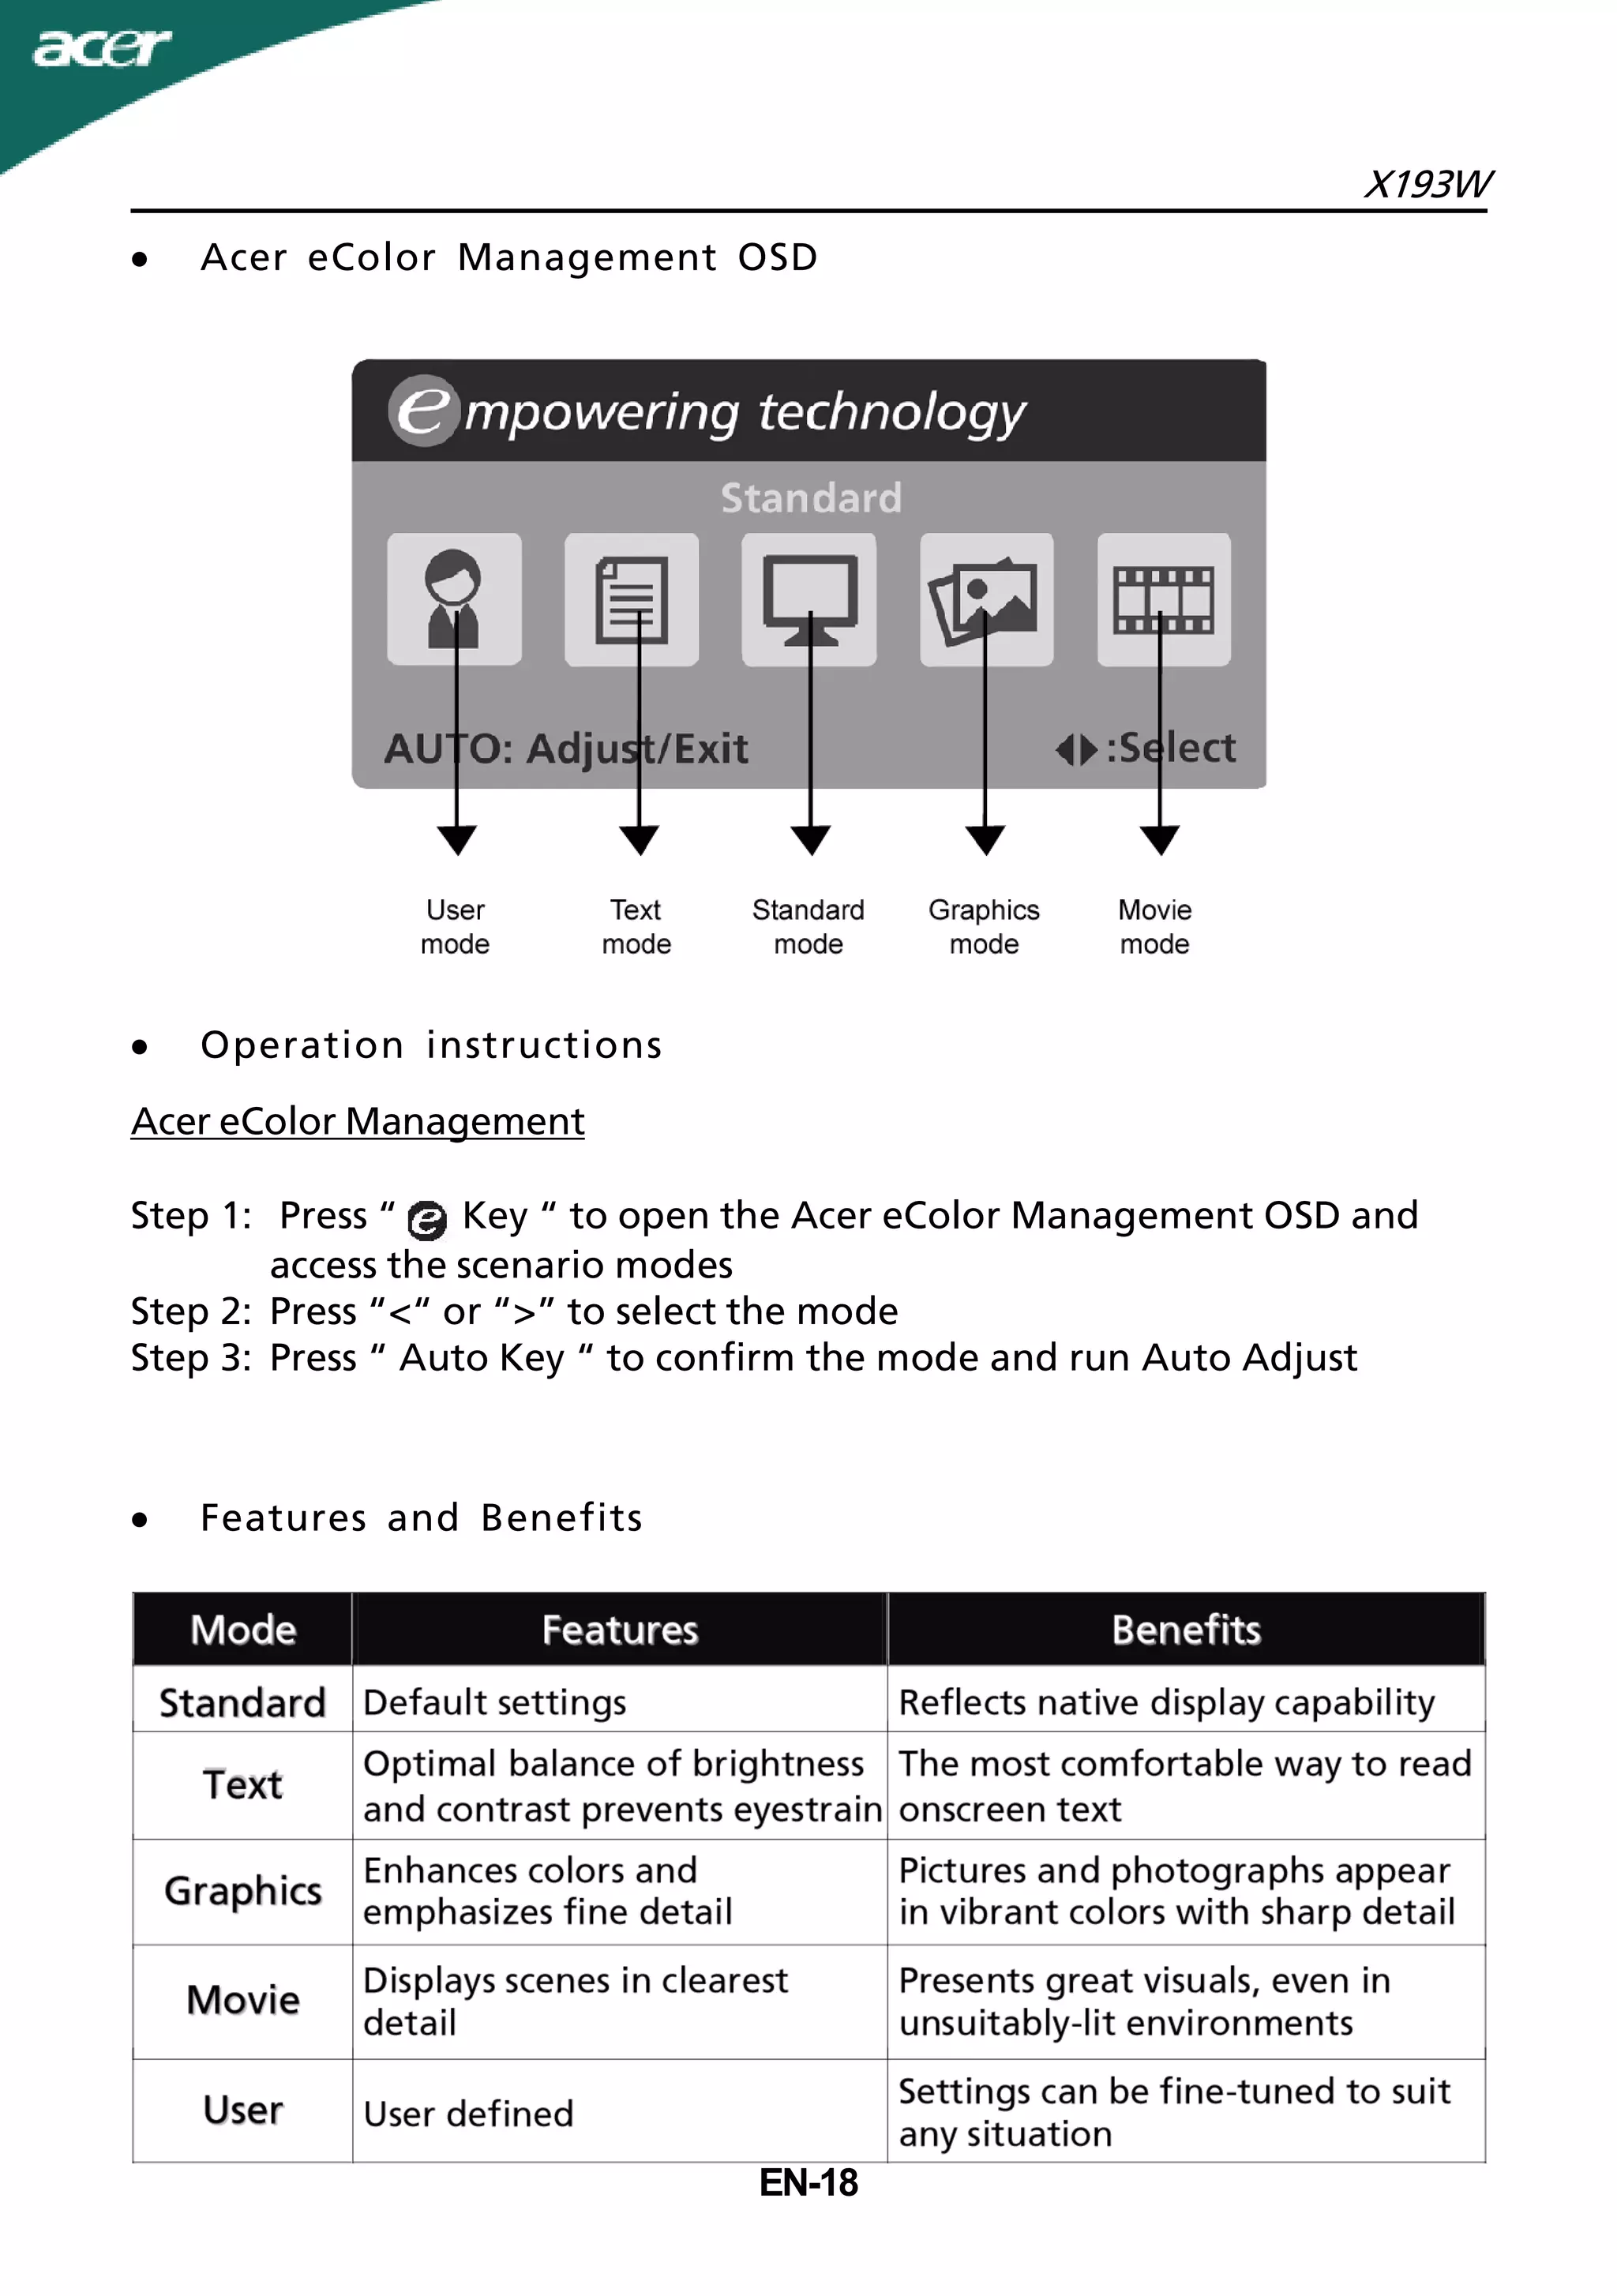


This document provides instructions and specifications for an LCD monitor. It includes sections on safety precautions, unpacking, installing, adjusting and connecting the monitor, as well as troubleshooting. The document contains technical details such as pin assignments, standard display modes, and OSD menu functions. It aims to ensure the safe and proper setup and use of the monitor.