Download to read offline


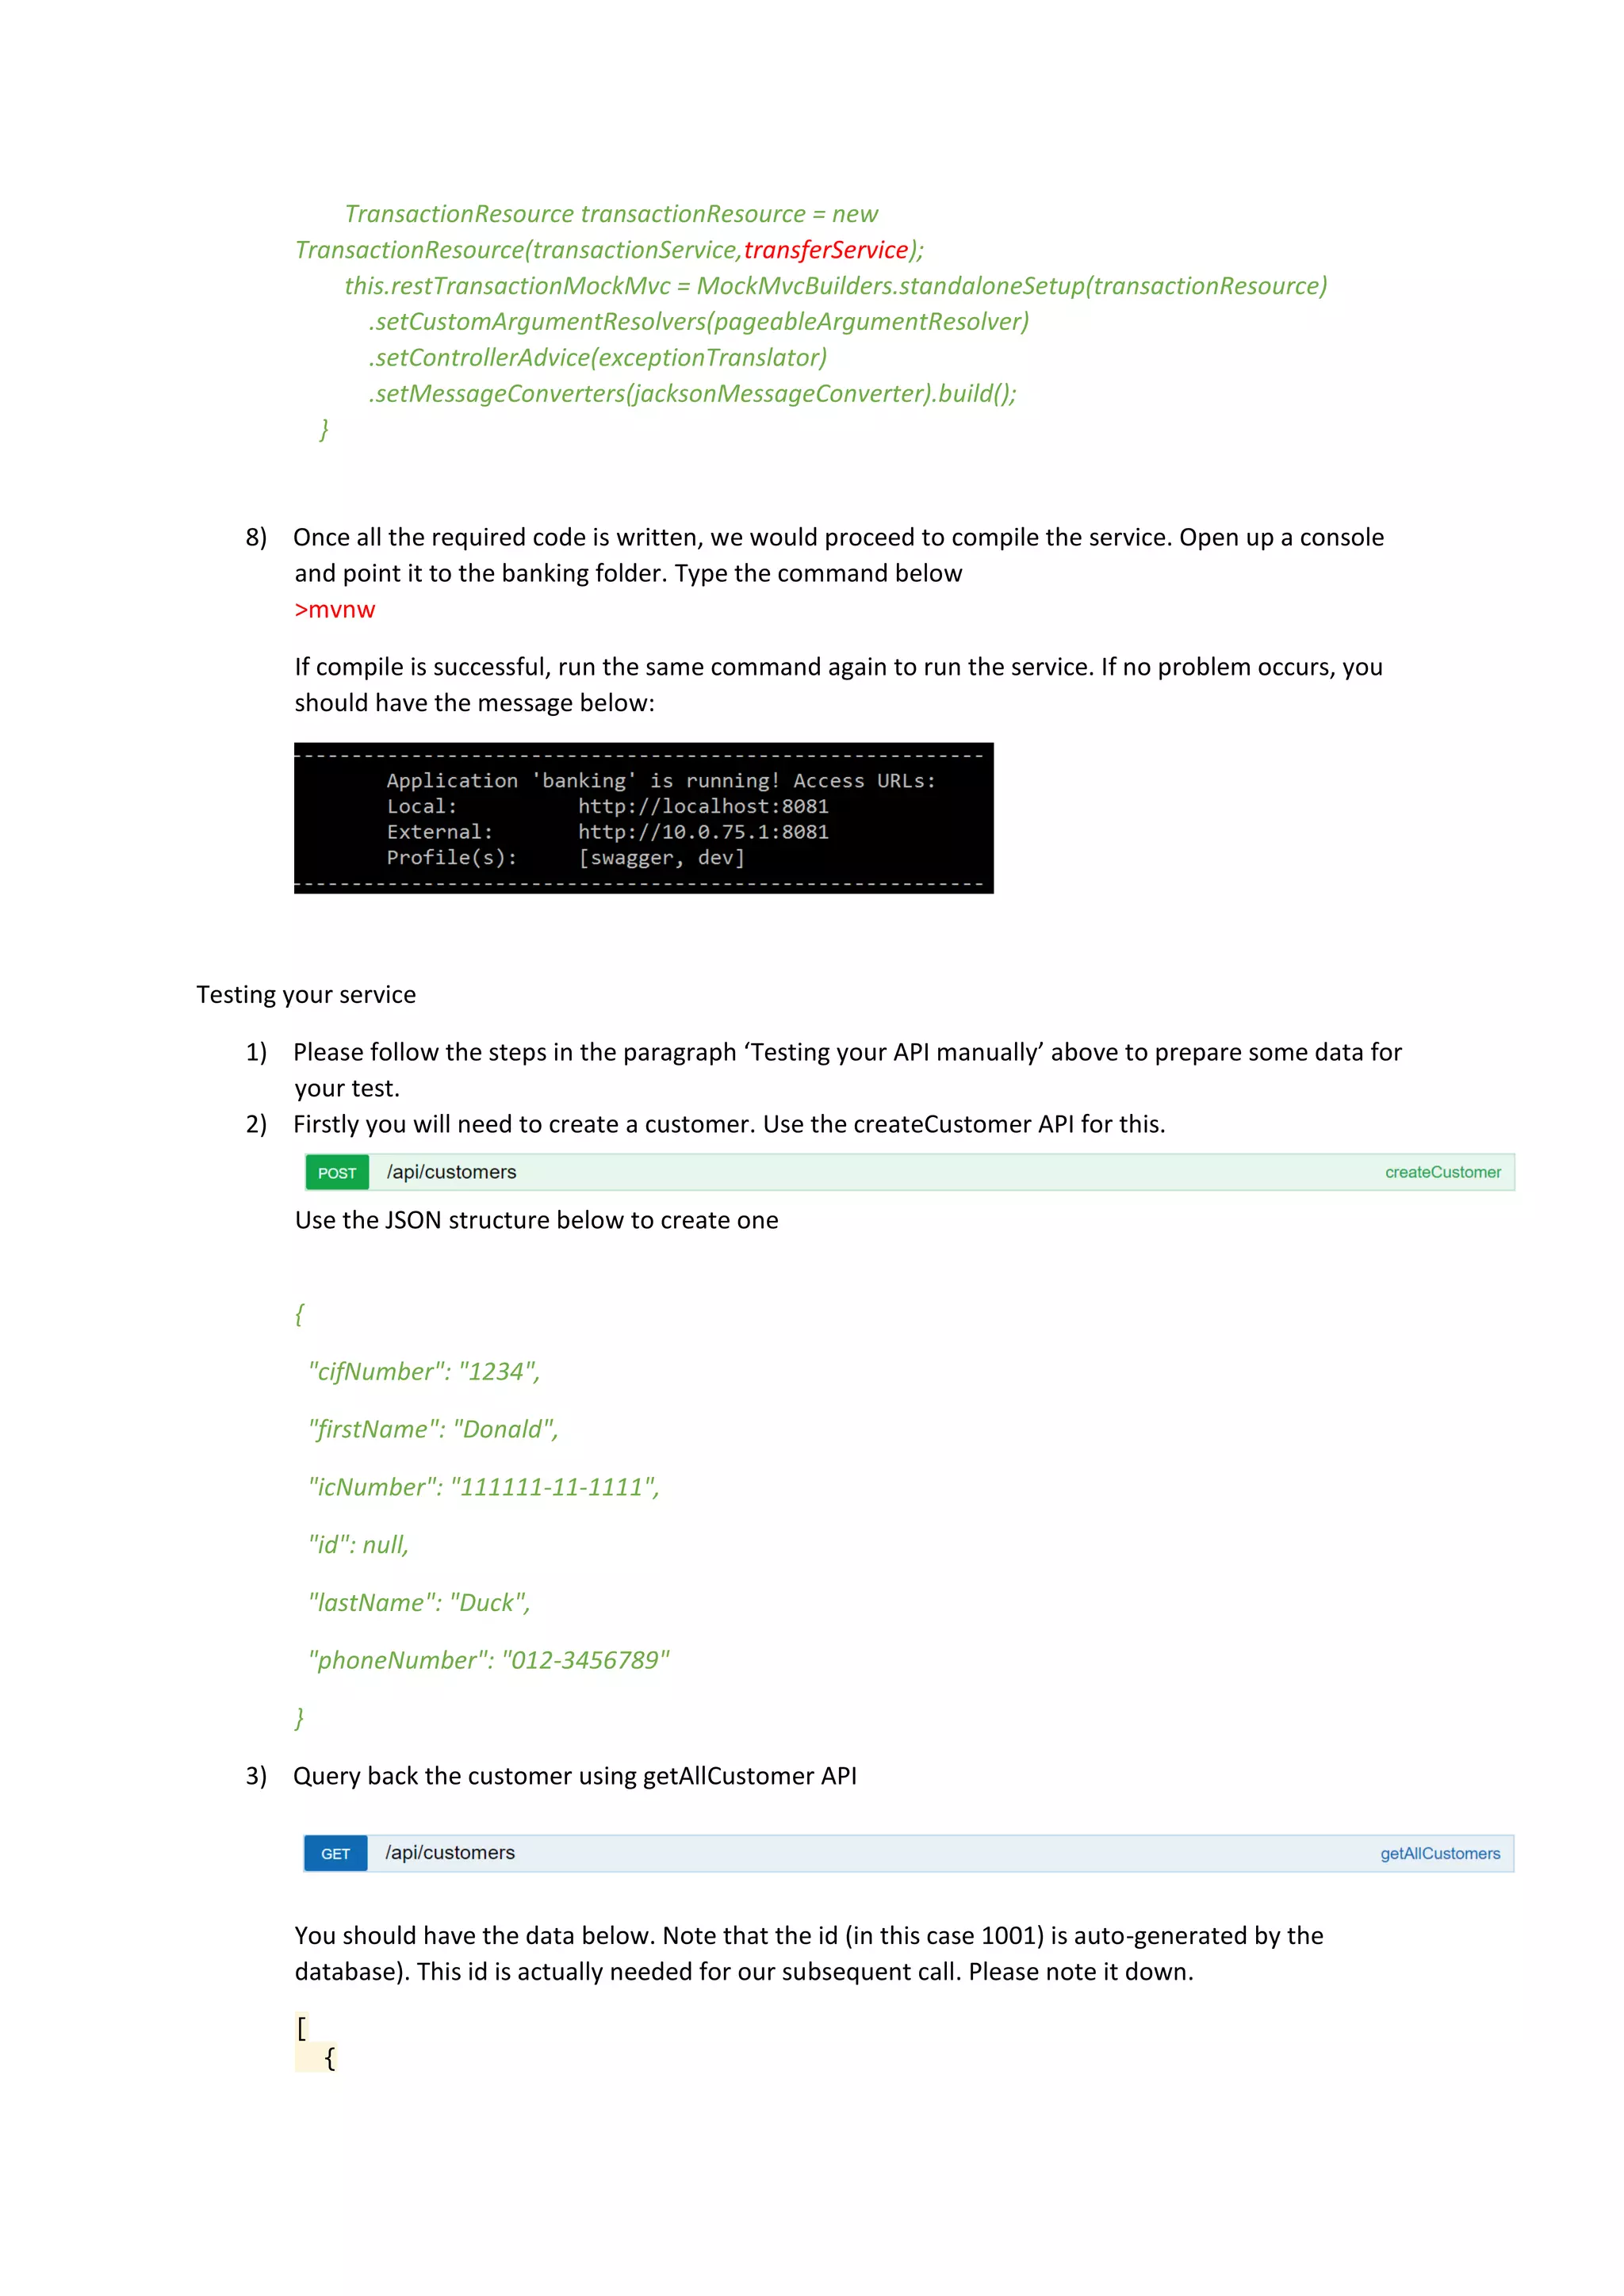
!["id": 1001,
"cifNumber": "1234",
"firstName": "Donald",
"lastName": "Duck",
"icNumber": "111111-11-1111",
"phoneNumber": "012-3456789"
}
]
4) Then, use the createAccount API.
Create two accounts as indicated below. Note that the field customerId must contain the id noted
back in #3. We will be using the account number (represented by accountNumber field) to do the
transfer, please note them down.
{
"accountNumber": "1111",
"balance": "100.40",
"customerId": 1001,
"id": null,
"openingDate": "2017-05-18T02:53:25.432Z",
"productId": "CASA",
"status": 0
}
{
"accountNumber": "2222",
"balance": "200.40",
"customerId": 1001,
"id": null,
"openingDate": "2017-05-18T02:53:25.432Z",
"productId": "CASA",
"status": 0
}
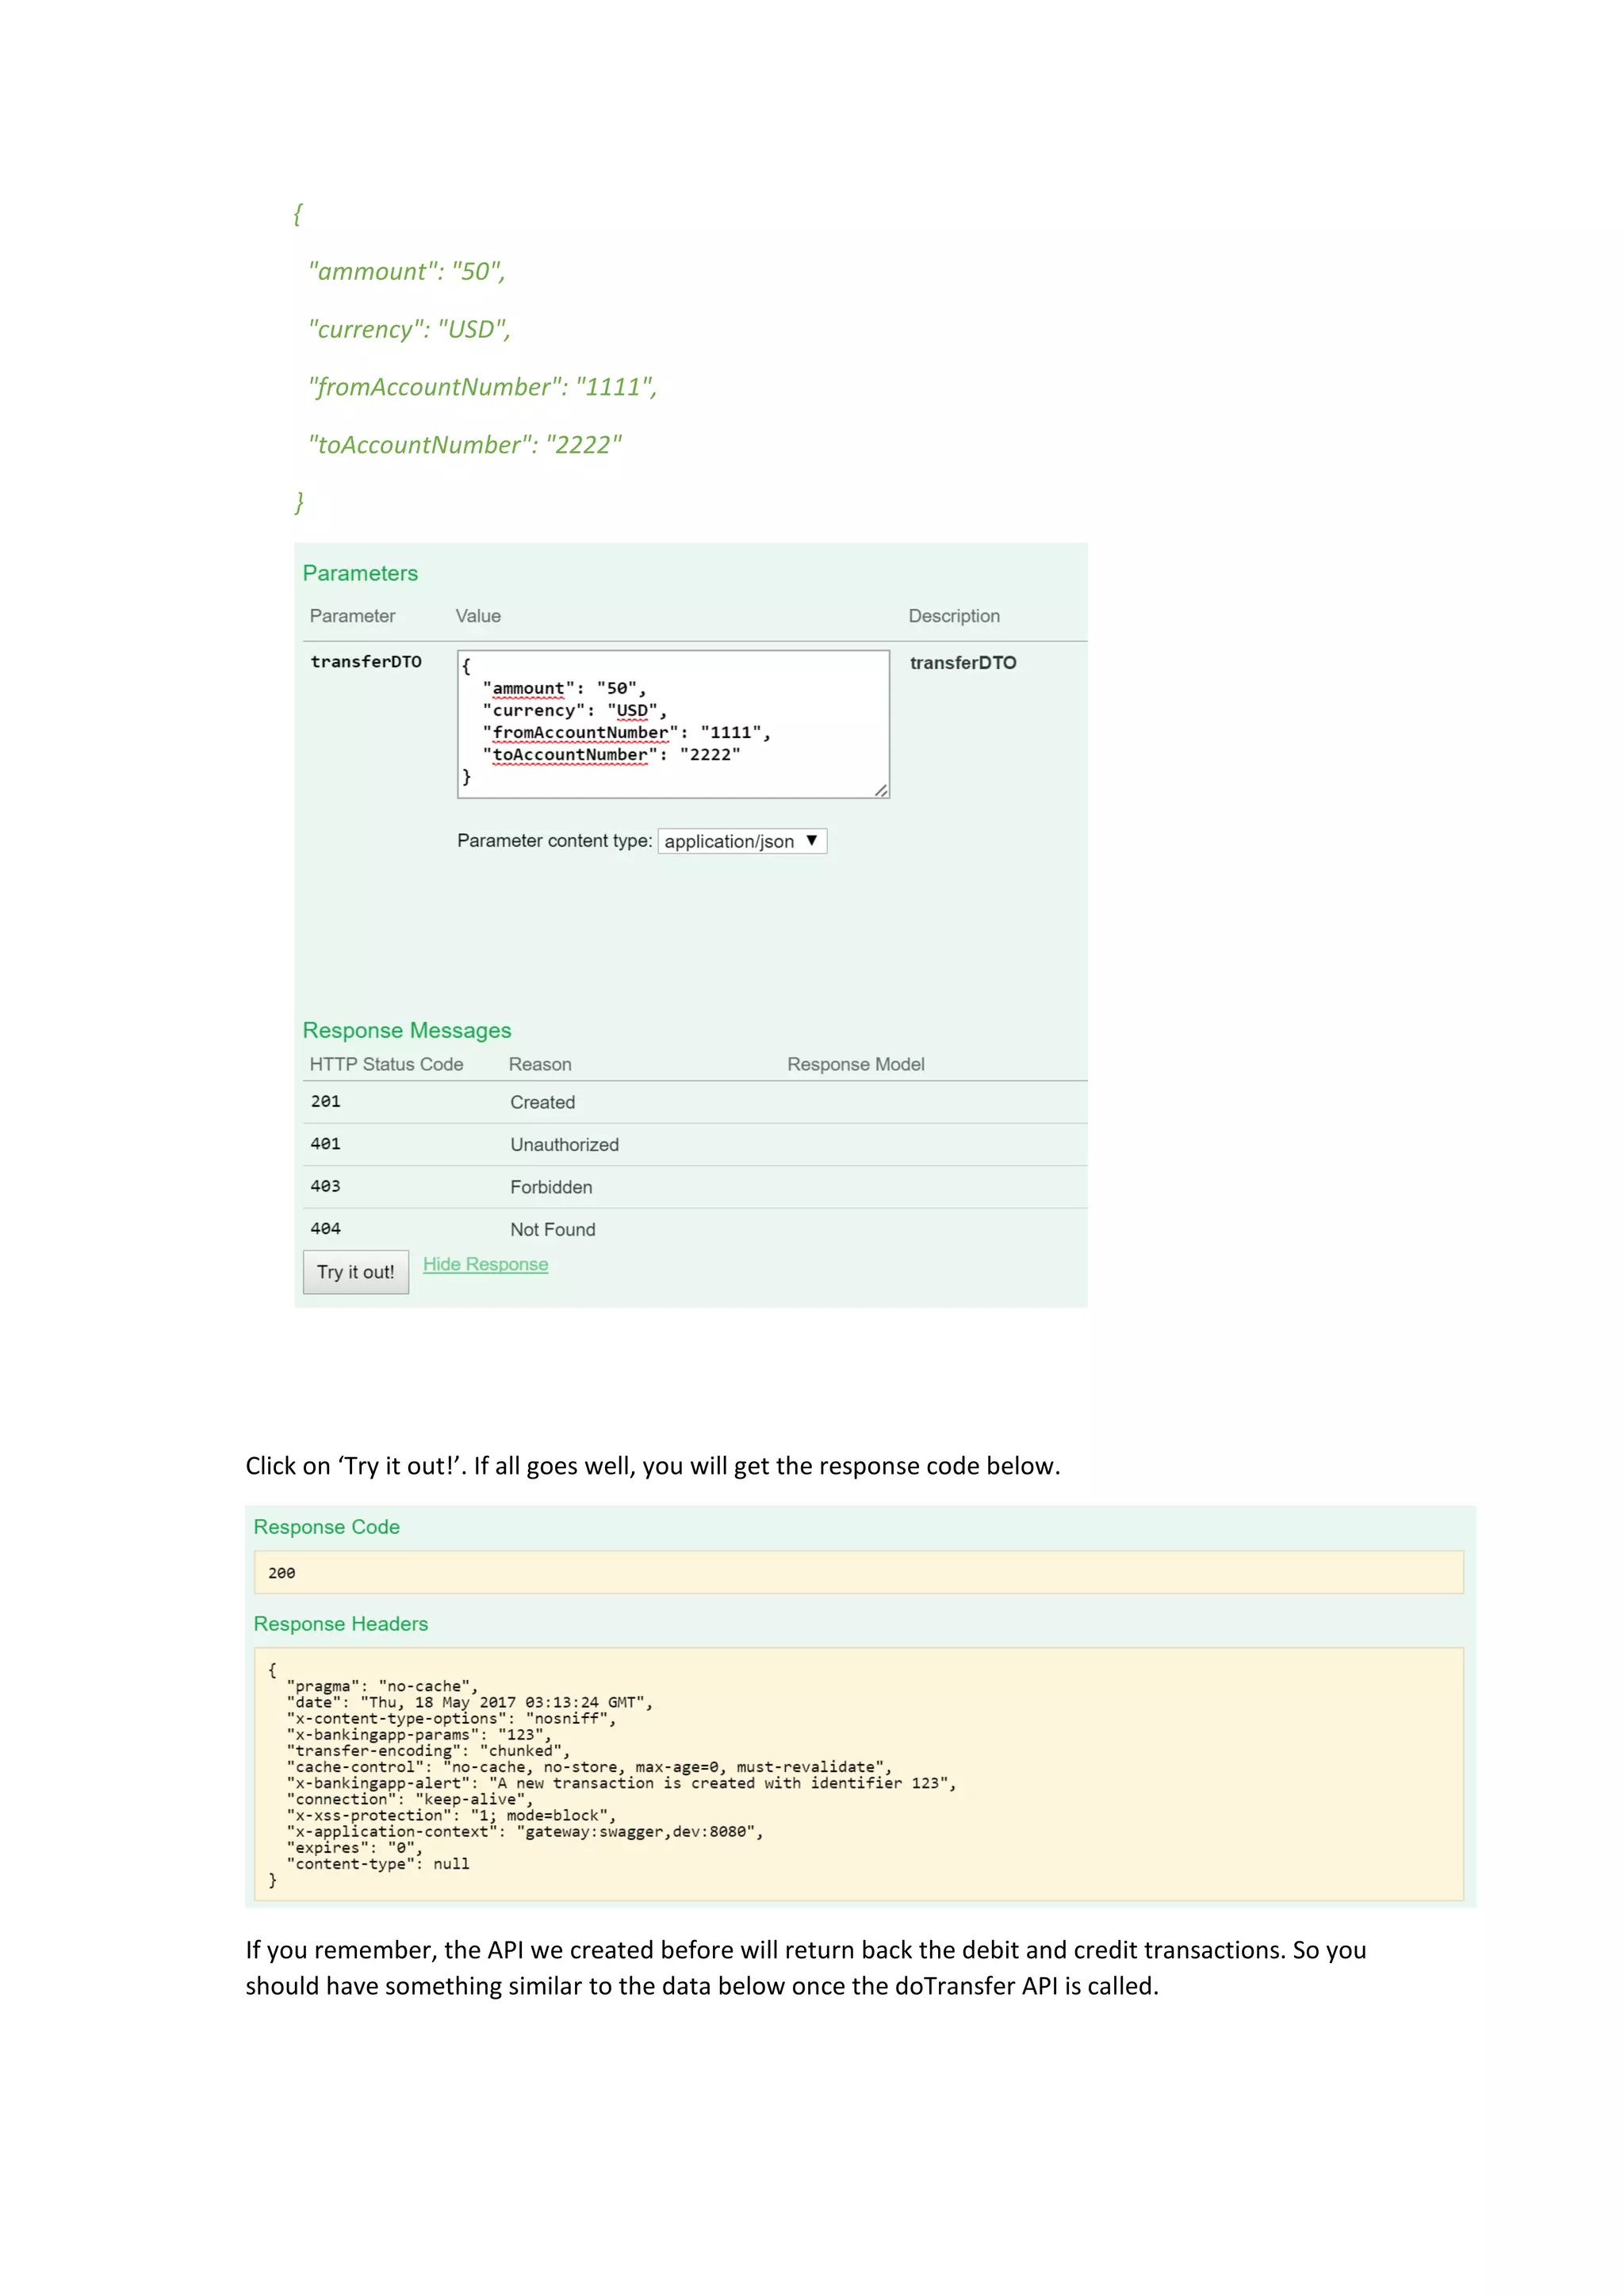
5) Next, open up the doTransfer API
We will transfer 50 from account 1111 to 2222. Enter the data as below to test the API.](https://image.slidesharecdn.com/microservicesfromscratch-170605005240/75/Micro-services-from-scratch-Part-1-25-2048.jpg)

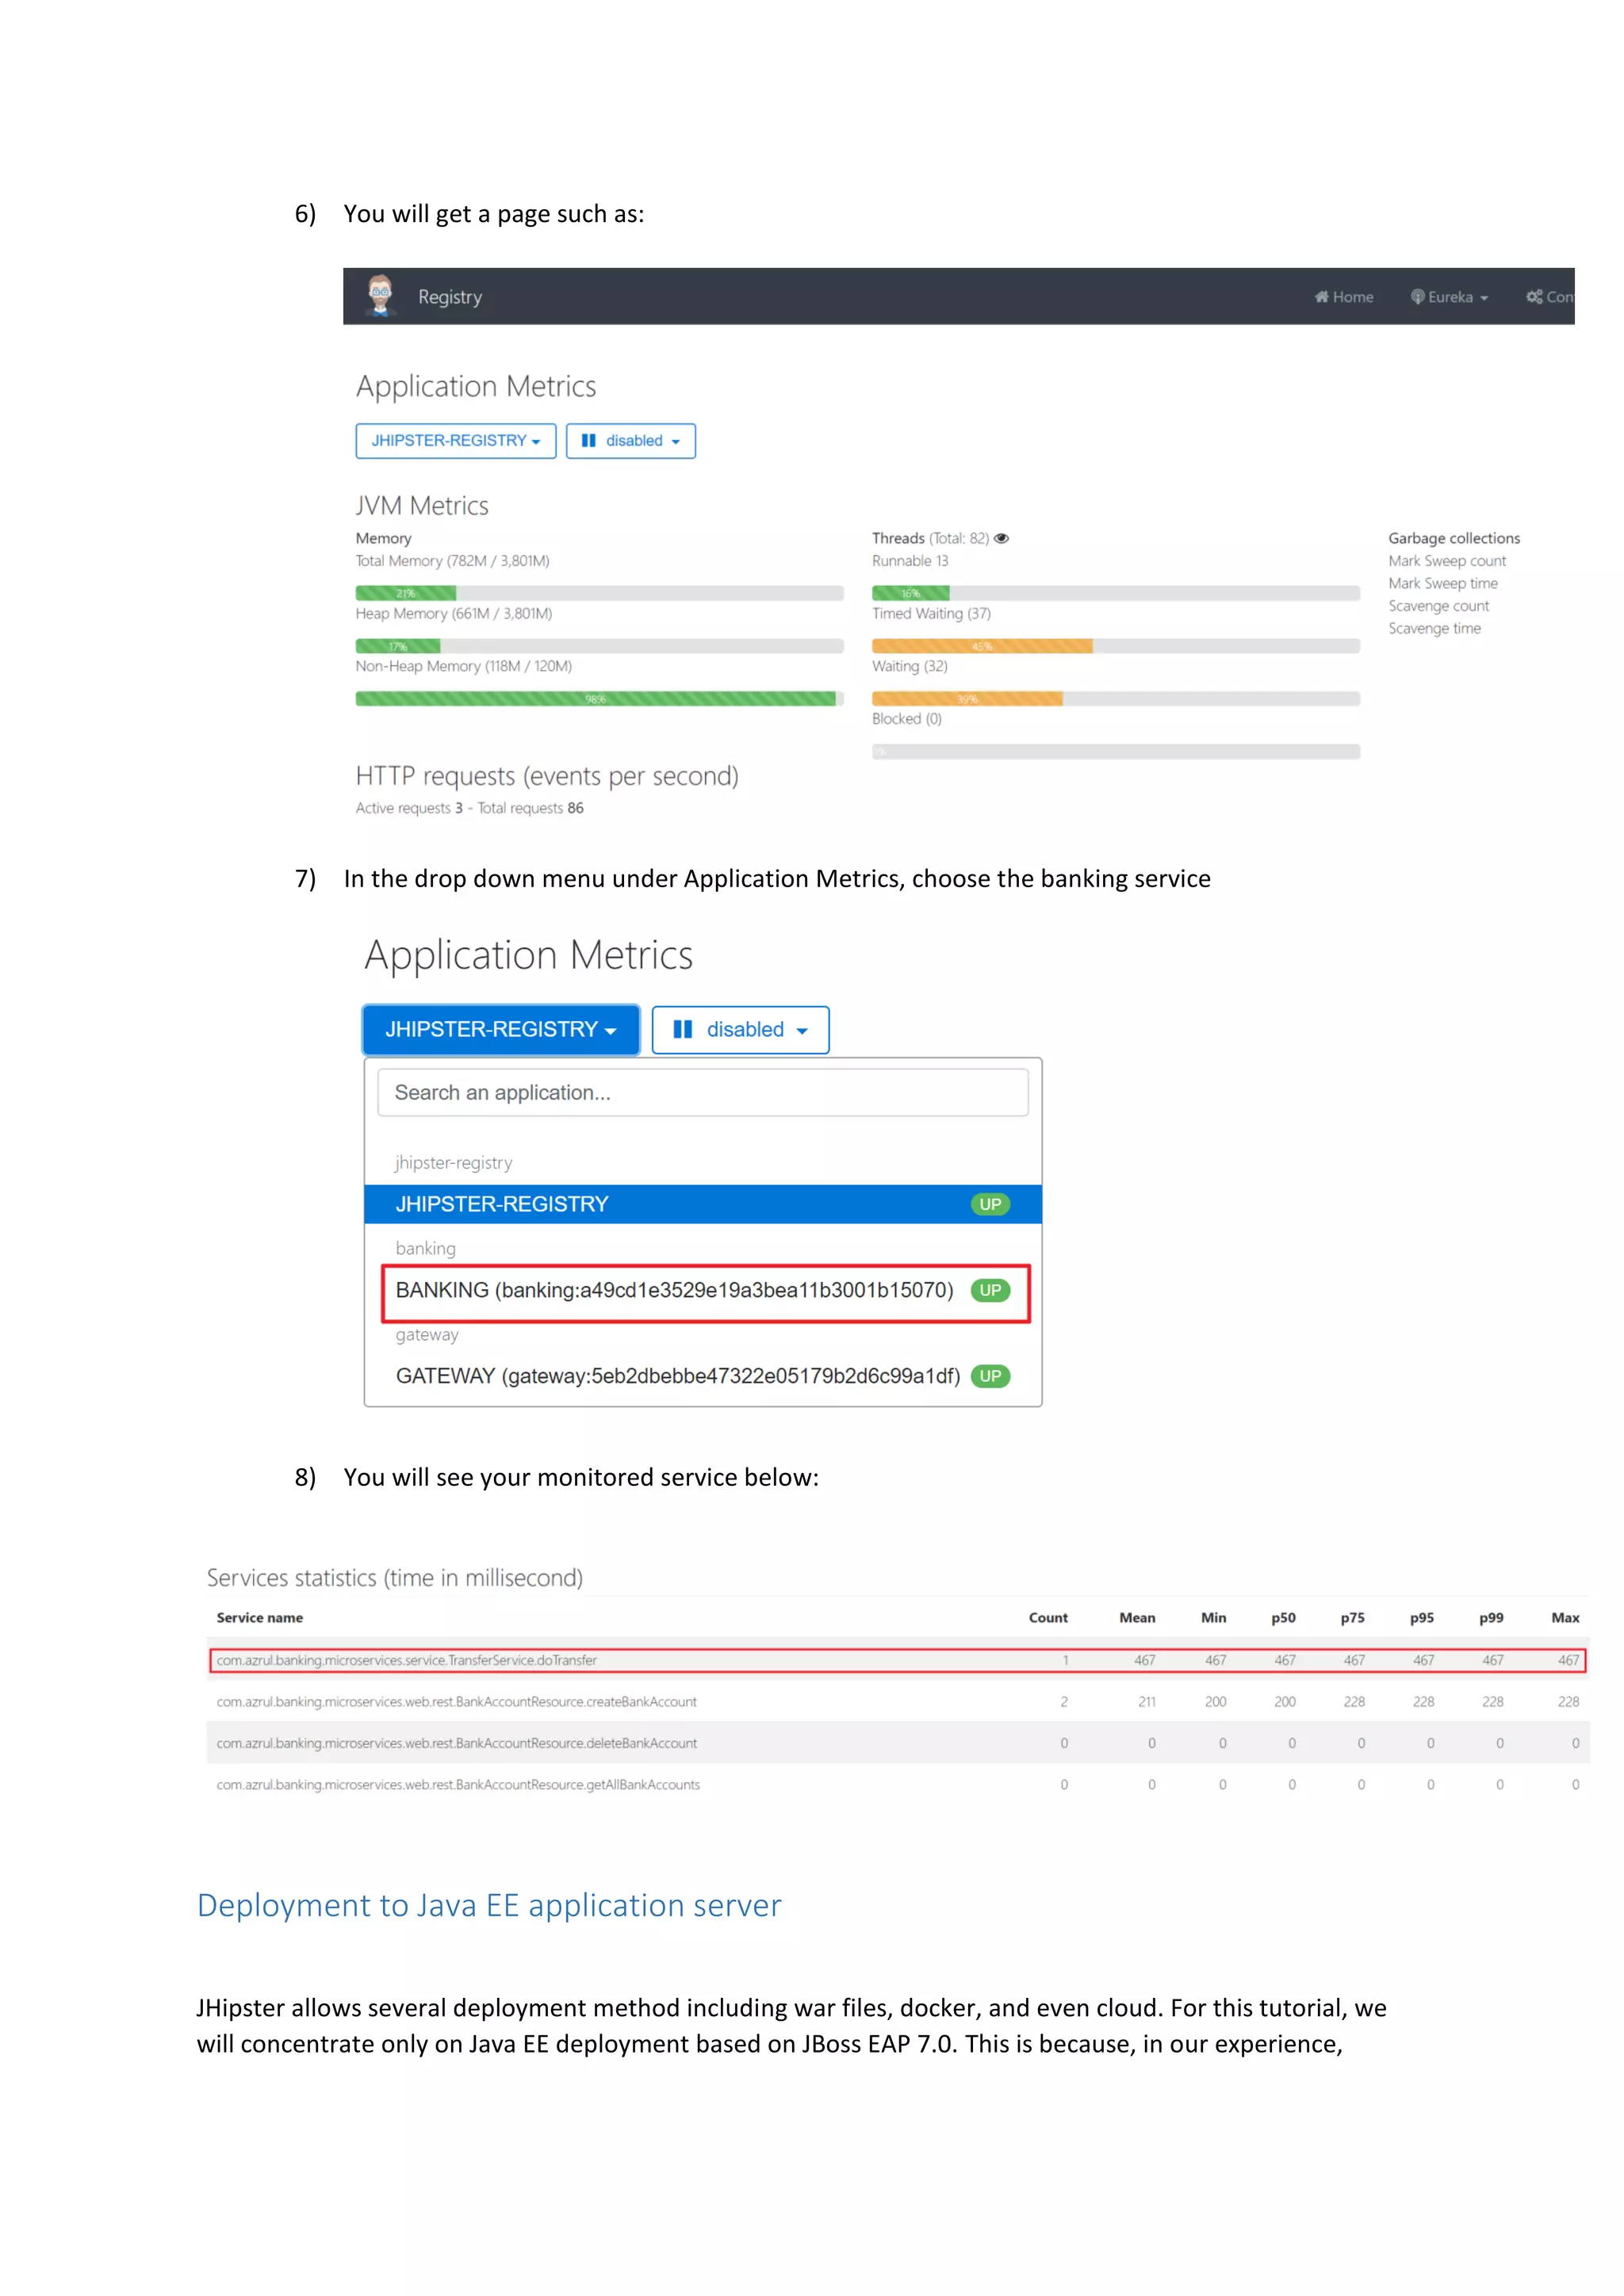


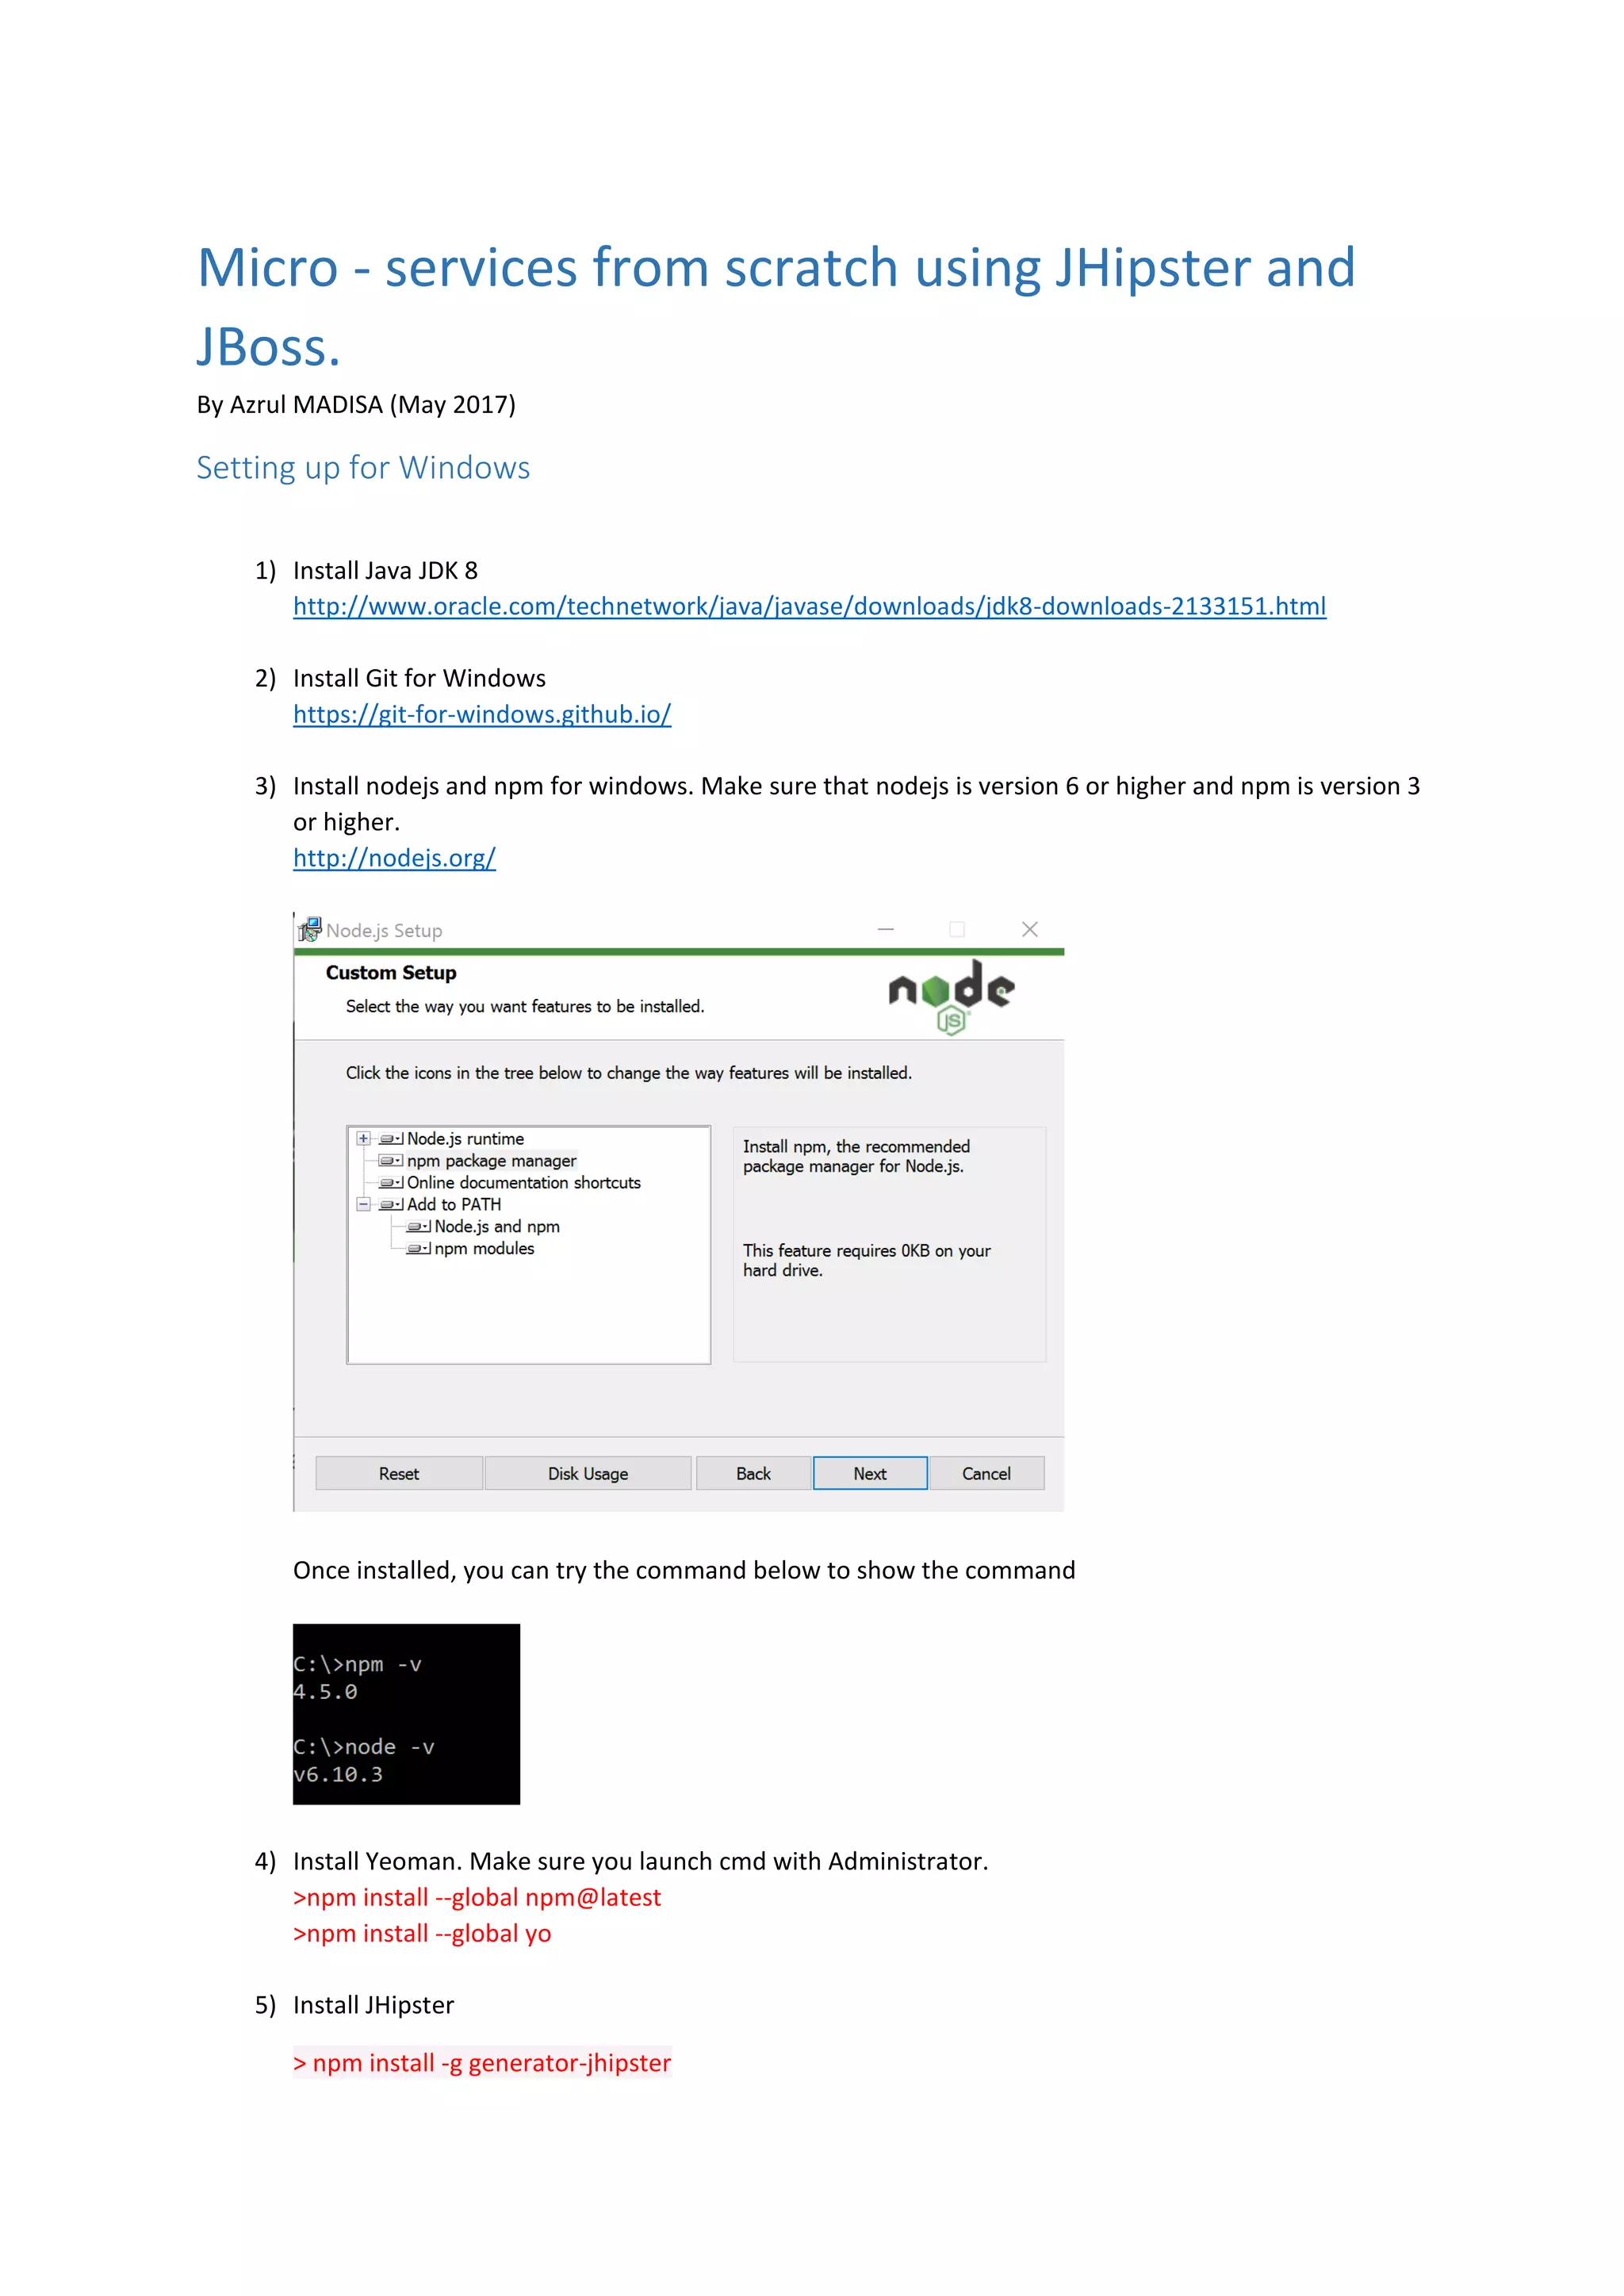
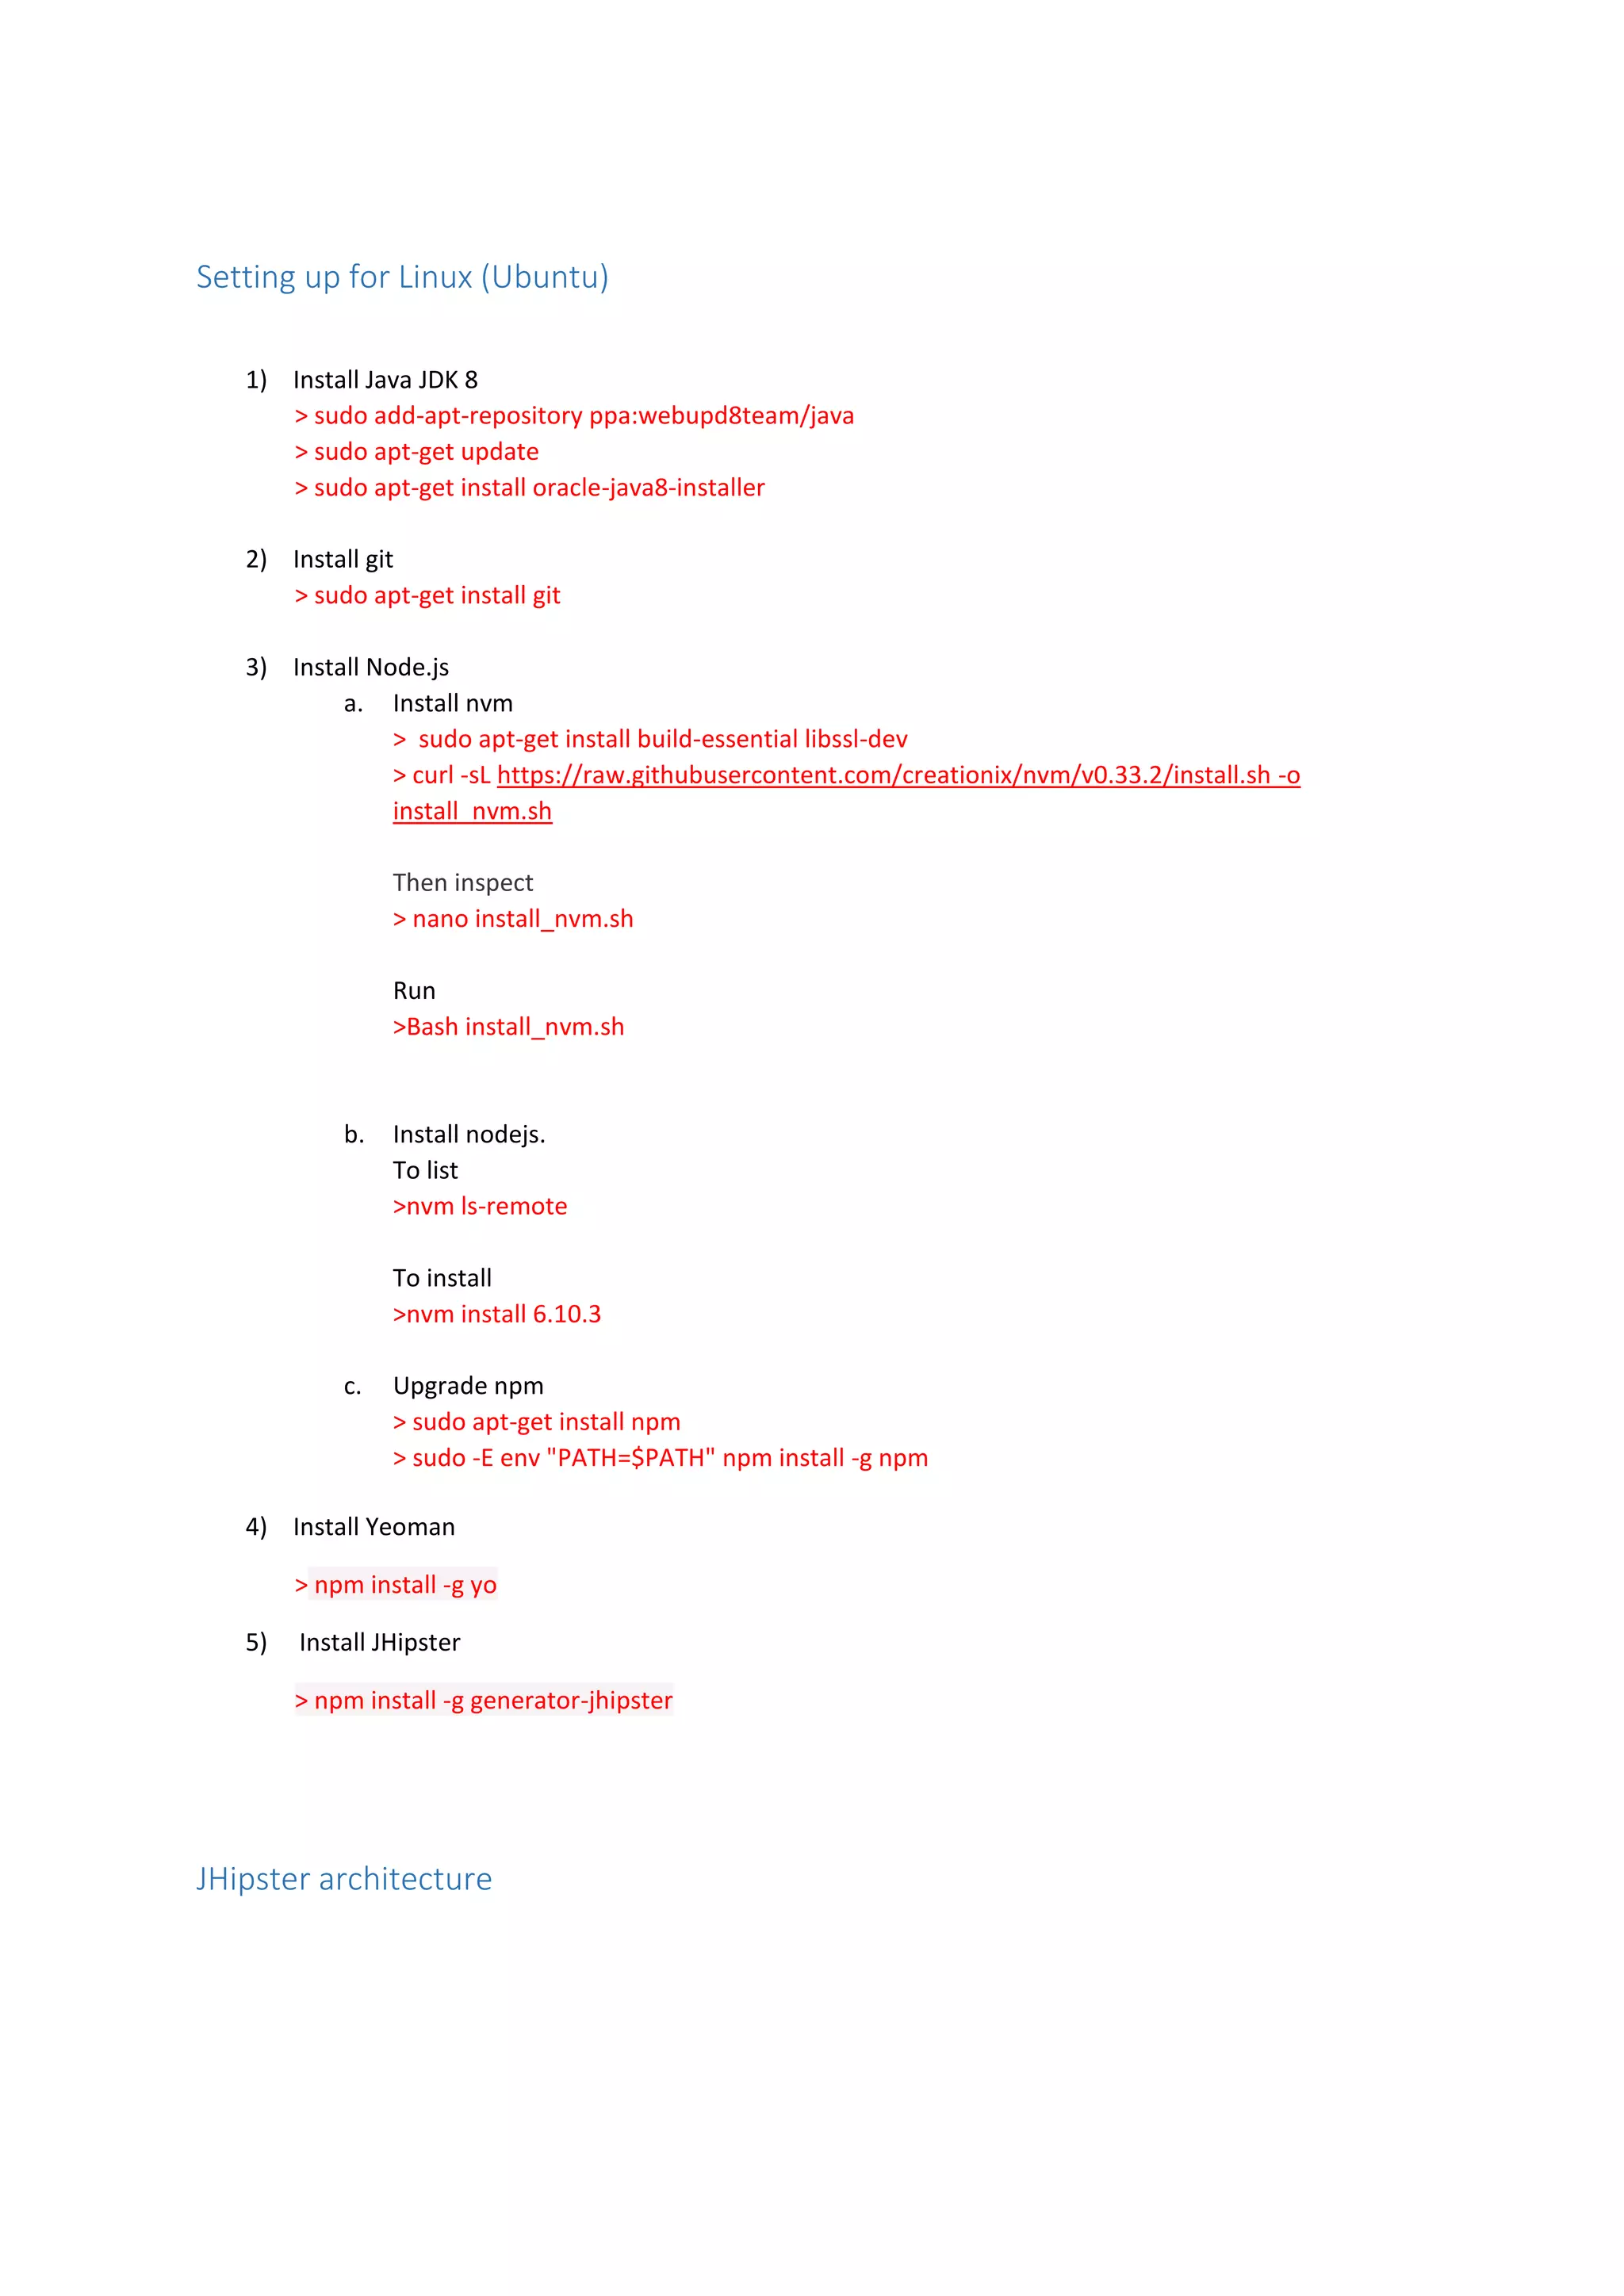
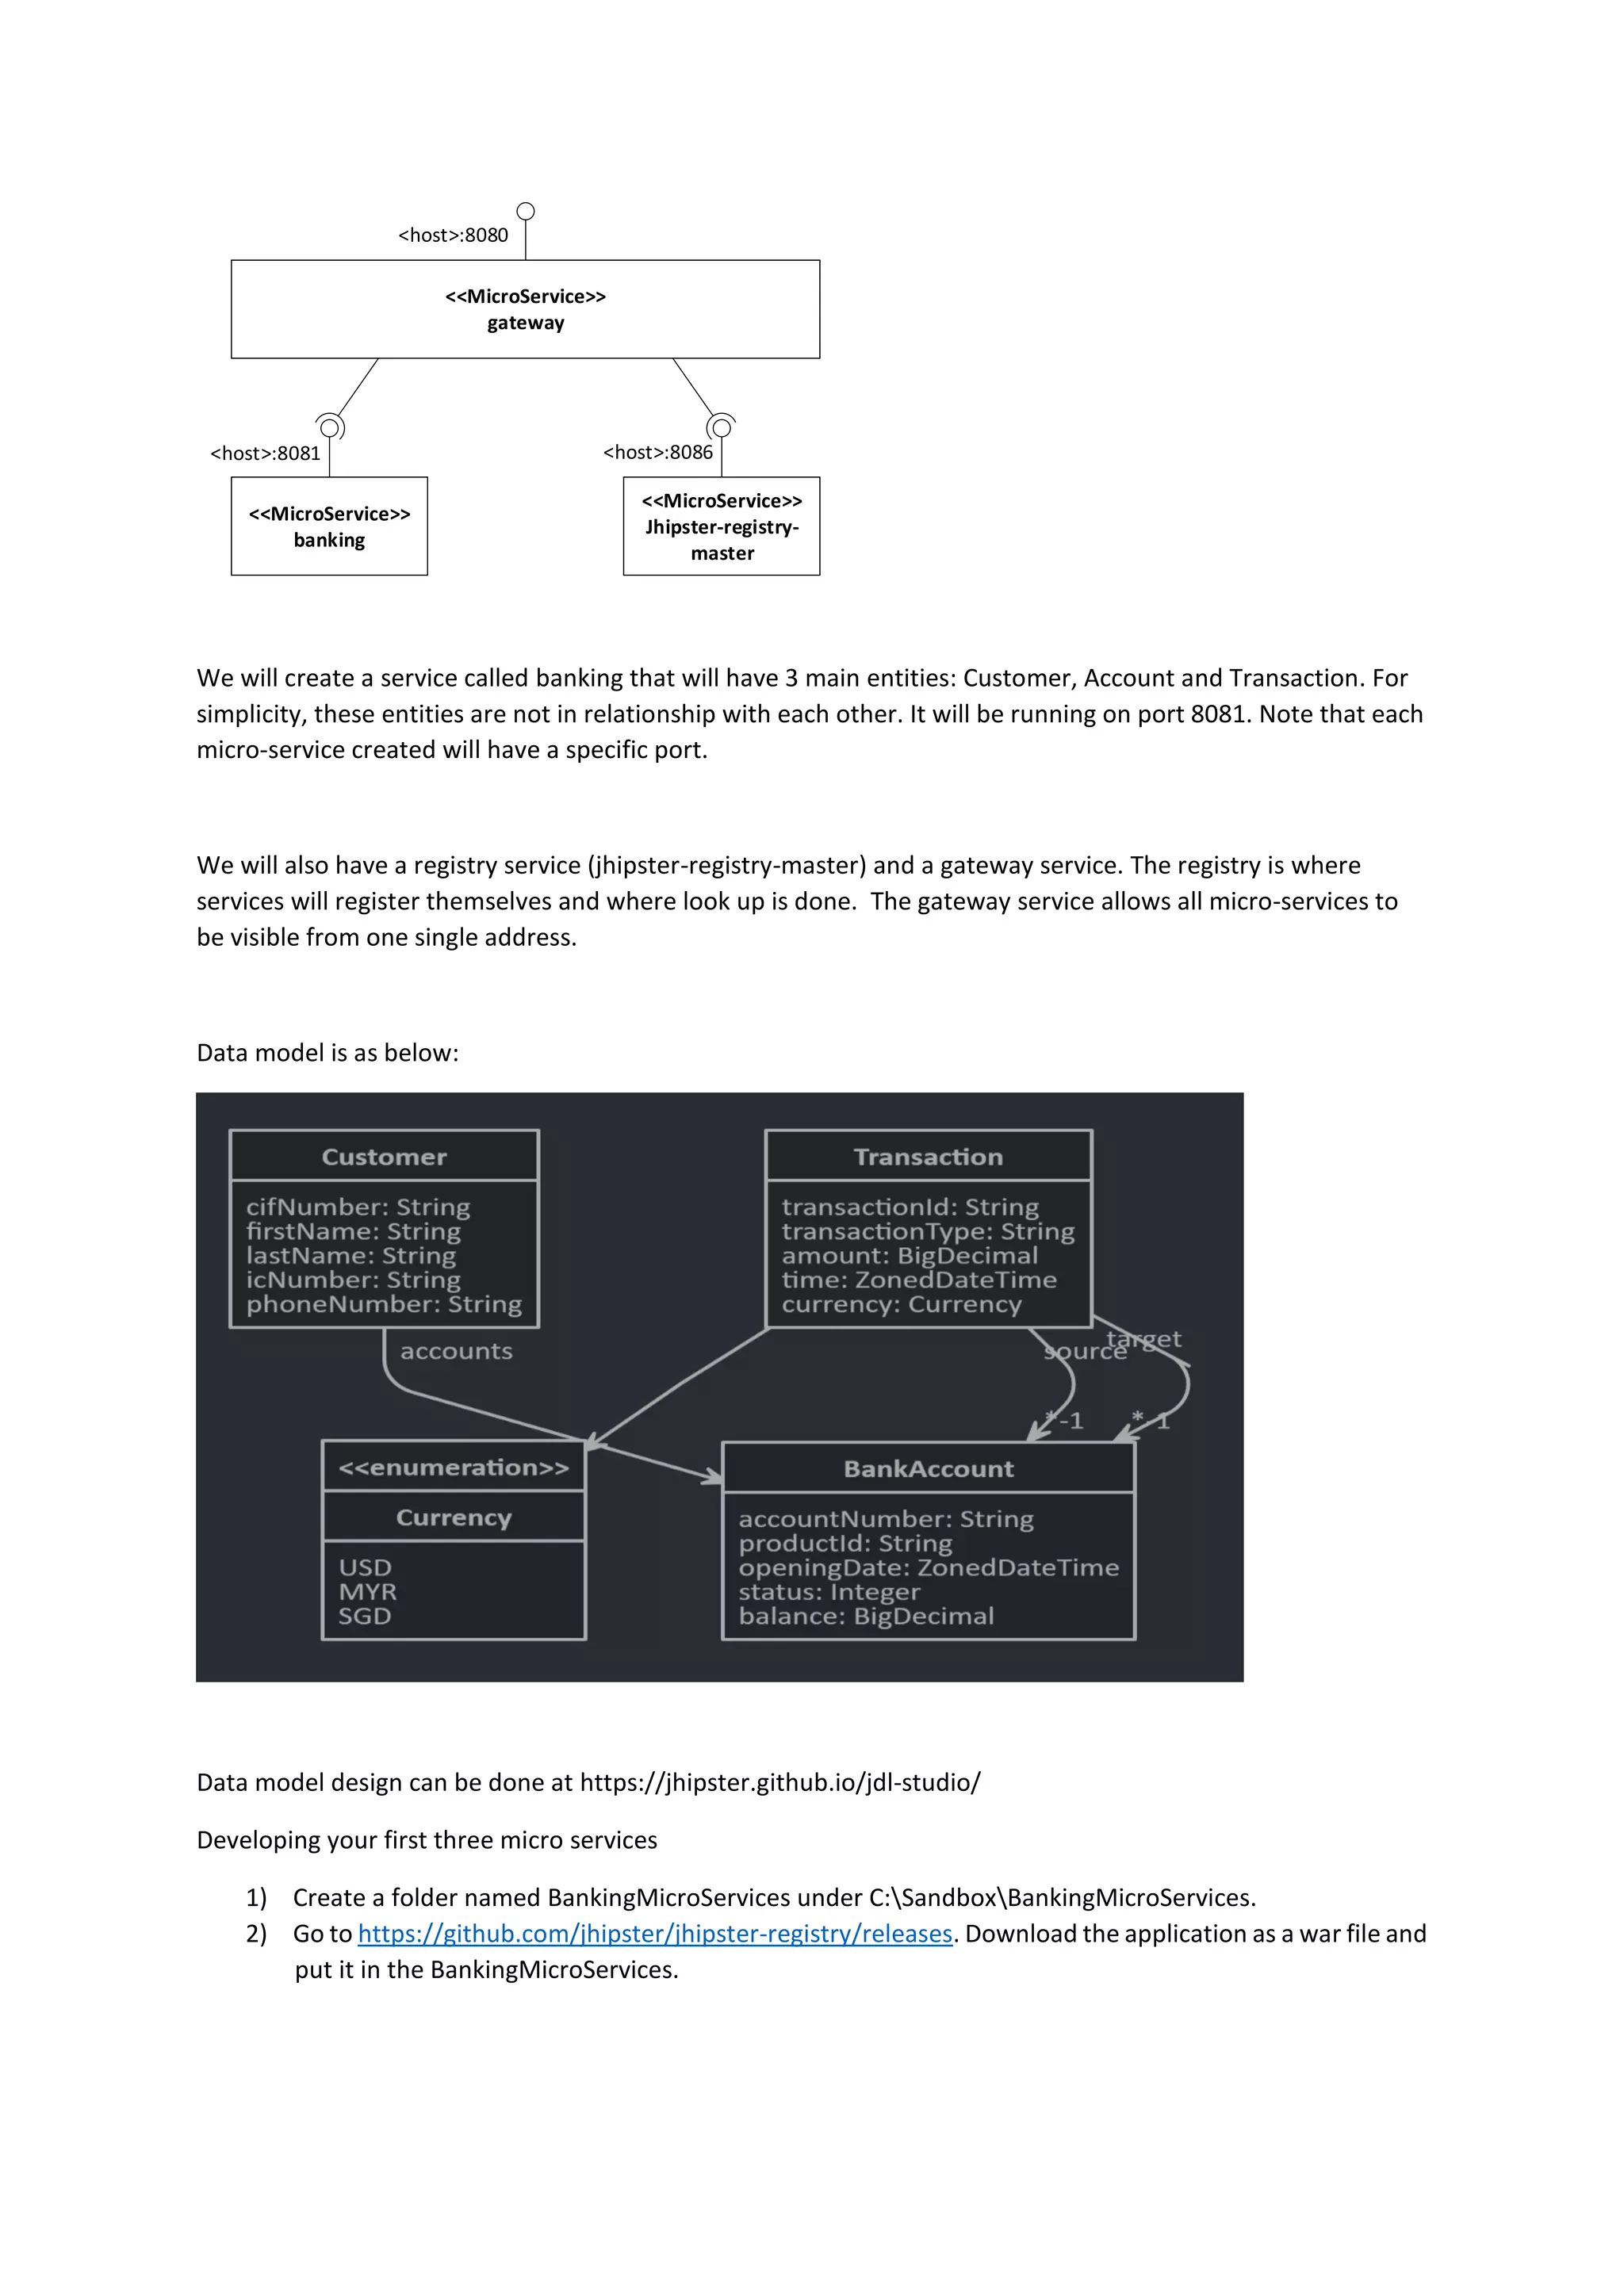
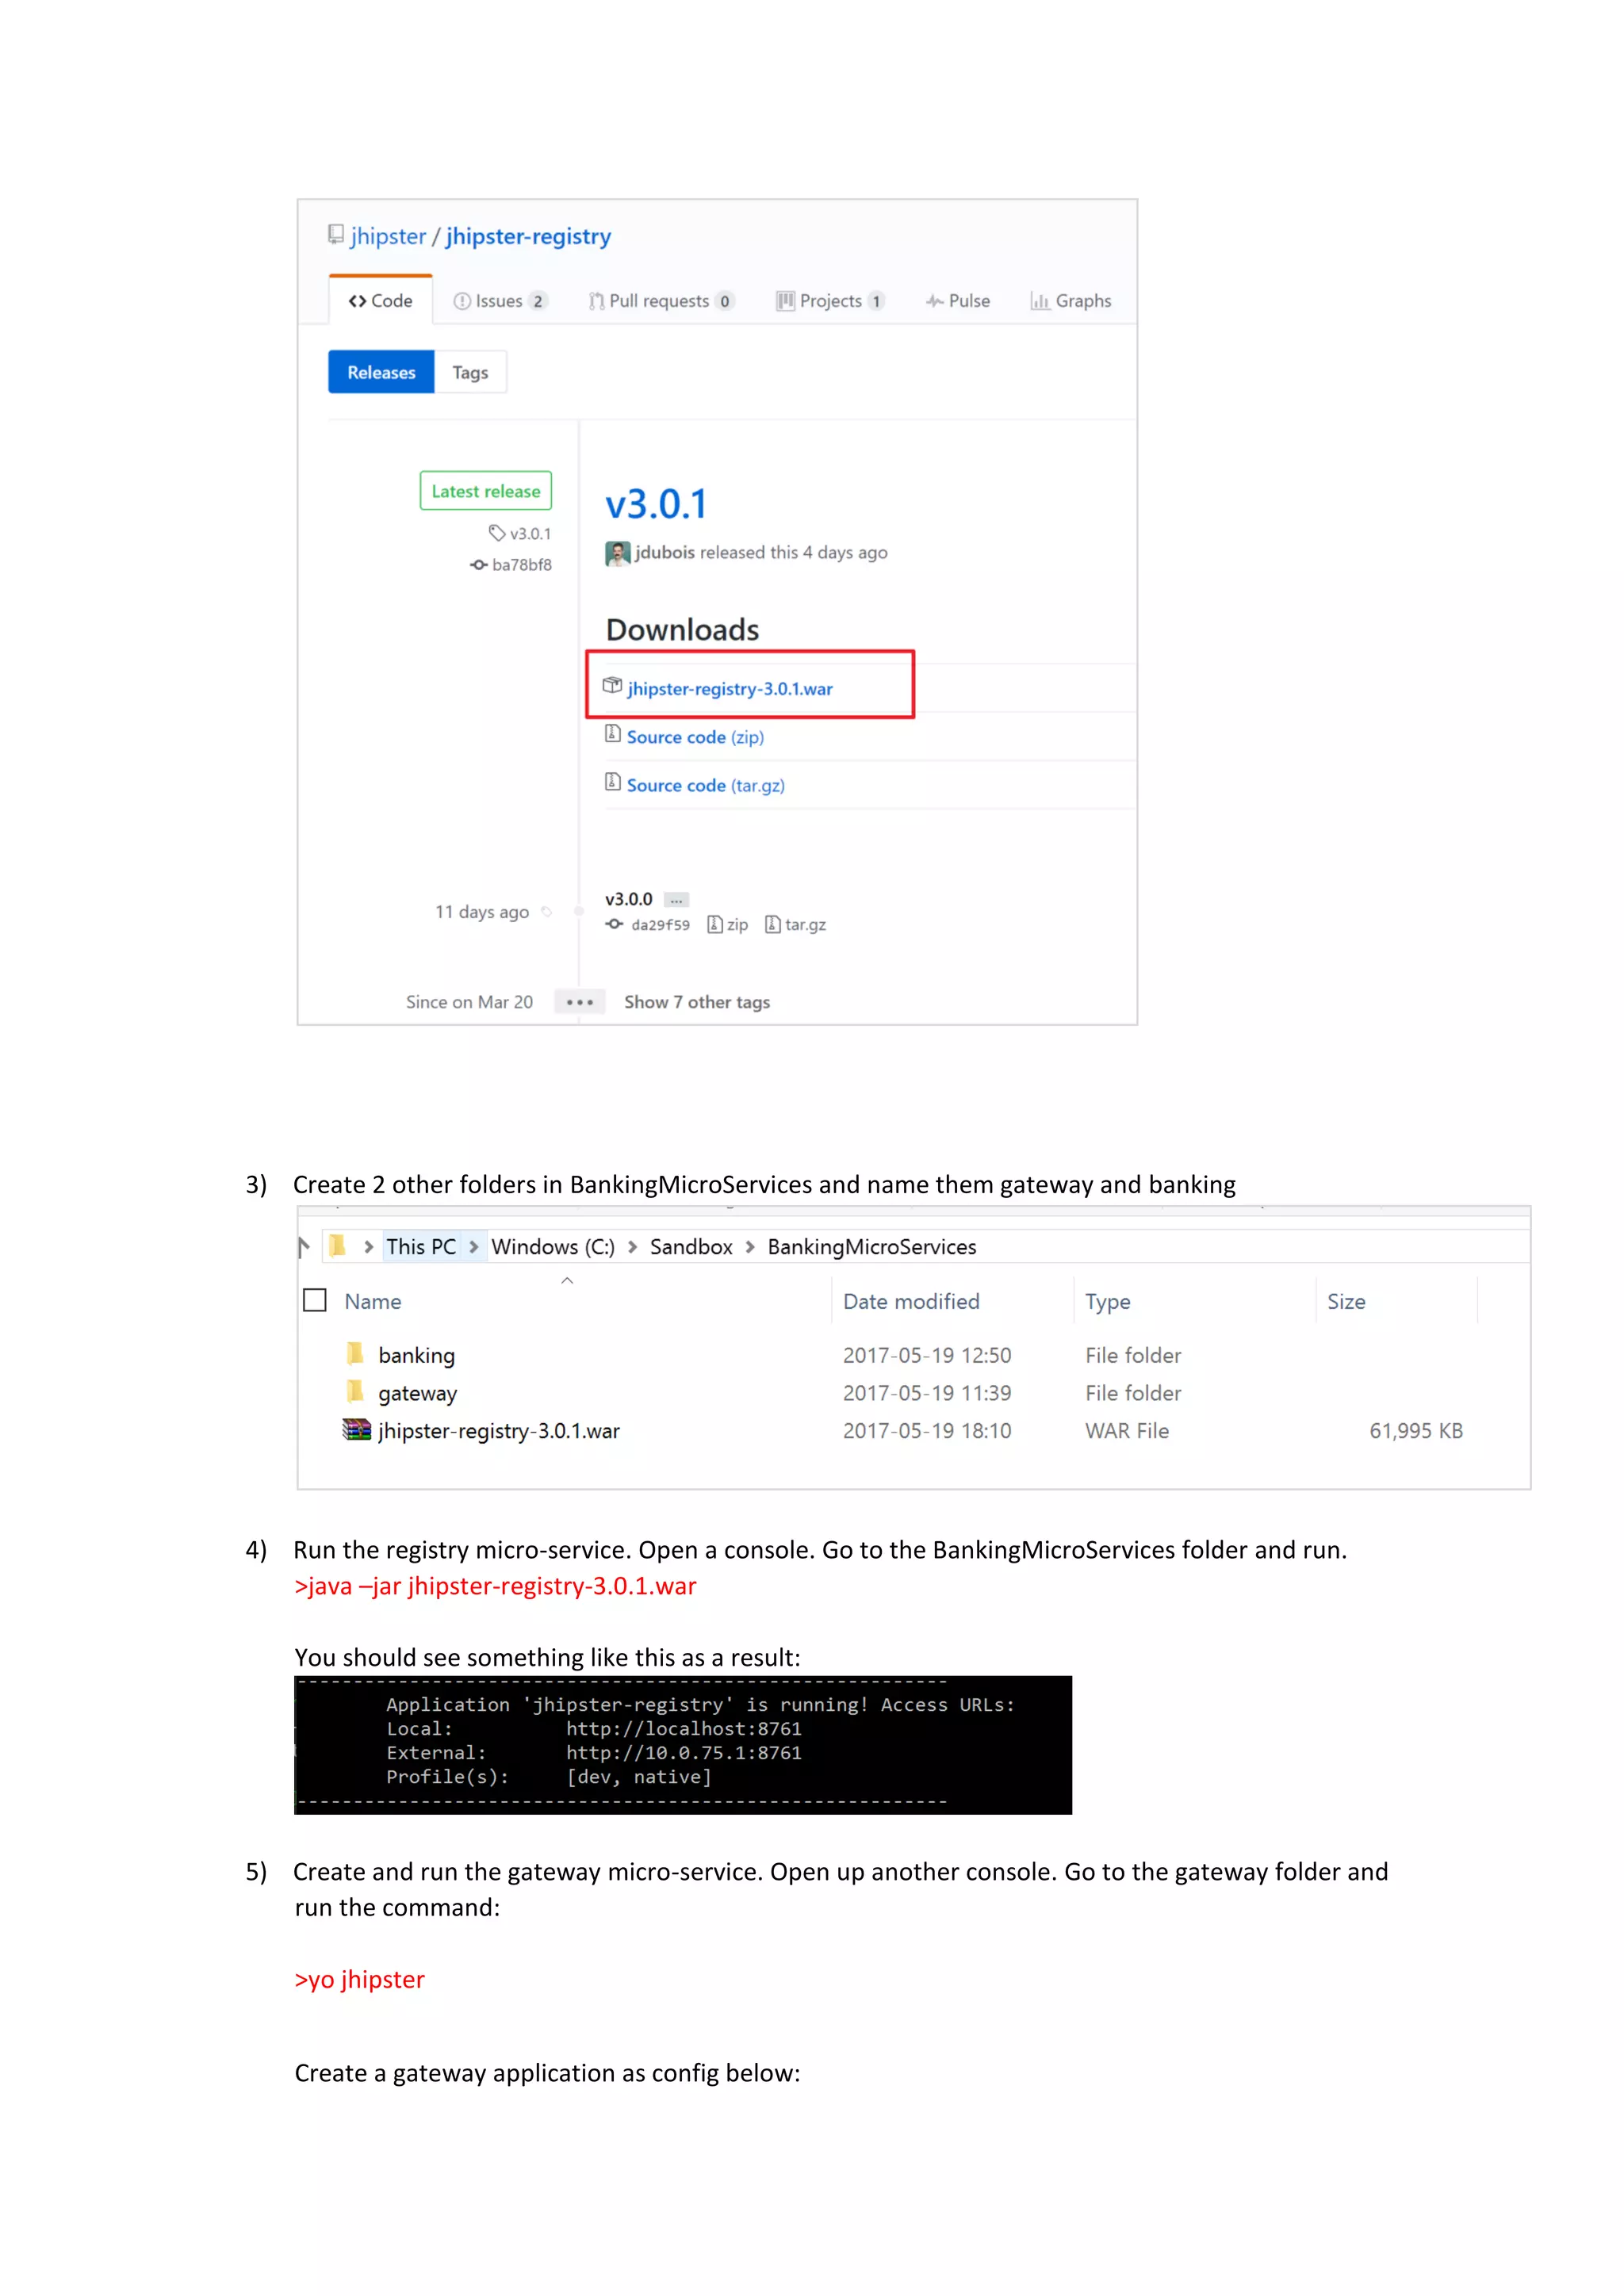
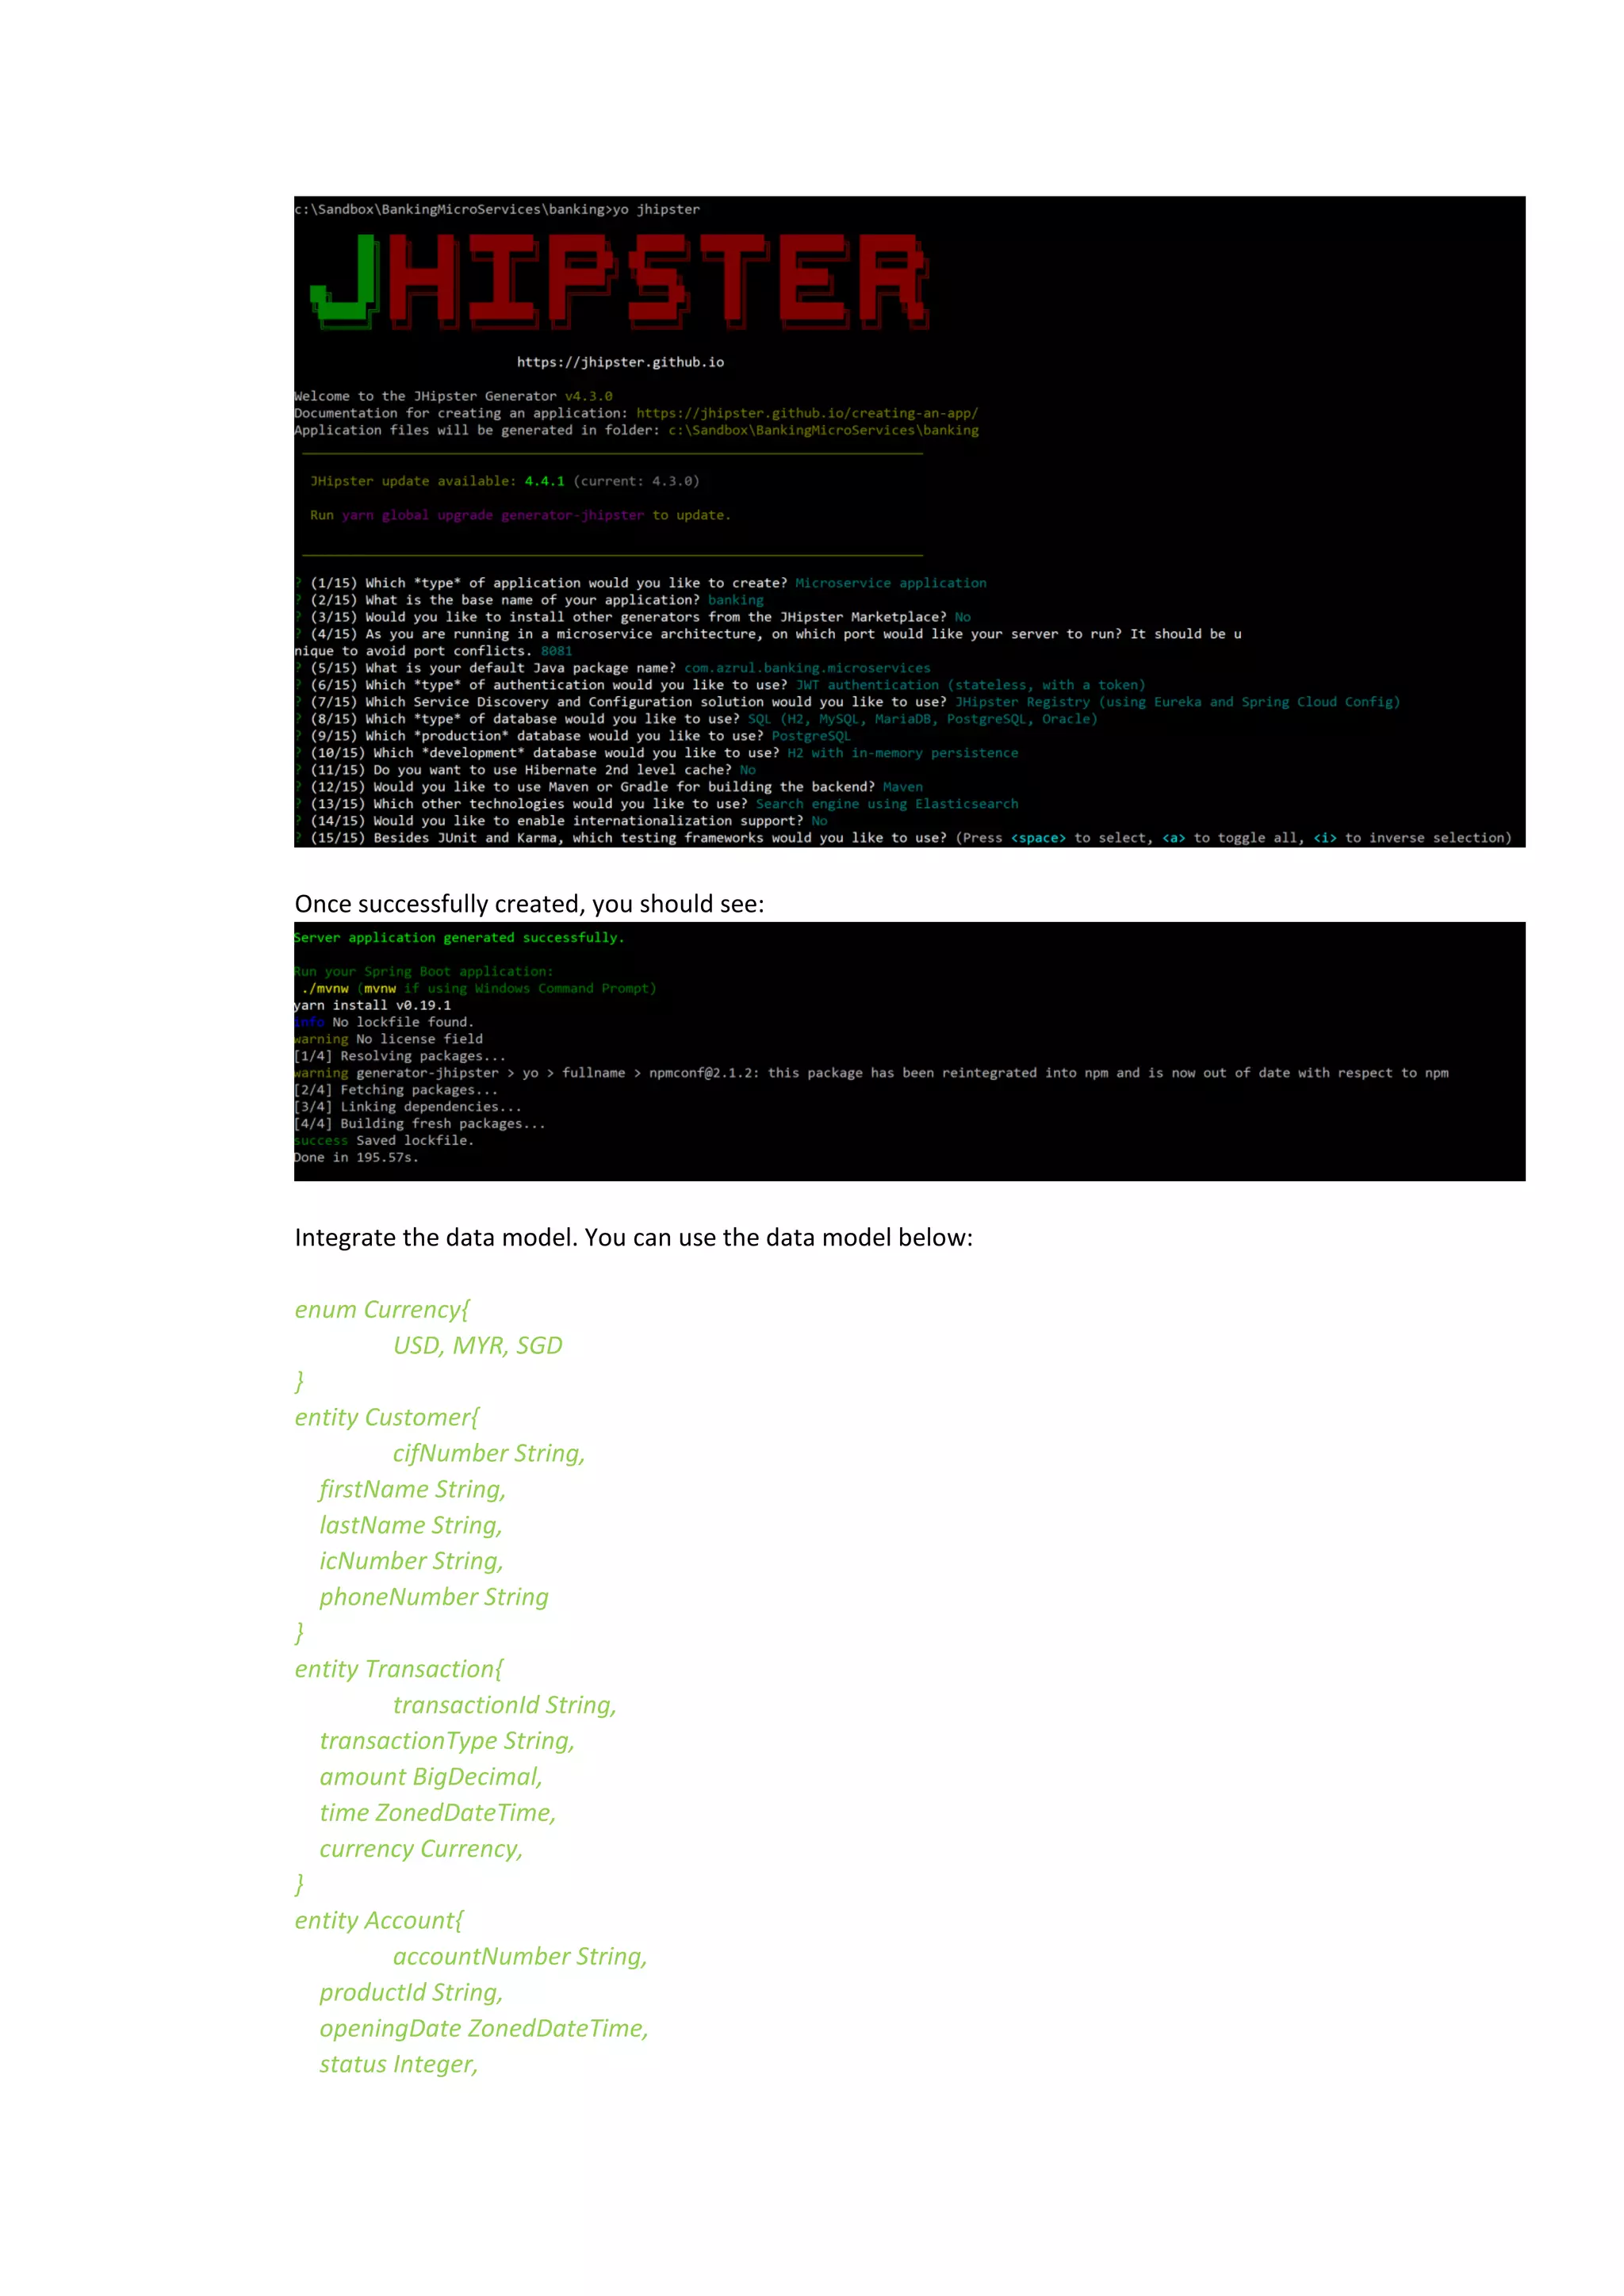
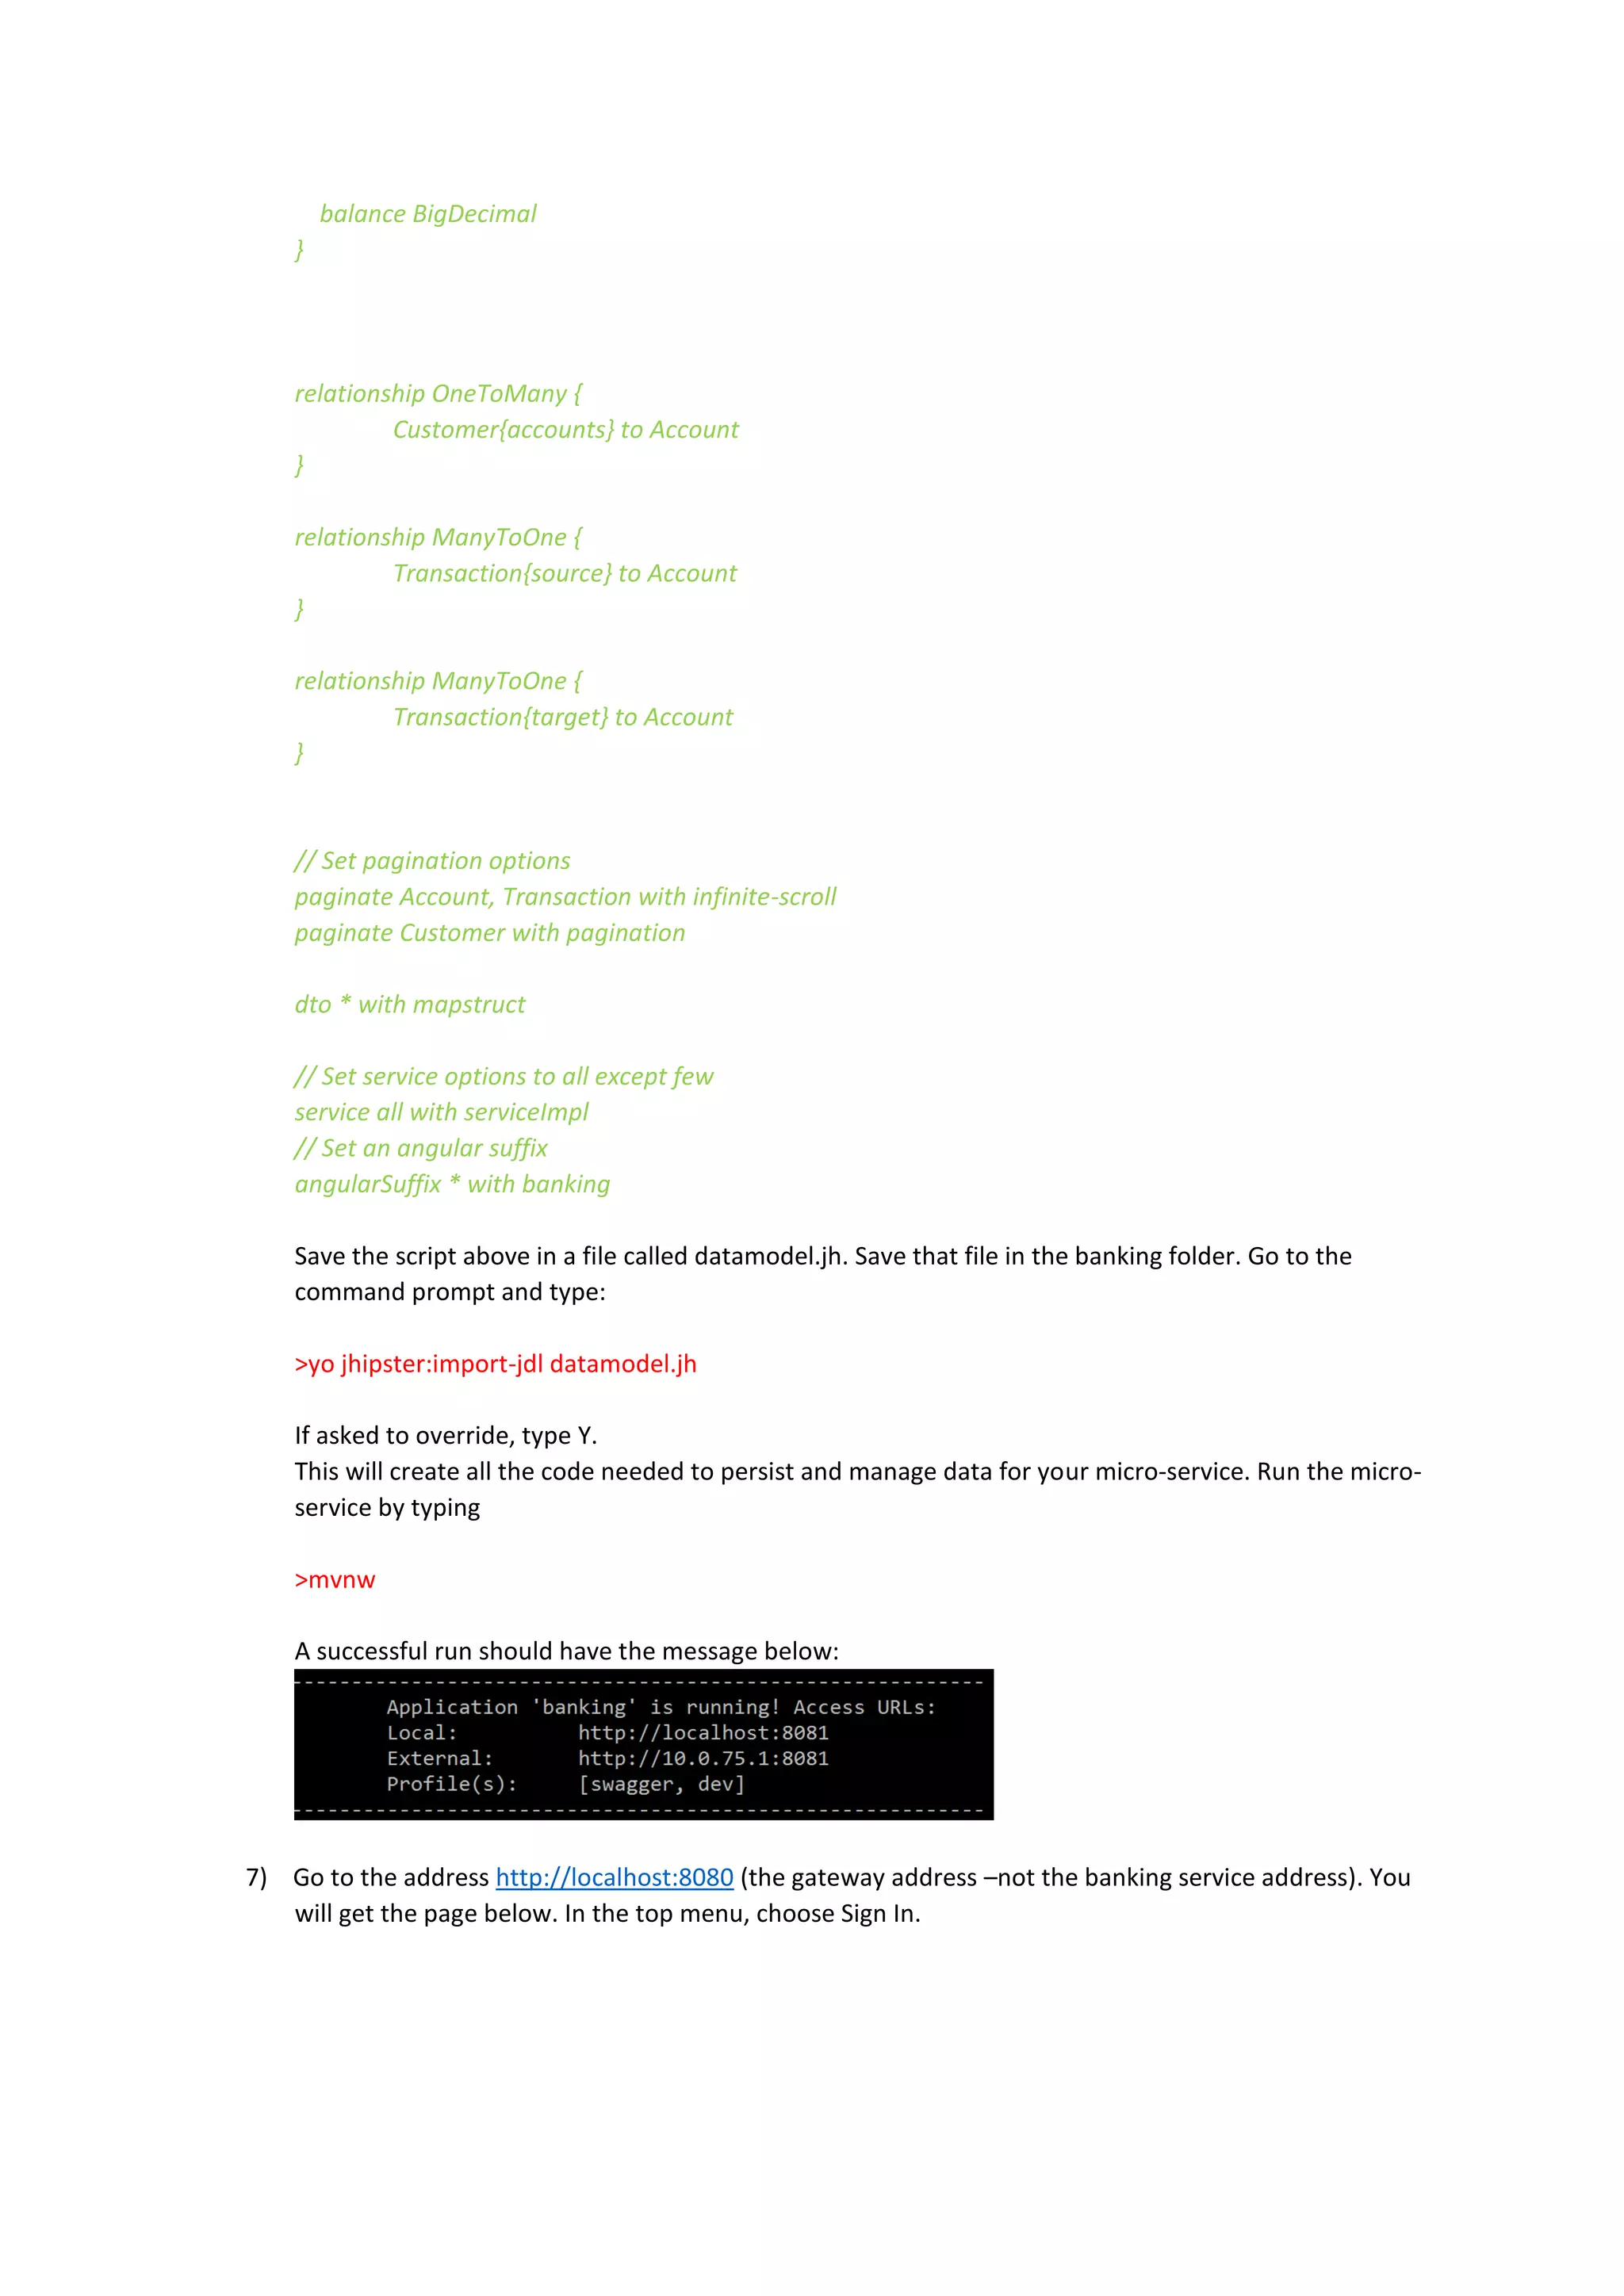
The document provides instructions for setting up microservices from scratch using JHipster and JBoss on Windows and Linux (Ubuntu) systems. It describes how to install prerequisites like Java, Git, Node.js, Yeoman and JHipster. It then demonstrates how to generate and run a sample banking application with 3 microservices (registry, gateway, banking), and test the banking service API. Finally, it describes how to create a custom transfer service to transfer funds between accounts.