Download to read offline


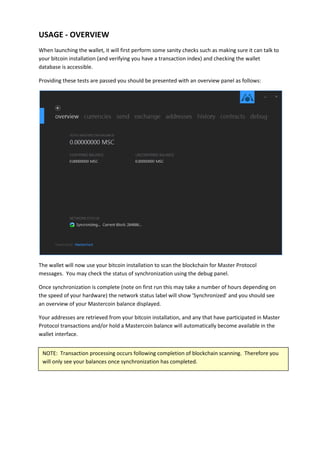
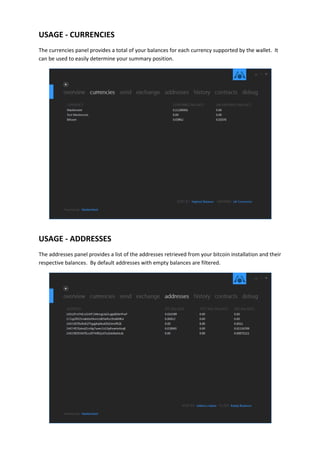
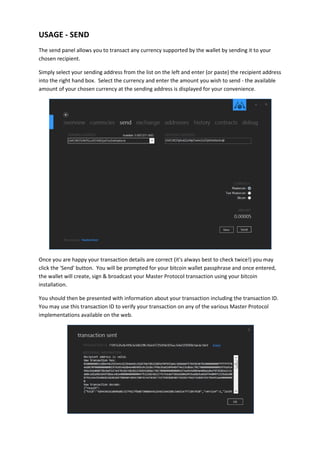
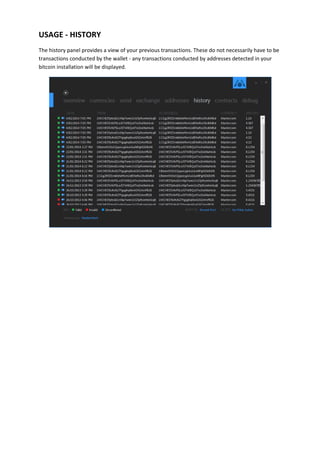
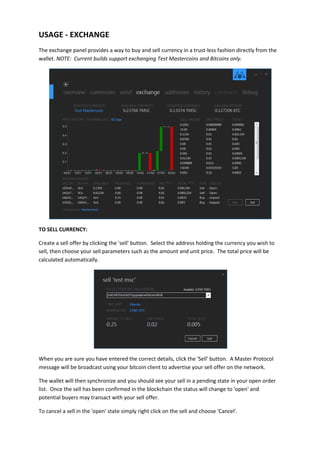
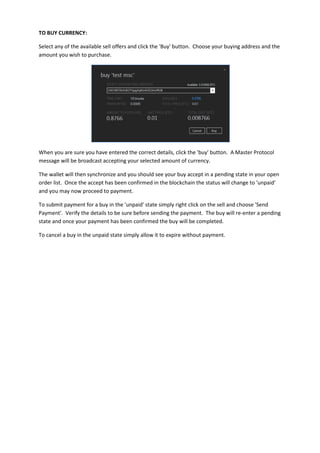


This document provides documentation on using the Masterchest Wallet software, including: - It requires .NET Framework 4.0 and a Bitcoin client with transaction indexing enabled. - Users can view balances of supported currencies like Mastercoin and send currencies to other addresses. The wallet interfaces with the local Bitcoin client. - Additional features include a currency exchange, transaction history, and syncing with the blockchain to detect user balances and transactions.