Download to read offline
![New-PowerAppManagementApp -ApplicationId [the Application (client) ID you copied when
creating your app registration]
Install Azure DevOps Extension
ALM Accelerator uses a number of Azure DevOps extensions, including some third-party
extensions that are available in the Azure DevOps Marketplace. Under Organization Settings
in Azure DevOps , install the extension as described in the following procedure. For more
information about Azure DevOps extensions from Microsoft and others, visit Evaluate
Marketplace Extension Publishers . In addition, a link to each third-party extension's
webpage and their source code is provided in the following list.
Go to https://dev.azure.com , and select Organizational Settings .
Select General > Extensions .
Install the following extensions:
Power Platform Build Tools (required) : This extension includes Microsoft build tasks for
Microsoft Power Platform. (
https://marketplace.visualstudio.com/items?itemName=microsoft-IsvExpTools.PowerPlatform
-BuildTools )
Replace Token (Required) : This extension is used by pipelines to replace tokens in
configuration files in order to be able to store secure values in private variables configured
for the pipeline. (
https://marketplace.visualstudio.com/items?itemName=qetza.replacetokens |
https://github.com/qetza/vsts-replacetokens-task )
SARIF SAST Scan tab (optional) : This extension can be used to visualize the SARIF files
that are generated by the Solution Checker during a build. ( SARIF SAST Scan tab - Visual
Studio Marketplace )](https://image.slidesharecdn.com/untitleddocument40-230517172056-374124af/75/Manually-set-up-ALM-accelerator-for-Power-Platform-components-6-2048.jpg)
![Importing the solution and configuring
the app
Install ALM Accelerator in Dataverse
Download the latest managed solution file from GitHub[latest version] :
CenterofExcellenceALMaccelerator_ _managed.zip.
Go to PowerApps and select the environment you want to use to host the ALM Accelerator
for Power Platform app.
On the left pane, select Solutions .
Select Import , and browse to the location of the managed solution that you downloaded.
Select a Next , and then select Next again .
On the Connections page, select or create a new connection to use to connect to Dataverse
for the CDS DevOps connection .
Select Import , and wait for the solution import process to complete.
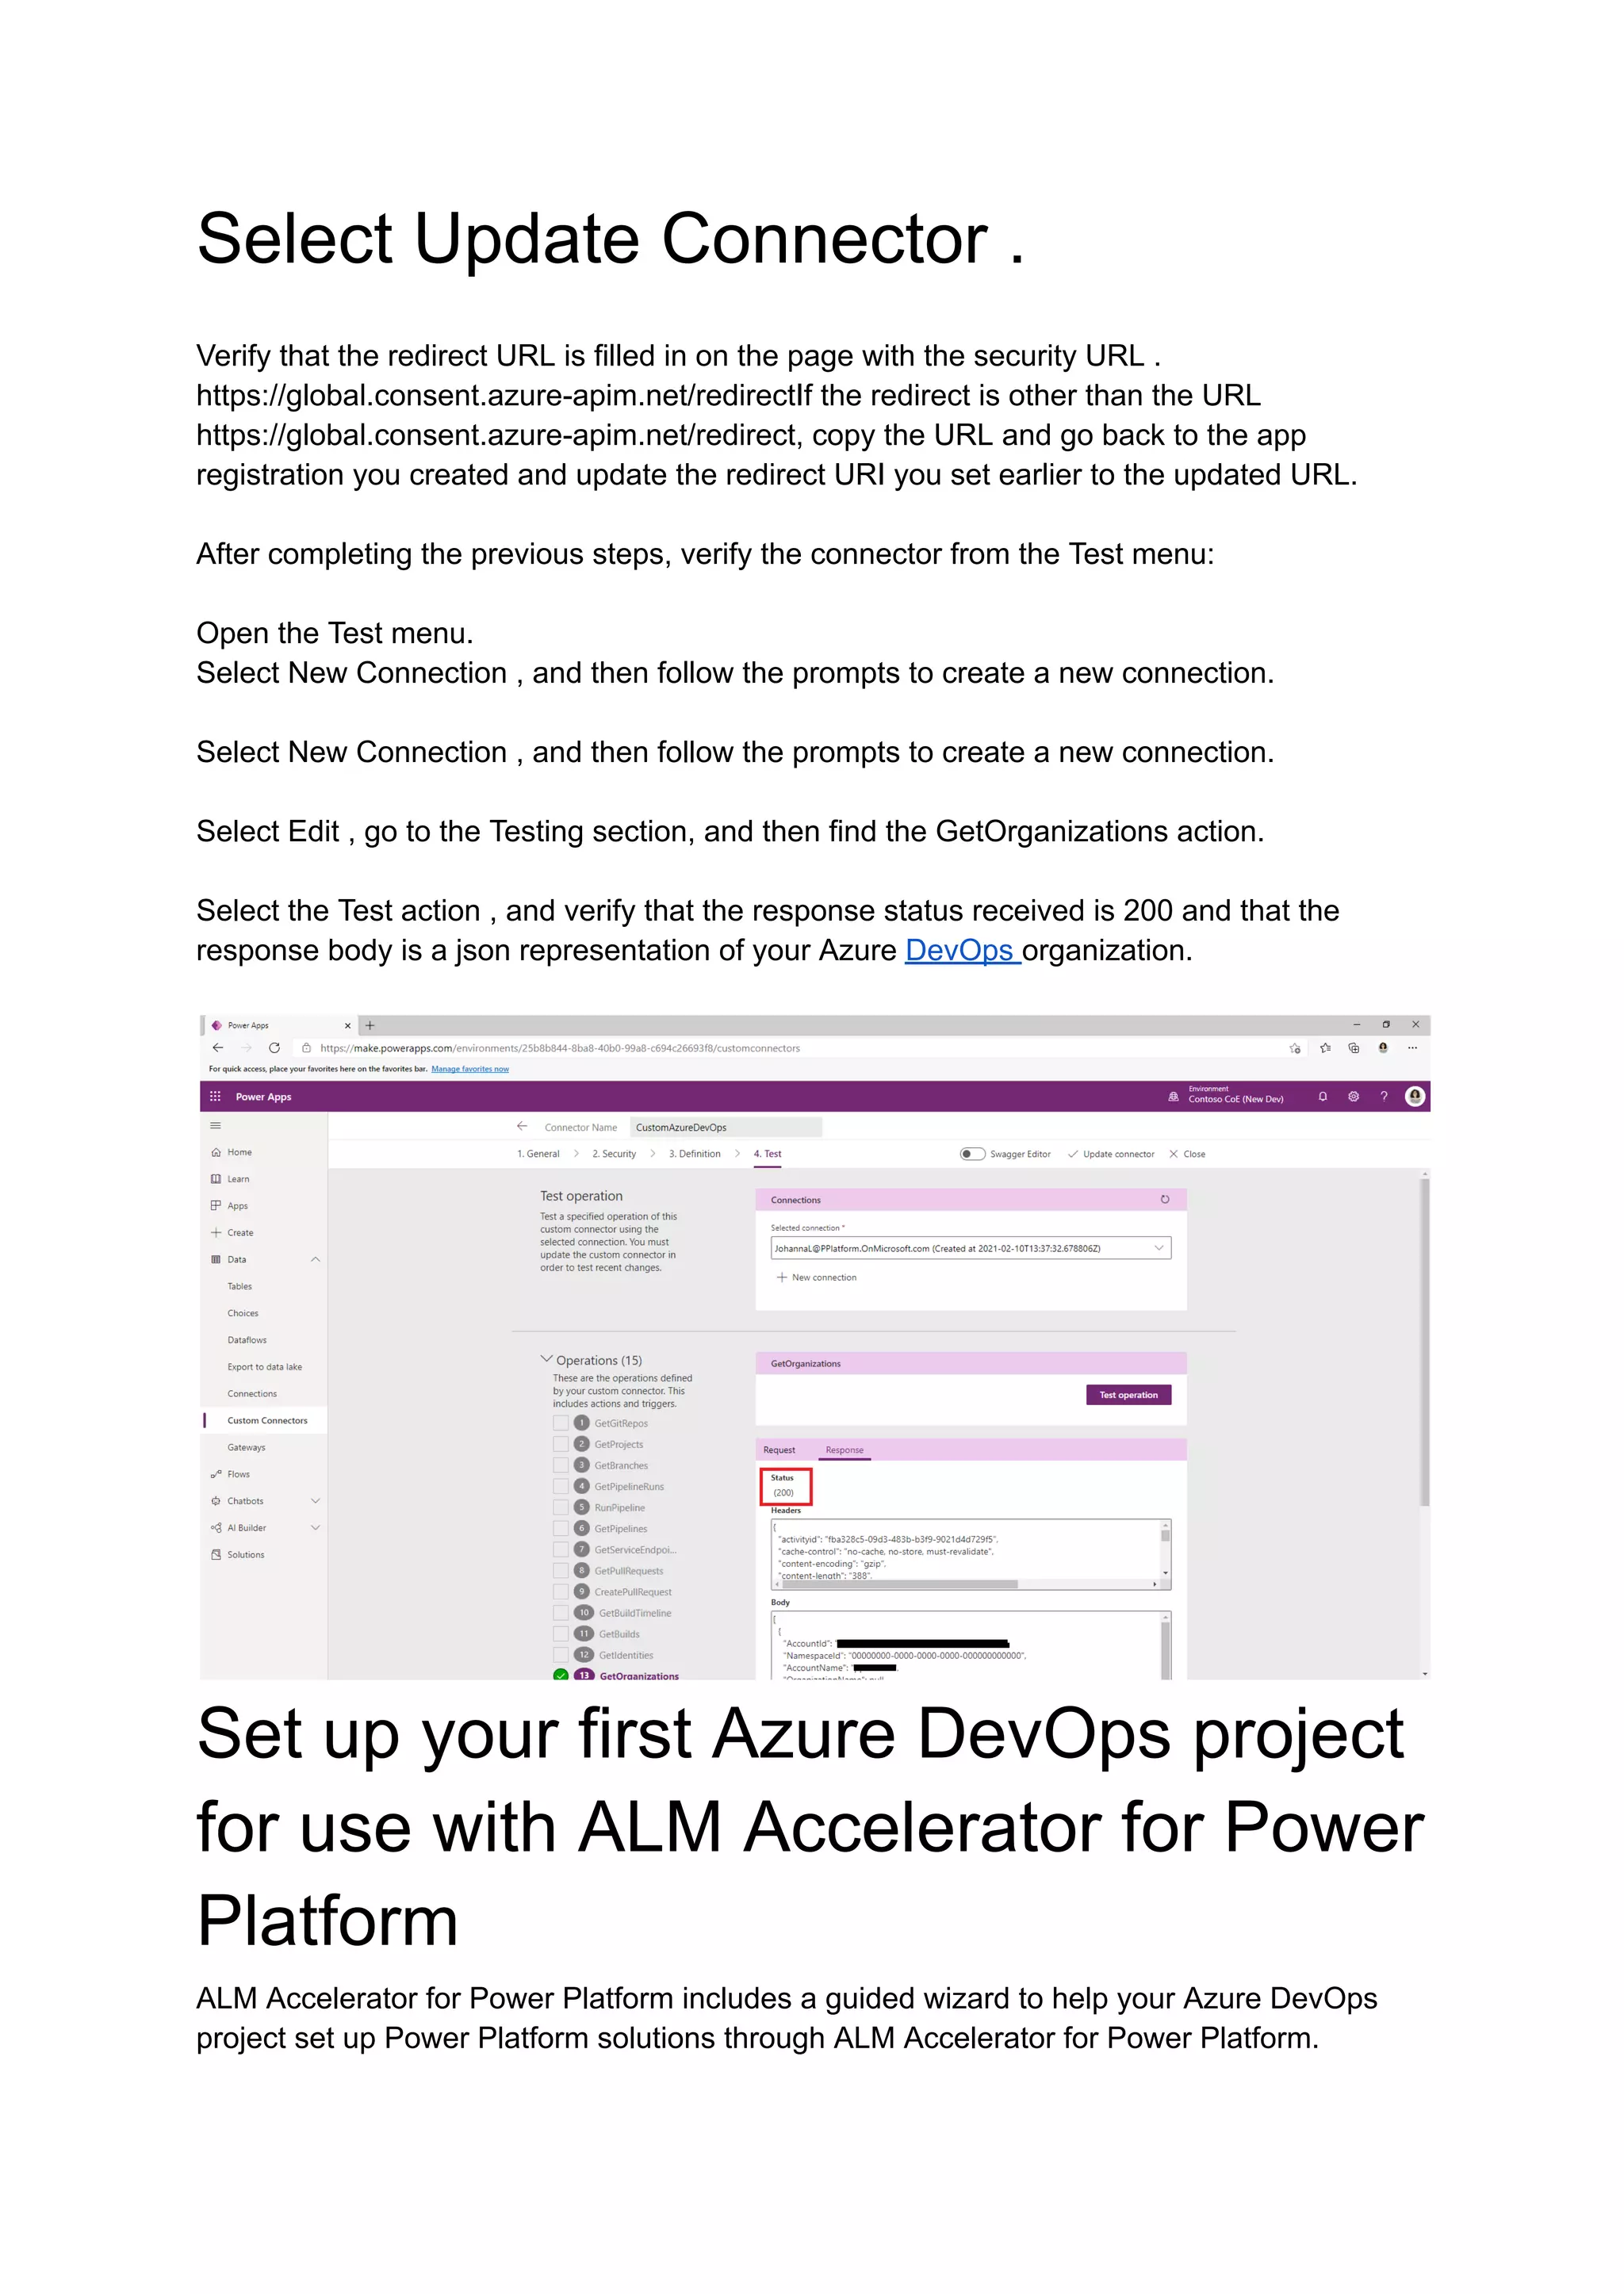
Configure DevOps custom connector
In Power Apps , select your environment, and then select Data > Custom Connectors >
CustomAzureDevOps .
Select Edit , go to the Security section, select Edit , and then set the following fields.](https://image.slidesharecdn.com/untitleddocument40-230517172056-374124af/75/Manually-set-up-ALM-accelerator-for-Power-Platform-components-7-2048.jpg)


The document provides instructions for manually setting up the ALM Accelerator for Power Platform components to enable source control strategies with Azure DevOps and automated builds and deployments without manual intervention. It discusses prerequisites for the setup, including a Dataverse environment, Azure DevOps organization, required users and permissions. It then details the steps to create an Azure AD app registration, import the ALM Accelerator solution, configure the DevOps connector, set up the first Azure DevOps project, and set up makers to use the ALM Accelerator app.


