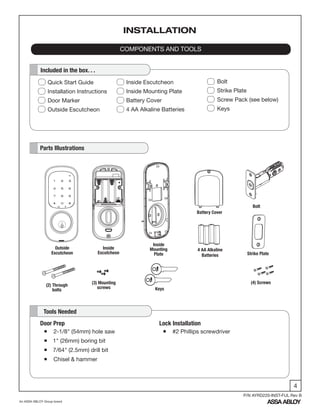
Download to read offline
![6
An ASSA ABLOY Group brand
P/N AYRD220-INST-FUL Rev B
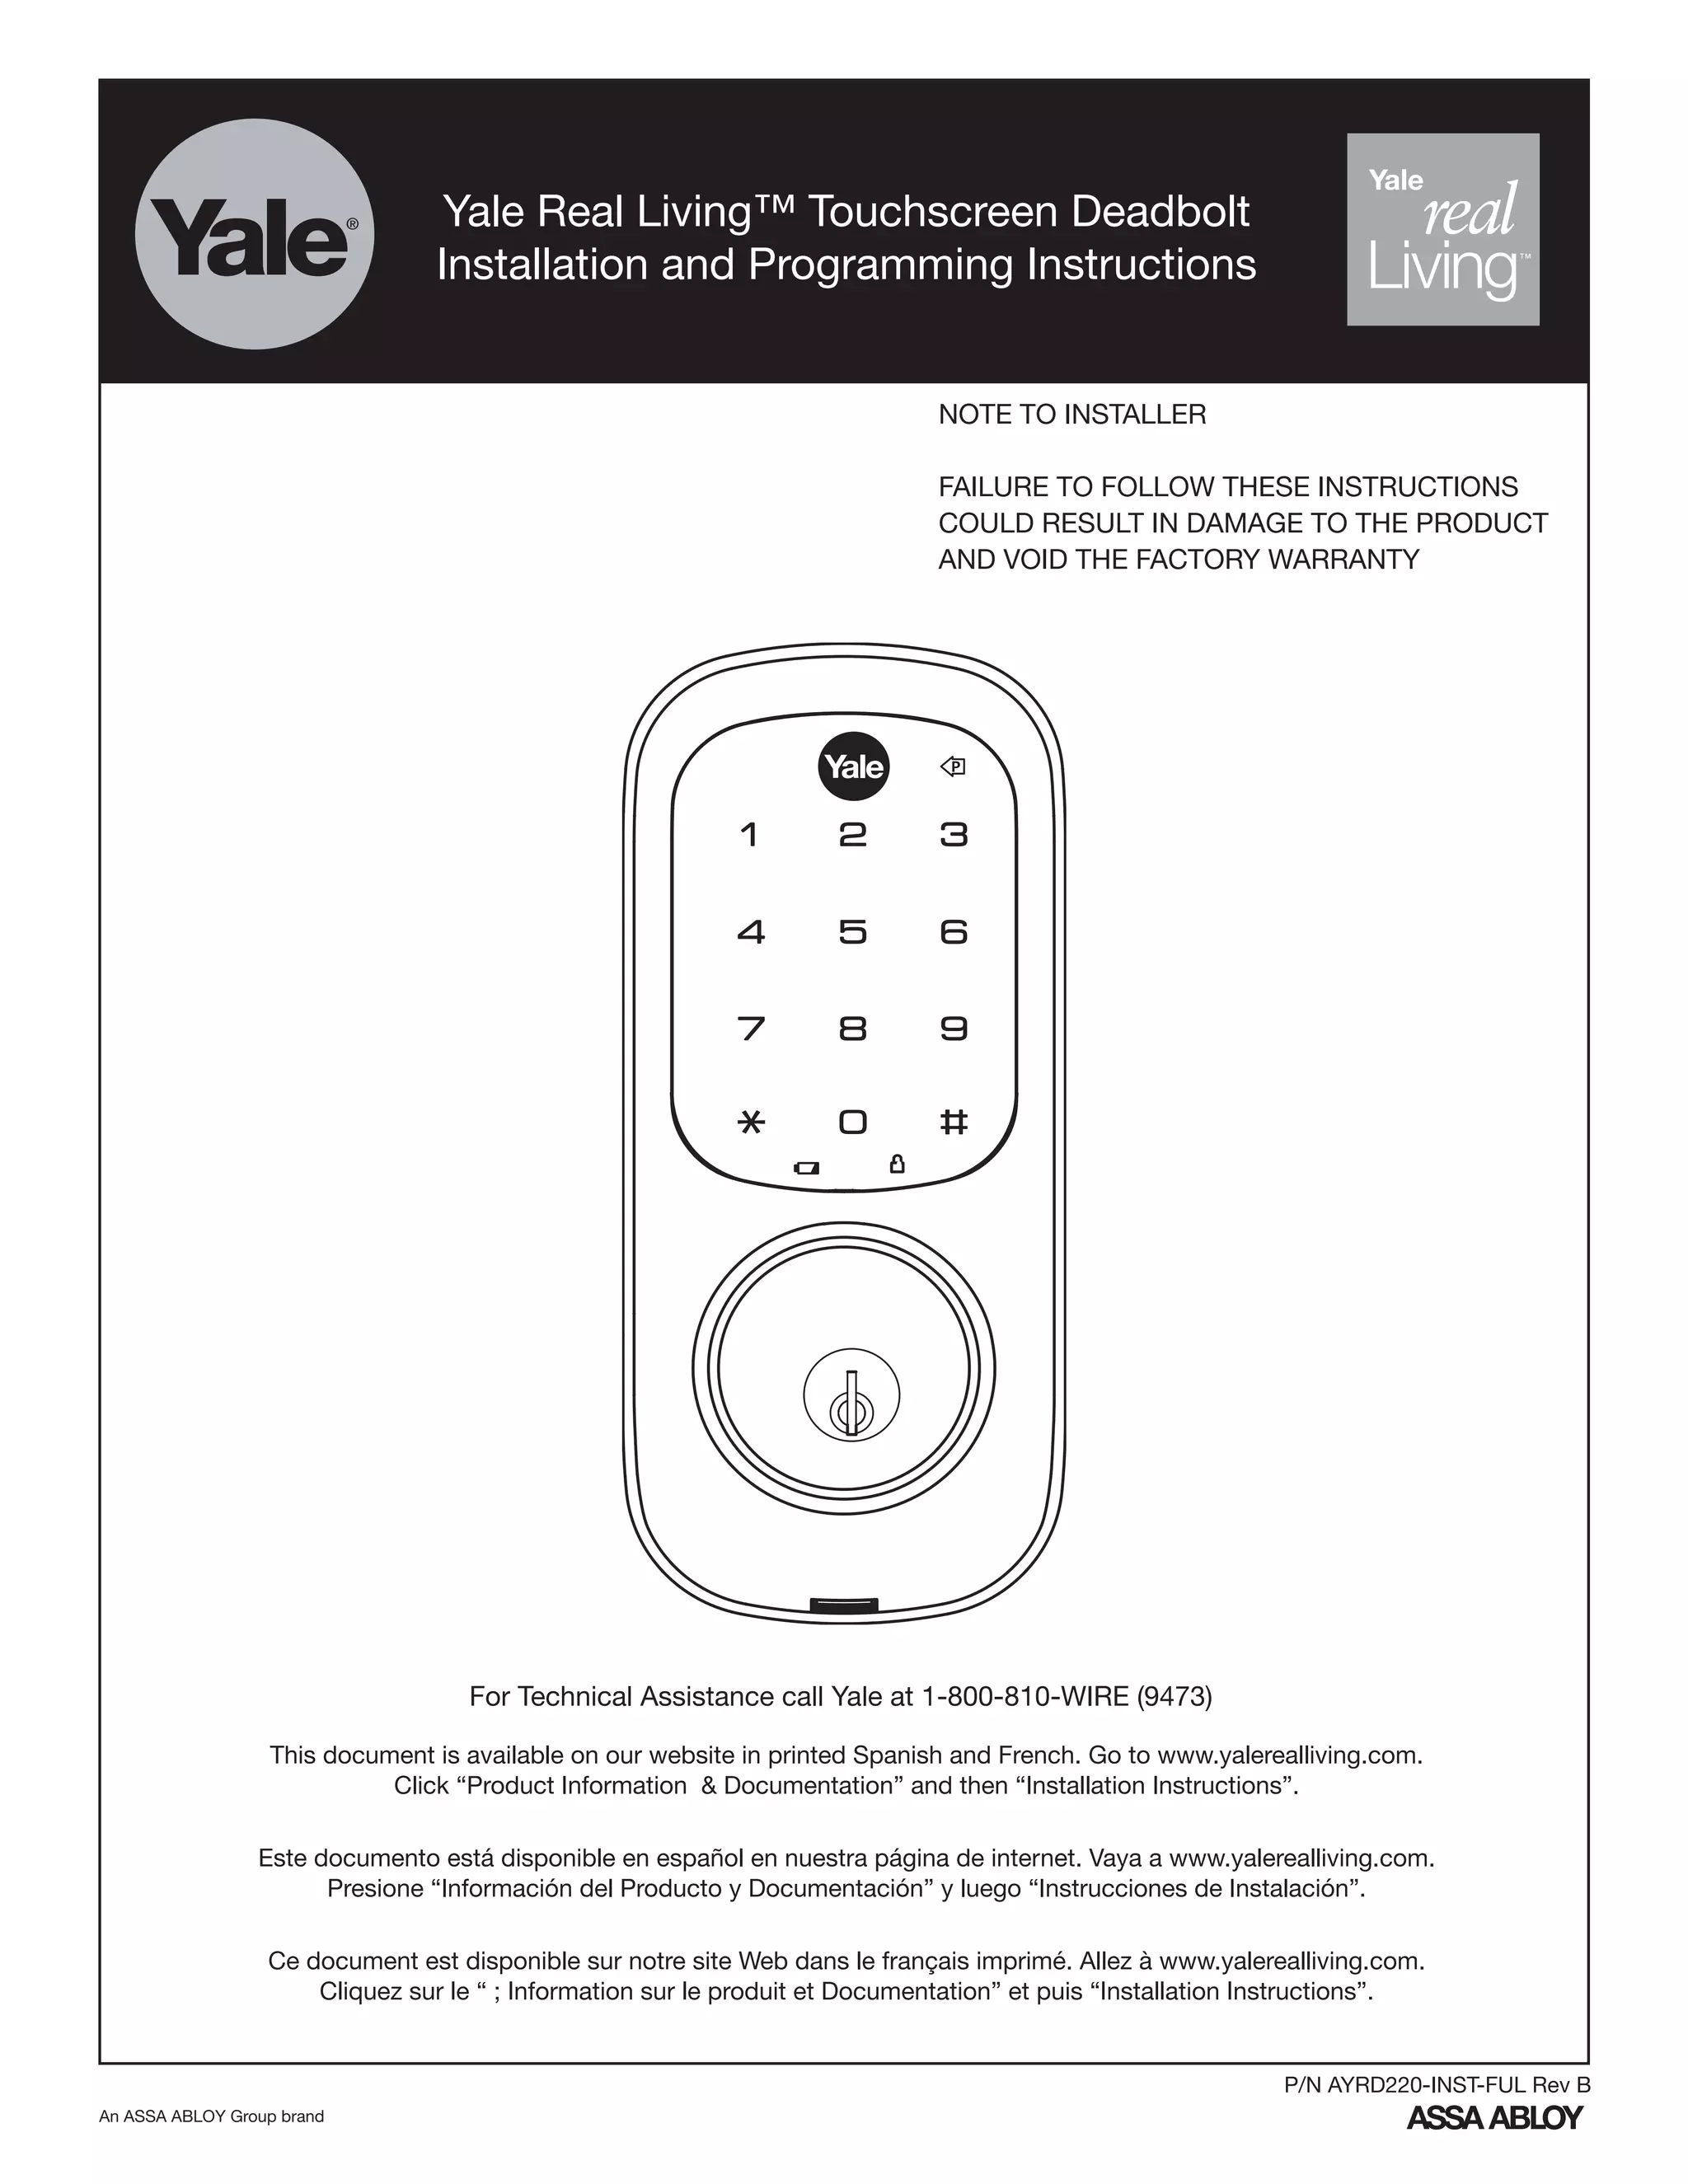
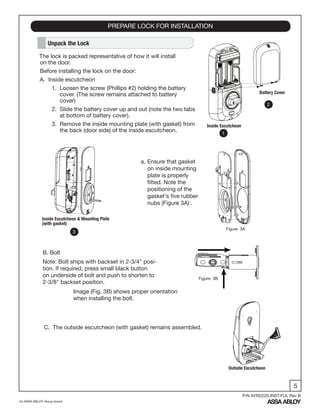
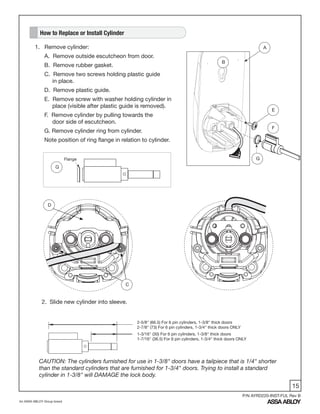
1. Install bolt in door.
NOTE: The bolt must be in a retracted (unlocked) position
when installing the lockset.
Attach with two (2) M4 x 25.4mm [8-32 x 1"] screws supplied.
2. Install strike on the door frame, making sure to allow
for the bolt to be centered in the strike.
3. Install outside escutcheon.
As you position the outside escutcheon, route the
cable through 2-1/8" diameter hole (Figure 3A).
NOTE: Cable must go under bolt and through (Fig. 3B).
Ensure that the tailpiece is oriented correctly
(see arrows Fig. 3B).
4. Holding the outside escutcheon flush to the door,
position the inside mounting plate by first routing
the cable and connector through the mounting
plate's 1/2" hole (Fig. 4A) and then inserting the
mounting plate “tongue” into the bottom slot of the
outside escutcheon (Fig. 4B).
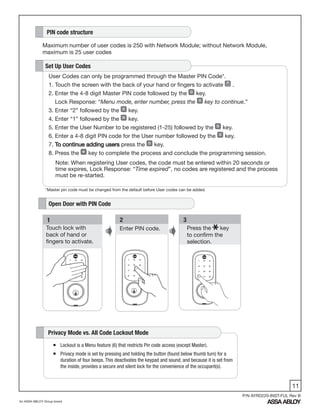
INSTALL LOCK
Figure 4B
Figure 4A
Figure 3B
Figure 3A
(2) M4 x 25.4mm
[8-32 x 1"]
Flat Head
Combination Screws
(2) M4 x 25.4mm
[8-32 x 1"]
Flat Head
Combination Screws
1
2
“Tongue”](https://image.slidesharecdn.com/manualdeutilizaoyrd221-170511132656/85/Manual-de-utilizacao-YRD-221-6-320.jpg)
![7
An ASSA ABLOY Group brand
P/N AYRD220-INST-FUL Rev B
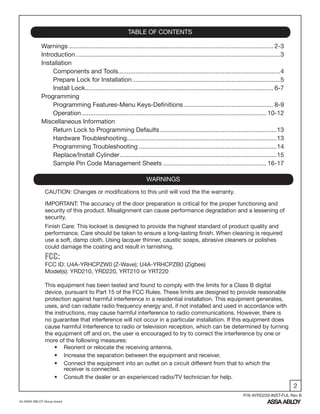
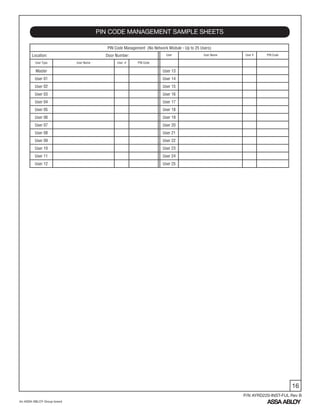
5. Secure both assemblies using (2) M6 x 59.5mm pan
head machine screws, making sure that outside
escutcheon is vertically aligned.
Tighten securely with a #2 Phillips screwdriver.
Do not over-tighten.
7. Install inside escutcheon on inside mounting plate.
Note in Fig. 7A the horizontal orientation of the tail
piece as you insert the inside escutcheon (thumb
turn should be vertical).
6. Attach cable assembly to the inside escutcheon
printed circuit board (PCB) by lining up notches on
top of cable connector to slots on PCB connector
(Fig. 6B). Press connector in firmly using thumbs
until completely seated (proper position indicated
by arrows on PCB as in Figures 6A and 6B).
CAUTION:
Use care when assembling to ensure that
the cable lies against the back recessed
area of the inside escutcheon (Fig. 6A).
Position and bend cable, using the harness
clip as shown in Fig. 6A to prevent binding
when installing the escutcheon over the
mounting plate.
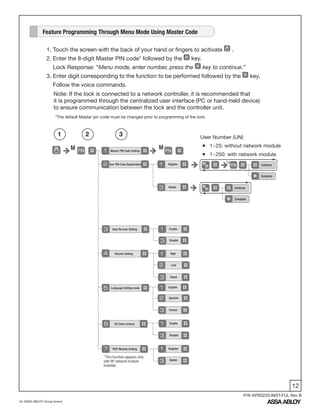
Figure 6A
Figure 7A
Figure 6B
Harness
clip
8. Install and secure using (3) M4 x 8mm [8-32 x 5/16"]
pan head screws through the inside escutcheon into
the mounting plate.
IMPORTANT: Before installing the batteries, test
the mechanical operation of the lock by using
both thumb turn and the key. The movement of the
bolt should be smooth and unobstructed. If
operation is not smooth, review the previous steps
to ensure proper installation.
9. Insert four (4) AA alkaline batteries. Lock responds,
“Welcome to Yale Real Living™” and will adjust for
proper handing of the lock.
Note: Refer to programming instructions prior to
completion of step 10.
10. Install battery cover and tighten Phillips head
screw.](https://image.slidesharecdn.com/manualdeutilizaoyrd221-170511132656/85/Manual-de-utilizacao-YRD-221-7-320.jpg)

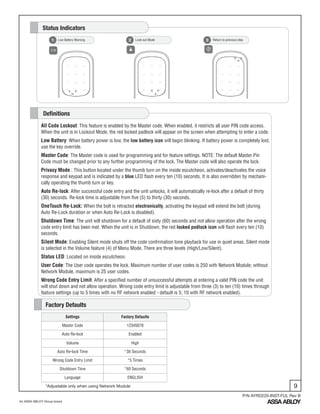
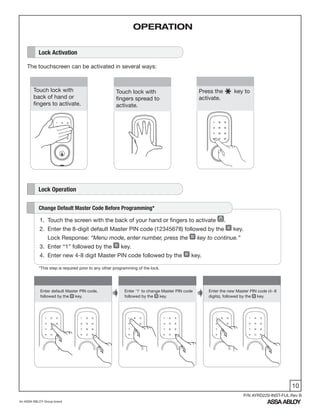

The document provides installation and programming instructions for the Yale Real Living™ touchscreen deadbolt lock, emphasizing the importance of correct installation for functionality and warranty preservation. It includes warnings, necessary components, a detailed step-by-step installation guide, and programming features such as user codes and operational settings. The document is also available in Spanish and French on the company's website.


