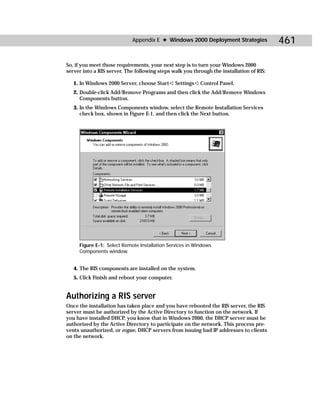
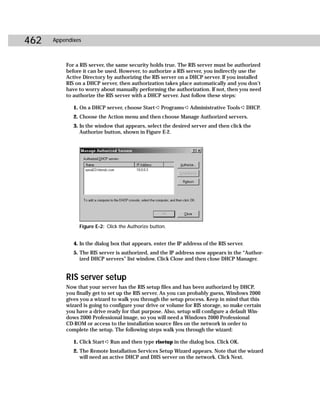
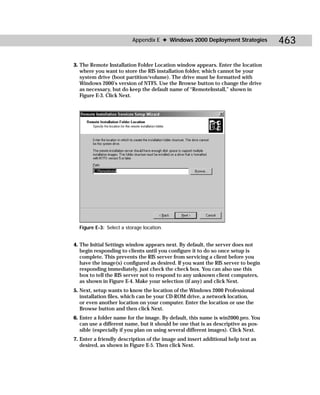
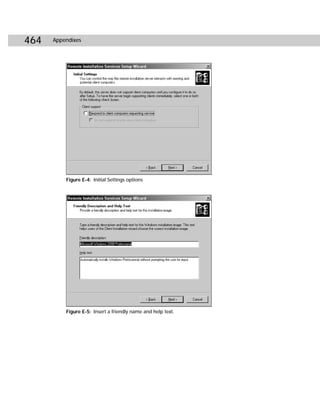
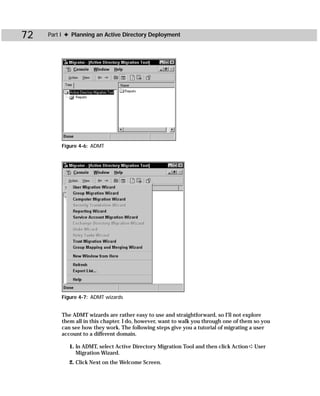
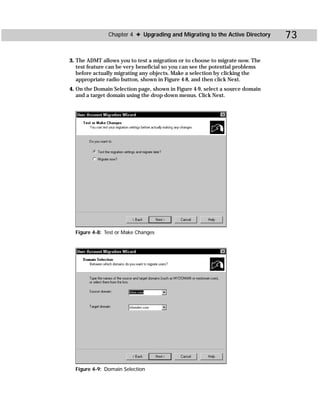
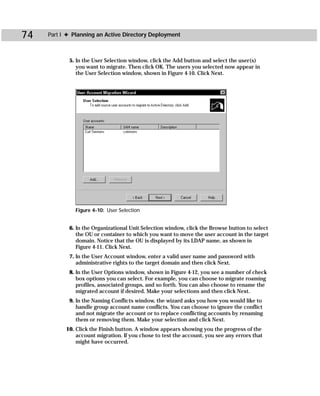
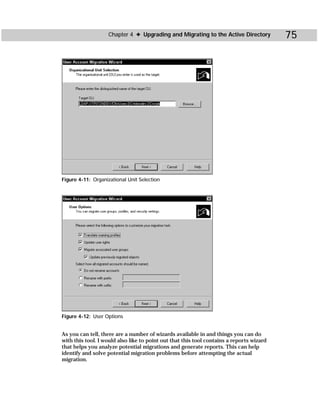
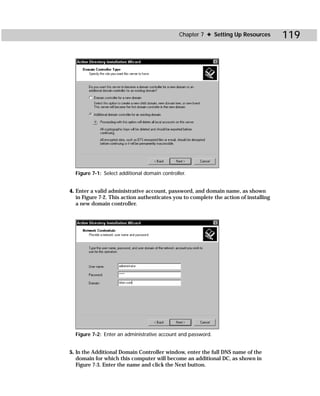
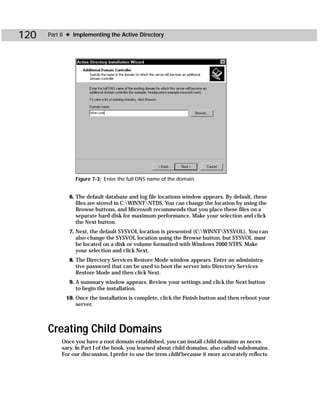
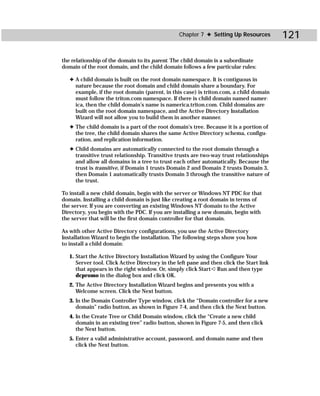
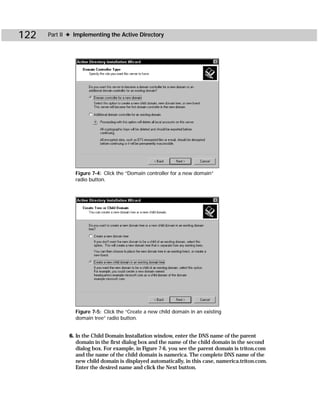
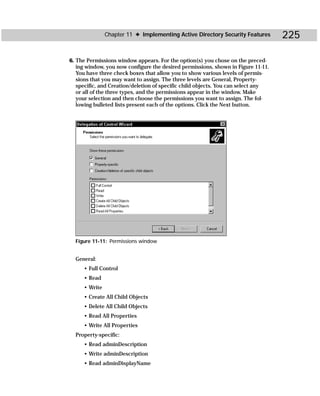
This document provides information about the Active Directory Bible book. It includes the book's copyright information, limitations of liability, credits for those involved in the book's production, and an introduction from the author about the book's contents and structure. The author aims to provide a comprehensive resource for planning, installing, configuring, and managing Microsoft's Active Directory directory service technology.


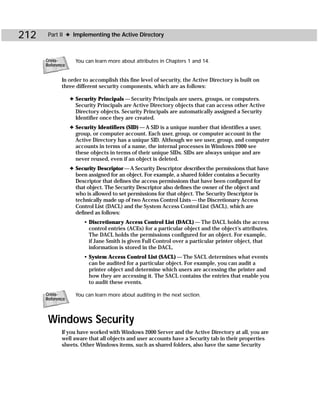
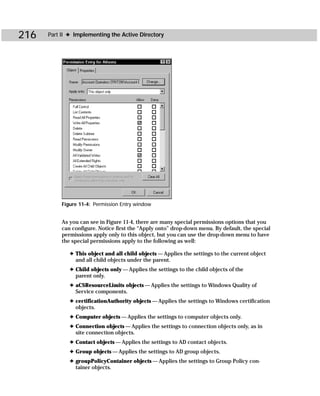


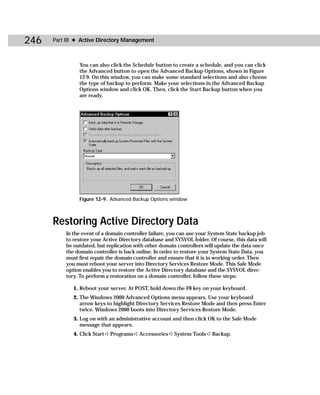


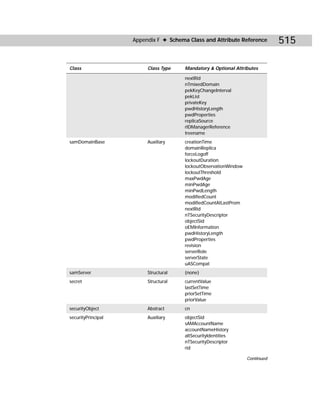
![420 Appendixes
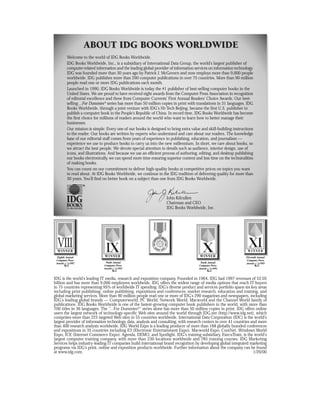
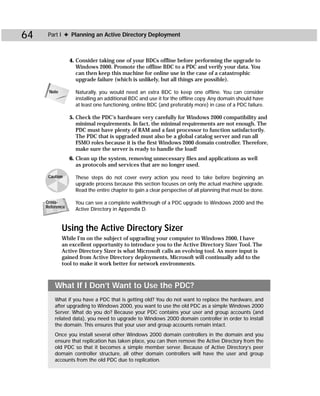
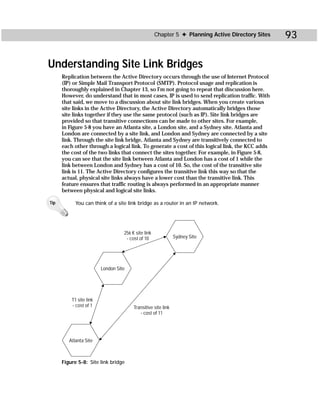
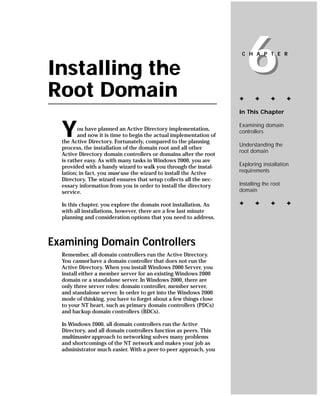
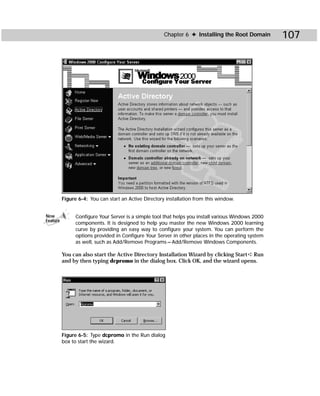
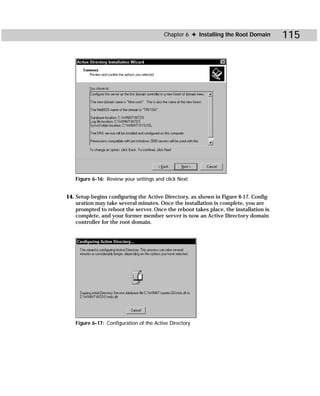
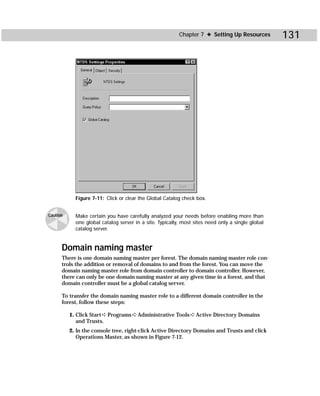
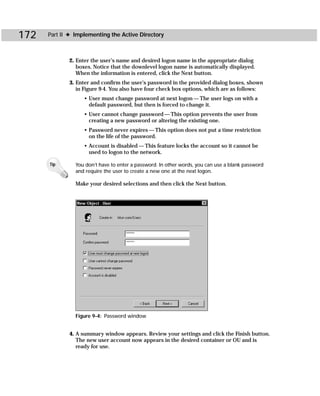
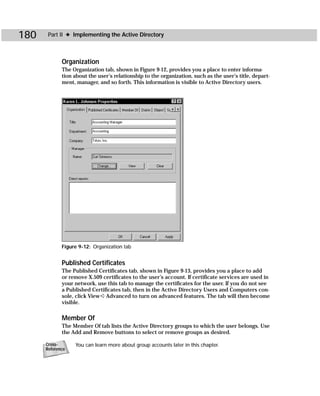
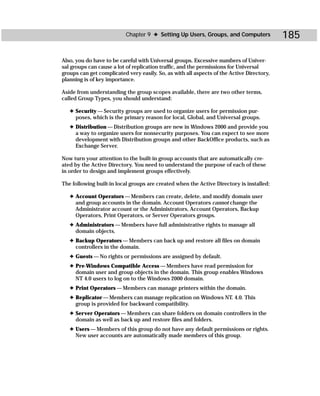
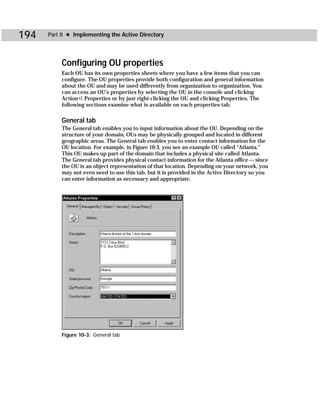
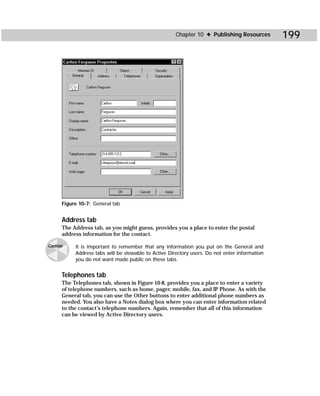
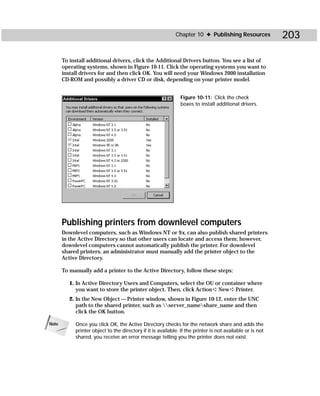
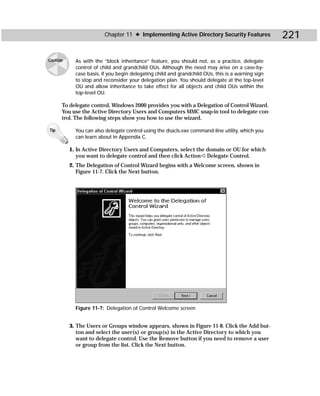
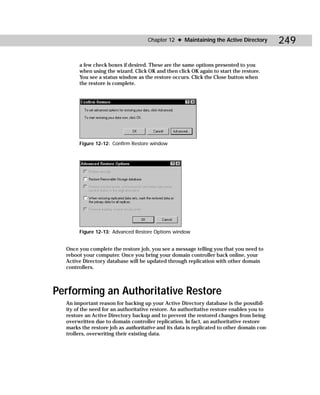
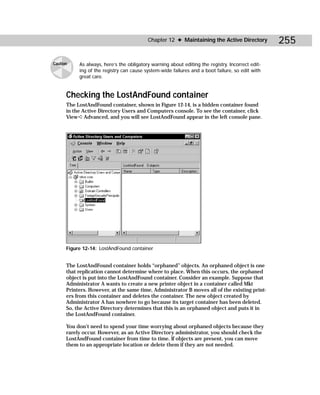
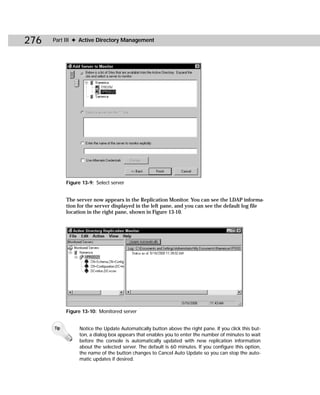
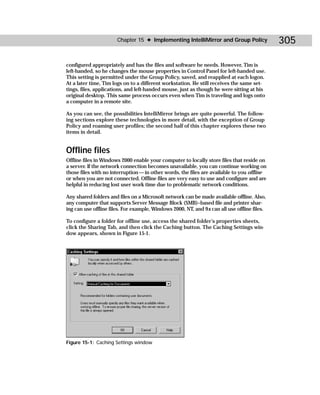
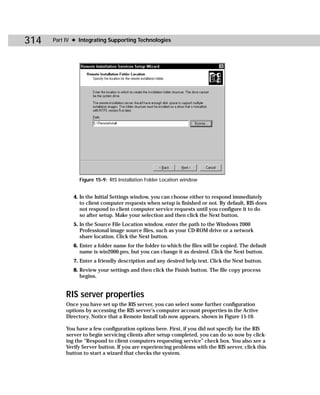
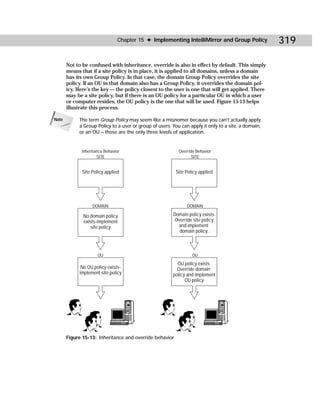
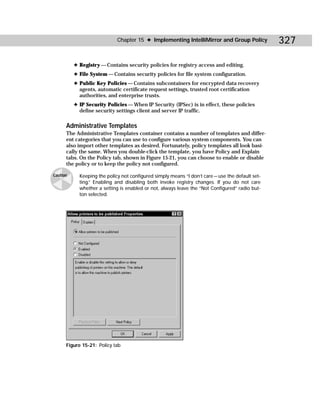
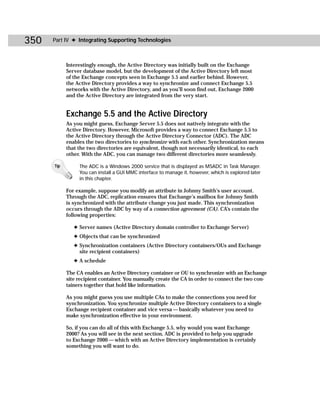
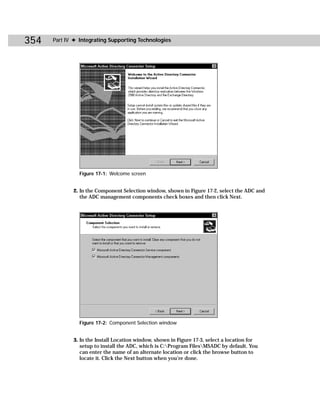
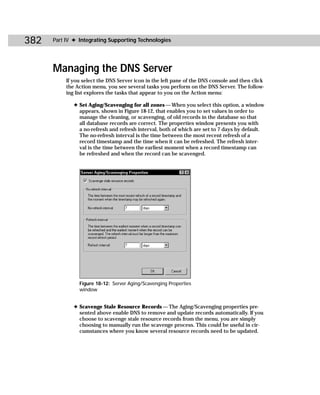
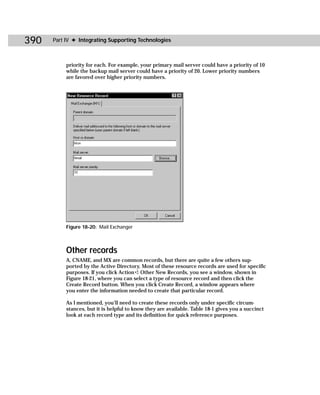
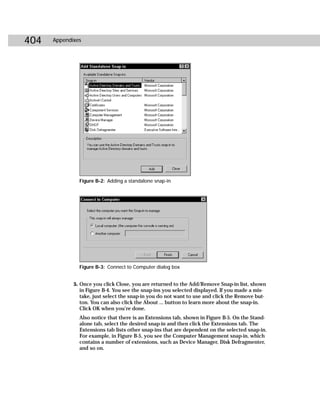
Figure C-2: Showaccs.exe
Showaccs.exe creates a text file as a comma separator file (.csv), which is called the
Access Profile File. This file shows the ACLs on your system for specific objects.
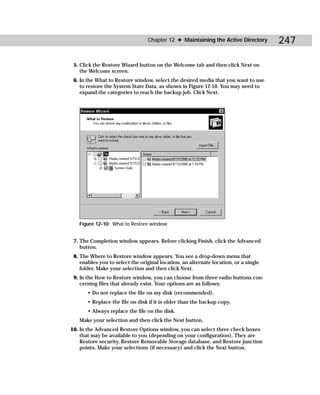
Table C-1 shows the command-line syntax for showaccs.exe.
showaccs access_profile_file [/f [path]] [/r] [/s] [/p] [/g]
[/m [map_file_path]] [/nobuiltins] [/?]
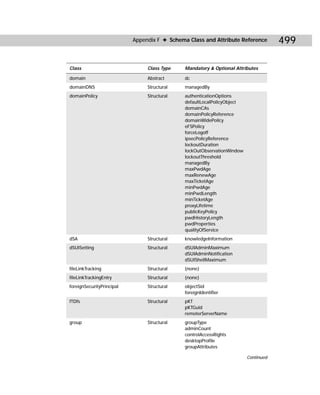
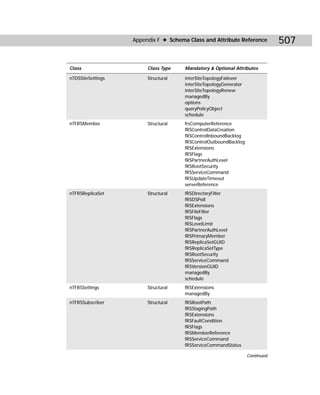
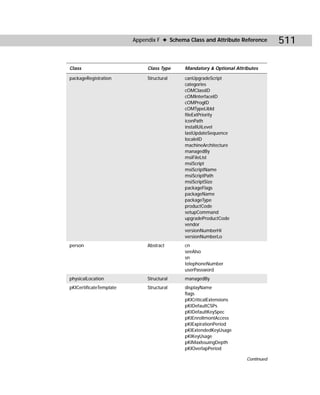
Table C-1
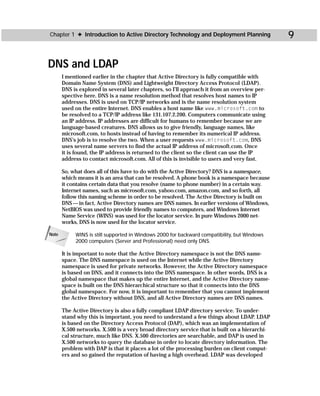
Showaccs.exe Command-line Reference
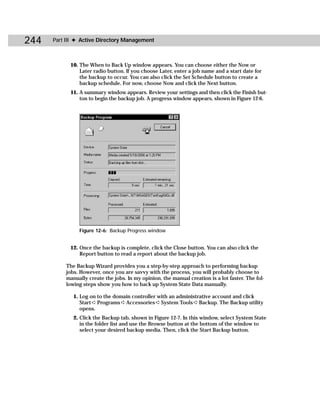
Parameters Explanation
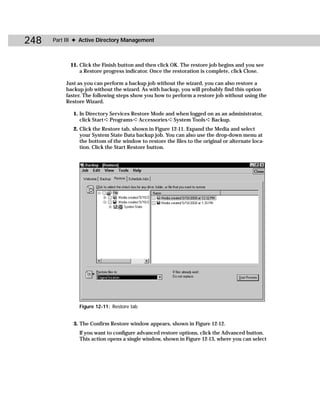
access_profile_file Specifies the path of the .csv file to be generated.
/f [path] Shows access rights for all NTFS files or, optionally, for those
in the directory tree of the specified path.
/r Shows access rights for the registry.
/s Shows access rights for file shares.
/p Shows access rights for printer shares.
/g Shows access rights for local groups.
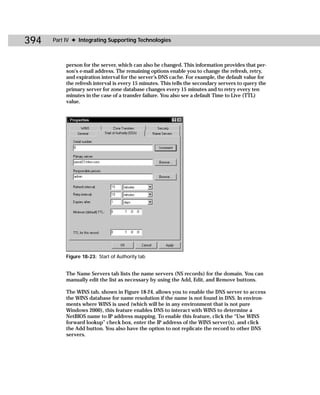
/m [map_file_path] Generates a map file, optionally in the directory specified by
map_file_path.
/nobuiltins Omits access rights for built-in groups.
/? (or with no switch) Displays a usage screen.](https://image.slidesharecdn.com/labibliadeactivedirectory-100824104020-phpapp02/85/La-biblia-de-active-directory-434-320.jpg)
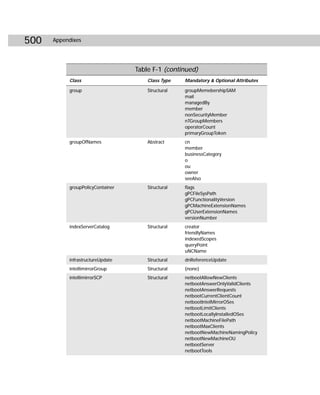
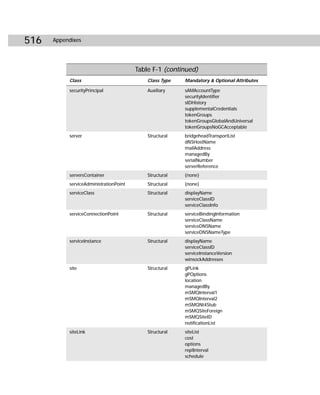
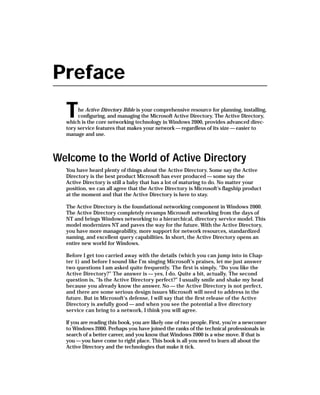
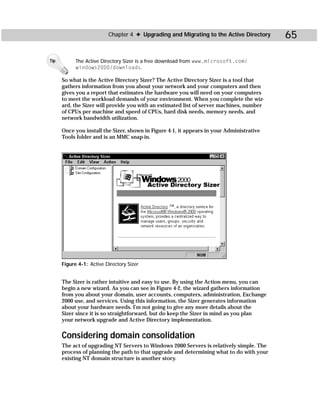
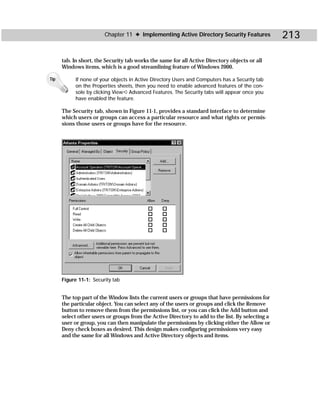
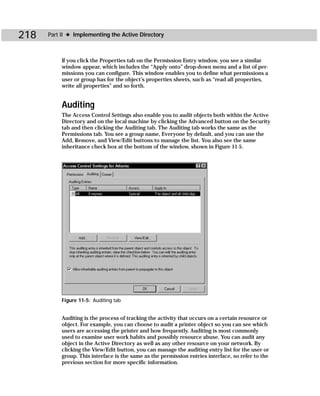
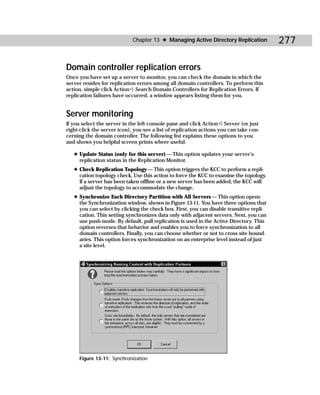
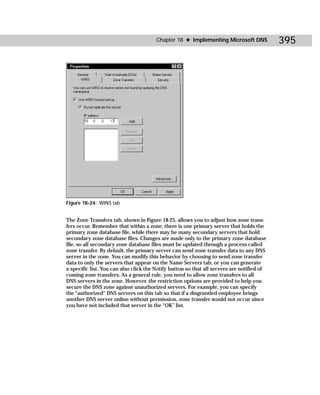
![Appendix C ✦ Additional Administrative Tools 421
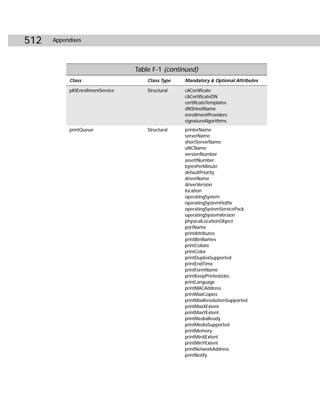
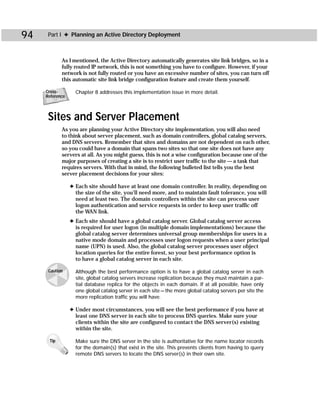
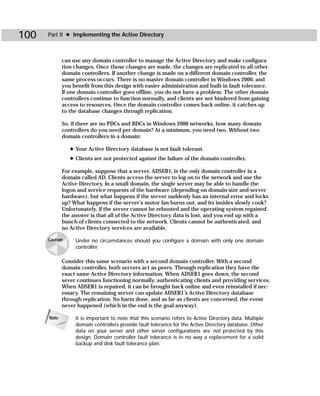
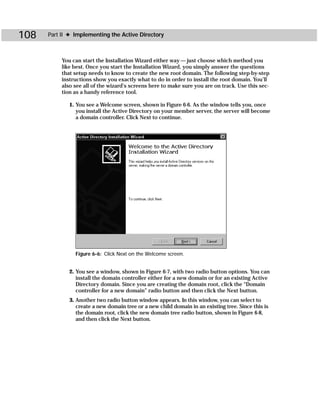
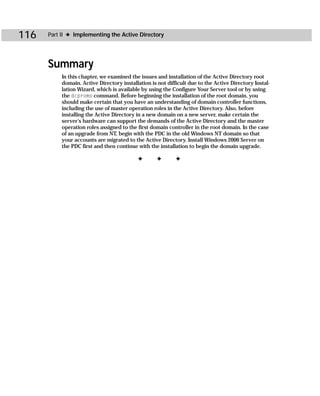
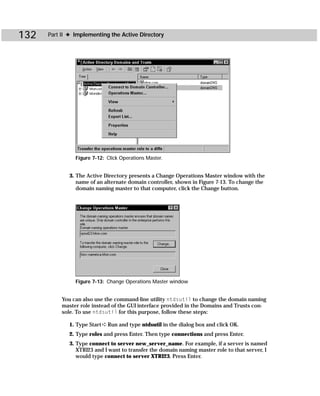
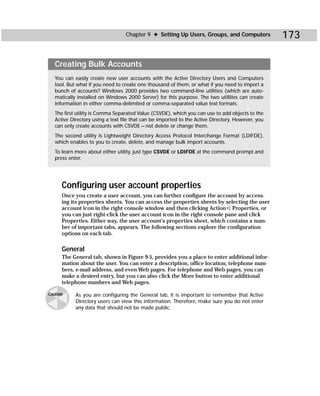
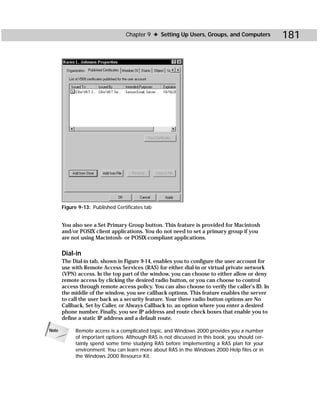
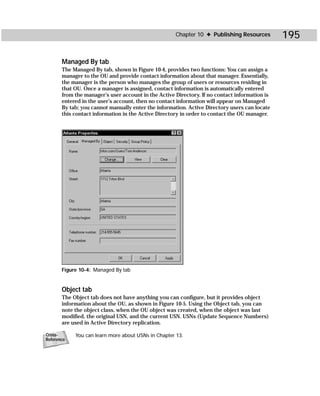
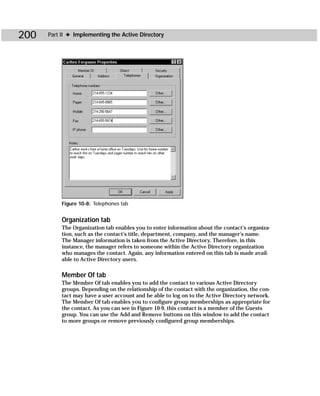
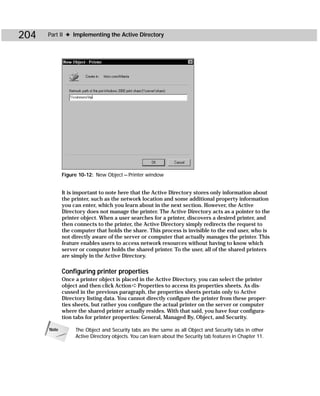
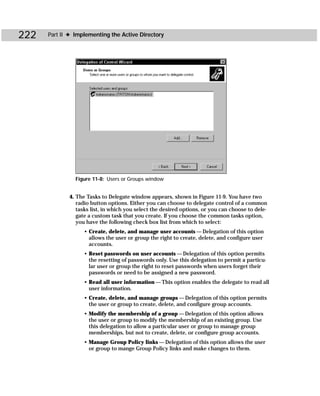
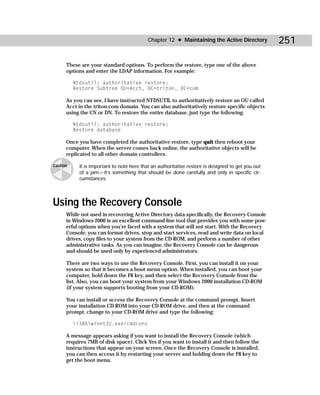
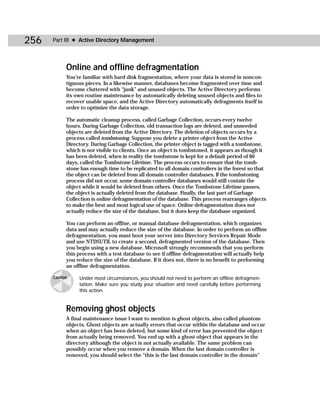
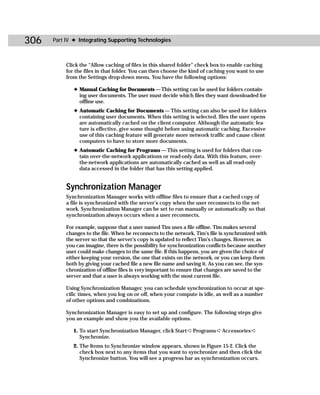
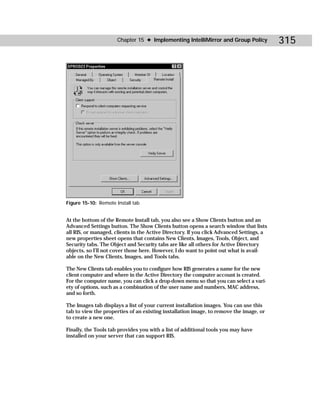
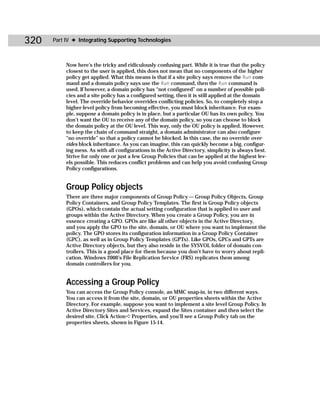
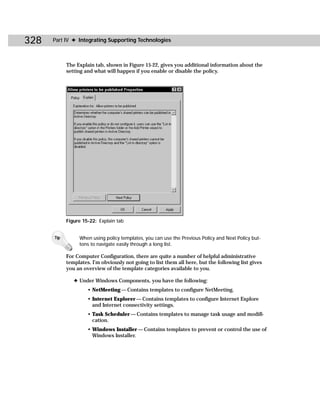
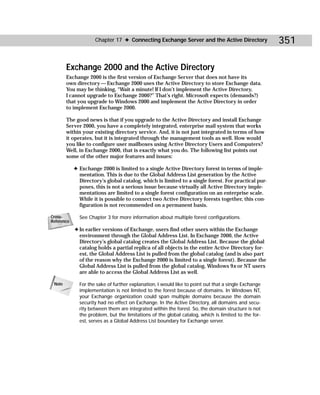
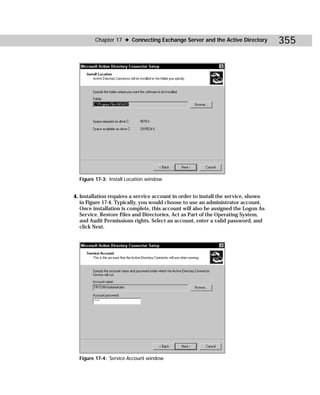
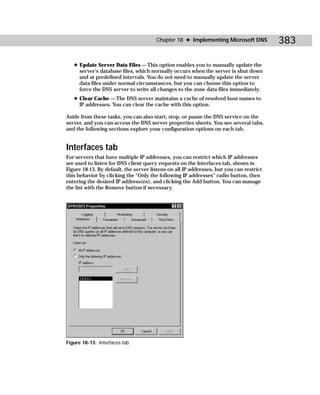
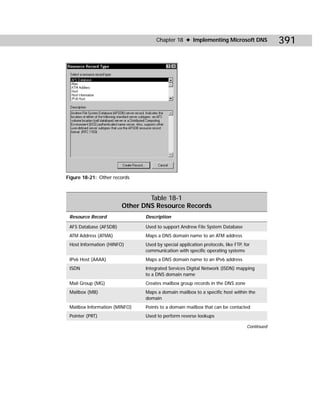
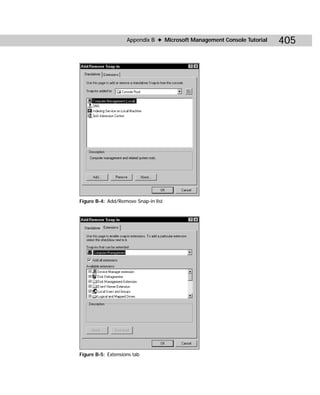
SIDWalk.exe
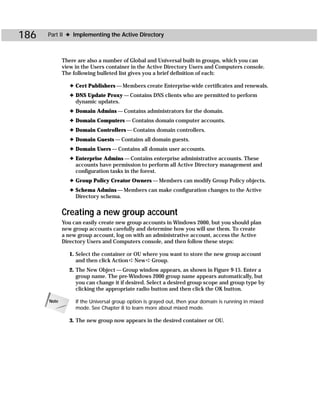
SIDWalk.exe, shown in Figure C-3, is the second command-line utility that makes up
SIDWalker. SIDWalk takes a mapping file and scans all ACLs in the registry, the file
system, shares, and local group memberships. Then, SIDWalk uses the ACL scan to
replace every instance of the old file’s SID with the new file’s SID — thus the name
SIDWalk.
Figure C-3: SIDWalk.exe
Table C-2 shows you the command-line syntax for SIDWalk.exe:
sidwalk profile_file [profile_file ...] [/t] [/f [path]] [/r]
[/s] [/p] [/g] [/l file] [/?]
Table C-2
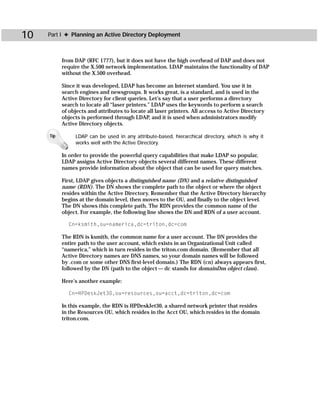
SIDWalk.exe Command-line Reference
Parameters Explanation
profile_file Specifies the path and filename of one or more .csv mapping files to be
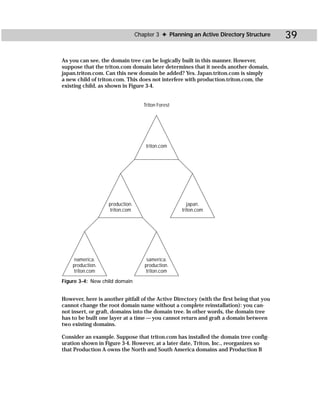
used for input.
/t Conducts a test run.
/f [path] Scans all NTFS file system files or only those on the directory tree of the
specified path.
/r Scans the registry.
/s Scans file shares.
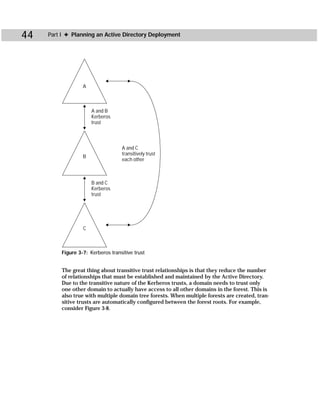
Continued](https://image.slidesharecdn.com/labibliadeactivedirectory-100824104020-phpapp02/85/La-biblia-de-active-directory-435-320.jpg)
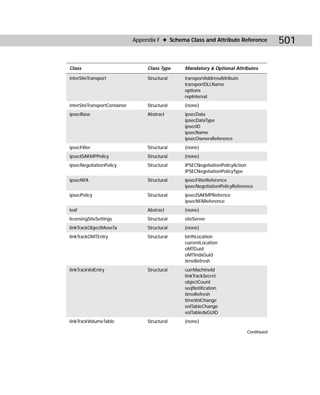
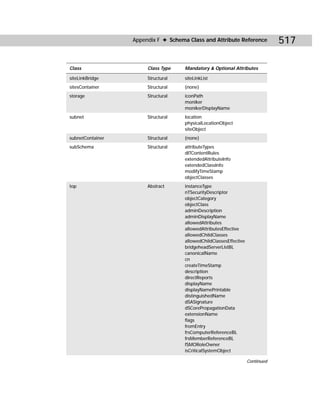
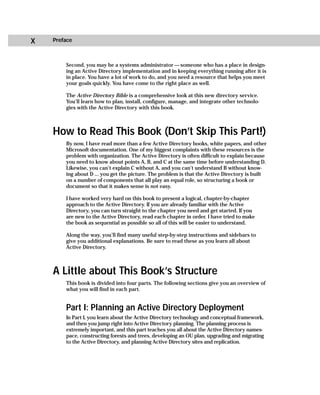
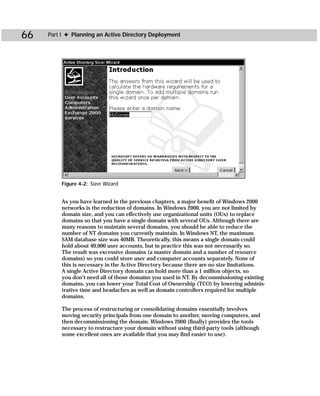
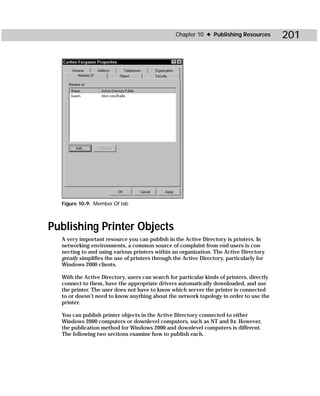
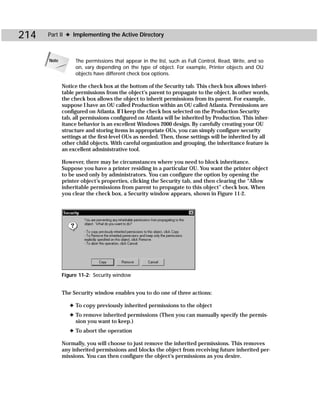
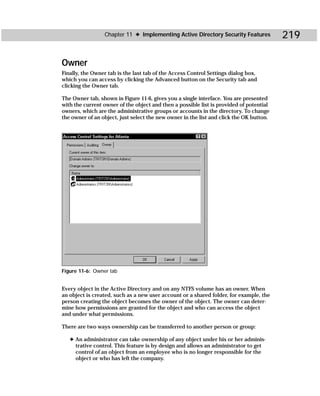
![424 Appendixes
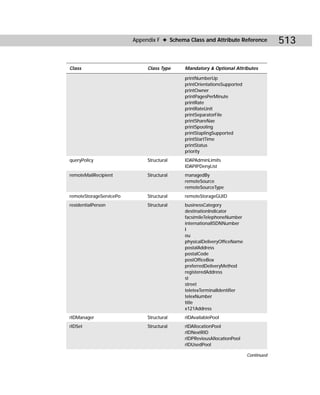
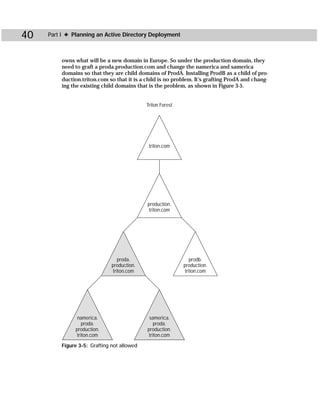
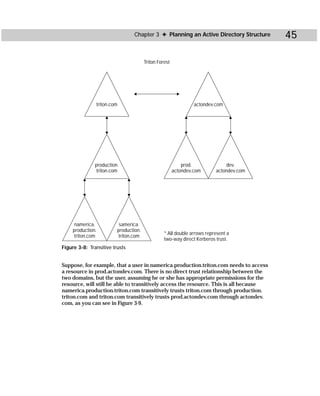
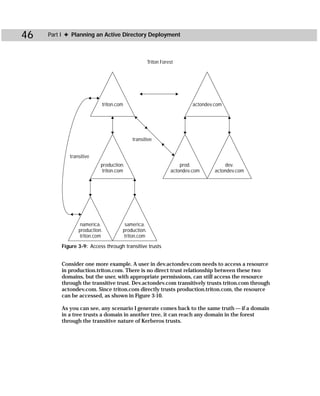
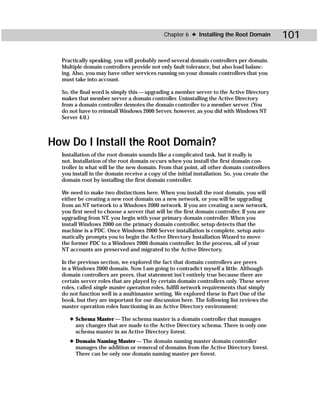
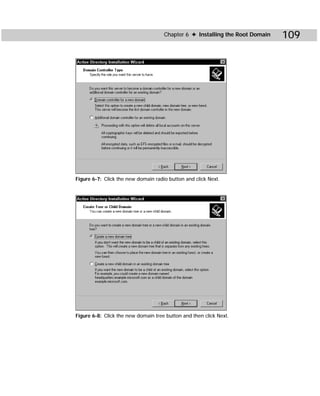
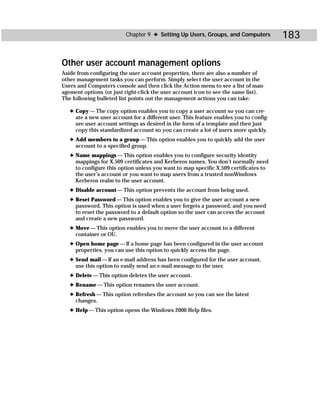
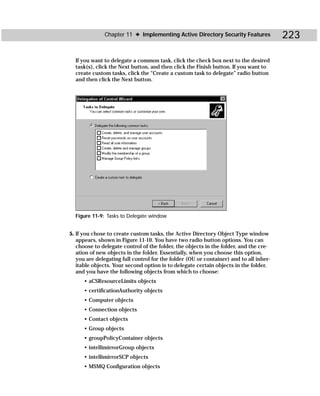
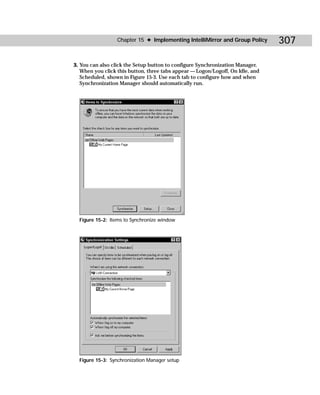
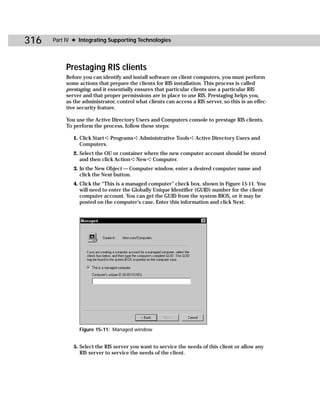
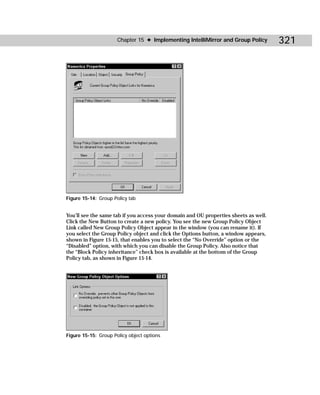
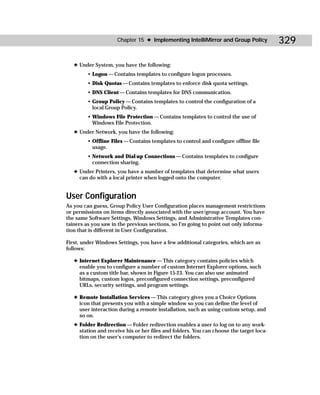
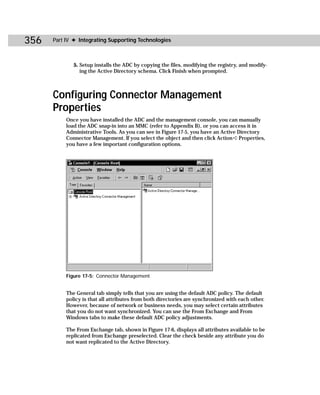
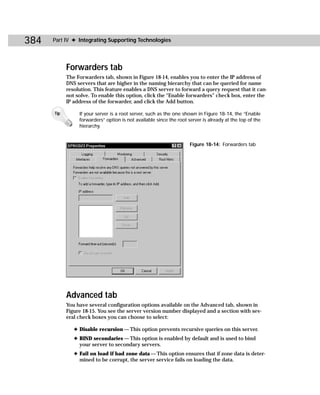
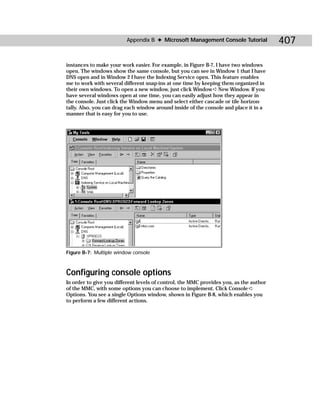
Figure C-5: Acldiag.exe
acldiag “ObjectDN” [/chkdeleg] [/fixdeleg] [/geteffective:{User
| Group}] [/schema] [/skip] [/tdo]
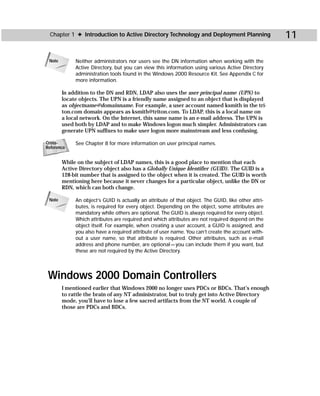
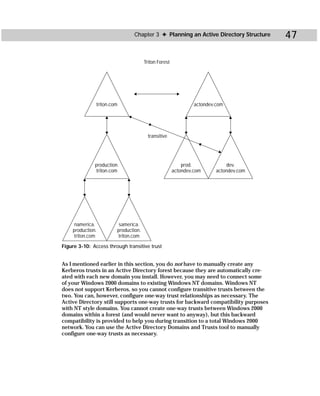
Table C-3
Acldiag.exe Command-line Reference
Parameters Explanation
ObjectDN Specifies the distinguished name of a valid Active
Directory object. Must be enclosed in quotation marks.
/chkdeleg Checks whether the security on the object includes any
of the delegation templates currently in use by the
Delegation of Control Wizard.
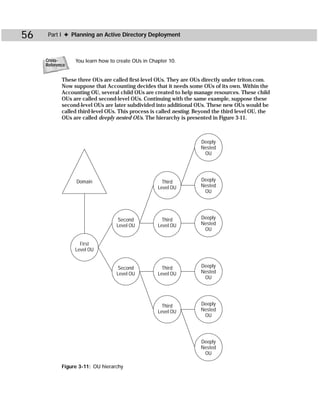
/fixdeleg Causes the tool to fix any delegations that have been
applied to the object by the Delegation of Control
Wizard.
/geteffective:{user | group} Prints out permissions of the specified user or group in a
readable format. If you specify “*” for user or group, it
prints the effective rights of all users and groups that
show up on the ACL.
/schema Checks whether the security on the object includes
schema defaults.
/skip Does not display the security description.
/tdo Writes tab-delimited output for use in databases or
spreadsheets instead of readable format output.](https://image.slidesharecdn.com/labibliadeactivedirectory-100824104020-phpapp02/85/La-biblia-de-active-directory-438-320.jpg)
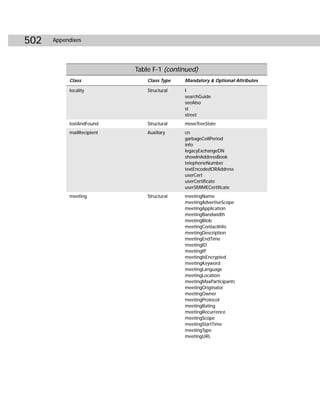
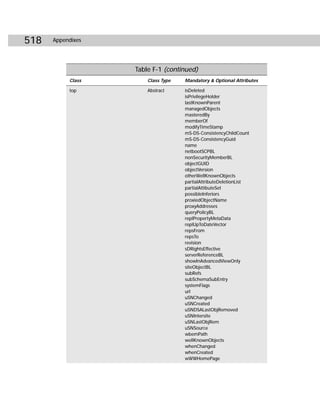
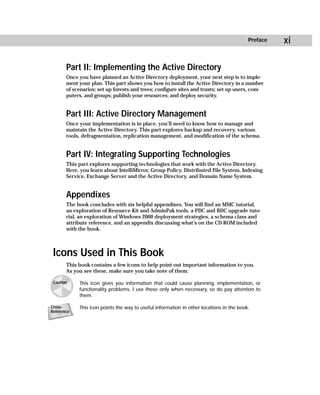
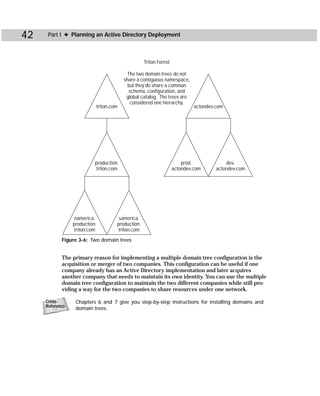
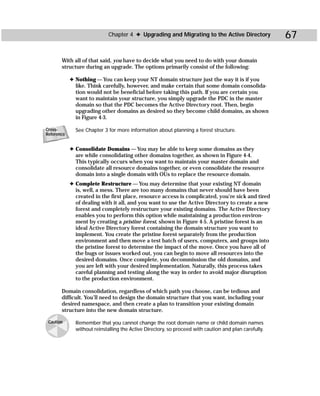
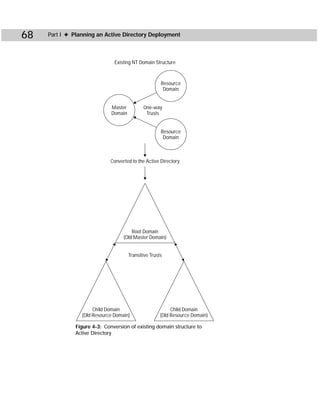
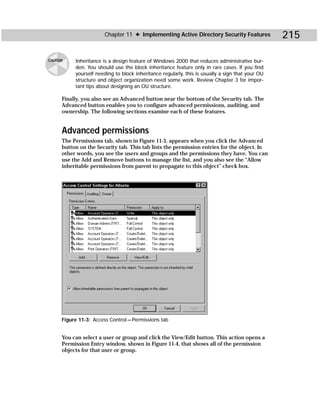
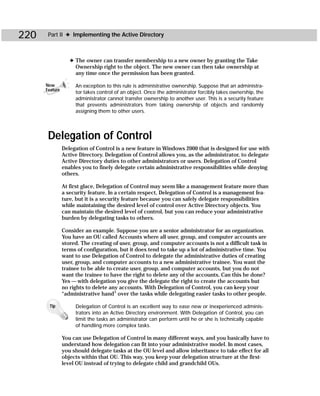
![Appendix C ✦ Additional Administrative Tools 425
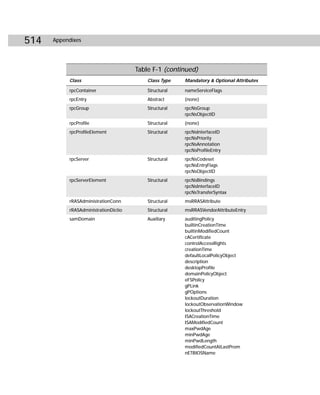
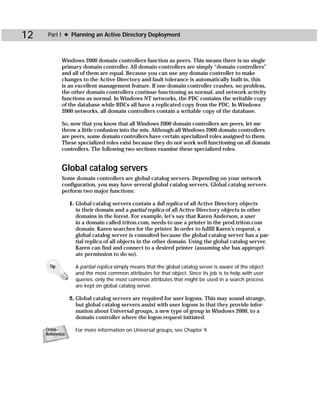
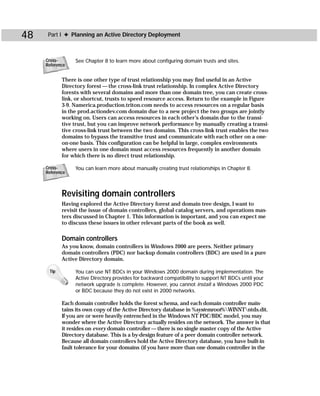
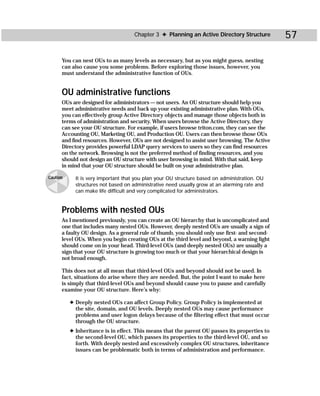
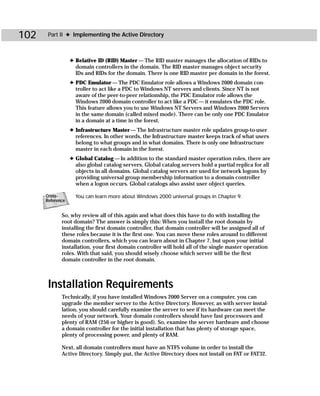
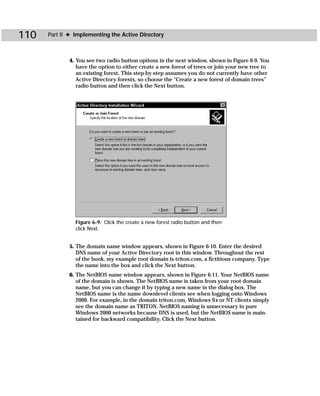
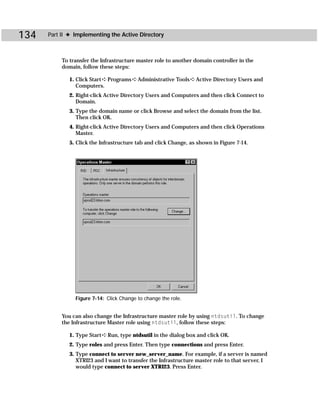
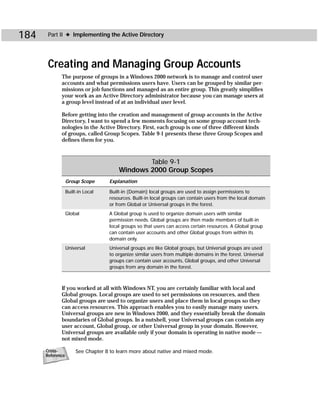
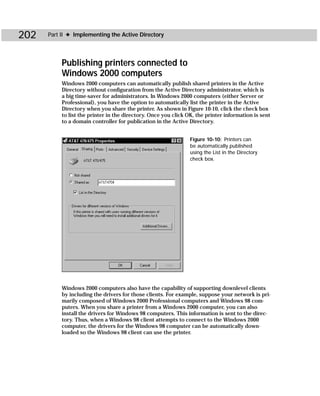
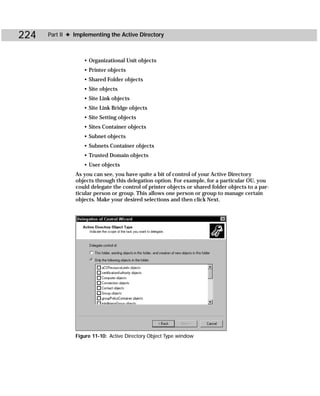
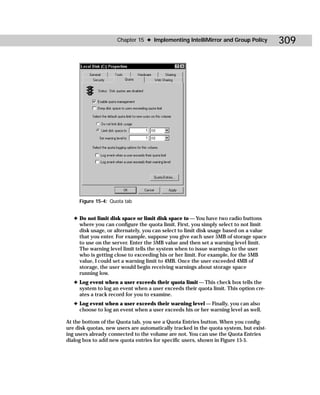
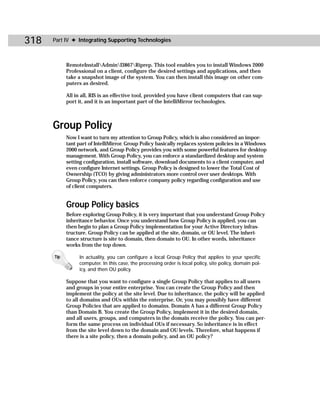
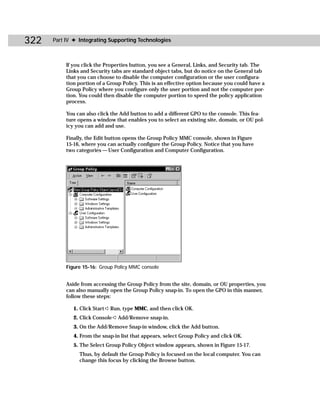
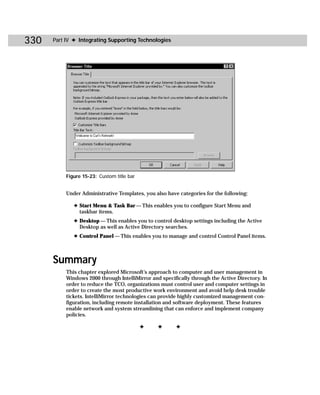
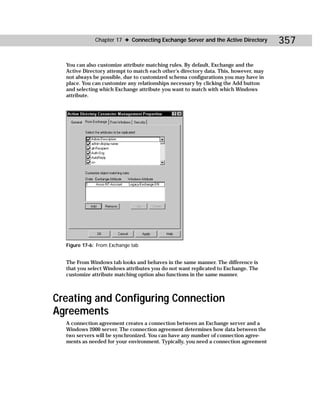
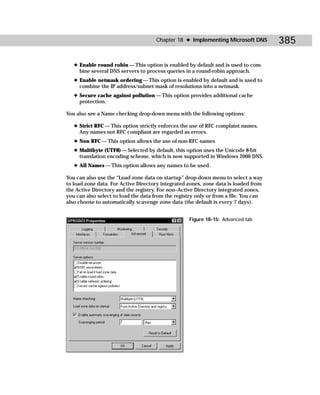
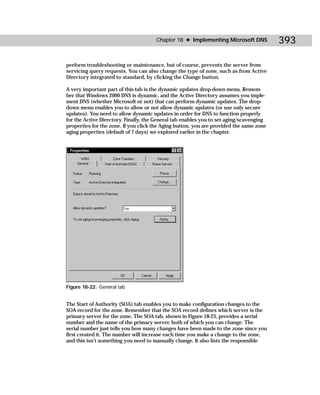
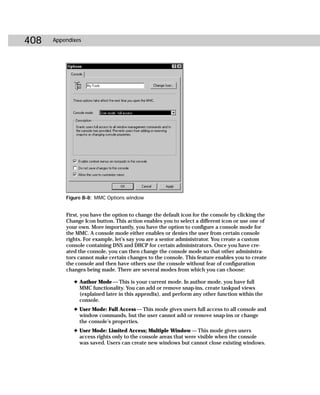
Dcdiag.exe
Domain Controller Diagnostics is a command-line utility that enables you to gain
important information about the status of domain controllers in a forest. Dcdiag.exe
can be a useful troubleshooting tool when you are experiencing DC problems. From
this tool, you can gain useful information about connectivity, intersite health, role
check, replication, trust relationship verification, your topology, and so forth.
Figure C-6 shows you the command-line utility, and Table C-4 gives you the com-
mand-line syntax.
Figure C-6: Dcdiag.exe
dcdiag /s:DomainController [/n:NamingContext]
[/u:DomainUsername /p:{* | Password | “”}] [{/a | /e}] [{/q |
/v}] [/i] [/f:LogFile] [/ferr:ErrLog] [/c [/skip:Test]]
[/test:Test] [{/h | /?}]
Table C-4
Dcdiag.exe Command-line Reference
Parameters Explanation
/s: DomainController. Uses DomainController as home server. This is a
required parameter.
/n: NamingContext. Uses NamingContext as the naming context to test.
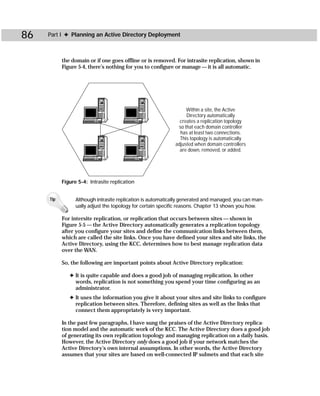
Domains may be specified in NetBIOS, DNS, or DN form.
Continued](https://image.slidesharecdn.com/labibliadeactivedirectory-100824104020-phpapp02/85/La-biblia-de-active-directory-439-320.jpg)
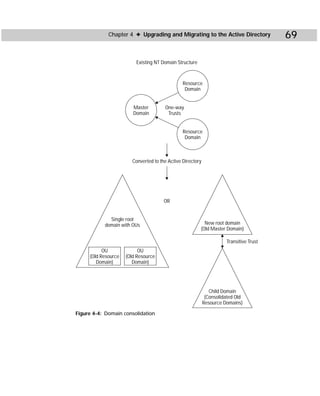
![428 Appendixes
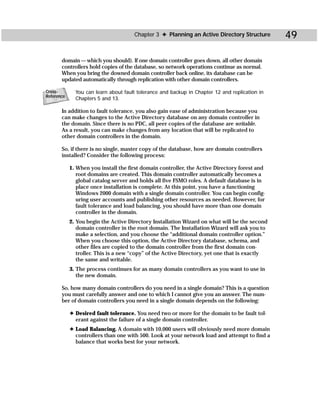
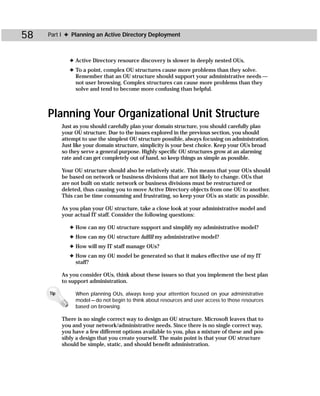
Netdiag.exe
The Network Connectivity Tester is not an Active Directory tool per se, but is
an important and easy to use networking command-line utility. So, I thought it
deserved inclusion here. With Netdiag, you can perform diagnostic tests on your
network to help isolate problems with your network clients. The command-line
syntax is very straightforward, and there are quite a few networking tests you
can perform. Figure C-7 shows you the utility, and Tables C-6 and C-7 give you
the command-line syntax and test references you need.
Figure C-7: Netdiag.exe
netdiag [/q] [/v] [/l] [/debug] [/d:DomainName] [/fix]
[/DcAccountEnum] [/test:testname] [/skip:testname]
Table C-6
Netdiag.exe Command-line Reference
Parameters Explanation
/q Specifies quiet output (errors only).
/v Specifies verbose output.
/l Sends output to NetDiag.log; the log file is created in the same
directory where netdiag.exe was run.
/debug Specifies even more verbose output; may take a few minutes to
complete.
/d:DomainName Finds a domain controller in the specified domain.](https://image.slidesharecdn.com/labibliadeactivedirectory-100824104020-phpapp02/85/La-biblia-de-active-directory-442-320.jpg)
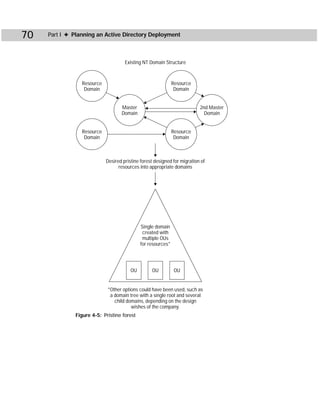
![430 Appendixes
Table C-7 (continued)
Tests Explanation
Netstat Netstat information test
Netware Netware test
Route Routing table test
Trust Trust relationship test
WAN WAN configuration test
WINS WINS service test
Winsock Winsock test
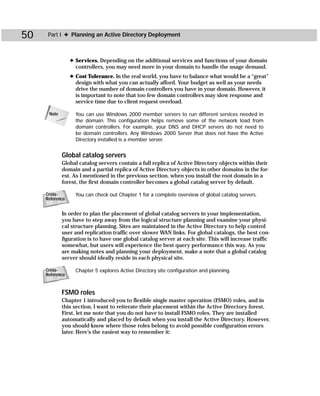
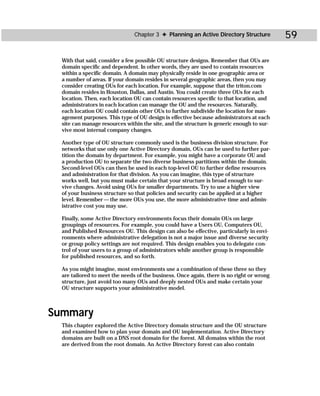
Dfsutil.exe
Distributed File System utility is a command-line tool that enables you to trou-
bleshoot problems with a Distributed File System (Dfs).
Cross- Chapter 16 explores the Distributed File System.
Reference
The Dfsutil.exe utility is included in this appendix because Dfs can be integrated
with the Active Directory (and typically is integrated). Dfsutil can be used to check
Dfs servers and locate Dfs hierarchy problems. Figure C-8 shows you the command-
line utility, and Table C-8 gives you the command-line syntax.
Figure C-8: Dfsutil.exe
dfsutil [options]](https://image.slidesharecdn.com/labibliadeactivedirectory-100824104020-phpapp02/85/La-biblia-de-active-directory-444-320.jpg)
![Appendix C ✦ Additional Administrative Tools 431
Table C-8
Dfsutil.exe Command-line Reference
Options Parameters Explanation
/list:Domain [/dcname:DcName] Lists the Domain Distributed File Systems in the
Domain or a specific domain controller. This
command displays the root or roots hosted on
the computer or domain.
/view:dfsnamedfsshare Views the metadata in dfsnamedfsshare. You can
[/dcname:DcName] [/level:Level] pipe the output with the |more command or send
it to a text file for large Dfs configurations. When
specified with the optional [MachineName]
parameter, DFSGETBLOB is useful for walking a
specific domain controller’s view of the Dfs
configuration to check for inconsistencies in the
Dfs namespace due to latency in Active Directory
replication. The /dcname:DcName parameter uses
the directory service on a specific domain controller.
The /level:Level specifies a level of viewing. A higher
level shows more detail.
/verify:dfsnamedfsshare Verifies the metadata in dfsnamedfsshare.
[/dcname:DcName] [/level:Level]
/reinit:ServerName Reinitializes the Dfs root ServerName.
/whatis:ServerName Reports what kind of root ServerName is.
/dfsalt:UNCPath Resolves the UNC path to a servershare. This lists
the currently selected server to which a client is
connected when a folder is backed by more than
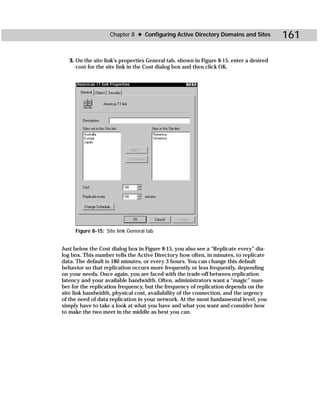
one server.
/unmap:dfsnamedfsshare / Removes servershare from Dfs.
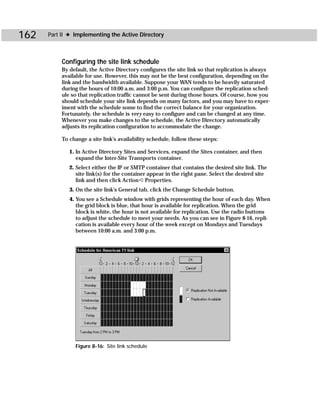
root:servershare
/clean:ServerName Updates the registry of ServerName so that it is not a
Dfs root. This cleans out Dfs-related entries.
/dclist:Domain Lists the domain controllers in Domain.
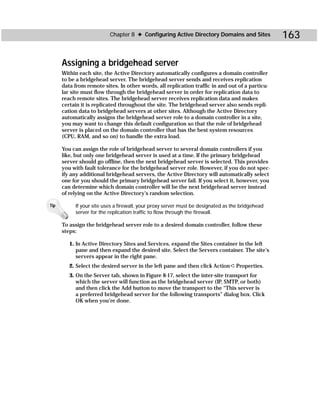
/dcname:DcName Uses the directory service on a specific domain
controller.
/trusts:Domain Lists the Windows 2000 trusted domains of Domain.
/dcname:DcName Uses the directory service on a specific domain
controller.
/all Lists all trusted domains regardless of type (Windows
2000 or Windows NT 4.0).
Continued](https://image.slidesharecdn.com/labibliadeactivedirectory-100824104020-phpapp02/85/La-biblia-de-active-directory-445-320.jpg)
![432 Appendixes
Table C-8 (continued)
Options Parameters Explanation
/? or /help Displays this syntax at the command line.
/pktinfo [/dfs] [/level:Level] This syntax is for client-side only. It shows the parts of
the Dfs namespace cached by the client, the names
of the servers participating in the Dfs share, the
clients’ randomization order of the participating
servers, and the current go to server.
/pktflush[:EntryToFlush] This syntax is for client-side only. It flushes the local
Partition Knowledge Table (PKT) cached by the client.
If EntryToFlush is specified, it flushes just the specified
local PKT entry.
/spcinfo [/all] Dumps the SPC table.
/spcflush[:EntrytoFlush] Flushes the local SPC table. If EntryToFlush is
specified, it flushes just the specified SPC table entry.
/readreg Makes Mup.sys reread the registry.
/dfs Makes Dfs.sys reread the registry.
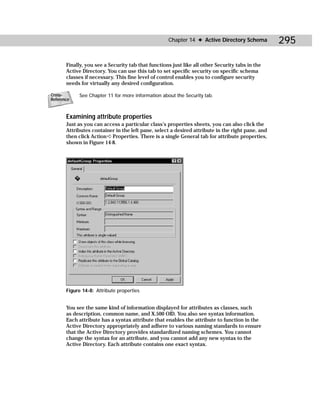
ADSI Edit
The Active Directory Services Interface Editor is a lower-level editor for the Active
Directory. Using ADSI Edit, you can perform all kinds of tasks, such as add, delete,
and move Active Directory objects as well as add, remove, and view attributes of
objects.
Caution As with the Schema Manager console, great care must be taken when using ADSI
Edit. Editing should be performed only by experienced administrators or program-
mers. Incorrect edits can bring an Active Directory environment to a halt and result
in the Active Directory having to be reinstalled.
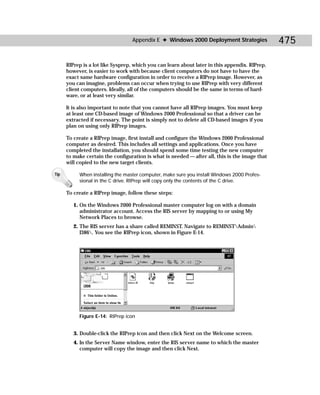
ADSI Edit is an MMC snap-in that you manually open (see Appendix B for instruc-
tions). As shown in Figure C-9, you see a Domain NC, Configuration Container, and a
Schema container. The ADSI Edit snap-in functions like all other snap-ins.
Cross- See Chapter 14 to learn more about ADSI Editor and schema modifications.
Reference](https://image.slidesharecdn.com/labibliadeactivedirectory-100824104020-phpapp02/85/La-biblia-de-active-directory-446-320.jpg)
![434 Appendixes
dsacls object [/a] [/d {user | group}:permissions [...]] [/g
{user | group}:permissions [...]] [/i:{p | s | t}] [/n] [/p:{y
| n}] [/r {user | group} [...]] [/s [/t]] [/?]
Table C-9
Dsacls.exe Command-line Reference
Parameters Explanation
dsacls object Displays the security on an object. Object is the path
to the directory services object on which to display or
manipulate the ACLs. This path must be a distinguished
name.
/a Displays the ownership and auditing information as well
as the permissions.
/d {user | group}:permissions Denies specified permissions to user or group. You can
specify more than one user or group in a command.
/g {user | group}:permissions Grants specified permissions to user or group. You can
specify more than one user or group in a command.
/i:{c | o | i | p} Specifies one of the inheritance flags, which are p =
Propagate inheritable permissions one level only, s =
Subobjects only, and t = This object and subobjects.
/n Replaces the current access on the object instead of
editing it.
/p Marks the object as protected (y = yes) or not protected
(n = no). If the /p option is not present, the current
protection flag is maintained.
/r {user | group} Removes all permissions for the specified user or group.
You can specify more than one user or group in a
command.
/s Restores the security on the object to the default for that
object class as defined in Active Directory schema.
/t Restores the security on the tree of objects to the default
for each object class. This switch is valid only with the /s
option.
/? Displays this syntax listing.
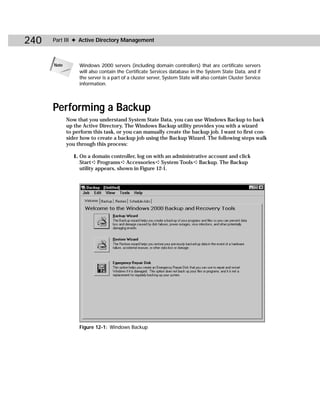
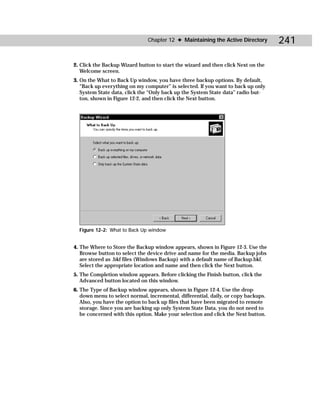
Syntax for {user | group} must be expressed in one of the following ways:
✦ user@domain or domainuser
✦ group@domain or domaingroup](https://image.slidesharecdn.com/labibliadeactivedirectory-100824104020-phpapp02/85/La-biblia-de-active-directory-448-320.jpg)
![Appendix C ✦ Additional Administrative Tools 435
Note More than one user or group can be specified in a command.
Syntax for permissions must be expressed in the following form:
[PermissionBits];[{Object | Property}];[InheritedObjectType]
Table C-10 lists the PermissionBits values that can be used.
Table C-10
PermissionsBits Values
PermissionBits Explanation
GR Generic Read
GE Generic Execute
GW Generic Write
GA Generic All
SD Delete
DT Delete an object and all of its children
RC Read security information
WD Change security information
WO Change owner information
LC List the children of an object
CC Create a child object
DC Delete a child object
WS Write to self object
RP Read property
WP Write property
CA Control access right
LO List the object access
Dsastat.exe
DSA Statistics is a command-line diagnostic tool that compares and detects differ-
ences between naming contexts on domain controllers. You can use Dsastat.exe to
compare two directory trees within the same domain or through the global catalog
server in an across-domain format. Dsastat.exe gathers statistics that help you](https://image.slidesharecdn.com/labibliadeactivedirectory-100824104020-phpapp02/85/La-biblia-de-active-directory-449-320.jpg)
![436 Appendixes
determine if domain controllers have an accurate image of the objects in their own
domain, and it is a great tool to determine if domain controllers within a domain
are up-to-date with one another or if global catalog servers are up-to-date across
domains. Figure C-11 shows you Dsastat.exe, and Table C-11 gives you the com-
mand-line syntax.
Figure C-11: Dsastat.exe
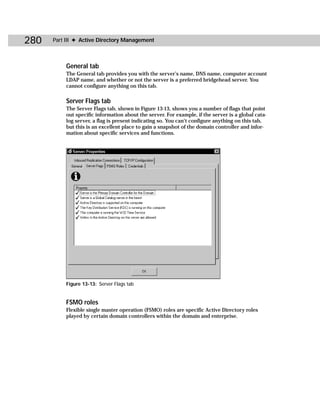
dsastat [/?] [-loglevel:option] [-output:option] [-f:filename]
[-s:servername[portnumber][;servername[portnumber];...]] [-
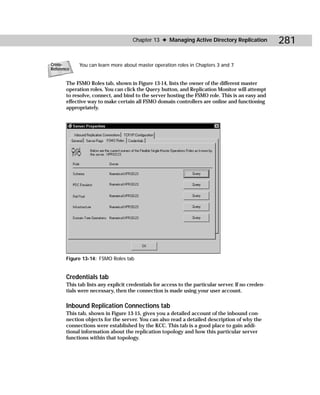
t:option] [-sort:option] [-p:entrynumber] [-b:searchpath] [-
filter:ldapfilter] [-gcattrs:option[;option;...]]
Table C-11
Dsastat.exe Command-line Reference
Parameters Explanation
/? Displays help for Dsastat, along with the default options
and parameter values.
-loglevel:option Specifies the extent of logging that is performed during
execution. Valid option values are INFO, TRACE, and
DEBUG. The default option is INFO.
-output:option Specifies where the results of Dsastat are displayed. Valid
options are SCREEN, FILE, or BOTH. If FILE is selected
the output is saved to a file named Dsastat.log.nnnnn. The
default option is SCREEN.](https://image.slidesharecdn.com/labibliadeactivedirectory-100824104020-phpapp02/85/La-biblia-de-active-directory-450-320.jpg)
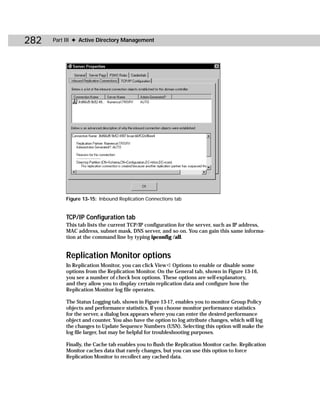
![Appendix C ✦ Additional Administrative Tools 437
Parameters Explanation
-f:filename Specifies the name of an initialization file to use for
parameters if user does not specify the parameters on
the command line.
-s:servername[portnumber] Specifies the names of the servers on which the
[;servername[portnumber];...] comparison will be performed. If the port number is
:3268, the comparison will be performed against the
global catalog of that server. The default port number is
the default LDAP port (389).
-t:option Specifies whether to perform a statistics comparison or a
full-content comparison. Valid option values are TRUE
(perform a statistical comparison) or FALSE (perform a
full-content comparison). The default option is TRUE.
-sort:option Determines whether the search operations are performed
with sorting based on object GUID. Valid option values are
TRUE (perform sorted queries) or FALSE (do not perform
sorted queries). The default value is FALSE.
-p:entrynumber Sets page size for ldap_search operation. The valid range
for entrynumber is from 1 to 999. The default value is 64.
The number indicates the number of entries to be
returned per page.
-b:searchpath Sets the distinguished name of the base search path. This
allows Dsastat to perform the comparison against any
subtree of the directory.
-filter:ldapfilter Sets LDAP filter used in the LDAP search operation. The
filter must conform to LDAP search syntax as specified in
RFC 2254. The default filter is (objectclass=*).
-gcattrs:option[;option;...] Specifies attributes to be returned from search. This option
is used only if the comparison option -t is set to FALSE.
Valid option values are any LDAP attribute, objectclass
when no attributes are requested, auto if only those
attributes that are replicated to the Global Catalog are
requested, and all when you want all attributes contained
in an object to be retrieved.
Ldp.exe
Ldp.exe is an Active Directory administration tool that enables you to perform
Lightweight Directory Access Protocol (LDAP) operations and view objects in the
Active Directory with their metadata. Ldp.exe can be useful in troubleshooting](https://image.slidesharecdn.com/labibliadeactivedirectory-100824104020-phpapp02/85/La-biblia-de-active-directory-451-320.jpg)
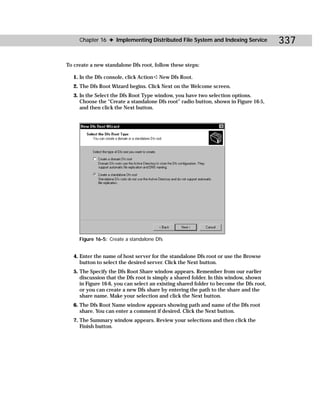
![Appendix C ✦ Additional Administrative Tools 439
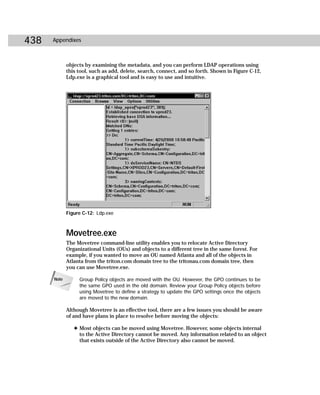
✦ Computer objects are not moved during a Movetree operation. You can use
Netdom.exe, explained in the next section, to move computer objects
between domains.
✦ Users’ personal data, logon scripts, policies, and so forth are not moved using
Movetree.
✦ Local and Domain Global groups are not moved and all user accounts and
groups maintain their security identities. ACLs are not reset. Universal groups
are moved during a Movetree operation.
✦ The following objects cannot be moved: system objects, objects in the config-
uration or schema naming contexts, domain controllers, any object whose
parent is a domain controller, any object with an identical name as an object
in the new domain, and all objects in special containers (Builtin,
ForeignSecurityPrincipal, System, and LostAndFound).
Caution If a Movetree operation is paused or aborted, any objects that have not yet been
moved but were targeted for the move are placed in an Orphan container found in
the LostAndFound container. See Chapter 12 to learn more about the LostAndFound
container.
Figure C-13 shows you the Movetree tool, and Table C-12 gives you the command-
line syntax.
Figure C-13: Movetree.exe
movetree {/start | /startnocheck | /continue | /check} /s
SrcDSA /d DstDSA /sdn SrcDN /ddn DstDN [/u [Domain]Username /p
Password] [/verbose] [{/? | /help}]](https://image.slidesharecdn.com/labibliadeactivedirectory-100824104020-phpapp02/85/La-biblia-de-active-directory-453-320.jpg)
![440 Appendixes
Table C-12
Movetree.exe Command-line Reference
Parameters Explanation
/start Starts a Movetree operation. This command
includes a /check operation by default.
/startnocheck Starts a Movetree operation with no /check.
/continue Continues the execution of a previously
paused or failed Movetree operation.
/check Performs a test of the Movetree operation,
checking the whole tree without moving any
objects. An error message occurs if necessary
permissions are not met, the destination
server does not have enough disk space, an
RDN conflict exists, a sameAccountName
conflict occurs, or nonmovable objects exist
(see previous bulleted list).
/s SrcDSA Specifies the fully qualified primary DNS
name of the source server in the domain
from which the objects are being moved.
/d DstDSA Specifies the fully qualified primary DNS
name of the destination server in the domain
to which the objects are being moved.
/sdn SrcDN Specifies the distinguished name of the
source subtree to which the object is being
moved.
/ddn DstDN Specifies the distinguished name of the
destination subtree to which the object is
being moved.
/u [Domain]Username /p Password Runs Movetree under the credentials of a
valid user name and password.
/verbose Runs Movetree in verbose mode.
/? or /help Displays the command-line syntax.](https://image.slidesharecdn.com/labibliadeactivedirectory-100824104020-phpapp02/85/La-biblia-de-active-directory-454-320.jpg)
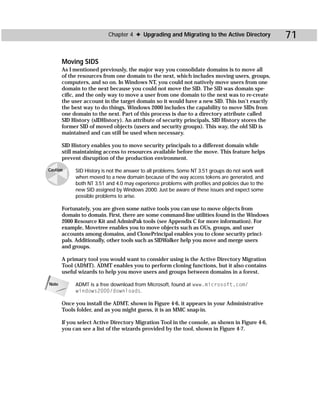
![Appendix C ✦ Additional Administrative Tools 441
When using Movetree, you may receive error level code. The following bulleted list
defines those error levels:
✦ 0 — No error
✦ 1 — Command-line syntax error
✦ 2 — Directory conflict, such as a duplicate name
✦ 3 — Network error, such as an unavailable domain controller
✦ 4 — System resource error, such as low disk space
✦ 5 — Internal processing error
Netdom.exe
Netdom.exe is a command-line utility designed to help you manage network
domains. With Netdom you manage domains and trust relationships between
domains, and you can perform a number of specific tasks, such as joining a com-
puter to a domain and managing computer accounts for both member servers and
workstations. You can create trust relationships between domains and manage
those trust relationships as well. Figure C-14 shows you the Netdom.exe tool, and
Table C-13 gives you the command-line syntax.
Figure C-14: Netdom.exe
netdom command object [/D:domain] [options]
Note Parameters and commands for Netdom.exe are case sensitive.](https://image.slidesharecdn.com/labibliadeactivedirectory-100824104020-phpapp02/85/La-biblia-de-active-directory-455-320.jpg)
![442 Appendixes
Table C-13
Netdom.exe Command-line Reference
Command Parameters Explanation
ADD computer /D:domain [/Ud:User /Pd: This is a workstation or server command that
{Password | *}][/S:Server] [/OU:ou_path] adds a workstation or server account to the
[/DC] domain.
HELP Displays a command-line syntax screen.
HELP command Displays a more detailed command-line
syntax screen for a particular command.
command | MORE Displays the detailed command-line syntax
screen for command one screen at a time.
HELP SYNTAX Explains how to interpret the notation used
in the syntax screens.
JOIN computer /D:domain [/OU:ou_path] Joins a workstation or member server
[/Ud:User /Pd:{Password | *}] [/Uo:User / (computer) to a domain.
Po:{Password | *}]
[/Reboot[:time_in_seconds]]
MOVE computer /D:domain Moves a workstation or member server
[/OU:ou_path] [/Ud:User /Pd: (computer) to a new domain.
{Password | *}] [/Uo:User /Po:
{Password | *}]
[/Reboot[:time_in_seconds]]
REMOVE computer /D:domain Removes a workstation or member server
[/Ud:User /Pd:{Password | *}] (computer) from a domain.
[/Uo:User /Po:{Password | *}]
[/Reboot[:time_in_seconds]]
RENAME computer [/D:domain] Renames a Windows NT 4.0 backup domain
[/Reboot[:time_in_seconds]] controller (computer).
RESET computer /D:domain [/S:Server] Resets the secure connection between a
[/Uo:User /Po:{Password | *}] workstation and a domain controller.
VERIFY computer /D:domain Verifies the secure connection between a
[/Uo:User /Po:{Password | *}] workstation and a domain controller.](https://image.slidesharecdn.com/labibliadeactivedirectory-100824104020-phpapp02/85/La-biblia-de-active-directory-456-320.jpg)
![Appendix C ✦ Additional Administrative Tools 443
Command Parameters Explanation
QUERY /D:domain [/S:Server] Retrieves membership, trust, and other
[/Ud:User /Pd:{Password | *}] information from a domain.
[/Verify] [/Reset] [/Direct]
{WORKSTATION | SERVER | DC | OU |
PDC | FSMO | TRUST}
TIME computer /D:domain [/Ud:User / Verifies or resets and synchronizes time
Pd:{Password | *}] [/Uo:User /Po: within a domain.
{Password | *}] [/Verify] [/Reset]
[WORKSTATION] [SERVER]
TRUST trusting_domain_name / Establishes, verifies, or resets a trust
D:trusted_domain_name [/Ud:User] relationship between domains.
[/Pd:{Password | *}] [Uo:User]
[/Po:{Password | *}] [/Verify] [/Reset]
[/PasswordT:new_realm_trust_password]
[/Add] [/Remove [/Force]] [/Twoway]
[/Kerberos] [/Transitive[:{yes | no}]]
Repadmin.exe
Repadmin.exe is a command-line replication diagnostics tool that enables you to
examine and troubleshoot replication problems between domain controllers in
the Active Directory. You can use Repadmin to examine each domain controller in
order to see the replication topology from that domain controller’s viewpoint. The
Knowledge Consistency Checker (KCC) generates and maintains the replication
topology within a site, but you can use Repadmin to manually make changes to
the topology. This feature, however, should not be necessary under normal circum-
stances. The best use of this tool is the monitoring of replication between servers
or between servers connected with unreliable WAN connections.
Caution You do not need to manually manipulate an Active Directory site’s replication
topology under normal circumstances, and incorrectly doing so may cause replica-
tion problems or failure. See Chapter 13 for more information about how the KCC
functions in the Active Directory.
Figure C-15 shows the Repadmin tool, and Table C-14 gives you the command-line
parameters and arguments.](https://image.slidesharecdn.com/labibliadeactivedirectory-100824104020-phpapp02/85/La-biblia-de-active-directory-457-320.jpg)
![444 Appendixes
Figure C-15: Repadmin.exe
repadmin command arguments [/u:[domain]user /pw:{password|*}]
Table C-14
Repadmin.exe Command-line Reference
Commands and Arguments Explanation
/u:[domain]user Specifies an optional user (from an optional
domain) as the administrator. If the user name
and password are not specified, Repadmin uses
the credentials of the currently logged-on user.
/pw:{password|*} Specifies the password of the user specified by
the /u: switch. If the user name and password are
not specified, Repadmin uses the credentials of
the currently logged-on user.
/sync Naming_Context Destination_ Starts a replication event for the specified naming
DSA Source_DSA_UUID [/force] context between the source and destination
[/async][/full] [/addref] [/allsources] domain controllers. The source DSA UUID can
be determined when viewing the replication
partners with the repadmin /showreps
command.
/force Overrides the normal replication schedule.
/async Starts the replication event, but Repadmin does
not wait for the replication event to complete.](https://image.slidesharecdn.com/labibliadeactivedirectory-100824104020-phpapp02/85/La-biblia-de-active-directory-458-320.jpg)
![Appendix C ✦ Additional Administrative Tools 445
Commands and Arguments Explanation
/full Forces a full replication of all objects from the
destination DSA.
/syncall Destination_DSA [Naming_ Repadmin does not wait for the replication event
Context] [Flags]/kcc [DSA] [/async] / to complete.
async
/bind [DSA] Binds the Directory System Agent (DSA).
/propcheck Naming_ Checks USN of DSA.
Context Originating_DSA_
Invocation_ID Originating_
USN [DSA_from_which_to_
enumerate_host_DSAs]
/getchanges Naming_Context Checks for DSA naming context changes.
[Source_DSA] [/cookie:file]
/showreps [Naming_Context] Displays the replication partners (RepsFrom and
[DSA [Source_DSA_UUID]] RepsTo) for each naming context that is held on
[/verbose] [/unreplicated] [/nocache] the specified domain controller. The output also
indicates whether or not the domain controller is
also a Global Catalog server.
/showvector Naming_Context [DSA] For a specified naming context, shows the up-to-
[/nocache] date information.
/showmeta Object_DN [DSA] Displays the replication metadata for any object
[/nocache] stored in Active Directory such as attribute ID,
version number, originating and local Update
Sequence Number (USN), and originating DSA’s
GUID and date/time stamp.
/showtime [Windows_2000_ With no arguments, this command displays the
Directory_Service_Time_Value] current system time in both the directory service
format and string format.
/showmsg Win32_error_number Takes as an argument the Win32 error number
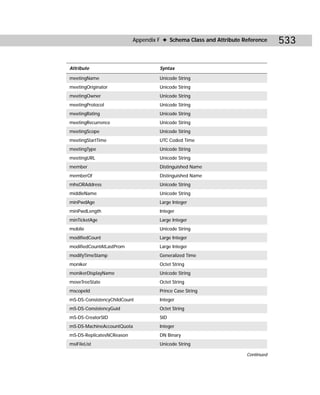
and displays the Win32 error text.
/showism [Transport_DN] [/verbose] Must be executed locally.
/showsig [DSA] DSA signature.
/showconn [DSA] [{Container_DN | DSA connection.
DSA_UUID}]
/showcert [DSA] DSA connection
/showctx [DSA] [/nocache] DSA connection.
/queue [DSA] DSA connection.
/failcache [DSA] DSA connection.](https://image.slidesharecdn.com/labibliadeactivedirectory-100824104020-phpapp02/85/La-biblia-de-active-directory-459-320.jpg)
![Appendix C ✦ Additional Administrative Tools 447
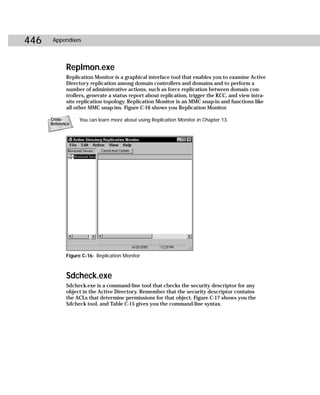
Figure C-17: Sdcheck.exe
sdcheck Server Object [-dumpSD] [-dumpAll] [-debug] [[-domain:
DomainName] -user: UserName -password: Password] [/?]
Table C-15
Sdcheck.exe Command-line Reference
Parameters Explanation
Server Specifies the name of the domain controller on which to
perform the query. You can provide either the DNS or UPN
name.
Object Specifies the name of the object on which you want to
determine the ACL entries. The name can be the logon name,
DN, or UPN.
-dumpSD Displays only the security descriptor for the selected object.
-dumpALL Displays the security descriptor for the selected object along
with all security descriptors inherited from parent containers.
-debug Displays internal debugging information for Sdcheck.exe.
-domain: DomainName Specifies the domain name of UserName in either DNS or
NetBIOS format.
-user: UserName Specifies the name of a user other than the current one, in
the form of either the logon name or user principal name.
-password: Password Specifies the name of UserName. Used to specify credentials
other than the current user’s name.
/? Displays syntax on the command line.](https://image.slidesharecdn.com/labibliadeactivedirectory-100824104020-phpapp02/85/La-biblia-de-active-directory-461-320.jpg)