Download to read offline
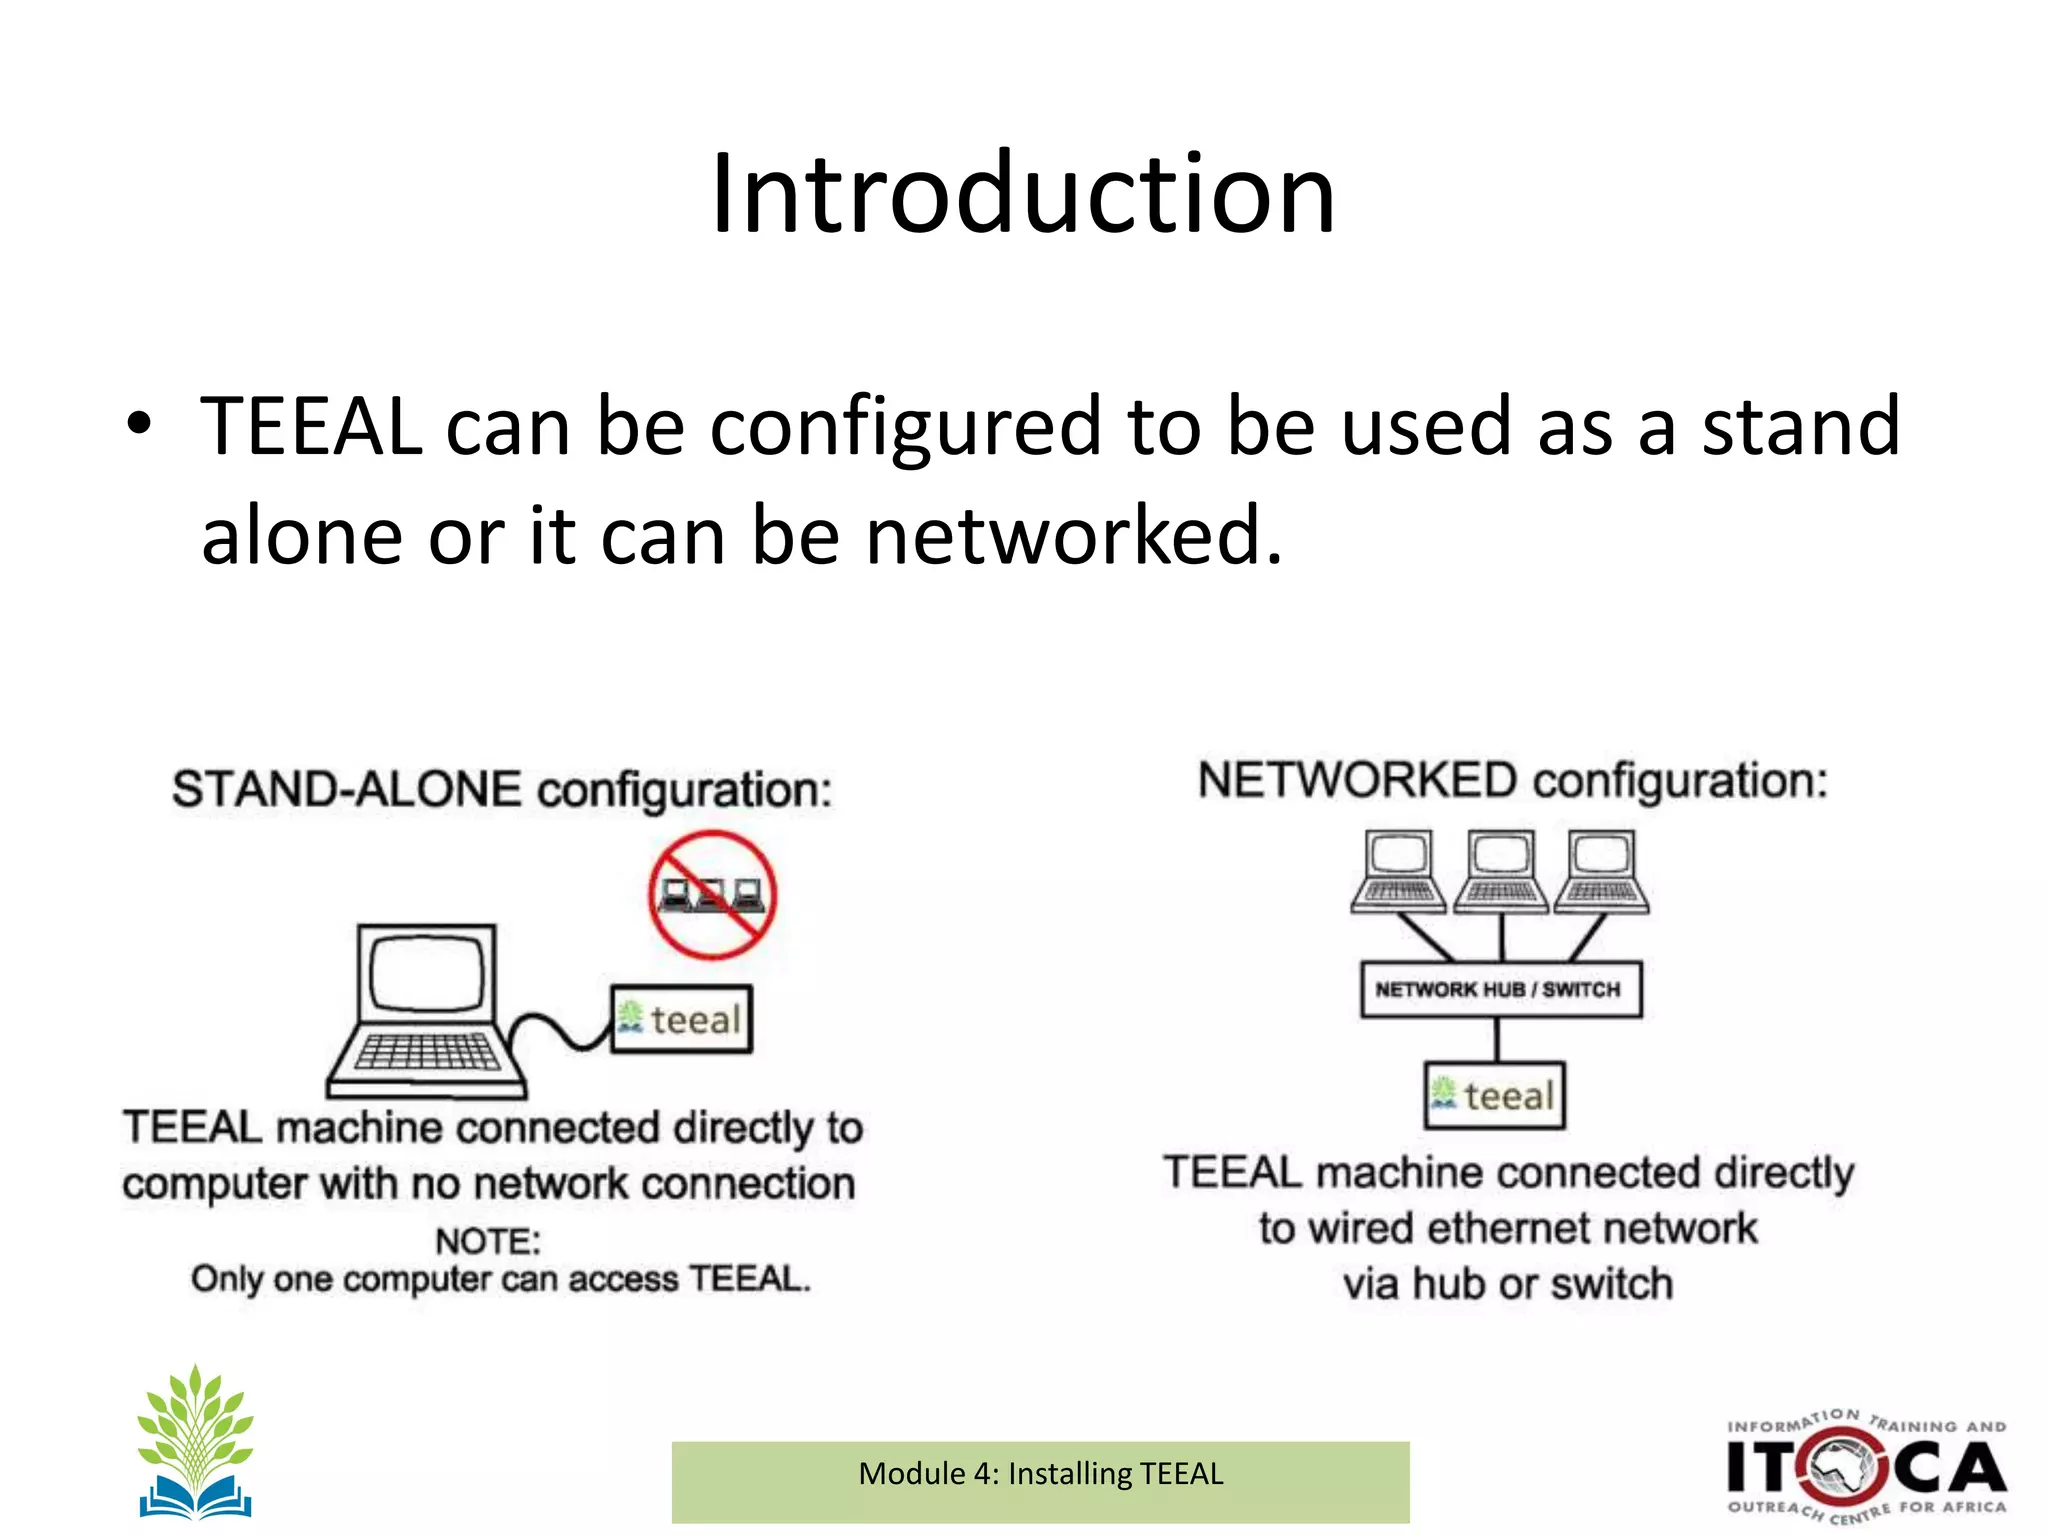
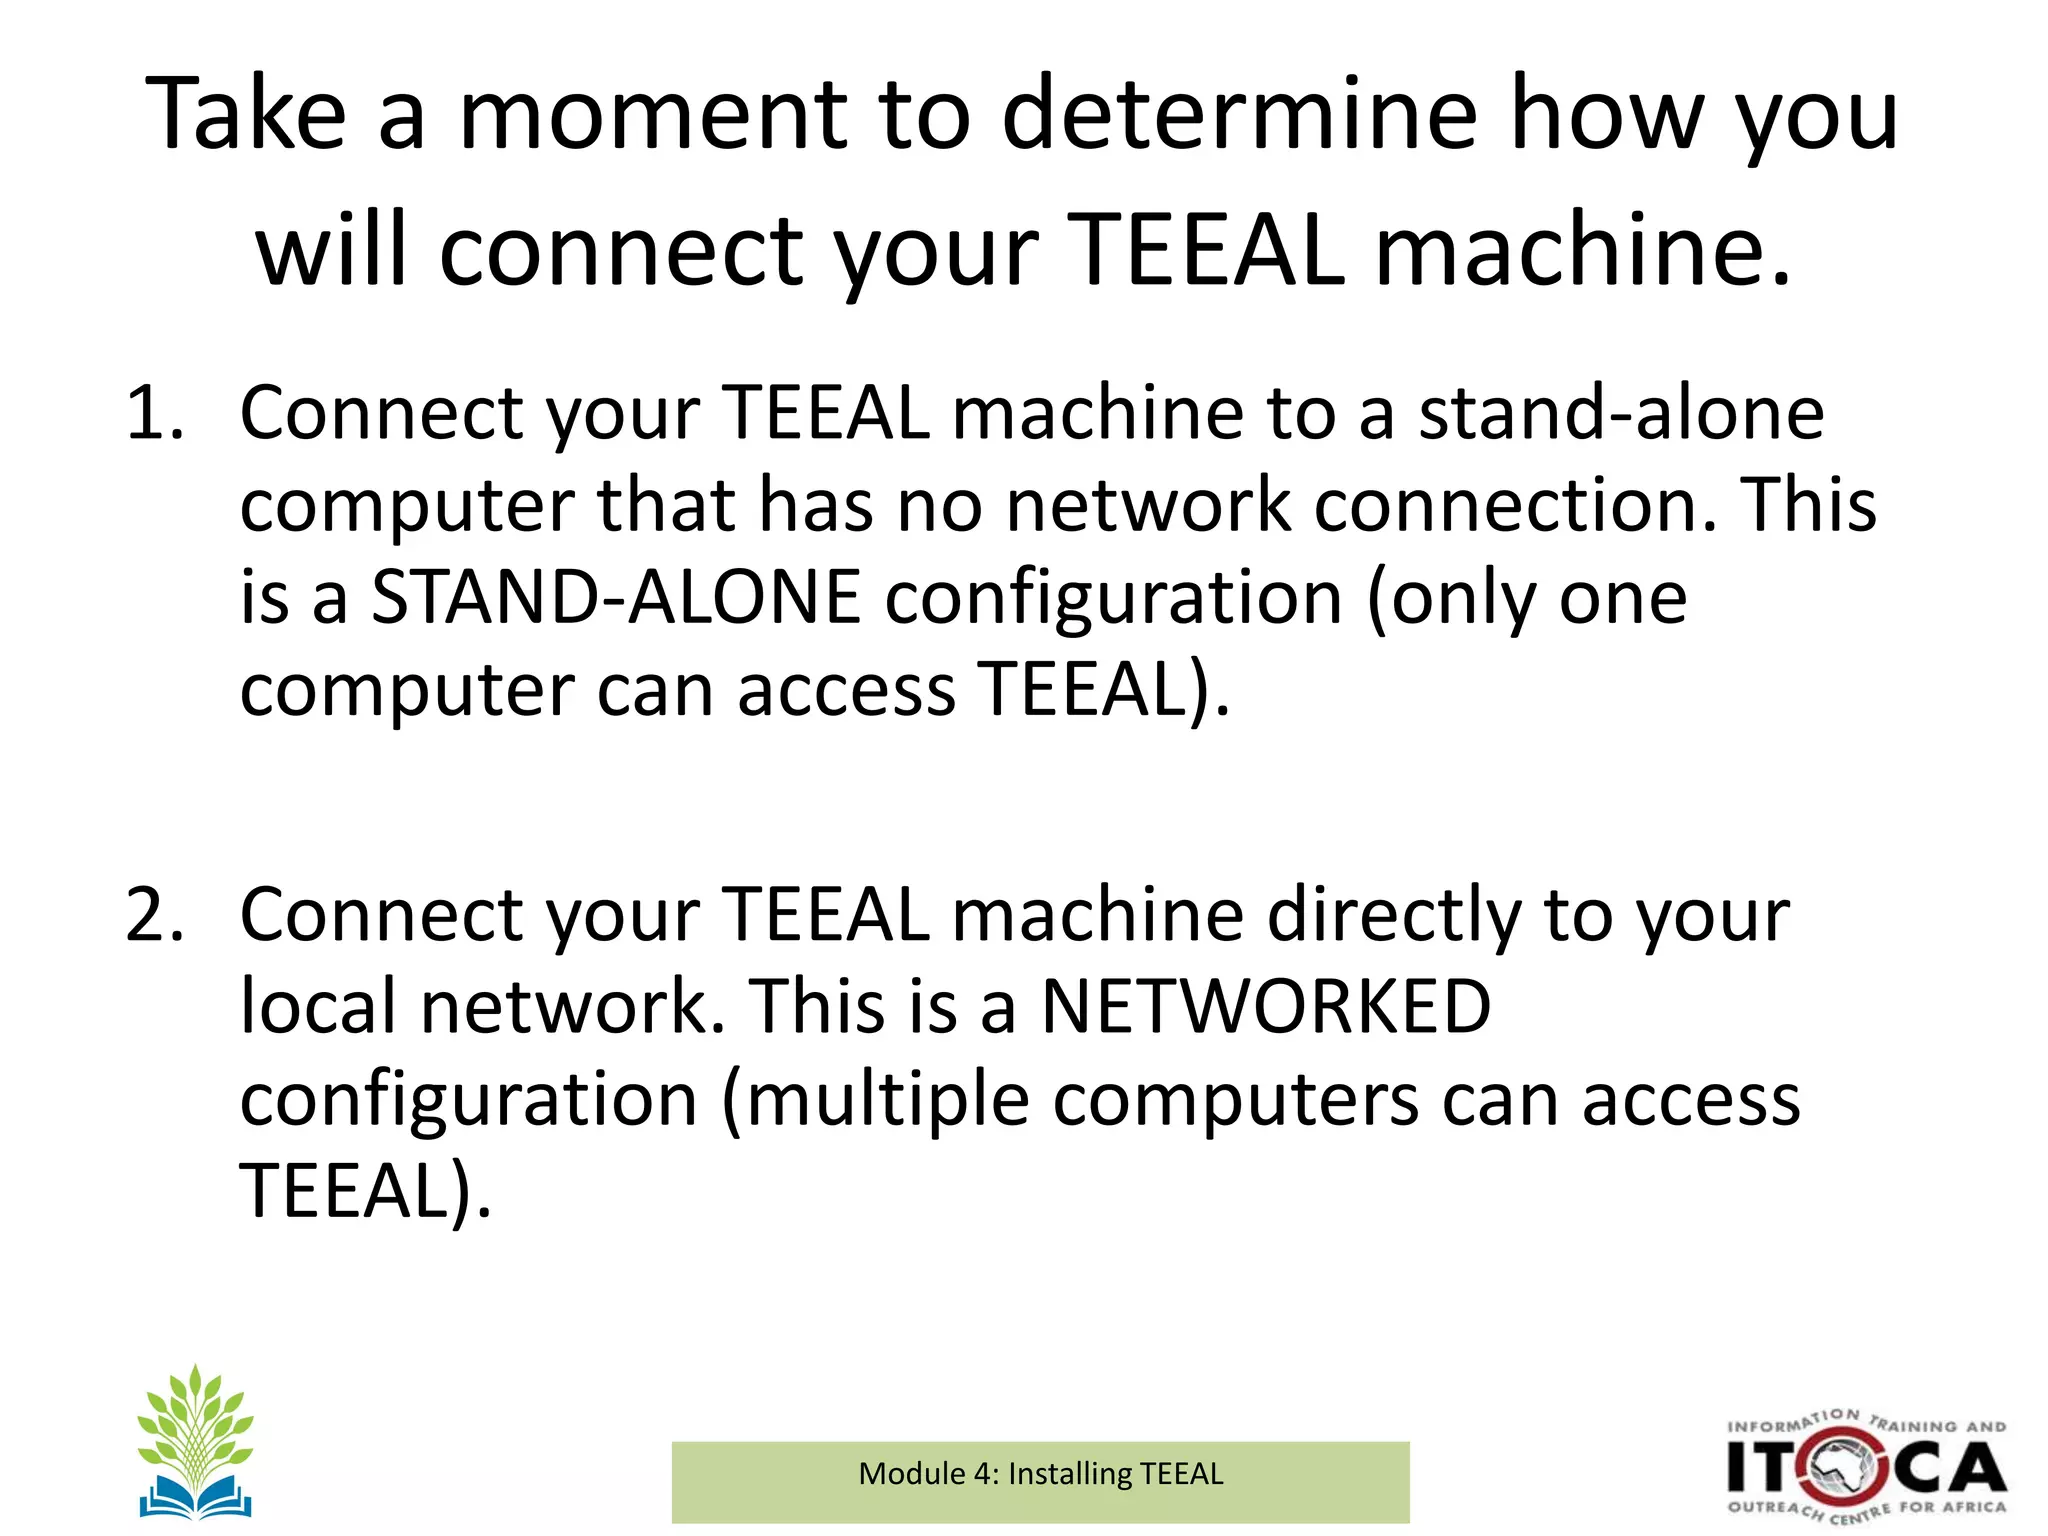

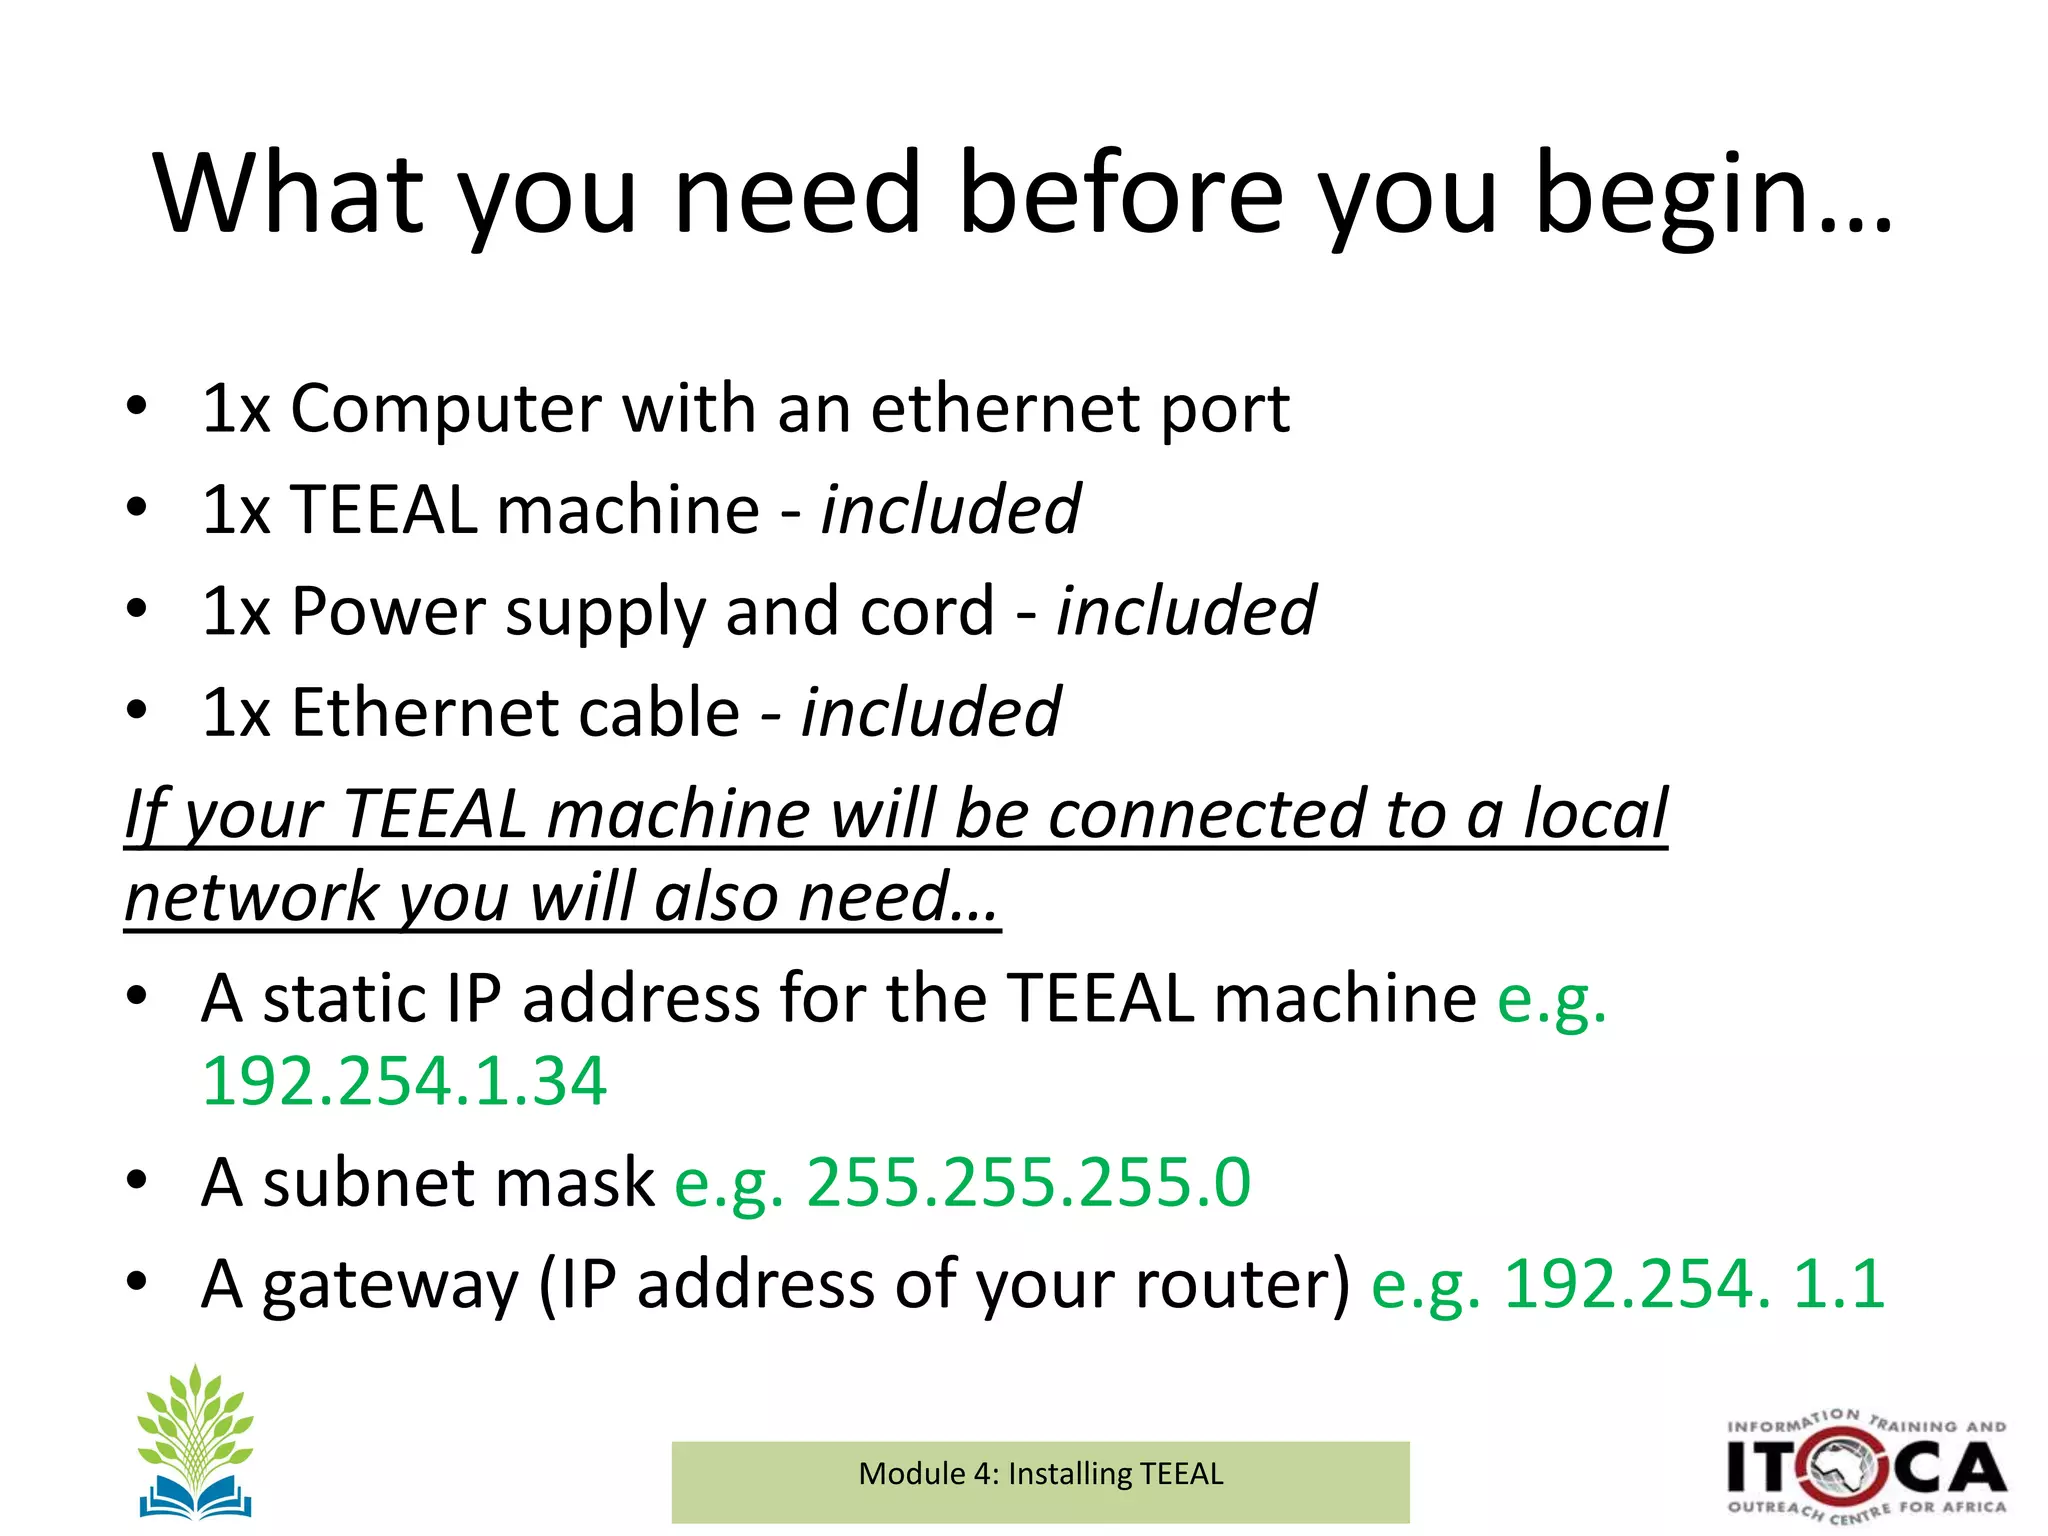
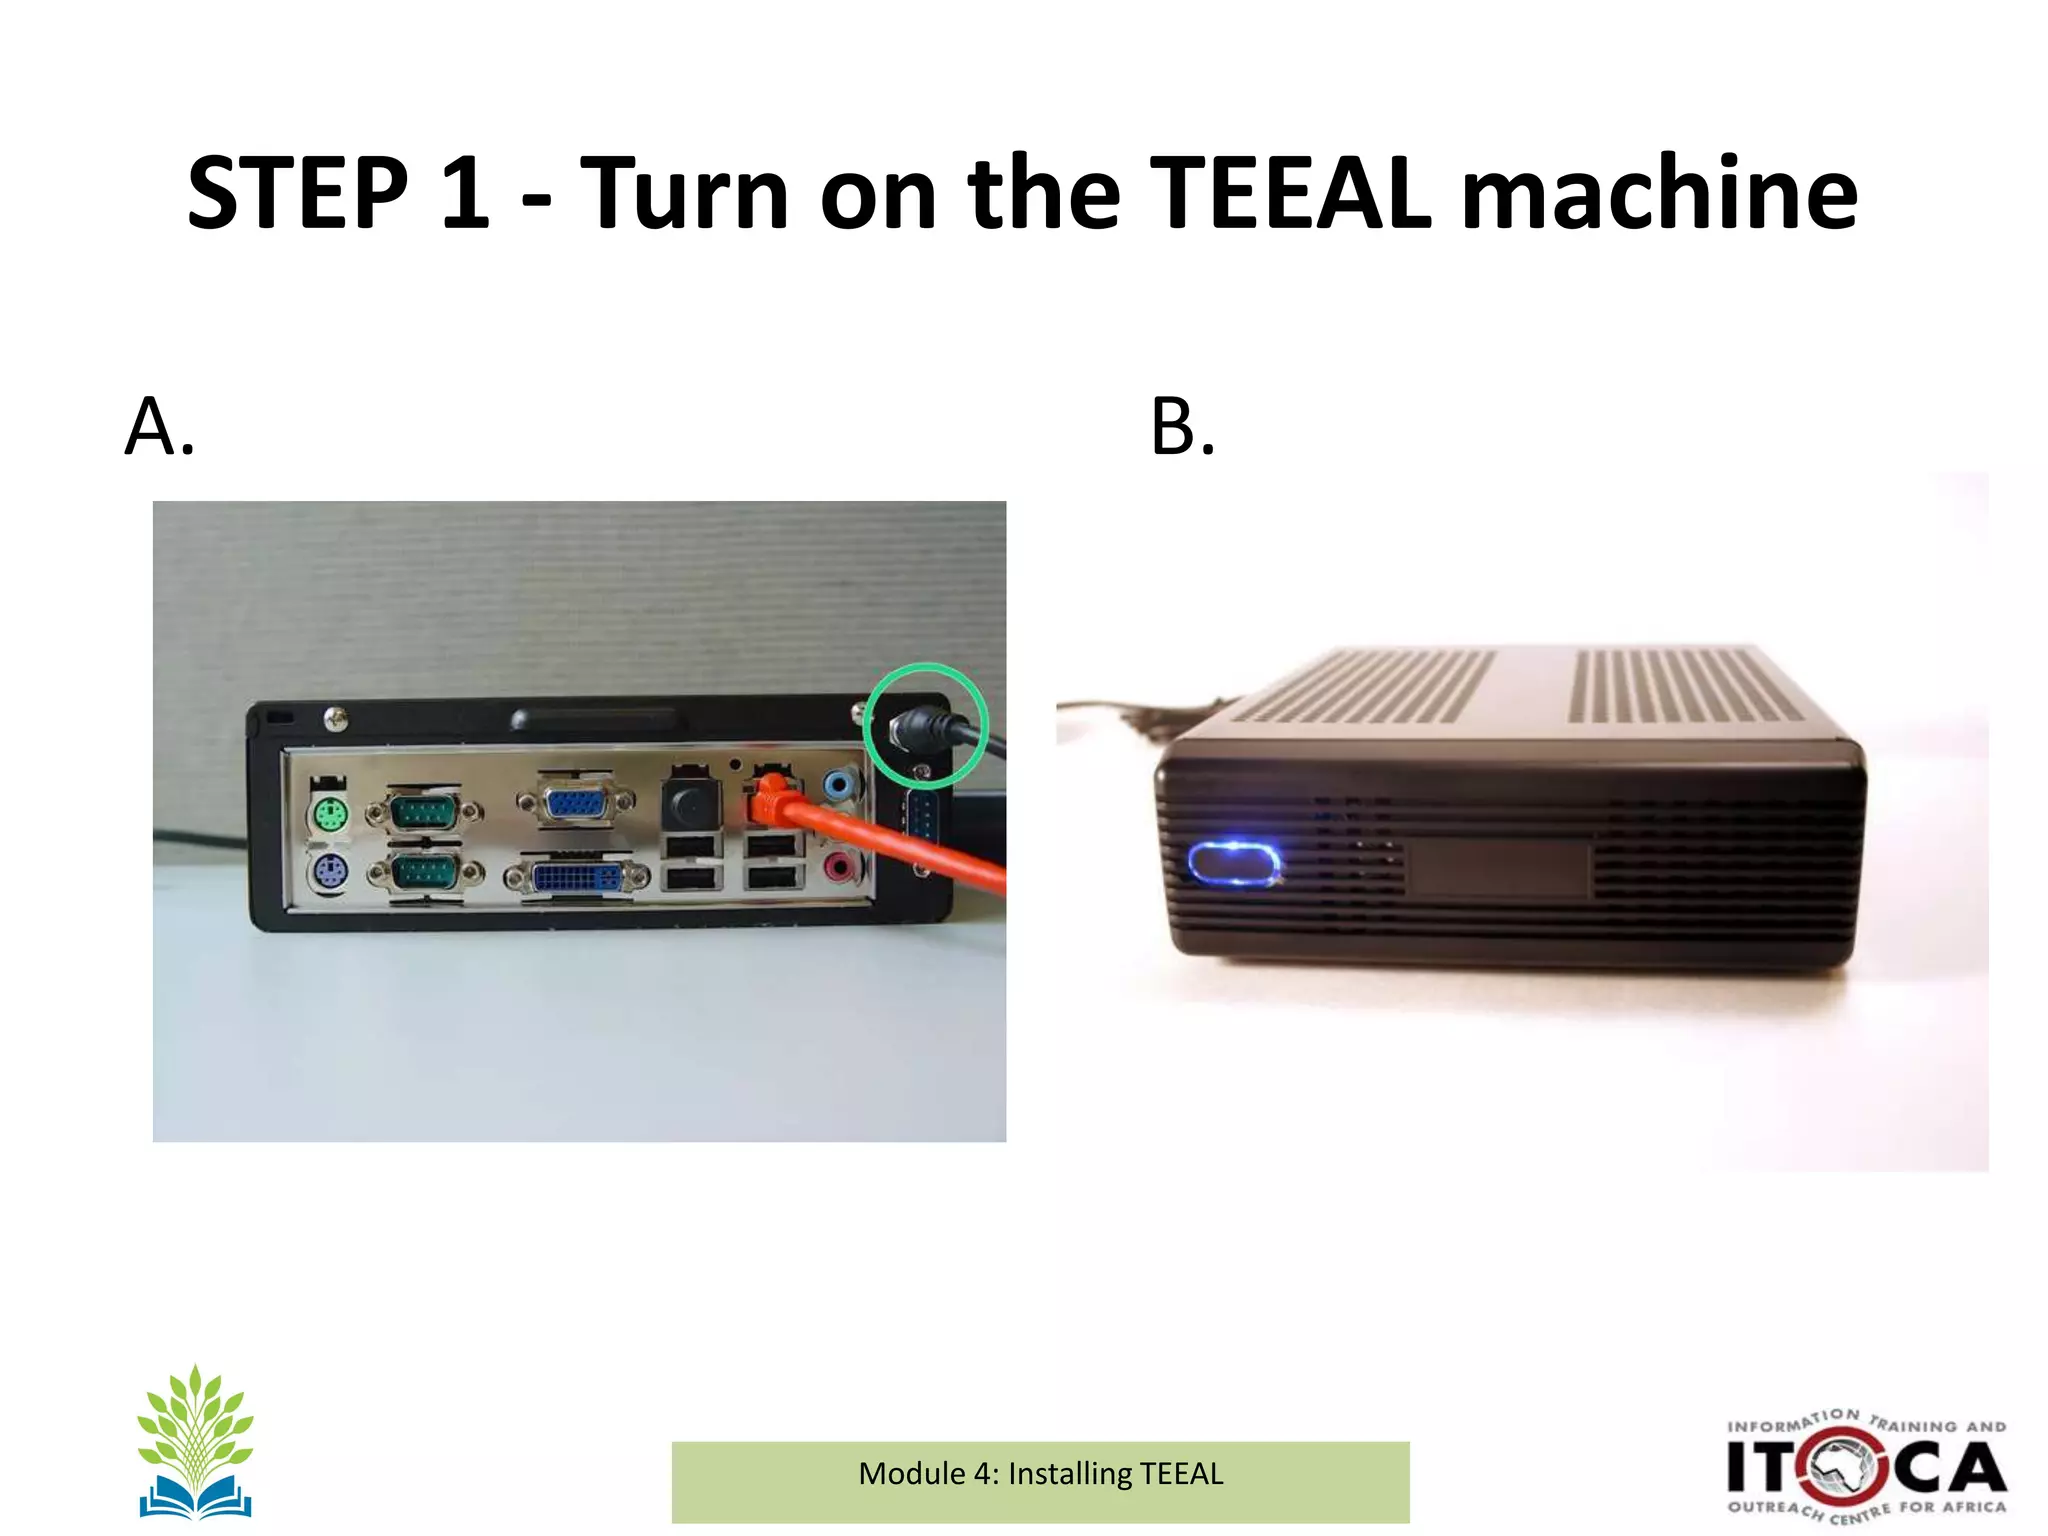

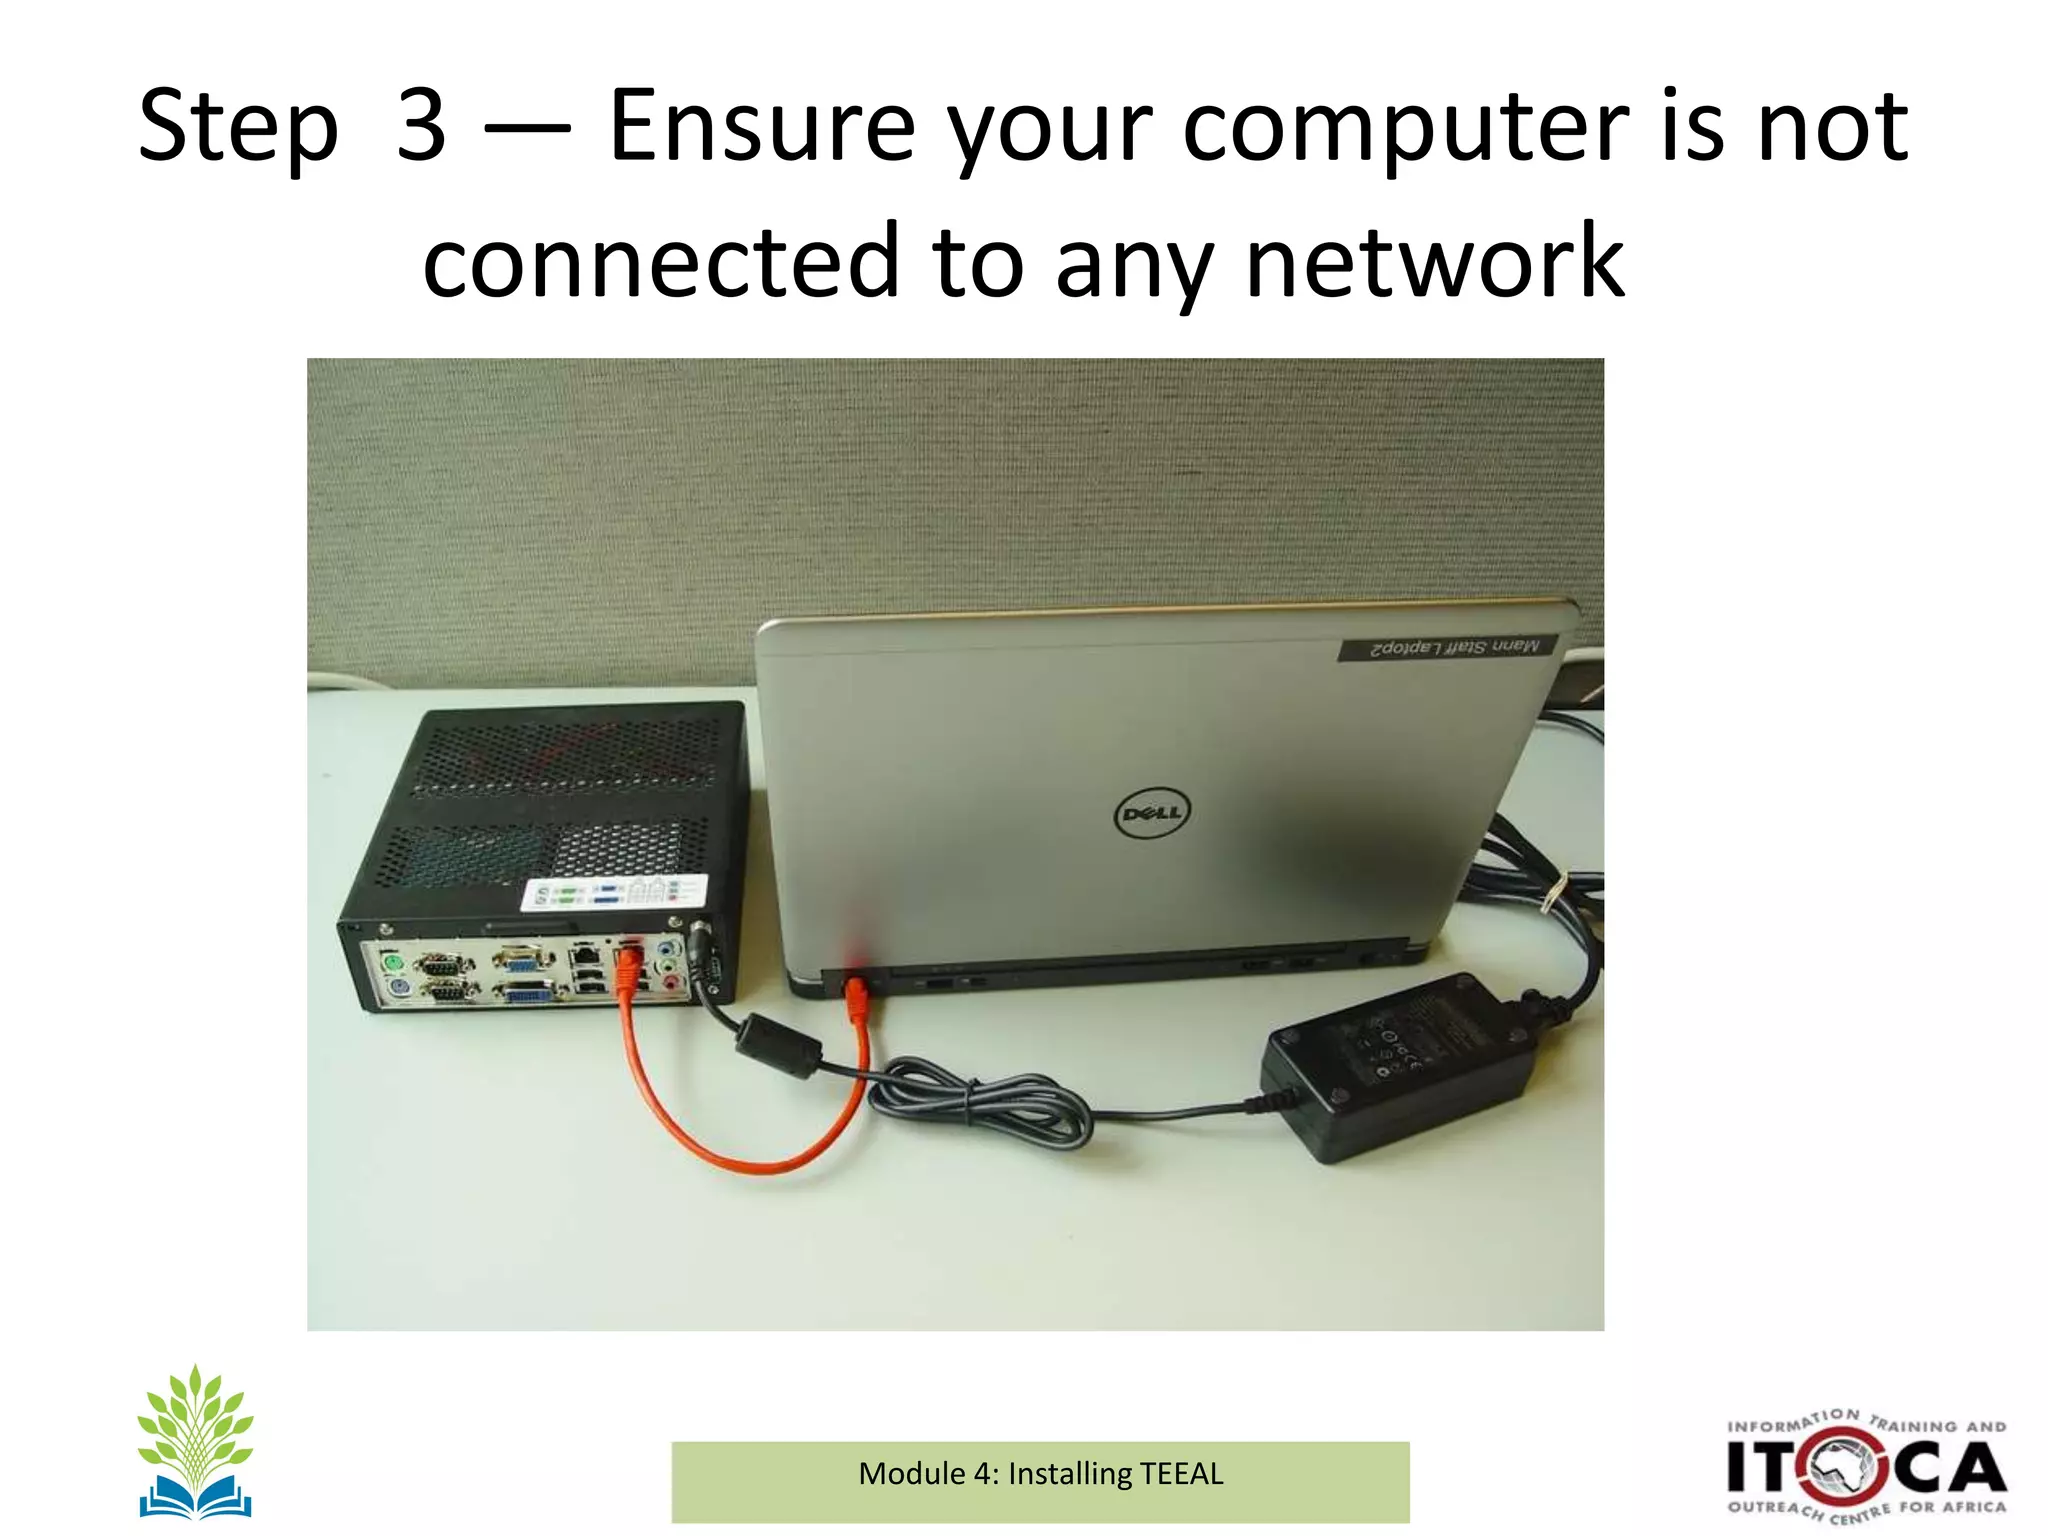
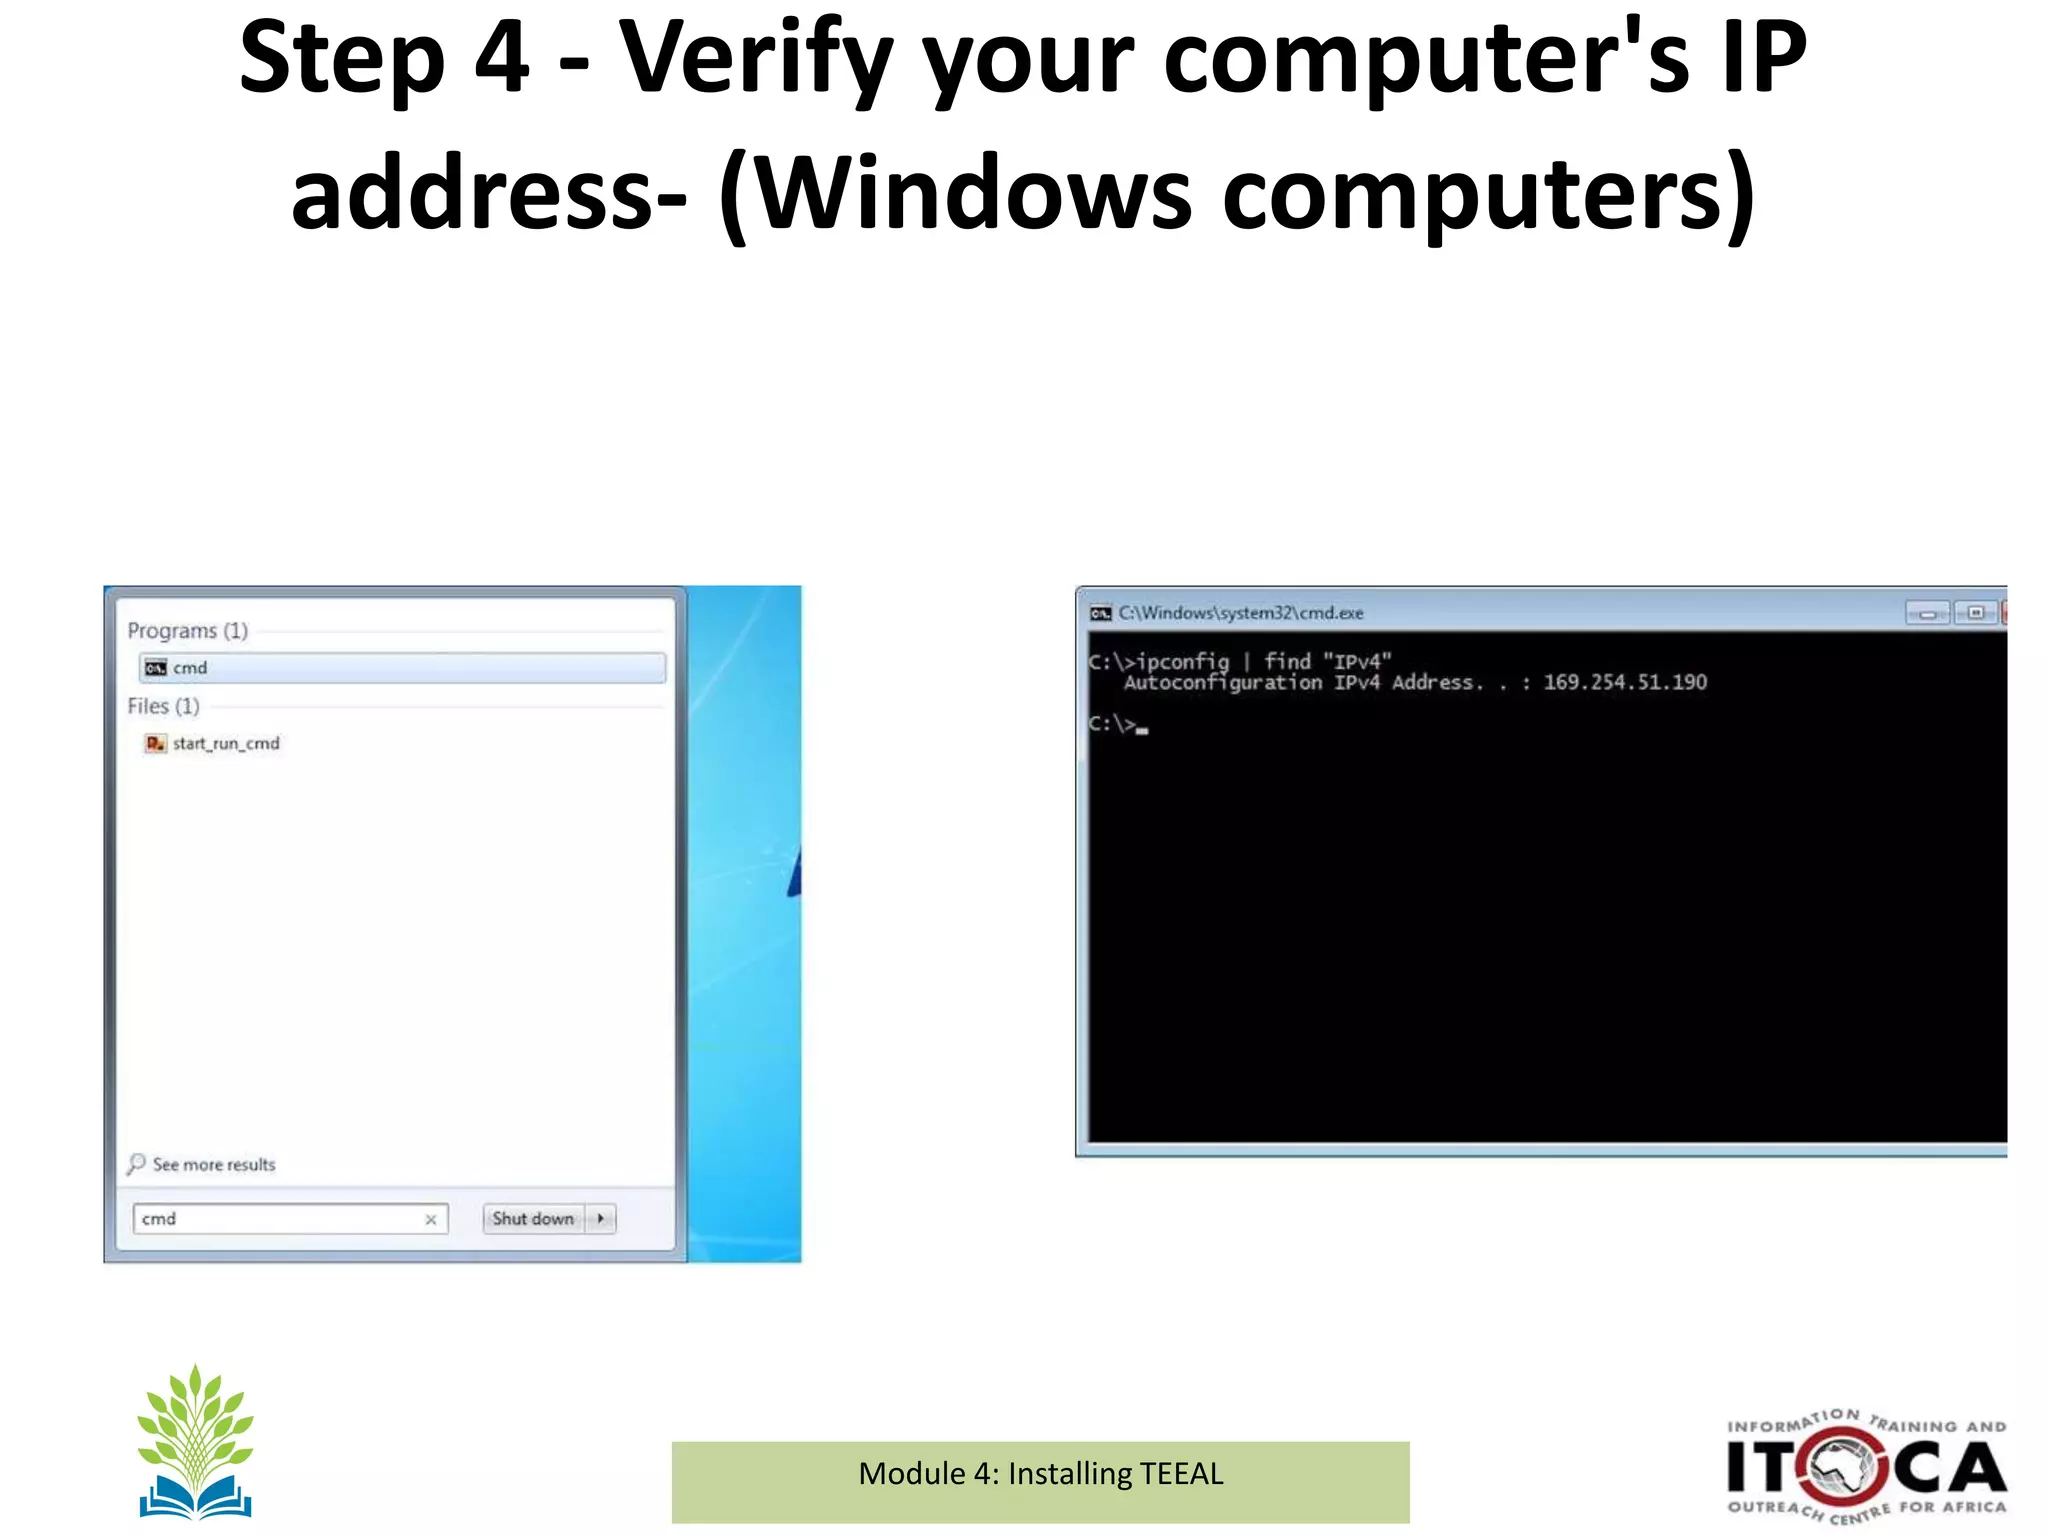
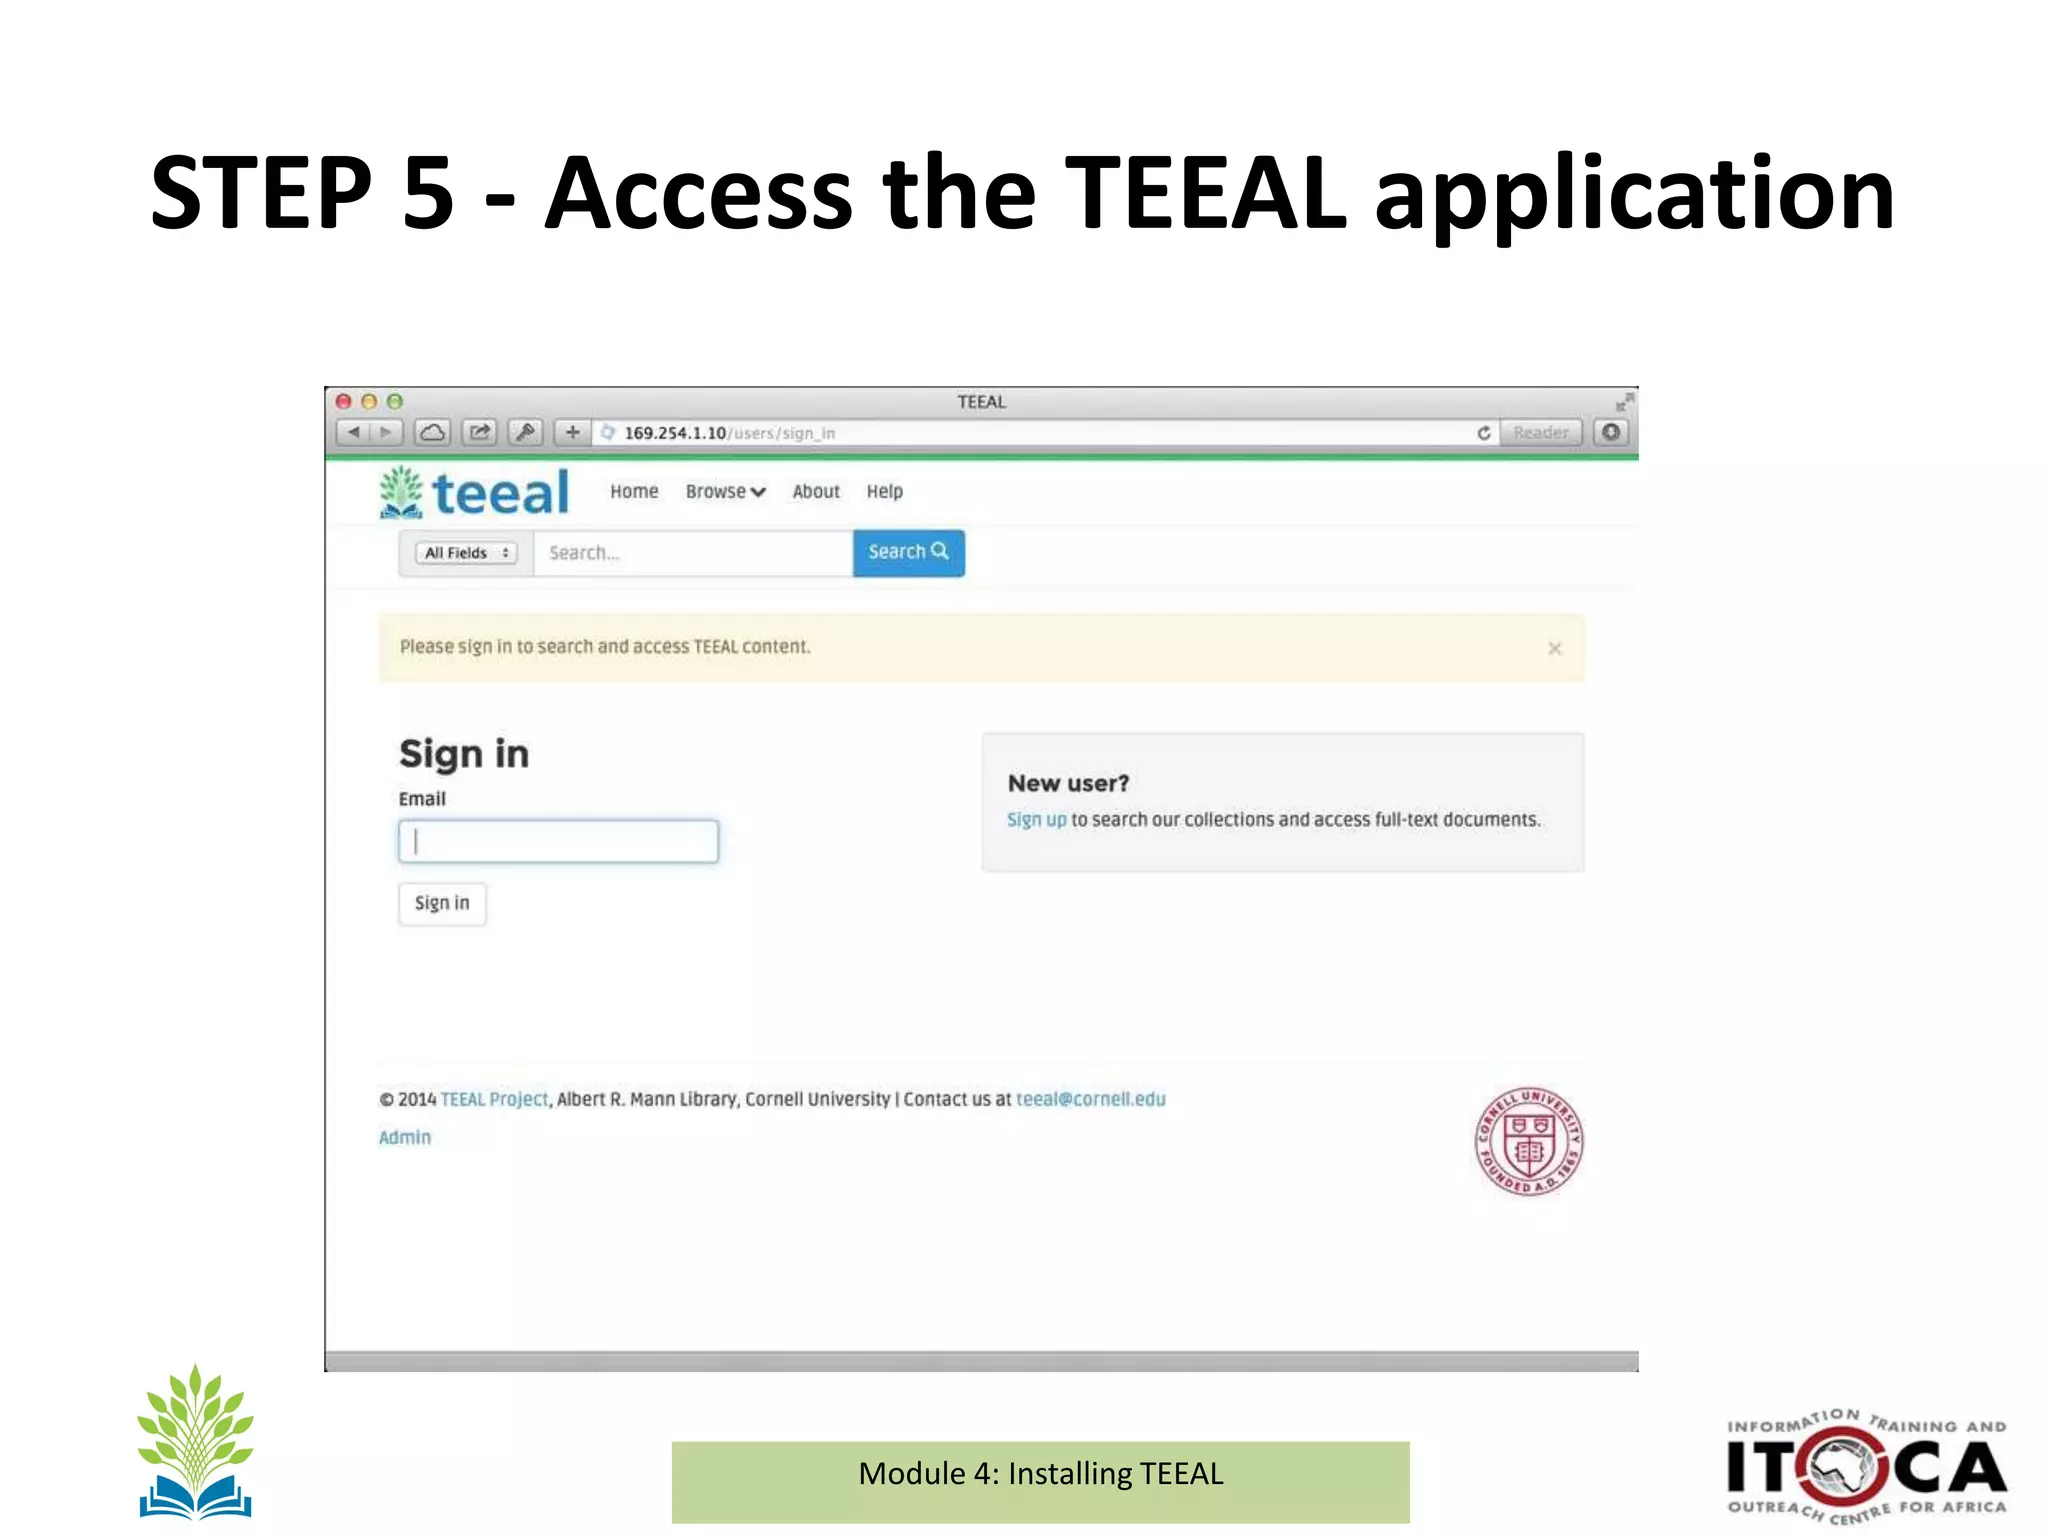
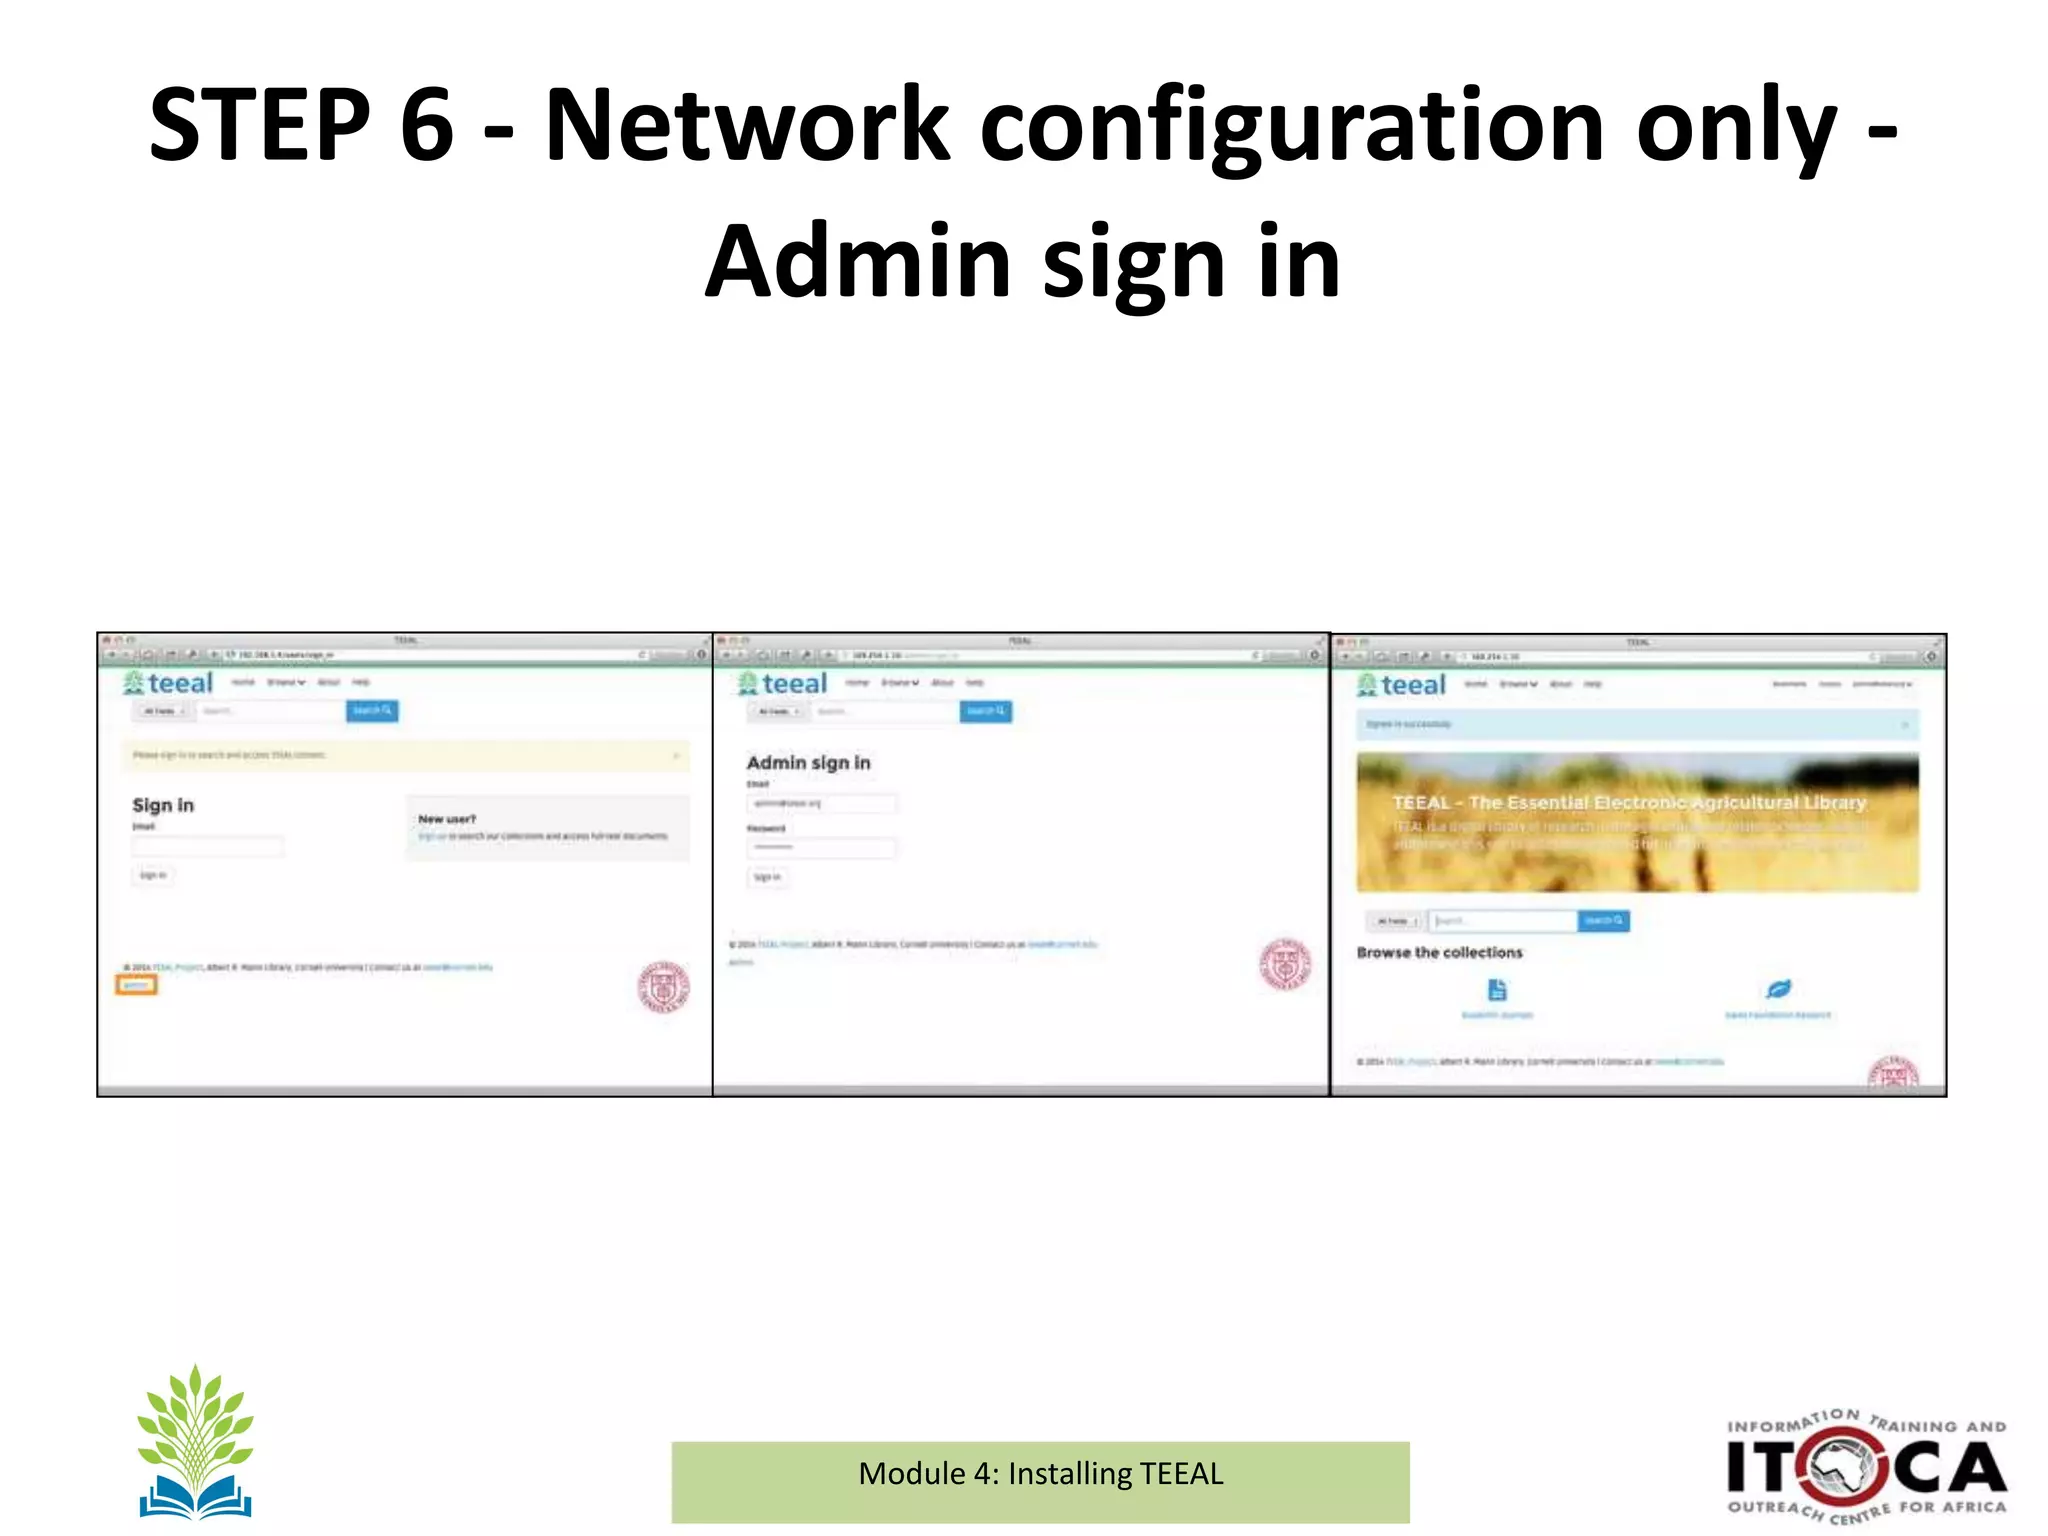
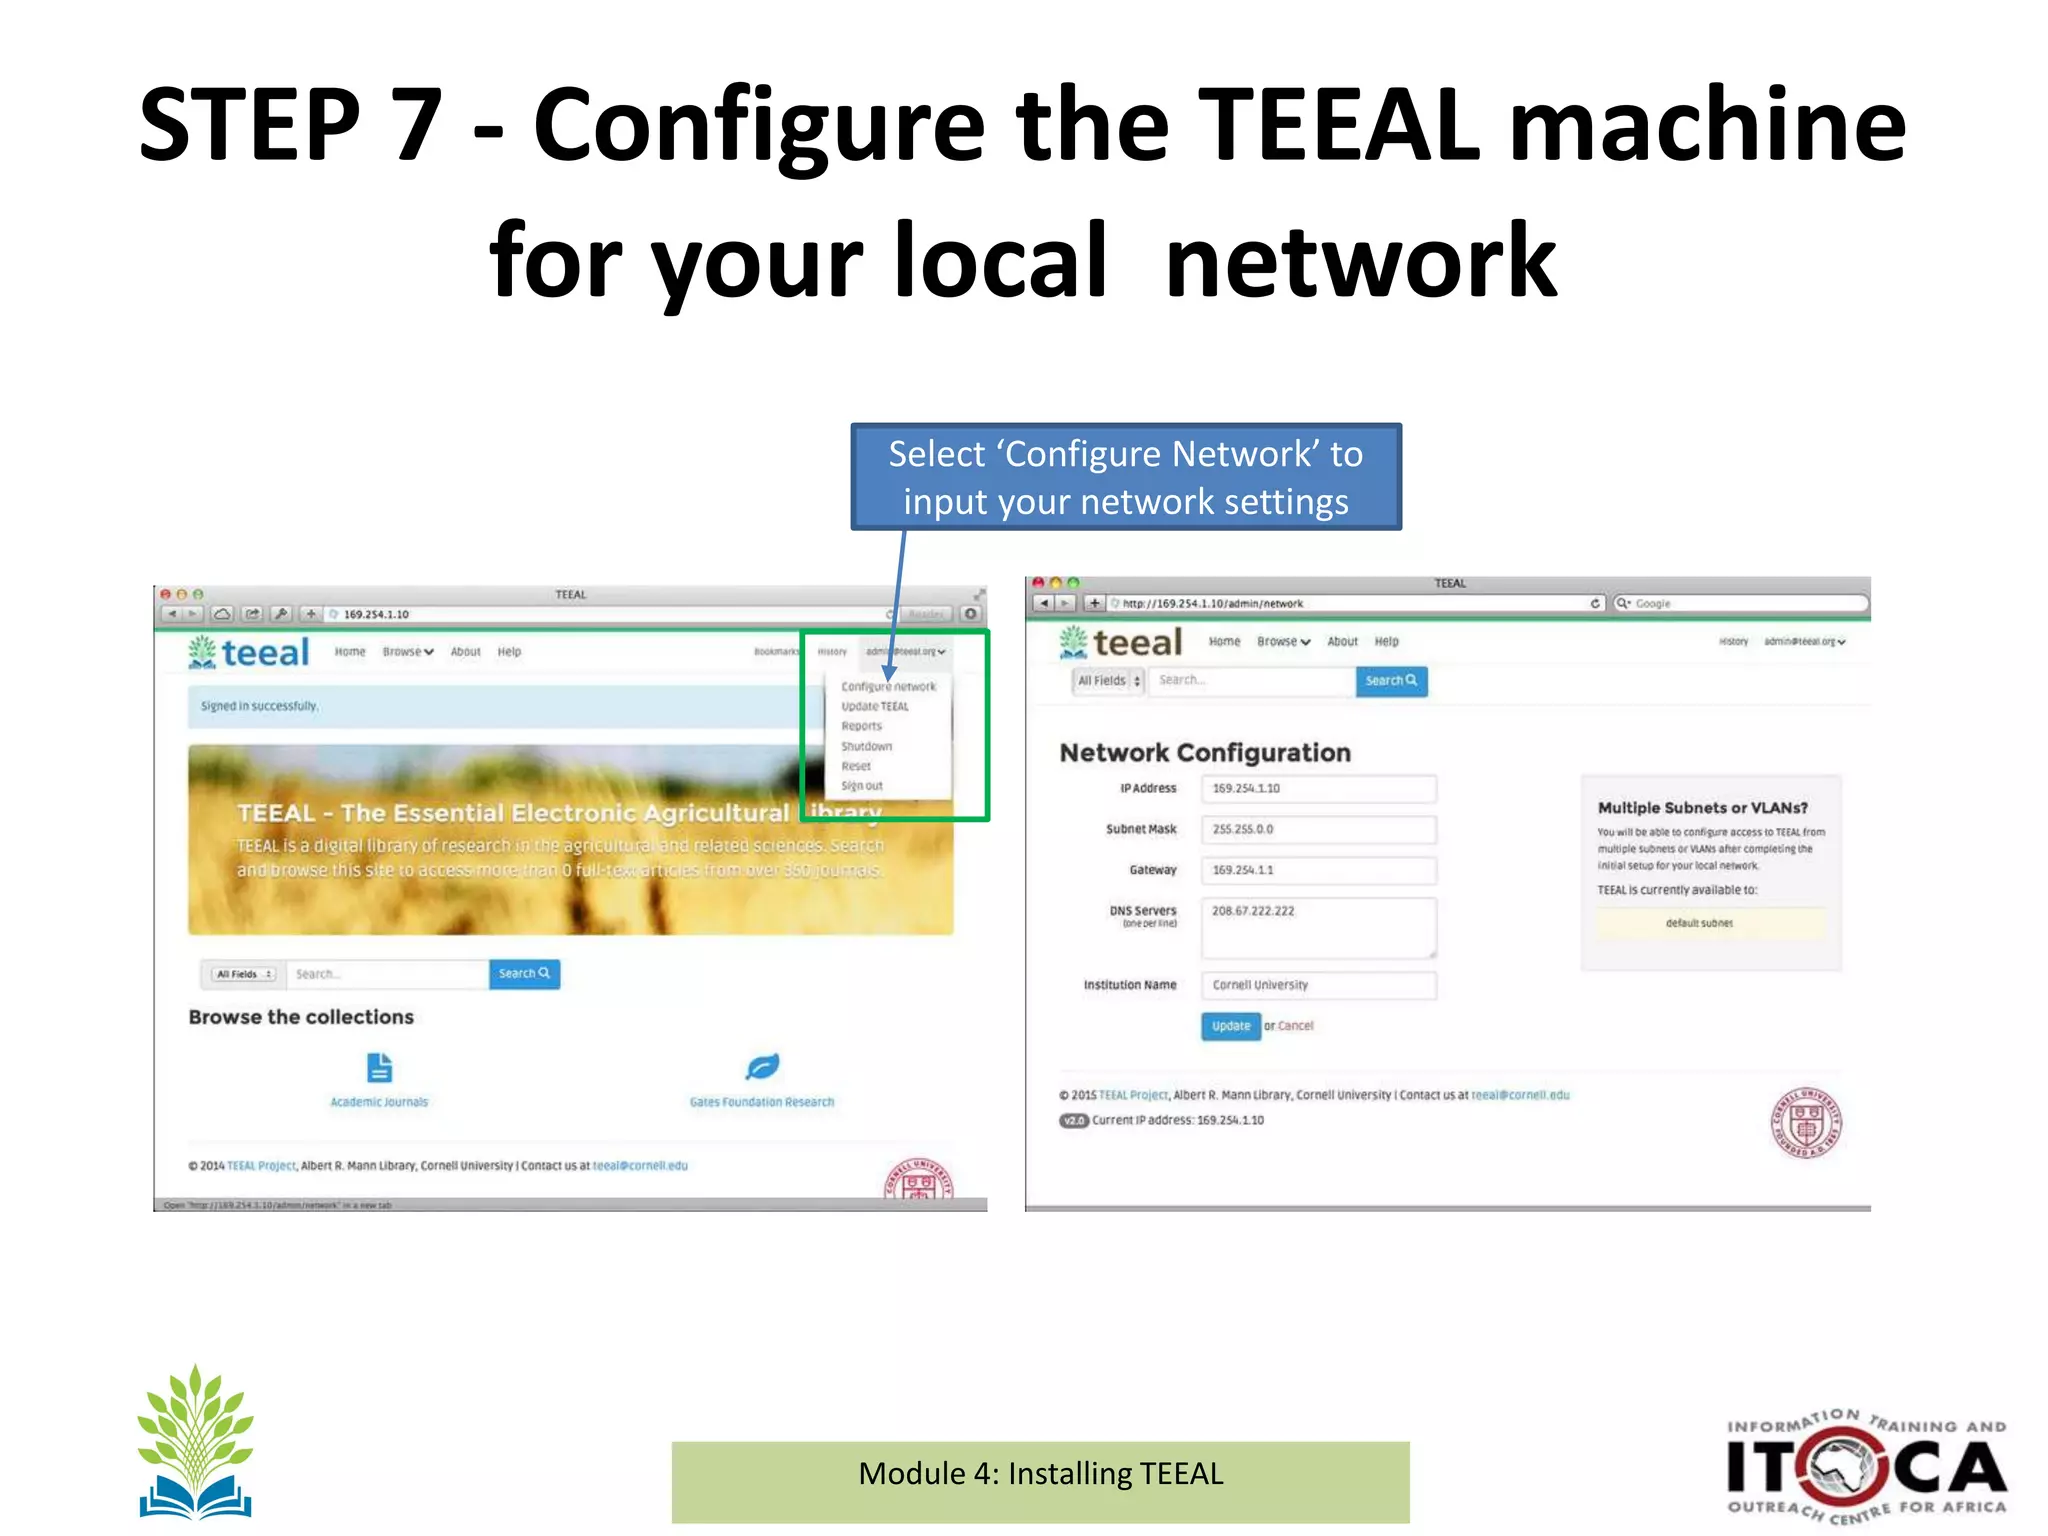

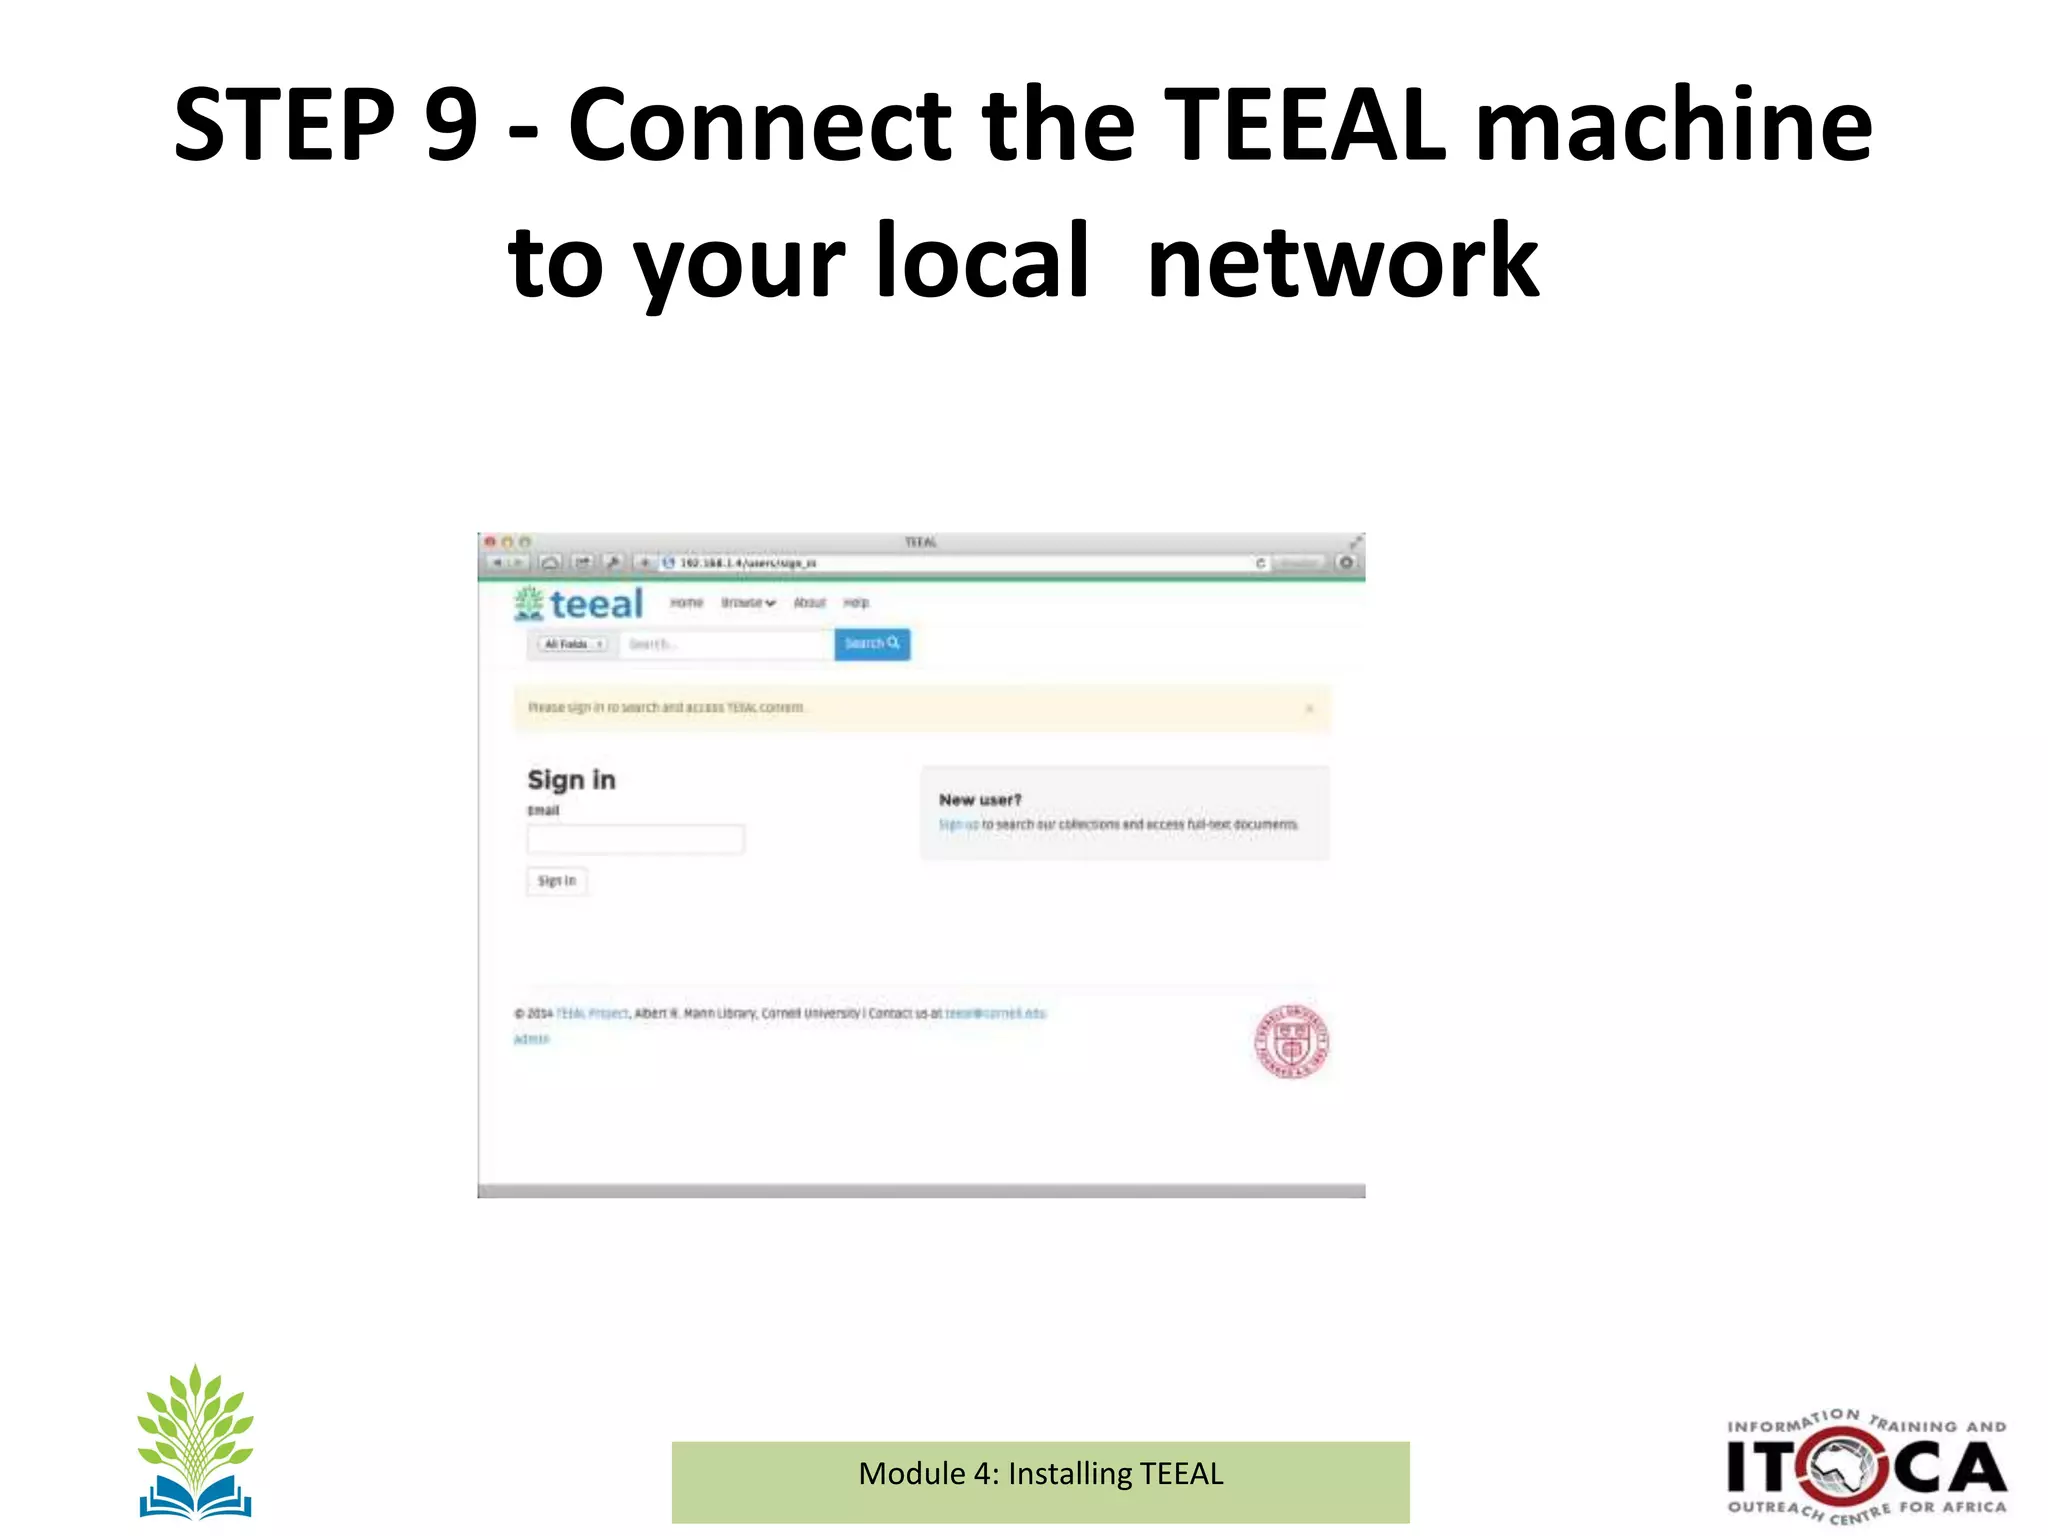

This document provides instructions for installing the TEEAL machine either as a standalone system connected directly to one computer, or networked and connected to a local network accessible by multiple computers. It describes unpacking the TEEAL machine components, connecting the machine to a computer or network, accessing the TEEAL application, and configuring the necessary network settings for standalone or networked use. Users are also directed to additional documentation for installing on Linux environments or resetting the IP address if the TEEAL interface cannot be accessed.


