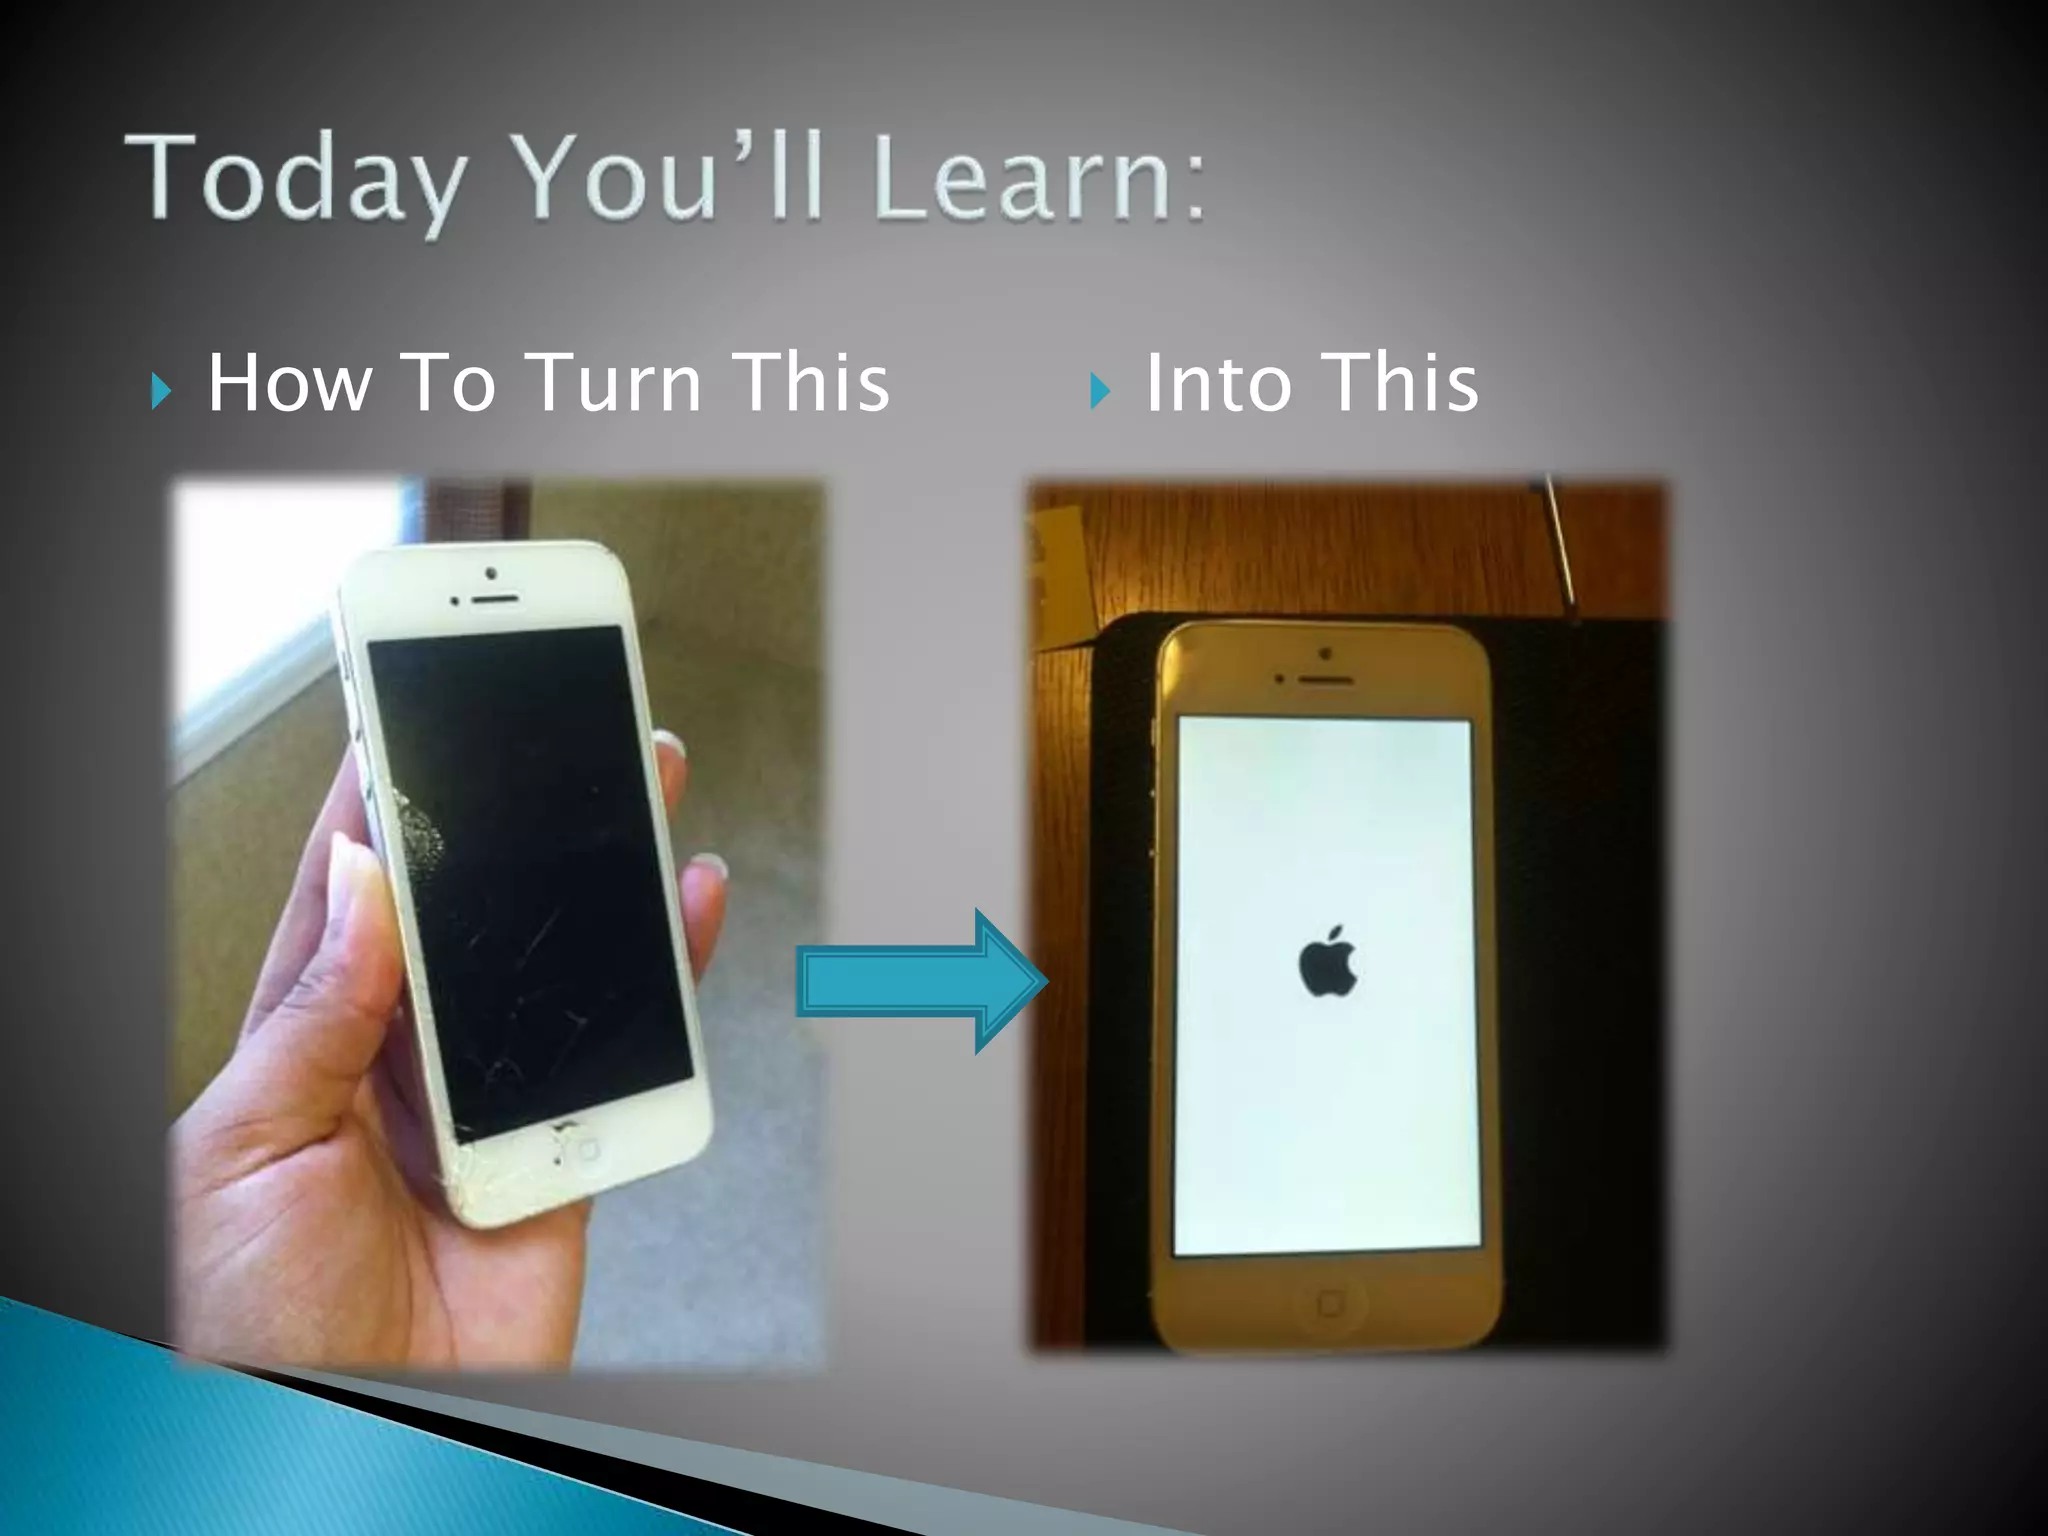
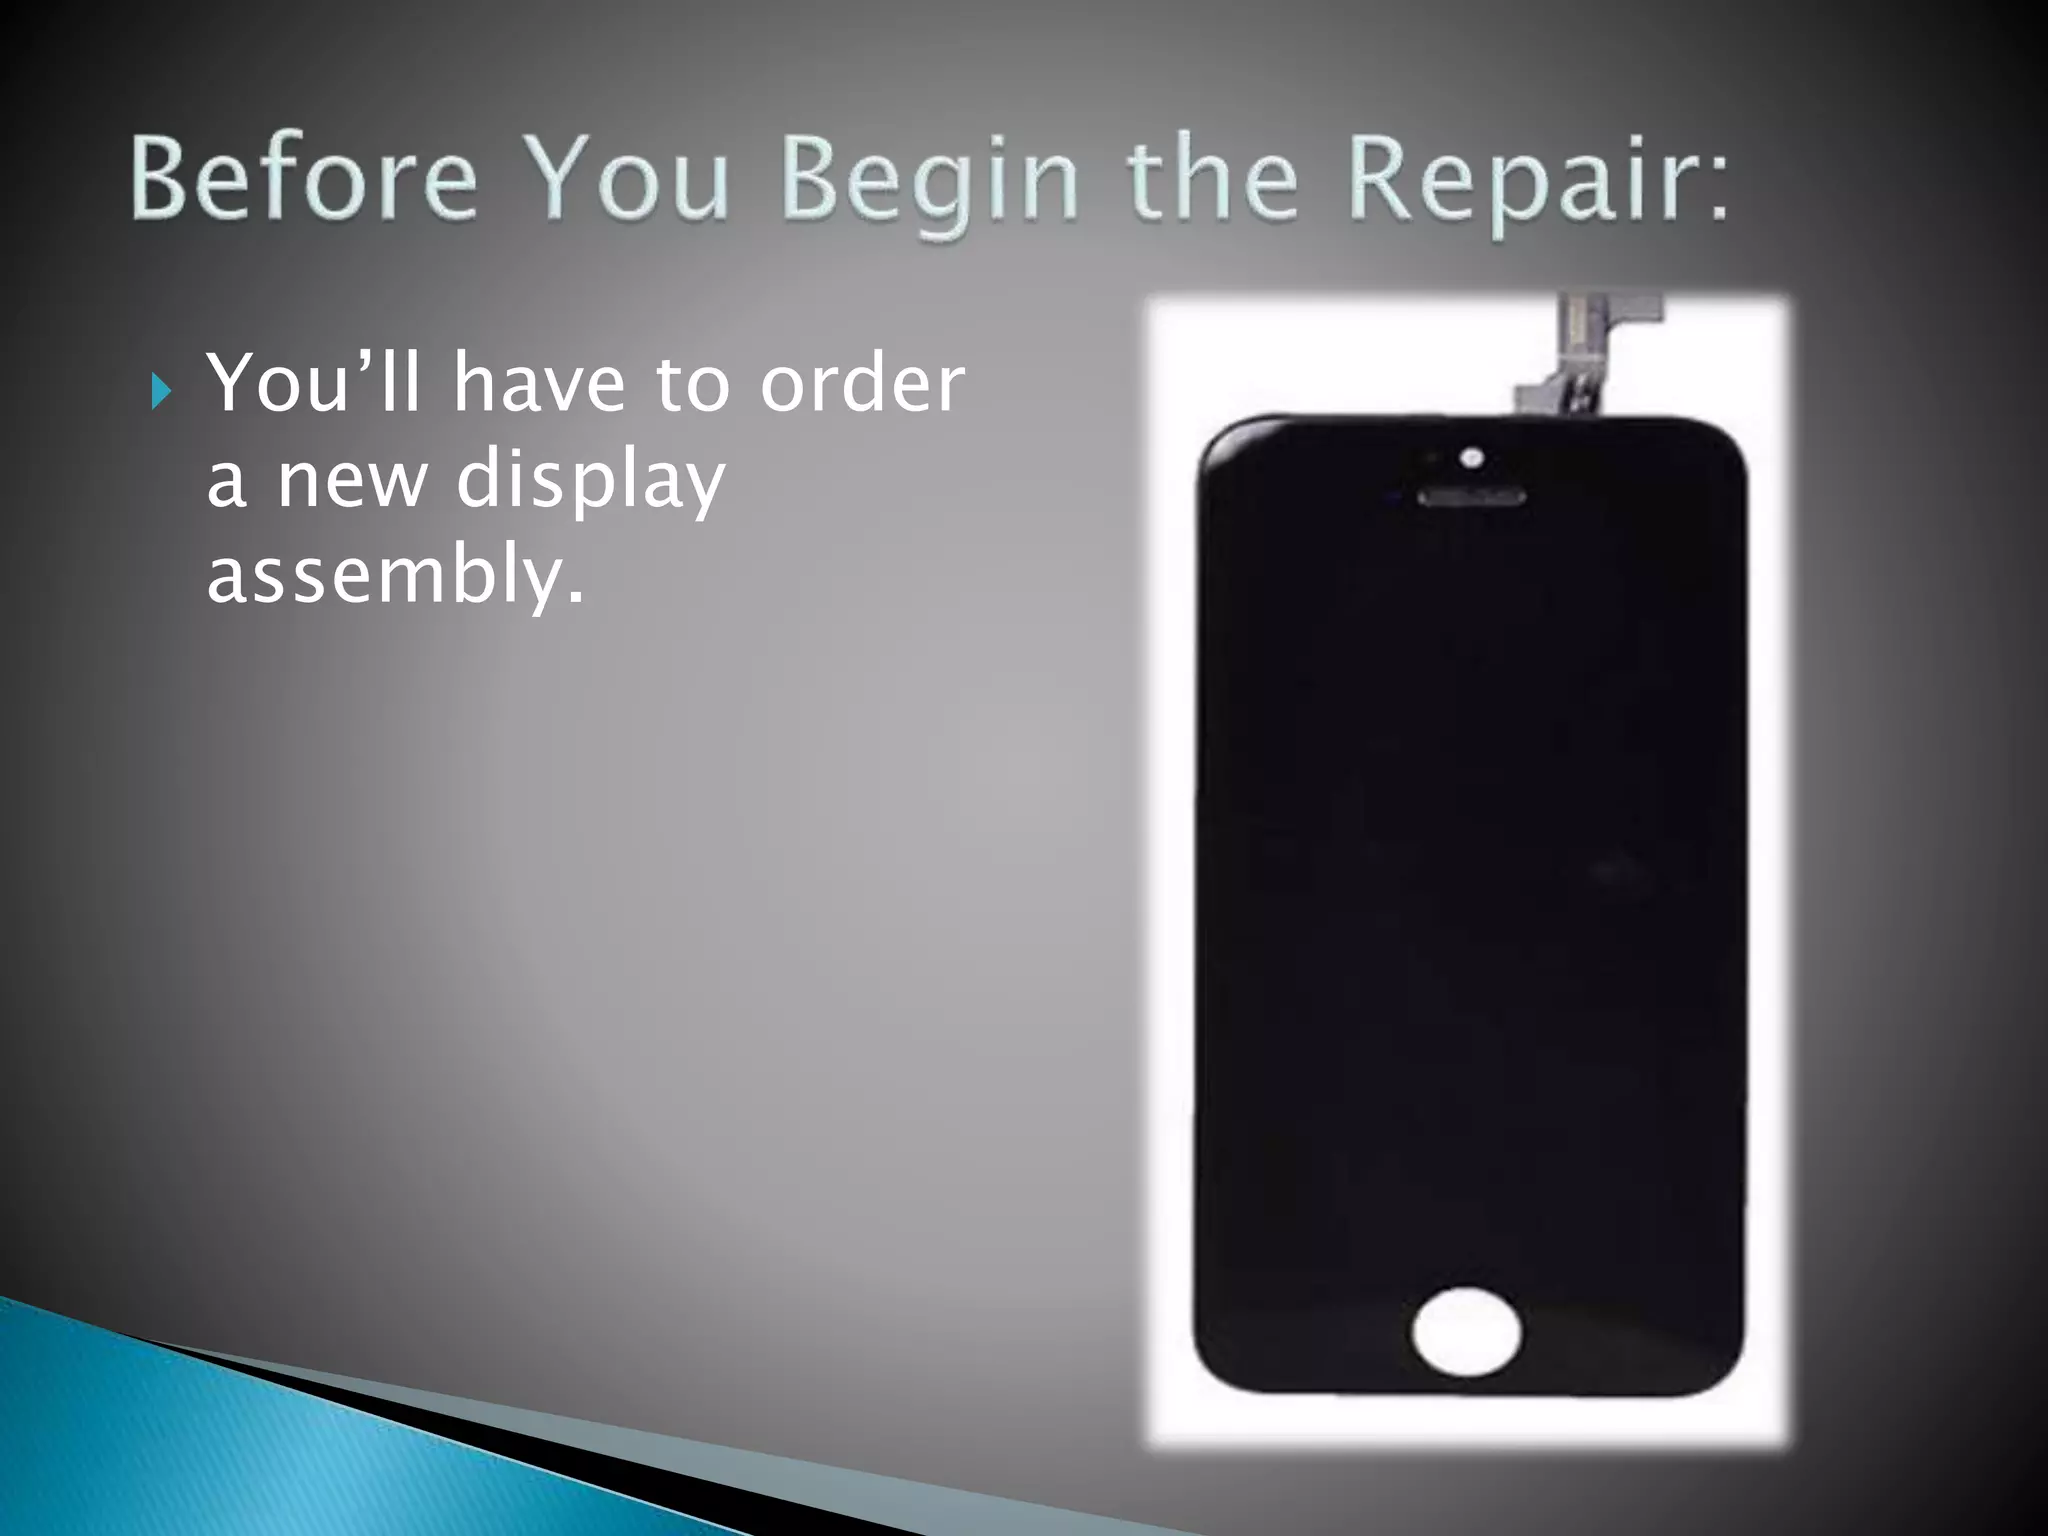
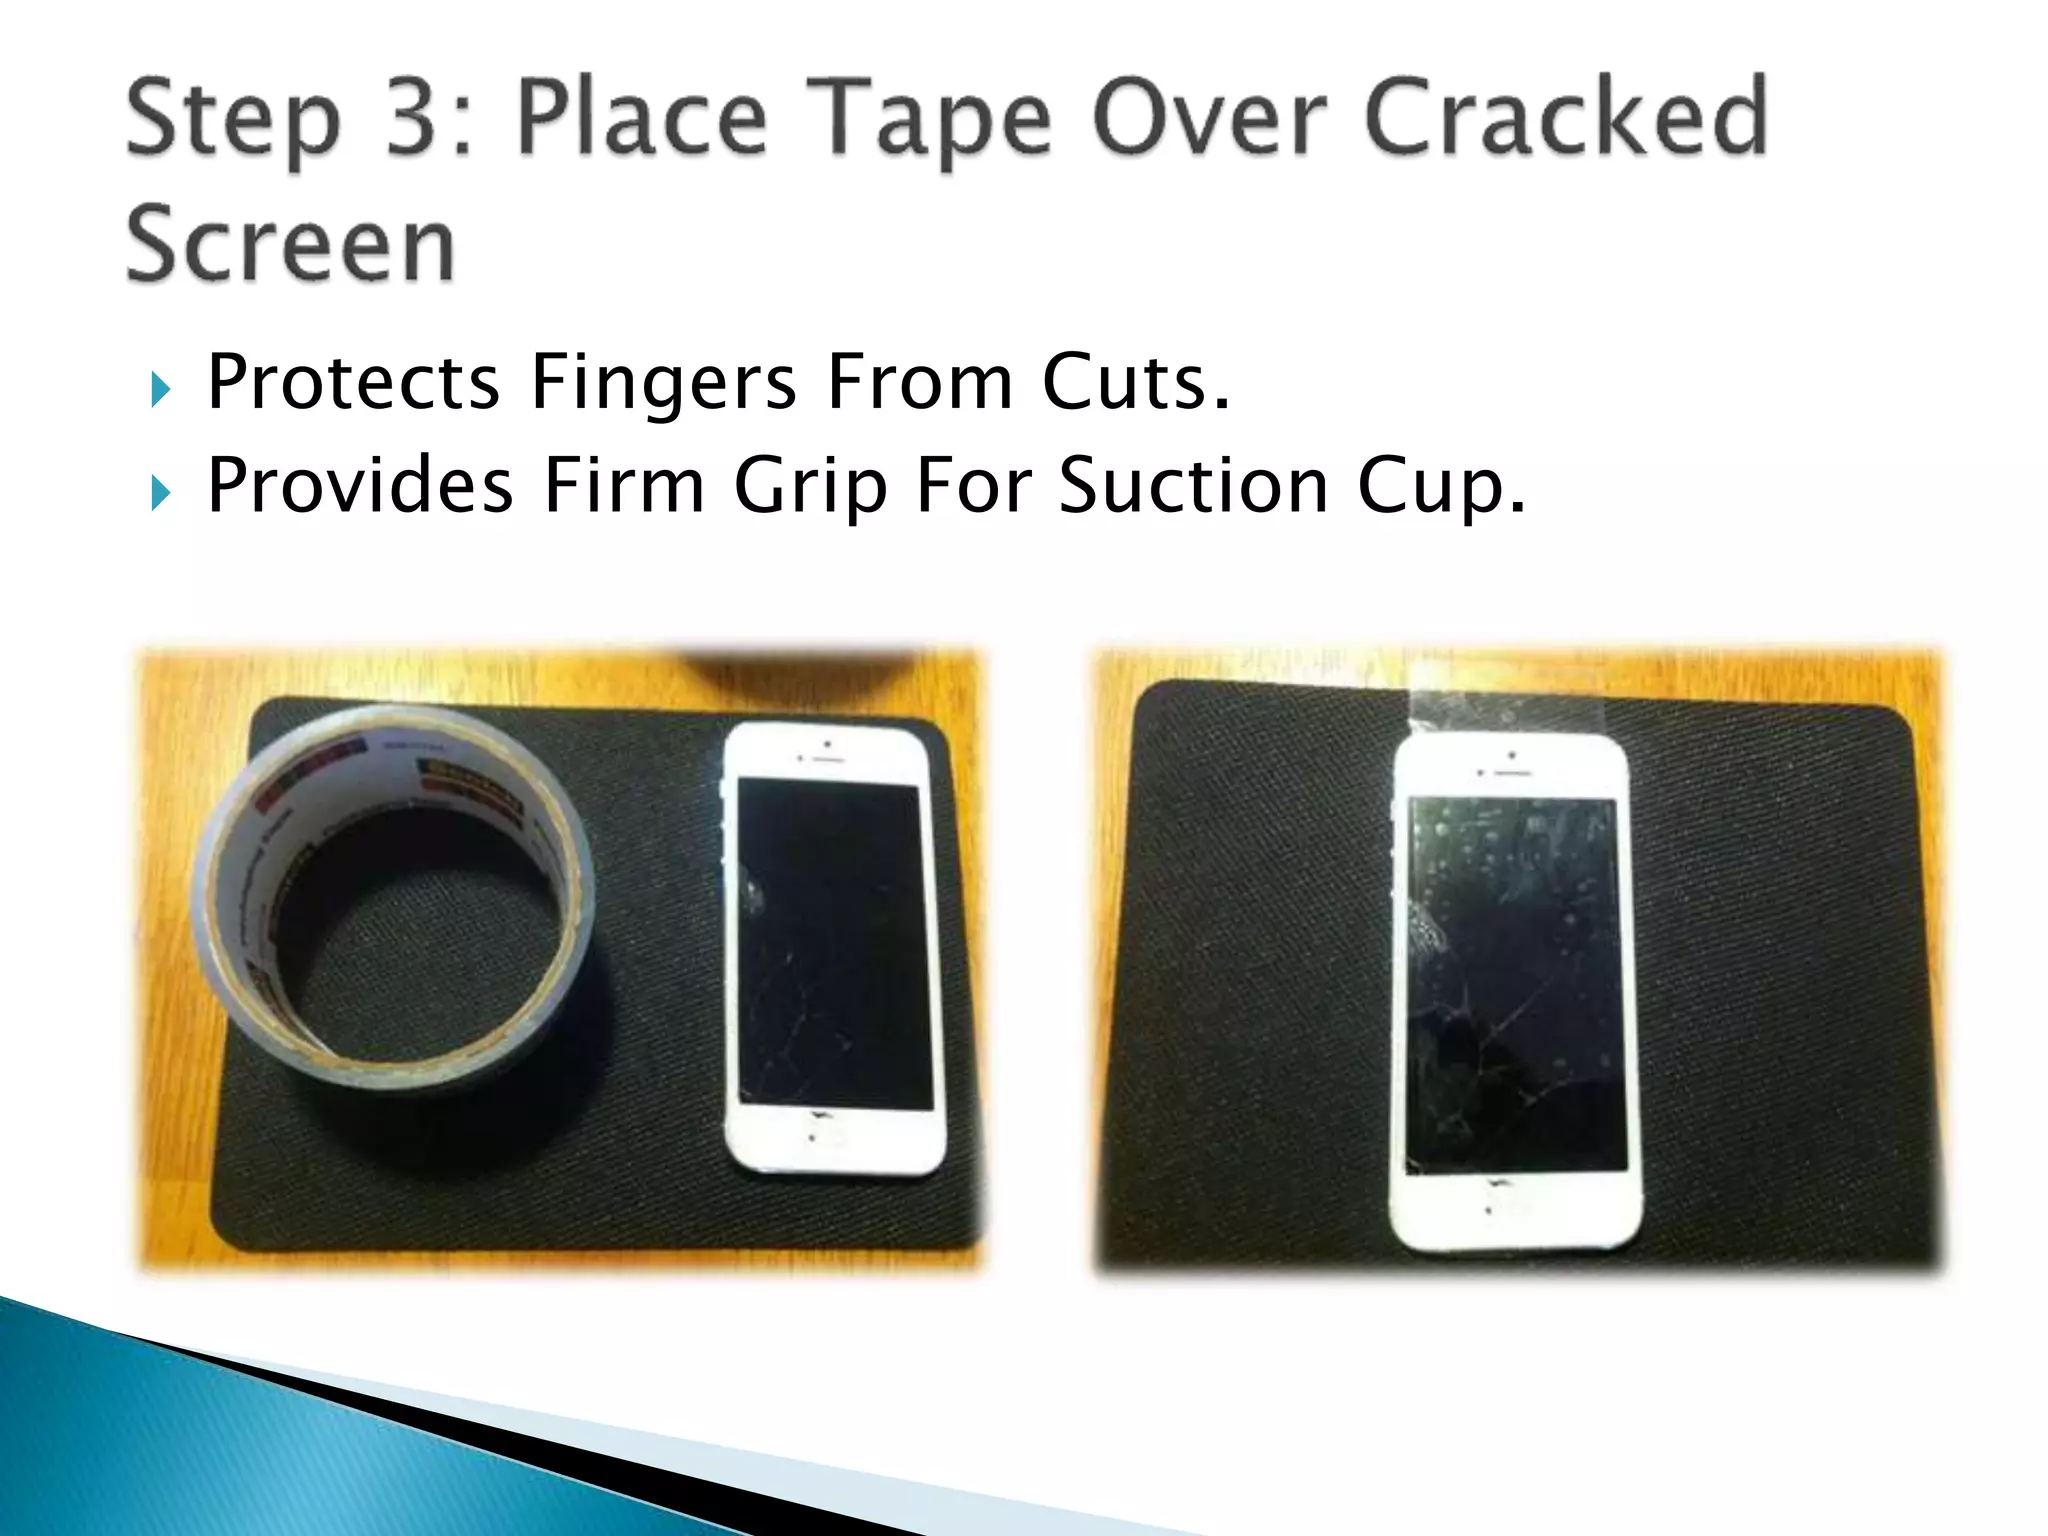
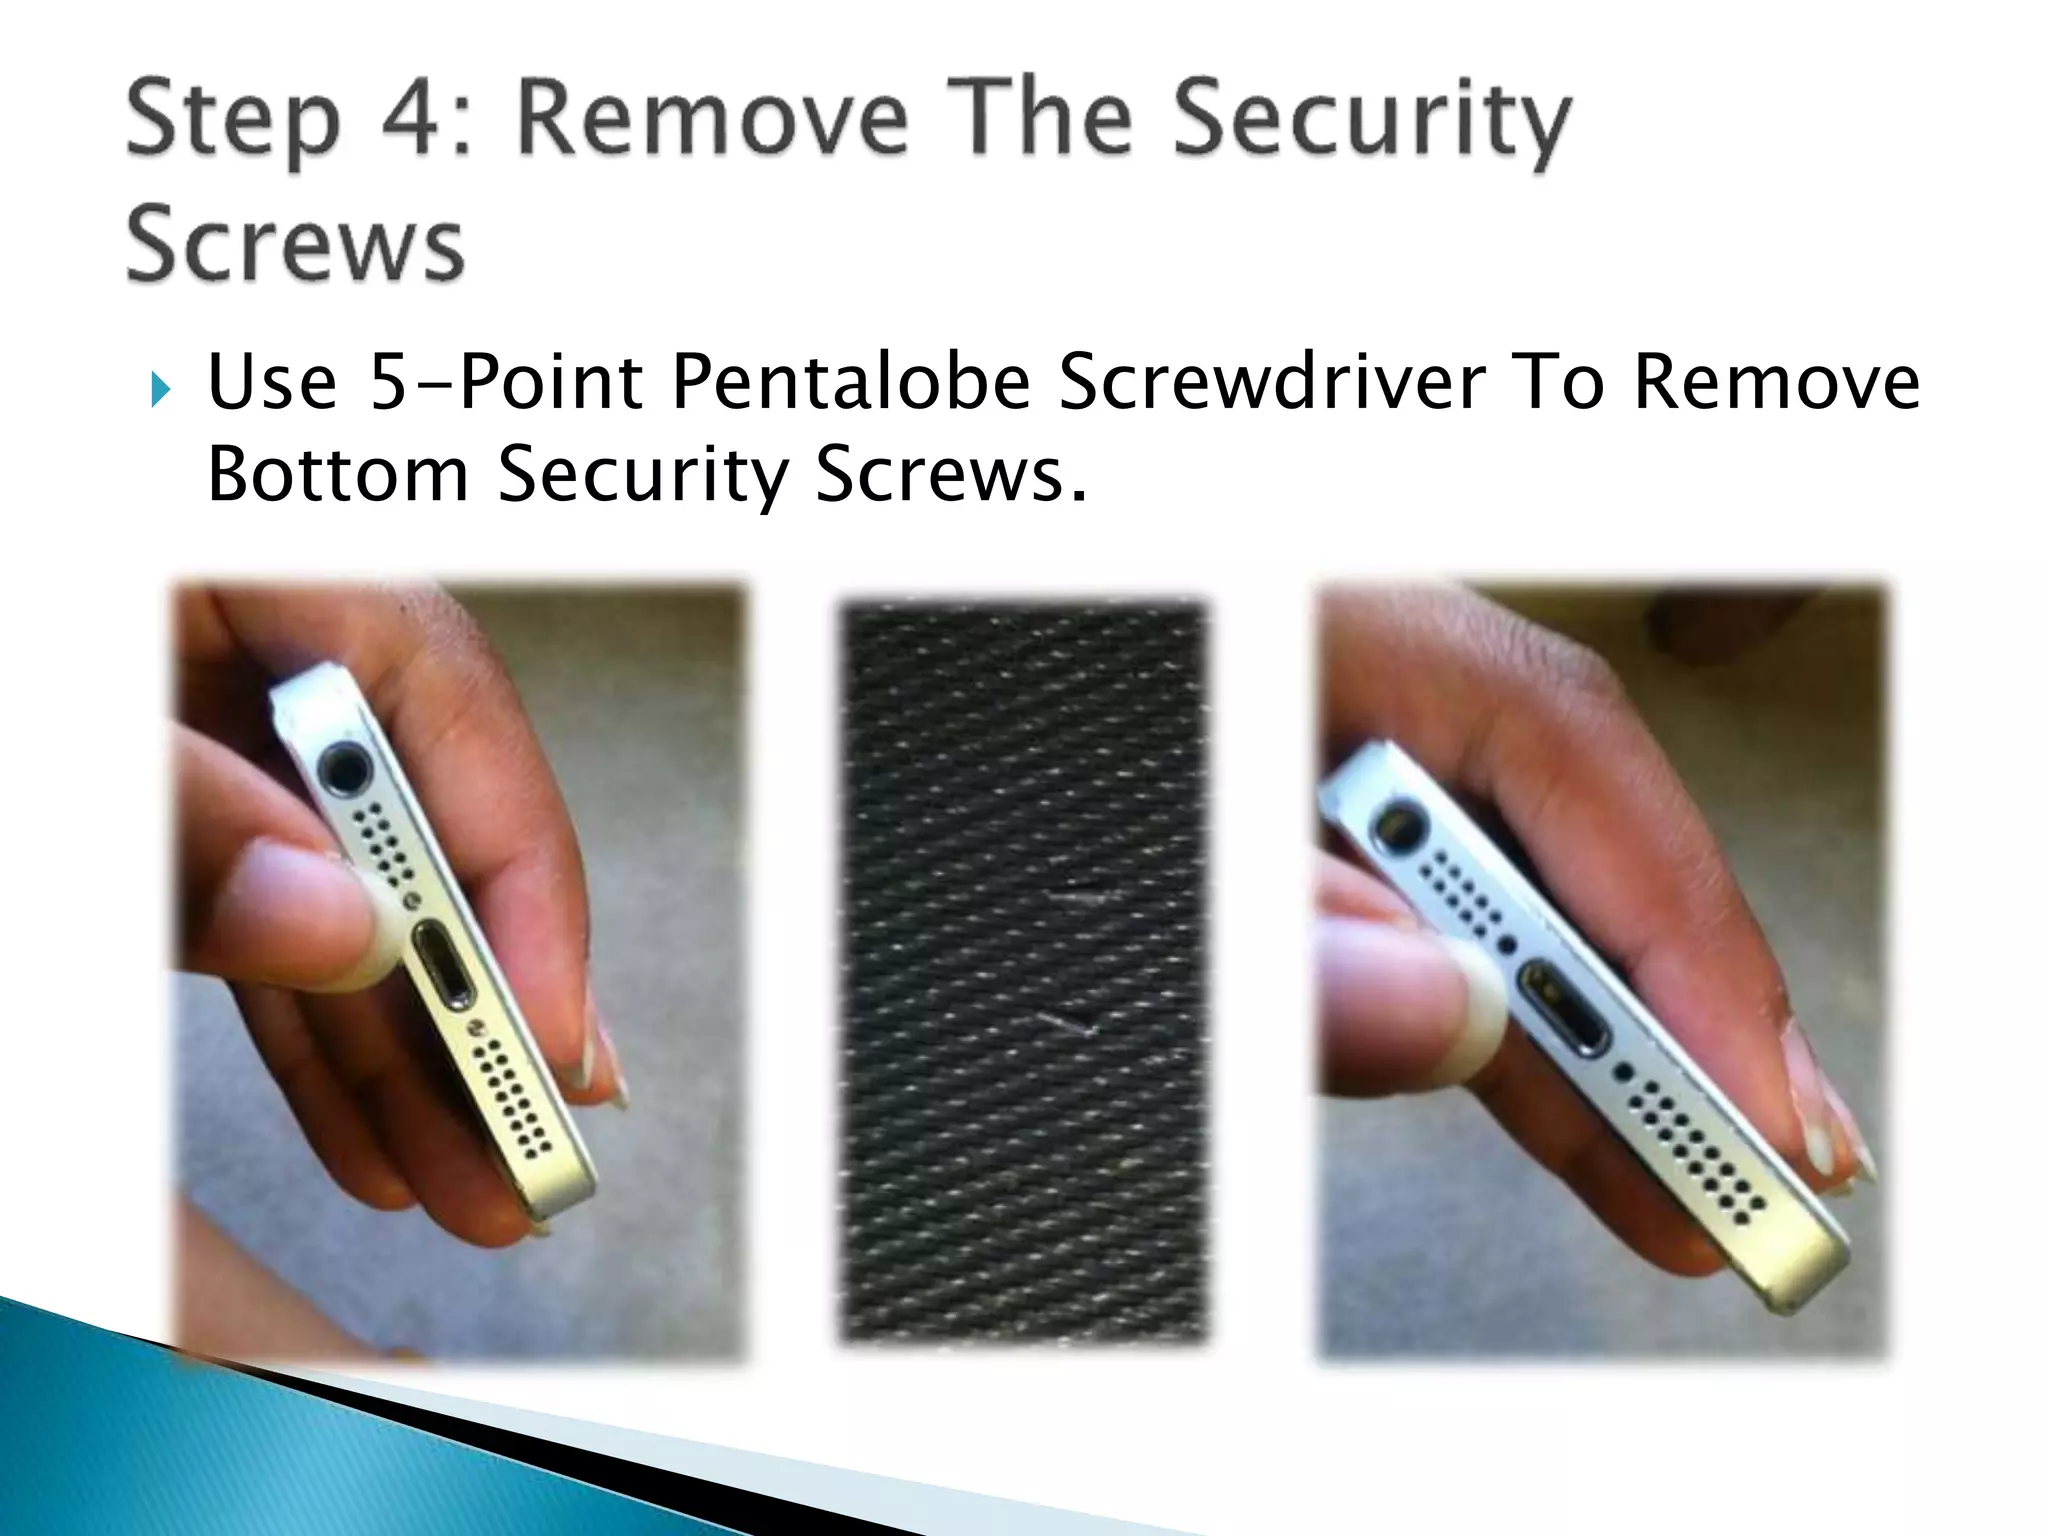
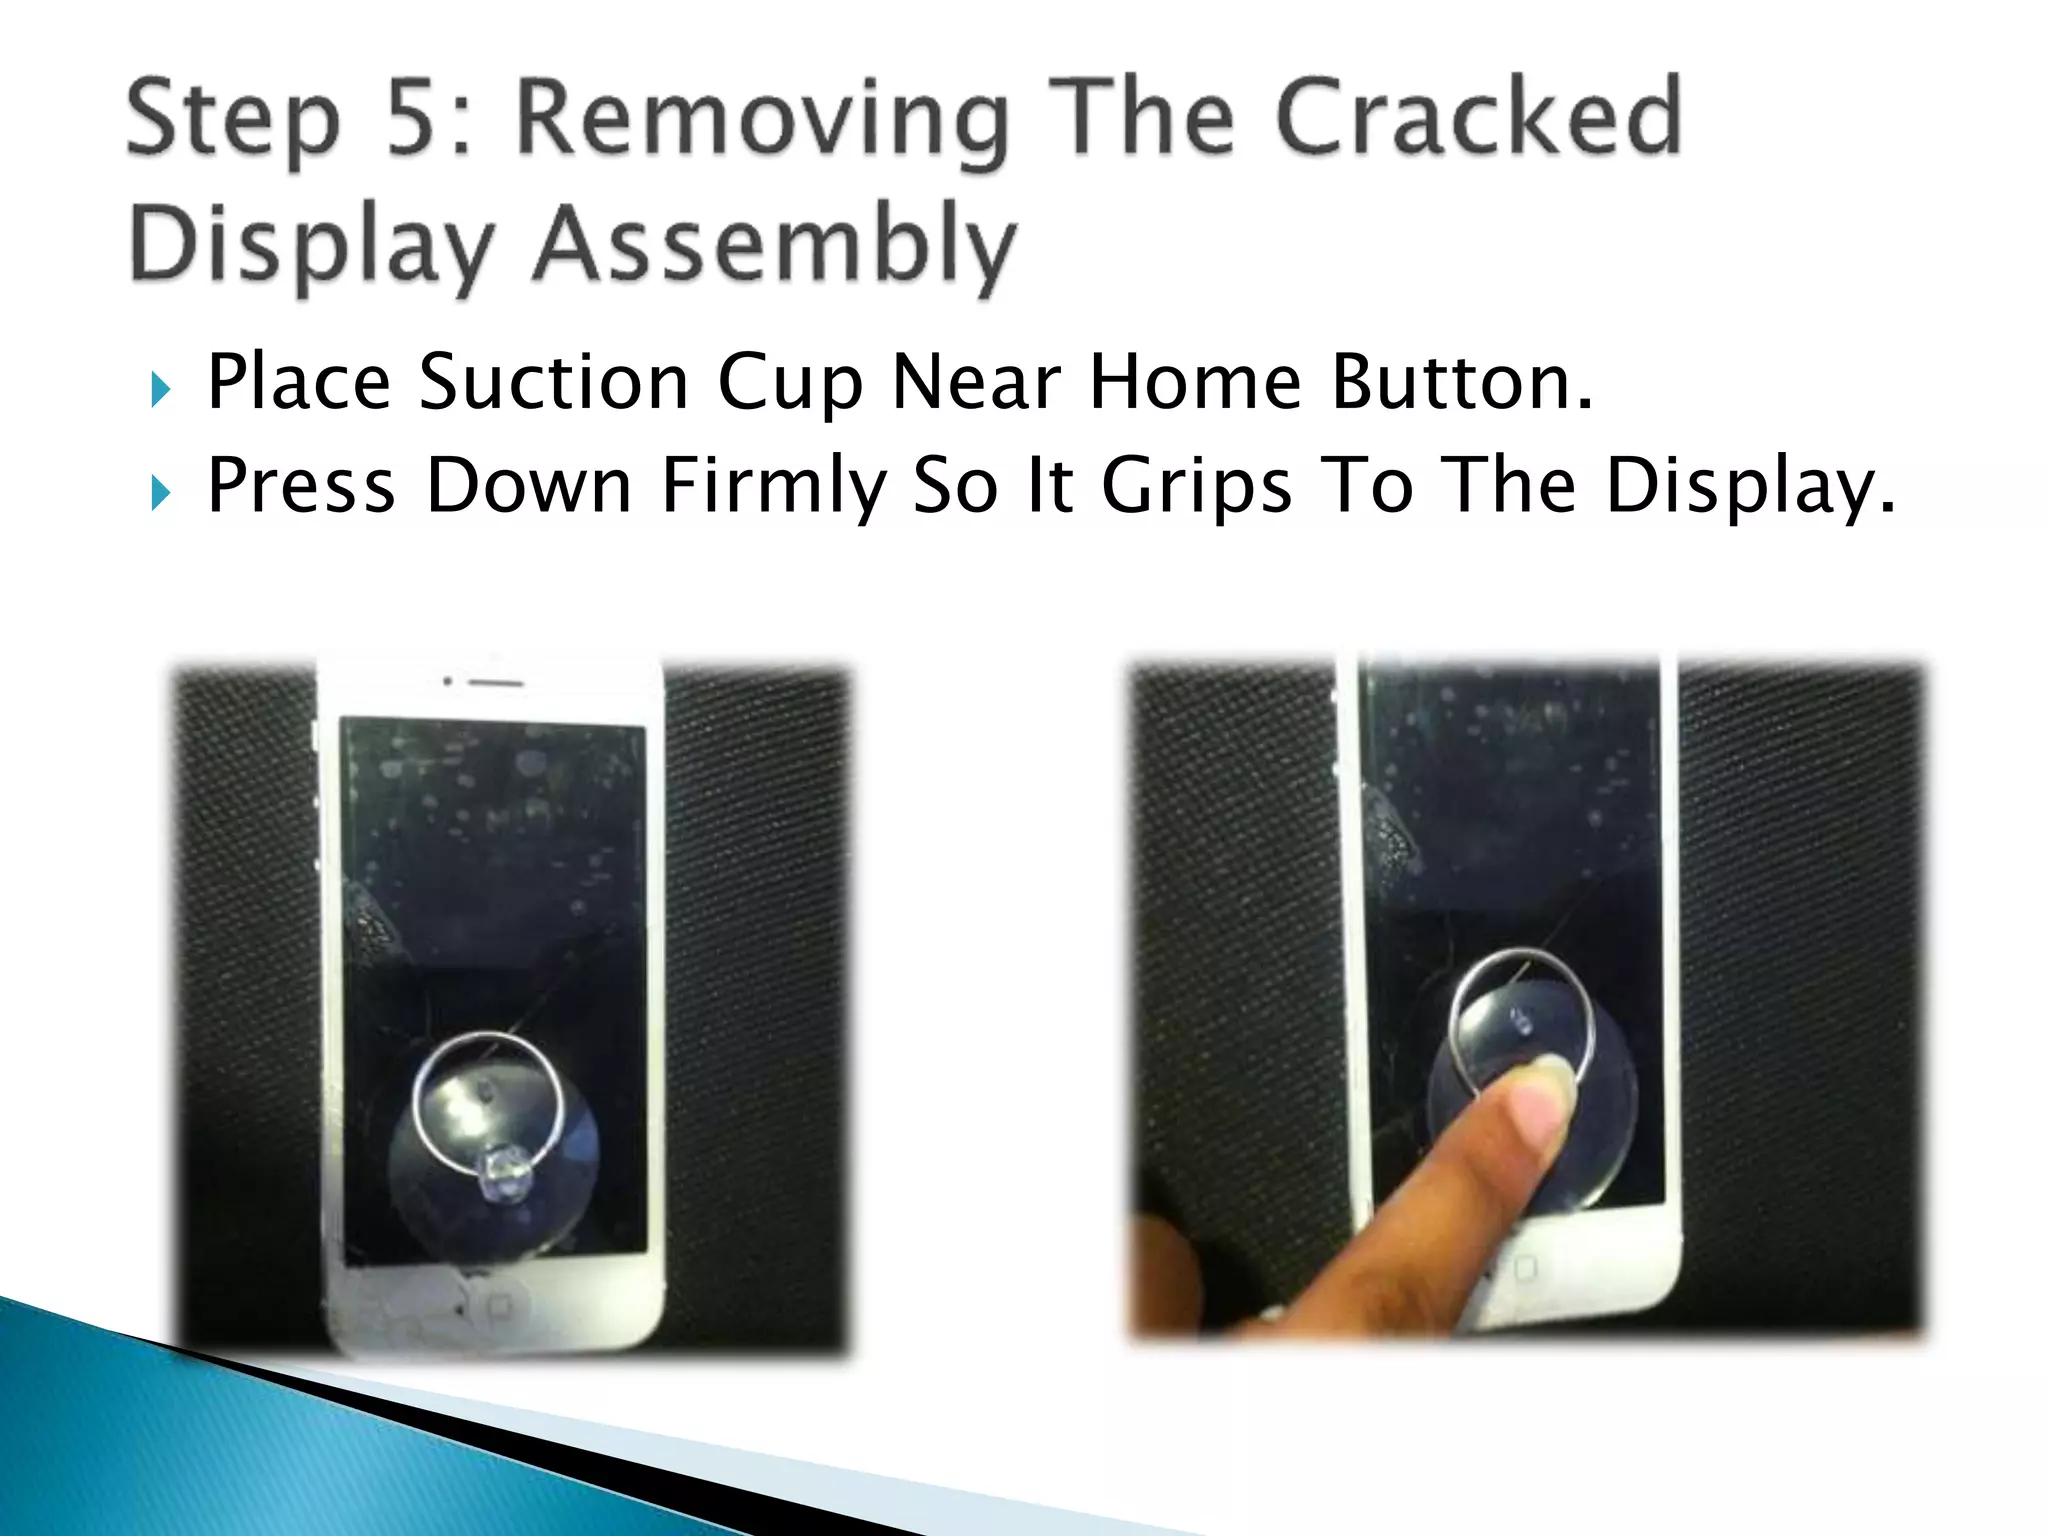
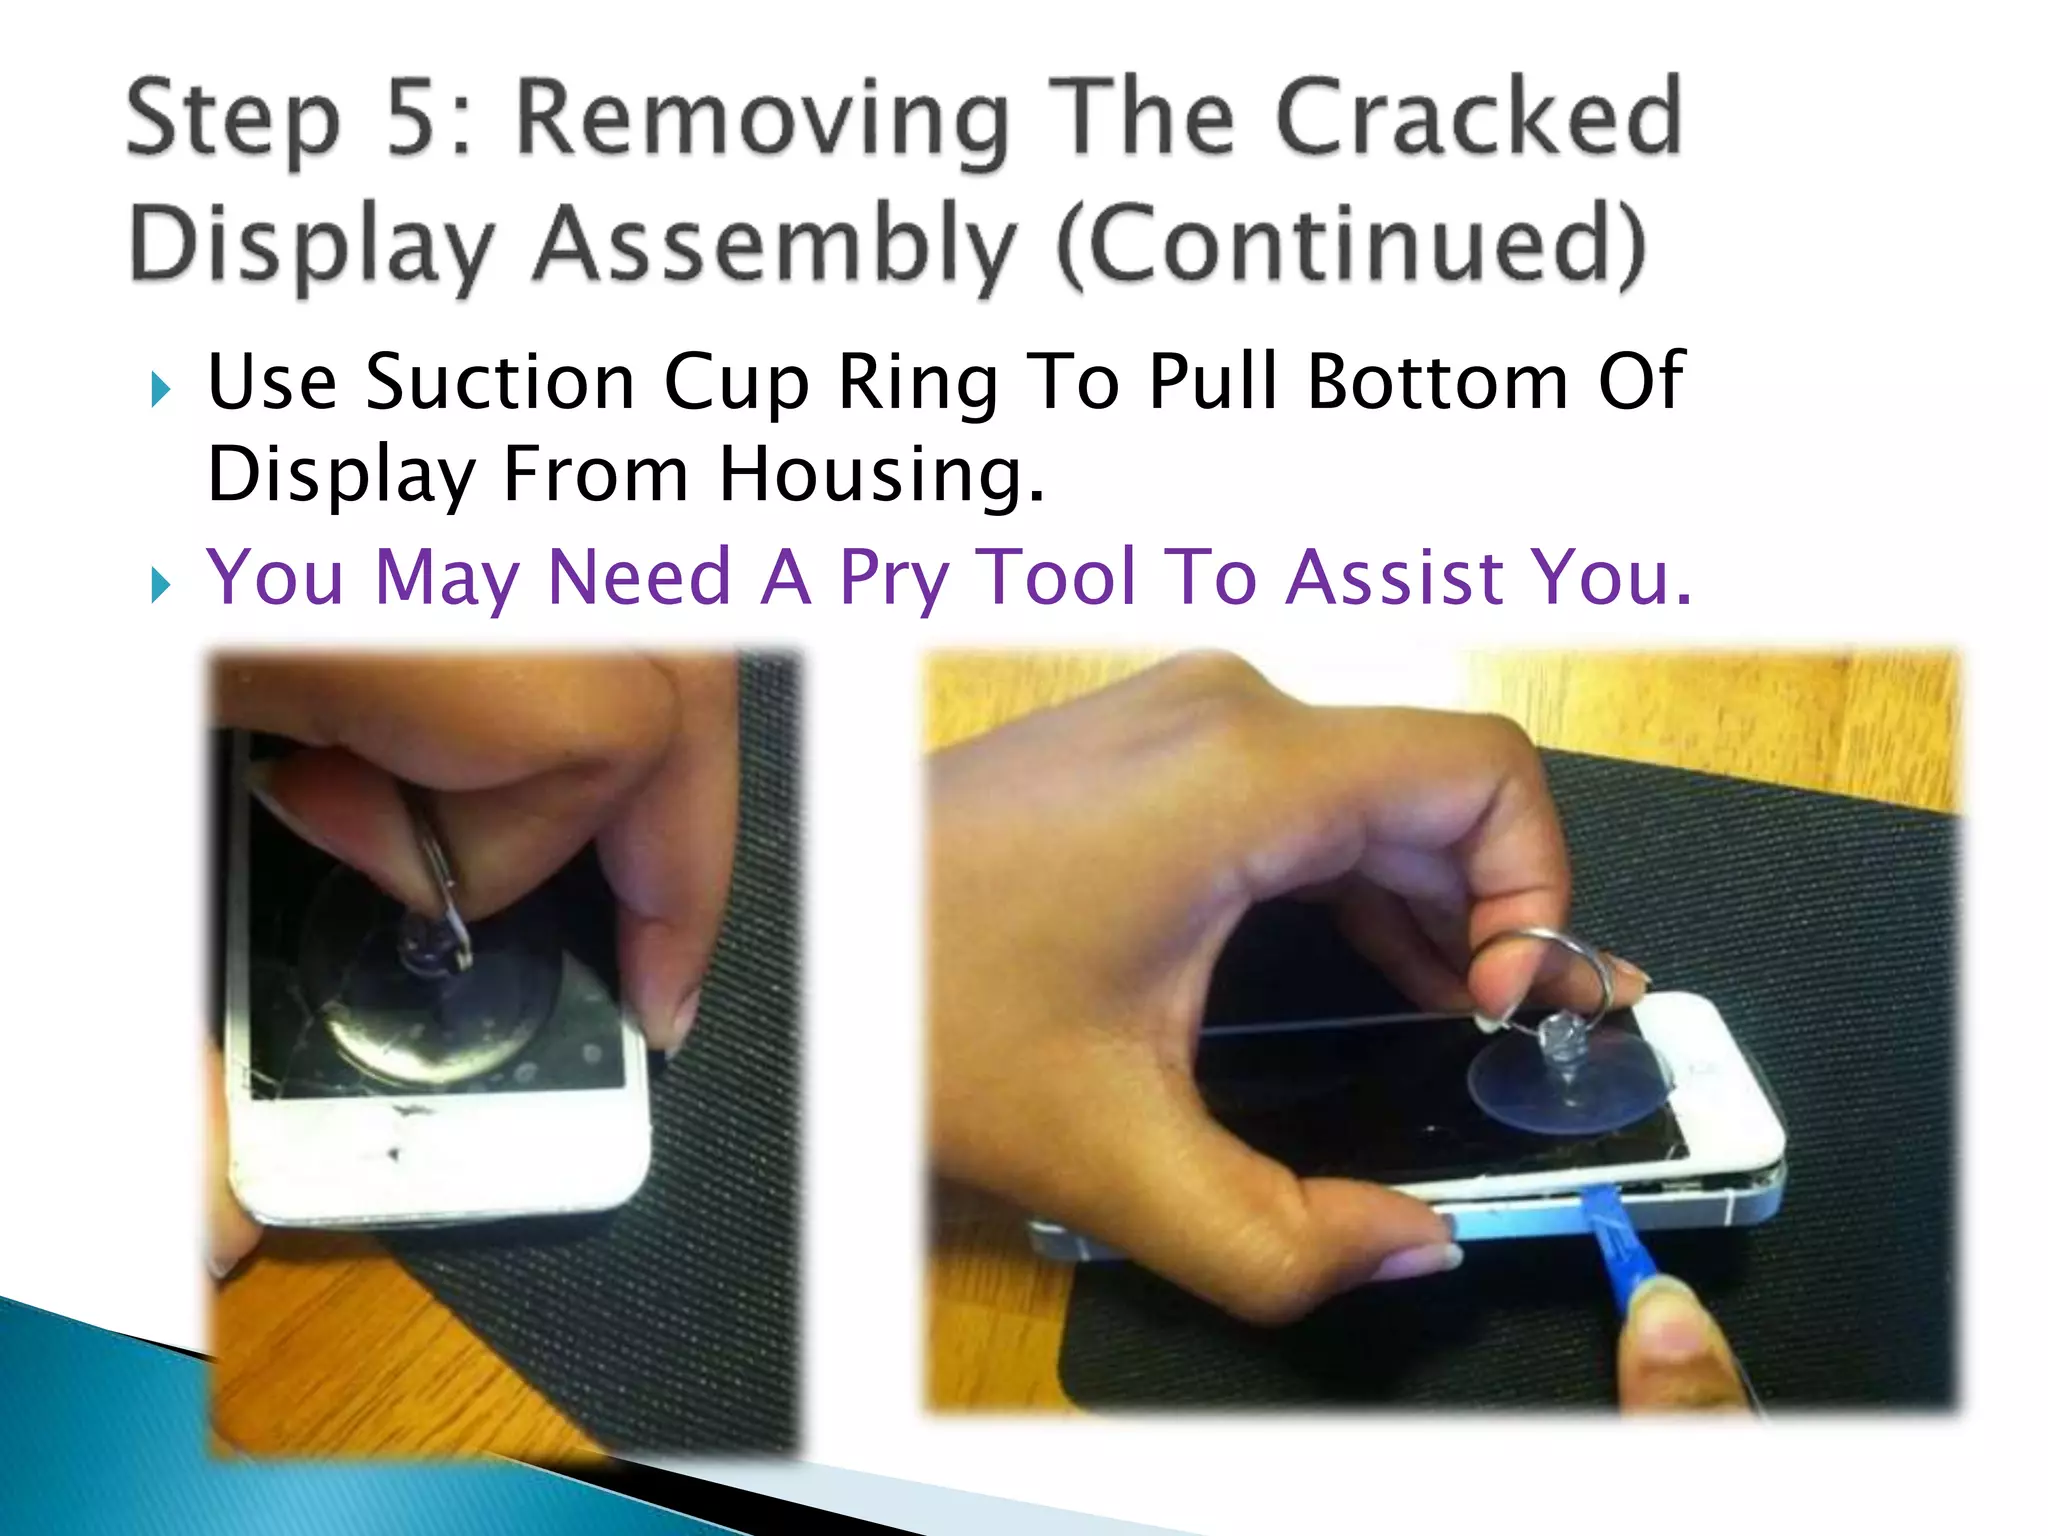
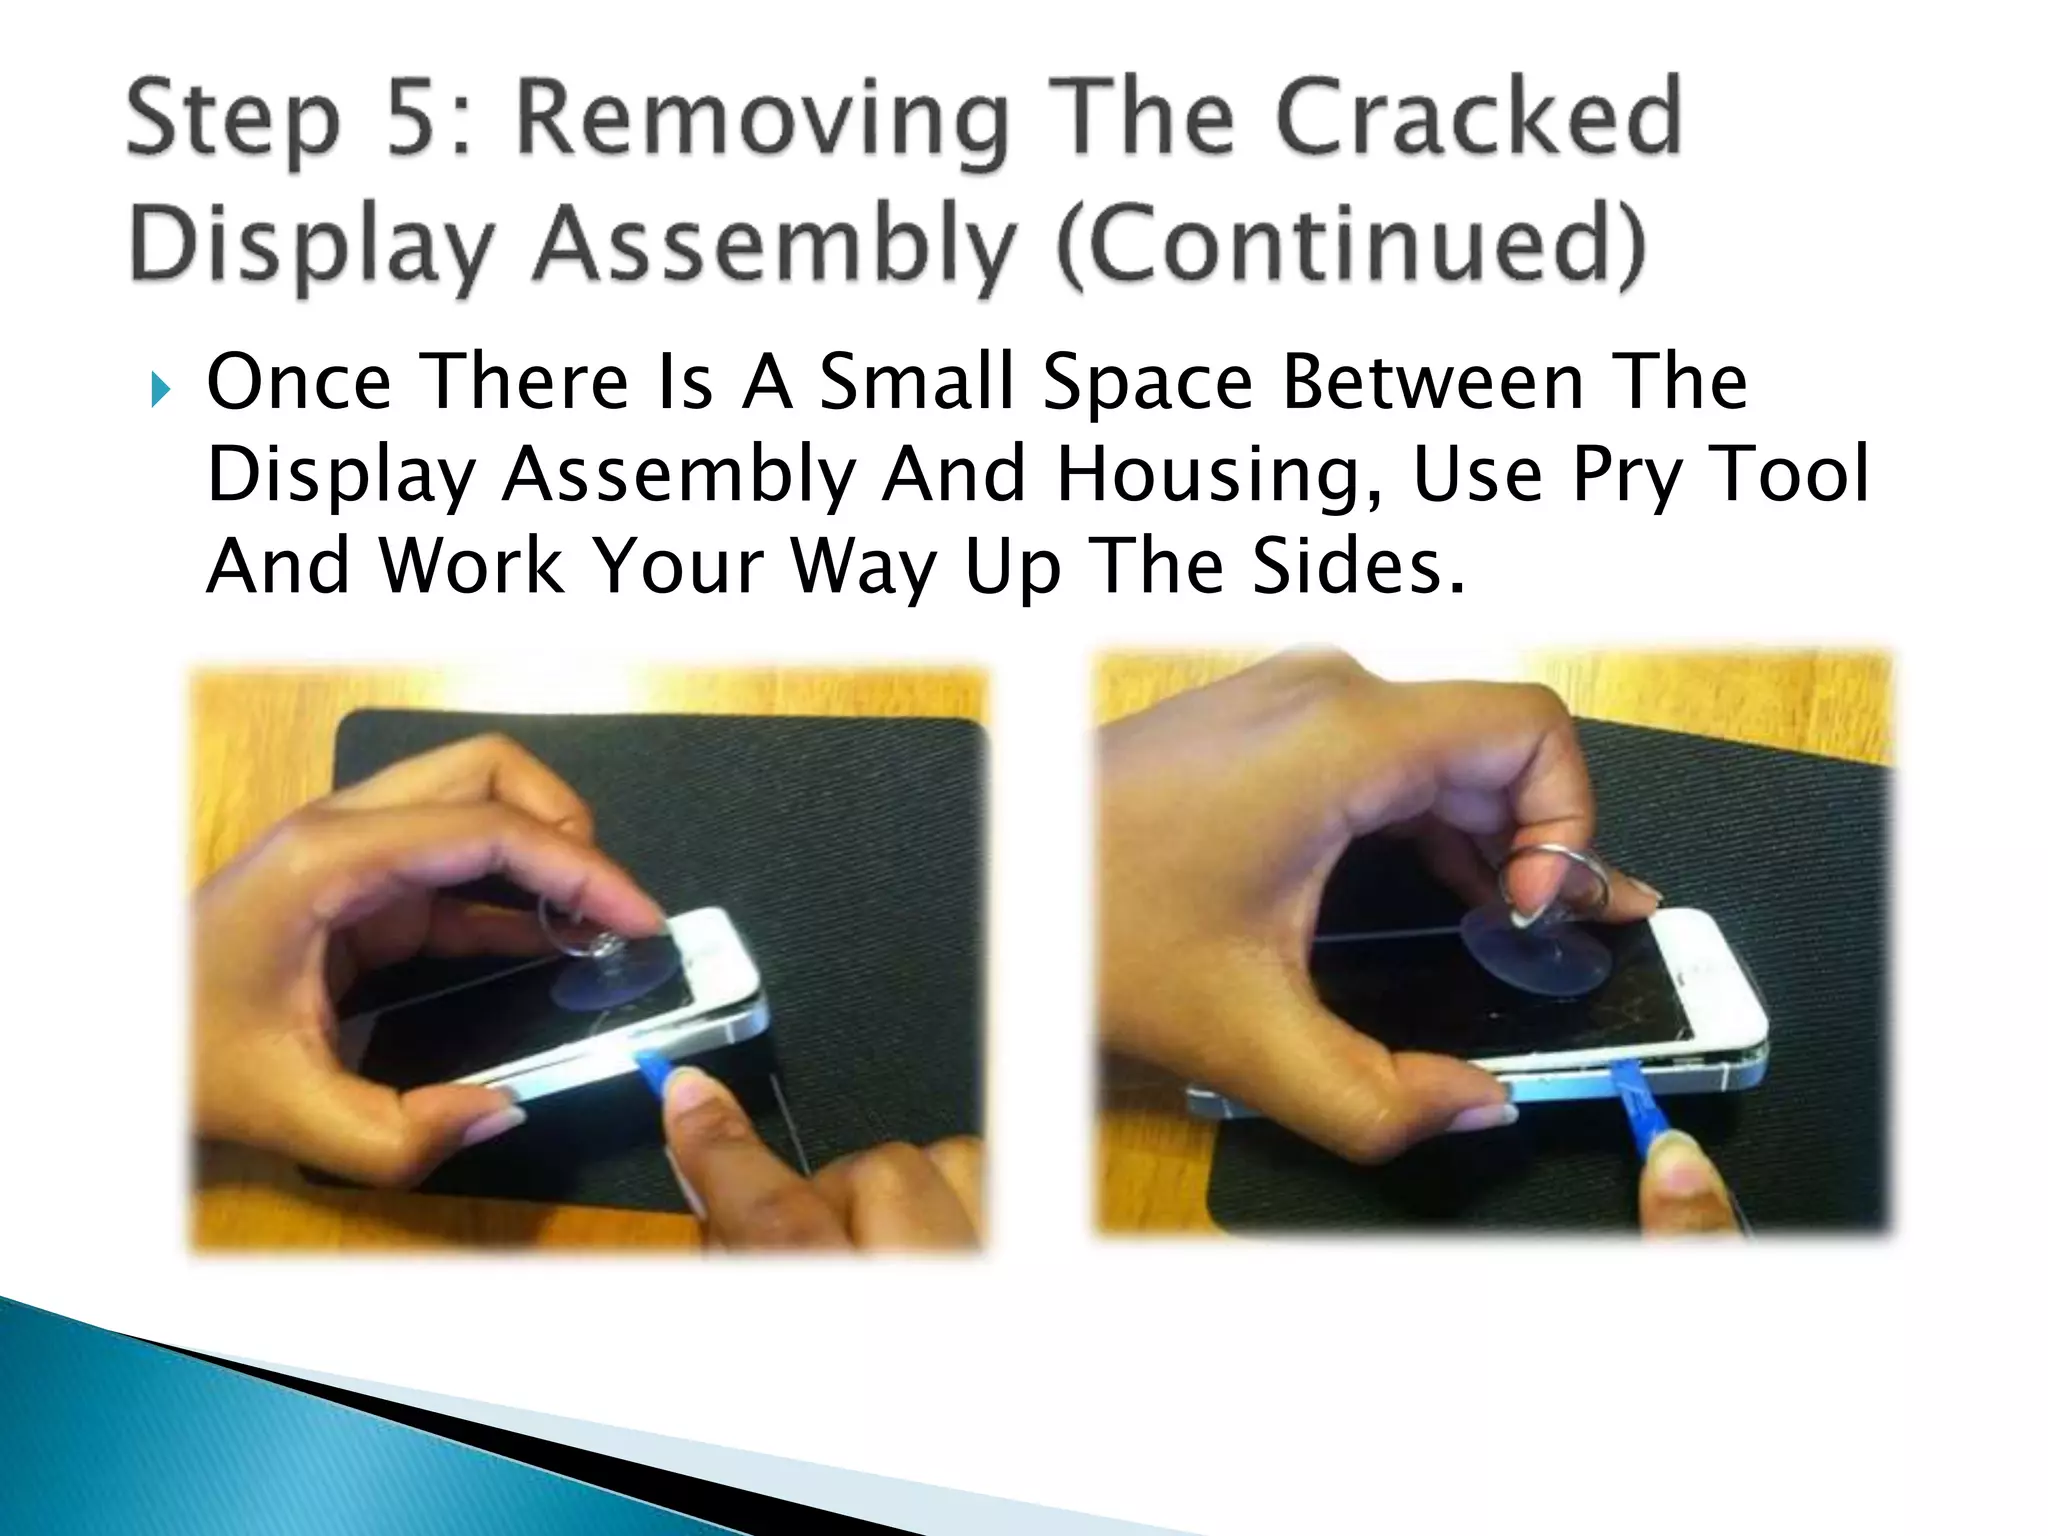
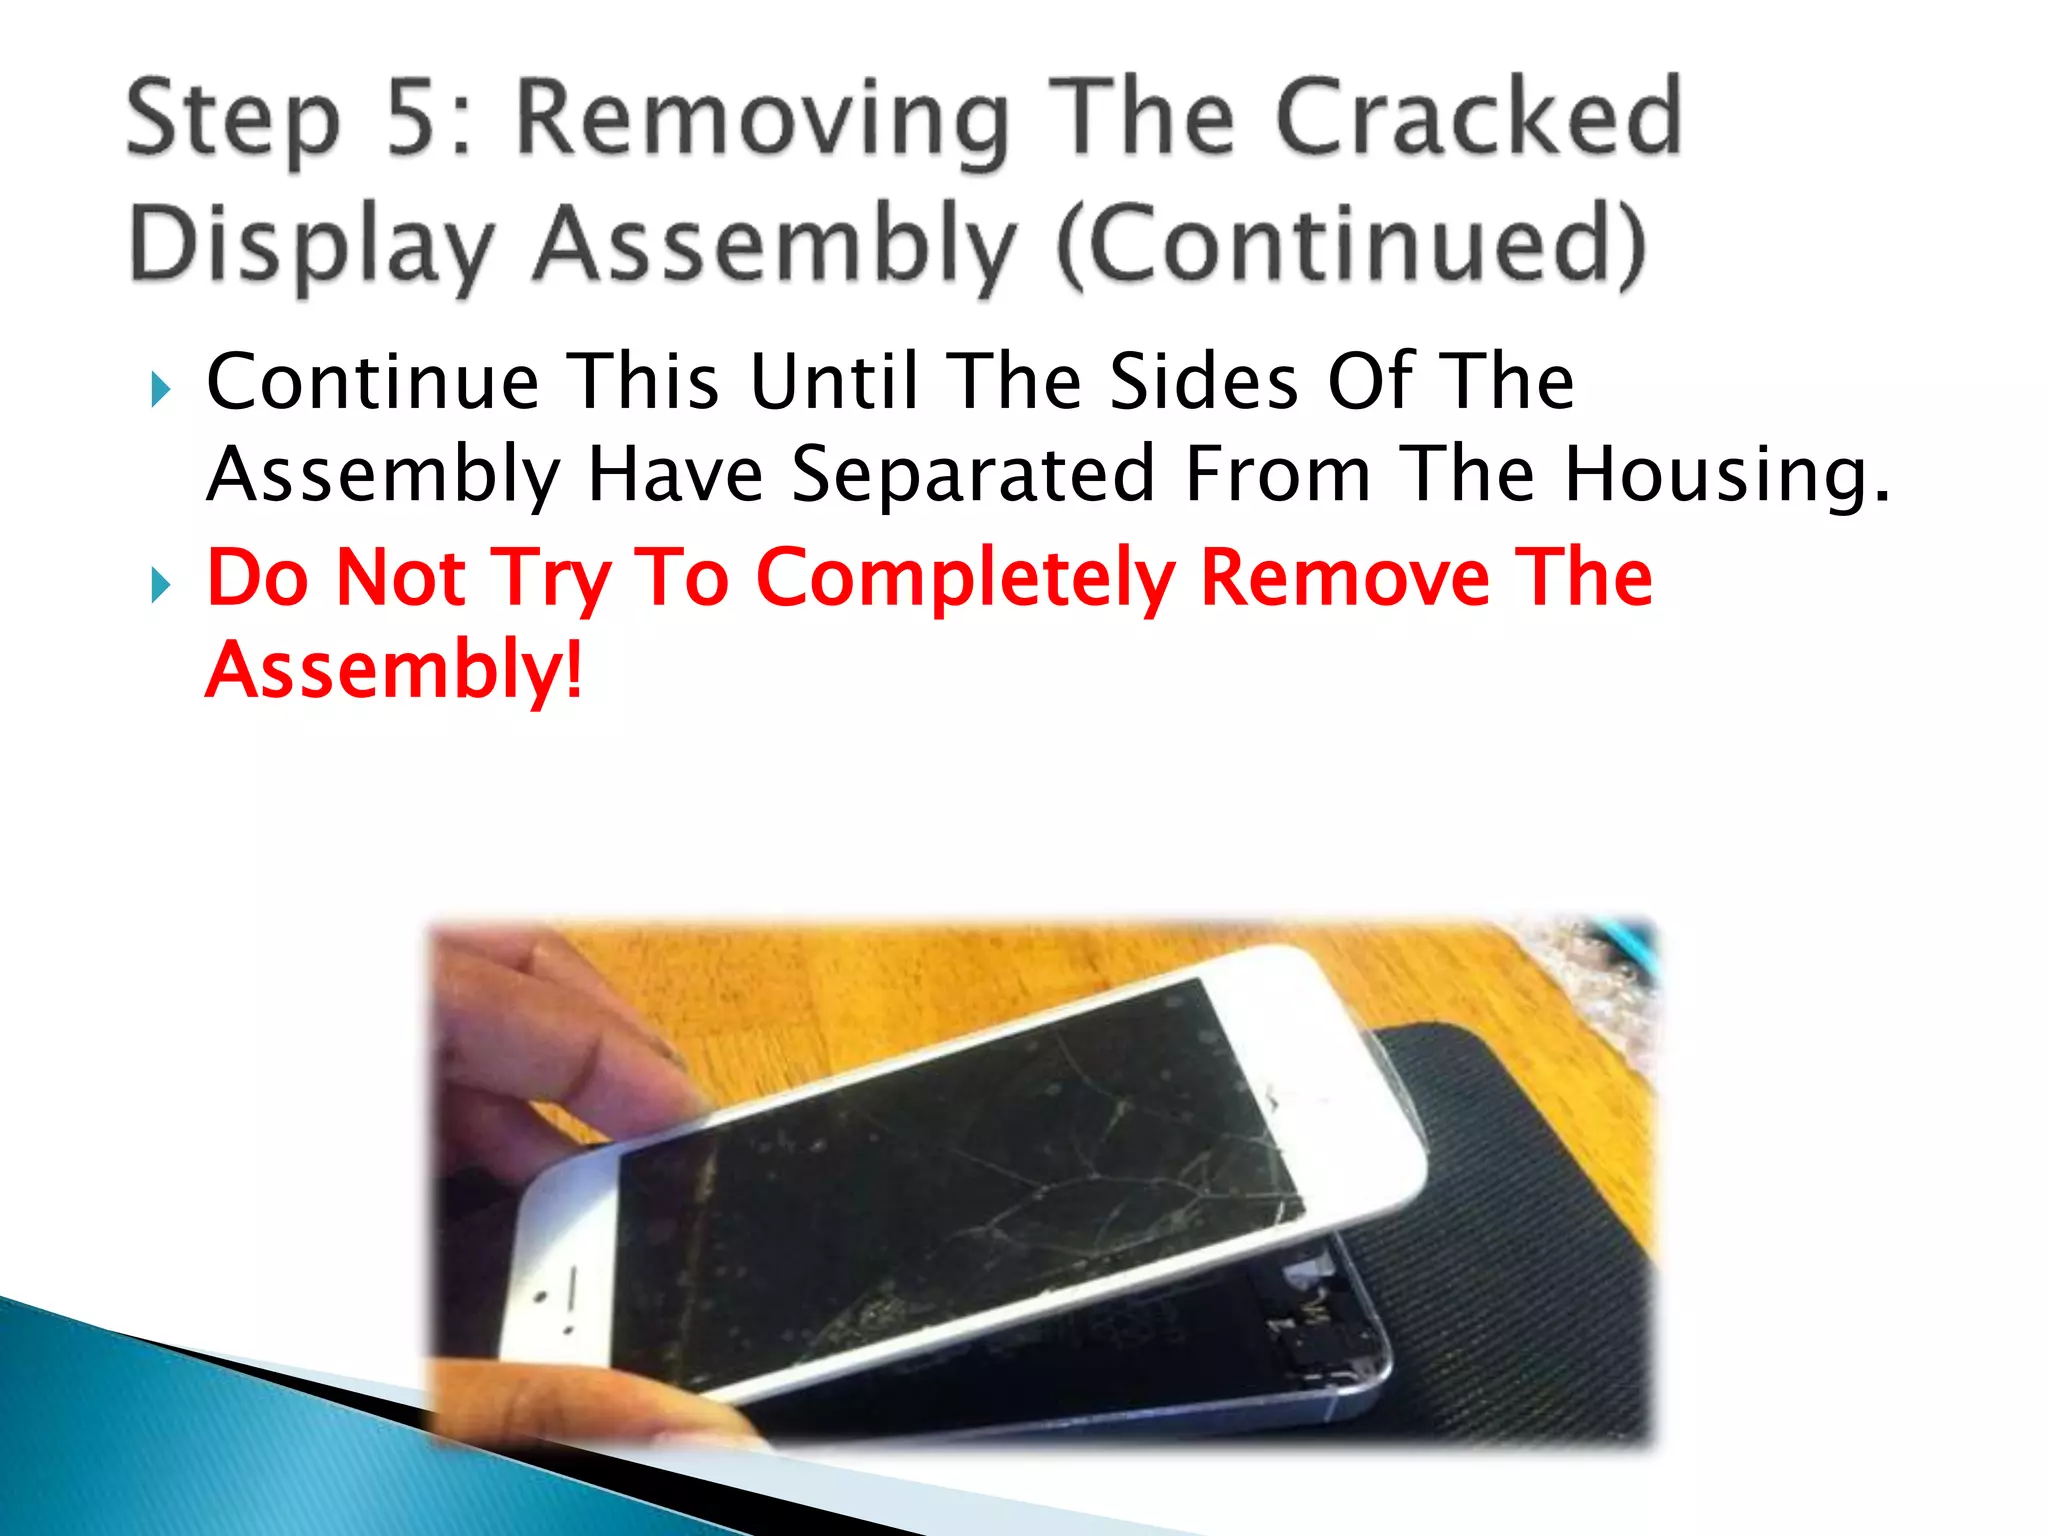
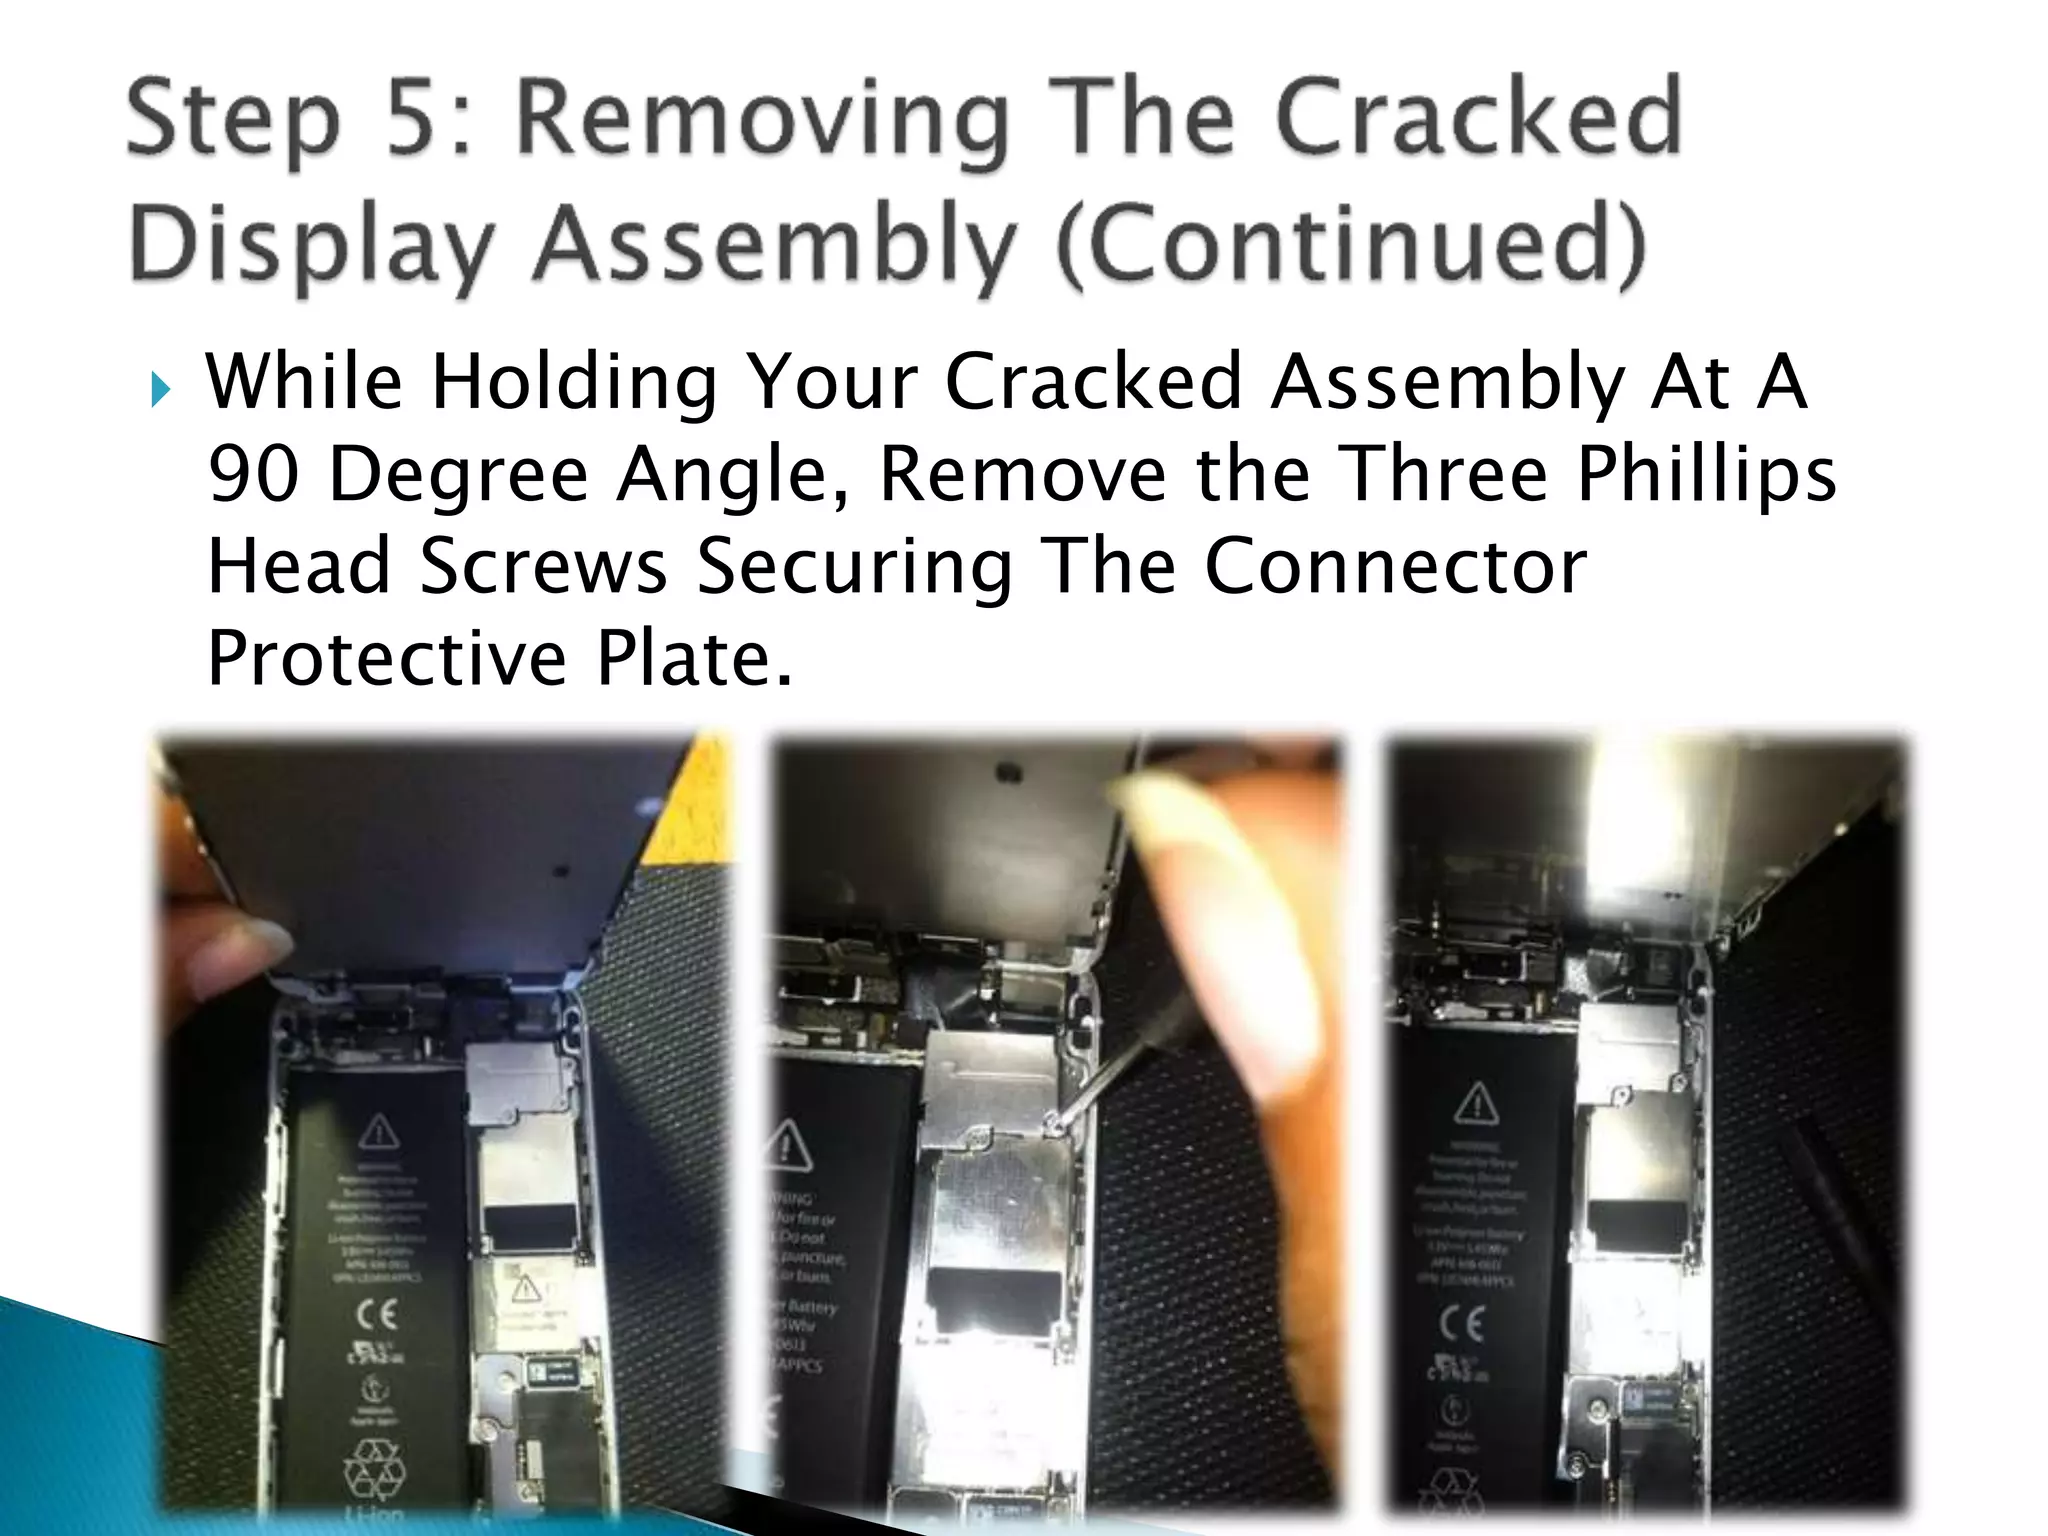
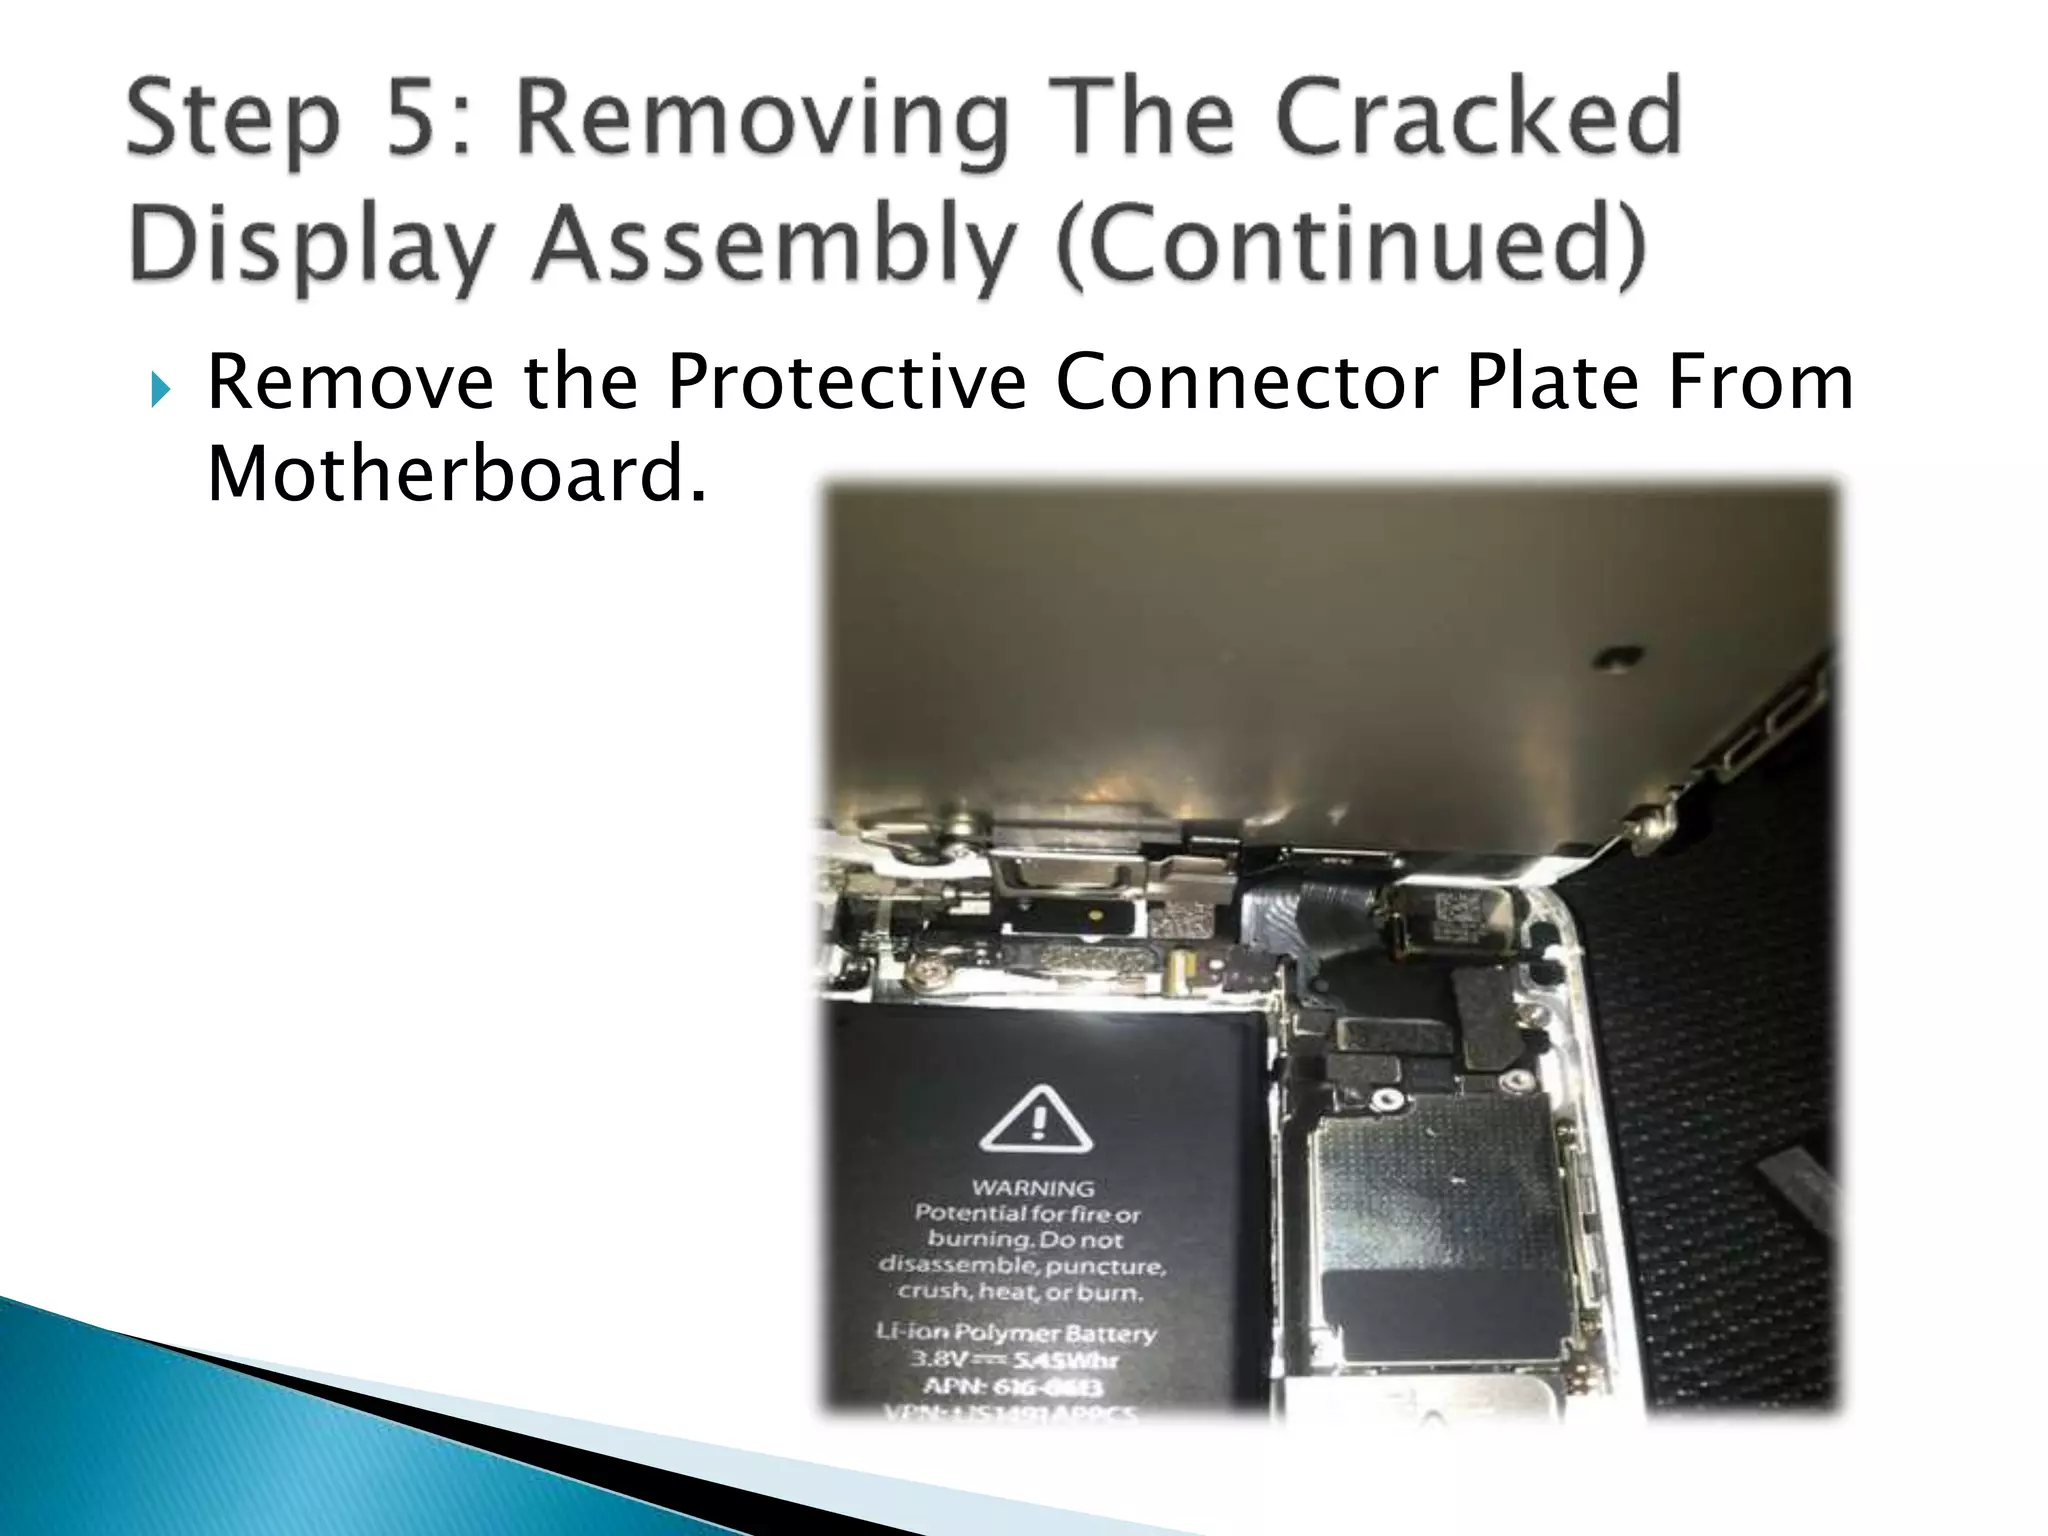
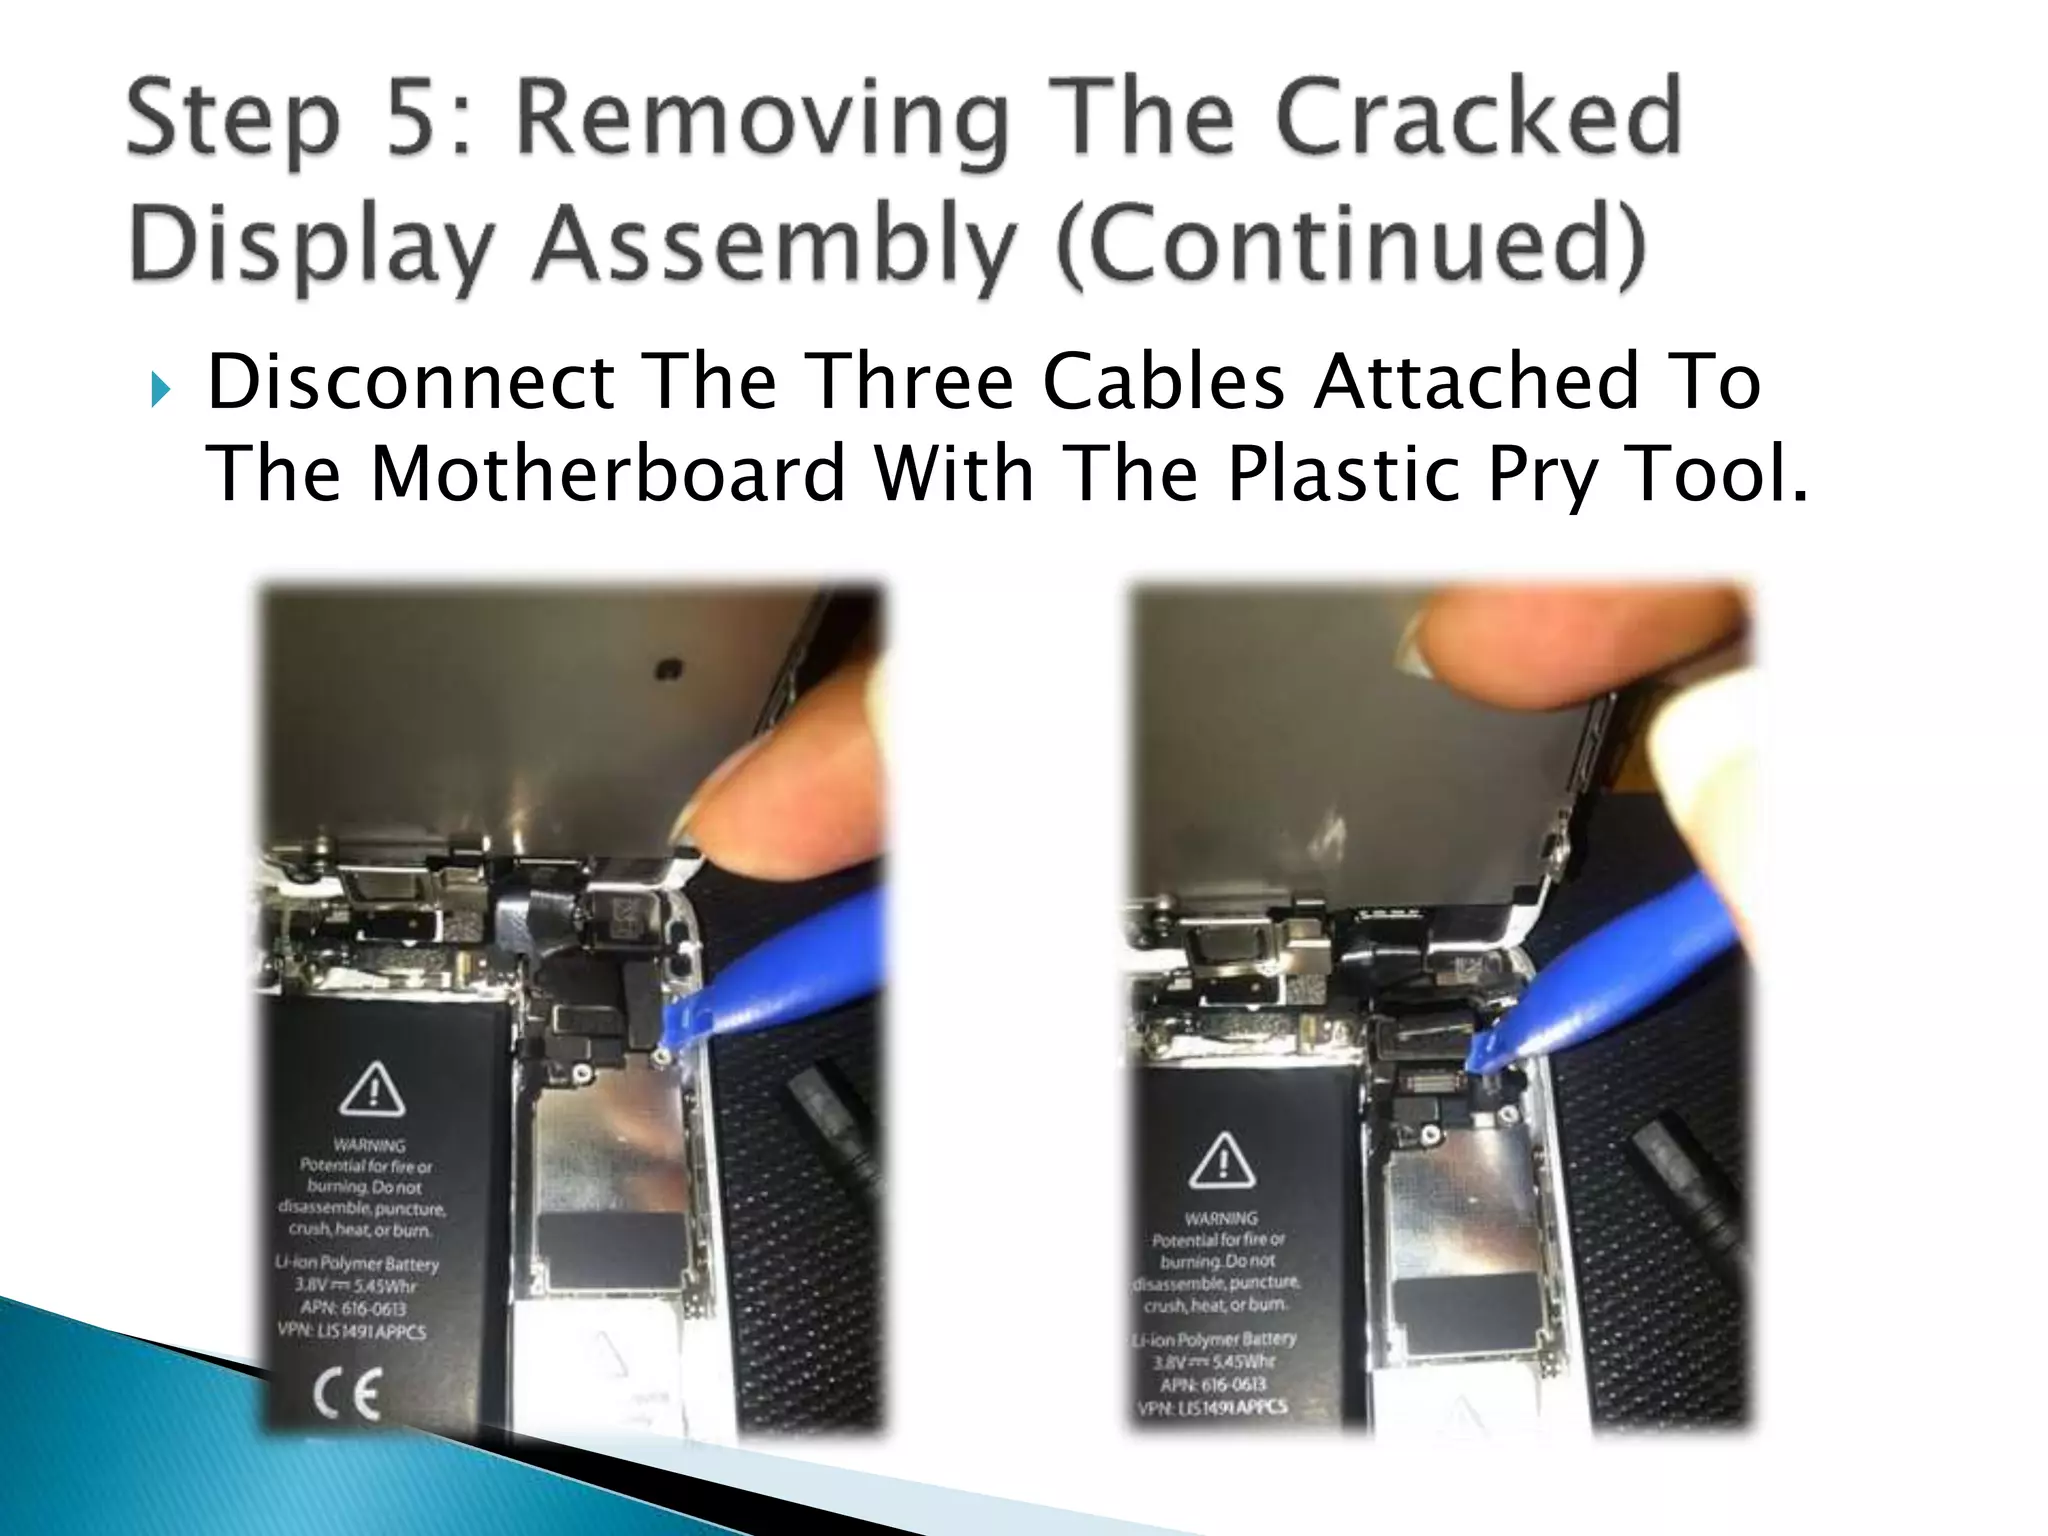
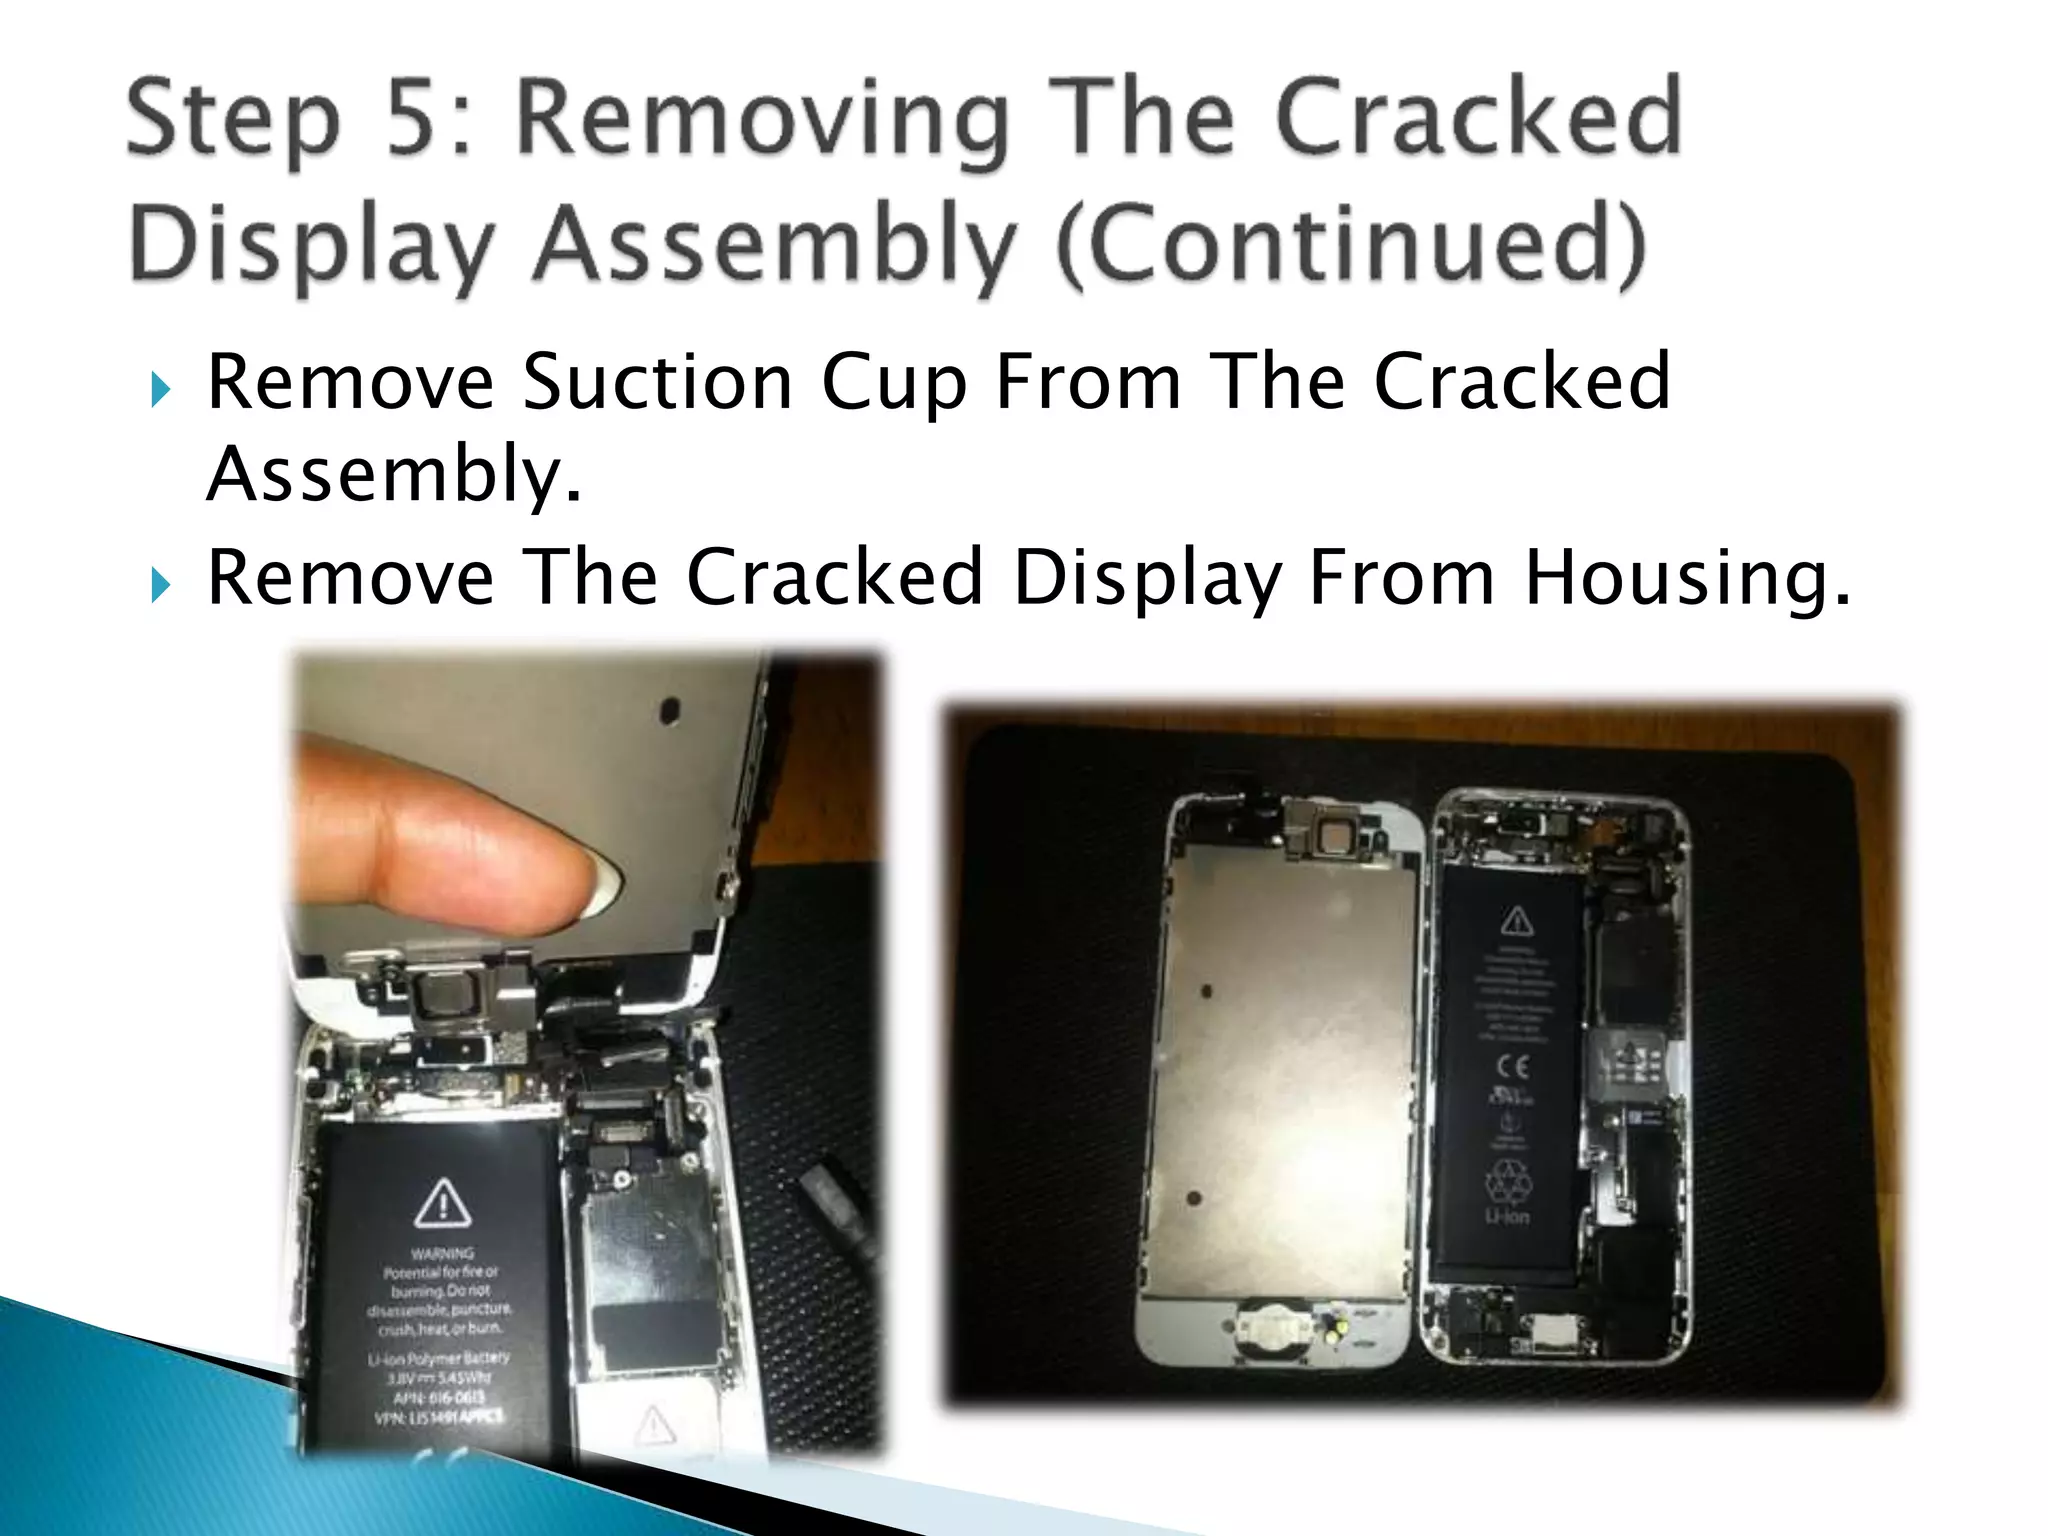
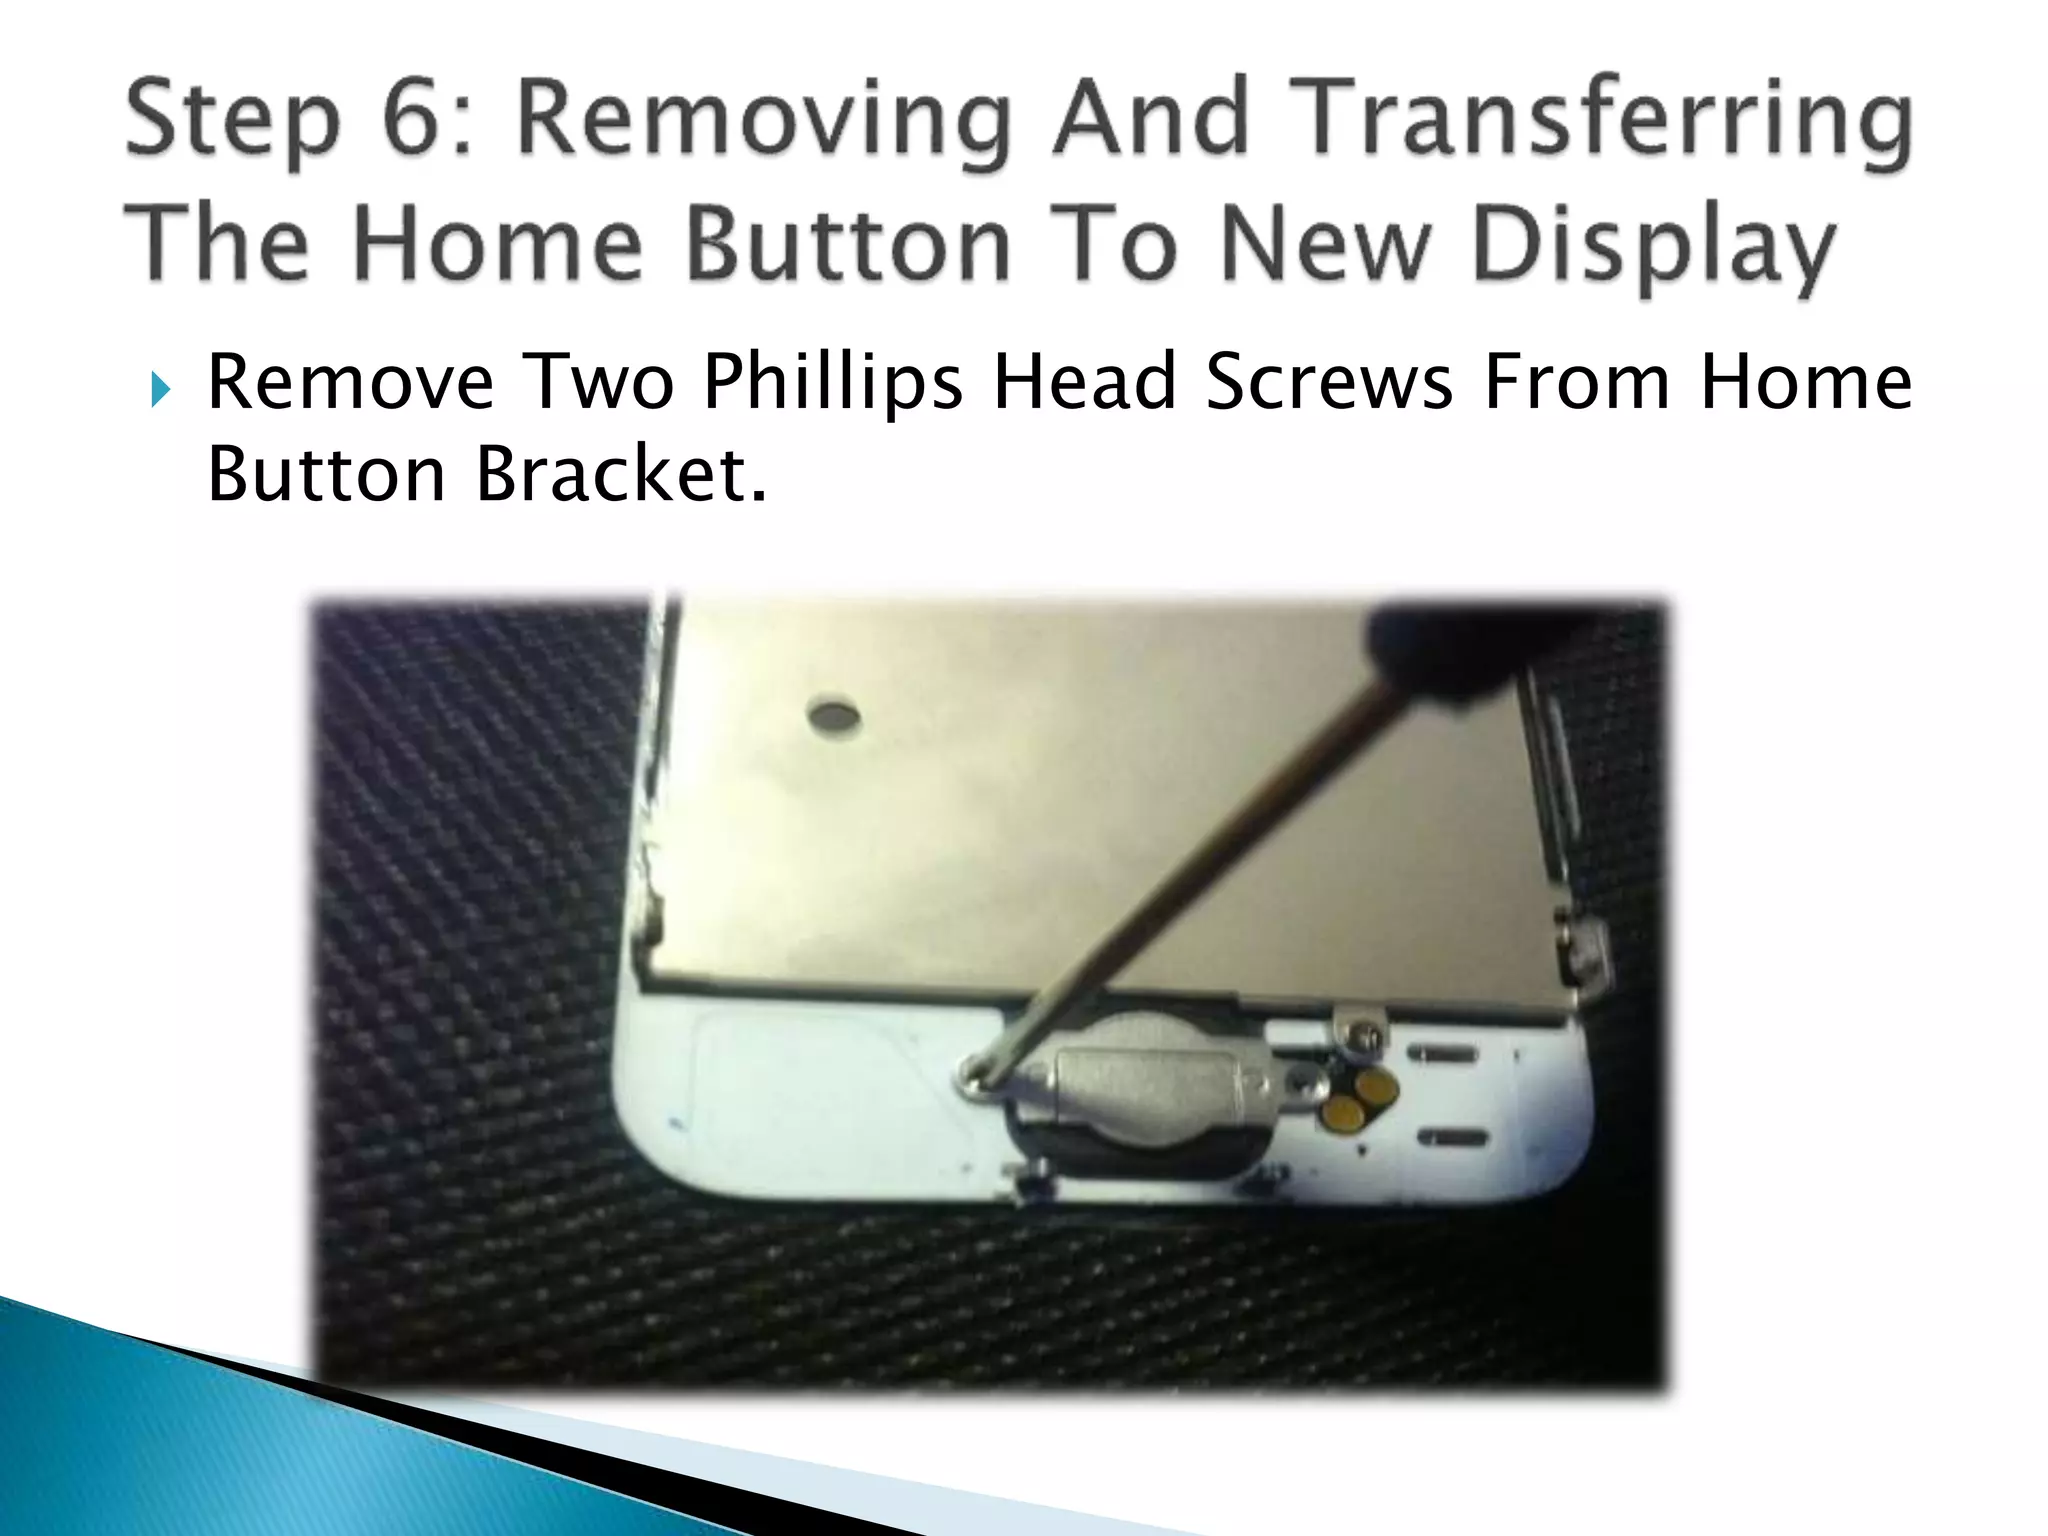
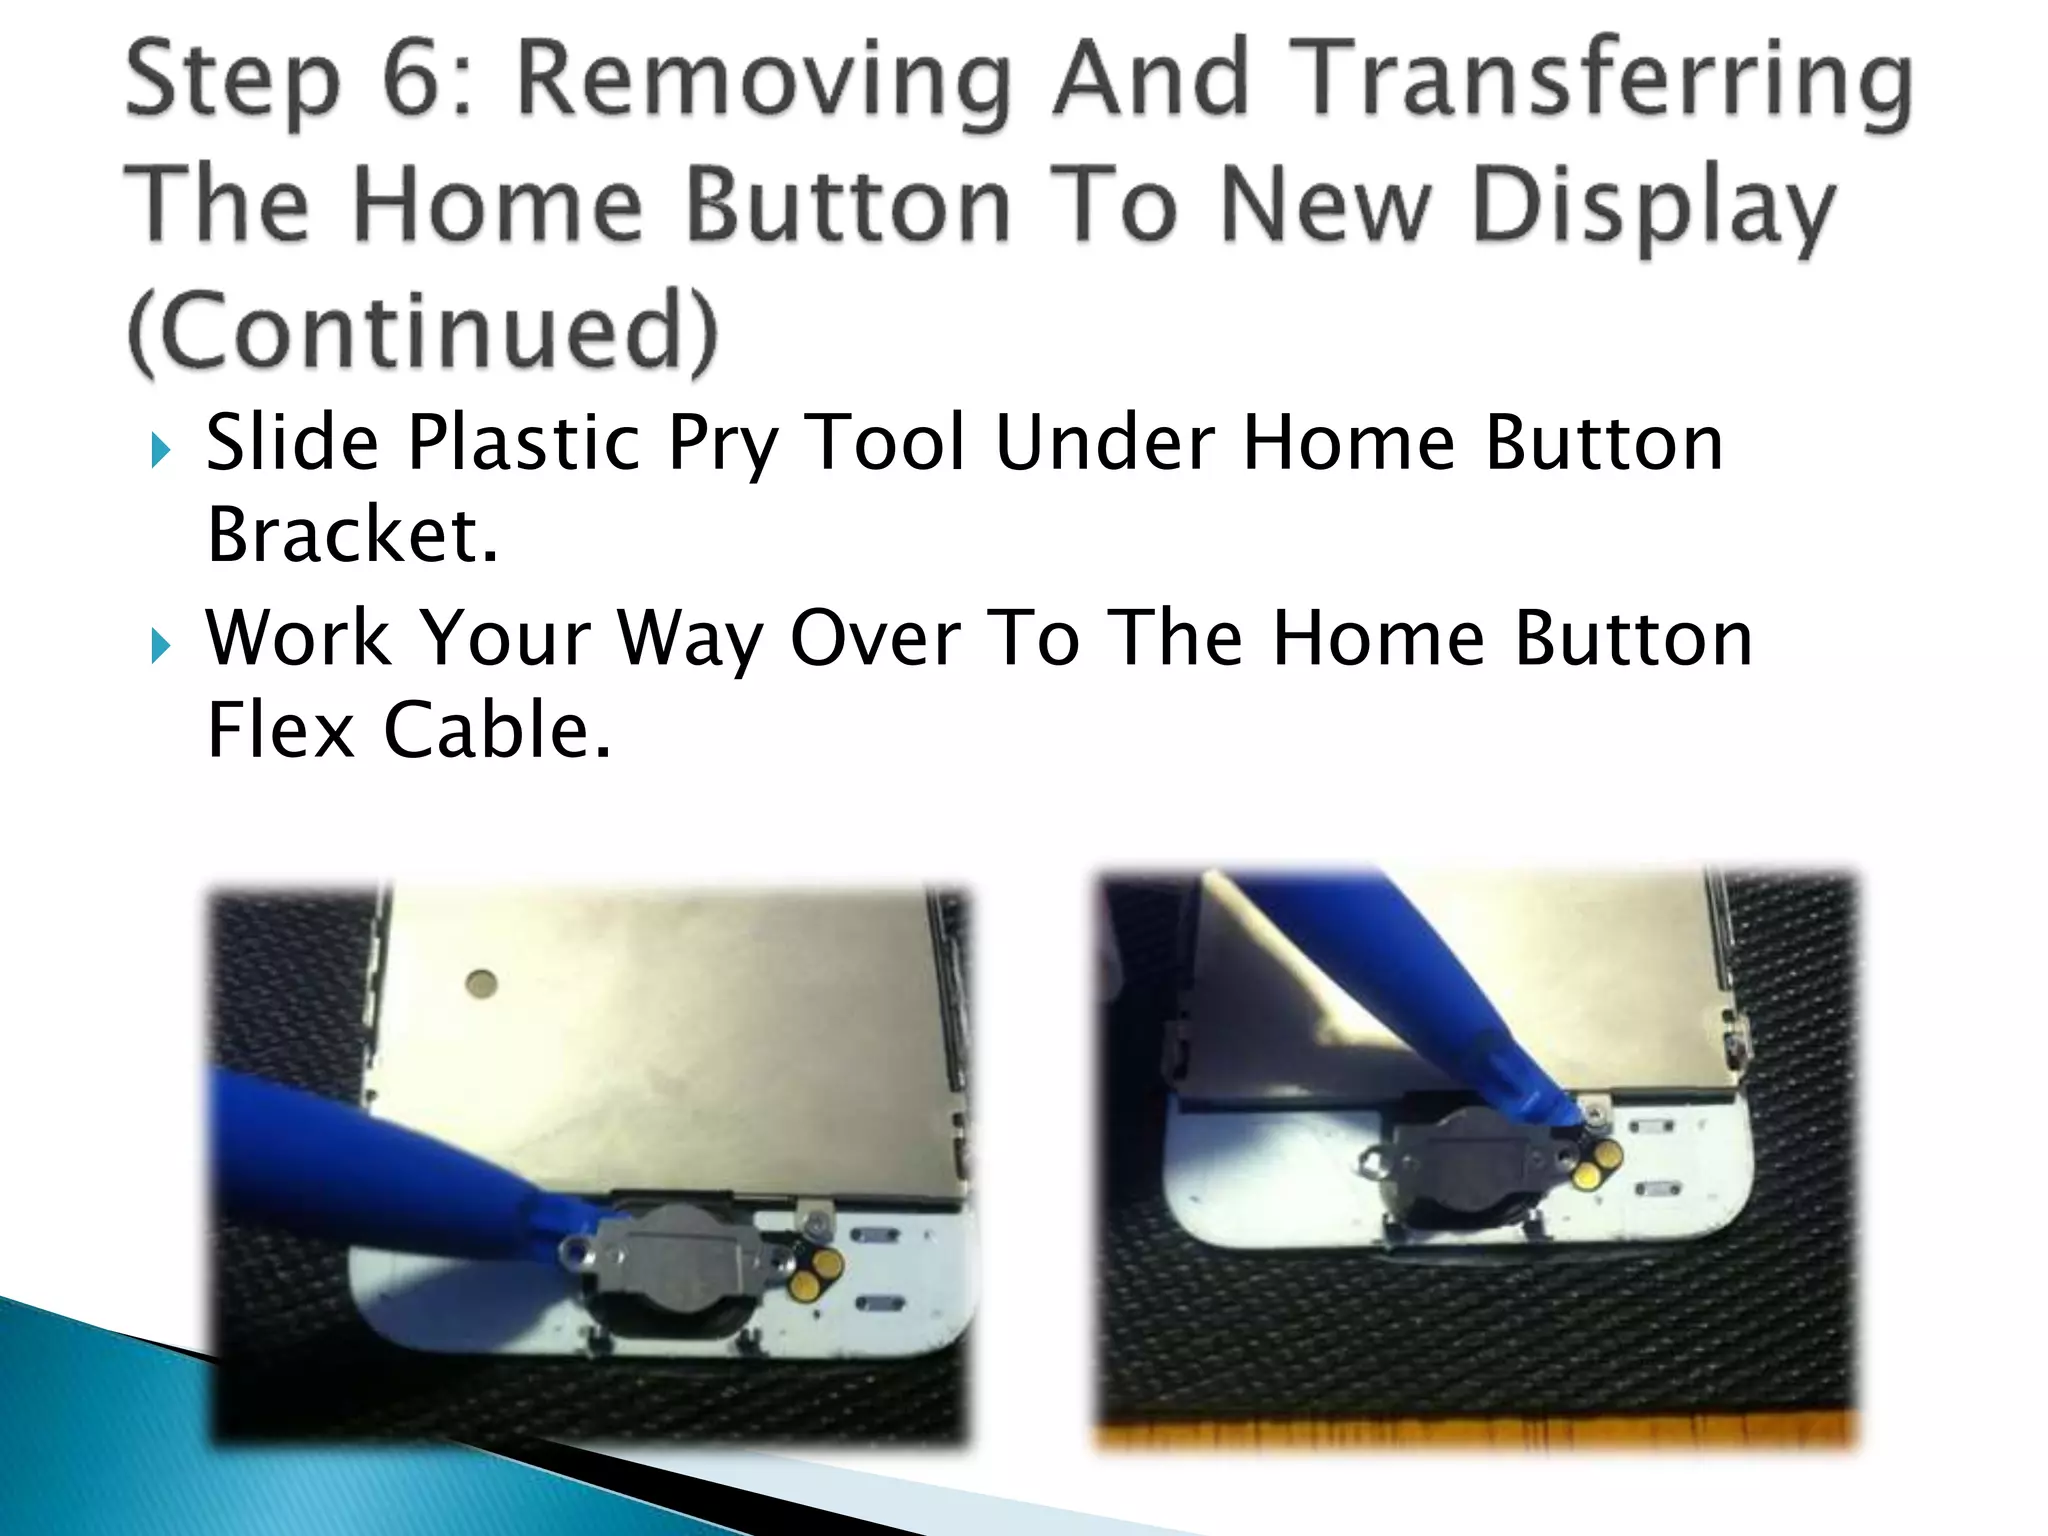
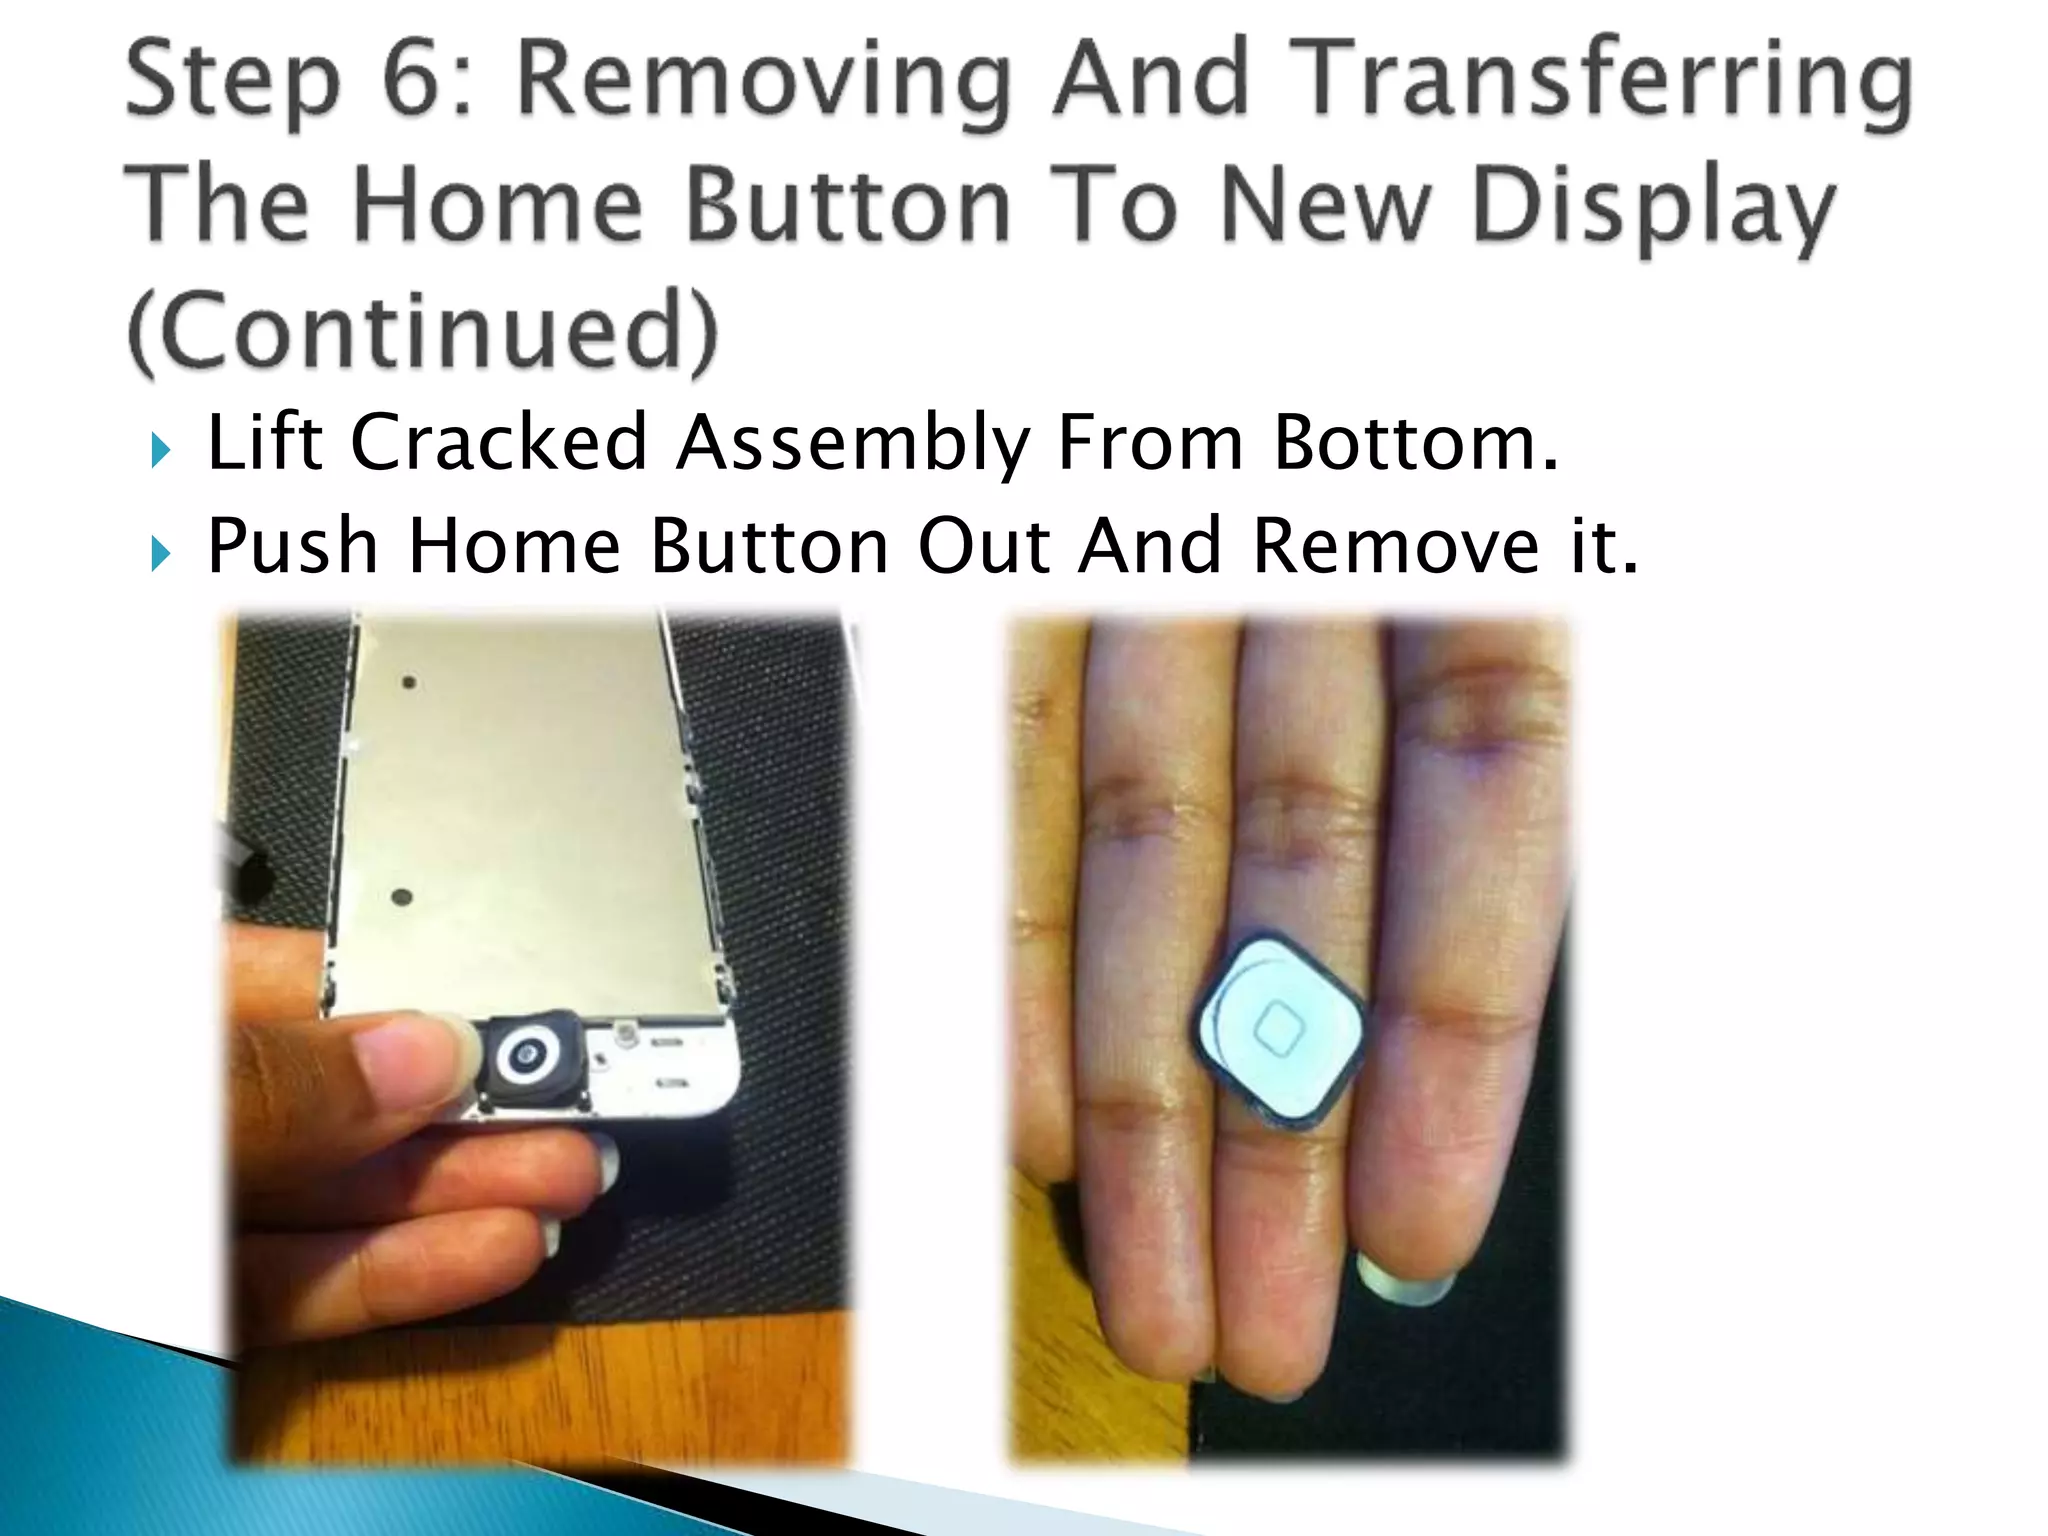
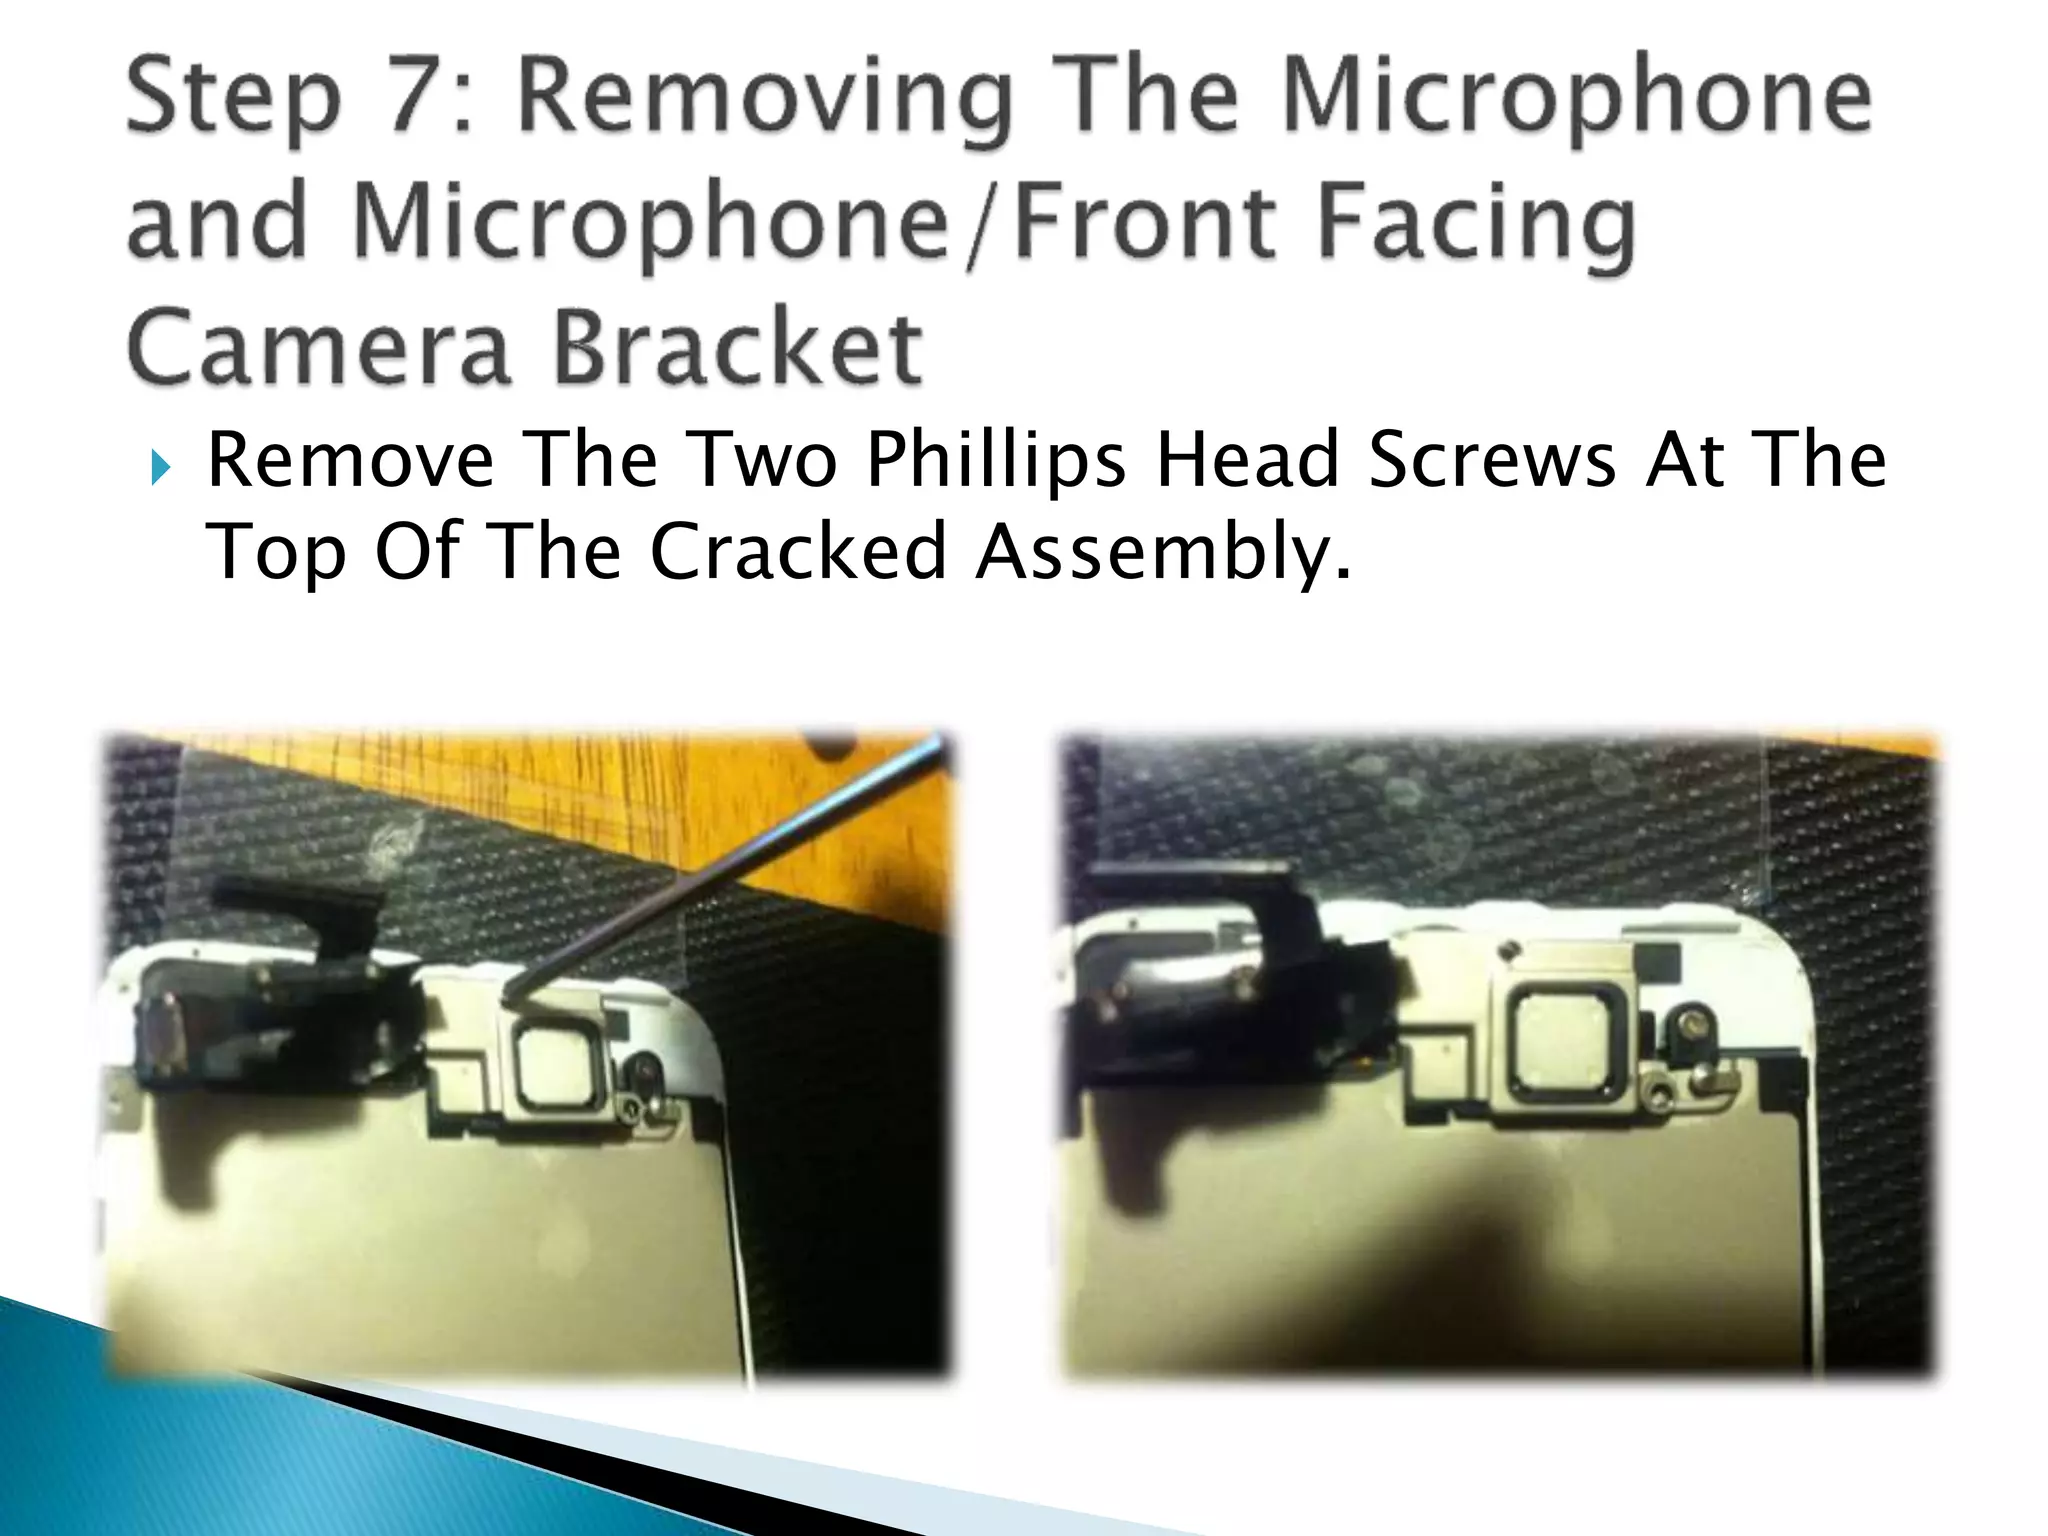
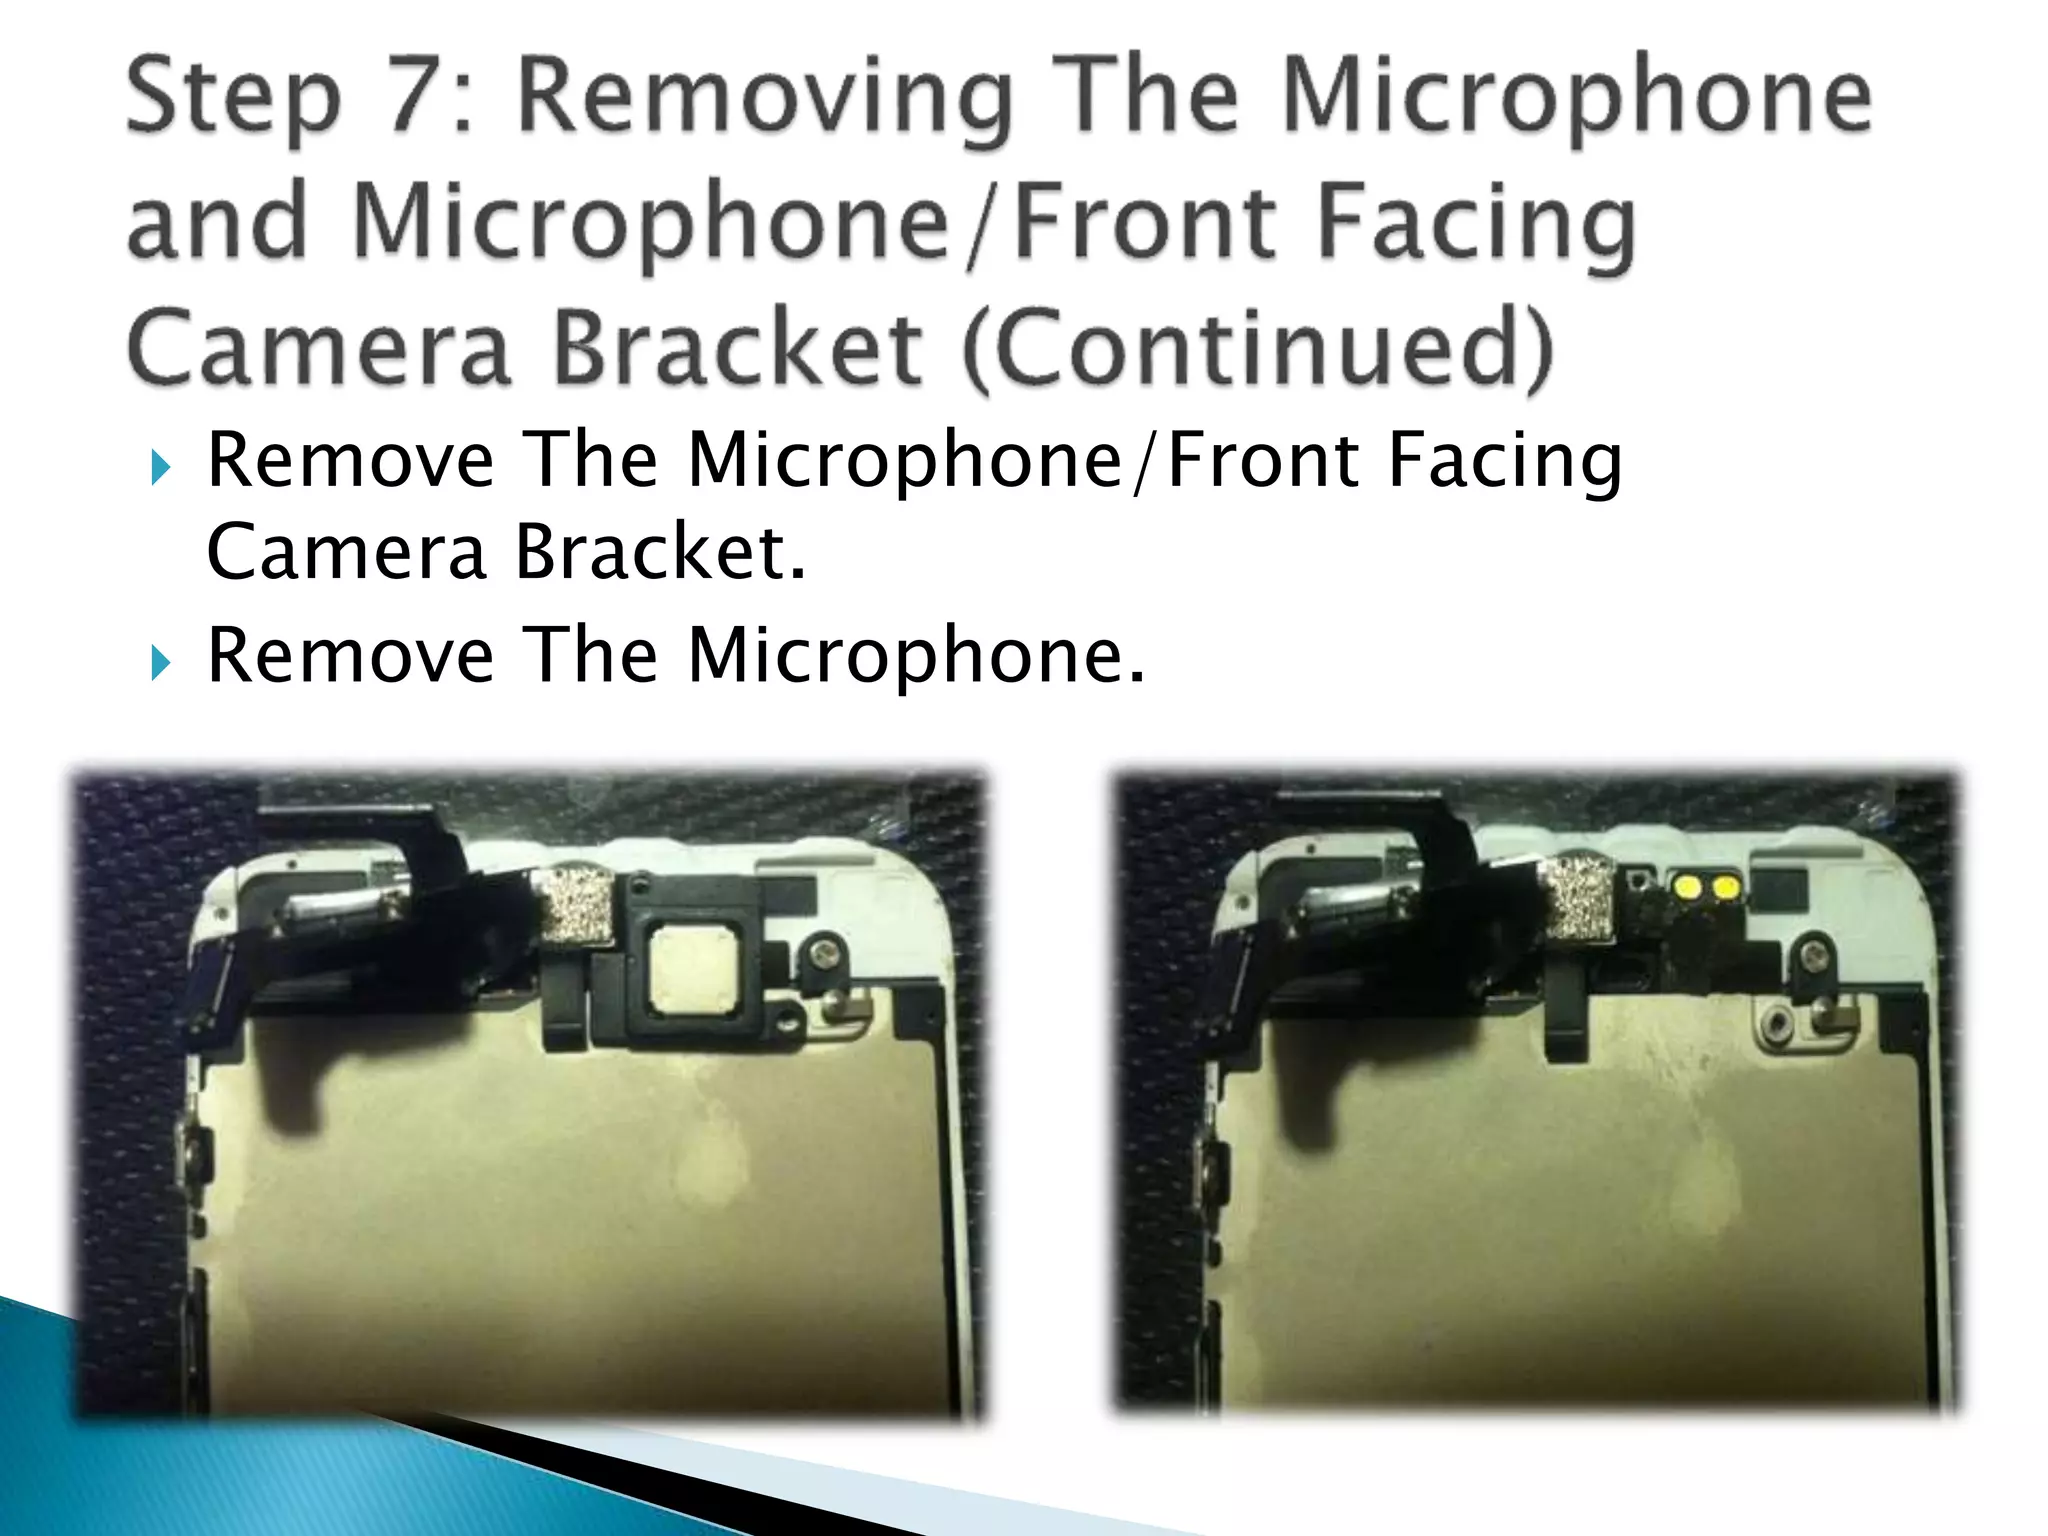
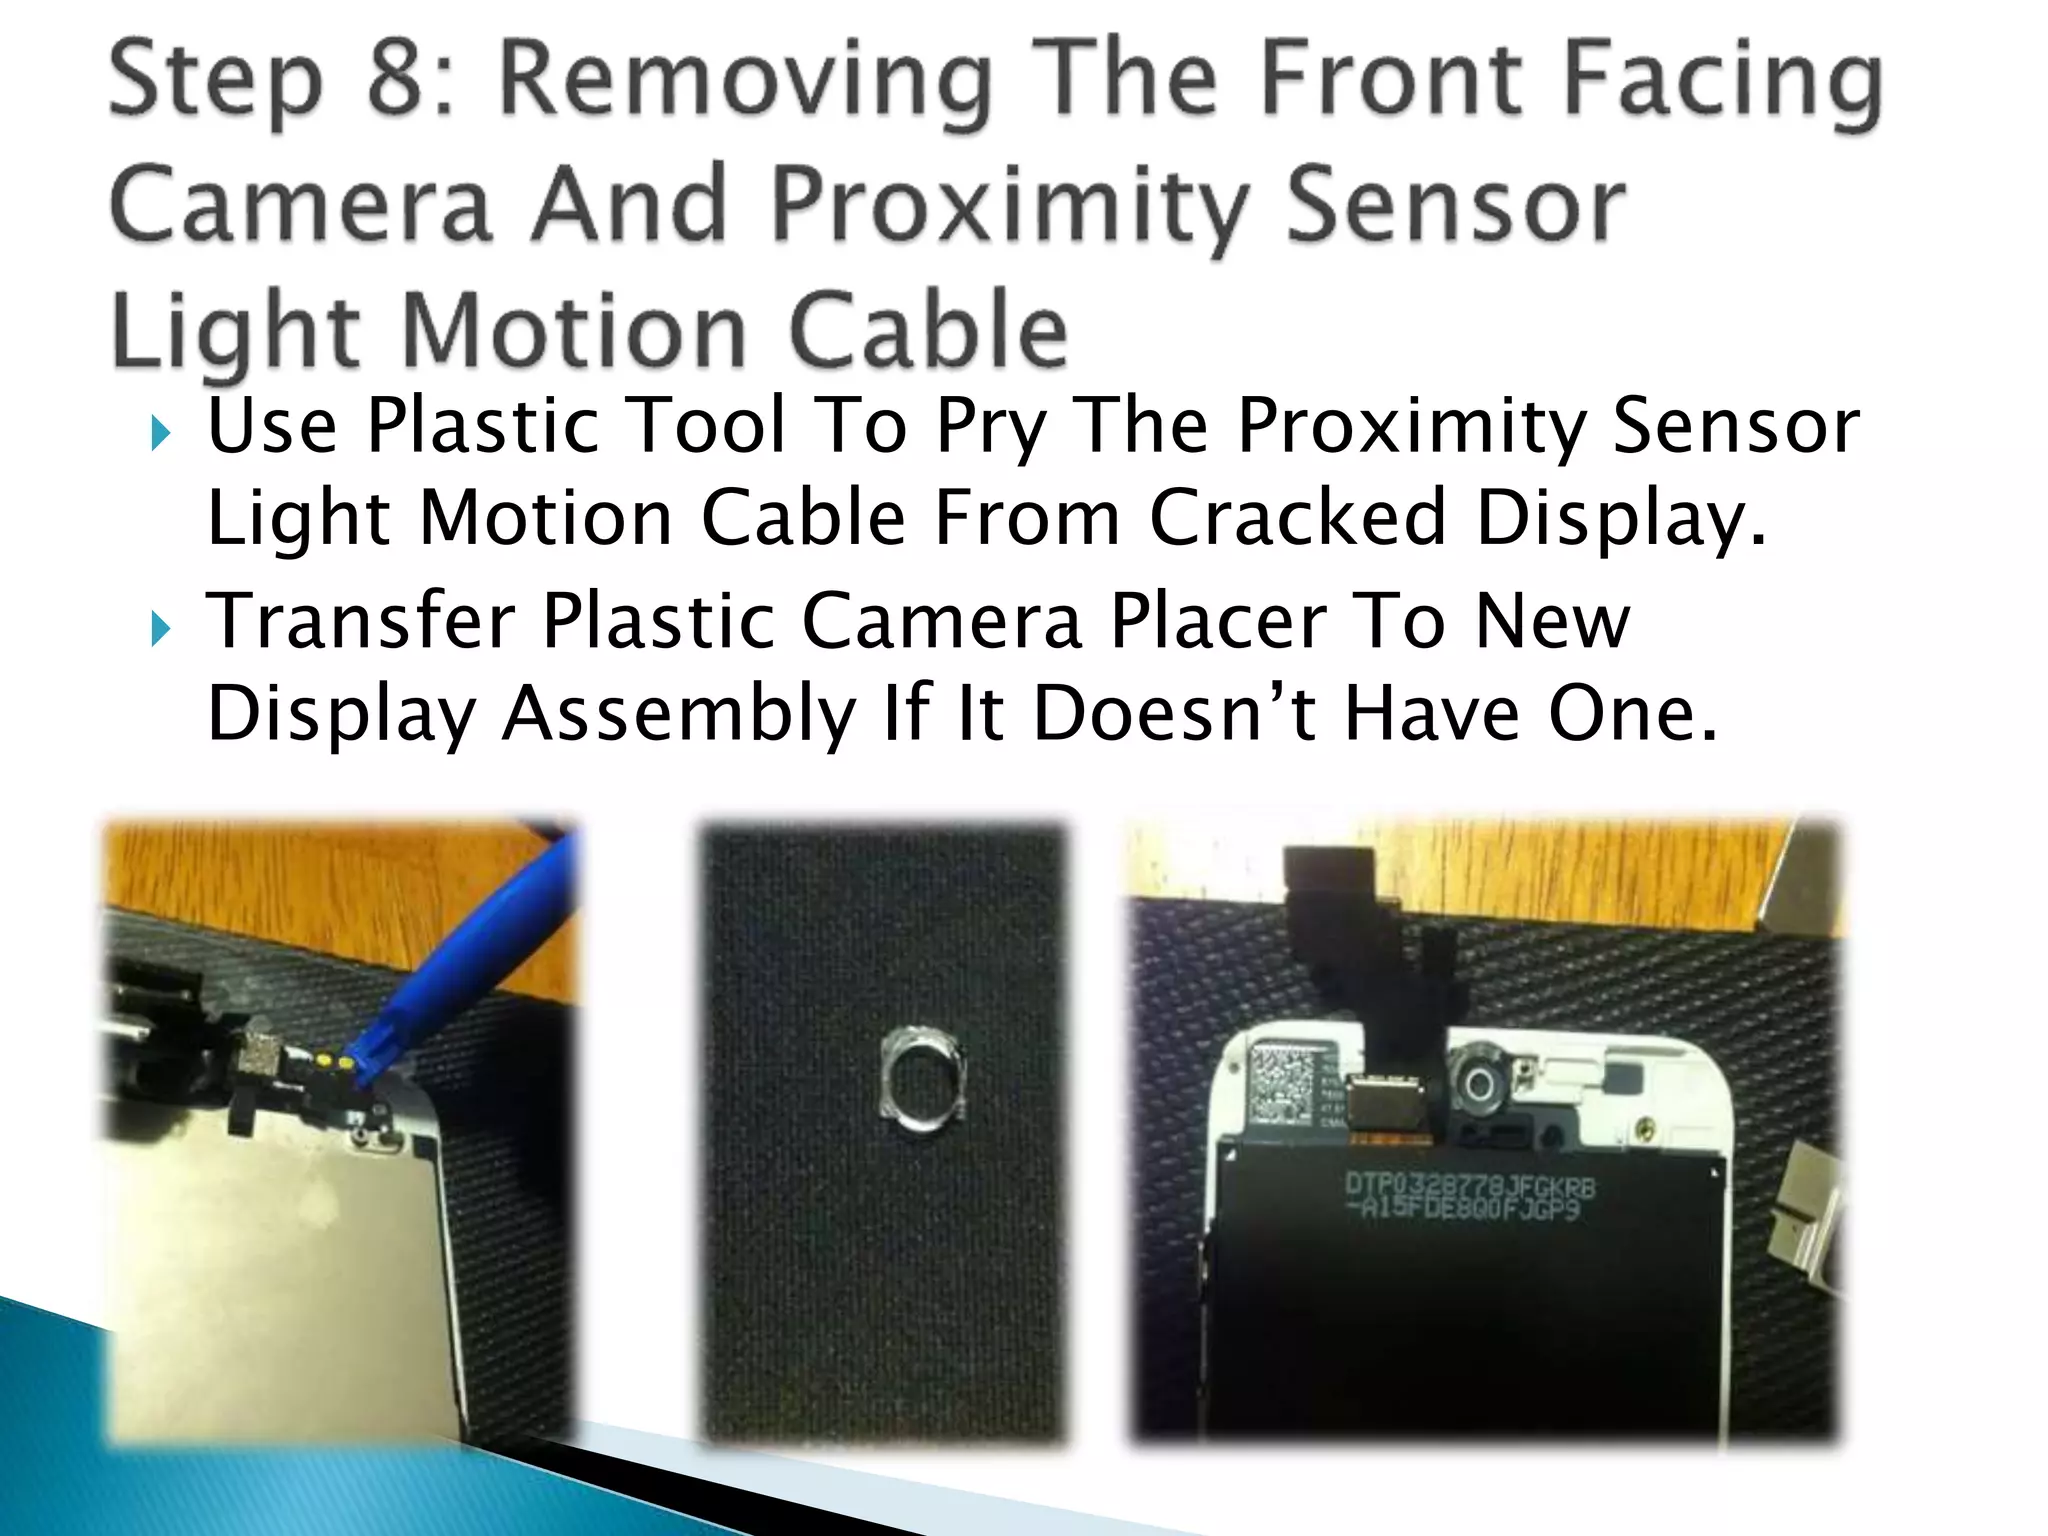
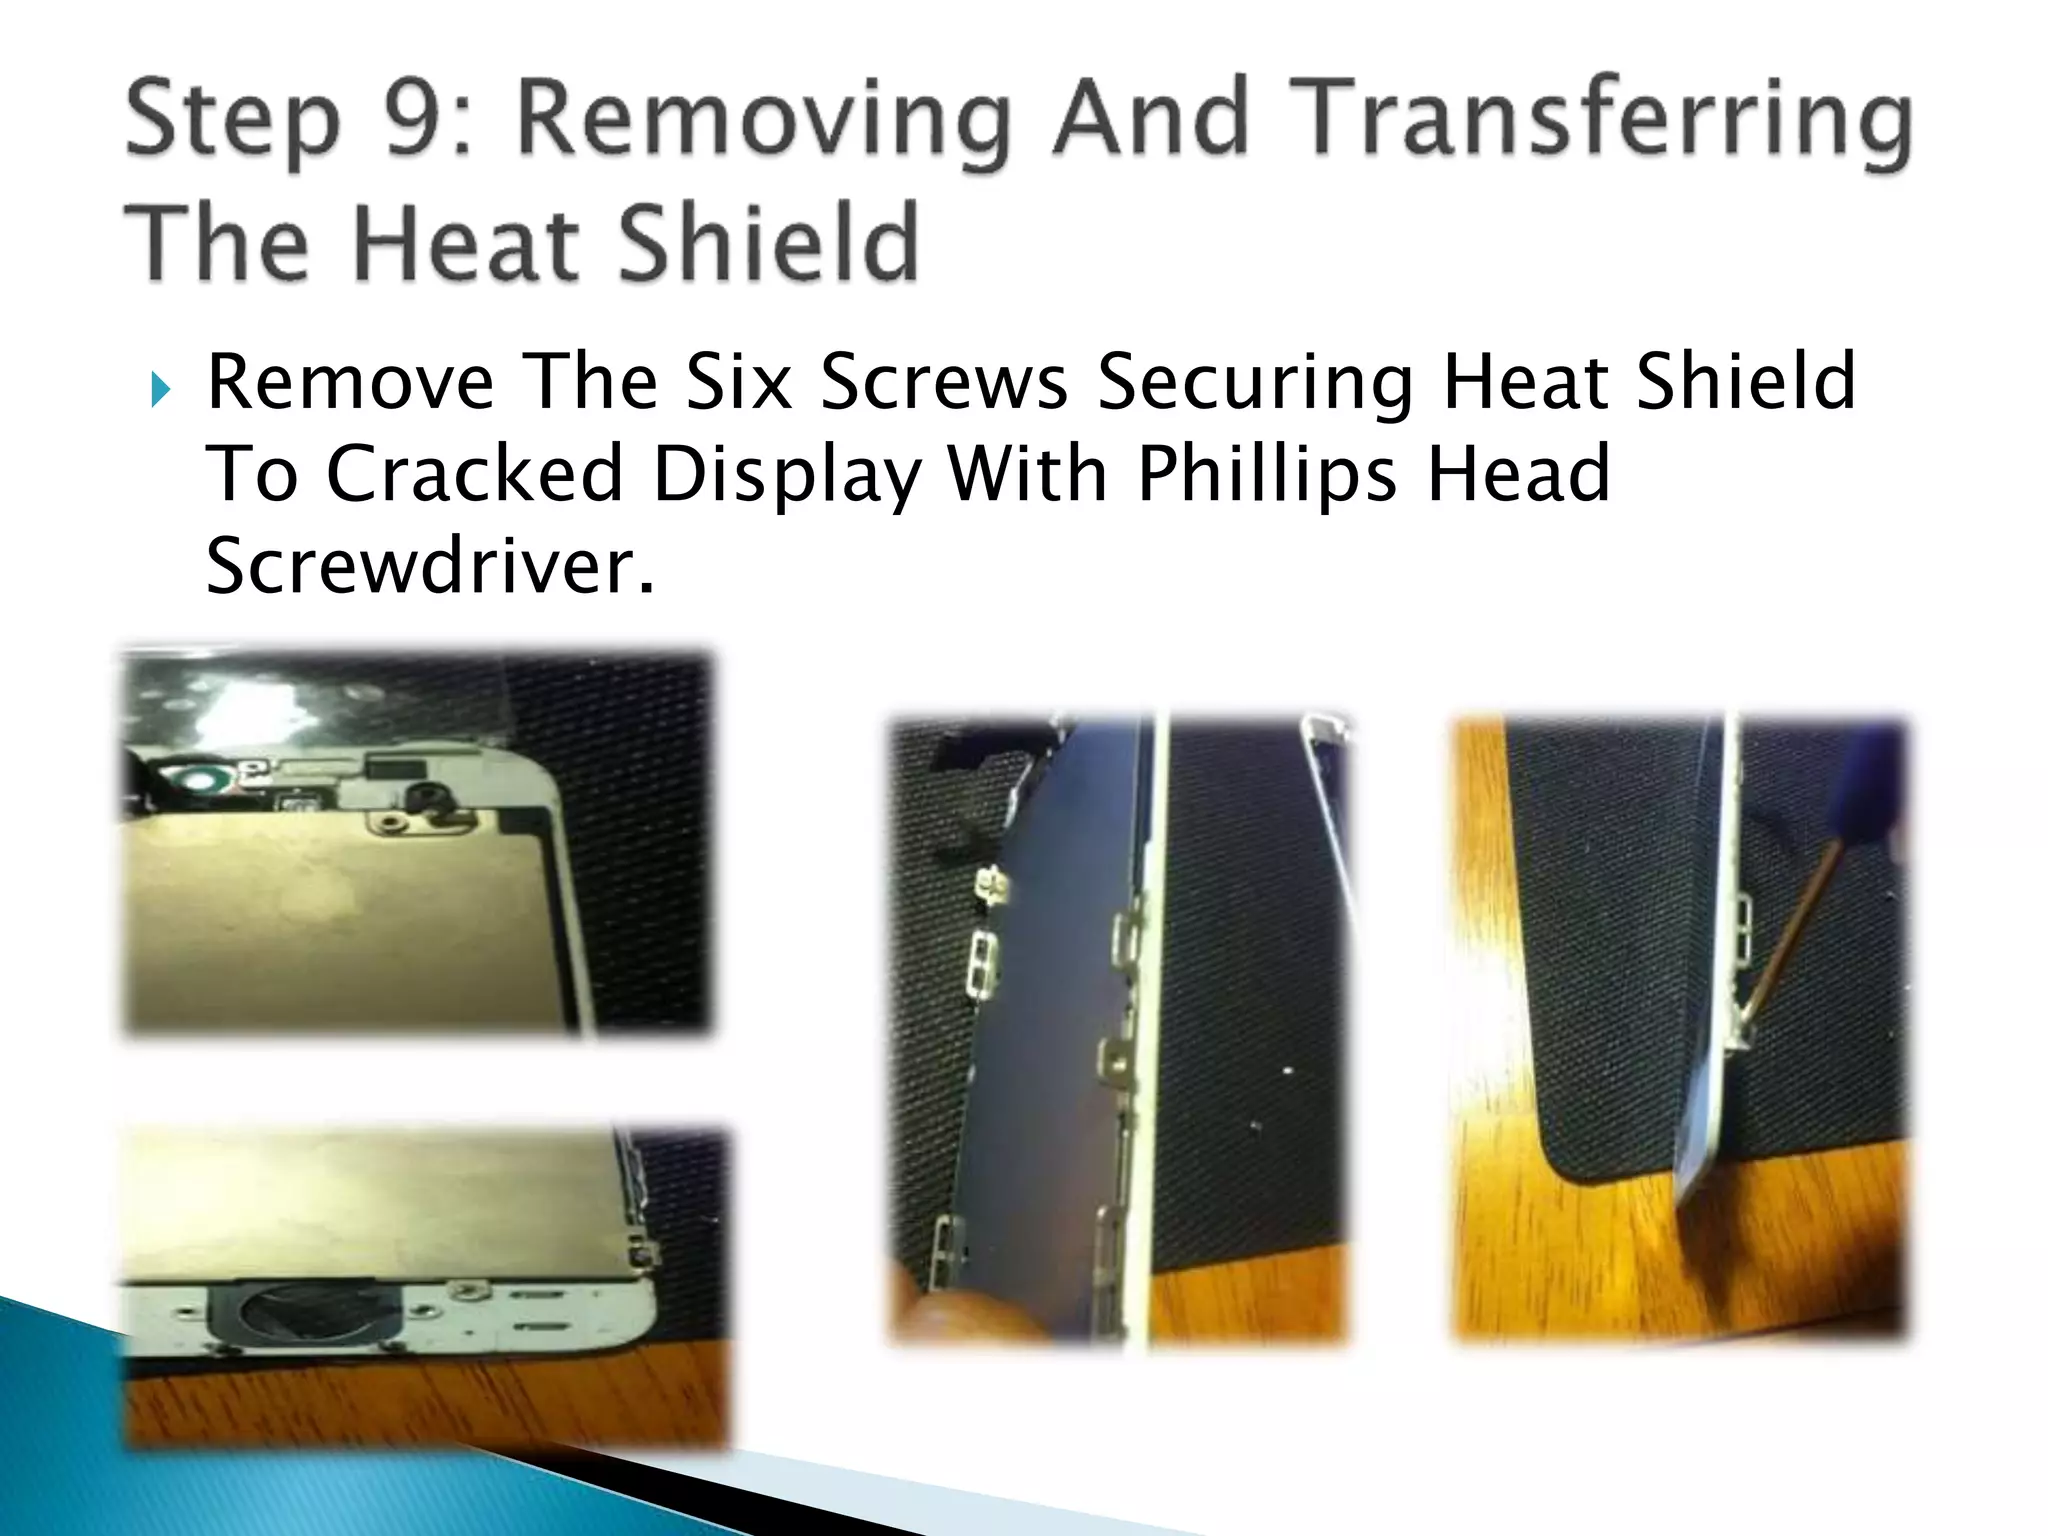
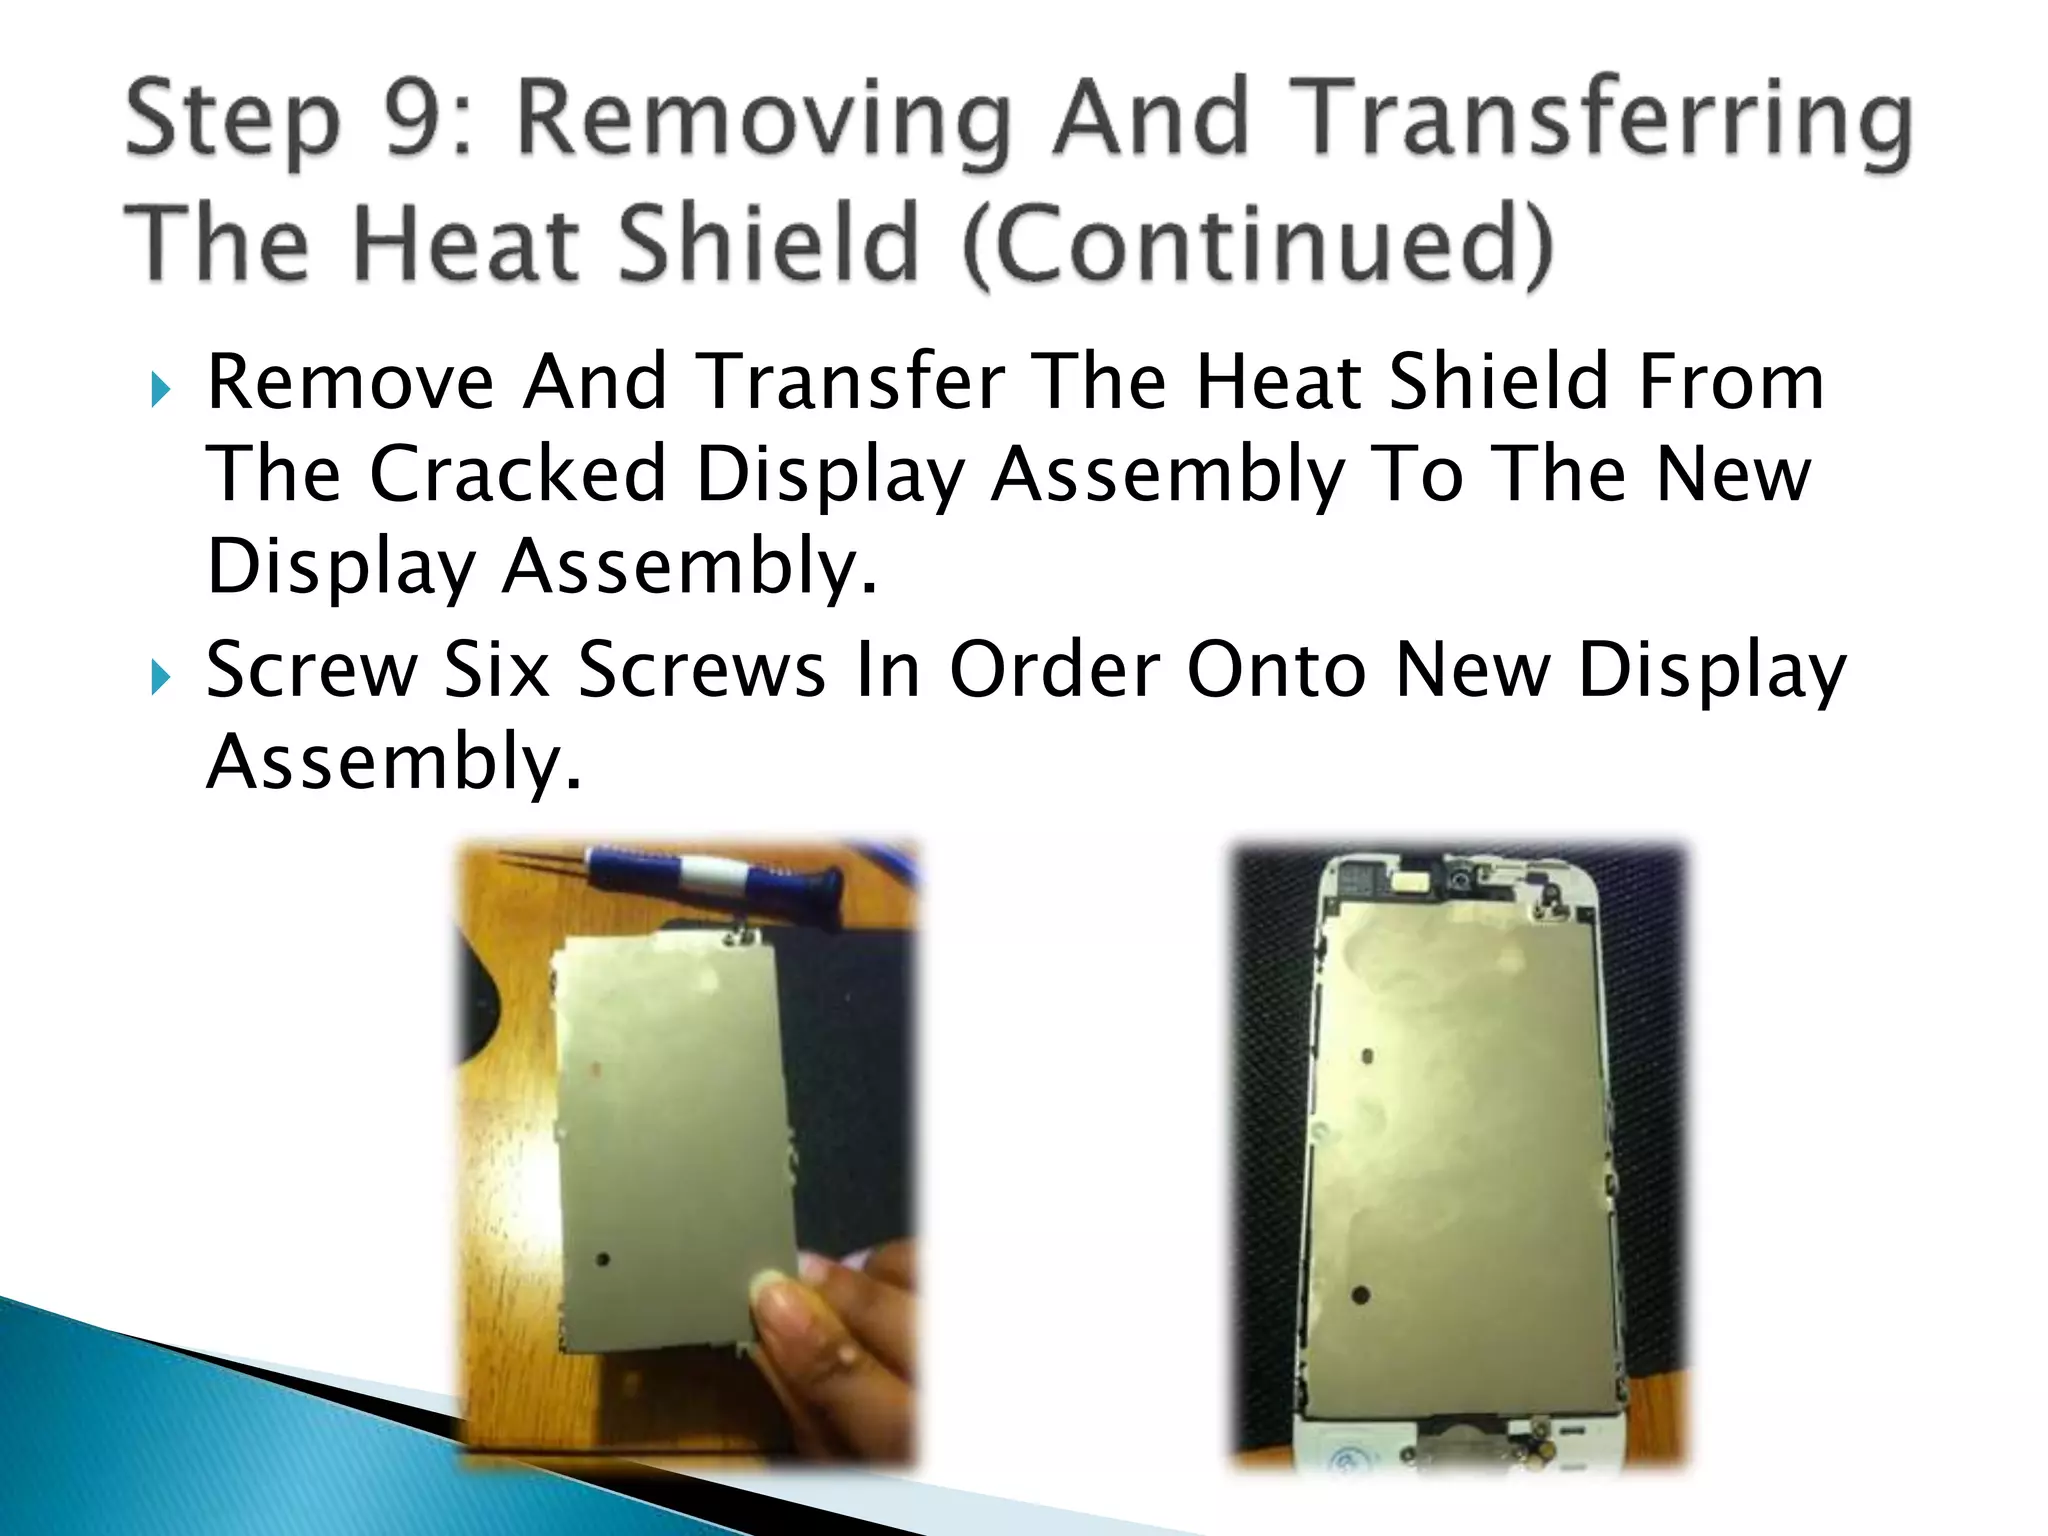
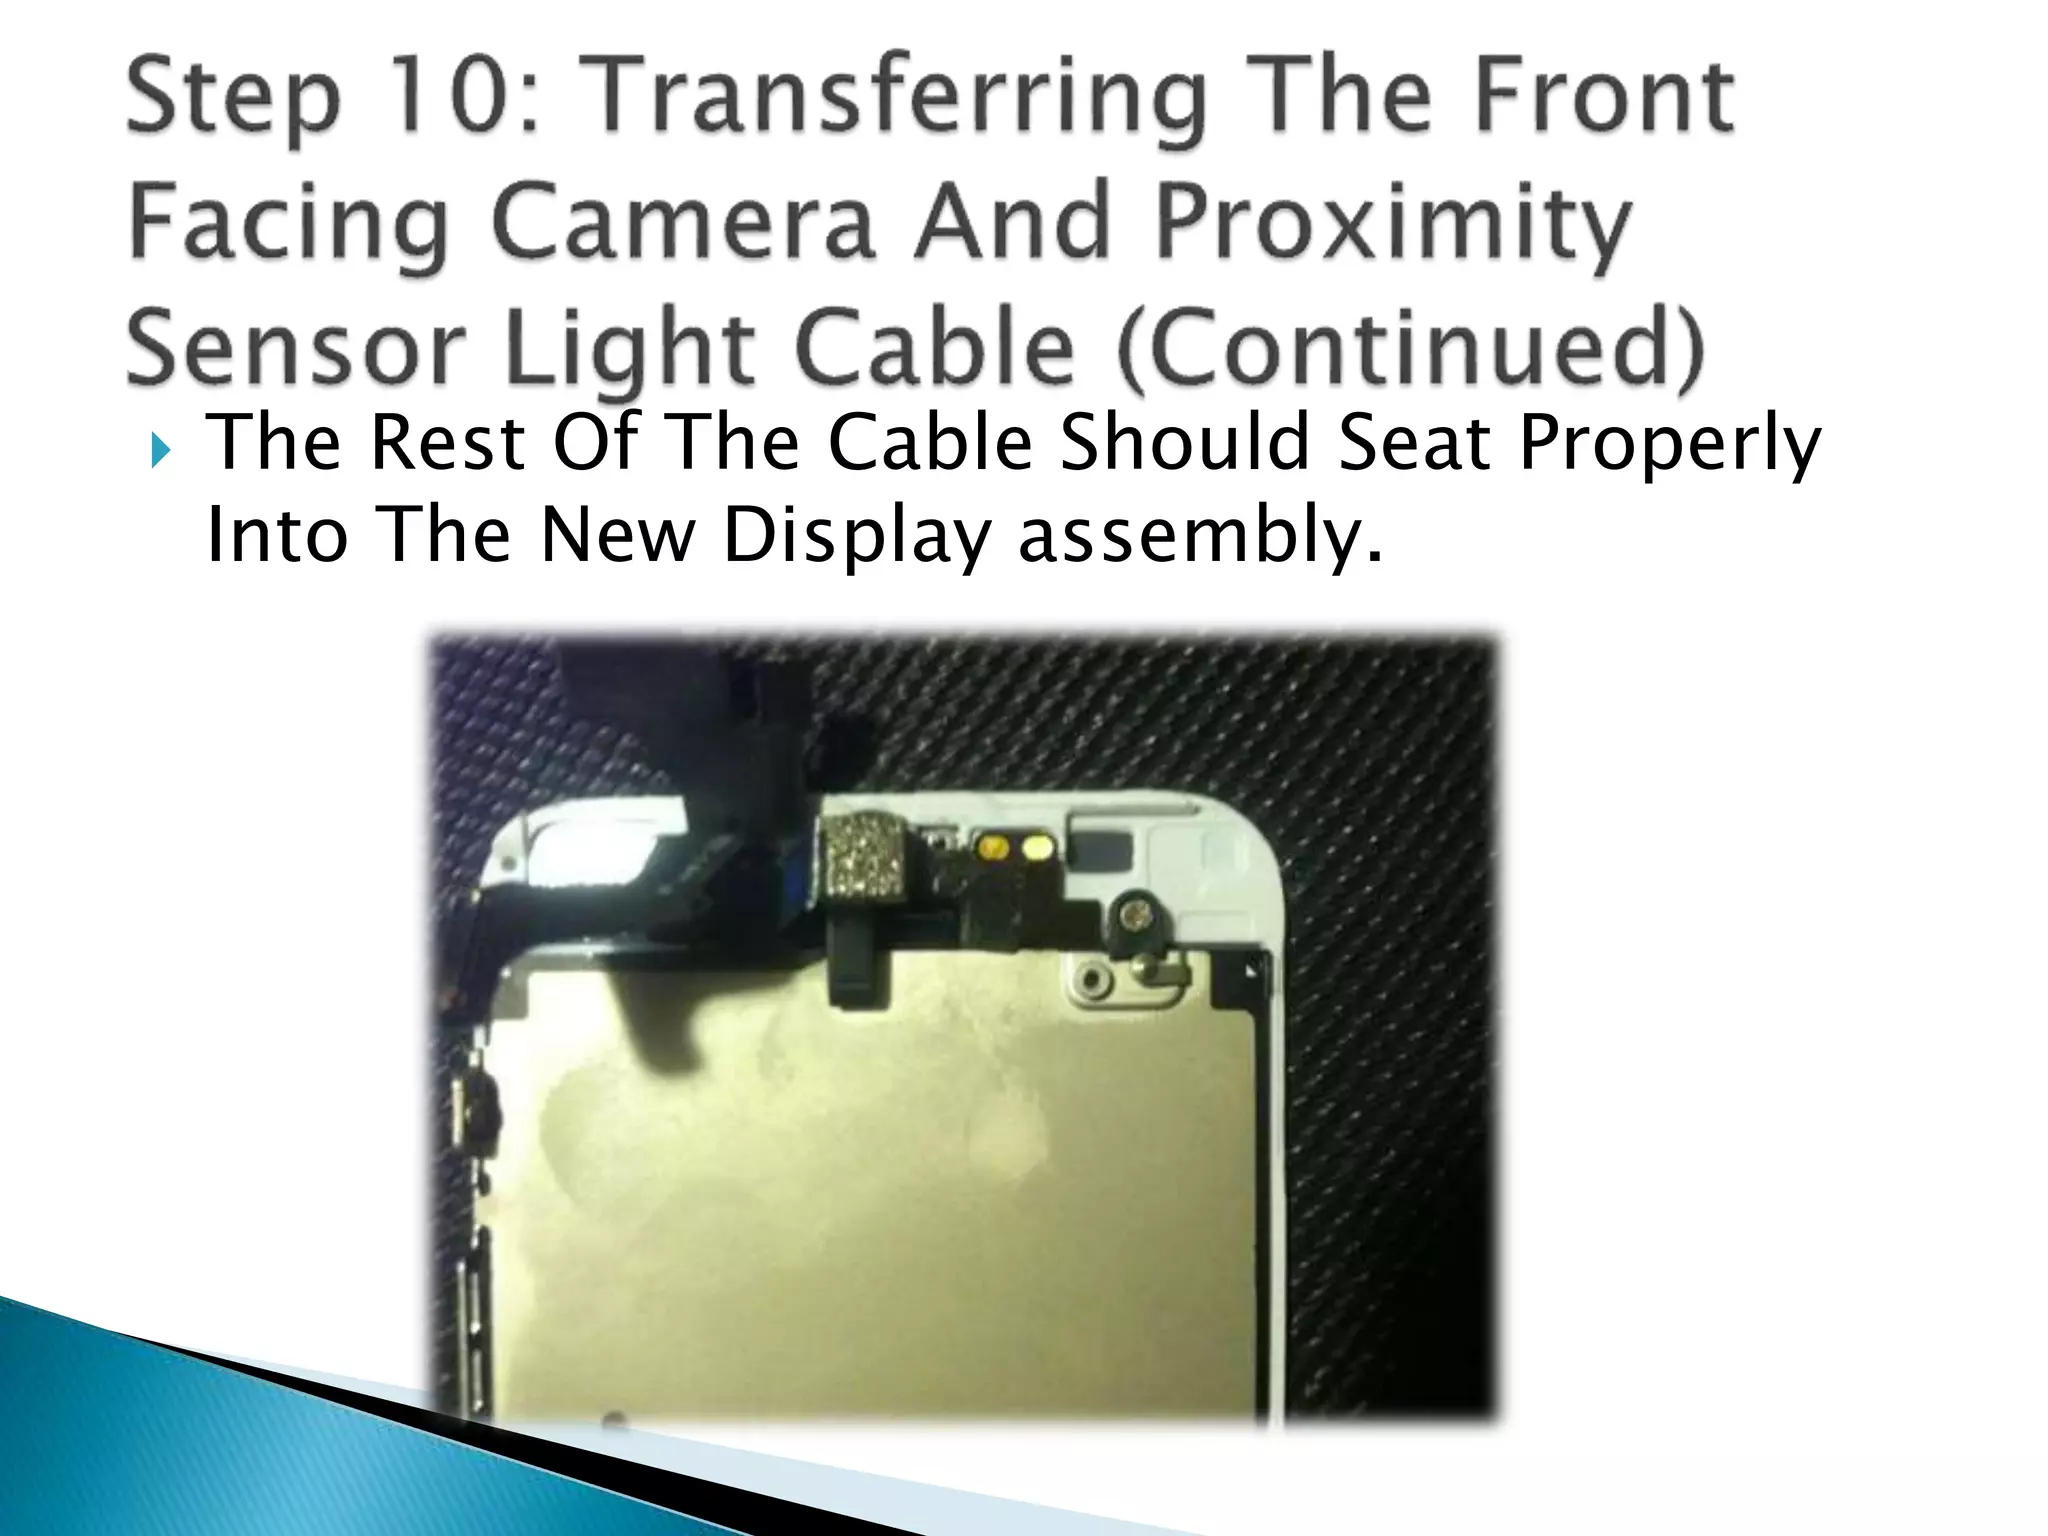
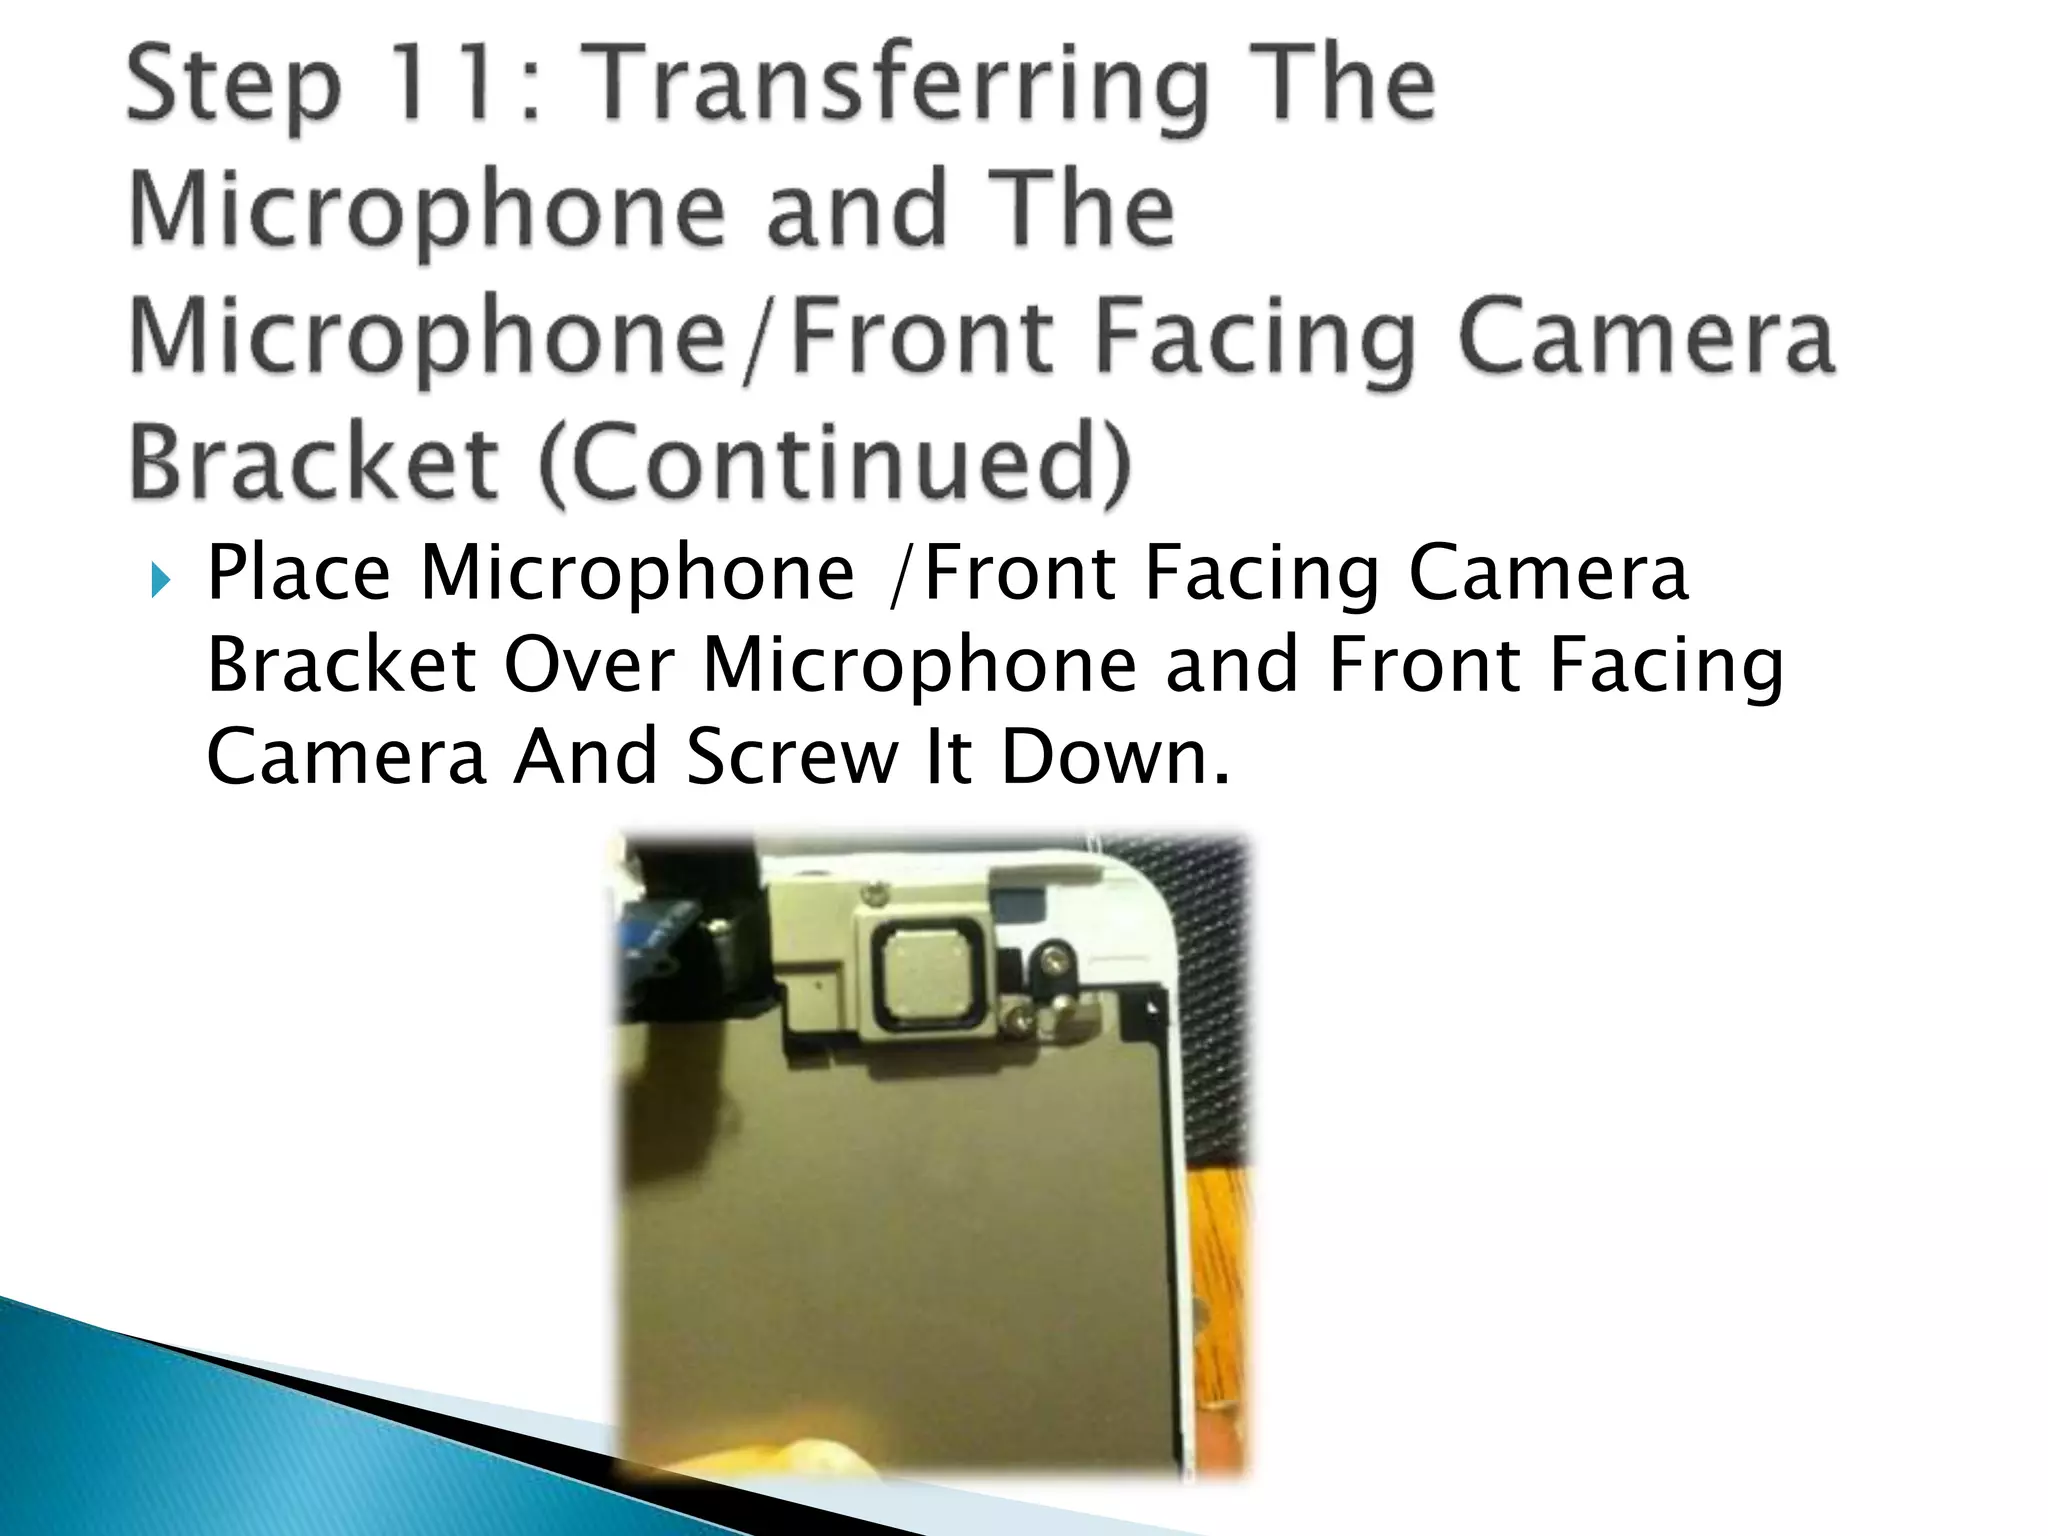
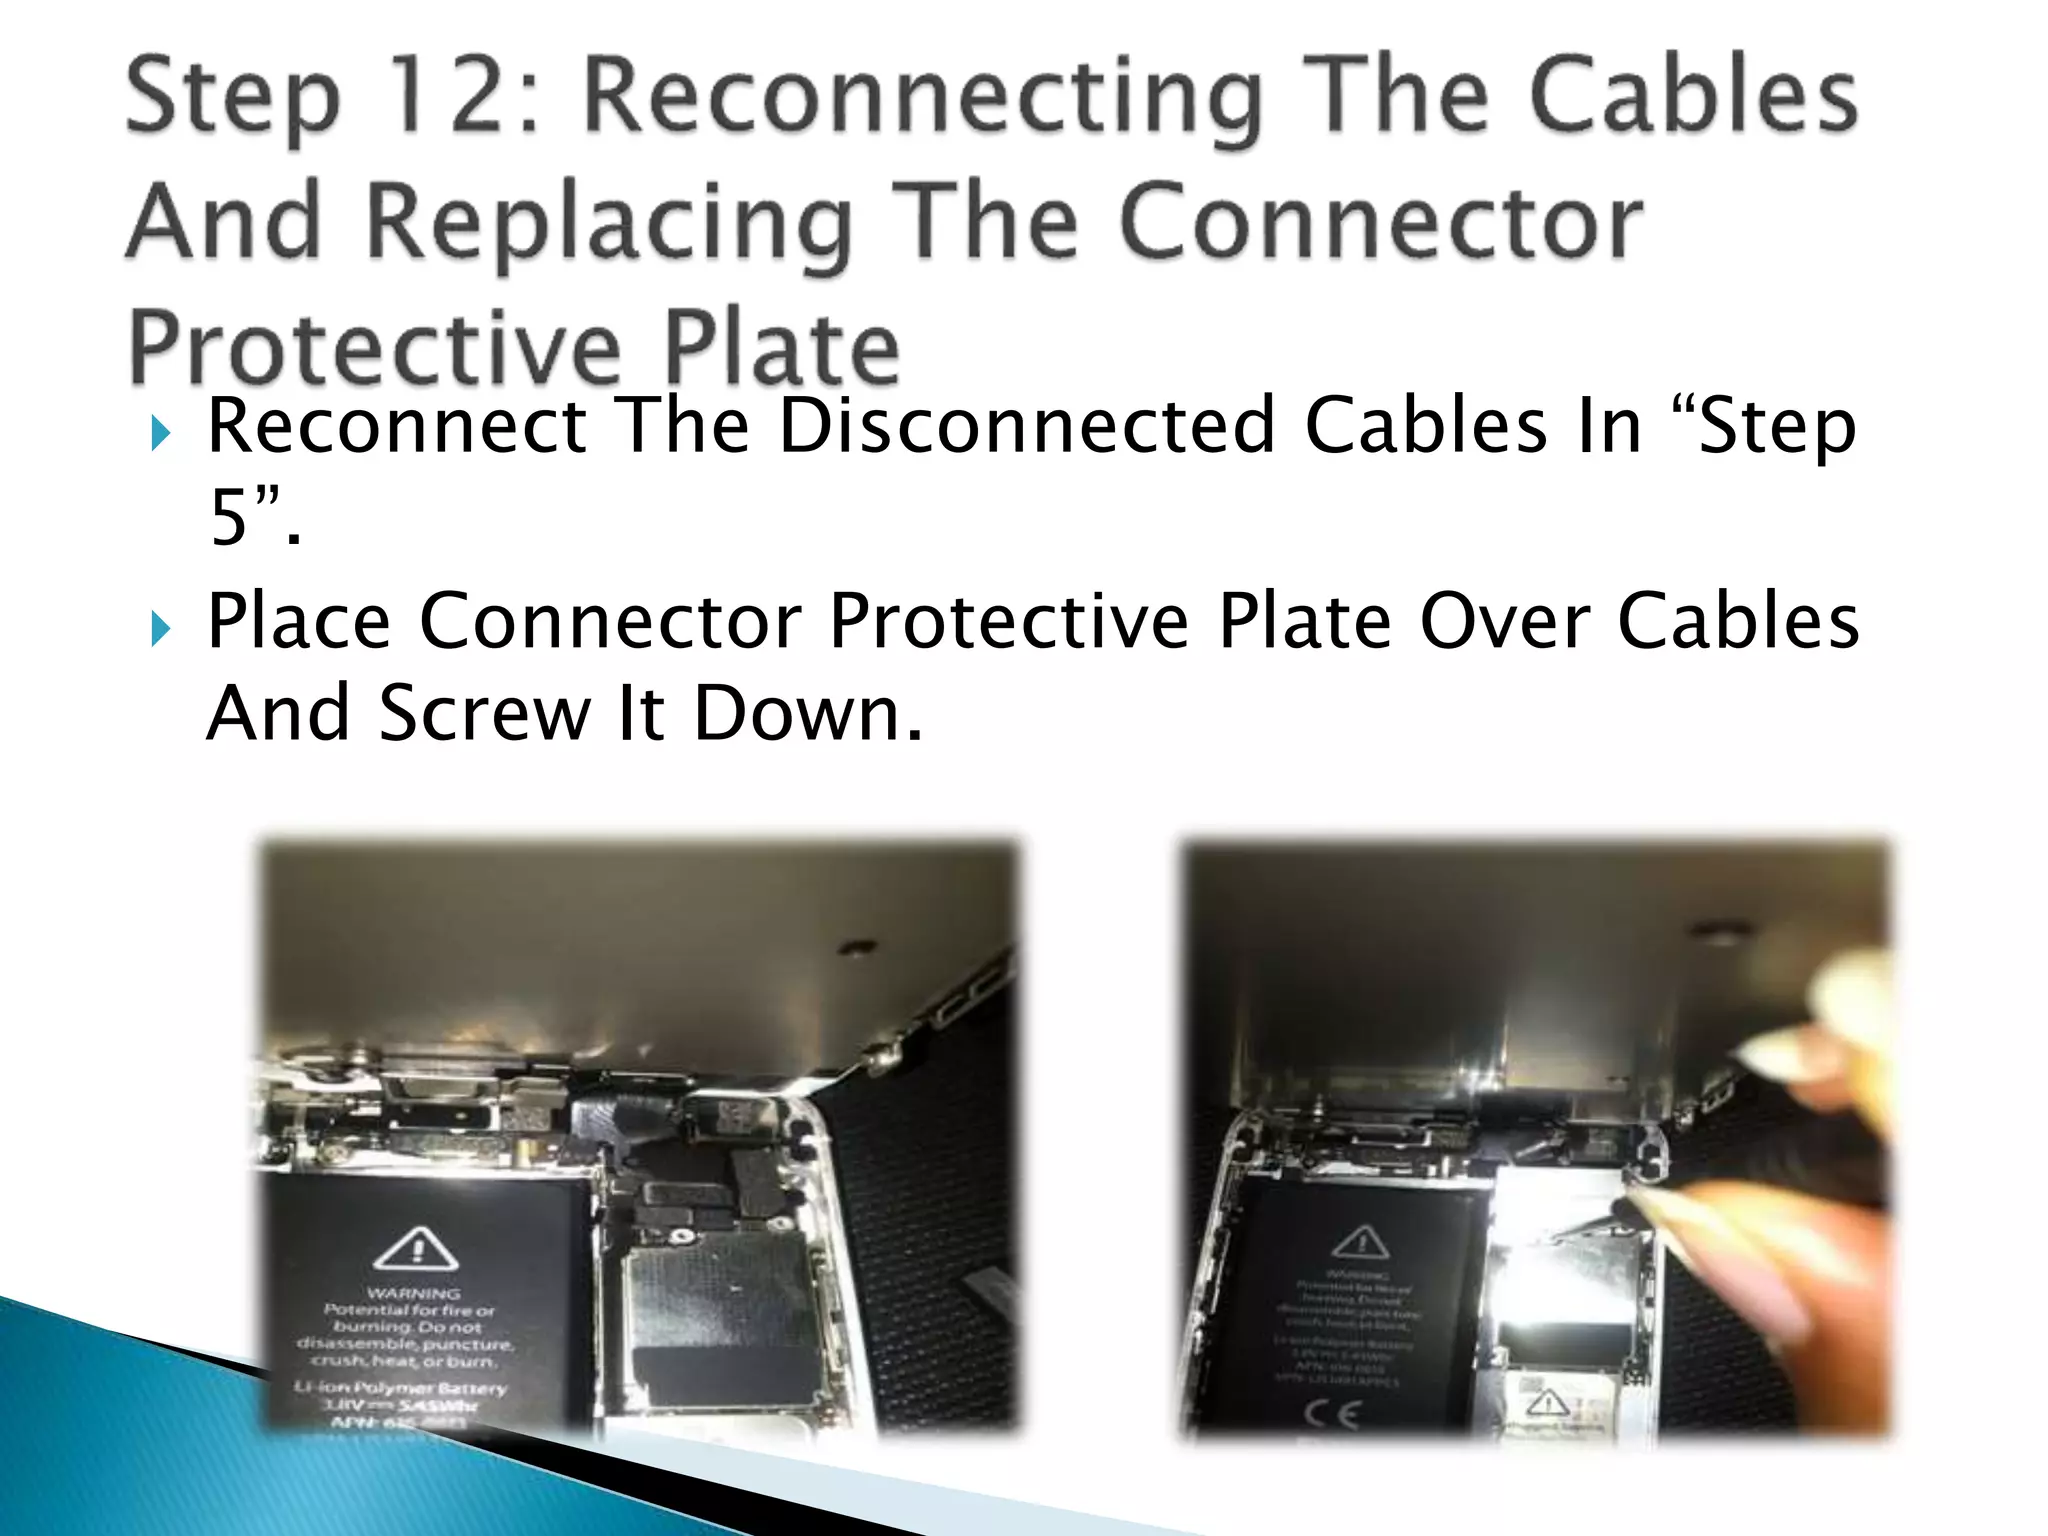
14. Use 5-Point Pentalobe Screwdriver To Remove
Bottom Security Screws.
15. Place Suction Cup Near Home Button.
Press Down Firmly So It Grips To The Display.
16. Use Suction Cup Ring To Pull Bottom Of
Display From Housing.
You May Need A Pry Tool To Assist You.
17. Once There Is A Small Space Between The
Display Assembly And Housing, Use Pry Tool
And Work Your Way Up The Sides.
18. Continue This Until The Sides Of The
Assembly Have Separated From The Housing.
Do Not Try To Completely Remove The
Assembly!
19. While Holding Your Cracked Assembly At A
90 Degree Angle, Remove the Three Phillips
Head Screws Securing The Connector
Protective Plate.
20. Remove the Protective Connector Plate From
Motherboard.
21. Disconnect The Three Cables Attached To
The Motherboard With The Plastic Pry Tool.
22. Remove Suction Cup From The Cracked
Assembly.
Remove The Cracked Display From Housing.
23.
24. Remove Two Phillips Head Screws From Home
Button Bracket.
25. Slide Plastic Pry Tool Under Home Button
Bracket.
Work Your Way Over To The Home Button
Flex Cable.
26. Gently Pry Home Button Flex Cable And
Bracket Up.
Mind You, The Home Button Flex Cable And
Bracket Should Move As One.
27. Lift Cracked Assembly From Bottom.
Push Home Button Out And Remove it.
28.
29. Remove The Two Phillips Head Screws At The
Top Of The Cracked Assembly.
30. Remove The Microphone/Front Facing
Camera Bracket.
Remove The Microphone.
31.
32. Use Plastic Tool To Pry The Proximity Sensor
Light Motion Cable From Cracked Display.
Transfer Plastic Camera Placer To New
Display Assembly If It Doesn’t Have One.
33. Use Pry Plastic Pry Tool To Disconnect The
Gold Secondary Microphone From Cracked
Display.
34.
35. Remove The Six Screws Securing Heat Shield
To Cracked Display With Phillips Head
Screwdriver.
36. Remove And Transfer The Heat Shield From
The Cracked Display Assembly To The New
Display Assembly.
Screw Six Screws In Order Onto New Display
Assembly.
37. Connect The Secondary Microphone To The
New Display Assembly With Pry Tool.
Press Front Facing Camera Down Into The
New Display.
38. The Rest Of The Cable Should Seat Properly
Into The New Display assembly.
39. Place Microphone Onto New Display.
Make Sure Gold Coils Are On Top Of The Gold
Circles On Cable.
40. Place Microphone /Front Facing Camera
Bracket Over Microphone and Front Facing
Camera And Screw It Down.
41.
42. Reconnect The Disconnected Cables In “Step
5”.
Place Connector Protective Plate Over Cables
And Screw It Down.
43. Lifting The Bottom Of Your New Display
Assembly, Push Upward So Clips At The Top
Of The Assembly Fit Flesh Into The Housing.
44. Continue To Push Upward As you Lay The
New Display Assembly Into The Housing.
45. Softly Push Sides Of Display Into Housing
Along With The Bottom Of The Display.
Replace The Two Security Screws Into The
Bottom Of The iPhone.